
Lip Spoiler Install
 05-01-2006, 08:58 PM
#1
Racer
Thread Starter
Join Date: Jan 2006
Location: The ROC
Age: 53
Posts: 295
Likes: 0
Received 0 Likes
on
0 Posts
Lip Spoiler Install
ok- finally got my lip spoiler installed so I figured I'd show you how I got it on and aligned properly. I purchased from Trimking and would absolutely recommend them to anyone- color match and quality were top notch.
The short of it is you just peel off the tape and stick it on. If that's all you need to know then you can stop reading here. For anyone interested, here's the long version showing how I did it...
The spoiler comes with double-sided tape that has been covered with masking tape prior to painting. The tape basically covers all 4 edges of the spoiler. Peeling back the masking tape reveals the adhesive.
Before you peel away, you need to make sure to have the trunk lid surface free of wax. Luckily I was going to Zaino the car so I washed and clayed the car beforehand, with the final wash using Dawn to remove any remaining wax.
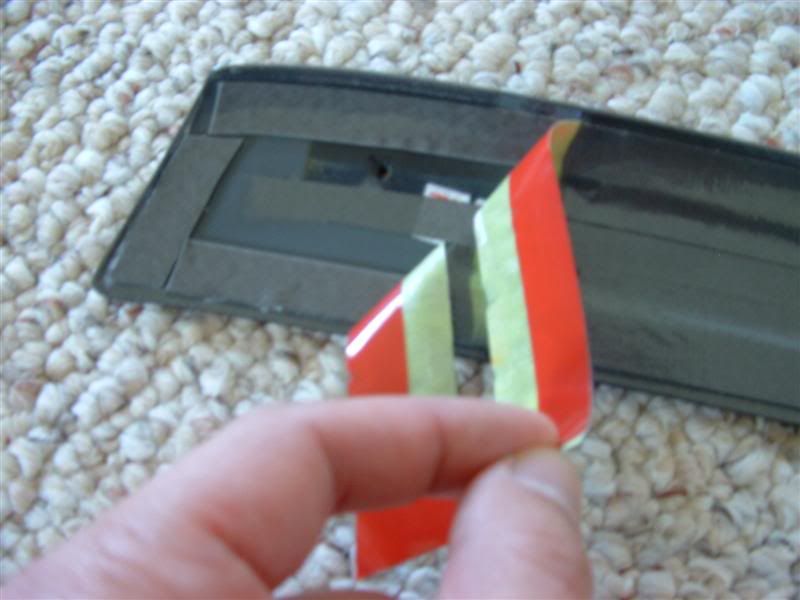
The key to installation is getting the spoiler in exactly the right spot. The strong tape will make it almost impossible to adjust once you've placed it down with the adhesive exposed. To place it on temporarily I placed 4 pieces of double-sided tape on the bottom of the spoiler- one at each end and two just off-center. DO NOT place it in the exact center since this is the high point of the trunk and is the first part of the spoiler that will touch when you place it down- you will have a hard time moving it around!
Getting it in the right spot is trial and error. Keeping both ends the same distance from the trunk side edge and keeping the lip at the same point along the edge of the trunk are the keys. One thing that surprised me is that you have to flex it somewhat to get it to lay right. If you just place it down the ends will be too far back on the trunk- the spoiler is straighter than the trunk if you were to look straight down at it.
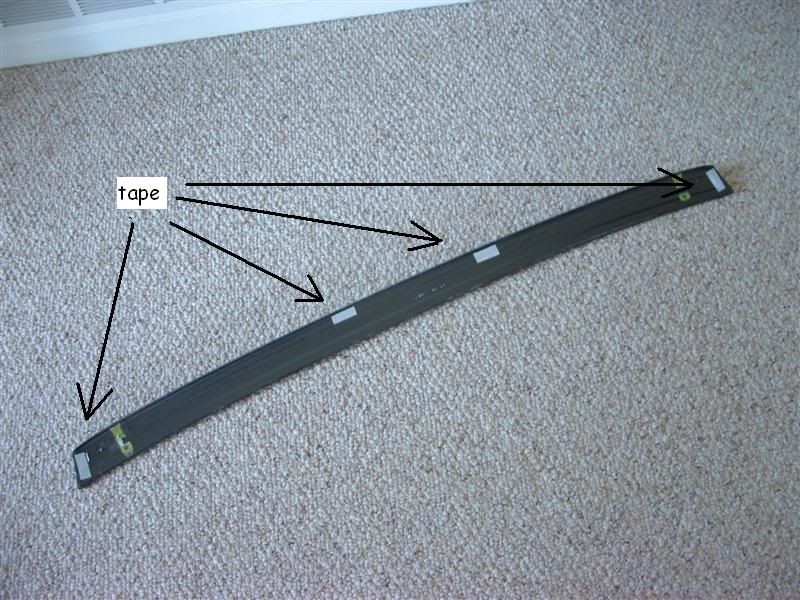
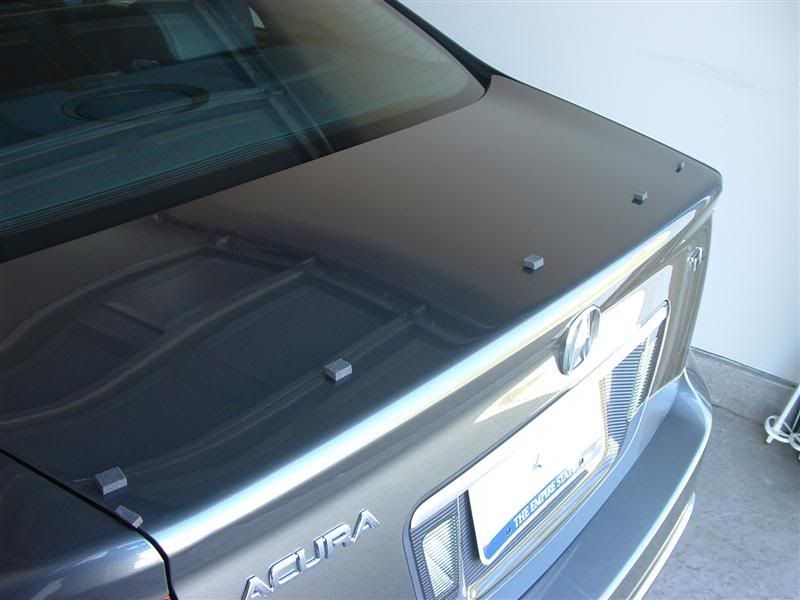
Once I got it on and it looked right, I cut some pieces of stick-on weatherstripping to act as guides and stuck them at key points along the edge. I decided to start on the left side so I marked the side edge and periodic points along the top edge. I felt this was easier than marking it somehow and it was "safer" than clamping on some type of stops to the deck.
Here you can see the "natural" shape with the end unstuck...
Here are the guides ready for the final placement...
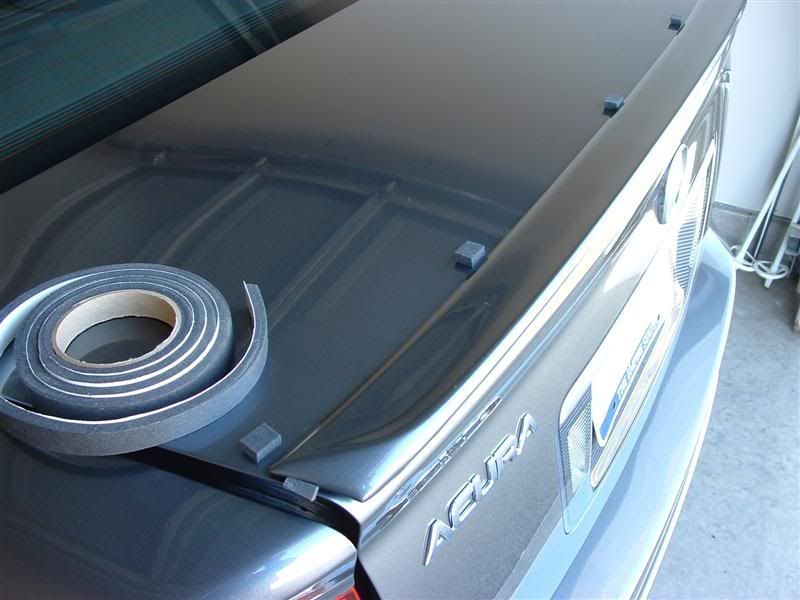
Then it's just peel and follow the guides. A light press down will give you some slight adjustment ability. Once I got it down completely I pressed firmly along the whole length with a microfiber towel. [notice the small dent!! argh!!]
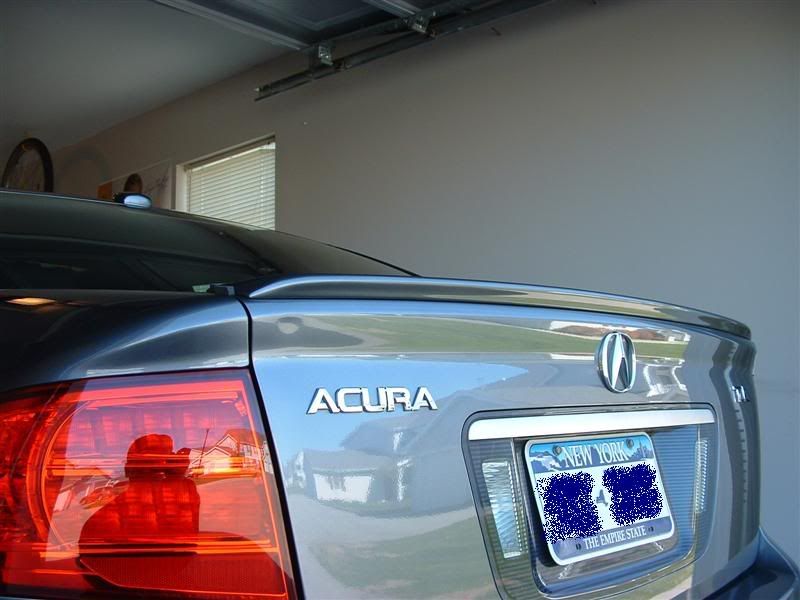
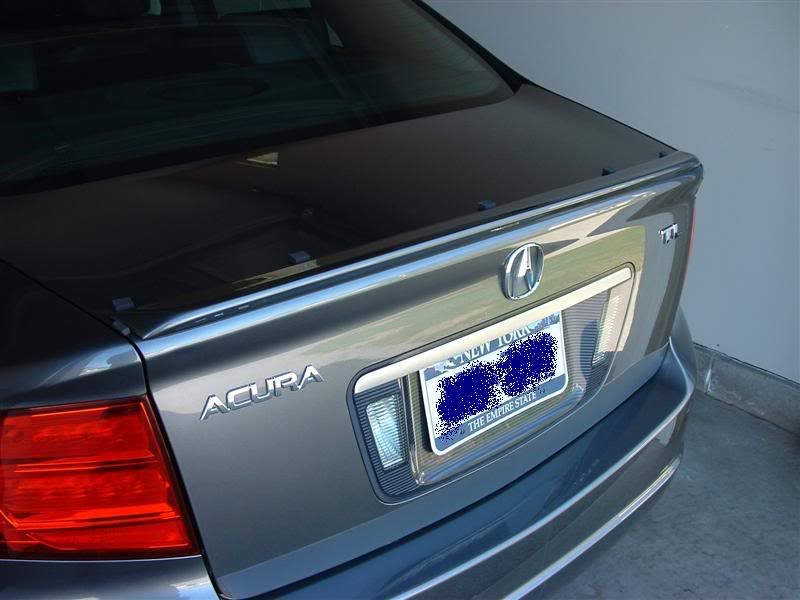
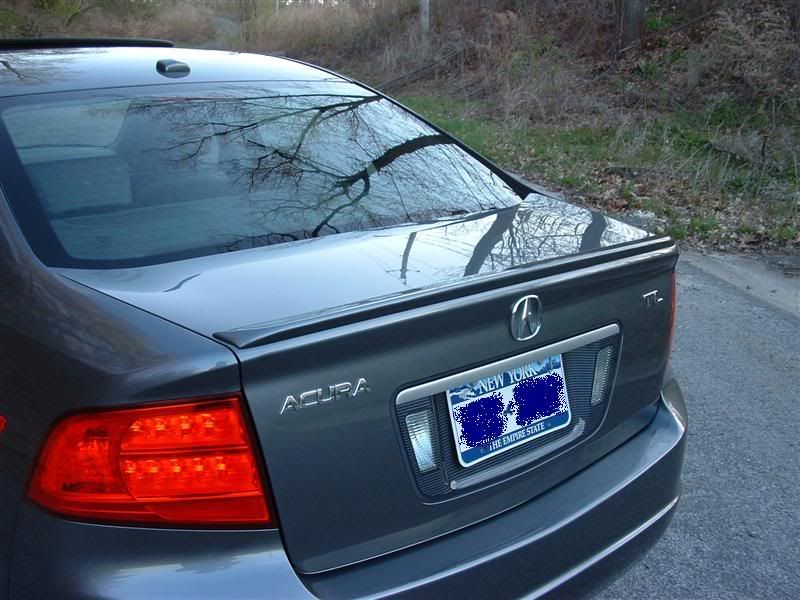
The final product...
The short of it is you just peel off the tape and stick it on. If that's all you need to know then you can stop reading here. For anyone interested, here's the long version showing how I did it...
The spoiler comes with double-sided tape that has been covered with masking tape prior to painting. The tape basically covers all 4 edges of the spoiler. Peeling back the masking tape reveals the adhesive.
Before you peel away, you need to make sure to have the trunk lid surface free of wax. Luckily I was going to Zaino the car so I washed and clayed the car beforehand, with the final wash using Dawn to remove any remaining wax.
The key to installation is getting the spoiler in exactly the right spot. The strong tape will make it almost impossible to adjust once you've placed it down with the adhesive exposed. To place it on temporarily I placed 4 pieces of double-sided tape on the bottom of the spoiler- one at each end and two just off-center. DO NOT place it in the exact center since this is the high point of the trunk and is the first part of the spoiler that will touch when you place it down- you will have a hard time moving it around!
Getting it in the right spot is trial and error. Keeping both ends the same distance from the trunk side edge and keeping the lip at the same point along the edge of the trunk are the keys. One thing that surprised me is that you have to flex it somewhat to get it to lay right. If you just place it down the ends will be too far back on the trunk- the spoiler is straighter than the trunk if you were to look straight down at it.
Once I got it on and it looked right, I cut some pieces of stick-on weatherstripping to act as guides and stuck them at key points along the edge. I decided to start on the left side so I marked the side edge and periodic points along the top edge. I felt this was easier than marking it somehow and it was "safer" than clamping on some type of stops to the deck.
Here you can see the "natural" shape with the end unstuck...
Here are the guides ready for the final placement...
Then it's just peel and follow the guides. A light press down will give you some slight adjustment ability. Once I got it down completely I pressed firmly along the whole length with a microfiber towel. [notice the small dent!! argh!!]
The final product...
 05-02-2006, 04:18 PM
#7
Doctor Sarcasm
Join Date: Jan 2006
Location: Central Florida
Age: 44
Posts: 1,107
Likes: 0
Received 0 Likes
on
0 Posts
Originally Posted by Andrew McCarthy
Don't lie- I know you used crayon.
Trending Topics
05-02-2006, 05:02 PM
#8
TL Loverrrrrrr
xtin: You Med student all have good eyes to just eyed it.
I got pretty bad eyes (-11, -12) with bad perspective. I don't think I would attempt the eyed it method.
I got pretty bad eyes (-11, -12) with bad perspective. I don't think I would attempt the eyed it method.
05-02-2006, 05:26 PM
#9
Doctor Sarcasm
Join Date: Jan 2006
Location: Central Florida
Age: 44
Posts: 1,107
Likes: 0
Received 0 Likes
on
0 Posts
Originally Posted by waacow
xtin: You Med student all have good eyes to just eyed it.
I got pretty bad eyes (-11, -12) with bad perspective. I don't think I would attempt the eyed it method.
I got pretty bad eyes (-11, -12) with bad perspective. I don't think I would attempt the eyed it method.
05-02-2006, 05:43 PM
#10
TL Loverrrrrrr
Love those contact lens.. 
BTW, lembowski just mentioned to me that the spoiler lip from trimking isn't completely the same as the Acura OEM lip, anyone can confirm that? He mentioned someone at the CA meet have trimking and it didn't look like the Acura one. He also said "The oem one is a little thicker and solid looking.". All this time, I always thought they look exactly the same.
BTW, lembowski just mentioned to me that the spoiler lip from trimking isn't completely the same as the Acura OEM lip, anyone can confirm that? He mentioned someone at the CA meet have trimking and it didn't look like the Acura one. He also said "The oem one is a little thicker and solid looking.". All this time, I always thought they look exactly the same.
05-02-2006, 08:48 PM
#11
Racer
Thread Starter
Join Date: Jan 2006
Location: The ROC
Age: 53
Posts: 295
Likes: 0
Received 0 Likes
on
0 Posts
Originally Posted by subinf
Great pics. How did you get that dent?
05-06-2006, 01:43 PM
#15
Burning Brakes
Join Date: Nov 2005
Posts: 929
Likes: 0
Received 0 Likes
on
0 Posts
Originally Posted by xtin
I just eyed and it stuck it on. hahha looks hot!
Love the anthracite!
Love the anthracite!
-get 1 w/ the mounting bolts
05-09-2006, 08:04 AM
#17
Forced Induction
Nice work, I just did a test fit, taped off the edges of the 3M tape, and aligned it, and slowly pulled off the red strip and it was on there. I am not sure if its on there as an OEM wing, but it looks straight. I got the eBay special lip spoiler.
05-15-2006, 05:50 PM
#19
Racer
Thread Starter
Join Date: Jan 2006
Location: The ROC
Age: 53
Posts: 295
Likes: 0
Received 0 Likes
on
0 Posts
Originally Posted by uwccpan
Nicely done
It would be great if u could post some pics of ur entire car
It would be great if u could post some pics of ur entire car

 05-16-2006, 09:05 AM
#21
Racer
Thread Starter
Join Date: Jan 2006
Location: The ROC
Age: 53
Posts: 295
Likes: 0
Received 0 Likes
on
0 Posts
Originally Posted by jmaikamon
Newbie here! I just picked up my new 06' TL four days ago. What was the cost for the spoiler? Does it come painted? Where (exactly) did you buy it?

Thread
Thread Starter
Forum
Replies
Last Post
BoricuaTL
Car Parts for Sale
138
04-08-2016 01:08 PM
mugen_kid
Member Cars for Sale
7
11-13-2015 10:38 PM