Jordan00711's Build Thread
 03-12-2013, 01:48 PM
#1
Instructor
Thread Starter

Jordan00711's Build Thread
Ive been more of a lurker than poster here but after nearly two years Ill finally contribute something worth while! 
Ive had my TL since Feb of 12' and it has really come a long way since when she was purchase, in my eyes atleast. In 2012 she got some bolt ons, wheels & tires, coils, etc. Drover her like that for a good while. Took her to Import Alliance in North Carolina this past summer and ran into an aziner or two, also got to see Eric's TL .
.
Here are some pics from 2012

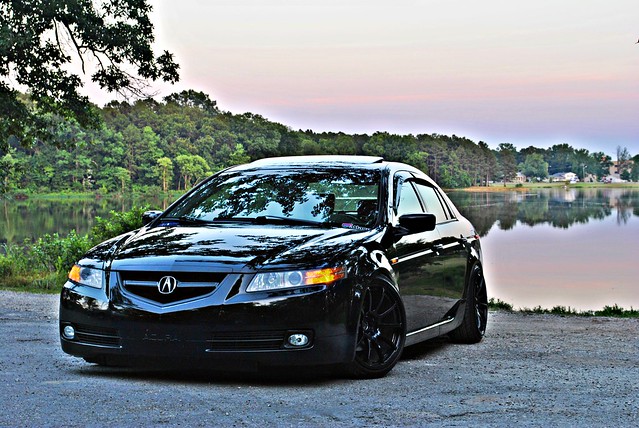
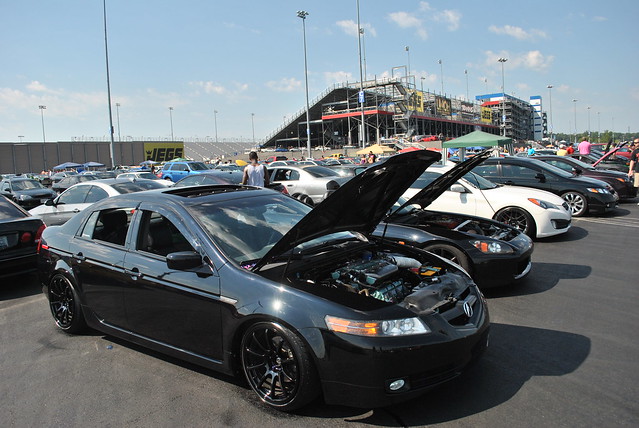
At IA in Charlotte
Moved to Colorado at the end of summer and being busy with school and work the TL hasn't got to much love or updates. 2013 will finally be a change to that!
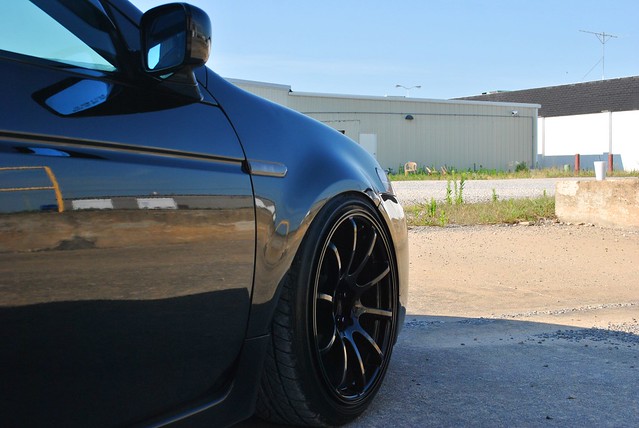
Here she sits in winter mode(Rpf1's and 245's):


Ive had my TL since Feb of 12' and it has really come a long way since when she was purchase, in my eyes atleast. In 2012 she got some bolt ons, wheels & tires, coils, etc. Drover her like that for a good while. Took her to Import Alliance in North Carolina this past summer and ran into an aziner or two, also got to see Eric's TL
.Here are some pics from 2012
At IA in Charlotte
Moved to Colorado at the end of summer and being busy with school and work the TL hasn't got to much love or updates. 2013 will finally be a change to that!
Here she sits in winter mode(Rpf1's and 245's):
Last edited by Jordan00711; 03-12-2013 at 01:53 PM.
 03-12-2013, 02:14 PM
#2
Race Director
iTrader: (3)
Join Date: Feb 2012
Location: South Florida
Age: 30
Posts: 18,278
Received 3,824 Likes
on
2,847 Posts
Looks great! Can't say I'm a fan of the tiny RPF's  but I like that black on black.
but I like that black on black.
03-12-2013, 02:51 PM
#3
Moderator
iTrader: (3)
I don't remember seeing your car at IA. Weird.
Anyways, nice progress! So the RPF1s are just for winter? Any plans for A-Spec?
Anyways, nice progress! So the RPF1s are just for winter? Any plans for A-Spec?
03-12-2013, 05:26 PM
#5
Instructor
Thread Starter
The RPfs are kinda my temps/winters.. Got new wheels coming and the Rotas are going to get refinished.
Aspec w/ type s rear will eventually happen.. Probably closer to the summer time frame
Trending Topics
03-12-2013, 07:03 PM
#8
 03-12-2013, 07:41 PM
#10
Team Owner
iTrader: (2)
Join Date: Jan 2008
Location: Kansas City, MO (Overland Park, KS)
Posts: 36,545
Received 6,470 Likes
on
5,162 Posts
03-12-2013, 09:15 PM
#11
Drifting
Looked great all blacked out!!
 03-12-2013, 11:11 PM
#14
tehLEGOman
Join Date: Dec 2004
Location: Charlotte, NC
Age: 40
Posts: 9,135
Received 1,982 Likes
on
1,335 Posts
03-13-2013, 03:01 AM
#15
Instructor
Thread Starter
The wheels are 18x9 +25 but I ran them with spacers.
(15mm F/ 20mm R)
Tires are 225/40 Falken Ziex 512
Thanks guys
She's getting some more love this week lol.. here are a few updates
Here's the engine bay currently
-Battery Relocation
-Radiator Hoses
-Coolant Overflow/Reservoir Relocation

Also while replacing the thermostat, radiator hoses, and draining the coolant I shot the thermostat housing in wrinkle black

(15mm F/ 20mm R)
Tires are 225/40 Falken Ziex 512
Thanks guys
She's getting some more love this week lol.. here are a few updates
Here's the engine bay currently
-Battery Relocation
-Radiator Hoses
-Coolant Overflow/Reservoir Relocation
Also while replacing the thermostat, radiator hoses, and draining the coolant I shot the thermostat housing in wrinkle black
The following users liked this post:
bluetl04 (03-14-2013)
03-13-2013, 02:09 PM
#17
Instructor
Thread Starter
thanks... the bay has a long way to go imo lol
A bit of an update..currently in the middle of doing my headlights. Basically doing the V1 Blacked Out with black turn signal strip/fog shroud
Here are some of the goodies:
ZKW Lenses
Morimoto 5k Bulbs
Nokya 5k Fogs
Switchback Turnsignals


A bit of an update..currently in the middle of doing my headlights. Basically doing the V1 Blacked Out with black turn signal strip/fog shroud
Here are some of the goodies:
ZKW Lenses
Morimoto 5k Bulbs
Nokya 5k Fogs
Switchback Turnsignals
03-14-2013, 04:03 PM
#20
Instructor
Thread Starter
Here are a few more pics from doing the headlights
A few pics of paint/primering


Also took the time to do the "demon eye" mod as well. I used two 5mm red led's.

Used some oem wiring I had laying around to make the little harness for the power/ground's


A few pics of paint/primering
Also took the time to do the "demon eye" mod as well. I used two 5mm red led's.
Used some oem wiring I had laying around to make the little harness for the power/ground's
 03-14-2013, 06:39 PM
#25
Senior Moderator
Nice! 
 03-14-2013, 07:46 PM
#26
Instructor
Thread Starter
Should have some more pics up later guys!
03-14-2013, 10:25 PM
#28
Team Owner
iTrader: (2)
Join Date: Jan 2008
Location: Kansas City, MO (Overland Park, KS)
Posts: 36,545
Received 6,470 Likes
on
5,162 Posts
03-19-2013, 11:43 PM
#29
Instructor
Thread Starter
Finally posting some updates.
Ran into a few issues while doing my headlights but overall things came out alright. My lenses were showing some yelowing/dingyness and they also had some random odd ass scratches like they were poorly resotred sometime before. The lenses came out fine they just seem to have a slight haze that the plastx didn't remove 100%. Any sugestions? Clear coat maybe? Also during the painting of the fog light shrouds some black paint got onto the chrome reflective area. Well it didn't seem to be an issue till i went to remove it with a little bit of rubbing alcohol which ended up stripping the factory chrome finish. Not knowing what else to do I went ahead and painted them the brightest silver I could find. I did the turn signal strips as well.


I also found a better method than using pliers to remove the amber diffuser. I tried the plier method but it wasnt working to well for me. I went a different route entirely. I used a dremmel cut off wheel to cut the back stubs flush then drilled them like you would a spot weld. Works like a dream!

I finished up the coolant reservoir/ps reservoir relocation. A few things still need cleaned and tidied up but all the relocation stuff is done.

-
Ran into a few issues while doing my headlights but overall things came out alright. My lenses were showing some yelowing/dingyness and they also had some random odd ass scratches like they were poorly resotred sometime before. The lenses came out fine they just seem to have a slight haze that the plastx didn't remove 100%. Any sugestions? Clear coat maybe? Also during the painting of the fog light shrouds some black paint got onto the chrome reflective area. Well it didn't seem to be an issue till i went to remove it with a little bit of rubbing alcohol which ended up stripping the factory chrome finish. Not knowing what else to do I went ahead and painted them the brightest silver I could find. I did the turn signal strips as well.
I also found a better method than using pliers to remove the amber diffuser. I tried the plier method but it wasnt working to well for me. I went a different route entirely. I used a dremmel cut off wheel to cut the back stubs flush then drilled them like you would a spot weld. Works like a dream!
I finished up the coolant reservoir/ps reservoir relocation. A few things still need cleaned and tidied up but all the relocation stuff is done.
-
03-22-2013, 10:29 AM
#31
Race Director
iTrader: (3)
Join Date: Feb 2012
Location: South Florida
Age: 30
Posts: 18,278
Received 3,824 Likes
on
2,847 Posts
Nice! Can't wait to see the headlights installed 
03-22-2013, 05:44 PM
#32
I would say leave the car as is. Your car looks terrific without the a-spec body kit 
BTW, why did you end up changing wheels? not saying that i don't like the blue wheels, but the black ones look just right on your car..
what kind of wheels are thoses btw?
BTW, why did you end up changing wheels? not saying that i don't like the blue wheels, but the black ones look just right on your car..
what kind of wheels are thoses btw?
03-23-2013, 06:34 PM
#33
Instructor
Thread Starter
Demon Eyes arent wired up to the switch yet but here they are installed. No good close ups but Ill give it a proper shoot when the snow melts away... Bit of an update as well I'd say to hehe ...


I switched to the rpf's for the winter time and also the tires on my rotas needed flipped. The black wheels are 18x9 Rota G Force... Theyre no longer black tho
.
03-23-2013, 06:41 PM
#34
Moderator
iTrader: (3)
Dat wheel color 
03-23-2013, 07:01 PM
#35
Instructor
Thread Starter
Coolant Reservoir Relocation DIY
Tools Needed:
Phillips Head and Flat Head
10mm Varying(wrench or ratchet)
Shop Towels
First part is just the removal of your front bumper. I converted mine to quick release for a number of reasons, this being one.
Here’s the DIY for the front bumper removal
https://acurazine.com/forums/showthread.php?t=628363
Once you have that and the core support trim piece you canbegin the install

The stock coolant res sits between the two radiator fans and is held on by one 10mm bolt. Ive used both an offset 10mm wrench and an 1/8” drive ratchet to remove it. Go ahead and disconnect the hose from the radiator neck to the reservoir lid. Put a shop towel under it so your coolant doesn’t drip everywhere. Once it is out of the way go ahead and disconnect the radiator neck portion of the hose. Now this is where it becomes kinda an at case basis. Iknew roughly where I wanted to mount my reservoir so I purchased an aftermarket one for my relocation. Therefore if you use a tank different than mine your mounting will vary a little bit.
I ran my hose from the radiator neck down bewtween the rad and condenser core all the way to the bottom of the core support before Iexited the front.
To make the running of the line I removed my two upper radiator stays. Theyre the 10mm bolts at opposing ends of the radiator.


I used some zipties to mount it to the condenser core.

The only issue I have with my mounting location so far is that it kinda catches on some of the inner backing of the fog light cutout on the bumper.

With my relocation I measured the amount of coolant from the max line of the oem reservoir and poured it into the aftermarket res. I marked the level then masked it off to shoot flat black. It originally was clear. No I don’t have a hi-low window for my coolant but I check it enough that doesn’t matter.If it drops below the max line it will be a lot more noticeable with only the max window anywho.
Phillips Head and Flat Head
10mm Varying(wrench or ratchet)
Shop Towels
First part is just the removal of your front bumper. I converted mine to quick release for a number of reasons, this being one.
Here’s the DIY for the front bumper removal
https://acurazine.com/forums/showthread.php?t=628363
Once you have that and the core support trim piece you canbegin the install
The stock coolant res sits between the two radiator fans and is held on by one 10mm bolt. Ive used both an offset 10mm wrench and an 1/8” drive ratchet to remove it. Go ahead and disconnect the hose from the radiator neck to the reservoir lid. Put a shop towel under it so your coolant doesn’t drip everywhere. Once it is out of the way go ahead and disconnect the radiator neck portion of the hose. Now this is where it becomes kinda an at case basis. Iknew roughly where I wanted to mount my reservoir so I purchased an aftermarket one for my relocation. Therefore if you use a tank different than mine your mounting will vary a little bit.
I ran my hose from the radiator neck down bewtween the rad and condenser core all the way to the bottom of the core support before Iexited the front.
To make the running of the line I removed my two upper radiator stays. Theyre the 10mm bolts at opposing ends of the radiator.
I used some zipties to mount it to the condenser core.
The only issue I have with my mounting location so far is that it kinda catches on some of the inner backing of the fog light cutout on the bumper.
With my relocation I measured the amount of coolant from the max line of the oem reservoir and poured it into the aftermarket res. I marked the level then masked it off to shoot flat black. It originally was clear. No I don’t have a hi-low window for my coolant but I check it enough that doesn’t matter.If it drops below the max line it will be a lot more noticeable with only the max window anywho.
Last edited by Jordan00711; 03-23-2013 at 07:09 PM.
03-23-2013, 08:40 PM
#36
Oh boy me like the new color of the wheels.
Btw you are a living proof that once you go black, you can go back LOL
stop being a whore teaser a post pictures of the headlights!!
Oh and welcome to the JDM fastener club LOL
Btw you are a living proof that once you go black, you can go back LOL
stop being a whore teaser a post pictures of the headlights!!
Oh and welcome to the JDM fastener club LOL
Last edited by 24no7; 03-23-2013 at 08:45 PM.
03-23-2013, 08:55 PM
#37
Instructor
Thread Starter

I'll post some full pics once the snow melts and I can get her out of the garage.
I love those fasteners!! Lol literally have them everywhere in my bay but the valve cover bolts
 03-24-2013, 11:30 PM
#40
Instructor
Thread Starter