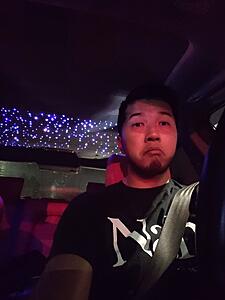
DIY: Fiber Optic Star Ceiling Install
 06-26-2018, 02:46 AM
#1
DIY: Fiber Optic Star Ceiling Install
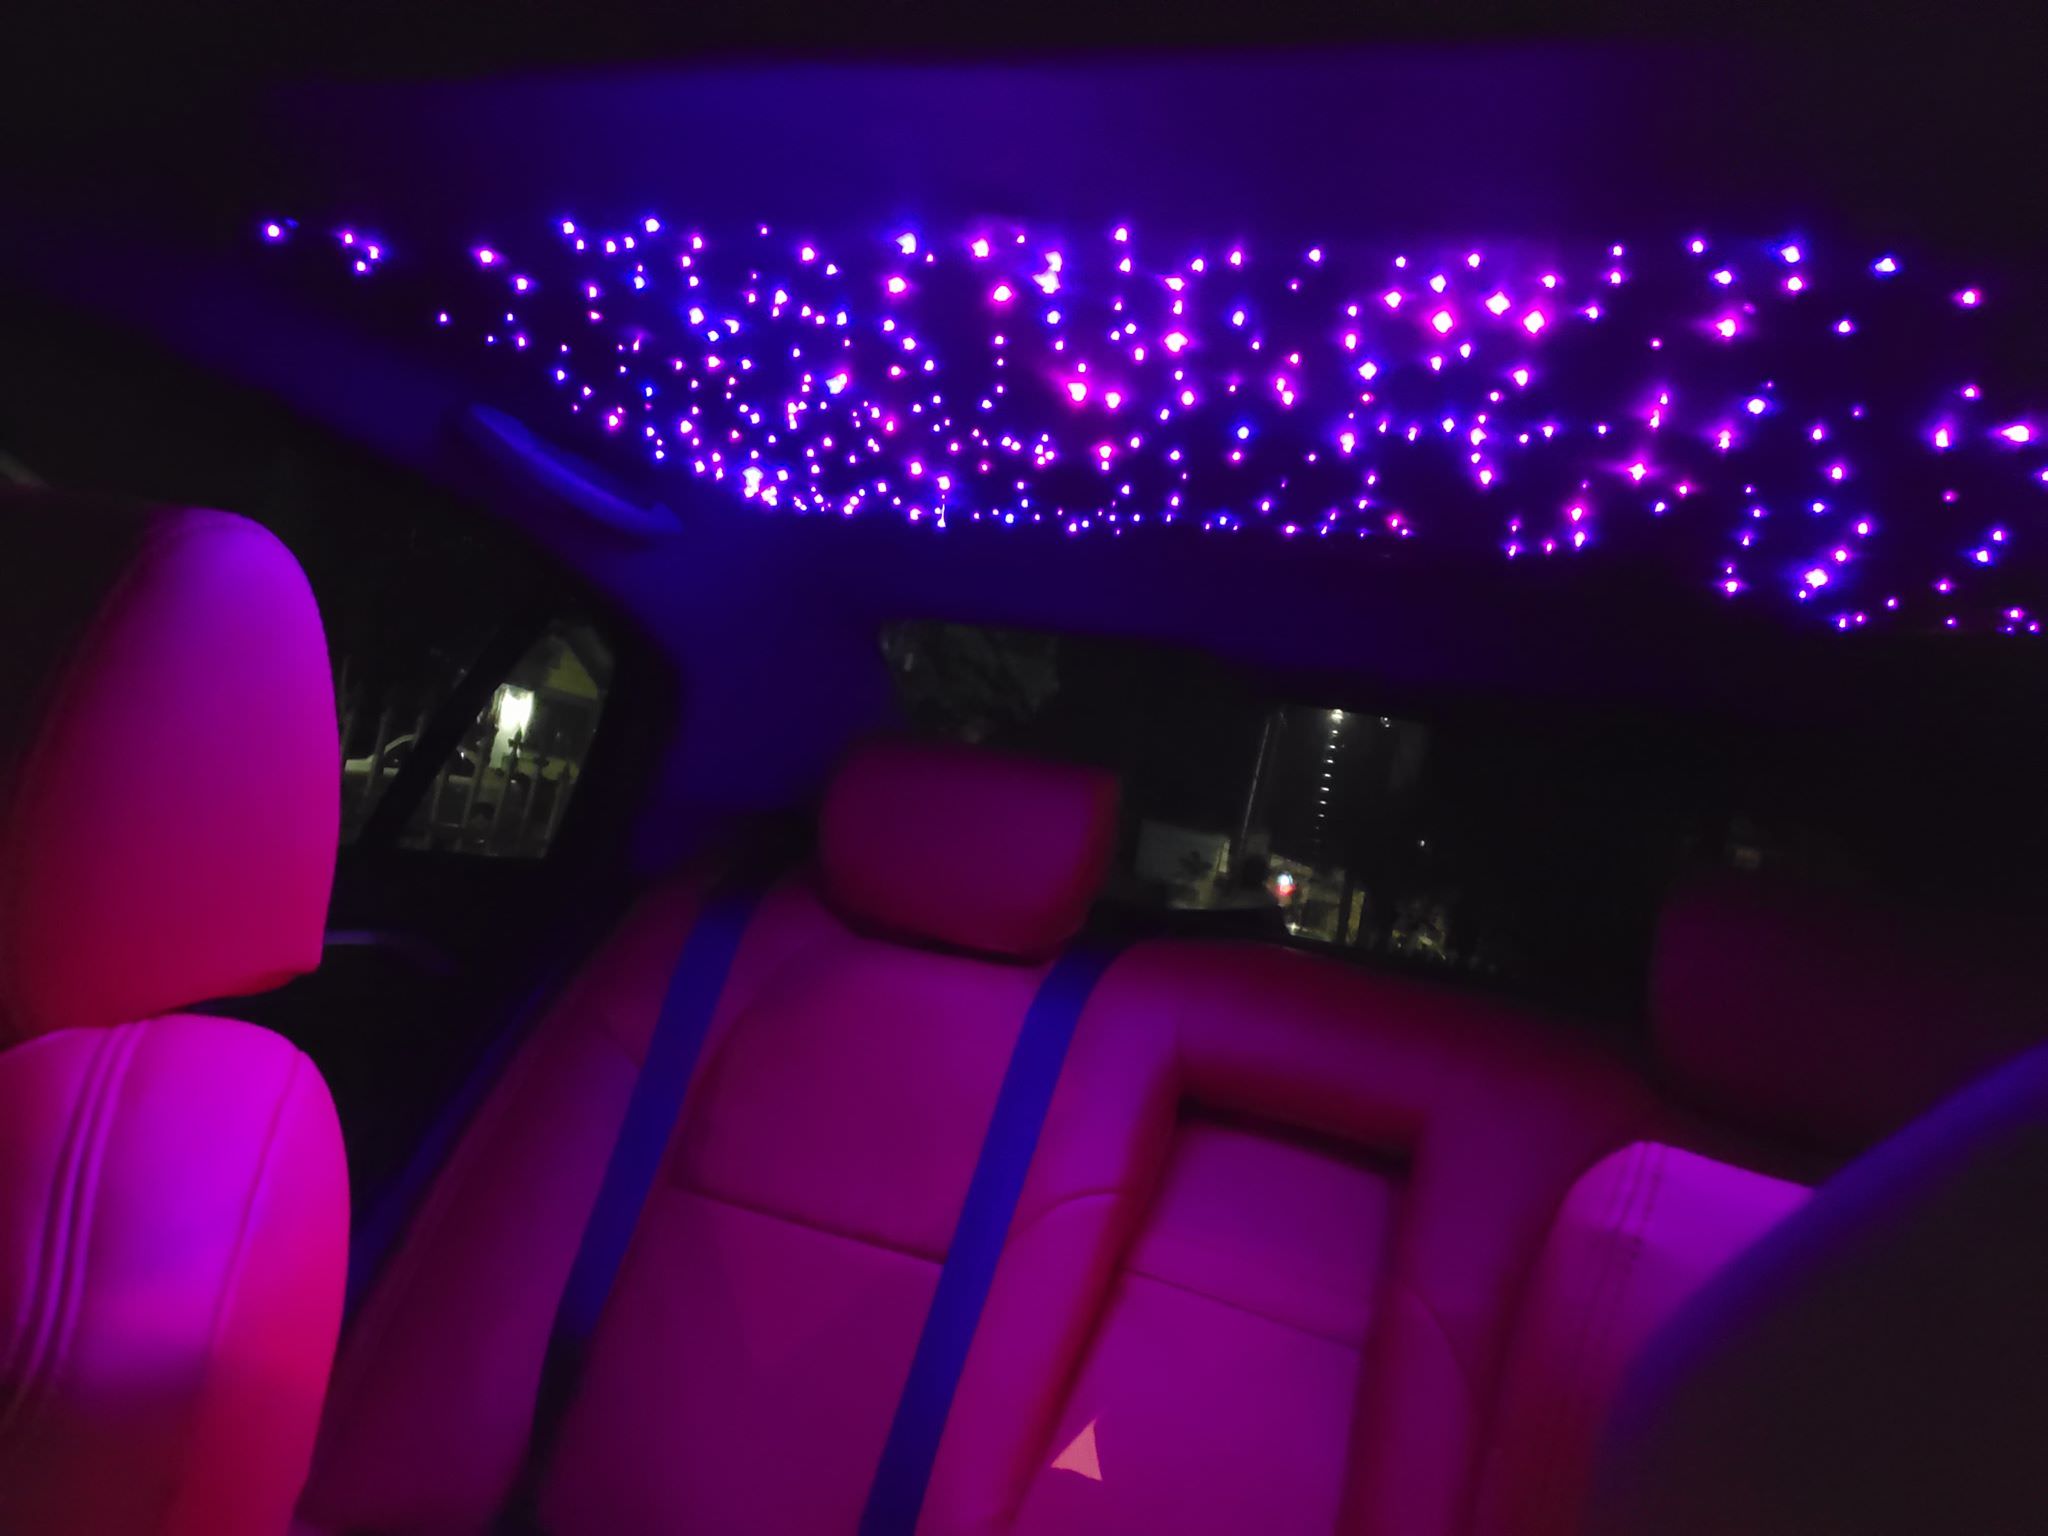
Got the idea from Rolls Royce Wraith $12,000 option which uses 1200 strands.
Video Link 1 - https://i.imgur.com/FVeFZYe.mp4
Video Link 2 -

Materials needed
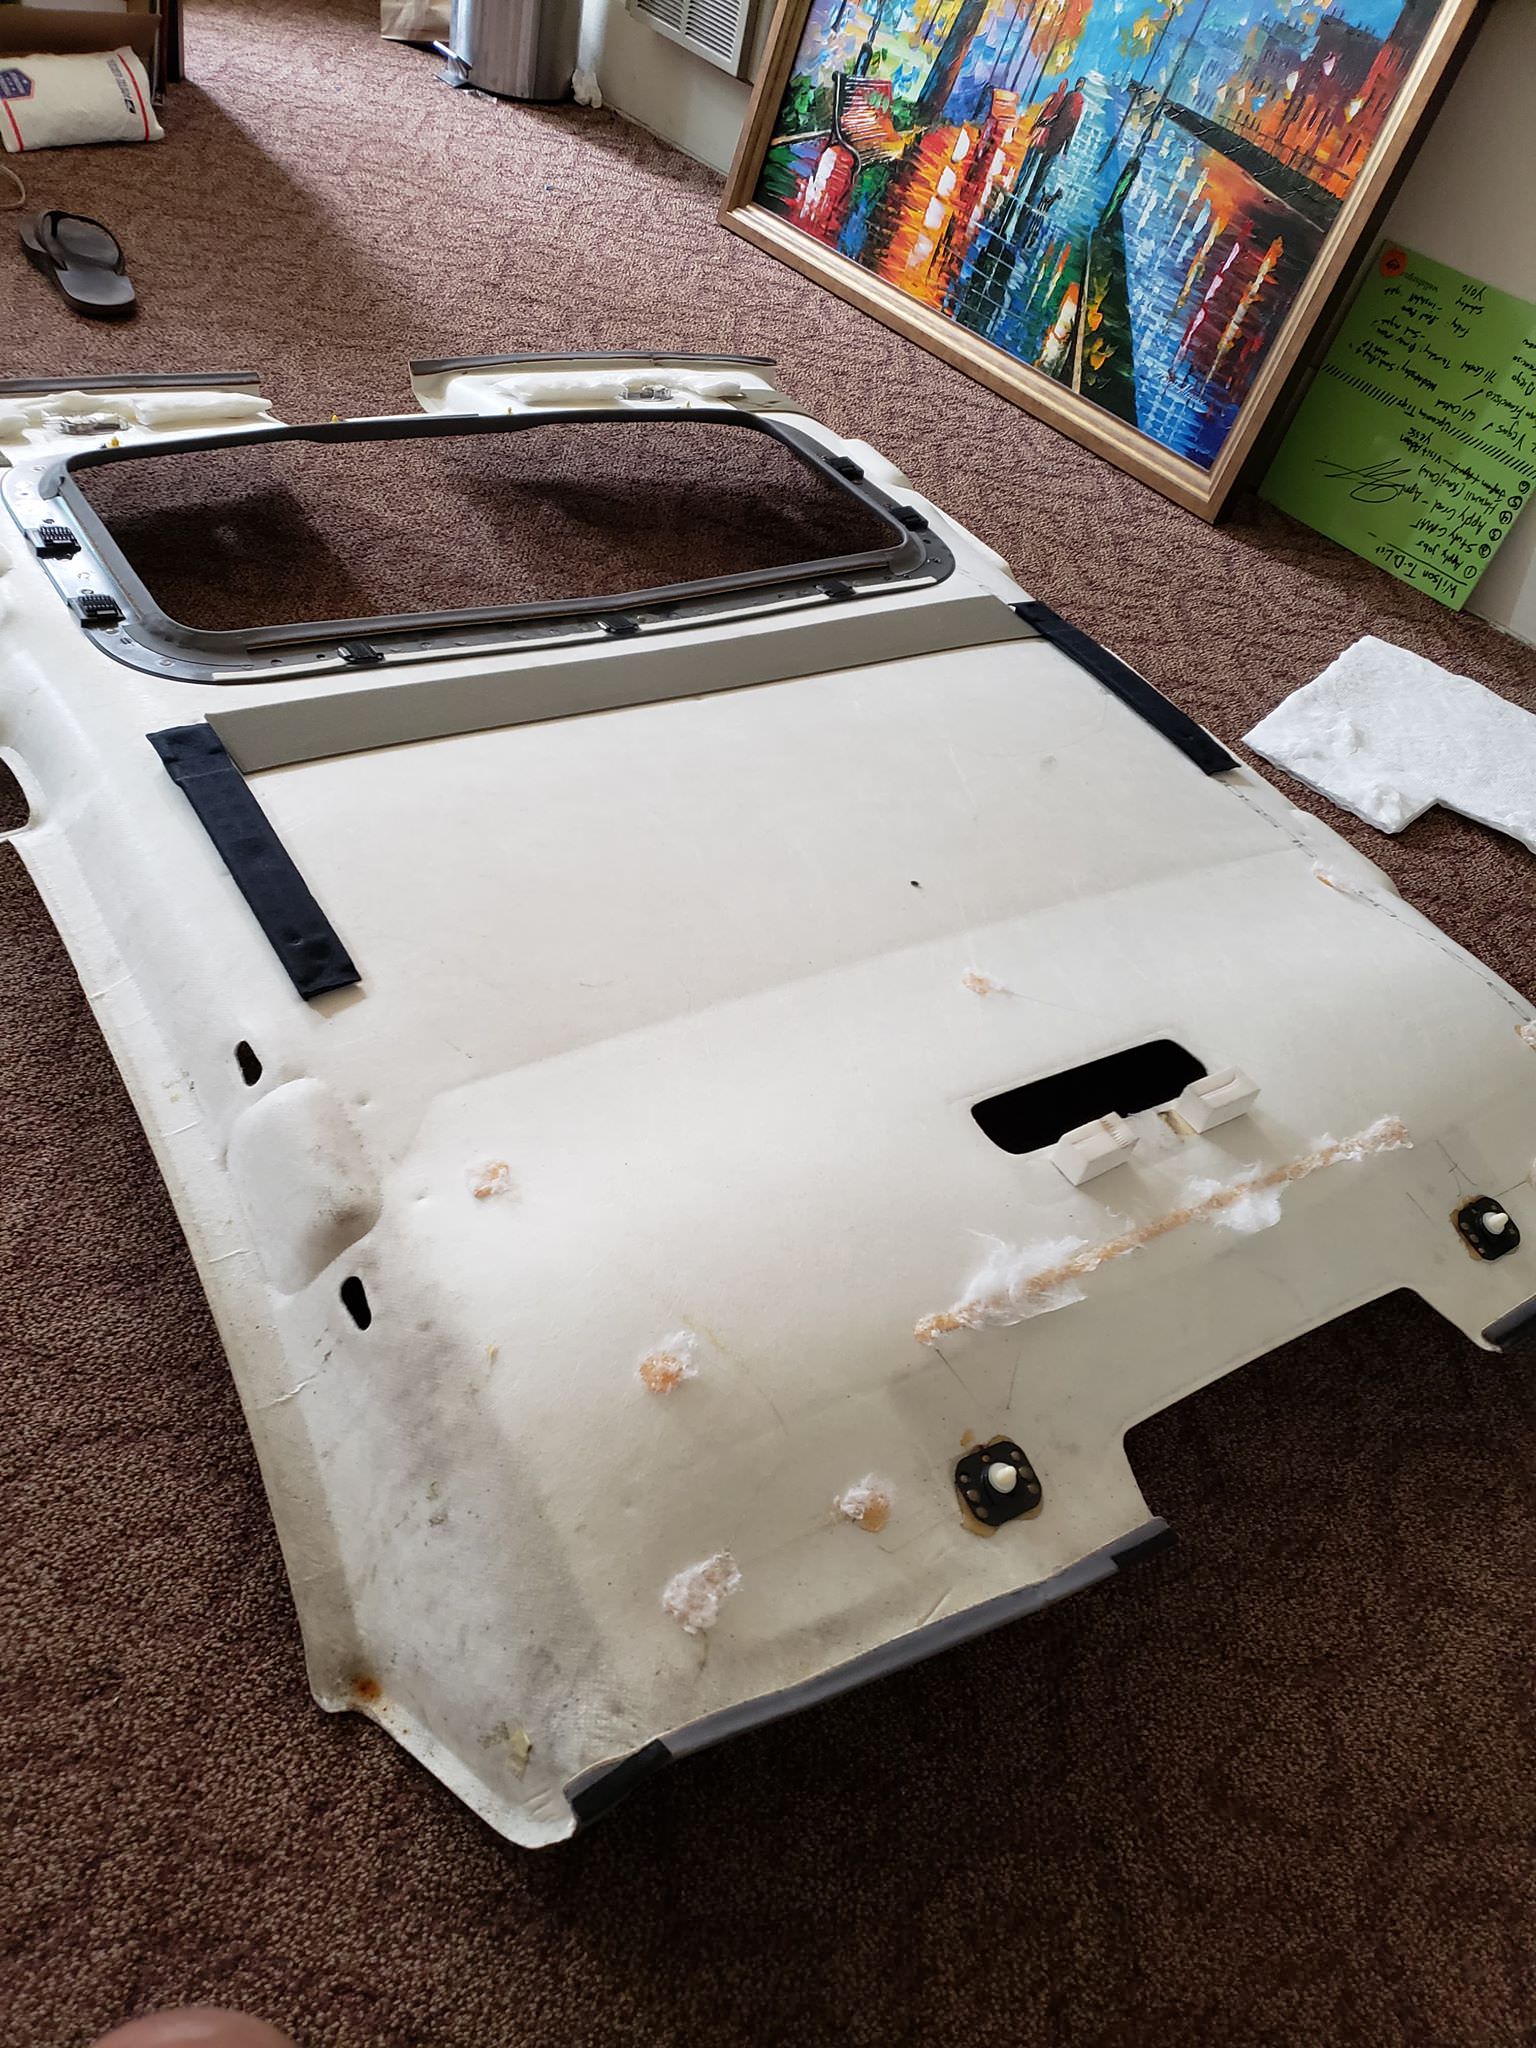
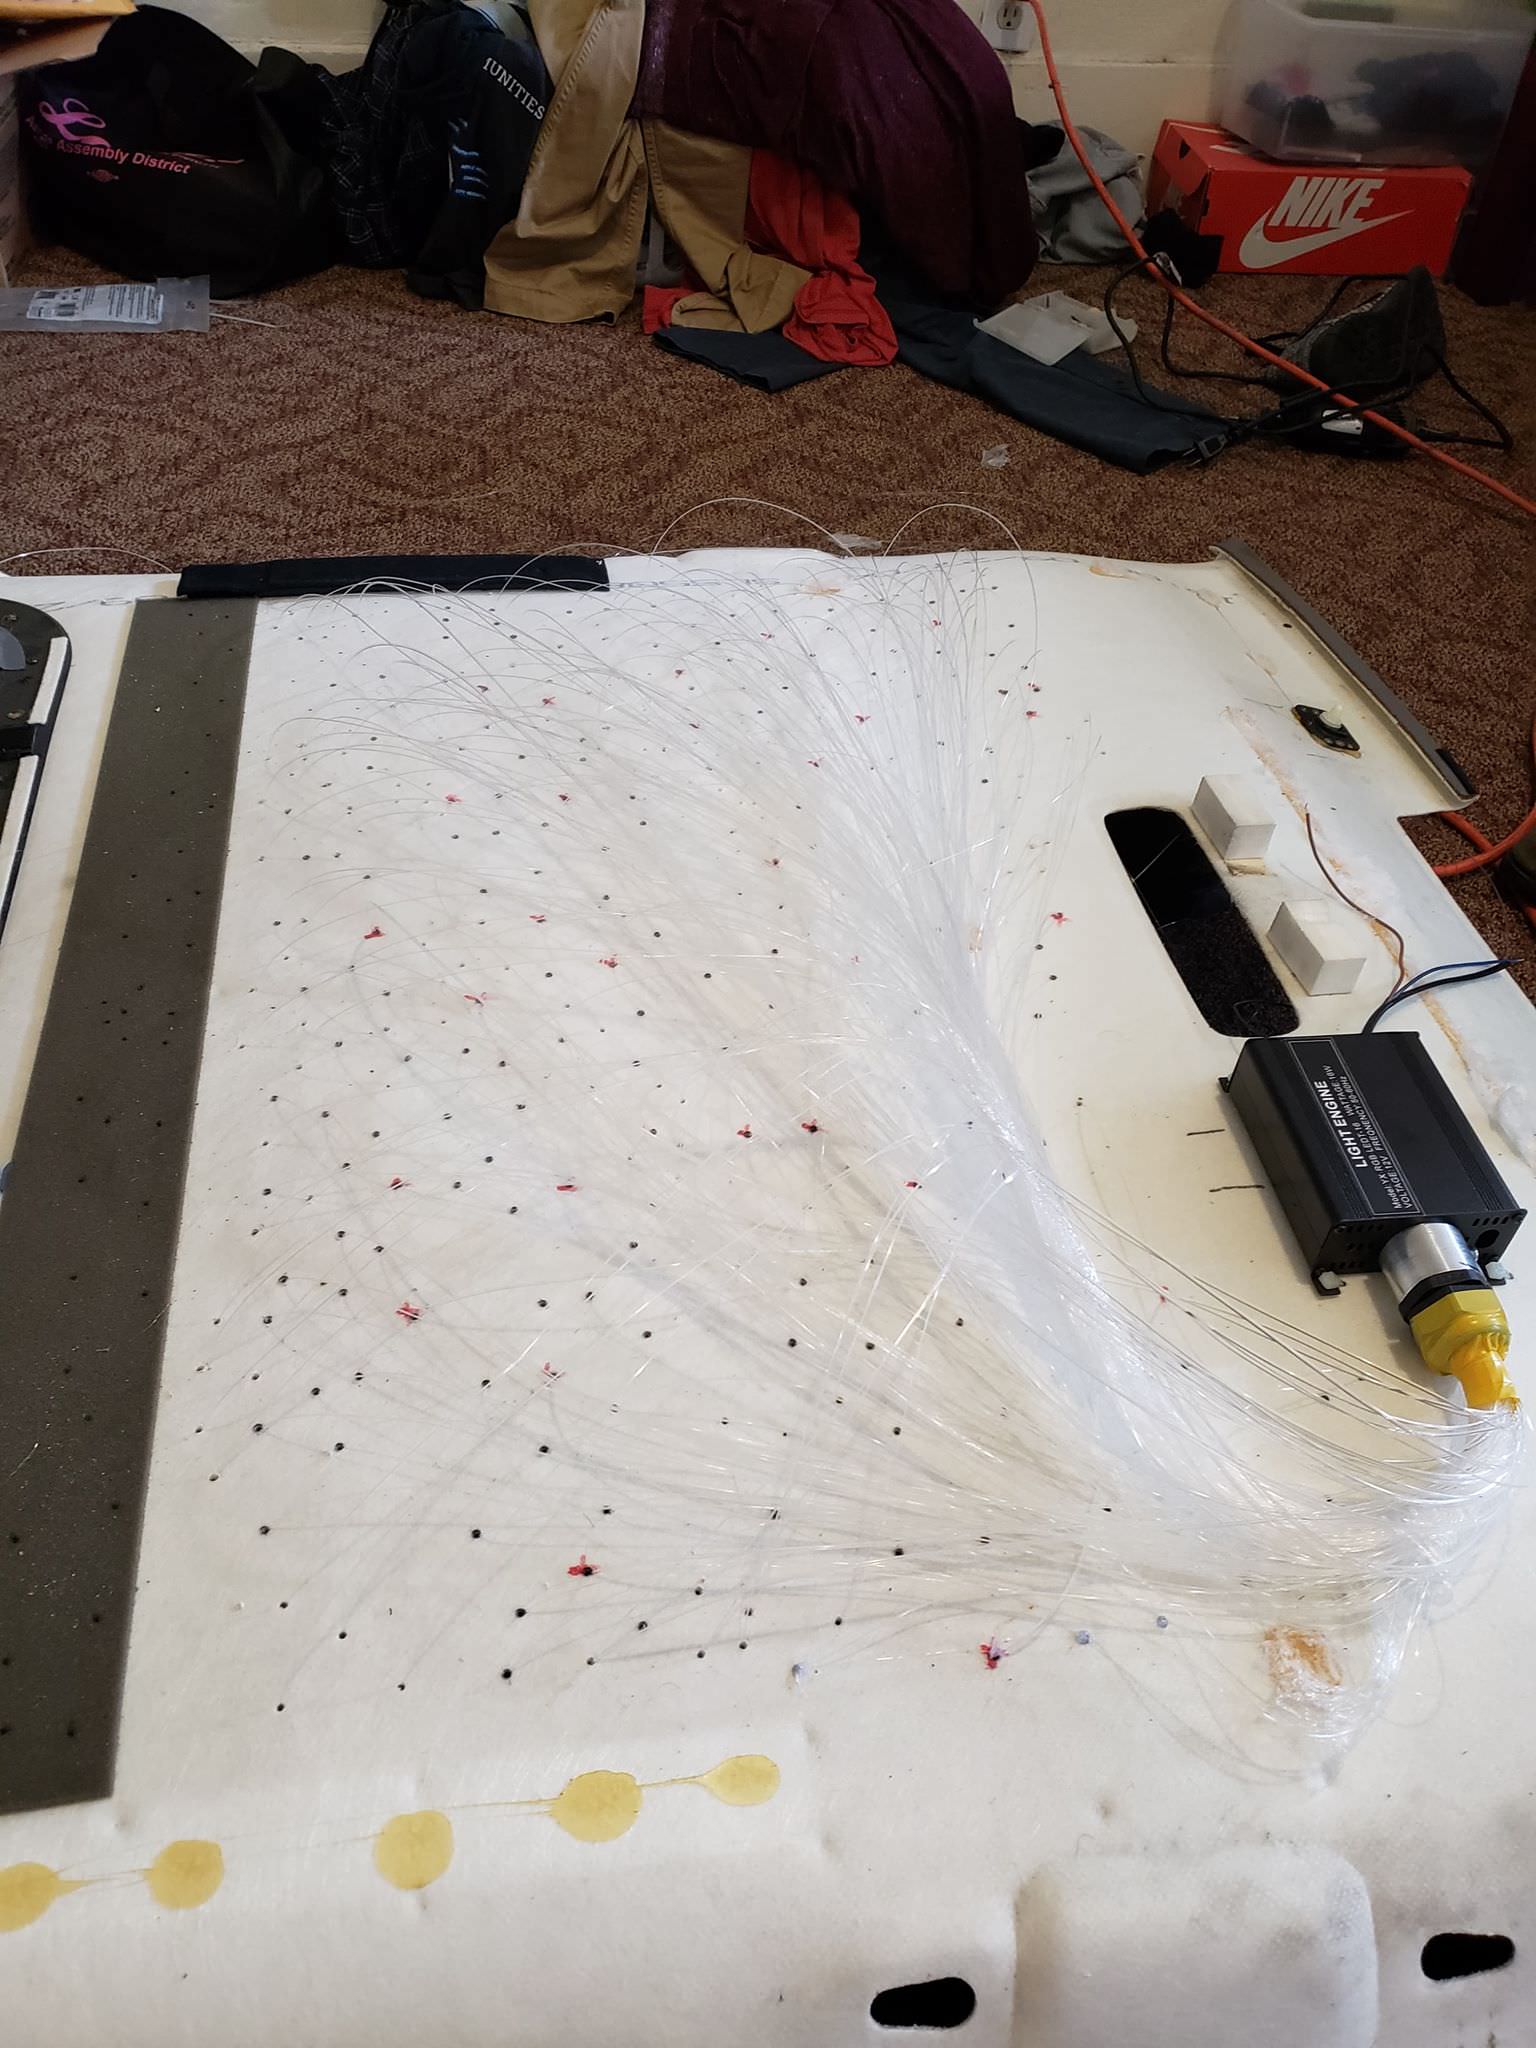
1. Remove headliner
2. Install light generator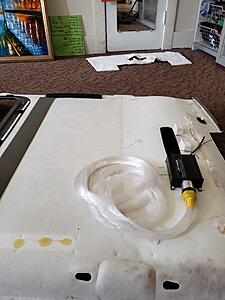
3. Plot out lights
4. Drill
5. String in cables
6. Glue down
7. Trim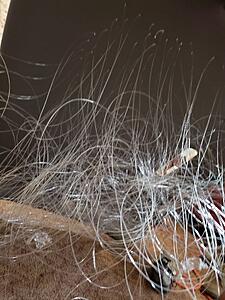
8. Wiring Part 1
9. Reinstall headliner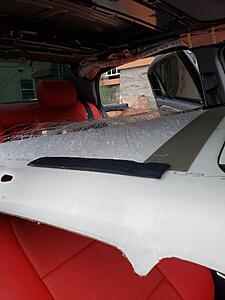
10. Wiring Part 2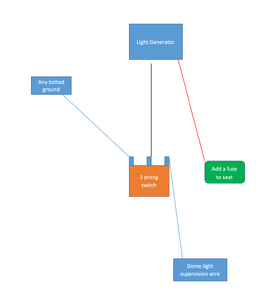
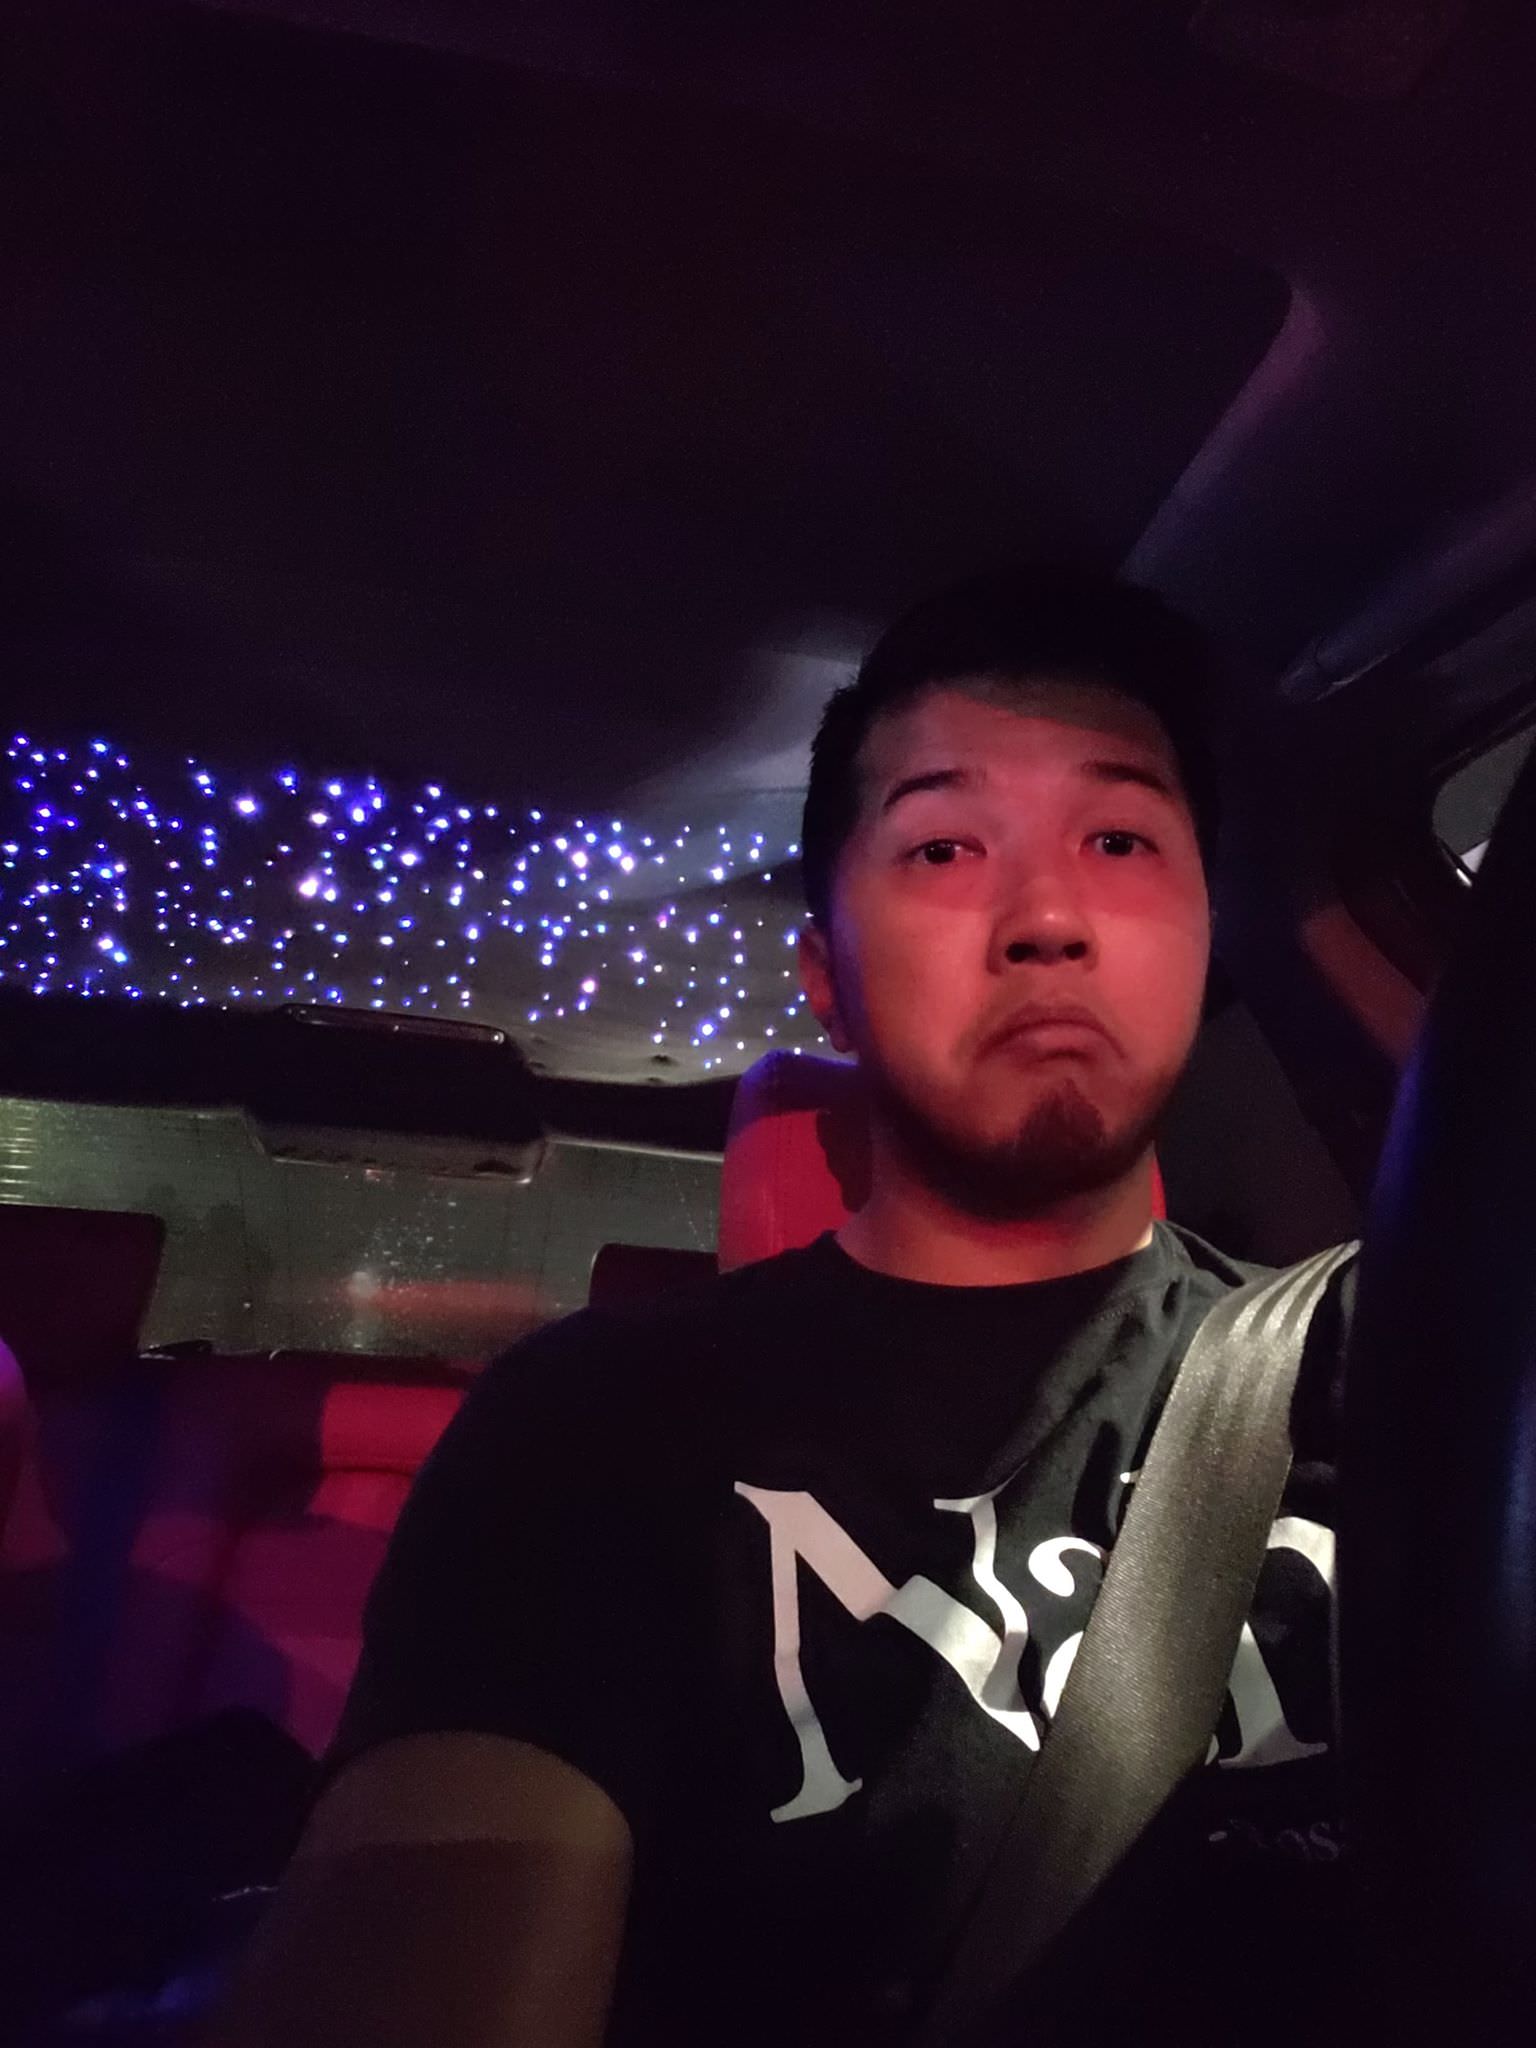
11. Done!
Video Link 1 - https://i.imgur.com/FVeFZYe.mp4
Video Link 2 -
Materials needed
- Any 12V DC fiberoptic kit on ebay like this one - link - make sure it has (3) different size strands for better effect
- Flat head screwdriver
- Philips head screwdriver
- Soldering gun or butt connectors
- 10ft of wire
- Drill or something sharp
- Zip ties
1. Remove headliner
- Remove all the sun visors,
- Remove roof handles, by popping clips around the edges,
- Remove dome light
- Remove rear dome light
- Remove front a pillar covers
- Remove rear c pillar covers
- Pull down directly in front of sunroof to release clips
- temporarily remove rubber door trim to release headliner
- Release headliner from b -pillar, just pull over
- Remove front seat headrest and recline seat
- Pull headliner out from rear passenger door, fold headliner--its ok it wont break, fold to get through door and it'll straighten out.
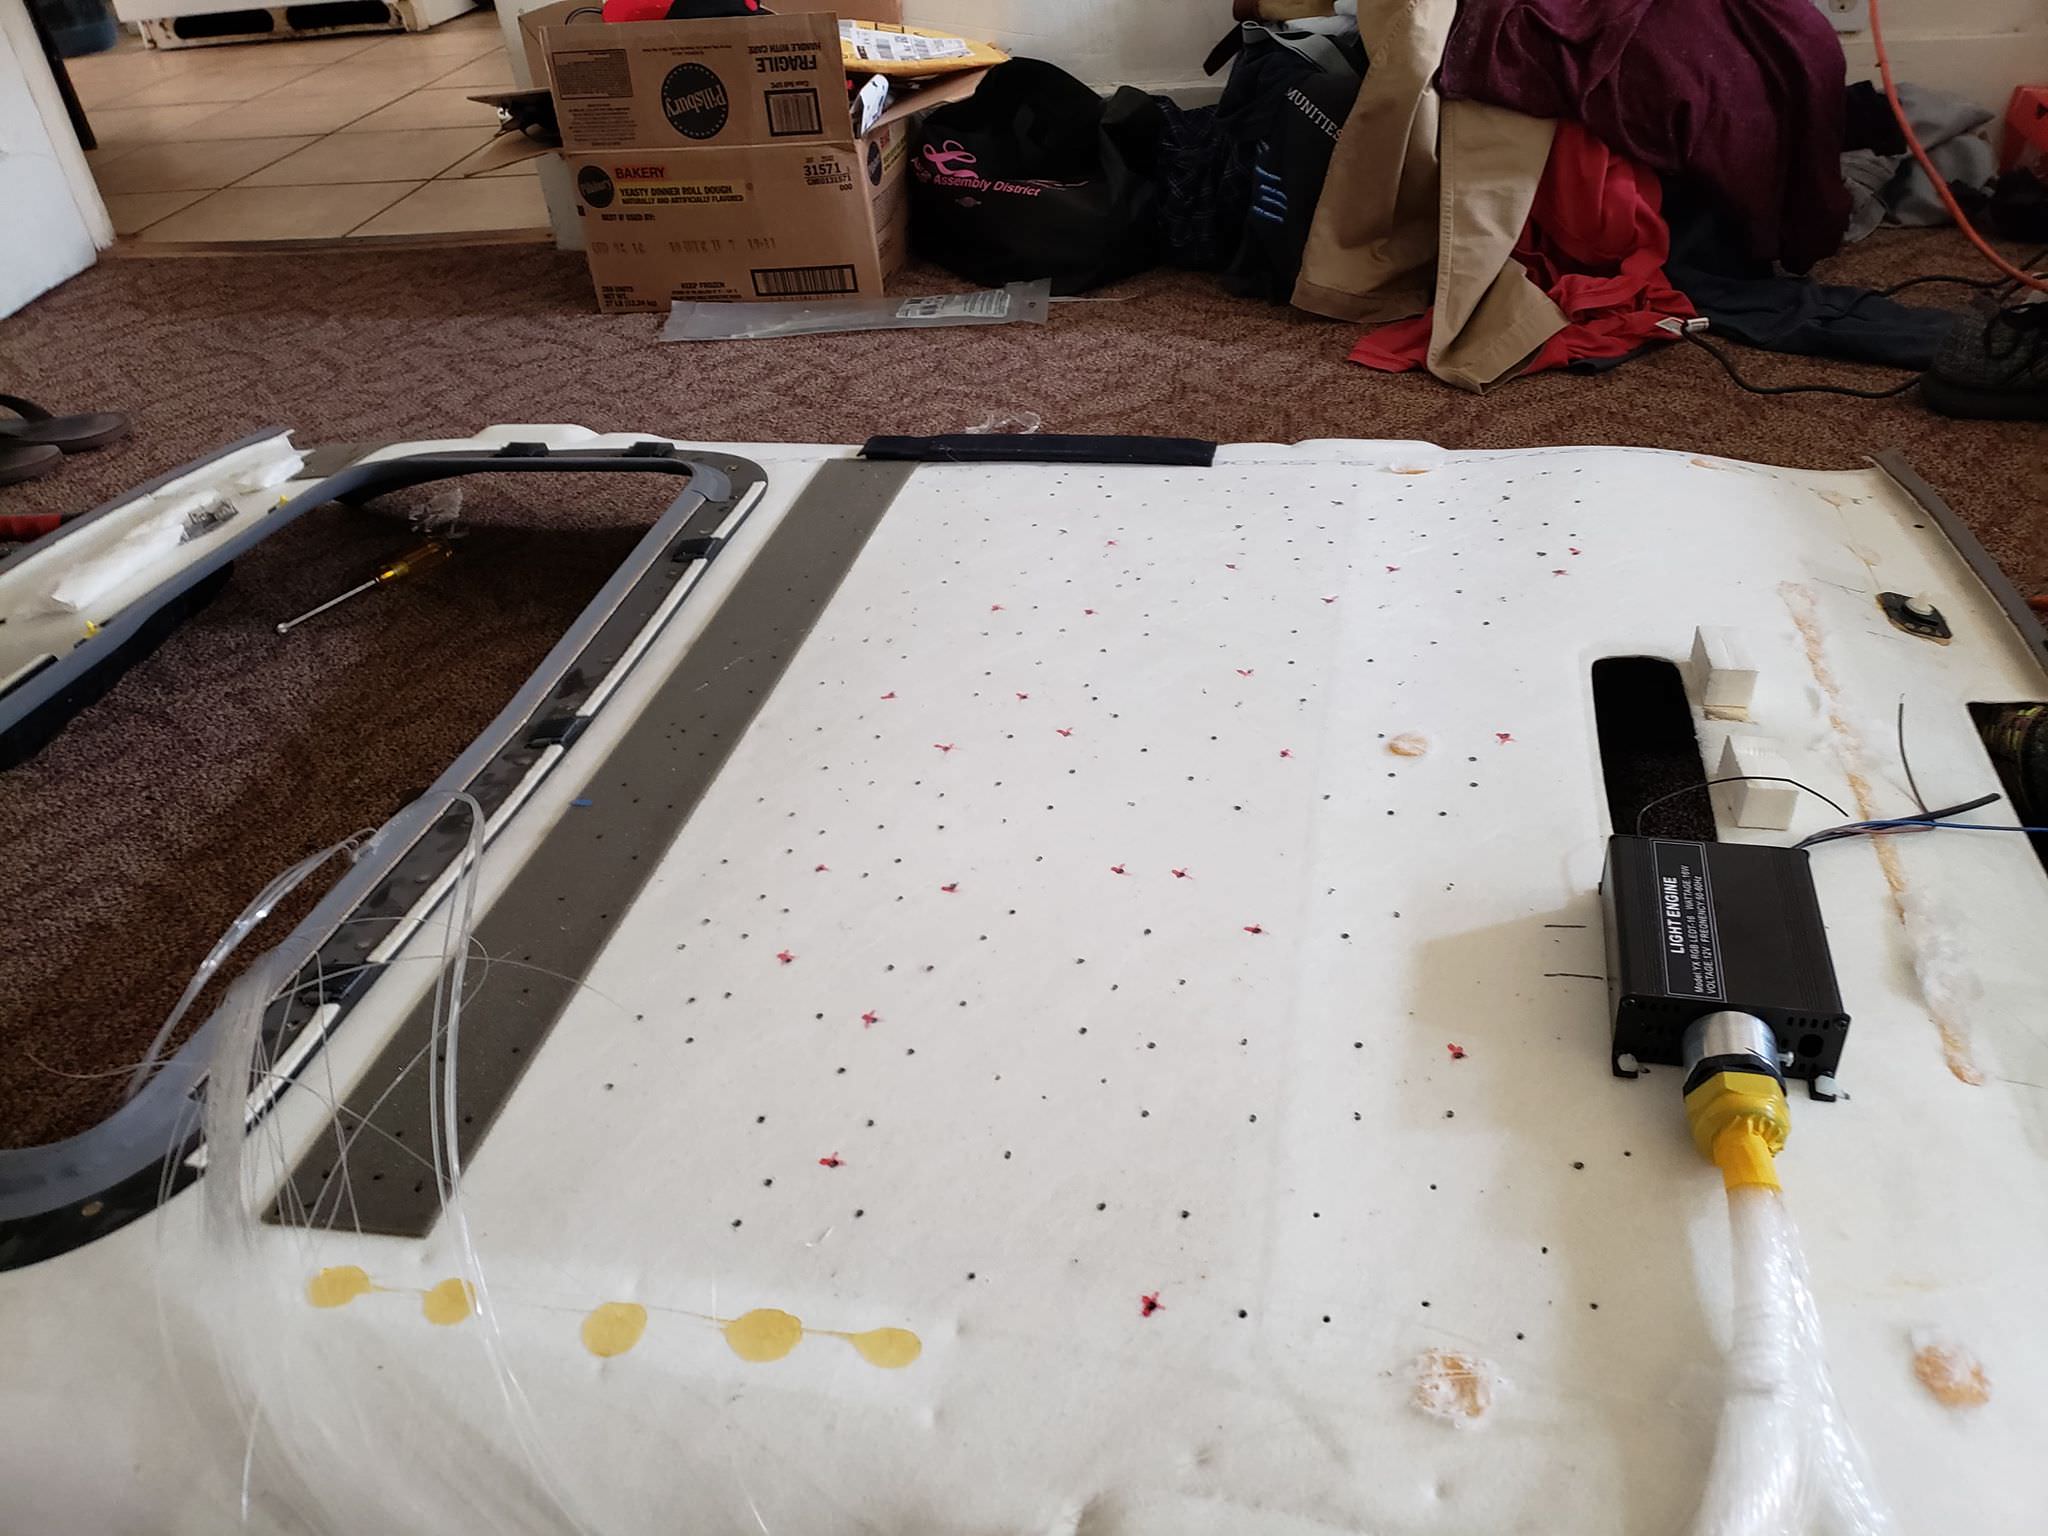
2. Install light generator
- Open your hood and test which wire is the positive and ground, use your battery terminals to figure it out. In my case, blue was power, and brown was ground
- Make sure you know if the power generator is on already
- Place the bundle of strands into the light generator and tighten down the screw
- About two inches from the rear dome light on driver side, mount the light generator facing driver side rear door
- Drill or poke two holes near each of the mounting tabs for the light generator, zip tie it in or use a bolt or w.e

3. Plot out lights
- Note how many cables came in your kit (i.e. 300, 200, 100) and begin dotting the headliner counting.
- If you got the (3) different size kit like I did, I just marked 300 dots and went back with red marker to mark where I would put different sized strands to vary the look
- You can go closer to sunroof, but warning your slide cover and use of sunroof will be limited greatly. I stopped where the black foam is, so about 4" from sun roof
- You can reach into the sides of the front but I dont recommend doing the front as the headliner is pressed up against the roof skin tight, no room for the cables
- You can have fun here, I put the zodiac Leo in one corner but try to vary the spacing, you want it to look random
4. Drill
- I drilled all the holes at once instead of doing one by one,
- You can just stab it through but doing this 300 times gets tiring so I use the smallest drill bit I had, which was maybe a 1/4", felt too big but whatever.
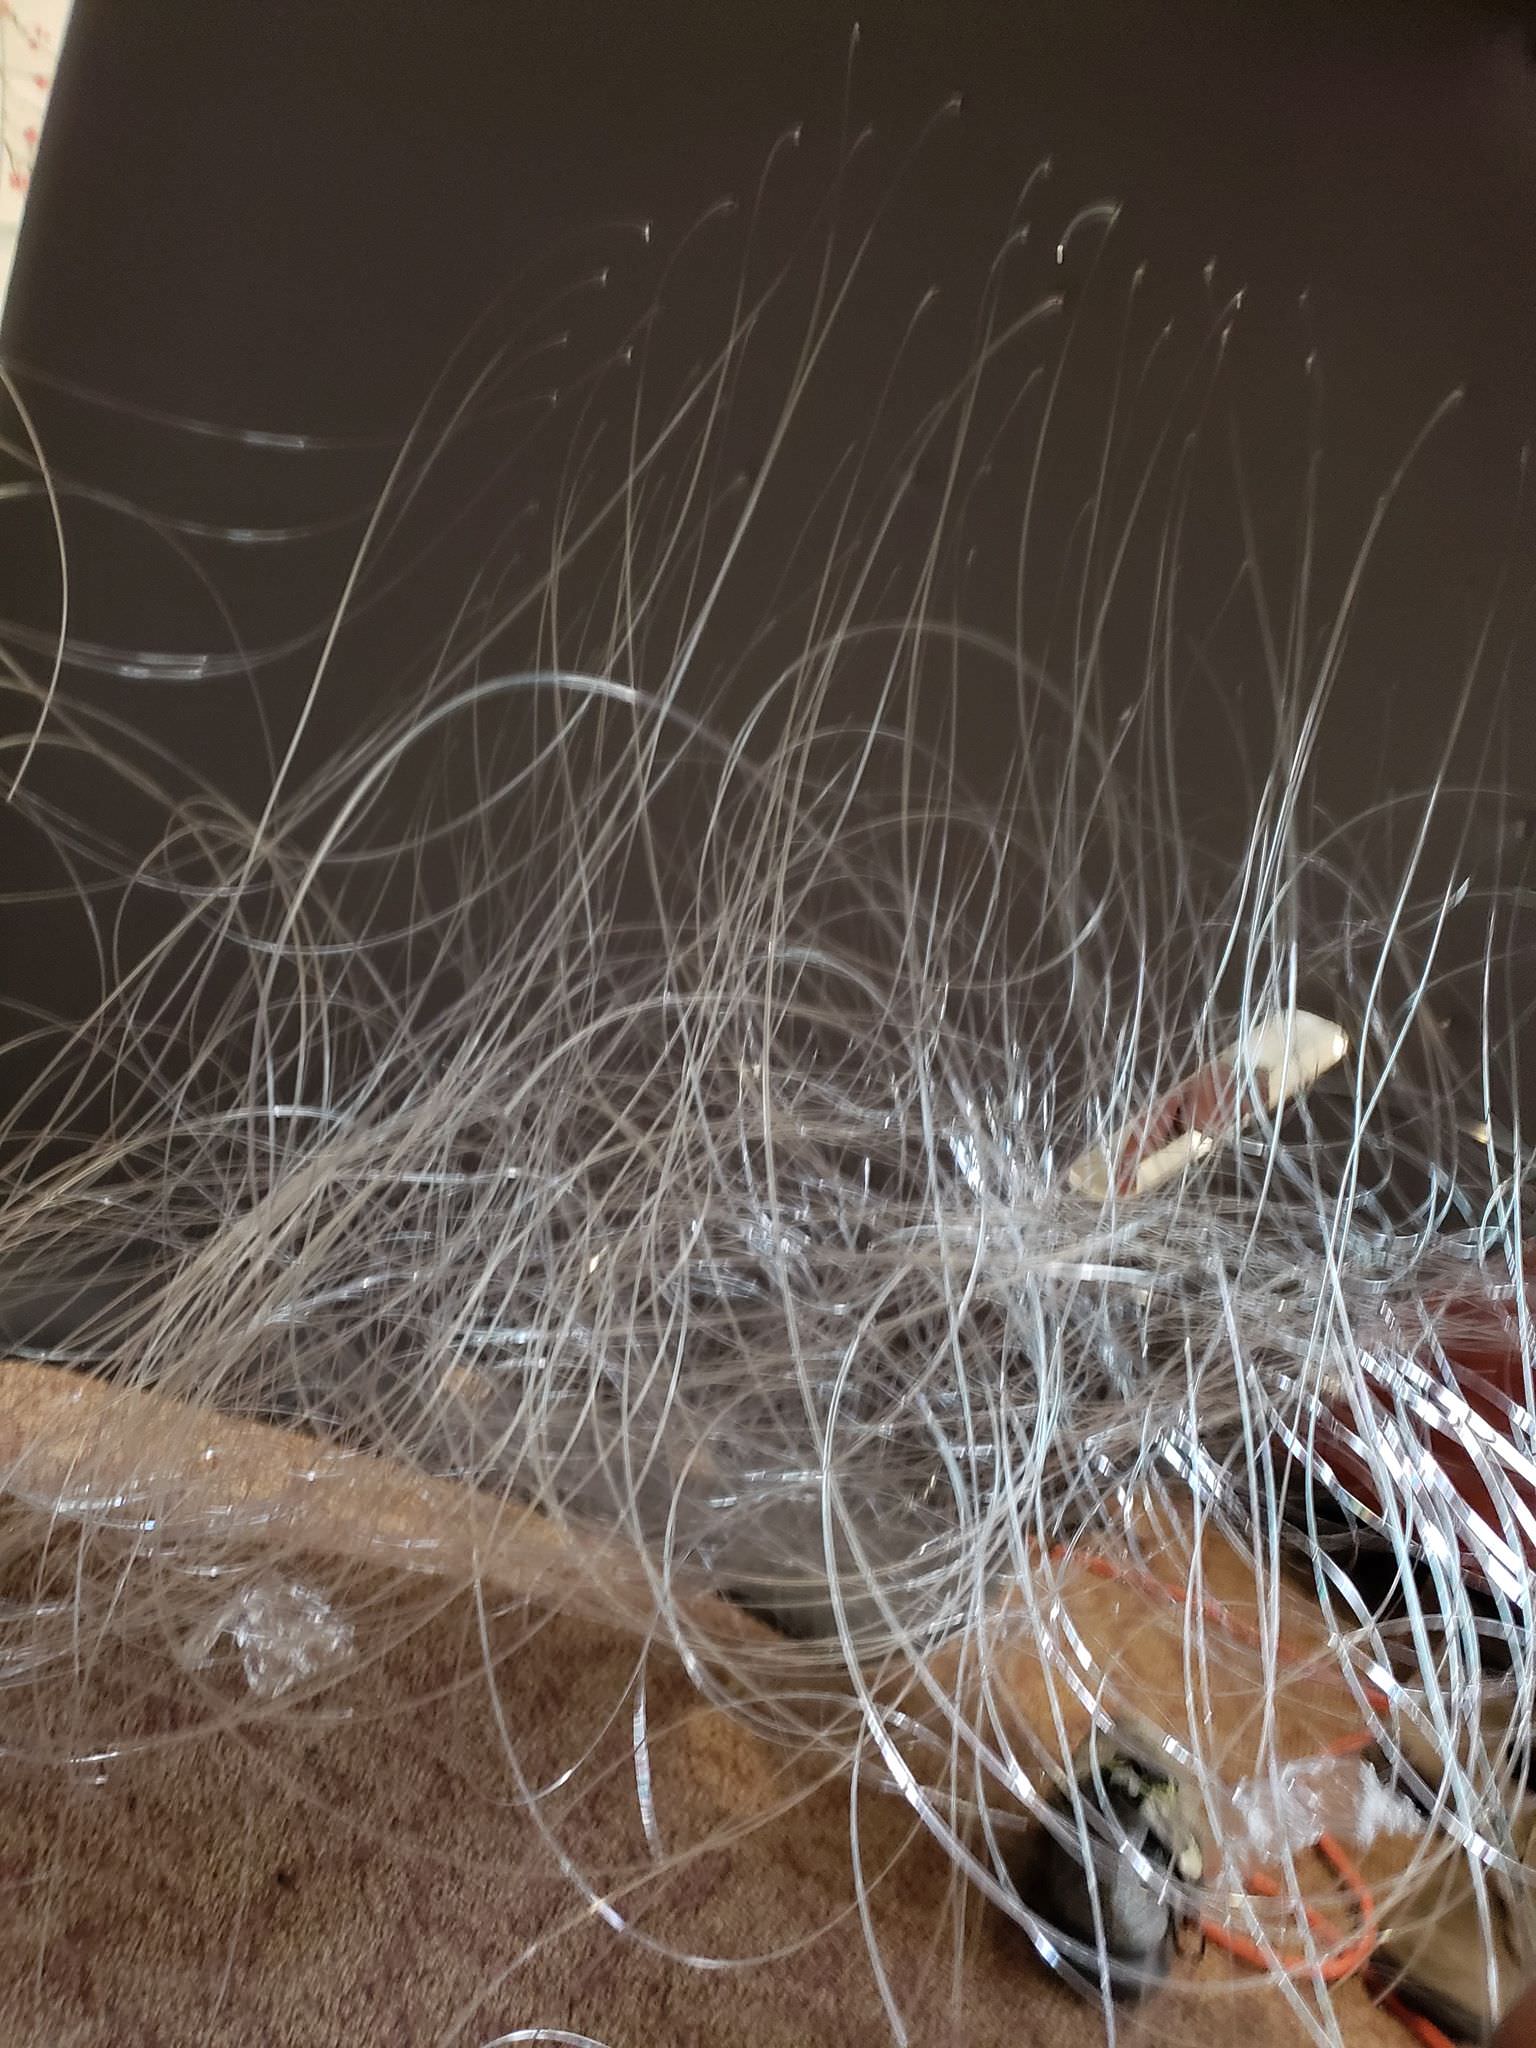
5. String in cables
- Try to separate the different size fiber optic cables
- I pulled the bulk of the cables towards me, and plucked one strand at a time into the holes
- DO NOT try to do more then one a time, you'll start to cross the cables and gets messy, do one at a time, so you can pull the strand clear of other strands
- When you get to one of the holes you marked for a different size fiber optic, just pull from that group and lay in
- Always pull from underneath to get it nice and snug
6. Glue down
- Do not use super glue, it'll melt the cable
- I used hot glue gun since it sets fast
7. Trim
- After all the cables are glued down
- Take nail clippers and trim them flush with the liner
- Nail clippers work great because they tend to round out the cable so its not jagged or sharp, also useful for zipties
8. Wiring Part 1
- Extend the wires on the light generator so that it runs across the headliner and about 4ft after so it run down the pillar
9. Reinstall headliner
- Start back to front
- Fold in headliner and reinstall through rear passenger door

10. Wiring Part 2
- Use a fuse adapter like this - on the positive wire, crimp or solder
- Swap the seat recline fuse with the fuse adapter
- Easy Route - Attach the ground to a 2 prong switch and then attach the other side of prong to a ground
- More difficult route use a 3 prong switch like this -
- the fiber optics will come on with door and through a switch
- wire middle prong to light generator
- wire other prong to dome light supervisor wire, located in top right of fuse box
- wire other prong to ground

11. Done!
Last edited by DesertMistTL; 06-26-2018 at 03:01 AM.

The following users liked this post:
EvilVirus (06-26-2018)
 06-26-2018, 12:34 PM
#3
Race Director
iTrader: (8)
so awesome
can't imagine how long you spent to do this mod!
can't imagine how long you spent to do this mod!
 06-26-2018, 09:12 PM
#7
Team Owner
Looks pretty cool...
I have a few questions- can you change the color of the "stars"? How does the glue hold up an really hot days? I'd imagine it can get a bit soft and let go. Any issues thus far?
I have a few questions- can you change the color of the "stars"? How does the glue hold up an really hot days? I'd imagine it can get a bit soft and let go. Any issues thus far?
Trending Topics
The following users liked this post:
TacoBello (06-26-2018)
07-05-2018, 09:11 AM
#9
Senior Moderator
wow 


Thread
Thread Starter
Forum
Replies
Last Post
senile32nd
Audio, Video, Electronics & Navigation
3
02-18-2002 12:01 AM
StreetEffectz
Audio, Video, Electronics & Navigation
14
12-20-2000 06:03 PM

