Hi-Speed's race engine swap
 02-08-2015, 08:48 PM
#121

What did you regret about your valve covers being painted? I used the wrinkle coat paint like some others did, but then I covered it with grabber blue hi-temp paint, and I think it turned out pretty good. I kind of messed up the IM plate, but the valve covers turned out nice. I think heat is the key with the wrinkle paint.
 02-08-2015, 09:09 PM
#122
iWhine S/C 6MT TL
iTrader: (1)
What did you regret about your valve covers being painted? I used the wrinkle coat paint like some others did, but then I covered it with grabber blue hi-temp paint, and I think it turned out pretty good. I kind of messed up the IM plate, but the valve covers turned out nice. I think heat is the key with the wrinkle paint.
02-18-2015, 12:08 AM
#124
Took the car to get some gas and noticed it was smoking from under the hood quite a bit. Oil and coolant spilled on the heat wrap during the head swap so I expected some smoke for a few days as that burned off. The smoke was pretty constant at the gas station and stop lights on the way home, so I decided to see where it was coming from. I found that the turbo blanket was soaked with oil and smoking like crazy. Lucky for me I have not taken the car for too long of a drive or I might have started a fire with that much oil.
I really like the turbo blanket I had on the car (PTP turbo blankets ) and will be buying another one from them to replace it. My issue now is whether to buy the cool looking lava blanket for $40 extra or get another black blanket. These blankets do a amazing job of keeping the heat away from other parts and in the turbo. Spool also seems to be improved when the turbo is warmed up. The heat from the turbo was melting the seam sealer in the hood and dripping it on the hot side prior to the blanket.
I really like the turbo blanket I had on the car (PTP turbo blankets ) and will be buying another one from them to replace it. My issue now is whether to buy the cool looking lava blanket for $40 extra or get another black blanket. These blankets do a amazing job of keeping the heat away from other parts and in the turbo. Spool also seems to be improved when the turbo is warmed up. The heat from the turbo was melting the seam sealer in the hood and dripping it on the hot side prior to the blanket.
02-18-2015, 06:14 AM
#125

Took the car to get some gas and noticed it was smoking from under the hood quite a bit. Oil and coolant spilled on the heat wrap during the head swap so I expected some smoke for a few days as that burned off. The smoke was pretty constant at the gas station and stop lights on the way home, so I decided to see where it was coming from. I found that the turbo blanket was soaked with oil and smoking like crazy. Lucky for me I have not taken the car for too long of a drive or I might have started a fire with that much oil.
I really like the turbo blanket I had on the car (PTP turbo blankets ) and will be buying another one from them to replace it. My issue now is whether to buy the cool looking lava blanket for $40 extra or get another black blanket. These blankets do a amazing job of keeping the heat away from other parts and in the turbo. Spool also seems to be improved when the turbo is warmed up. The heat from the turbo was melting the seam sealer in the hood and dripping it on the hot side prior to the blanket.
I really like the turbo blanket I had on the car (PTP turbo blankets ) and will be buying another one from them to replace it. My issue now is whether to buy the cool looking lava blanket for $40 extra or get another black blanket. These blankets do a amazing job of keeping the heat away from other parts and in the turbo. Spool also seems to be improved when the turbo is warmed up. The heat from the turbo was melting the seam sealer in the hood and dripping it on the hot side prior to the blanket.
02-18-2015, 03:06 PM
#127
I have heat shield on my tsx and it works well but nothing like the DEI titanium blanket on the TL you can touch it anytime and it's just warm
06-23-2015, 11:32 PM
#129
Summer update:
I have a few projects for the TL this summer to make the TL run and look better.
Project 1 : Swap over to the Flash Pro, so I can get it retuned and take some of the idle quirks out.
Project 2: Replace front o2's, IAT, and coolant sensor, ties into project 1 to help with the tune and get things as accurate as possible. Coolant sensor is reading 154 degrees when cruzing, I replaced the thermostat with no change so I think it's the sensor. IAT is reading about 18 degrees low so that will also be changed. O2 sensors are original so, I felt replacing them would be a good idea.
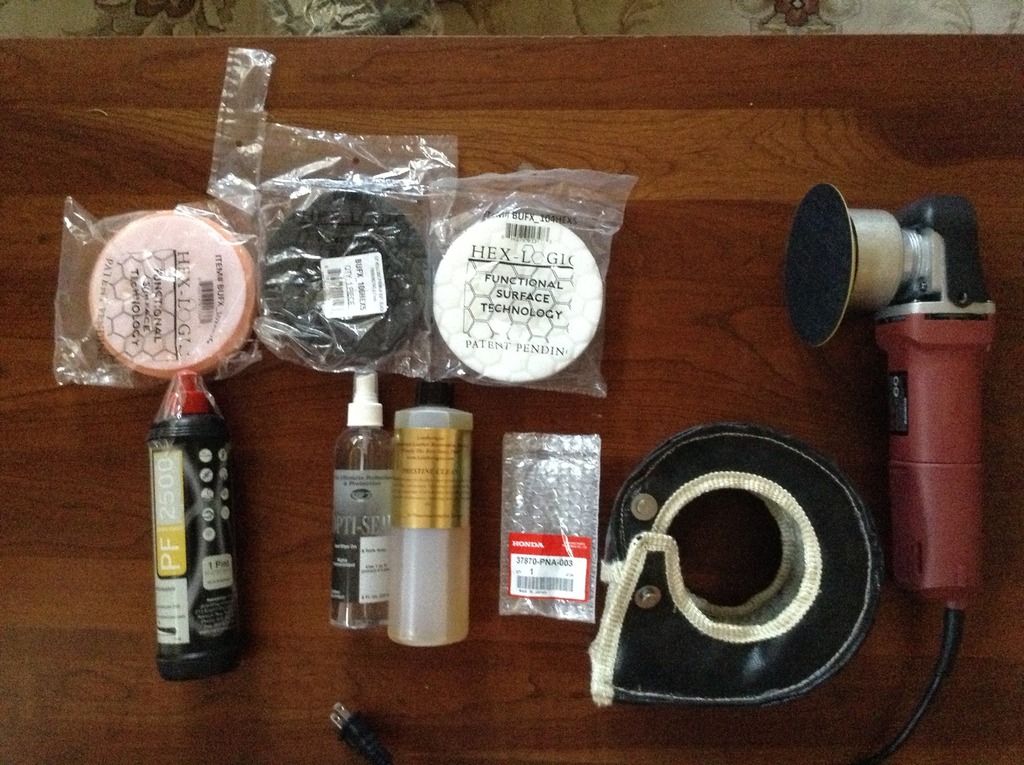
Project 3 : Detail car, full polish with Menzerna 2500 and cleaning of seats and seals with Pristine Clean. I have never polished a car before so I plan to start with the commuter to test first before moving on to the TL
Project 4: Put new turbo blanket on and enjoy cooler intake temps. Took the car out last week on a 85 degree day and measured 600 degrees exhaust side, 165 intake side of the turbo. The charge pipe was 125 and the filter was 145 degrees, with no blanket. I can't wait to get back to cooler air temps and better spool.
Project 5: Trouble shoot Methanol system, to see what I damaged. It worked sporadically and I had it turned down to start spray at 3 psi, with full spray at 8 with my low boost stock setup. Turns out it was running while on the dyno and may have effected the tune. I can't tell, but I would like the extra octane for protection, so I'm going to fix it.
Project 6: Replace my AFR gauge / system, due to water damage. I will also be replacing my boost gauge (starting to die) with a AEM boost gauge when I switch to flash Pro because I'm using the MS3 to control boost now.
Here is a pic of some of the new stuff to help with my projects.
I have a few projects for the TL this summer to make the TL run and look better.
Project 1 : Swap over to the Flash Pro, so I can get it retuned and take some of the idle quirks out.
Project 2: Replace front o2's, IAT, and coolant sensor, ties into project 1 to help with the tune and get things as accurate as possible. Coolant sensor is reading 154 degrees when cruzing, I replaced the thermostat with no change so I think it's the sensor. IAT is reading about 18 degrees low so that will also be changed. O2 sensors are original so, I felt replacing them would be a good idea.
Project 3 : Detail car, full polish with Menzerna 2500 and cleaning of seats and seals with Pristine Clean. I have never polished a car before so I plan to start with the commuter to test first before moving on to the TL
Project 4: Put new turbo blanket on and enjoy cooler intake temps. Took the car out last week on a 85 degree day and measured 600 degrees exhaust side, 165 intake side of the turbo. The charge pipe was 125 and the filter was 145 degrees, with no blanket. I can't wait to get back to cooler air temps and better spool.
Project 5: Trouble shoot Methanol system, to see what I damaged. It worked sporadically and I had it turned down to start spray at 3 psi, with full spray at 8 with my low boost stock setup. Turns out it was running while on the dyno and may have effected the tune. I can't tell, but I would like the extra octane for protection, so I'm going to fix it.
Project 6: Replace my AFR gauge / system, due to water damage. I will also be replacing my boost gauge (starting to die) with a AEM boost gauge when I switch to flash Pro because I'm using the MS3 to control boost now.
Here is a pic of some of the new stuff to help with my projects.

Last edited by Hi speed; 06-23-2015 at 11:35 PM.
The following users liked this post:
sbuoy (04-24-2016)


The following users liked this post:
Hi speed (06-29-2015)
06-29-2015, 11:27 AM
#132
That's awesome, thanks so much Ken. I am almost there, just trying for replace a few sensors first. I'm still deciding about the type-a MT ECU and if it's worth it to not need to solder the ECU to keep cruise. Thanks again, I will let you know when I am ready to go.
The following users liked this post:
Hi speed (06-29-2015)
06-29-2015, 03:22 PM
#136
I have been driving my civic (commuter) with no cruise and I'm getting used to it, I find it more useful on faster cars and those I don't drive as much to keep from speeding. On flat ground cruise is good with the turbo, but hit any incline and the car will try to go into boost on it's own.
06-29-2015, 03:27 PM
#137
It's a PTP blanket. My last one worked great and was holding up very well. They sell them on EBay or the PTP website same price $110 plus $10 shipping. Highly recommended these guys know what they are doing. They also have the Lava/ carbon fiber look for $40 more.

 07-01-2015, 06:46 PM
#141
Safety Car
iTrader: (7)
Join Date: Dec 2008
Location: San Jose, CA/ Charleston, WV
Posts: 4,045
Received 619 Likes
on
459 Posts
looks kinda runny on some area? Did you sand and prime it before paint? That would really help the paint stay.
I would also suggest baking them in a spare toaster over or something to help the paint harden
I painted myself the TL-S valve cover and it was a bitch to do. lol
I would also suggest baking them in a spare toaster over or something to help the paint harden
I painted myself the TL-S valve cover and it was a bitch to do. lol
07-01-2015, 07:04 PM
#142
looks kinda runny on some area? Did you sand and prime it before paint? That would really help the paint stay.
I would also suggest baking them in a spare toaster over or something to help the paint harden
I painted myself the TL-S valve cover and it was a bitch to do. lol
I would also suggest baking them in a spare toaster over or something to help the paint harden
I painted myself the TL-S valve cover and it was a bitch to do. lol
I was running out of paint and needed to do 3 coats to get the wrinkle finish,so the valve covers didn't come out as good as I would have liked. I used paint stripper on a pair of covers that were already peeling and sanded as much as I could before painting. There are lots of little crevices that are difficult to sand that I left alone and painted over.
The front cover is not bad, but the back cover needs more paint or a possible repaint. I am ordering a can to finish them up and paint a few other things.
The paint is hard to use since you need 3 coats and it doesn't wrinkle for a few hrs. My issue was, I laid them flat to paint them and once the can got low I had to keep moving it around to keep paint spraying. I should have had them powder coated.
07-02-2015, 05:44 AM
#143
I think they look good. Not quite as much wrinkle as I would expect - how did you heat them after painting? When I did mine, if I recall, I would paint, heat, paint, heat, etc for 3 or 4 coats. The wife is not about to let me use her new stove, so I had to make due with a heat gun. I then put a colored top coat on so it would be the color I wanted, since they don't make a blue wrinkle paint, or I couldn't find it. The only thing I did slightly different was every place there was a screw hole I covered with tape, so the mating pad was covered. I didn't want the thickness of the paint to interfere with screwing into the covers.
07-02-2015, 07:14 AM
#144
Safety Car
iTrader: (7)
Join Date: Dec 2008
Location: San Jose, CA/ Charleston, WV
Posts: 4,045
Received 619 Likes
on
459 Posts
I was running out of paint and needed to do 3 coats to get the wrinkle finish,so the valve covers didn't come out as good as I would have liked. I used paint stripper on a pair of covers that were already peeling and sanded as much as I could before painting. There are lots of little crevices that are difficult to sand that I left alone and painted over.
The front cover is not bad, but the back cover needs more paint or a possible repaint. I am ordering a can to finish them up and paint a few other things.
The paint is hard to use since you need 3 coats and it doesn't wrinkle for a few hrs. My issue was, I laid them flat to paint them and once the can got low I had to keep moving it around to keep paint spraying. I should have had them powder coated.
07-02-2015, 07:12 PM
#145
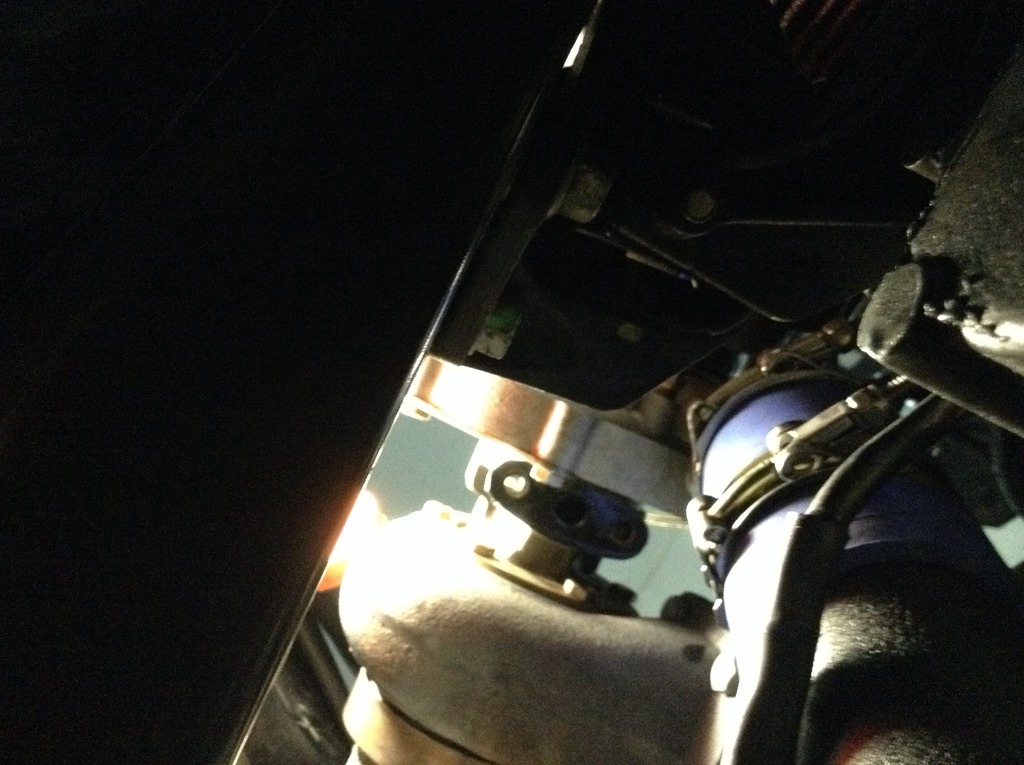
Made some progress today on the air filter. As some of you may know, the turbo on the version one kit faces towards the rear of the car and the fuse box making fitment of a large enough filter very difficult. Some members were able to stuff a larger air filter down by the transmission, but after many hrs trying I was not able to make it work. Lately IAT temps on the car have been going up more quickly and the turbo is surging above 14 psi, so I decided to revisit the air filter issue and see what I could do.
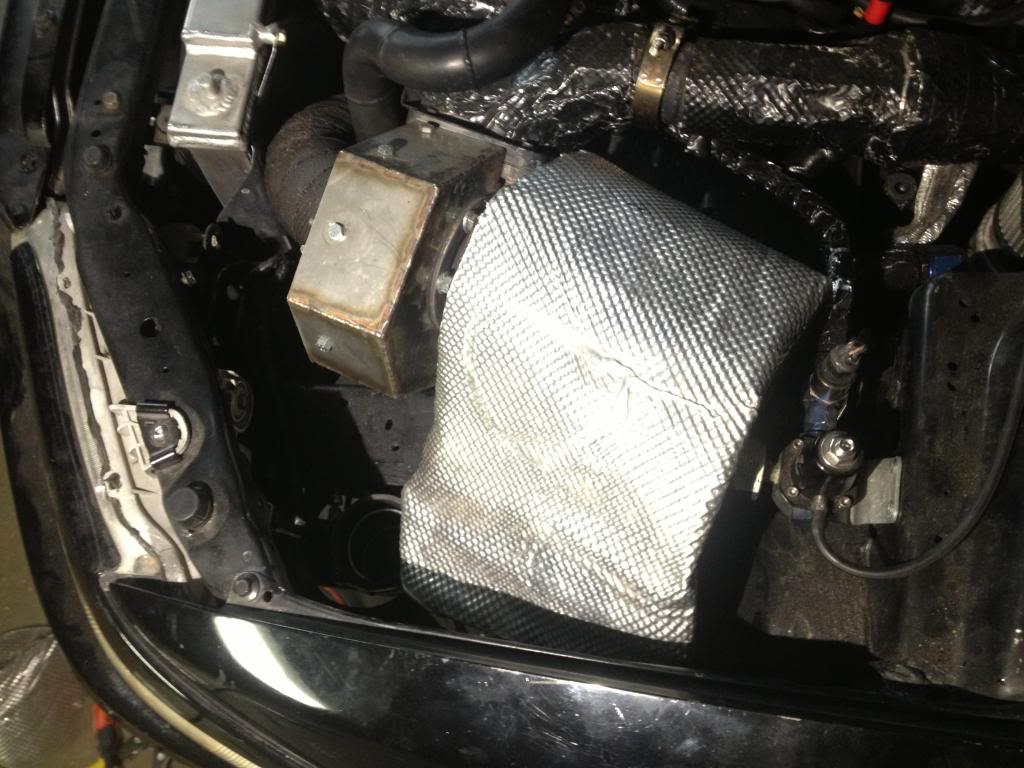
The filter I have on the turbo is old and dirty so I decided I would pull it off and clean it at the least. While doing that I decided to look at how much play I had in the fuse box to allow a larger filter. I unbolted the fuse box and rerouted a few wires to allow it to move over and back towards to firewall and bam I was able to get some space. I originally wanted to mount the filter farther down in the engine , but like before there just wasn't enough space even with the fuse box moved. I bought 3 or 4 air filters back when I trying whatever I could to find one that fit and ended up scratching and bending them up too much to return them. I pulled them out to check how they would fit and my largest filter a 9 inch was able to go in, but not attach straight to the turbo. I was so close, but the charge pipe was not able to connect to the TB. I had a 45 degree elbow that I cut down a little and that gave me just enough material to attach the filter.
I'm still in shock that I was able to get the 9 inch filter in, the filter it replaces was only 3.5 inch tall, so the engine will breathe quite a bit better now. The trick was to get the filter as close as possible to the turbo. With the fuse box in place I has always tying to dive under it to allow the filter to clear the bottom of the box. With it moved I was able to bring the filter up much higher, more level, and closer to the turbo. I'm very happy with how it fits , just wish I would have thought of moving the fuse box before. Plan is to drive it tomorrow to see how it feels. Here are a few pics.
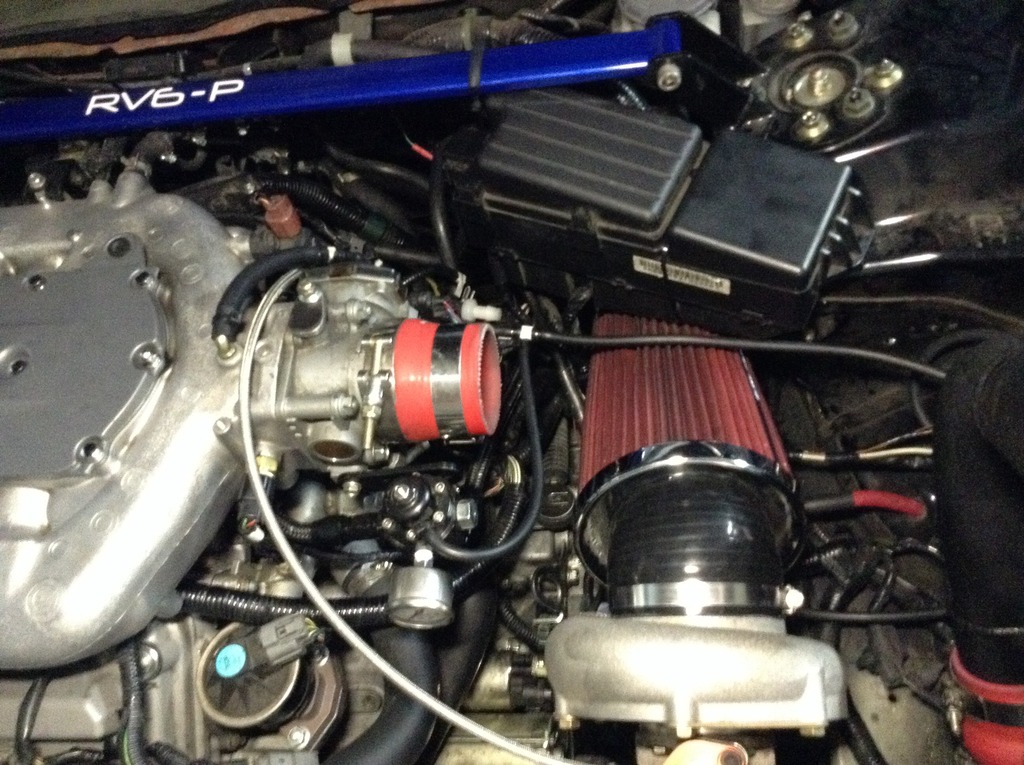
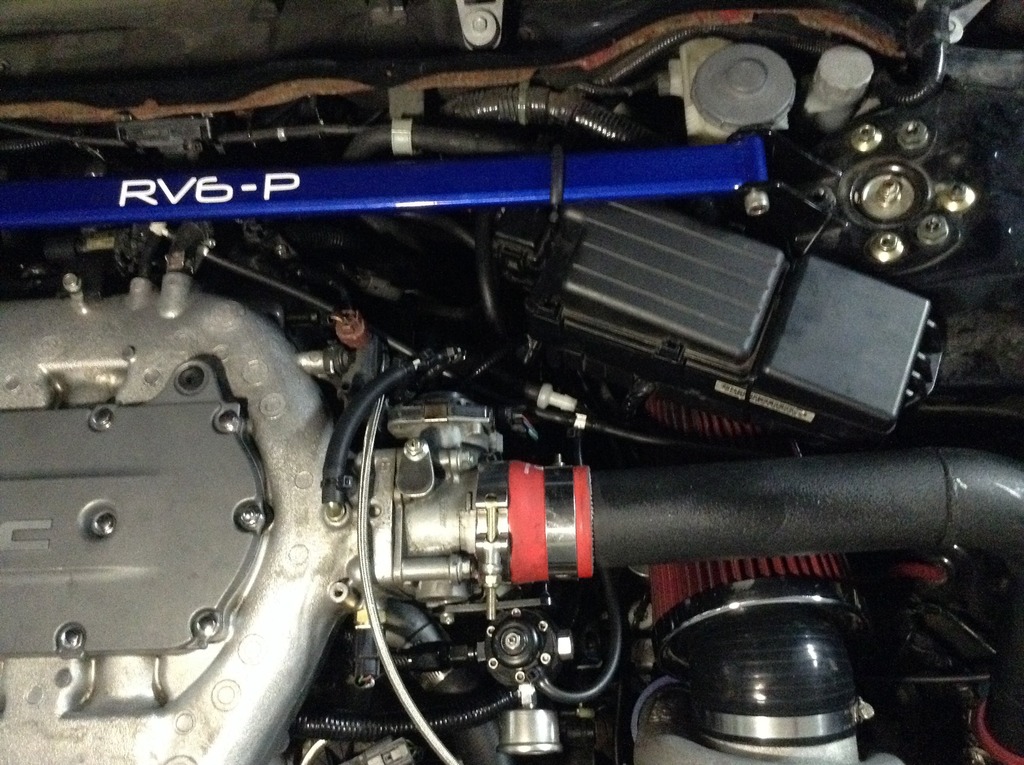
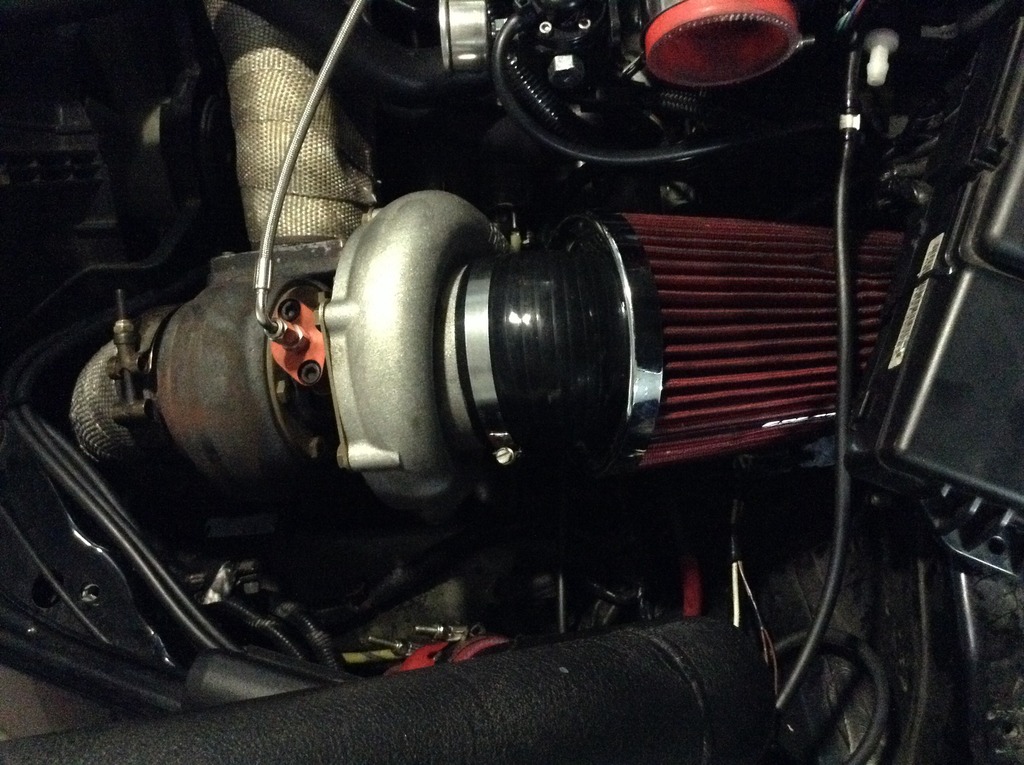


Last edited by Hi speed; 07-02-2015 at 07:17 PM.
The following users liked this post:
ABP_04TL (07-03-2015)
07-02-2015, 08:45 PM
#146
Made some progress today on the air filter. As some of you may know, the turbo on the version one kit faces towards the rear of the car and the fuse box making fitment of a large enough filter very difficult. Some members were able to stuff a larger air filter down by the transmission, but after many hrs trying I was not able to make it work. Lately IAT temps on the car have been going up more quickly and the turbo is surging above 14 psi, so I decided to revisit the air filter issue and see what I could do.
The filter I have on the turbo is old and dirty so I decided I would pull it off and clean it at the least. While doing that I decided to look at how much play I had in the fuse box to allow a larger filter. I unbolted the fuse box and rerouted a few wires to allow it to move over and back towards to firewall and bam I was able to get some space. I originally wanted to mount the filter farther down in the engine , but like before there just wasn't enough space even with the fuse box moved. I bought 3 or 4 air filters back when I trying whatever I could to find one that fit and ended up scratching and bending them up too much to return them. I pulled them out to check how they would fit and my largest filter a 9 inch was able to go in, but not attach straight to the turbo. I was so close, but the charge pipe was not able to connect to the TB. I had a 45 degree elbow that I cut down a little and that gave me just enough material to attach the filter.
I'm still in shock that I was able to get the 9 inch filter in, the filter it replaces was only 3.5 inch tall, so the engine will breathe quite a bit better now. The trick was to get the filter as close as possible to the turbo. With the fuse box in place I has always tying to dive under it to allow the filter to clear the bottom of the box. With it moved I was able to bring the filter up much higher, more level, and closer to the turbo. I'm very happy with how it fits , just wish I would have thought of moving the fuse box before. Plan is to drive it tomorrow to see how it feels. Here are a few pics.
You should REALLY consider ducting air from either the fender well or the front (or even below) of the car instead of pulling hot air from the engine compartment like the current setup is doing. Its basically compressing the hot air and making it even hotter. The intercooler can only remove so much air before its size/design limits its ability to cool the air enough to where the turbine is no longer in its efficiency zone.
I too had the same issue and ended up using a heat shield to construct an isolated chamber of which enabled the turbo to draw in cooler air that was pulled from a large hole where the stock air box was. Here's a picture of what I did. Mind you, this brought my IAT's down to near ambient temps.
 07-03-2015, 06:34 PM
#147
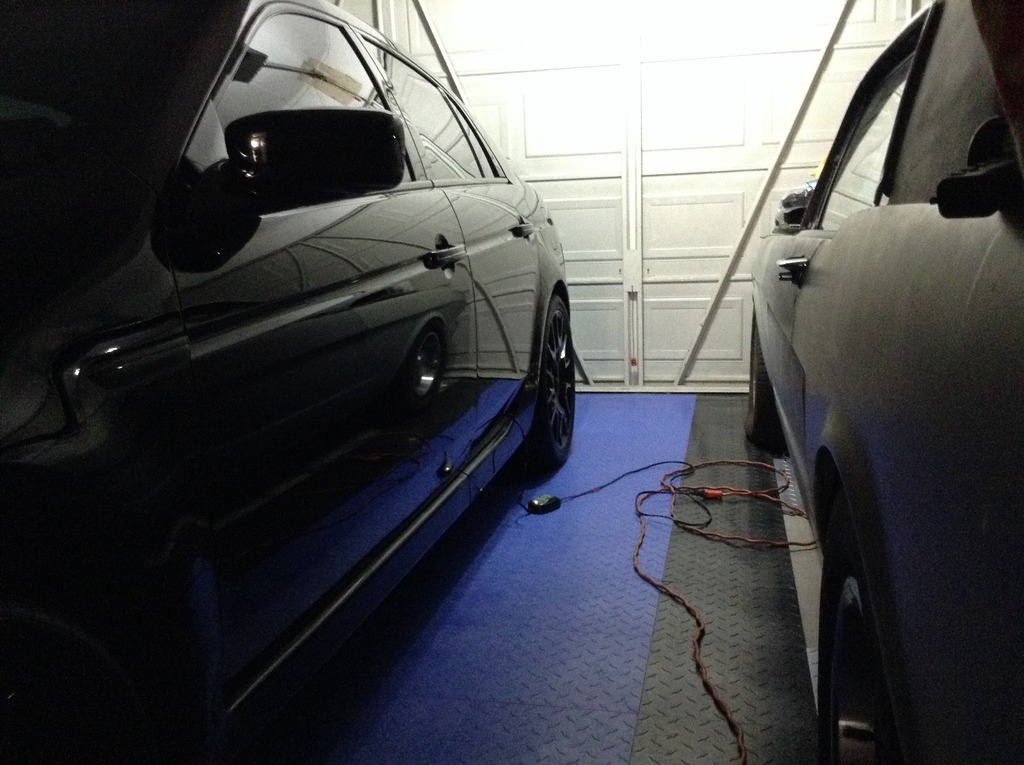
I got a chance to start my polishing the car today. It been crazy hot in Cali ( at least for us) and we are in a huge drought, so I pulled the car onto the lawn under the tree and got to work. Washed it off and pulled into the garage to start clay baring it to prepare for polish.
I practiced polishing my Civic last week just to get a feel for it and it turned out great, but it's a silver car so, it's hard to see scratches and always looks shiny. After clay I taped off the lights, a few seals, and I was ready to start polishing. I watched a video that said to do a test patch to perfect your area and get an idea of the amount of work needed to clean it. I did that on the hood and it came out pretty good, the hood has a lot of little dings so it will never be perfect. I did the passenger rear quarter panel and doors before I almost slipped on sweat and decided to call it a day and resume on Sunday. Here are a few pics of the TL looking like a ninja turtle.
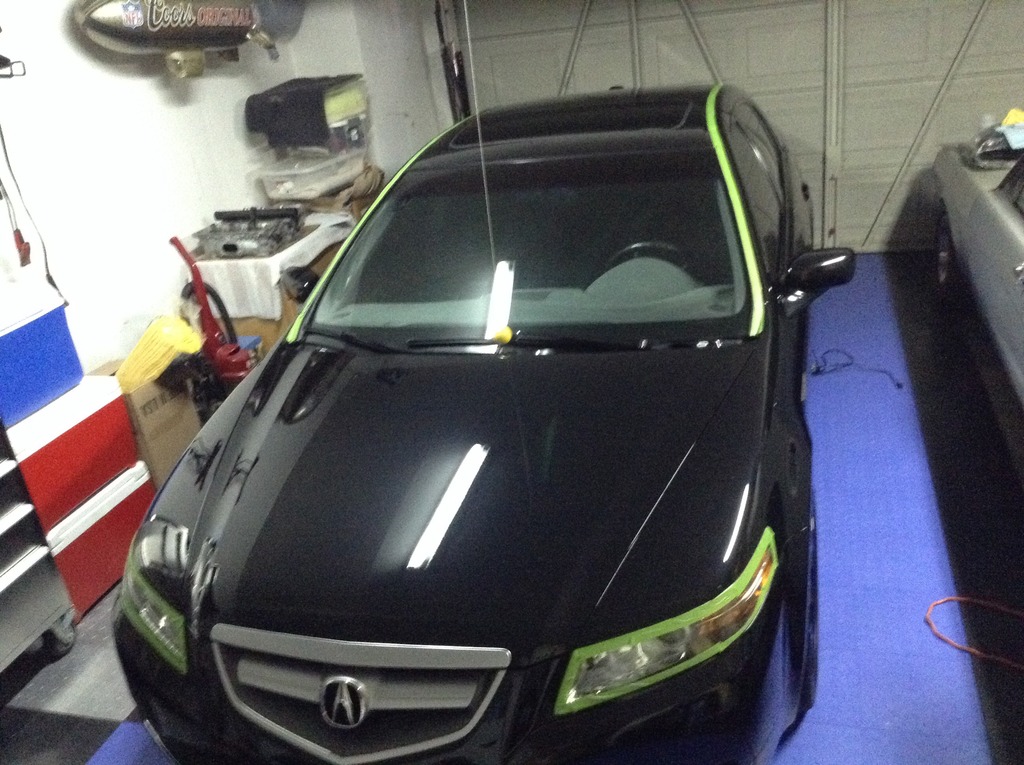
I practiced polishing my Civic last week just to get a feel for it and it turned out great, but it's a silver car so, it's hard to see scratches and always looks shiny. After clay I taped off the lights, a few seals, and I was ready to start polishing. I watched a video that said to do a test patch to perfect your area and get an idea of the amount of work needed to clean it. I did that on the hood and it came out pretty good, the hood has a lot of little dings so it will never be perfect. I did the passenger rear quarter panel and doors before I almost slipped on sweat and decided to call it a day and resume on Sunday. Here are a few pics of the TL looking like a ninja turtle.


The following users liked this post:
ABP_04TL (07-03-2015)
07-04-2015, 02:41 AM
#148

I just did my accord, buffed out a lot of scratches and sealed the paint
Here's a trick for the moonroof, open it up and put a couple trash bags in there so the polish doesn't get into the interior of the car. That way you won't get the compound in the rubber seal around the moonroof and have to try to clean it up later. Two bags laid in there usually does the trick.
Here's a trick for the moonroof, open it up and put a couple trash bags in there so the polish doesn't get into the interior of the car. That way you won't get the compound in the rubber seal around the moonroof and have to try to clean it up later. Two bags laid in there usually does the trick.
07-07-2015, 08:17 PM
#149
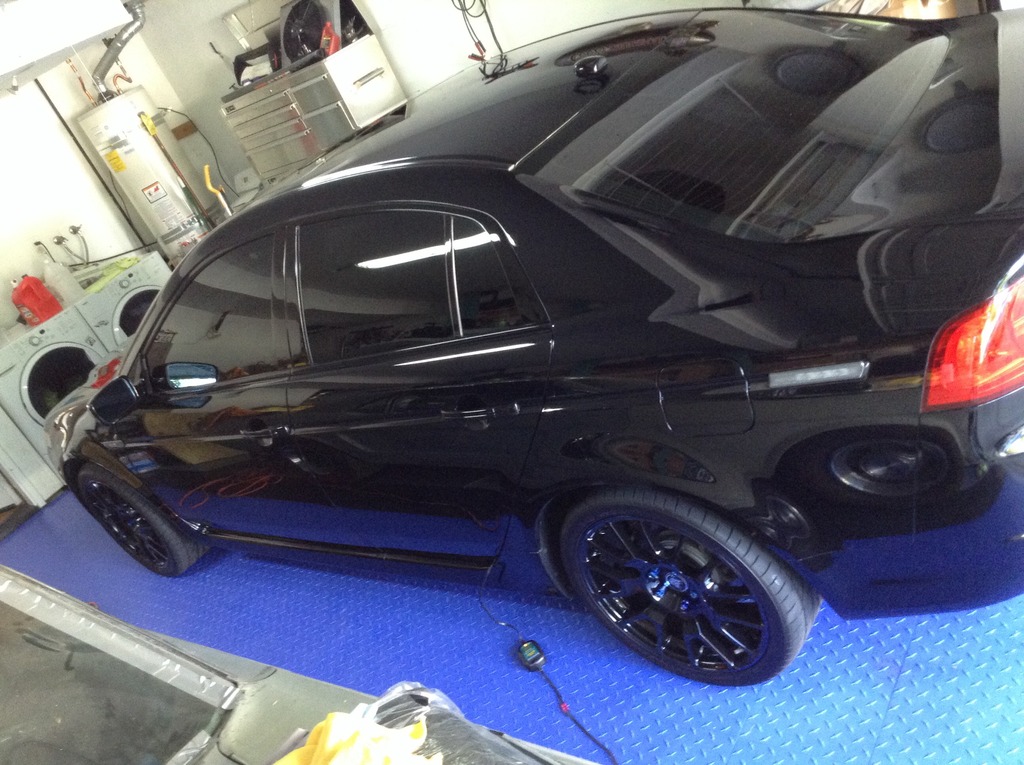
Finished up polishing today. The hood and front bumper are pretty pitted from 9 yrs of driving, but I'm very happy with the improvement in both and the rest of the car came out amazing. I don't have the lights to check the finish other than my LED flashlight, but the results were amazing. My initial plan was to use Menzerna 2500 and 4500, but ended up using just buying the 2500. $100 in polish seemed crazy for something I've never done before, so the 2500 seemed good. Took about 8 hrs over two days, taking my time.


Last edited by Hi speed; 07-07-2015 at 08:22 PM.
The following users liked this post:
Hi speed (07-07-2015)
07-08-2015, 05:19 PM
#151
Senior Moderator
looking good 
The following users liked this post:
Hi speed (07-17-2015)
07-17-2015, 05:24 PM
#152
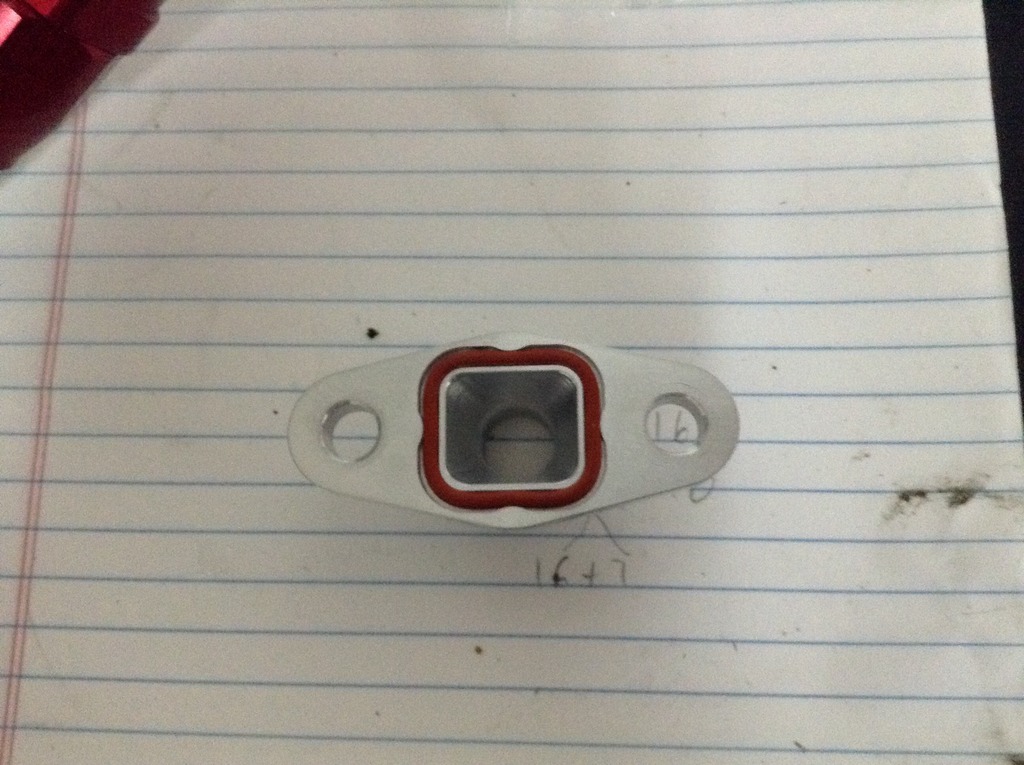
I have been having some oil related issues since the engine went into the car, both burning of oil and a small leak from the turbo drain. The leak from the turbo drain is coming from both the top and bottom of the drain assembly. The actual turbo drain piece itself and the connector to the oil pan. The fitting attaching to the oil pan was dripping a small amount and needed to be changed ( AN fitting on braided hose, not welded into the oil pan). The other leak from the turbo drain was more serious because it soaked onto my turbo blanket and killed it. I tighten the drain and put a gasket on it with the hope it would stop leaking. Recently I bought a new blanket and decided to check out the drain to see if I could put it on and found the leak is still enough to soak the blanket over time. At this point I decided that I needed a new gasket and went on eBay. What I found was way better, so I ordered it and here it is. A 10 AN drain with a nice O ring seal that completely seals the turbo to the drain.
So I took off the drain today to measure the hose for replacing and noticed the turbo has a larger drain opening than the original drain piece. That is no longer a problem with the new drain, I hope. The plan is to order the new fittings and hose in black nylon braided hose, so I can finally install the turbo blanket. Also bought a Hondata 4 bar Map, MT harness and EGR block off., just waiting on the harness. Next needs to be the ECU. My issue is unless I can flash the auto ECU to mirrior my 06 ECU, I won't be able to drive the car until I get it tuned. With the amount of oil I'm burning I am thinking I may need to rebuild the engine and wouldn't tune until that was done. So actually pairing the ECU may have to wait unless I can mirrior 06 ECU and run it with the MS3 like it is now then pull the MS3 and tune with Flash pro once the engine is rebuilt.

So I took off the drain today to measure the hose for replacing and noticed the turbo has a larger drain opening than the original drain piece. That is no longer a problem with the new drain, I hope. The plan is to order the new fittings and hose in black nylon braided hose, so I can finally install the turbo blanket. Also bought a Hondata 4 bar Map, MT harness and EGR block off., just waiting on the harness. Next needs to be the ECU. My issue is unless I can flash the auto ECU to mirrior my 06 ECU, I won't be able to drive the car until I get it tuned. With the amount of oil I'm burning I am thinking I may need to rebuild the engine and wouldn't tune until that was done. So actually pairing the ECU may have to wait unless I can mirrior 06 ECU and run it with the MS3 like it is now then pull the MS3 and tune with Flash pro once the engine is rebuilt.


Last edited by Hi speed; 07-17-2015 at 05:33 PM.
07-17-2015, 05:50 PM
#153
Are you able to just leave the MS3 in place? Since you have an 06, I can't remember if you need the wacky jumper harness. Some do, some don't. If not, then it should just be as simple as plugging in the new ecu, programming the immobilizer, and then letting the MS3 override the 07 eu settings. Did you get an auto or manual ECU for the hondata? I've driven on the stock auto program, but it throws codes out the wazoo. Ideally you'd want to download a stock J32 map and then let your MS3 do all the 'customizing'.
I'm curious, what issues do you have with idle on the MS3? I'd much rather have it than the Hondata - it has a ton of features Hondata is lacking. Granted, I want an MS3 Pro
I'm curious, what issues do you have with idle on the MS3? I'd much rather have it than the Hondata - it has a ton of features Hondata is lacking. Granted, I want an MS3 Pro
07-17-2015, 06:27 PM
#154
Are you able to just leave the MS3 in place? Since you have an 06, I can't remember if you need the wacky jumper harness. Some do, some don't. If not, then it should just be as simple as plugging in the new ecu, programming the immobilizer, and then letting the MS3 override the 07 eu settings. Did you get an auto or manual ECU for the hondata? I've driven on the stock auto program, but it throws codes out the wazoo. Ideally you'd want to download a stock J32 map and then let your MS3 do all the 'customizing'.
I'm curious, what issues do you have with idle on the MS3? I'd much rather have it than the Hondata - it has a ton of features Hondata is lacking. Granted, I want an MS3 Pro
I'm curious, what issues do you have with idle on the MS3? I'd much rather have it than the Hondata - it has a ton of features Hondata is lacking. Granted, I want an MS3 Pro
Harness wise all I need to do it plug the Can wires into the OBD port. I have a 06 MT Navi. If the j32 map and MS3 work, I will do the immobilizer pairing just to get it out of the way for later tuning. Idle issues for me started more with the new engine than the stock, but the MS3 Doesn't seem able to control the Drive by wire throttle and I get surging at idle when its first started and once it heats up. Most of my desire to use Hondata management is the familiarly of the tuner with it and the ability to use and disable stock sensors. I dont have much experance with tuning, but the MS3 seemed pretty difficult to tune, taking 7+ hrs of dyno time to dial everything in. I only paid for 3 hrs, but the tuner I use is pretty good and didn't seem to like the MS3. I will have to get a boost controller, since Hondata doesn't support it. My boost and AFR gauges are shot so, I was thinking AEM boost controller / gauge combo for $350. This and a new garage work bench will round out the summer of spending.
07-22-2015, 10:31 PM
#155
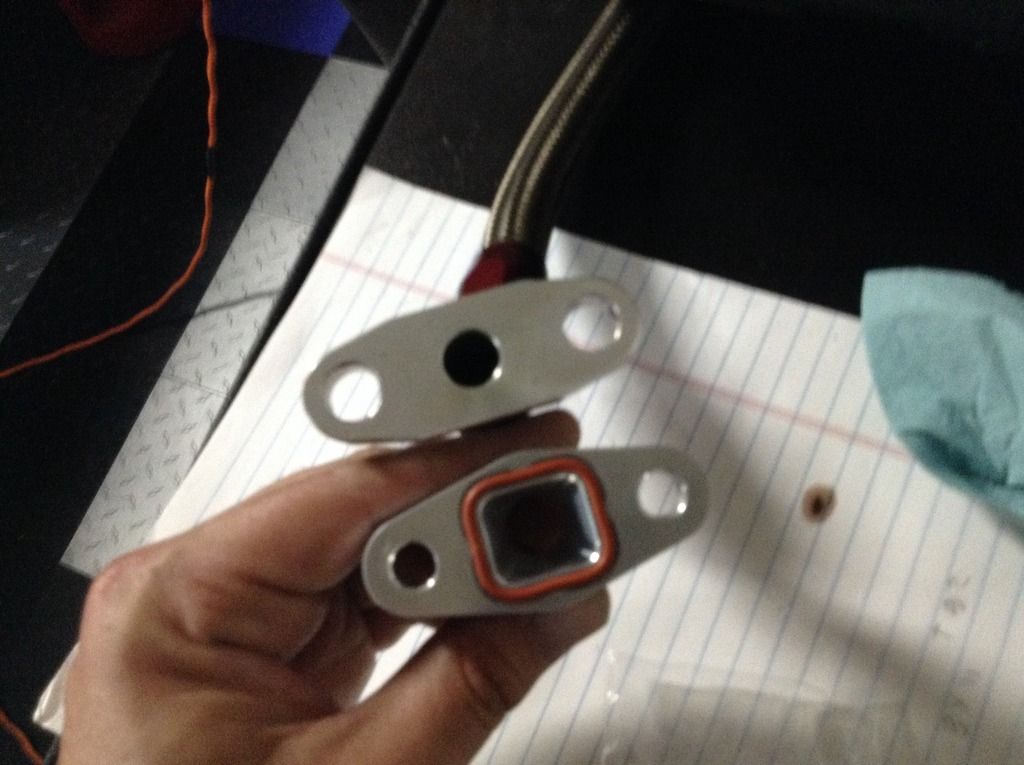
I got the turbo drain and new braided hose setup installed yesterday. The drain piece I bought was a little wider than the old one and needed some sanding to allow it to fit. The drain on the turbo is square and the new drain piece is milled out to the same size, with the O ring the seal is much better. When I first removed the old drain piece, the gasket was still on the turbo drain itself and looked round. It wasn't until I removed the gasket, that I noticed the drain on the turbo is actually square and 3 times the size of the round opening in the old drain piece.
I highly recommend this drain peice to anyone with a Precision or other turbo. At $26 shipped it's cheap insurance against leaks from the drain and ruining heat control devices. I also love nylon braided hose, for ease of assembly, use and look. I have a lot of AN fittings on the Mustang, using steel braided hose and it's sucks to assemble. The nylon hose takes 1/10 the effort to assemble and doesn't poke into your hand like the steel braided hose. I ordered the hose and fittings on Sunday night from Summit racing and got them at 10 am Monday morning. Summit was even doing free shipping on Russell hose and fittings.
Someone stole my commute car on Monday night, so the TL is going back to DD status until I get another car. Looks like the gas budget is going to expand a bit.
07-29-2015, 02:33 PM
#156
Update on my stolen civic. Lost the the car last week and It was recovered yesterday a few miles from my hose. No damage except the ignition cylinder and almost out of gas. They missed $40 cash in the trunk , only took an old phone and drove 350 miles. I very happy other than the $380 tow fee for one day of storage. $205 for the tow 3 miles, $75 for 4 hrs of storage and $100 to open the gate because " How would your car get out if I didn't open the gate". Robbery, but the cars worth more so I'm richer than I was 2 days ago.
They broke the ignition so it wouldn't go back to the off setting and the car would die if not driven every 10 or so hrs . I think they left the car and couldn't start it when they got back. In the time it took to find a jump the car was towed and with all their stuff was still inside. Mostly pipes, burglary tools and extremely smelly clothes. They did add a new vent clip air freshener which I found interesting. Not sure if it was to abate their smell or mine.
Now I'm replacing the ignition and looking at cheap DIY kill switches. If anyone has any knowledge in this area let me know. Thinking fuel pump.
Also got my butcher block counter top and put it on the bench. 8ft by 2 feet 1.5 inch thick from Sears for $150 shipped to the store and I picked it up. Looks amazing and was pretty cheap for what it is. I will post pics later.
08-05-2015, 01:56 PM
#157
Senior Moderator
Update on my stolen civic. Lost the the car last week and It was recovered yesterday a few miles from my hose. No damage except the ignition cylinder and almost out of gas. They missed $40 cash in the trunk , only took an old phone and drove 350 miles. I very happy other than the $380 tow fee for one day of storage. $205 for the tow 3 miles, $75 for 4 hrs of storage and $100 to open the gate because " How would your car get out if I didn't open the gate". Robbery, but the cars worth more so I'm richer than I was 2 days ago.
They broke the ignition so it wouldn't go back to the off setting and the car would die if not driven every 10 or so hrs . I think they left the car and couldn't start it when they got back. In the time it took to find a jump the car was towed and with all their stuff was still inside. Mostly pipes, burglary tools and extremely smelly clothes. They did add a new vent clip air freshener which I found interesting. Not sure if it was to abate their smell or mine.
Now I'm replacing the ignition and looking at cheap DIY kill switches. If anyone has any knowledge in this area let me know. Thinking fuel pump.
Also got my butcher block counter top and put it on the bench. 8ft by 2 feet 1.5 inch thick from Sears for $150 shipped to the store and I picked it up. Looks amazing and was pretty cheap for what it is. I will post pics later.
They broke the ignition so it wouldn't go back to the off setting and the car would die if not driven every 10 or so hrs . I think they left the car and couldn't start it when they got back. In the time it took to find a jump the car was towed and with all their stuff was still inside. Mostly pipes, burglary tools and extremely smelly clothes. They did add a new vent clip air freshener which I found interesting. Not sure if it was to abate their smell or mine.
Now I'm replacing the ignition and looking at cheap DIY kill switches. If anyone has any knowledge in this area let me know. Thinking fuel pump.
Also got my butcher block counter top and put it on the bench. 8ft by 2 feet 1.5 inch thick from Sears for $150 shipped to the store and I picked it up. Looks amazing and was pretty cheap for what it is. I will post pics later.
It's not that hard to add a kill switch, you can do it at home in your driveway.
The following users liked this post:
Hi speed (08-05-2015)
08-07-2015, 10:32 AM
#159
Racer
Did you tap the oil pan with a pipe thread? I would think liquid pipe sealant would do the trick for that. Also are your o rings viton material? It is much more resiliant to heat and will not absorb oil like the cheap o rings
08-07-2015, 02:29 PM
#160
No the oil pan fitting is welded to the pan. You could drill and put a fitting with a nut on the inside of the pan to get away with not welding it, but if that nut comes loose bad things will happen. Pan is aluminum so I wouldn't try to tap it. Just replaced the oil drain hose and bought the wrong lower fitting ( straight instead of 45 ) so I used the old one and it's leaking, so I will need to revisit that soon.