
HFL Upgrade!
 01-13-2009, 09:46 PM
#1
Instructor
Thread Starter
HFL Upgrade!
During the time I’m waiting for the 08 TL Navigation harness for conversion, I installed the HFL Switch to the steering wheel.
These are the problems I’ve found:
• After I’ve removed the air bag and horn, there was no extra harness run of the cable for the HFL
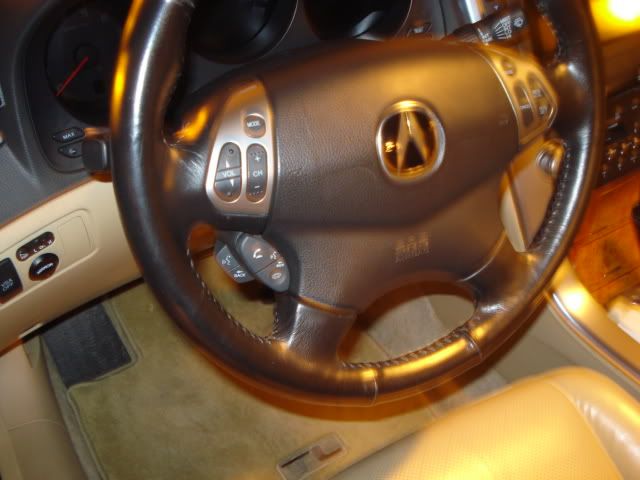
• Due to my car is “Base Model”, therefore, there’s no hole on the side for me to place the switch. (see pic’s for details).
http://s295.photobucket.com/albums/m...current=P1.jpg
Here is a list of part for upgrade (prices from Acura Delrey www.acuraoemparts.com
http://s295.photobucket.com/albums/m...current=P2.jpg
011 77901-SEP-A00 SUB-WIRE, CABLE REEL 1 2005 TL 7.90
http://s295.photobucket.com/albums/m...current=P3.jpg
004 35890-SEP-A11 SWITCH ASSY., NAVIGATION GUIDE& HANDS FREE TELEPHONE 1 2005 TL 27.62
006 35891-SEP-A11 CASE A 1 2005 TL 2.06
014 78517-SDB-A81 PLATE SET, SWITCH 1 2005 TL 3.42
021 93893-04012-07 SCREW-WASHER (4X12) 4 2005 TL 0.54
Hand Free Link Update
1. Make sure you have the anti-theft codes for the radio before starting this project.
2. With the ignition switch off, disconnect the negative cable from the battery. Wait at least 3 minutes before you start to remove the steering wheel.
3. From under of driver’s side airbag, pry up on the retaining tab, and remove the access panel.
4. Remove the horn (black) ground terminal and the airbag (yellow)connectors from the switch set plate.
Unplug the horn ground terminals.
http://s295.photobucket.com/albums/m...current=P4.jpg
5. Unplug the airbag connectors: while holding the pin insulator, pull out on the cover insulator. Do not pull on the socket insulator.
6. Remove and discard the two Torx (T30)bolts that secure the airbag, and remove the airbag.
Carefully set the airbag in a secure location with the pad facing up. Do not drop or bump the airbag against anything
7. Remove the steering wheel bolt. Disconnect the stock 13-pin connector from the cable reel
8. Disconnect the cruise control switch connector and the audio remote switch connector. Note the location the connector
http://s295.photobucket.com/albums/m...current=P5.jpg
9. Use “Bennett Blade” for cutting the hole, meanwhile testing for fit the HFL switch when the hole is cuted.
10. After the hole’s cut, install the HFL/HFL-Voice control switch (two washer-screws)
11. Replace the new -13 pin white connector from the cable reel.
Also, replace the radio and cruise control both connectors back where you removed the first place.
http://s295.photobucket.com/albums/m...current=P6.jpg
Again, after removing the “Overhead Console, it’d be empty on the spot where the HFL is placed (see picture for detail)
http://s295.photobucket.com/albums/m...current=P7.jpg
Here is the list of part for upgrade prices from Acura Delrey www.acuraoemparts.com
http://s295.photobucket.com/albums/m...current=P8.jpg
009 39770-SEP-A12ZC TELEPHONE ASSY., HANDS FREE
( LIGHT CREAM IVORY ) 1 2008 TL 411.10
016 83255-SEP-A01 SCREW 8 2008 TL 0.40
(Price I paid: $69 from ebay with shipped).
Replacement
1. Carefully pry the moonroof switch out of the roof console, and disconnect the 7P connector
http://s295.photobucket.com/albums/m...current=P9.jpg
2. Reach into the hole for the moonroof switch, and pull down on the roof console to release the clip.
http://s295.photobucket.com/albums/m...urrent=P10.jpg
3. Remove the four bolts that secure the bezel to its mounting bracket.
http://s295.photobucket.com/albums/m...urrent=P11.jpg
http://s295.photobucket.com/albums/m...urrent=P11.jpg
4. Replace the new HFL Unit and screw the screws
http://s295.photobucket.com/albums/m...urrent=P13.jpg
5. Reinstall all removed parts in reverse order of removal
These are the problems I’ve found:
• After I’ve removed the air bag and horn, there was no extra harness run of the cable for the HFL
• Due to my car is “Base Model”, therefore, there’s no hole on the side for me to place the switch. (see pic’s for details).
http://s295.photobucket.com/albums/m...current=P1.jpg
Here is a list of part for upgrade (prices from Acura Delrey www.acuraoemparts.com
http://s295.photobucket.com/albums/m...current=P2.jpg
011 77901-SEP-A00 SUB-WIRE, CABLE REEL 1 2005 TL 7.90
http://s295.photobucket.com/albums/m...current=P3.jpg
004 35890-SEP-A11 SWITCH ASSY., NAVIGATION GUIDE& HANDS FREE TELEPHONE 1 2005 TL 27.62
006 35891-SEP-A11 CASE A 1 2005 TL 2.06
014 78517-SDB-A81 PLATE SET, SWITCH 1 2005 TL 3.42
021 93893-04012-07 SCREW-WASHER (4X12) 4 2005 TL 0.54
Hand Free Link Update
1. Make sure you have the anti-theft codes for the radio before starting this project.
2. With the ignition switch off, disconnect the negative cable from the battery. Wait at least 3 minutes before you start to remove the steering wheel.
3. From under of driver’s side airbag, pry up on the retaining tab, and remove the access panel.
4. Remove the horn (black) ground terminal and the airbag (yellow)connectors from the switch set plate.
Unplug the horn ground terminals.
http://s295.photobucket.com/albums/m...current=P4.jpg
5. Unplug the airbag connectors: while holding the pin insulator, pull out on the cover insulator. Do not pull on the socket insulator.
6. Remove and discard the two Torx (T30)bolts that secure the airbag, and remove the airbag.
Carefully set the airbag in a secure location with the pad facing up. Do not drop or bump the airbag against anything
7. Remove the steering wheel bolt. Disconnect the stock 13-pin connector from the cable reel
8. Disconnect the cruise control switch connector and the audio remote switch connector. Note the location the connector
http://s295.photobucket.com/albums/m...current=P5.jpg
9. Use “Bennett Blade” for cutting the hole, meanwhile testing for fit the HFL switch when the hole is cuted.
10. After the hole’s cut, install the HFL/HFL-Voice control switch (two washer-screws)
11. Replace the new -13 pin white connector from the cable reel.
Also, replace the radio and cruise control both connectors back where you removed the first place.
http://s295.photobucket.com/albums/m...current=P6.jpg
Again, after removing the “Overhead Console, it’d be empty on the spot where the HFL is placed (see picture for detail)
http://s295.photobucket.com/albums/m...current=P7.jpg
Here is the list of part for upgrade prices from Acura Delrey www.acuraoemparts.com
http://s295.photobucket.com/albums/m...current=P8.jpg
009 39770-SEP-A12ZC TELEPHONE ASSY., HANDS FREE
( LIGHT CREAM IVORY ) 1 2008 TL 411.10
016 83255-SEP-A01 SCREW 8 2008 TL 0.40
(Price I paid: $69 from ebay with shipped).
Replacement
1. Carefully pry the moonroof switch out of the roof console, and disconnect the 7P connector
http://s295.photobucket.com/albums/m...current=P9.jpg
2. Reach into the hole for the moonroof switch, and pull down on the roof console to release the clip.
http://s295.photobucket.com/albums/m...urrent=P10.jpg
3. Remove the four bolts that secure the bezel to its mounting bracket.
http://s295.photobucket.com/albums/m...urrent=P11.jpg
http://s295.photobucket.com/albums/m...urrent=P11.jpg
4. Replace the new HFL Unit and screw the screws
http://s295.photobucket.com/albums/m...urrent=P13.jpg
5. Reinstall all removed parts in reverse order of removal
 01-13-2009, 10:00 PM
#2
Instructor
Thread Starter
During the time I’m waiting for the 08 TL Navigation harness for conversion, I installed the HFL Switch to the steering wheel.
These are the problems I’ve found:
• After I’ve removed the air bag and horn, there was no extra harness run of the cable for the HFL
• Due to my car is “Base Model”, therefore, there’s no hole on the side for me to place the switch. (see pic’s for details).
http://i295.photobucket.com/albums/mm142/TL142/P1.jpg
Here is a list of part for upgrade (prices from Acura Delrey www.acuraoemparts.com
http://i295.photobucket.com/albums/mm142/TL142/P2.jpg
011 77901-SEP-A00 SUB-WIRE, CABLE REEL 1 2005 TL 7.90
http://i295.photobucket.com/albums/mm142/TL142/P3.jpg
004 35890-SEP-A11 SWITCH ASSY., NAVIGATION GUIDE& HANDS FREE TELEPHONE 1 2005 TL 27.62
006 35891-SEP-A11 CASE A 1 2005 TL 2.06
014 78517-SDB-A81 PLATE SET, SWITCH 1 2005 TL 3.42
021 93893-04012-07 SCREW-WASHER (4X12) 4 2005 TL 0.54
Hand Free Link Update
1. Make sure you have the anti-theft codes for the radio before starting this project.
2. With the ignition switch off, disconnect the negative cable from the battery. Wait at least 3 minutes before you start to remove the steering wheel.
3. From under of driver’s side airbag, pry up on the retaining tab, and remove the access panel.
4. Remove the horn (black) ground terminal and the airbag (yellow)connectors from the switch set plate.
Unplug the horn ground terminals.
http://i295.photobucket.com/albums/mm142/TL142/P4.jpg
5. Unplug the airbag connectors: while holding the pin insulator, pull out on the cover insulator. Do not pull on the socket insulator.
6. Remove and discard the two Torx (T30)bolts that secure the airbag, and remove the airbag.
Carefully set the airbag in a secure location with the pad facing up. Do not drop or bump the airbag against anything
7. Remove the steering wheel bolt. Disconnect the stock 13-pin connector from the cable reel
8. Disconnect the cruise control switch connector and the audio remote switch connector. Note the location the connector
http://i295.photobucket.com/albums/mm142/TL142/P5.jpg
9. Use “Bennett Blade” for cutting the hole, meanwhile testing for fit the HFL switch when the hole is cuted.
10. After the hole’s cut, install the HFL/HFL-Voice control switch (two washer-screws)
11. Replace the new -13 pin white connector from the cable reel.
Also, replace the radio and cruise control both connectors back where you removed the first place.
http://i295.photobucket.com/albums/mm142/TL142/P6.jpg
Again, after removing the “Overhead Console, it’d be empty on the spot where the HFL is placed (see picture for detail)
http://i295.photobucket.com/albums/mm142/TL142/P7.jpg
Here is the list of part for upgrade prices from Acura Delrey www.acuraoemparts.com
http://i295.photobucket.com/albums/mm142/TL142/P8.jpg
009 39770-SEP-A12ZC TELEPHONE ASSY., HANDS FREE
( LIGHT CREAM IVORY ) 1 2008 TL 411.10
016 83255-SEP-A01 SCREW 8 2008 TL 0.40
(Price I paid: $69 from ebay with shipped).
Replacement
1. Carefully pry the moonroof switch out of the roof console, and disconnect the 7P connector
http://i295.photobucket.com/albums/mm142/TL142/P9.jpg
2. Reach into the hole for the moonroof switch, and pull down on the roof console to release the clip.
http://i295.photobucket.com/albums/mm142/TL142/P10.jpg
3. Remove the four bolts that secure the bezel to its mounting bracket.
http://i295.photobucket.com/albums/mm142/TL142/P11.jpg
4. Replace the new HFL Unit and screw the screws
http://i295.photobucket.com/albums/mm142/TL142/P13.jpg
5. Reinstall all removed parts in reverse order of removal
01-13-2009, 10:11 PM
#3
Instructor
Thread Starter
Try this out!
During the time I’m waiting for the 08 TL Navigation harness for conversion, I installed the HFL Switch to the steering wheel.
These are the problems I’ve found:
• After I’ve removed the air bag and horn, there was no extra harness run of the cable for the HFL
• Due to my car is “Base Model”, therefore, there’s no hole on the side for me to place the switch. (see pic’s for details).

Here is a list of part for upgrade (prices from Acura Delrey www.acuraoemparts.com

011 77901-SEP-A00 SUB-WIRE, CABLE REEL 1 2005 TL 7.90

004 35890-SEP-A11 SWITCH ASSY., NAVIGATION GUIDE& HANDS FREE TELEPHONE 1 2005 TL 27.62
006 35891-SEP-A11 CASE A 1 2005 TL 2.06
014 78517-SDB-A81 PLATE SET, SWITCH 1 2005 TL 3.42
021 93893-04012-07 SCREW-WASHER (4X12) 4 2005 TL 0.54
Hand Free Link Update
1. Make sure you have the anti-theft codes for the radio before starting this project.
2. With the ignition switch off, disconnect the negative cable from the battery. Wait at least 3 minutes before you start to remove the steering wheel.
3. From under of driver’s side airbag, pry up on the retaining tab, and remove the access panel.
4. Remove the horn (black) ground terminal and the airbag (yellow)connectors from the switch set plate.
Unplug the horn ground terminals.

5. Unplug the airbag connectors: while holding the pin insulator, pull out on the cover insulator. Do not pull on the socket insulator.
6. Remove and discard the two Torx (T30)bolts that secure the airbag, and remove the airbag.
Carefully set the airbag in a secure location with the pad facing up. Do not drop or bump the airbag against anything
7. Remove the steering wheel bolt. Disconnect the stock 13-pin connector from the cable reel
8. Disconnect the cruise control switch connector and the audio remote switch connector. Note the location the connector

9. Use “Bennett Blade” for cutting the hole, meanwhile testing for fit the HFL switch when the hole is cuted.
10. After the hole’s cut, install the HFL/HFL-Voice control switch (two washer-screws)
11. Replace the new -13 pin white connector from the cable reel.
Also, replace the radio and cruise control both connectors back where you removed the first place.

Again, after removing the “Overhead Console, it’d be empty on the spot where the HFL is placed (see picture for detail)

Here is the list of part for upgrade prices from Acura Delrey www.acuraoemparts.com

009 39770-SEP-A12ZC TELEPHONE ASSY., HANDS FREE
( LIGHT CREAM IVORY ) 1 2008 TL 411.10
016 83255-SEP-A01 SCREW 8 2008 TL 0.40
(Price I paid: $69 from ebay with shipped).
Replacement
1. Carefully pry the moonroof switch out of the roof console, and disconnect the 7P connector

2. Reach into the hole for the moonroof switch, and pull down on the roof console to release the clip.

3. Remove the four bolts that secure the bezel to its mounting bracket.

4. Replace the new HFL Unit and screw the screws

5. Reinstall all removed parts in reverse order of removal
During the time I’m waiting for the 08 TL Navigation harness for conversion, I installed the HFL Switch to the steering wheel.
These are the problems I’ve found:
• After I’ve removed the air bag and horn, there was no extra harness run of the cable for the HFL
• Due to my car is “Base Model”, therefore, there’s no hole on the side for me to place the switch. (see pic’s for details).
Here is a list of part for upgrade (prices from Acura Delrey www.acuraoemparts.com
011 77901-SEP-A00 SUB-WIRE, CABLE REEL 1 2005 TL 7.90
004 35890-SEP-A11 SWITCH ASSY., NAVIGATION GUIDE& HANDS FREE TELEPHONE 1 2005 TL 27.62
006 35891-SEP-A11 CASE A 1 2005 TL 2.06
014 78517-SDB-A81 PLATE SET, SWITCH 1 2005 TL 3.42
021 93893-04012-07 SCREW-WASHER (4X12) 4 2005 TL 0.54
Hand Free Link Update
1. Make sure you have the anti-theft codes for the radio before starting this project.
2. With the ignition switch off, disconnect the negative cable from the battery. Wait at least 3 minutes before you start to remove the steering wheel.
3. From under of driver’s side airbag, pry up on the retaining tab, and remove the access panel.
4. Remove the horn (black) ground terminal and the airbag (yellow)connectors from the switch set plate.
Unplug the horn ground terminals.
5. Unplug the airbag connectors: while holding the pin insulator, pull out on the cover insulator. Do not pull on the socket insulator.
6. Remove and discard the two Torx (T30)bolts that secure the airbag, and remove the airbag.
Carefully set the airbag in a secure location with the pad facing up. Do not drop or bump the airbag against anything
7. Remove the steering wheel bolt. Disconnect the stock 13-pin connector from the cable reel
8. Disconnect the cruise control switch connector and the audio remote switch connector. Note the location the connector
9. Use “Bennett Blade” for cutting the hole, meanwhile testing for fit the HFL switch when the hole is cuted.
10. After the hole’s cut, install the HFL/HFL-Voice control switch (two washer-screws)
11. Replace the new -13 pin white connector from the cable reel.
Also, replace the radio and cruise control both connectors back where you removed the first place.
Again, after removing the “Overhead Console, it’d be empty on the spot where the HFL is placed (see picture for detail)
Here is the list of part for upgrade prices from Acura Delrey www.acuraoemparts.com
009 39770-SEP-A12ZC TELEPHONE ASSY., HANDS FREE
( LIGHT CREAM IVORY ) 1 2008 TL 411.10
016 83255-SEP-A01 SCREW 8 2008 TL 0.40
(Price I paid: $69 from ebay with shipped).
Replacement
1. Carefully pry the moonroof switch out of the roof console, and disconnect the 7P connector
2. Reach into the hole for the moonroof switch, and pull down on the roof console to release the clip.
3. Remove the four bolts that secure the bezel to its mounting bracket.
4. Replace the new HFL Unit and screw the screws
5. Reinstall all removed parts in reverse order of removal
 01-14-2009, 09:15 AM
#6
Instructor
Thread Starter
HFL Switch
35890-SEP-A11 SWITCH ASSY., NAVIGATION GUIDE& HANDS FREE TELEPHONE $27.62
35891-SEP-A11 CASE A $2.06
93893-04012-07 SCREW-WASHER (4X12) $2.16
78517-SDB-A81 PLATE SET, SWITCH $3.42
77901-SEP-A00 SUB-WIRE, CABLE REEL $7.90
HFL Unit
39770-SEP-A02ZC TELEPHONE ASSY., HANDS FREE $410.14
Note: Buy from ebay, cheaper...
32155-SEP-A11 WIRE, INTERIOR $116.70
04/05 Acura TL Electric Troubleshooting Manual $65
Trending Topics
07-15-2009, 01:04 AM
#8
6th Gear

Join Date: Jun 2009
Age: 44
Posts: 6
Likes: 0
Received 0 Likes
on
0 Posts
I have searched the threads and have been unsuccessful on this question will the HFL module from a 08 work on a non-navi 04 TL as is, as a swap out? Or is the entire HFL conversion necessary? If not what years HFL can I use for an 04?
07-15-2009, 09:36 AM
#9
Instructor
Thread Starter
Technically, 08 HFL should work for 04 with non navi/navi. I hooked up mine with a navi. According to the ETM, the only thing that's different between the two are that there's a 28P green new harness, instead of 22P. Also, they added AcuraLink System, while the rest are the same as 04. Any years of HFL can be used.
08-15-2009, 02:28 PM
#14
Instructor
Thread Starter
Thats why when you buy the model when it just came out, it's too new for it to have any other special features like HFL, XM. For everyones in the US, everything's already there.
 01-05-2010, 10:14 PM
#18
8th Gear

Join Date: Dec 2009
Posts: 8
Likes: 0
Received 0 Likes
on
0 Posts
kenny,
I can't pm yet.
I am a new member to the forum.
I have to wait 15 days.
As for the pics, I would like to see
where you had to cut a hole to install the hfl switch.
Also, the pics for the Hand Free Link Update part of your write up.
And what type of tool did you use?
I am not familiar with a Bennett Blade.
Thanks much,
r.
01-12-2010, 10:44 AM
#19
Instructor
Thread Starter
The good thing is you don't have to remove the old wiring harness, if you want to upgrade it. Now, I have an 08 HFL installed and work well.
kenny,
I can't pm yet.
I am a new member to the forum.
I have to wait 15 days.
As for the pics, I would like to see
where you had to cut a hole to install the hfl switch.
Also, the pics for the Hand Free Link Update part of your write up.
And what type of tool did you use?
I am not familiar with a Bennett Blade.
Thanks much,
r.
I can't pm yet.
I am a new member to the forum.
I have to wait 15 days.
As for the pics, I would like to see
where you had to cut a hole to install the hfl switch.
Also, the pics for the Hand Free Link Update part of your write up.
And what type of tool did you use?
I am not familiar with a Bennett Blade.
Thanks much,
r.
kennylu@rogers.com

Thread
Thread Starter
Forum
Replies
Last Post
mlody
5G TLX (2015-2020)
85
12-04-2019 02:11 PM
InFaMouSLink
Car Parts for Sale
3
10-30-2015 09:43 AM
phillyguerrilla
3G TL Audio, Bluetooth, Electronics & Navigation
0
09-26-2015 11:27 AM