When you click on links to various merchants on this site and make a purchase, this can result in this site earning a commission. Affiliate programs and affiliations include, but are not limited to, the eBay Partner Network.
'06/'08 RL Stock Camera Work Well For '07/'08 TL Navi
Hi Acuraziner's
I recently just purchaseed a rearview camera that belongs to a 06/08 Acura RL, and I've tested it and it works. I'm just looking for some suggestion on how to mountit near the license place. Any suggestions, I will appreciate it
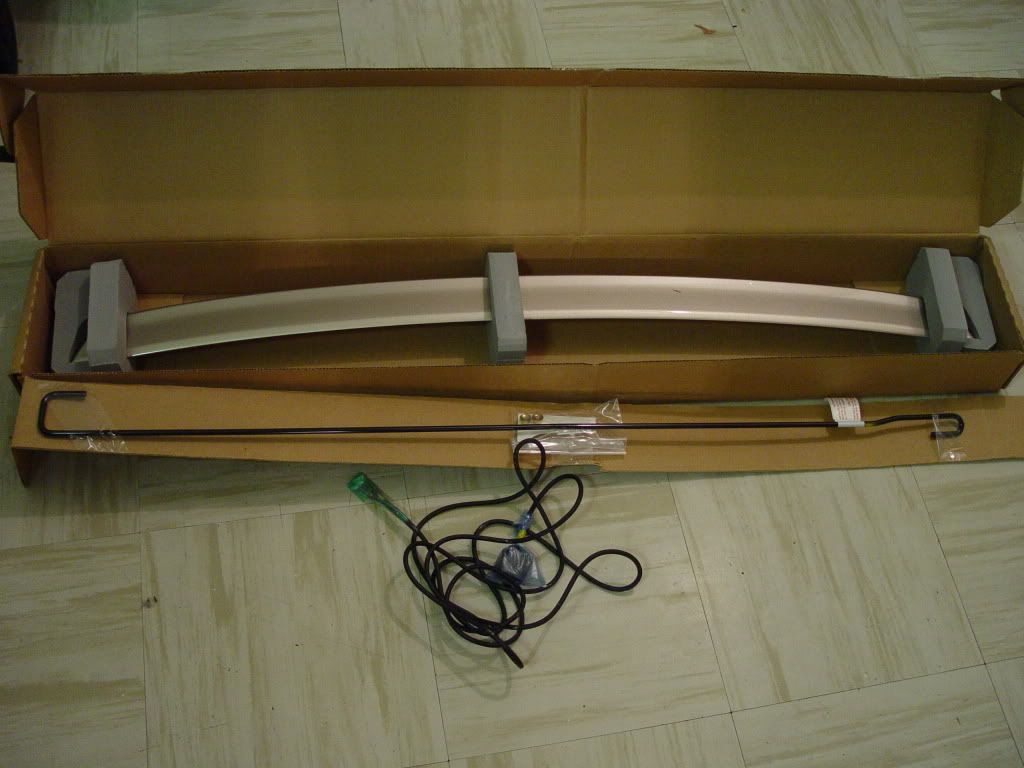
I brought these 2 items on ebay for $200 with shipped
Brand new 06/08 RL Camera
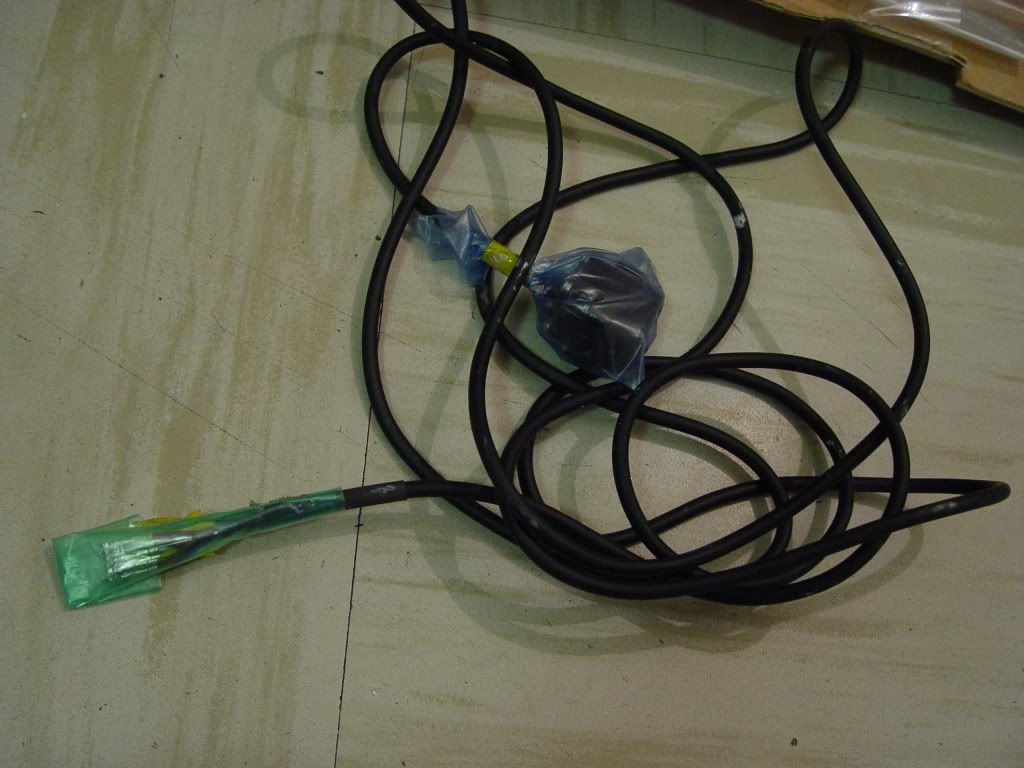
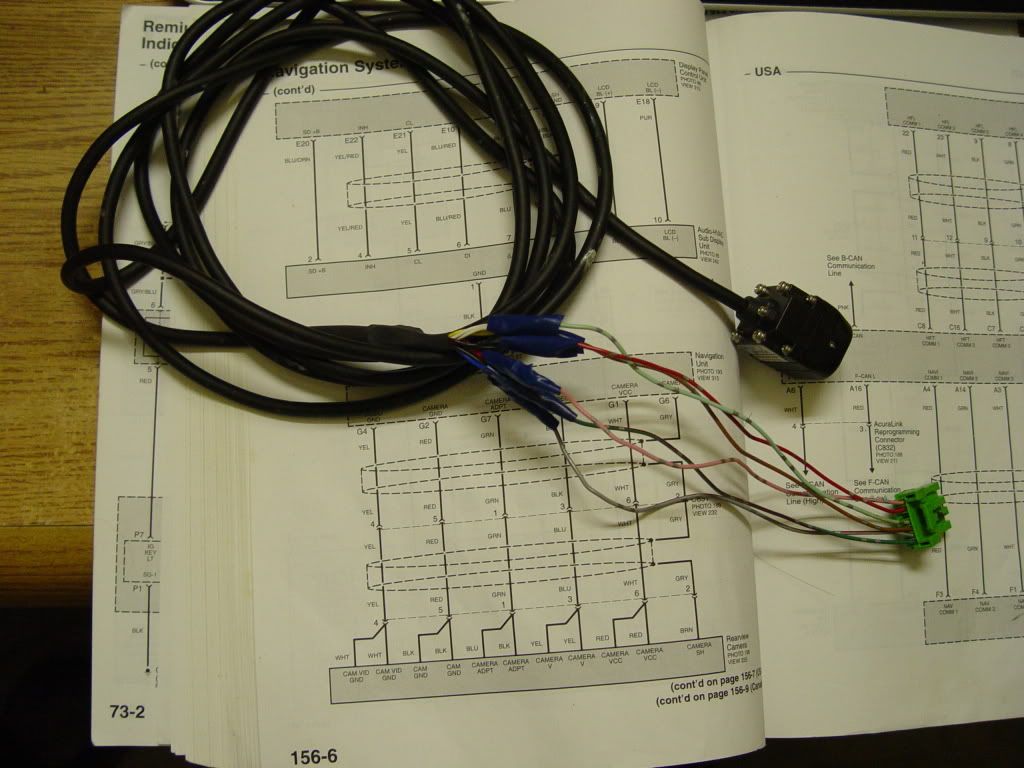
2004 TL Original Cable Reel
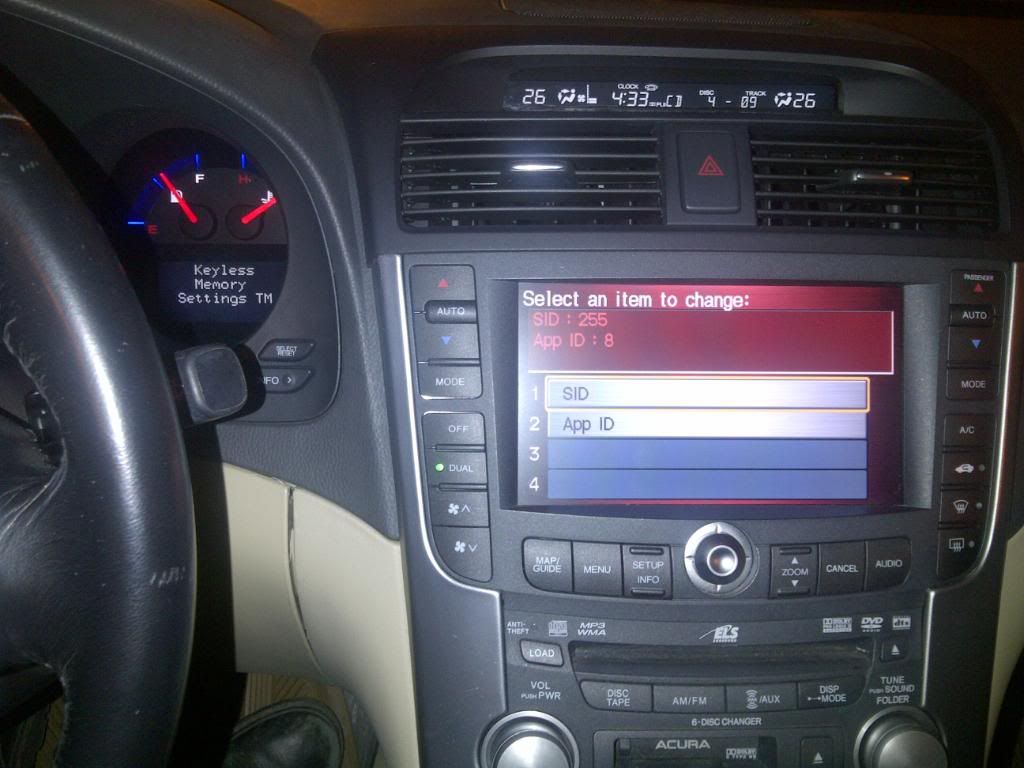
Depins
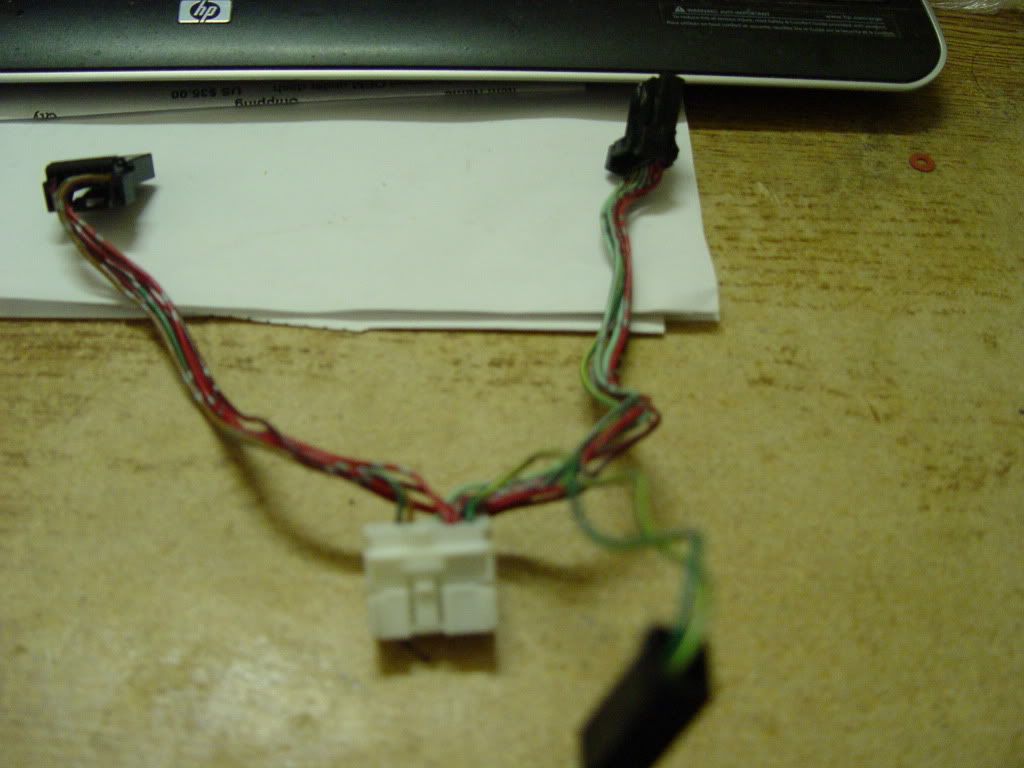
Wires Transfer to the 7P Green Connector
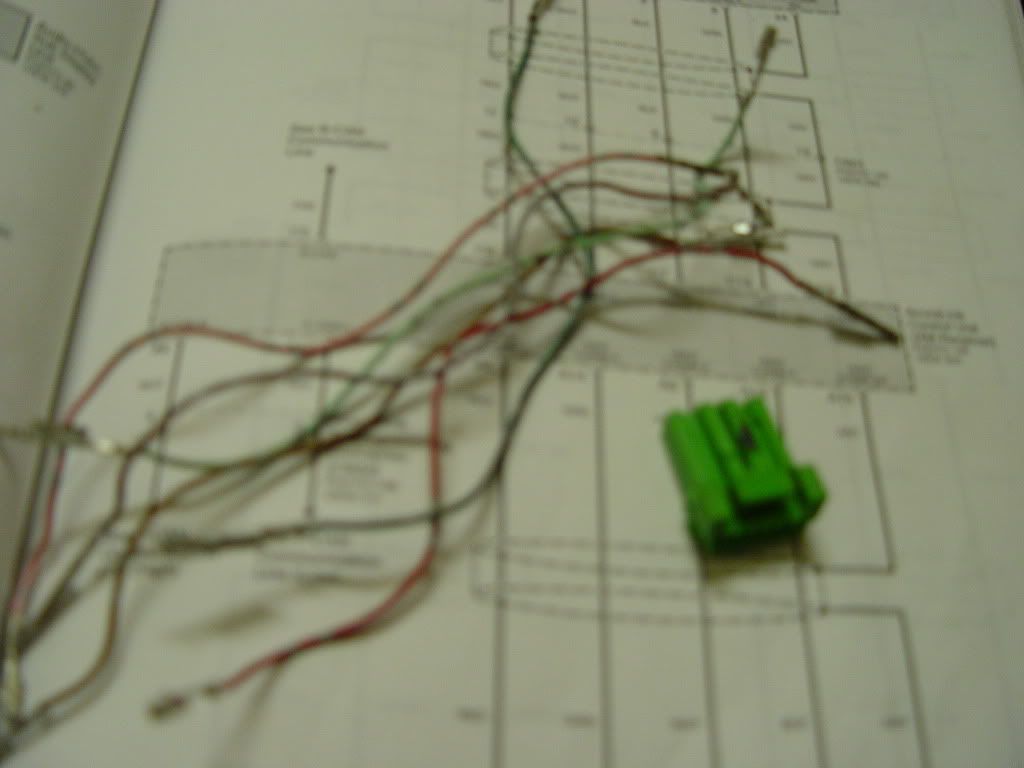
Follow the color wires from the book
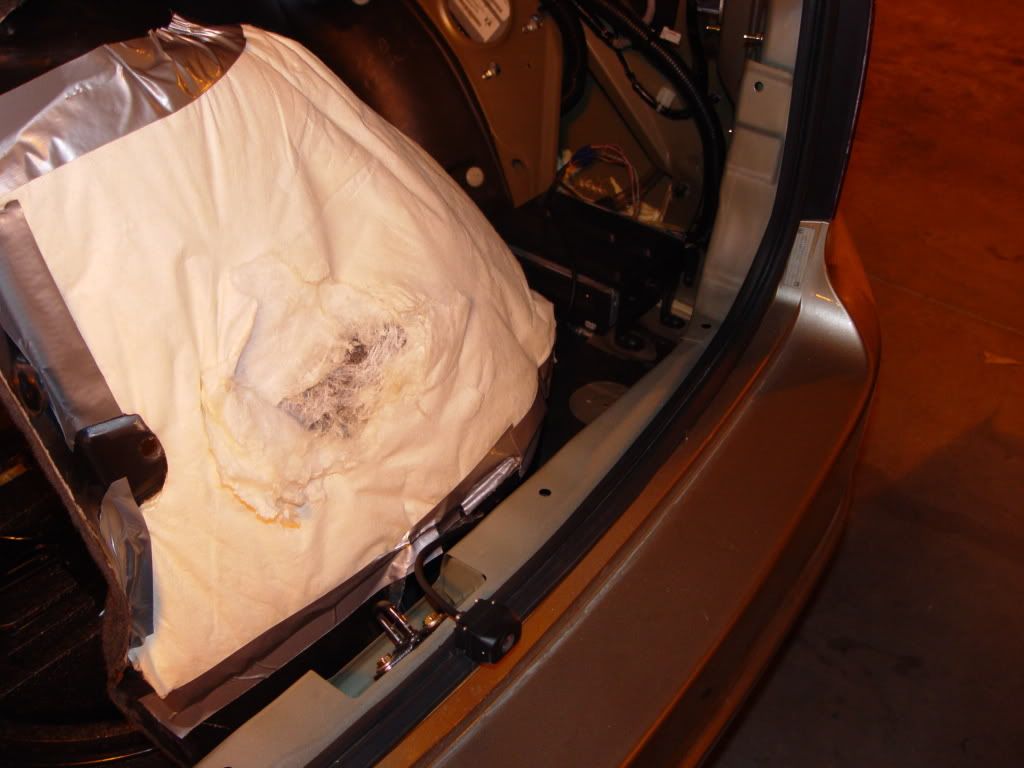
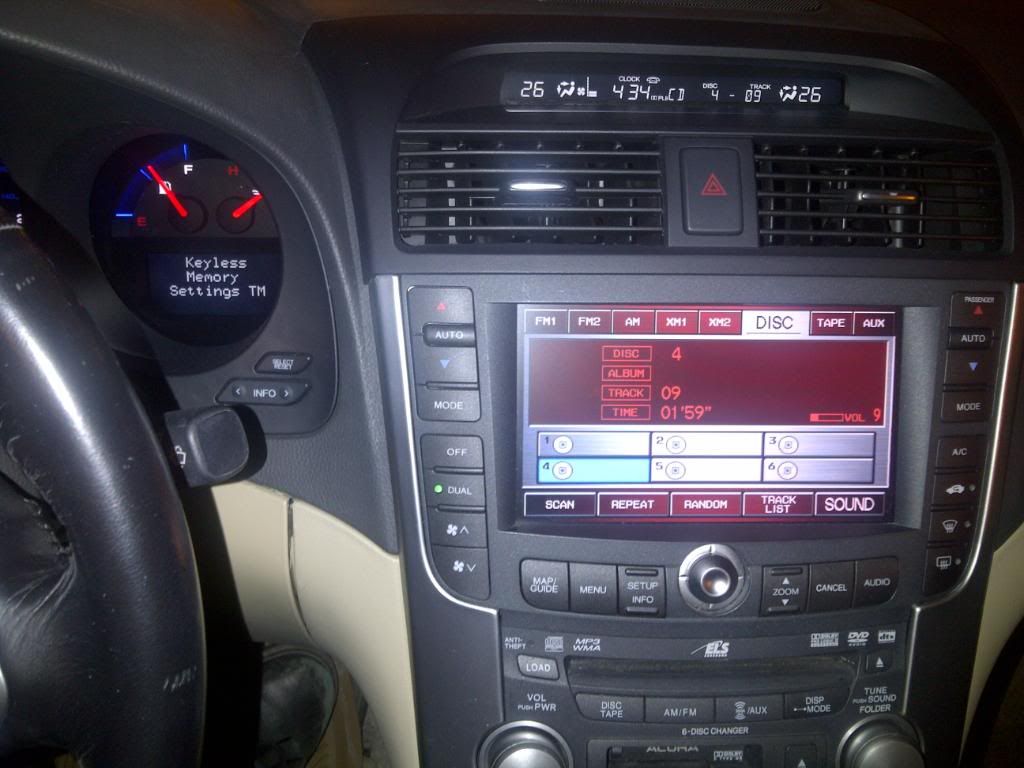
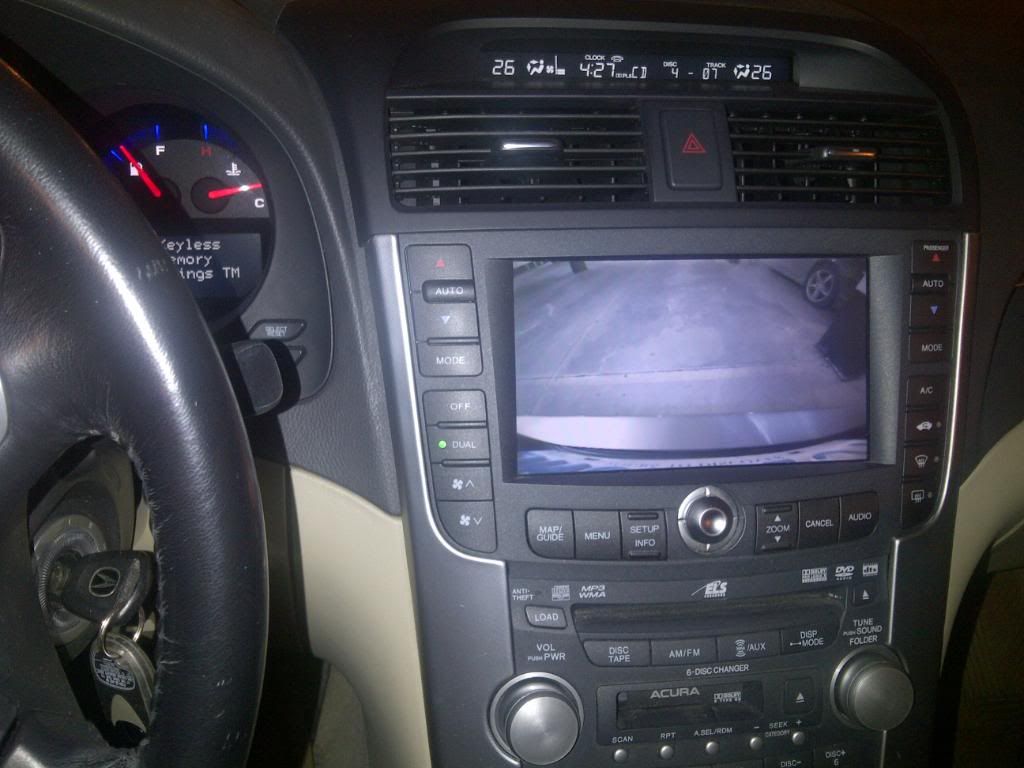
Plug into the Navigation drive and place the camea on the trunk opener for testing
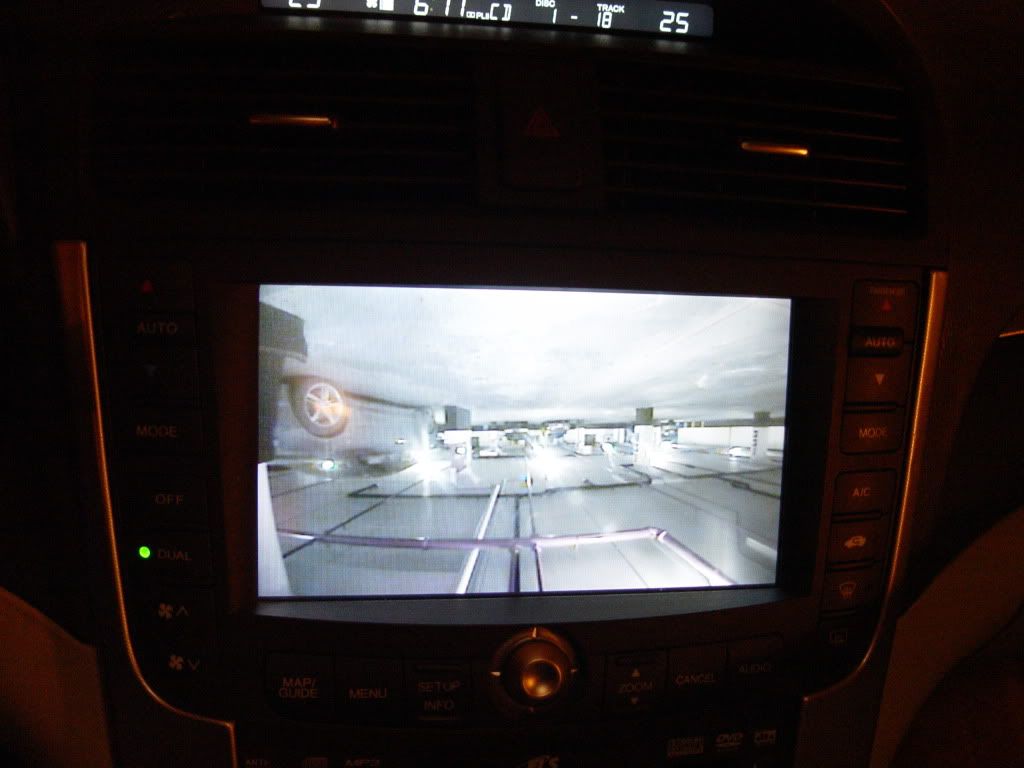
Start the engine and move to reverse. It work
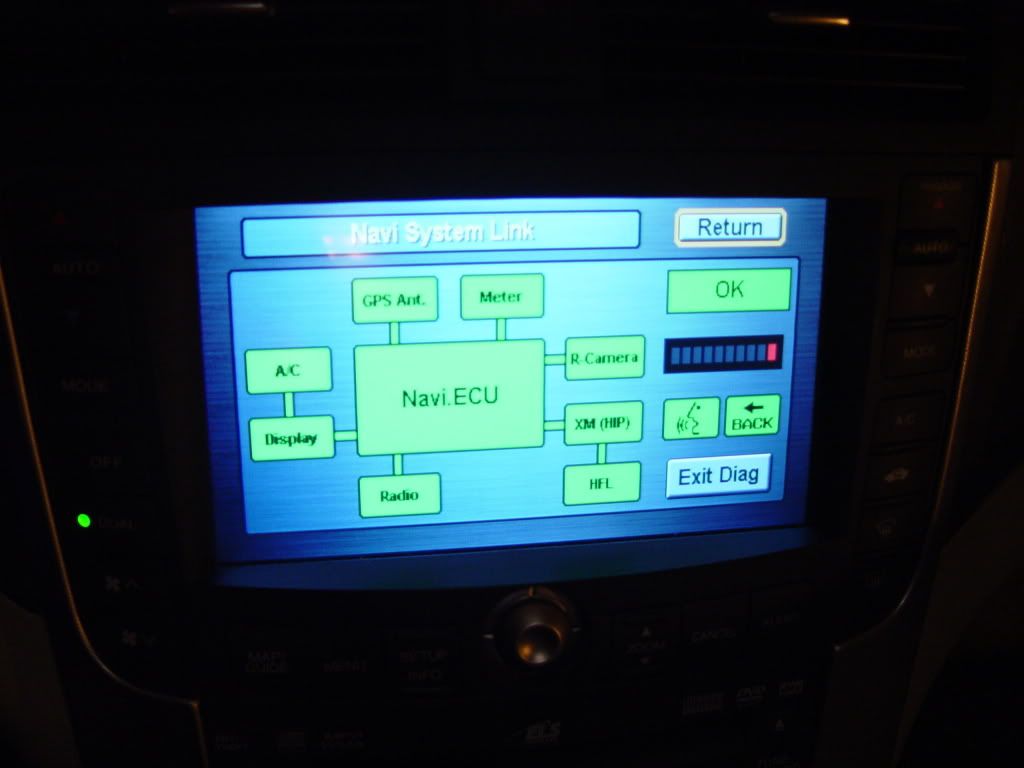
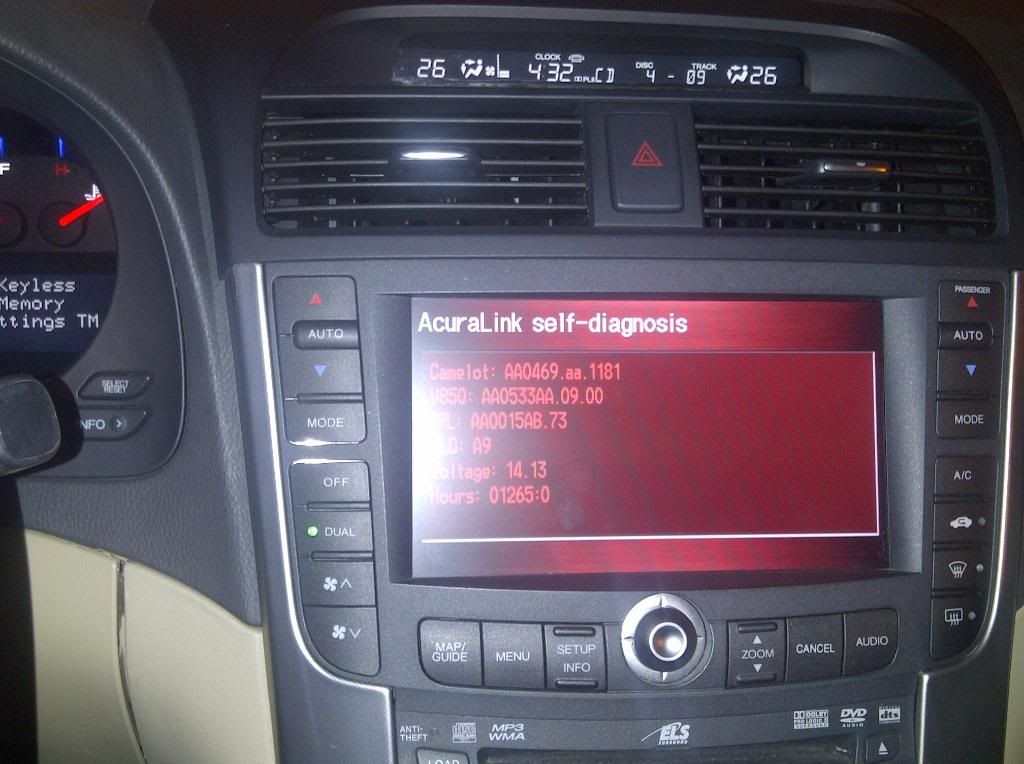
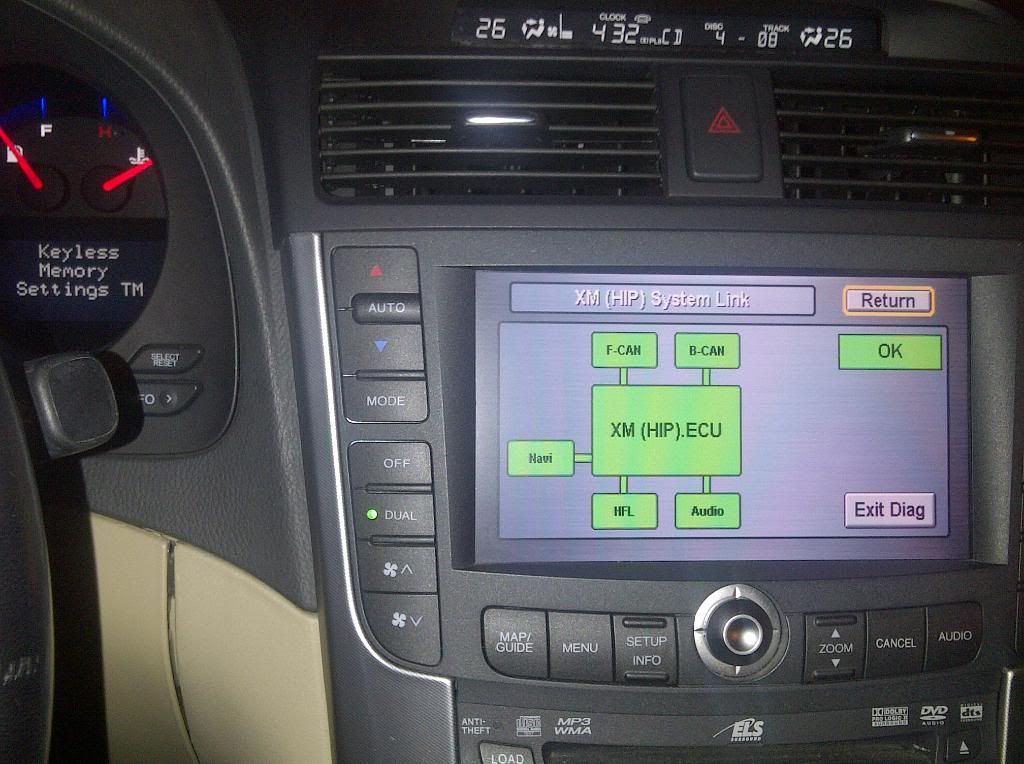
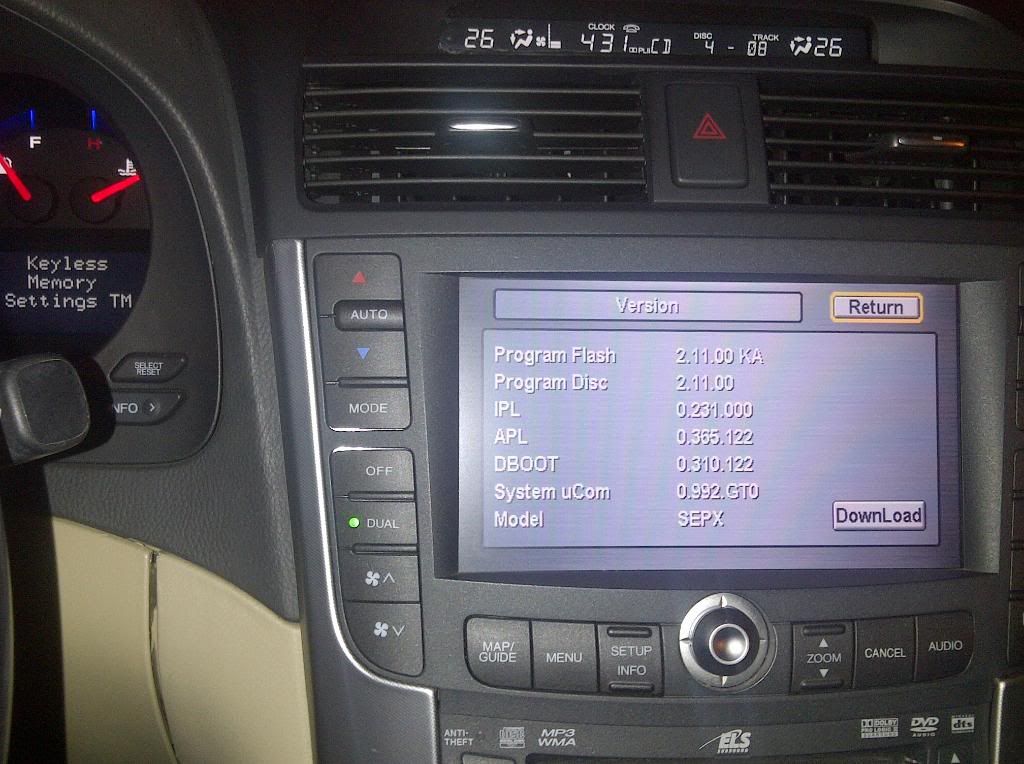
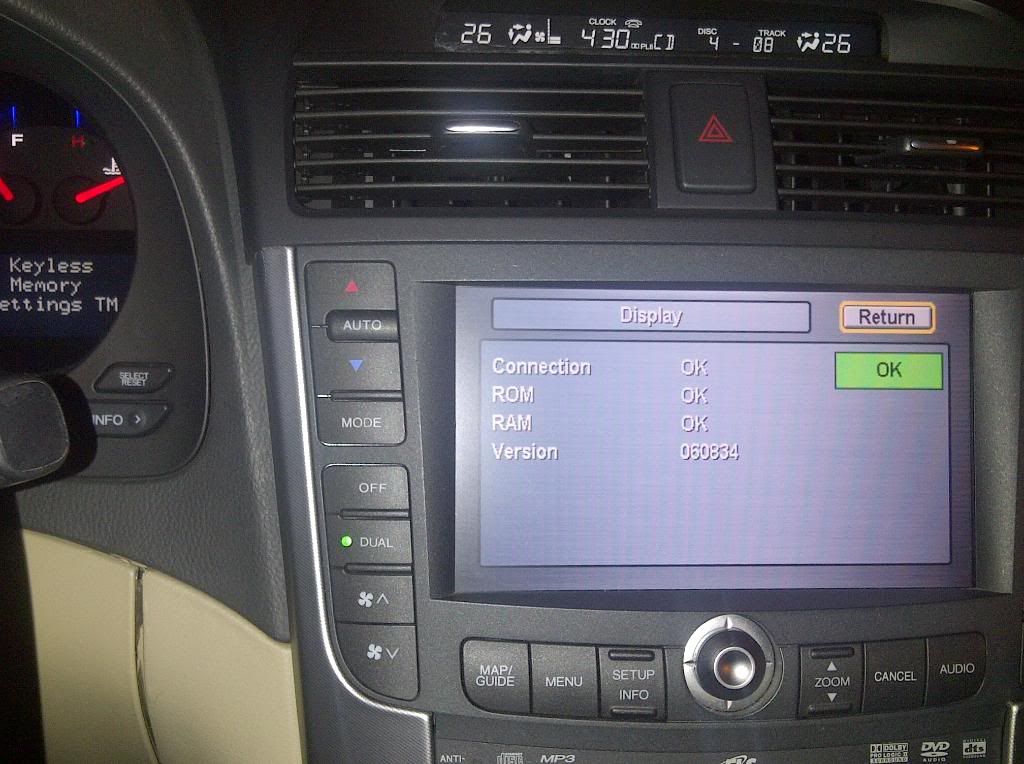
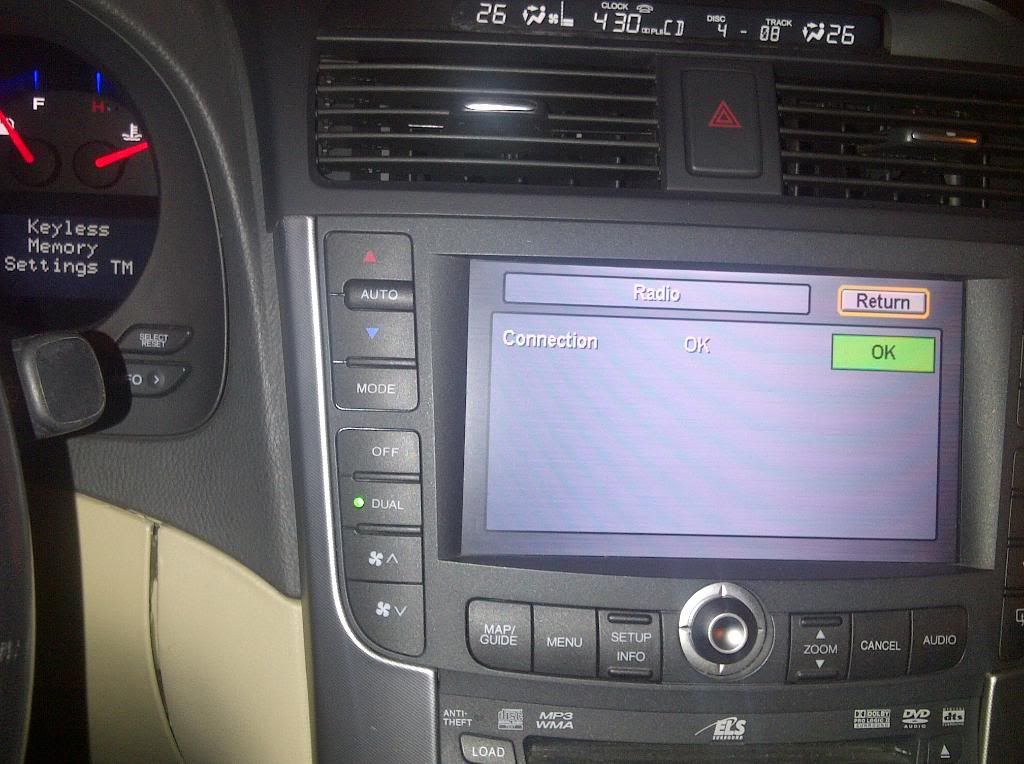
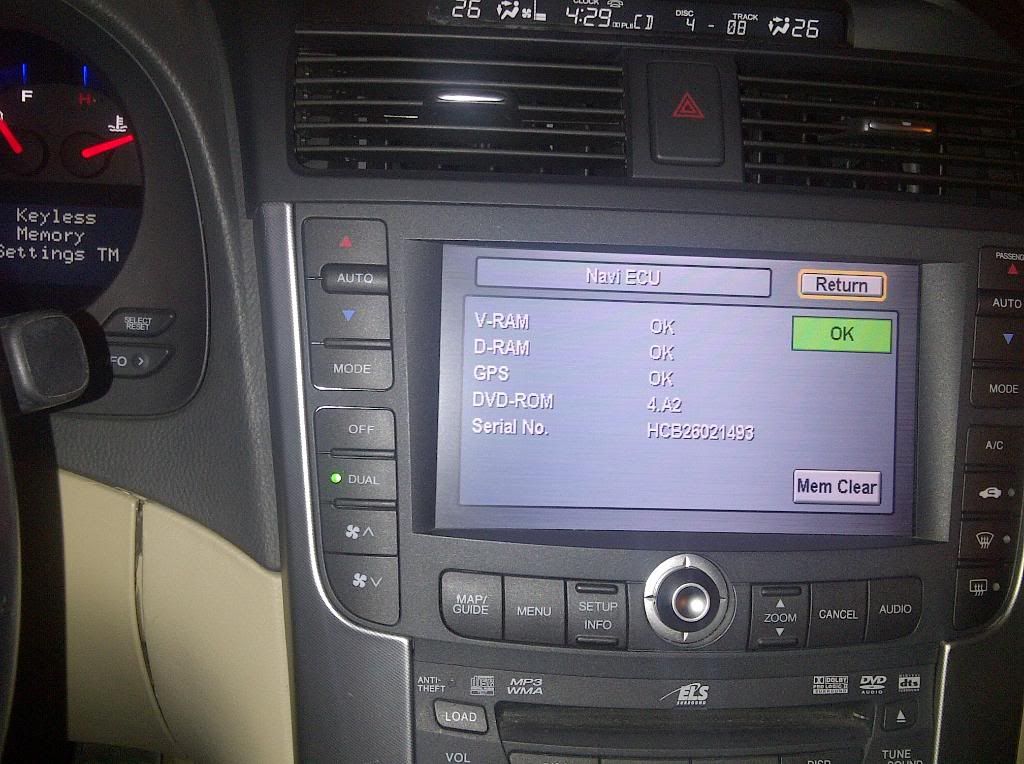
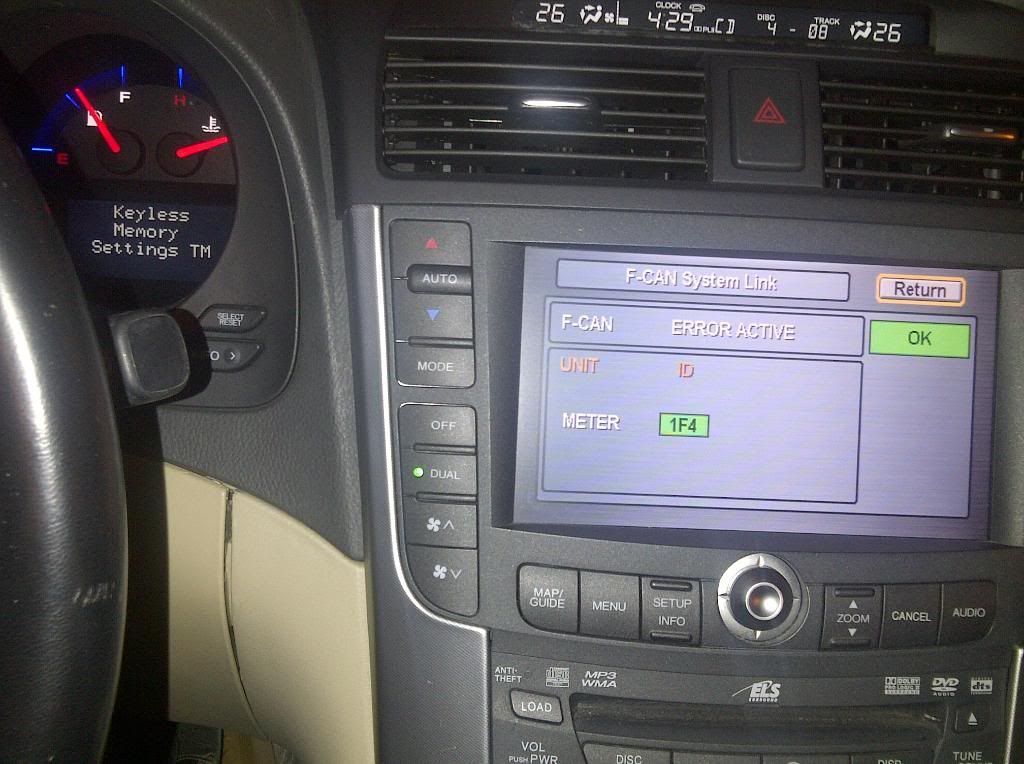
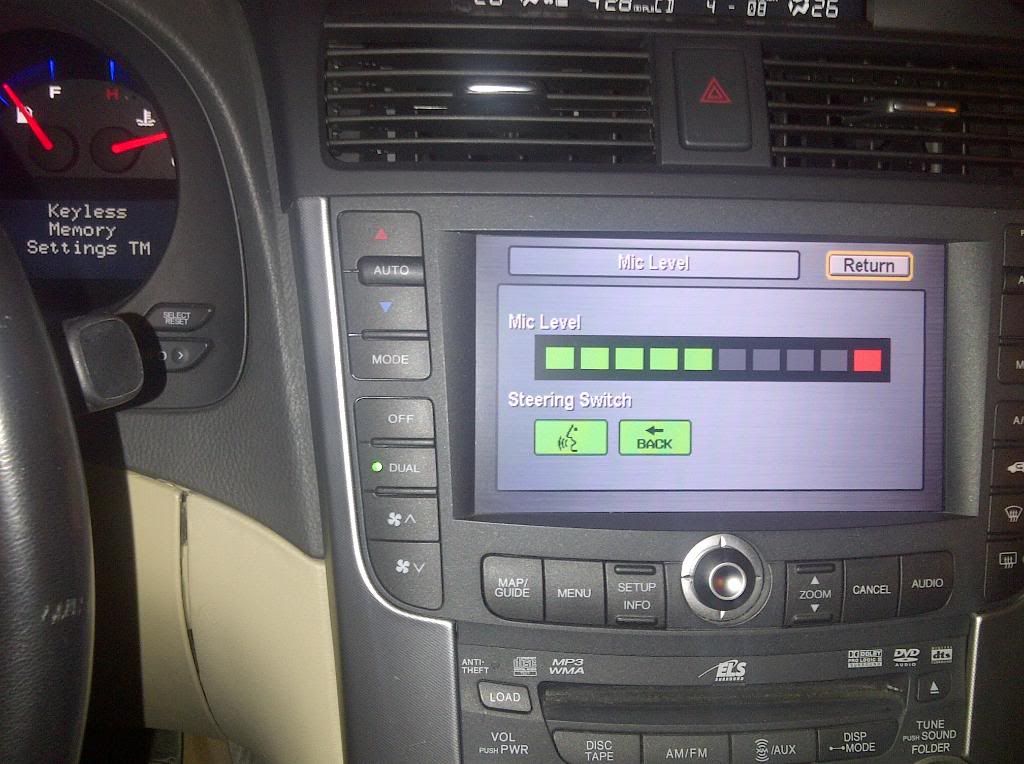
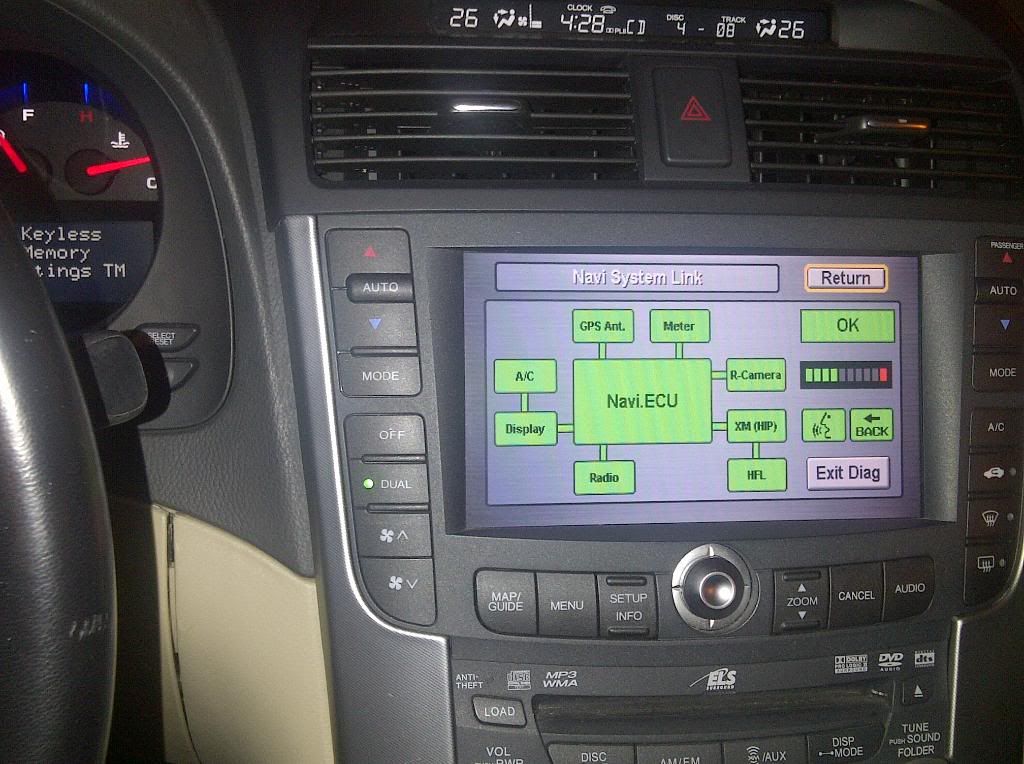
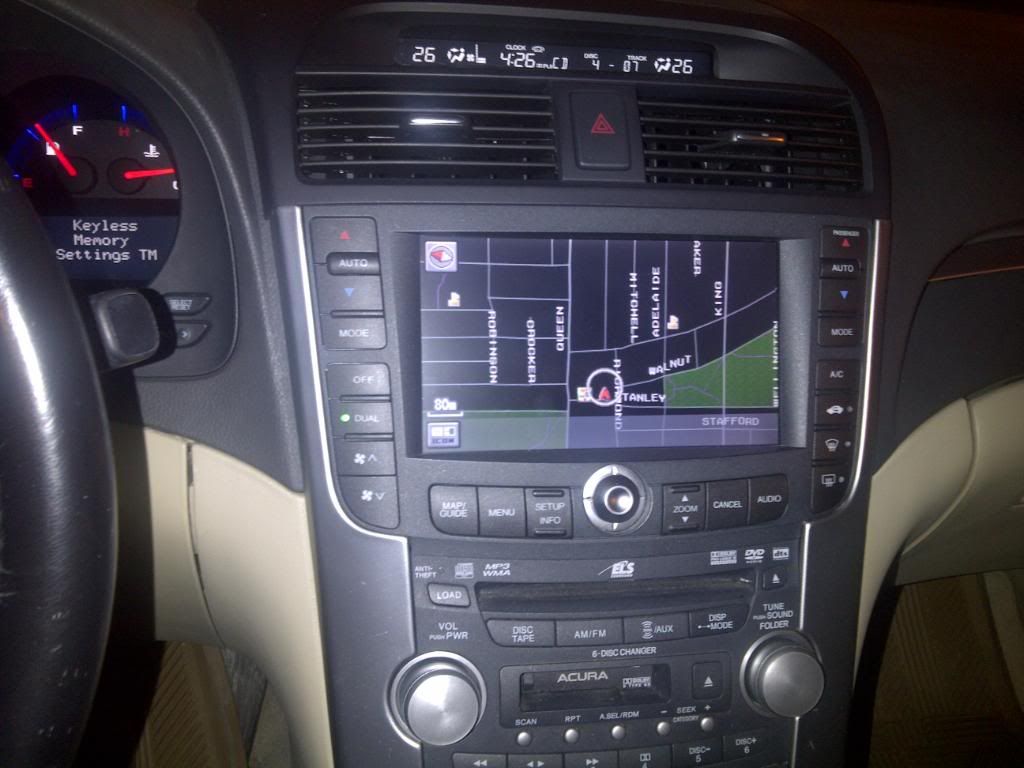
Navi System Link. All Greens
P.S I know some of these pictures not very clear and I will re-take when am completed. Thanks for your input...
Tools I used:
-Wire strippers
-Wire crimpers
-Wire cutters
-Butt Connectors
-Electrical tape
-Heat shrink tube (Optional)
See Pic’s for more details
Creating the connector to go into the back of the DVD-Rom unit:
-Cut the head off one end of the green connector and soldering with a wire to the 6P white male connector
Take your connector and make sure you orient it the correct way so the wires are inserted in the connector correctly.
See pin guide for correct pin layout for appropriate wires.
-Use electrical tape or heat shrink tube to cover the wires. (If using the shrink tube put the shrink tub on before you put the pins into the connector)
Testing the wire:
-Put wire into the port in the back of the DVD-Rom unit...
-For me…I used the 7P/Green, 6P/Whit male & female connector with pins so I had to insert the connector to the right one pin. (First pin/slot is blank anyways) No need to worry about the connector falling out as there is plenty of tension on the pins to keep it in place in the unit.
Green plugged into the unit, Insert other pins for the white male & female connector put key into the ignition to the ‘on’ position (no need to start) and put the car into reverse.
-If done correctly the screen should ‘beep’ and go blank. Test away by changing from P to R to D and back and forth…if works, carry on with DIY. Once the cam is connected it’ll be powered and you’ll then see a picture.
Connecting
(The camera I purchases has enough long from the lincense plate to the unit)
Start by removing trunk lid cover from the underside of the trunk.
-Run wires down the main harness that goes along the right side of the trunk and secure. (I used the tie-downs)
-Run the camera cable thru to the clip hole from the linese place
-Double check your connection before proceeding. Then wrap with Electrical tape of use shrink tube-install before connecting wires.
-Secure wires back into the wire loom and Re-tape the wire loom.
-Make all your connections to the camera and DVD unit and DOUBLE CHECK everything before powering the car.
Clean-up all the loose wires by zip tying and securing them up under the rear deck. Make sure you leave some slack on the wires and test the trunk lid movement to make sure there is no interference with the hinge and the wires.
All Done!
Finished Product….
Total install time was little under 2 hours…I’m very happy with the cam that I chose as I was looking for
Image quality is good enough for me...
Modifications to make camera fit...
Obviously, there’s no hole was drill for the installation. But I had to make a line on the lamp units to fit the cable of the camera
I brought the license plate bracket fro the Canadian tire auto shop for $3.99
Please feel free for ask question, I always welcom!
what year tl is yours? cuz the title says works for tl '07 / '08 but further down u mention u installed it on an '04 . i have an '05 so im guessing it should work. also the connector plugs directly into a slot behind the DVD Rom unit???
what year tl is yours? cuz the title says works for tl '07 / '08 but further down u mention u installed it on an '04 . i have an '05 so im guessing it should work. also the connector plugs directly into a slot behind the DVD Rom unit???
My ride is 04 Base but I installed 08 type s parts. I put a 06-08 rear-view camera and it works fine. Yes, it should connect and work, as long as you do not detach the cable, it'd be able to reach from the license plate to the back of the DVD rom unit.
that explains the different background image (silver/metal look) in ur diagnostic screen. cool thanks for the DIY. ill add this to my To Do lst for this year.
Very nice write up! I have an 05 stock everything, how would i get this to work with my nav? Do i need any other modules or modify any plugs? The reason i ask is because i see you modified yours. Thanks in advanced!!!!
Incredible job .... but may I ask why you put yourself through what looks like a daunting install for just a rear view camera? Was it just cuz you wanted to stay OEM?
They sell many rear view cameras that are just as good w/ easier install but I'm sure you knew that so I'm just curious.
Very nice write up! I have an 05 stock everything, how would i get this to work with my nav? Do i need any other modules or modify any plugs? The reason i ask is because i see you modified yours. Thanks in advanced!!!!
If you have the 07/08 DVD drive unit will be more easier
Incredible job .... but may I ask why you put yourself through what looks like a daunting install for just a rear view camera? Was it just cuz you wanted to stay OEM?
They sell many rear view cameras that are just as good w/ easier install but I'm sure you knew that so I'm just curious.
First of all, I'm pretty much comfortable when see everything were green in the system and I dont want to see any red when am driving.
Secondly, I very like these oem stuffs, they looked more aggressive.
the last thing is everything are working, I'm very happy!!!
The next upgrade is the A-SPEC LIP KITS
Where did you get the pinout diagram for the unit? Could you post that picture again? I'm wondering if it's possible to make a stock TL backup camera work with device that has a standard RCA input like a Naviks device. I have one of those, and I use a license plate backup camera but I want to make it look more stock. I'm hoping I can just solder an RCA plug onto a stock 07-08 TL camera and apply power to the correct pins.
Here's the only thing I've found so far. I need something like that for the 3G TL, so if you still have that diagram, that would be helpful.
 02-16-2012, 06:08 PM