
Suede headliner
 06-13-2009, 11:29 PM
#1
Suede headliner
searched through pages and pages of threads of any 3G TLs w/ suede headliner and couldnt find any. I tried search terms 'suede', 'headliner' and 'suede headliner' and got no hits with images.
Also -- any suggestions on what to go with? Aren't their different grades of suede? Then there's synthetic and real suede. and then isn't their perforated as well?
can any anyone help a brotha out -- thanks!

Also -- any suggestions on what to go with? Aren't their different grades of suede? Then there's synthetic and real suede. and then isn't their perforated as well?
can any anyone help a brotha out -- thanks!
Last edited by woot427; 06-13-2009 at 11:32 PM.

The following users liked this post:
slowburn089 (05-18-2014)
06-14-2009, 06:36 AM
#4
Instructor
Join Date: Apr 2007
Location: Ft. Lauderdale, FL
Age: 51
Posts: 148
Likes: 0
Received 1 Like
on
1 Post
I've got a suede headliner. It is synthetic. Real suede isn't really used for headliners because the hides aren't usually uniform and you would have to use more than one on a headliner and would have to sew seams. Alcantara is awesome but it is a little pricey. The guy that did mine used ultrasuede. It came out awesome. the pictures don't do it justice. I'm very happy.
06-14-2009, 06:44 AM
#5
RodneyC77, tripnbeats and Edluv143 also have suede headliners.
You won't find real suede to put in your vehicle. Alcantara is the best type of faux suede, but it will cost you like $120/yard plus installation.
My suggestion would be to get a look at the material in person and decide what you want. DIY is not too difficult if you are handy. I pretty much did mine myself with a second set of hands. Total work was about 3 hours.
If you're going to DIY, make sure you use a very good quality adhesive such as 3M ($14 per bottle). The last thing you want is for it to fall. You will go through about 6 cans of adhesive for the full headliner, rear deck and all 6 pillars.
06-14-2009, 12:55 PM
#6
Thanks for the info all. Yeah -- my car guy will be doing the headliner. He sueded his Scion XB and a couple other cars so I'm sure he's well aware how to get it done properly.
Trew --can you link me to the exact 3M product please? http://solutions.3m.com/wps/portal/3...ons/Adhesives/
Is it the lighting or are yours (Trew and edluv) different types of material? Both look very good. Any suggestions on where to order it as well?
I'm in philly, but my friend actually ordered his from a place in Phoenix that was recommended on scionlife.com -- but i will def be getting samples.
And one more ? -- what were total costs for both of u? Not including labor
Last edited by woot427; 06-14-2009 at 12:59 PM.

Trending Topics
06-14-2009, 06:17 PM
#12
2004 TL !!
iTrader: (1)

Join Date: Mar 2009
Location: Toronto
Age: 32
Posts: 176
Likes: 0
Received 0 Likes
on
0 Posts
ohh yeah im gettin all BLACK weathertech floor liners anyways, gonna get rid of my oem beige all season mats - they get wayyy too dirty always hafto clean it or the car looks nasty.. i dont think i need black carpets then? lol
06-14-2009, 07:29 PM
#13
Everything is very straightforward. Just take out the screws for the handles and light housings, pop off all 6 pillars by hand. The rest of the headliner is held in place by velcro (believe it or not).
The only thing that will give you some trouble is the B-Pillars. You have to unbolt the anchor for the seat belts from the bottom on the driver side and the seat on the passenger side so you can get the seat belt out of the pillar.
Also the sunroof slide... You will have to push up on the front so the bump raises over the stop and then it will slide all the way back and out. Take out the sunroof slide after you get the headliner out of the car. It will be easier that way.
Here's another view

The following 2 users liked this post by Trew:
Davknights (06-05-2016),
TL_buzz (12-16-2019)
 06-14-2009, 08:31 PM
#17
Senior Moderator
you guys aren't putting in stitching? IMO it looks werd without any stitching added to it, I'll take some pictures of the 7's Black Alcantara with the stitching added...
06-14-2009, 08:46 PM
#19
Senior Moderator
not my 7 since it has the Ebony interior, but the stitching:


Also trew, have you considered ebony Oh shit handles?
Also trew, have you considered ebony Oh shit handles?
06-14-2009, 08:58 PM
#20
3M Super 77 Adhesive Spray
It's a high contact adhesive that dries fast and does not soak into the fabric.
It sprays like silk coming out of Spiderman's wrists! Just spray it on the headliner AND the back of the suede fabric and let it tack up for about 3-5 minutes before you apply the fabric. Work from the center out if possible on all panels.
Oh and I strongly recommend doing the headliner job with a buddy. Once the fabric touches the panels with the 3M on it, it sticks like crazy glue!
06-14-2009, 09:01 PM
#21
AJ wow that looks awesome!
Yes I'm looking into it. I was initially afraid to dye them because I feared they would fade.
I left it gray for a bit to see if it looked ok, but after seeing Edluv's dye job, I think i'm going to black out the handles and light housings.
Yes I'm looking into it. I was initially afraid to dye them because I feared they would fade.
I left it gray for a bit to see if it looked ok, but after seeing Edluv's dye job, I think i'm going to black out the handles and light housings.
06-14-2009, 09:07 PM
#22
3M Super 77 Adhesive Spray
It's a high contact adhesive that dries fast and does not soak into the fabric.
It sprays like silk coming out of Spiderman's wrists! Just spray it on the headliner AND the back of the suede fabric and let it tack up for about 3-5 minutes before you apply the fabric. Work from the center out if possible on all panels.
Oh and I strongly recommend doing the headliner job with a buddy. Once the fabric touches the panels with the 3M on it, it sticks like crazy glue!
It's a high contact adhesive that dries fast and does not soak into the fabric.
It sprays like silk coming out of Spiderman's wrists! Just spray it on the headliner AND the back of the suede fabric and let it tack up for about 3-5 minutes before you apply the fabric. Work from the center out if possible on all panels.
Oh and I strongly recommend doing the headliner job with a buddy. Once the fabric touches the panels with the 3M on it, it sticks like crazy glue!
How many cans did you use and where can I get this stuff?
06-14-2009, 09:22 PM
#23
http://www.target.com/gp/search/185-...t_adv_XSGT0634
You will need about 6 cans minimum. Whatever you do... DON'T skimp on the application. Apply liberally to the headliner and the fabric backing.
You will need about 6 cans minimum. Whatever you do... DON'T skimp on the application. Apply liberally to the headliner and the fabric backing.
06-14-2009, 10:13 PM
#24
Senior Moderator
better yet, why don't you just wrap the handles in Alcantra and just use interior paint on the caps/attachments
06-14-2009, 10:44 PM
#25
Instructor
Join Date: Apr 2007
Location: Ft. Lauderdale, FL
Age: 51
Posts: 148
Likes: 0
Received 1 Like
on
1 Post
06-14-2009, 11:32 PM
#27
Honestly a DIY is not necessary...
Everything is very straightforward. Just take out the screws for the handles and light housings, pop off all 6 pillars by hand. The rest of the headliner is held in place by velcro (believe it or not).
The only thing that will give you some trouble is the B-Pillars. You have to unbolt the anchor for the seat belts from the bottom on the driver side and the seat on the passenger side so you can get the seat belt out of the pillar.
Also the sunroof slide... You will have to push up on the front so the bump raises over the stop and then it will slide all the way back and out. Take out the sunroof slide after you get the headliner out of the car. It will be easier that way.
Here's another view
for the headliner for the grime on your headrest
  06-14-2009, 11:54 PM
#28
Trew -- I showed my friend your pics, and he mentioned how some may not like the black suede with gray handle bars, weather stripping, trim pieces, etc...
i assume it doesn't bother you, but figure I mention it and see what your opinion was.
I'm undecided to go gray or black...
i assume it doesn't bother you, but figure I mention it and see what your opinion was.
I'm undecided to go gray or black...
06-15-2009, 12:06 AM
#29
Senior Moderator
Trew -- I showed my friend your pics, and he mentioned how some may not like the black suede with gray handle bars, weather stripping, trim pieces, etc...
i assume it doesn't bother you, but figure I mention it and see what your opinion was.
I'm undecided to go gray or black...
i assume it doesn't bother you, but figure I mention it and see what your opinion was.
I'm undecided to go gray or black...
06-15-2009, 01:47 AM
#30
Rodney's pics need to be in here... I think he has a BAD ASS headliner with perforations. The Beige headliner is really growing on me! ALso look at the close attention he paid to detail with his handle bars man.. crazy shit! He really takes his interior to another level!


06-15-2009, 03:11 AM
#31
^^ was the trunk done the same way?
trew - thats pretty straight foward.. thanks.. back on the to do list. much appreciated..
esco - i hear u.. no dirt people in the car.
trew - thats pretty straight foward.. thanks.. back on the to do list. much appreciated..
esco - i hear u.. no dirt people in the car.
06-15-2009, 07:40 AM
#32
tHANKS Elegant... I appreciate you adding me among the fly guys hear on AZine.... ... Trew's whip is official... and that Beige Suede is dope too... I got the Ginger color cause I wanted a little contrast...
Yes, My whole trunk is suede... Do you want to see my engine bay too....

... Trew's whip is official... and that Beige Suede is dope too... I got the Ginger color cause I wanted a little contrast... Yes, My whole trunk is suede... Do you want to see my engine bay too....
 insane!
06-15-2009, 11:53 AM
insane!
06-15-2009, 11:53 AM
#35
Senior Moderator
tHANKS Elegant... I appreciate you adding me among the fly guys hear on AZine.... ... Trew's whip is official... and that Beige Suede is dope too... I got the Ginger color cause I wanted a little contrast...
Yes, My whole trunk is suede... Do you want to see my engine bay too....
... Trew's whip is official... and that Beige Suede is dope too... I got the Ginger color cause I wanted a little contrast... Yes, My whole trunk is suede... Do you want to see my engine bay too....

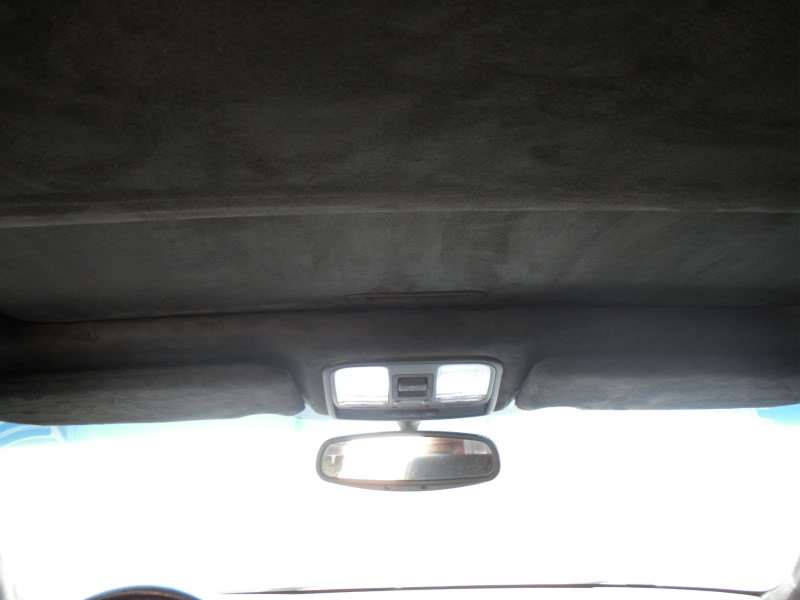
As I promised, pics of the two tone and the stitching:
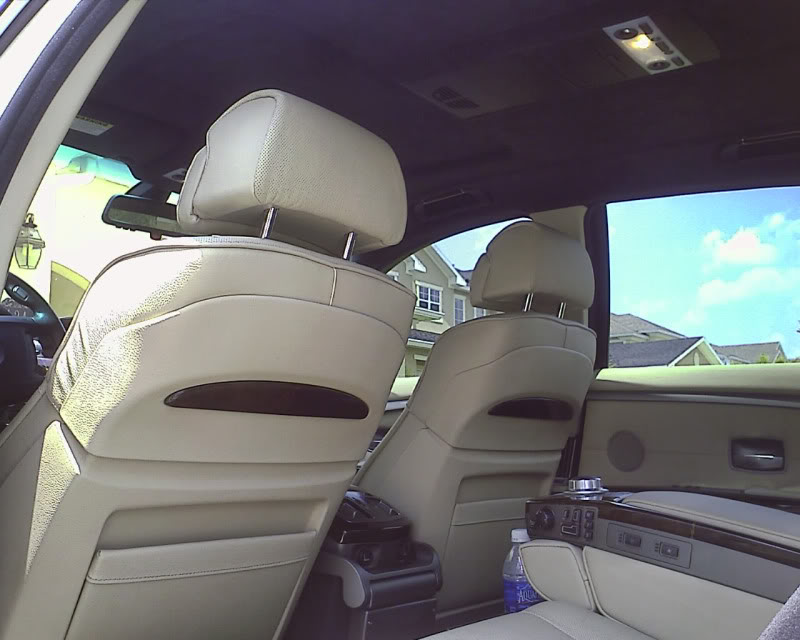
This is the two tone interior from the factory
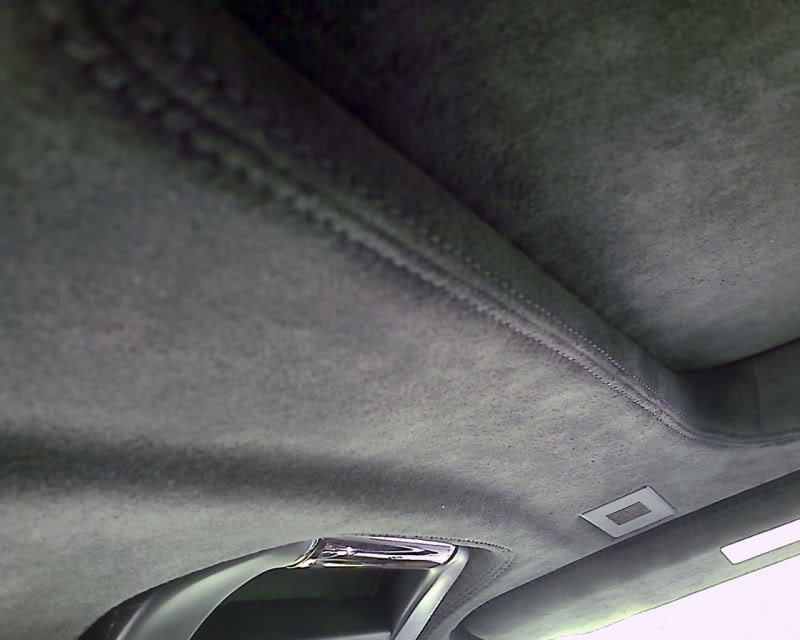
This is the stitching around the sunroof
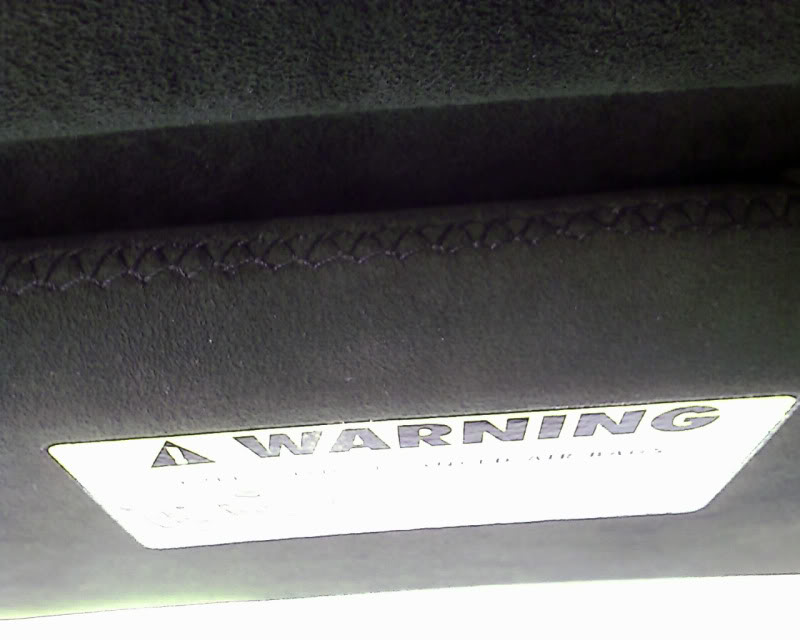
Stitching on the sun-visor/mirror at the bottom....
06-15-2009, 01:19 PM
#36
rodney- thanks for the response, i see ur trunk is done also, but what i was asking if u did it in the same fashon as ur headliner. taking it apart. spraying the glue and laying down the fabric.. thanks.
06-15-2009, 02:24 PM
#38
Safety Car

afta cleans it. best bet to keep it from rubbing toooo much up is using another piece of suede to rub against itself. i wouldnt use stitching unless im doing a very complex headliner....a lot of curves n turns especially with the tv in the ceiling. if its got dips the suede doesnt have much flex to it so u cant exactly pull n make it fit and then you would have to stitch the tl has a very simple flat headliner thats easy to work with it took me 3 hours to do eveything in mine. and then 8 hours a seat.
06-15-2009, 02:25 PM
#39
There are only 4 pieces:
Left side
Right Side
Bottom (Spare tire cover)
Top (under the rear deck)
All of these are held in with clips and thumb screws that double as hooks for the cargo net. The only hard part is having to take the back seat out to get to 6 of the clips.