

D-094: DIY Complete Brake Job with Pics


 12-08-2010, 05:08 PM
#42

Brembo caliper piston compressor
The Dougler,
I saw one of the pictures when you did the front disc and pads, you used the caliper piston compressor on the Brembo caliper. Can you tell me from where did you borrow that tool? I tried Advanced and Autozone last night but they didn't have it. Or did you buy it?
Thanks,
Platinum1
I saw one of the pictures when you did the front disc and pads, you used the caliper piston compressor on the Brembo caliper. Can you tell me from where did you borrow that tool? I tried Advanced and Autozone last night but they didn't have it. Or did you buy it?
Thanks,
Platinum1
Well after the lug nut incident (https://acurazine.com/forums/ramblings-12/tahoe-new-years-165027/) I finally got around to doing my brakes today, rotors and pads all the way around, Painted the rear calipers too. I have also run into a problem at 1 Corner which you can see at the end, which i'm not sure how to solve.
Disclaimer: These are merely my suggestions on how to replace your brakes, I am not a professional and this should only be taken as advice. I will not be held liable for anything you mess up as a result from following these directions.
1.Remove screws from rotors, Impact driver will make this possible.


2. Remove the Caliper bolts (12mm) pictured here. Use a wrench to stop the pins from rotating. Swing caliper away and rest of control arm.


3. Remove the caliper bracket bolts (14mm)

4. Use 2 8X1.25 bolts to push to rotor off the hub.

5. Clean up the hub a little with a wire brush. Then at the bottom of the hub rotate the little spike wheel up until it is fully retracted, this is so the e-brake shoes do not rub.


6. Install new rotor. Replace those screws if you wish, use lots of anti seize. If you use the screws it really helps when you dialing in the ebrake shoes. There is a little rubber plug that you have to remove from the old rotors. Once your new one is screwed on there is a little access hole that lets you adjust the spikey ebrake adjuster. This time you want to turn the spike wheel towards the ground until there is friction against the rotors, then turn it 6 clicks up. Replace the rubber plug.

7. With that all done, you want to lubricate the slider pins on the caliper bracket. Hold the rubber boot at the bottom and pull the pin up. Give it a little bit of grease. Push it back down so the boot full seats. Bolt up the caliper bracket to 41 ft-lbs.

8. On the caliper bracket there should be a metal clip on the top and bottom that the pads sit on. Lube those with the little packet of grease that comes with the pads, use sparingly. Remove the shims from the back of the pads and spread the grease over the back of the pad. Replace shim, grease back of shim. Slide the pads into the caliper bracket.


9. Prepare the caliper, clean around the seal with a toothbrush to remove all the crud. The grease the part of the piston that is exposed with the same grease as you used on the pins. Use a piston compressor tool to reset the piston in its bore. Slide the caliper over the pads and install the 2 12mm bolts with anti seize and torque to 17ft-lbs.


You can repeat these for all 4 if you have an AT for those of us with Brembos Read on.
1. Remove those danged screws with the impact driver again.
2. Turn the wheel towards you for better access, drive out the pins with a 3.5mm punch.


3. Pull pads out with vice grips. Clean caliper interior with tooth brush. Using a differnt piston compressor reset all 4 pistons in their bore.


4.Remove the brake line bracket on the spindle, 2 10mm bolts. Remove the caliper bolts on the back 2 20mm bolts. Hang the caliper on a coat hanger from the upper control arm.


5. Use the 2 8x1.25 bolts again to pull the rotor from the hub. Replace the rotor, put the 2 screws back in with anti-seize.

6. Re attach the caliper, anti-seize the bolts and torque to 125 ft-lbs. I forgot to take pic.
7. Grease the pads,, shims. Make sure you line up all the arrows with the direction of wheel motion.


8. Slide the pads back into the caliper. Slide the first pin through and punch back into place. Slip the spring under the one you just installed and hold the bottom part down while you slide the second pin through the bottom, and punch into place. It should look like this.
9. GO HAVE A BEER you just did you BRAKES. P.S. Torgue all your lugs to 81ft-lbs.
My dilema happened on the drivers side from caliper. The lower caliper bolt was cross thread from the factory or dealer. I'm still not sure how this is going to get fixed but i'm not happy. here's some pics.


Disclaimer: These are merely my suggestions on how to replace your brakes, I am not a professional and this should only be taken as advice. I will not be held liable for anything you mess up as a result from following these directions.
1.Remove screws from rotors, Impact driver will make this possible.
2. Remove the Caliper bolts (12mm) pictured here. Use a wrench to stop the pins from rotating. Swing caliper away and rest of control arm.
3. Remove the caliper bracket bolts (14mm)
4. Use 2 8X1.25 bolts to push to rotor off the hub.
5. Clean up the hub a little with a wire brush. Then at the bottom of the hub rotate the little spike wheel up until it is fully retracted, this is so the e-brake shoes do not rub.
6. Install new rotor. Replace those screws if you wish, use lots of anti seize. If you use the screws it really helps when you dialing in the ebrake shoes. There is a little rubber plug that you have to remove from the old rotors. Once your new one is screwed on there is a little access hole that lets you adjust the spikey ebrake adjuster. This time you want to turn the spike wheel towards the ground until there is friction against the rotors, then turn it 6 clicks up. Replace the rubber plug.
7. With that all done, you want to lubricate the slider pins on the caliper bracket. Hold the rubber boot at the bottom and pull the pin up. Give it a little bit of grease. Push it back down so the boot full seats. Bolt up the caliper bracket to 41 ft-lbs.
8. On the caliper bracket there should be a metal clip on the top and bottom that the pads sit on. Lube those with the little packet of grease that comes with the pads, use sparingly. Remove the shims from the back of the pads and spread the grease over the back of the pad. Replace shim, grease back of shim. Slide the pads into the caliper bracket.
9. Prepare the caliper, clean around the seal with a toothbrush to remove all the crud. The grease the part of the piston that is exposed with the same grease as you used on the pins. Use a piston compressor tool to reset the piston in its bore. Slide the caliper over the pads and install the 2 12mm bolts with anti seize and torque to 17ft-lbs.
You can repeat these for all 4 if you have an AT for those of us with Brembos Read on.
1. Remove those danged screws with the impact driver again.
2. Turn the wheel towards you for better access, drive out the pins with a 3.5mm punch.
3. Pull pads out with vice grips. Clean caliper interior with tooth brush. Using a differnt piston compressor reset all 4 pistons in their bore.
4.Remove the brake line bracket on the spindle, 2 10mm bolts. Remove the caliper bolts on the back 2 20mm bolts. Hang the caliper on a coat hanger from the upper control arm.
5. Use the 2 8x1.25 bolts again to pull the rotor from the hub. Replace the rotor, put the 2 screws back in with anti-seize.
6. Re attach the caliper, anti-seize the bolts and torque to 125 ft-lbs. I forgot to take pic.
7. Grease the pads,, shims. Make sure you line up all the arrows with the direction of wheel motion.
8. Slide the pads back into the caliper. Slide the first pin through and punch back into place. Slip the spring under the one you just installed and hold the bottom part down while you slide the second pin through the bottom, and punch into place. It should look like this.
9. GO HAVE A BEER you just did you BRAKES. P.S. Torgue all your lugs to 81ft-lbs.
My dilema happened on the drivers side from caliper. The lower caliper bolt was cross thread from the factory or dealer. I'm still not sure how this is going to get fixed but i'm not happy. here's some pics.
12-08-2010, 06:43 PM
#43
Burning Brakes
iTrader: (3)
Whats the deal with Acura and f'ing up stupid shit like crossthreading bolts??? One of the little 6x1.0mm bolts holding in my timing belt auto tensioner was crossthreaded from the factory and it took me like an extra 5hrs of work to fix it. Acuras arent as great as I once thought they were...
12-09-2010, 01:17 PM
#45
The Dougler,
I saw one of the pictures when you did the front disc and pads, you used the caliper piston compressor on the Brembo caliper. Can you tell me from where did you borrow that tool? I tried Advanced and Autozone last night but they didn't have it. Or did you buy it?
Thanks,
Platinum1
I saw one of the pictures when you did the front disc and pads, you used the caliper piston compressor on the Brembo caliper. Can you tell me from where did you borrow that tool? I tried Advanced and Autozone last night but they didn't have it. Or did you buy it?
Thanks,
Platinum1
12-14-2010, 01:45 PM
#46
Thanks Excelerate. I already did and it was very easy. But I'm stuck with one of the two screws that hold the left rotor in place. 1 is out and second one isn't yet. The head is completely bald/flush. I need to use some kind of pin push, hammered with small hammer/mallet, to turn it. I hope this works. I'll try it this afternoon.
12-23-2010, 12:58 AM
#49
New front rotors and pads are installed  They look great and perform perfectly fine so far. Those crappy small screws are no longer on the new rotors.
They look great and perform perfectly fine so far. Those crappy small screws are no longer on the new rotors.Thanks Excelerate. I already did and it was very easy. But I'm stuck with one of the two screws that hold the left rotor in place. 1 is out and second one isn't yet. The head is completely bald/flush. I need to use some kind of pin push, hammered with small hammer/mallet, to turn it. I hope this works. I'll try it this afternoon.
01-17-2011, 06:30 PM
#50
Cruisin'
Join Date: Jan 2011
Location: San Diego, CA
Posts: 22
Likes: 0
Received 0 Likes
on
0 Posts
I did my rear pads with EBC Red Stuff and could barely fit them in their respective slots. I had to take one of the shims off of the bracket. Haven't had any noise issues.
01-21-2011, 02:16 PM
#51
I took my car in for some work at a local trusted mechanic and to get my new rotors and pads installed. While taking off the calipers to install my new rotors, it turns out both bolts holding on the caliper on the drivers side were both cross threaded and ruined the caliper. He had a difficult time getting the bolts to come out. The passenger side was easy. They looked into the option of re-tapping the caliper but it wasn't possible. I ended up having to buy a new one at $355 because this came up unexpected.  I wonder how many other people had this issue? My car is a 2007 TL-S. This is the first time I've done any brake-related work on it.
I wonder how many other people had this issue? My car is a 2007 TL-S. This is the first time I've done any brake-related work on it.
01-21-2011, 02:20 PM
#52
Race Director
I took my car in for some work at a local trusted mechanic and to get my new rotors and pads installed. While taking off the calipers to install my new rotors, it turns out both bolts holding on the caliper on the drivers side were both cross threaded and ruined the caliper. He had a difficult time getting the bolts to come out. The passenger side was easy. They looked into the option of re-tapping the caliper but it wasn't possible. I ended up having to buy a new one at $355 because this came up unexpected. I wonder how many other people had this issue? My car is a 2007 TL-S. This is the first time I've done any brake-related work on it.
I wonder how many other people had this issue? My car is a 2007 TL-S. This is the first time I've done any brake-related work on it.Was this the first time the bolt had been removed?
https://acurazine.com/forums/3g-tl-problems-fixes-114/caliper-bolts-stripping-790470/
https://acurazine.com/forums/3g-tl-2004-2008-93/safe-729631/
Last edited by nfnsquared; 01-21-2011 at 02:25 PM.
01-21-2011, 02:25 PM
#53
Yes, this is the first time they've been removed. They were not able to salvage the caliper which is sad because there was nothing wrong with it. I'll try searching around on the forums to see if I can find what others have gone through. This is the only reference to a cross threaded caliper bolt I've found so far.
Do you recall if there was ever a recall or service bulletin related to this or if anyone got anything reimbursed for the part? I don't think it's likely because I'm out of warranty, but I figured it couldn't hurt to look into it.
Do you recall if there was ever a recall or service bulletin related to this or if anyone got anything reimbursed for the part? I don't think it's likely because I'm out of warranty, but I figured it couldn't hurt to look into it.
01-21-2011, 02:38 PM
#54
Race Director
Nope, no recall or TSB that I'm aware of. In one of those two links, someone theorizes that the bolts were being mistakenly cross threaded at the factory (either by machine or human) and then machine torqued.
Do a search for "caliper bolt" and unfortunately you'll find more than just those 2 links I posted...
Do a search for "caliper bolt" and unfortunately you'll find more than just those 2 links I posted...
01-21-2011, 02:47 PM
#55
Thanks a bunch for the info and the links. I'll read up on what others have encountered. This really stinks about the factory screwing up a bunch of people's calipers.
04-05-2011, 01:01 AM
#56
the overexplainer
gonna bookmark this.
I'm gonna let the shop do the first complete front brake job before I touch anything. After that at least I would know if the caliper bolts are OK.
Subsequent pad and rotor changes can be done by me after they verify my brembos havent been crossthreaded.
I'm gonna let the shop do the first complete front brake job before I touch anything. After that at least I would know if the caliper bolts are OK.
Subsequent pad and rotor changes can be done by me after they verify my brembos havent been crossthreaded.
04-06-2011, 05:06 PM
#57
gonna bookmark this.
I'm gonna let the shop do the first complete front brake job before I touch anything. After that at least I would know if the caliper bolts are OK.
Subsequent pad and rotor changes can be done by me after they verify my brembos havent been crossthreaded.
I'm gonna let the shop do the first complete front brake job before I touch anything. After that at least I would know if the caliper bolts are OK.
Subsequent pad and rotor changes can be done by me after they verify my brembos havent been crossthreaded.
You can do it yourself. Should be no sweat. Easiest brakes ever.
04-06-2011, 05:21 PM
#58
the overexplainer
The problem I'm concerned about is the supposed cross threading from the factory. I dont want to have to tow my car if I end up finding that I cant put my caliper bolts back in.
04-16-2011, 05:37 PM
#59
the overexplainer
Finished my rotor and pad replacement. It took longer than expected (as all things do haha...) but got it done. Did one side, then took a break cause it got too hot.
Luckily it appears the rotors were already replaced in the past in my case so the retaining bolts werent present on the rotors, and the caliper bolts were perfect. Putting the bolts back on, i hand threaded the caliper bolts by hand and then used a torque wrench. Torqued to spec.
Overall, fairly straightforward if you take your time for the first try. I can probably do it a lot faster having done them once.
Hopefully it's all good. If not, it has been nice postin w/ y'all.
06-06-2011, 07:42 AM
#60
Racer
Originally Posted by Excelerate
Wow.... unless you re-thread that caliper don't drive. You are missing a good 4 to 5 threads which is basically what the end of the bolt holds on to. More than likely the threads in the caliper are fine and the bolt is just messed up b/c the caliper metal is stronger than the bolt. If the threads are good just replace the bolt and torque it down to spec. Don't drive the car like you have it.
this happened to me over the weekend, except for both front brake calipers are going to need to be replaced because the threading was eaten by the bolts...i dont know anyone at any machine shops so i am forced to order 2 new brembo brake calipers from the dealer...very expensive...my car only has 46,000 miles on it and is still covered under a powertrain warranty. but because i decided to do the brake job myself they wont even listen to me to attempt to get this covered under warranty..this seems to be a common problem with these calipers...has anyone complained to Acura corporate or Brembo about this issue? it is a design flaw that can potentially be dangerous...and now i am spending another $600 on new calipers?? this is ridiculous
Wow.... unless you re-thread that caliper don't drive. You are missing a good 4 to 5 threads which is basically what the end of the bolt holds on to. More than likely the threads in the caliper are fine and the bolt is just messed up b/c the caliper metal is stronger than the bolt. If the threads are good just replace the bolt and torque it down to spec. Don't drive the car like you have it.
Excelerate, thanks for the tips. What actually happened is someone over tightened the bolt and it pulled the threads out of the aluminum caliper, when I removed the bolt the metal that was loged in the threads of the bolt and basically finished off the threads in the caliper.
I was able to pick the aluminum from the bolt threads with a small file, I cleaned it up with a wire brush on a dremel tool, the bolt is about as good as new.
The threads in the caliper were in bad shape, Also due to the weird thread pitch buying an off the shelf tap & dye was not possible. The bolt is an M14 X 150mm for those counting, not standard fare at local automotive shops and dealers are closed sunday. Lucky for me my best friend is a CNC/ Tool and dye maker, who has a key to his shop. Even luckier for me, we were able to turn up the correct tap from their rather large selection, I had him tap the caliper for me as he uses that shit all the time and I didn't want to risk finishing it off myself. The tap re threaded it like butter, bolt went in like new and is torqued to factor specifications at 125ft-lbs for those counting. I just drove 200km and everything feels great.
After doing the bed in procedure the brakes stop pretty decent but will get better with some more miles on them.
this happened to me over the weekend, except for both front brake calipers are going to need to be replaced because the threading was eaten by the bolts...i dont know anyone at any machine shops so i am forced to order 2 new brembo brake calipers from the dealer...very expensive...my car only has 46,000 miles on it and is still covered under a powertrain warranty. but because i decided to do the brake job myself they wont even listen to me to attempt to get this covered under warranty..this seems to be a common problem with these calipers...has anyone complained to Acura corporate or Brembo about this issue? it is a design flaw that can potentially be dangerous...and now i am spending another $600 on new calipers?? this is ridiculous
 04-01-2012, 03:19 PM
#63
1st Gear

Join Date: Nov 2011
Age: 64
Posts: 1
Likes: 0
Received 0 Likes
on
0 Posts
2 X 1.25 bolts
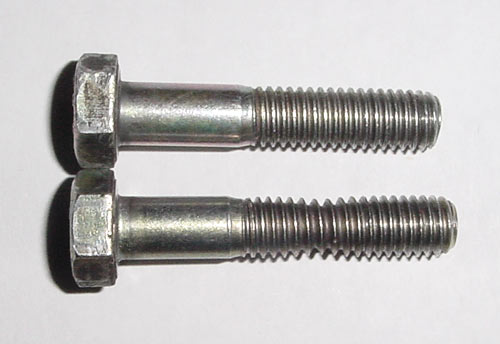
Did those two 2 X 1.25 bolts you used to push off the old rotors come with the new rotors? if not, Would you know the thread size so I can purchase two.
great write up. Thank you
great write up. Thank you
04-07-2012, 02:53 PM
#64
Occasionally I get a PM about this so I figured I would update the thread.
The Brembo Piston Compressor that I used for this I purchased at a company called Princess Auto, they are similar to Harbor Freight but located in Canada. Here's a direct link to the product page, I'm not sure if they ship to the US though.
http://www.princessauto.com/pal/prod...iston-Spreader
The Brembo Piston Compressor that I used for this I purchased at a company called Princess Auto, they are similar to Harbor Freight but located in Canada. Here's a direct link to the product page, I'm not sure if they ship to the US though.
http://www.princessauto.com/pal/prod...iston-Spreader
 06-03-2012, 07:47 PM
#67

Well thanks for the guidance and pictures! For me, it was 3 out of 4 bolts were cross treaded. Was able to clean up the threads on both. Bolts looked almost perfect. Was able to get them back in and down tight. I'm going to look for new calipers through just to be sure. Anybody have some ideas? I was able to get almost 86K miles out of the front brakes. If I can't find new ones reasonable, then I'll get rid of the car before the next time brakes are needed!
06-04-2012, 10:17 AM
#68


 10-17-2012, 07:19 PM
#71
Stripped Caliper Bolt
Hey Everyone, FYI I spoke with a well respected caliper re-builder in Scarborough. As a tip he recommended to not use an impact gun to remove/install the 19MM bolts. This should help prevent issues. I did the front pads/rotors on my 07 Type S this past weekend. Everything went well. Thanks again for the post!
03-20-2014, 09:02 AM
#72
Pro

I just want to say thank you for this write up. I ended up following it to change my pads and rotors on my 08 tl-S. Worked perfectly!
I too had to helicoil the front rotors
I too had to helicoil the front rotors
03-20-2014, 11:43 AM
#73
When I did my front pads & rotors (6MT), my caliper bolts came out fine (Las Vegas is extremely dry). For insurance, I did put some of that super sticky Brembo copper grease on the bolt threads when re-installing them. Just remember if you do put anti-sieze or Brembo grease on your caliper bolts, be sure to reduce your torque figure a bit to compensate for the now lubricated threads. This way you don't risk stretching the bolts.
06-11-2014, 09:23 PM
#74
1st Gear

Join Date: May 2014
Posts: 1
Likes: 0
Received 0 Likes
on
0 Posts
Anyone available please help!
I replaced my e-brakes on my 07 TL base, and now the rotors do not want to go in. It seems like the adjuster (spiky) wheel is too big. there is no way to adjust at it is all the way so my question is: Is there a different size adjuster?? I have no idea on how to finish this as this thing is making it impossible thank you all for your reply.
I replaced my e-brakes on my 07 TL base, and now the rotors do not want to go in. It seems like the adjuster (spiky) wheel is too big. there is no way to adjust at it is all the way so my question is: Is there a different size adjuster?? I have no idea on how to finish this as this thing is making it impossible thank you all for your reply.
04-21-2015, 11:13 AM
#76
Instructor
Used this as a guide for my brake job. I had replaced pads before but not rotors. I replaced all pads and front rotors. Spent all my time trying to loosen the rotor screws with impact screw driver, PB Blaster. Even tried MrHeelToe technique with hammer and chisel. Didn't budge. Eventually ended up drilling the screw heads off.
04-21-2015, 03:04 PM
#77
5th Gear

Join Date: Apr 2015
Posts: 5
Likes: 0
Received 0 Likes
on
0 Posts
Used this as a guide for my brake job. I had replaced pads before but not rotors. I replaced all pads and front rotors. Spent all my time trying to loosen the rotor screws with impact screw driver, PB Blaster. Even tried MrHeelToe technique with hammer and chisel. Didn't budge. Eventually ended up drilling the screw heads off.