
3M headlight restoration
 08-03-2012, 08:20 PM
#1
3M headlight restoration
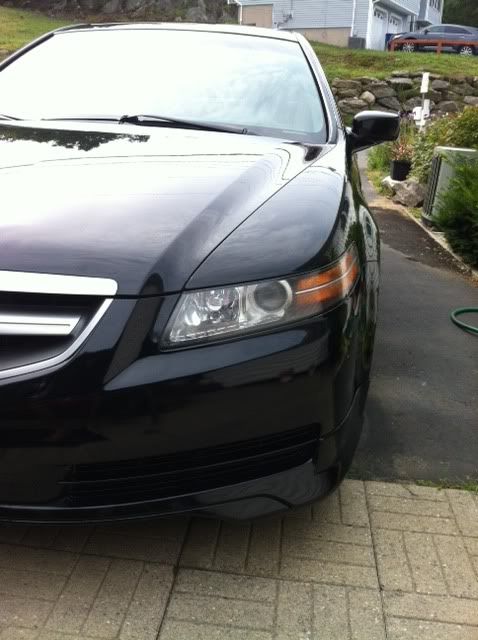
04 TL with 195k.
My headlights were getting pretty bad so i decided to try and restore them with 3M head light restoration kit.
I was so excited to get started I forgot to take a before shot, but i did take some after initial sanding.
Took about 2 hours.
All I can say is WOW!!! I can even see the low beam cut off again!

The following users liked this post:
KJ TL-S (09-22-2012)
 08-06-2012, 06:44 AM
#3
It definitely works, just take your time, mask off appropriately and use a product to protect the headlight from UV rays. I am currently using 303 until I can figure out a better solution.
08-06-2012, 12:08 PM
#4
Looks great! I used the same 3M Headlight Restoration Kit on my car and it came out great. I would definitely recommend this product.
Last edited by nighthawk203; 08-06-2012 at 12:13 PM.
08-06-2012, 03:31 PM
#5
I found the key is taking your time and going back and forth between the headlights rather than one at a time.
Its kind of scary at first but it is clear how well it works when your on the second to last stage.
Its kind of scary at first but it is clear how well it works when your on the second to last stage.
08-06-2012, 03:56 PM
#6
takin care of Business in
iTrader: (5)
Join Date: Jan 2008
Location: Kansas City, MO
Age: 40
Posts: 30,994
Received 4,732 Likes
on
4,064 Posts
very nice....I need to do this soon....
how much did you sand it down to??? more details
how much did you sand it down to??? more details
Trending Topics
08-07-2012, 11:10 AM
#8
takin care of Business in
iTrader: (5)
Join Date: Jan 2008
Location: Kansas City, MO
Age: 40
Posts: 30,994
Received 4,732 Likes
on
4,064 Posts
^^^ walmart does carry this as well 
The following users liked this post:
Sean S Thuok (08-07-2012)
The following users liked this post:
Sean S Thuok (08-07-2012)
08-07-2012, 11:30 AM
#10
Harbor Freight even has the 3m kit in stock (and on sale right now). As to how how much to sand down, there are very detailed instructions in the kit. You sand first using a 500 grit, then an 800 and so on, up to the included polishing compound with pad. It is not a difficult job to do. BUT, to get it right you need to take your time and really work on each step. I removed my headlights to make it easier to get right to the edge (due to the fenders/bumper cover).

 08-07-2012, 12:28 PM
#13
the overexplainer
amazon has the 3M kit pretty cheap esp if you have prime:
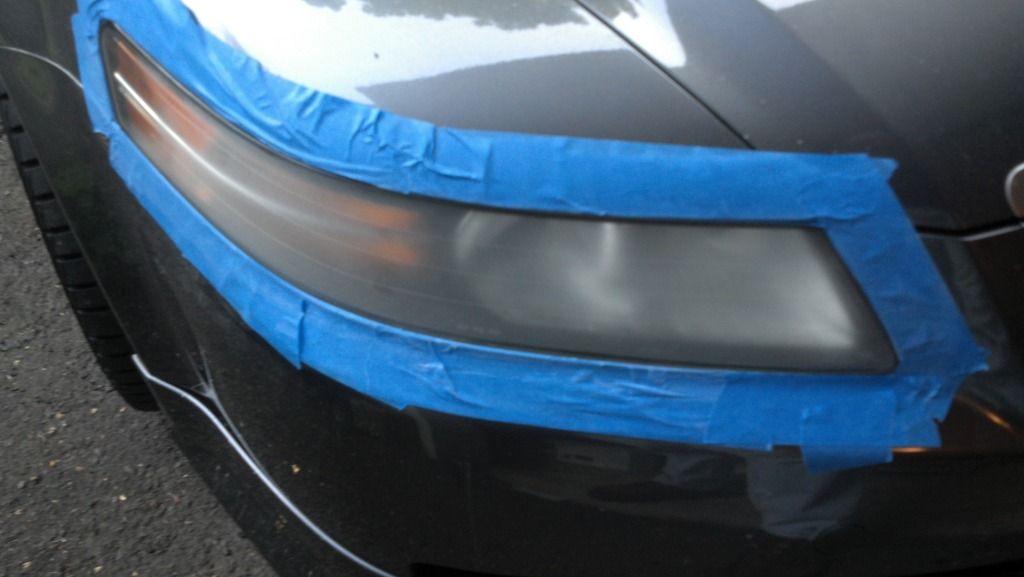
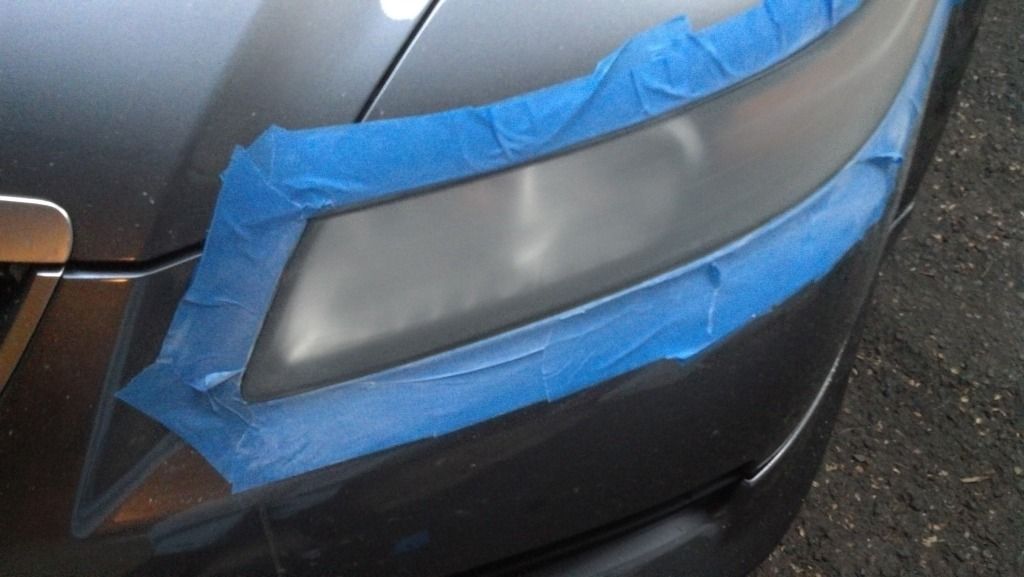
i've used the 50/50 Spar Urethane/Mineral spirits method and it seems to be holding up nicely to seal the plastic. Also used the 3M kit with good results. Just dont go crazy with the first phase with the low grit sandpaper.
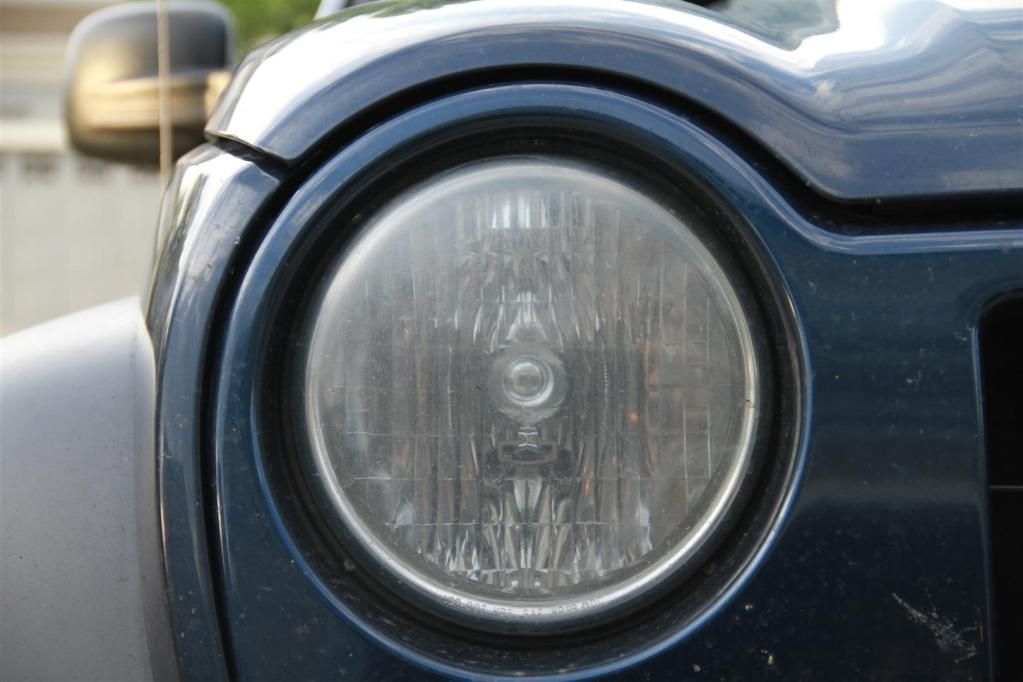
Before:

During:

After Sealant:

if using the spar urethane method, try your best not to get dust in it. It'll get stuck.
i've used the 50/50 Spar Urethane/Mineral spirits method and it seems to be holding up nicely to seal the plastic. Also used the 3M kit with good results. Just dont go crazy with the first phase with the low grit sandpaper.
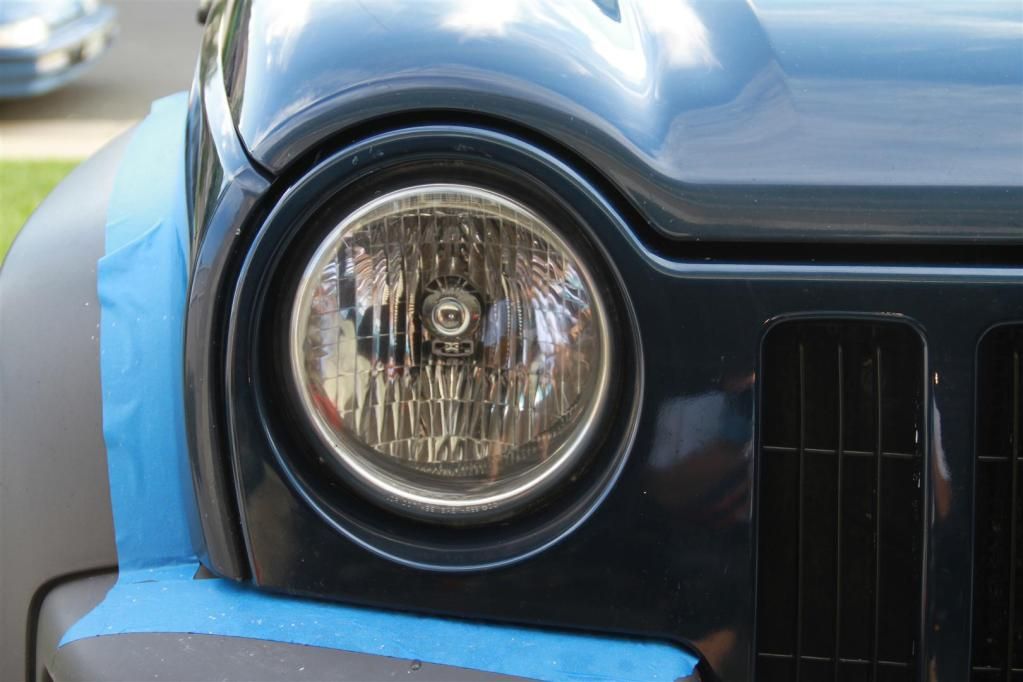
Before:
During:
After Sealant:
if using the spar urethane method, try your best not to get dust in it. It'll get stuck.
Last edited by ez12a; 08-07-2012 at 12:34 PM.
The following users liked this post:
Sean S Thuok (08-07-2012)
 Thanks! Walmart has so many different products on their shelf, ill chekc it out!
08-07-2012, 05:23 PM
Thanks! Walmart has so many different products on their shelf, ill chekc it out!
08-07-2012, 05:23 PM
#15
08-07-2012, 05:59 PM
#16
Yes!! I cannot stress how important the sealing portion is. Most of the products (i.e., turtle wax, 3M, etc) do the same job. They use abrasive sand paper to rub off the top layer on your headlight to expose the unoxidized layer. To me, there is no difference in how well they do their job (i.e., more expensive does not equal better product). It's all about the user and how much elbow grease you put into it. The important thing is using a good sealant right after you remove the existing layer or it'll simply oxidize again! The headlight sealants you buy is just a pre-mixed version of the urethane/mineral water so it's your choice on which direction to go. Just seal it well!!
08-07-2012, 07:17 PM
#17
Senior Moderator
The Sylvania kit is amazing! I've used it on 3 cars thus far with spectacular results and they have been holding up great! It's the only kit that comes with an ACTUAL clear-coat product to protect the headlight afterwards.
 08-07-2012, 10:19 PM
#19
Senior Moderator
To seal the headlights use a mixture 50/50 of mineral spirits and polyurathane. I used a folded paper towel to apply it. Just dab the papertowel into the mixture and start from the top and work you way down, moving back and forth. Don't pick up the papertowel until done. Allow a good 30 minutes to dry.
Last edited by LoveMyTL-S; 09-20-2012 at 08:10 PM. Reason: Spell correction
09-20-2012, 07:26 PM
#20
Drifting
iTrader: (9)
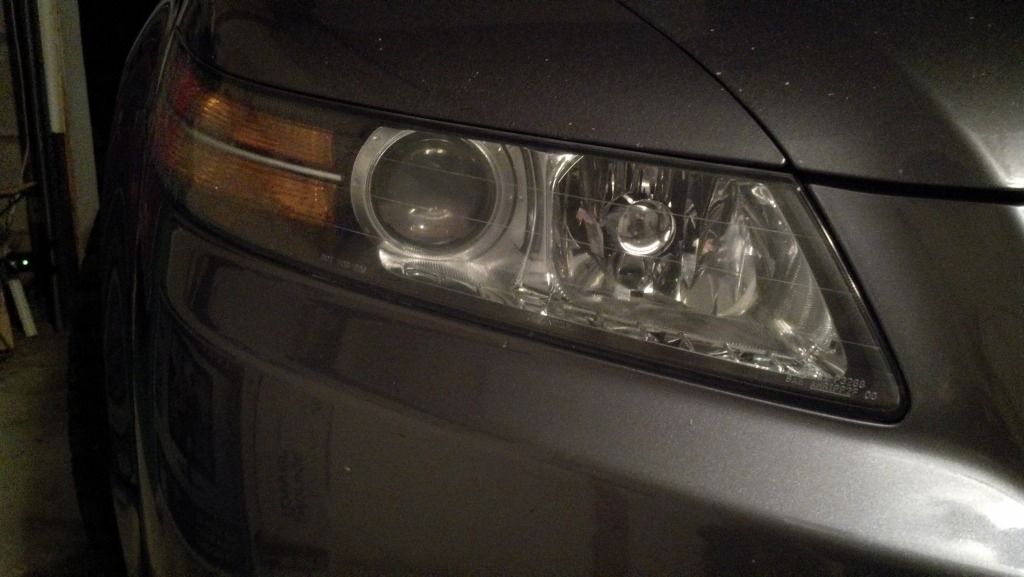
So I'm wondering if this is the right product for my problem. Only my driver side headlight has any issues, the other is perfect. But it isn't an overall hazy look, its a little different. A weird line across the bottom, and small scratches all over. Here is a pic:
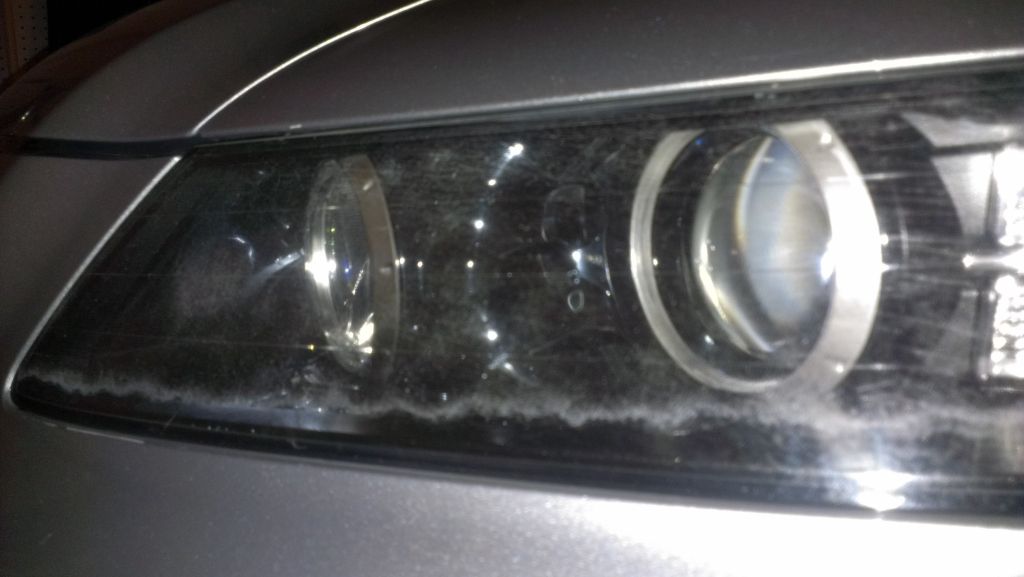
Anyone seen this before? Or know why it would only be one light? Would the 3M product take care of it?
Anyone seen this before? Or know why it would only be one light? Would the 3M product take care of it?
09-20-2012, 07:35 PM
#21
Race Director
iTrader: (3)
Join Date: Feb 2012
Location: South Florida
Age: 30
Posts: 18,278
Received 3,824 Likes
on
2,847 Posts
I had one light look like junk...turns out my other side took a hit in an accident before I bought the car. Brand new lens is like night and day difference to the 6 year old OEM one.
09-20-2012, 07:55 PM
#22
Drifting
iTrader: (9)
Hmm...weird thing is that it seems to be getting worse over time. Just more and more light scratches all over. No idea what could be causing it. But I'm thinking maybe I could use this product, and then after I seal it it won't come back.
09-20-2012, 08:02 PM
#23
the overexplainer
So I'm wondering if this is the right product for my problem. Only my driver side headlight has any issues, the other is perfect. But it isn't an overall hazy look, its a little different. A weird line across the bottom, and small scratches all over. Here is a pic:
Anyone seen this before? Or know why it would only be one light? Would the 3M product take care of it?
Anyone seen this before? Or know why it would only be one light? Would the 3M product take care of it?
but i really think it's the UV coat failing. 3M should fix it right up.
09-21-2012, 12:00 PM
#26
My first ricer
iTrader: (4)
I've thought about trying this, I have a little haze on the bottom of the lens, I think I might do it then get a clear or light smoke protective film, anybody use LaminX or a similar product on theirs?
09-21-2012, 11:27 PM
#29
Race Director
iTrader: (3)
Join Date: Feb 2012
Location: South Florida
Age: 30
Posts: 18,278
Received 3,824 Likes
on
2,847 Posts
How long does the clear coat actually last? I had mine done a few months ago and the shit's already yellow. Headlight (singular) looks like dookie. 
09-22-2012, 08:23 PM
#30
My headlights still look great, I would definitely suggest doing this if you have any unwanted blemishes.
I had a the weird line across the bottom, worked for that too.
I had a the weird line across the bottom, worked for that too.
09-24-2012, 09:10 PM
#32
www.colradodetail.com
I think most of the kits are overrated. To get crystal clear headlights here is what I do for my customers.
Depending on how bad the lights are pitted I start with a 300gritt wet sand. then move to 500, 800, 1000, 1500, 2500. By 1500 and 2500 you should start to see some of the haze go away. After the 2500gritt wet sand I use meguiars M105 compound followed by Menzerna final finsh polish. Then i top them off with a coat of Opti-Guard to reseal the plastic. But you can use any sealer of your choice.
Having the right tools it should take about an hour.
here are a set i did awhile ago.
09-24-2012, 09:12 PM
#33
www.colradodetail.com
 09-27-2012, 01:05 PM
#34
Racer
iTrader: (1)
I'll be doing this today, yesterday was removing some things from the car (overspray onto my grille from when the previous owner had the bumper painted) then I got some on the cleaning agent on the headlights and it started to destroy the lense...not good. it wasn't much but my headlights could use it anyways, I will post befores and afters and list what I thought was easiet and hardest, and recommendations for people doing this in the future.
09-27-2012, 06:47 PM
#36
I did the 50/50 last time I cleared my headlights, but they've finally begun to fail. Its no match for the brutal florida sun.
Ive done alot of research and found a 2k Aerosol Clearcoat from a company called spraymax. for those not familiar with automotive clears, they have 1ks, and 2ks. A 1k is just a single stage. 2k has 2 stages that requires the mixing of the urethane and the hardener. 2k's typically dont come in cans because once the two are mixed, the eventually harden. Spraymax made a button activated 2k aersol can clear coat, that once you activate, you have 24 hours to use. The clear coat is truely automotive grade in the sense that it is extremely hard and durable.
the trick was getting it locally. I found out that Finishmaster carries it, but typically only by special order. I had to call two different stores before either one could figure out what the heck I was talking about, but once they found it in there system, they shipped it to there store and I bought it for just about 20 bucks I think. online it goes for about 28 shipped. At any rate, I believe that this clear will end up being alot more durable then the 50/50.
Spraymax has a method listen on there website here:http://www.spraymax.de/index.php?id=620&L=1
There method includes a 1k, and 2k, and alot of sanding. I planned on doing 320 probably up to 800 and then shooting. If there were any surface impefections, I just planned on polishing them afterwards. I have yet to do this, but that is my plan as of now.
09-27-2012, 07:37 PM
#37
:what:
Aerosol clear will do that. So will most retail urethane topcoats. They dont have any or not enough UV resistance. I always use automotive grade (2 part mixture) clear coat. I did the lights on my celica 3 years ago and they still look brand new. I realize this is not an option for everybody, but its the only way to do it and NEVER have to think about it again.
09-27-2012, 09:35 PM
#39
:what:
I have a shop full of the shit....lol.
On any headlights I do, I use a High Performance High Solids Polyurethane Clear like PPG Del-Fleet or Dupont Imron. Those two are specifically used on commercial fleet vehicles(18 wheelers), boats, and airplanes. It is very flexible and resists chipping. The stuff is very expensive though. $200 a gallon minimum. I just keep what is leftover from "bigger" jobs and use it for "little" projects like this. Any good automotive grade clear will work though. You are looking at a minimum of $45-$50 for a quart setup (clear and hardener). Then of course you need a paint gun or a refillable aerosol can. http://www.eastwood.com/ew-billet-re...FQTnnAodXGsA7A
All of this will be available at a local paint jobber (body shop supply). Or you find someone like me to do it on the side on the cheap.
I sand with progressive grits starting with 400 and work up to 1200. DO NOT POLISH. I then spray a good coat of adhesion promoter, then a few good coats of clear.
Last edited by Wacker; 09-27-2012 at 09:37 PM.