When you click on links to various merchants on this site and make a purchase, this can result in this site earning a commission. Affiliate programs and affiliations include, but are not limited to, the eBay Partner Network.
Great job but why would you lie about the bolts???
Haha because I didnt know how conservative the dealership was about mods and warranty issues so I didnt want to risk it by saying I was trying to install something in it.
Great job on the OCC install but you have the hose installed in the wrong ports. You have to connect the Out from the OCC to the manifold and the In from the OCC to the top PCV valve port. Just switch the hoses from the OCC and you are good. Use this below video for reference.
I finally got everything put together using duna's recommendation after multiple trips to home Depot to get the right parts and drill bits it's finally on. Hopefully I installed it correctly.
So a few pointers for some other people installing this.
1) Try not to drop the two bolts which secure that fuel line, I did and it disappeared near the control arms. I spent an hour cutting my arm up inside the engine bay to find nothing. I went to dealership and said it was never there and got it replaced for free.
2) When removing and replacing the engine cover make sure the rubber mounting inserts are still connected to the cover. After a few removals and replacements one of the rubber pieces pulled a disappearing act on me too.
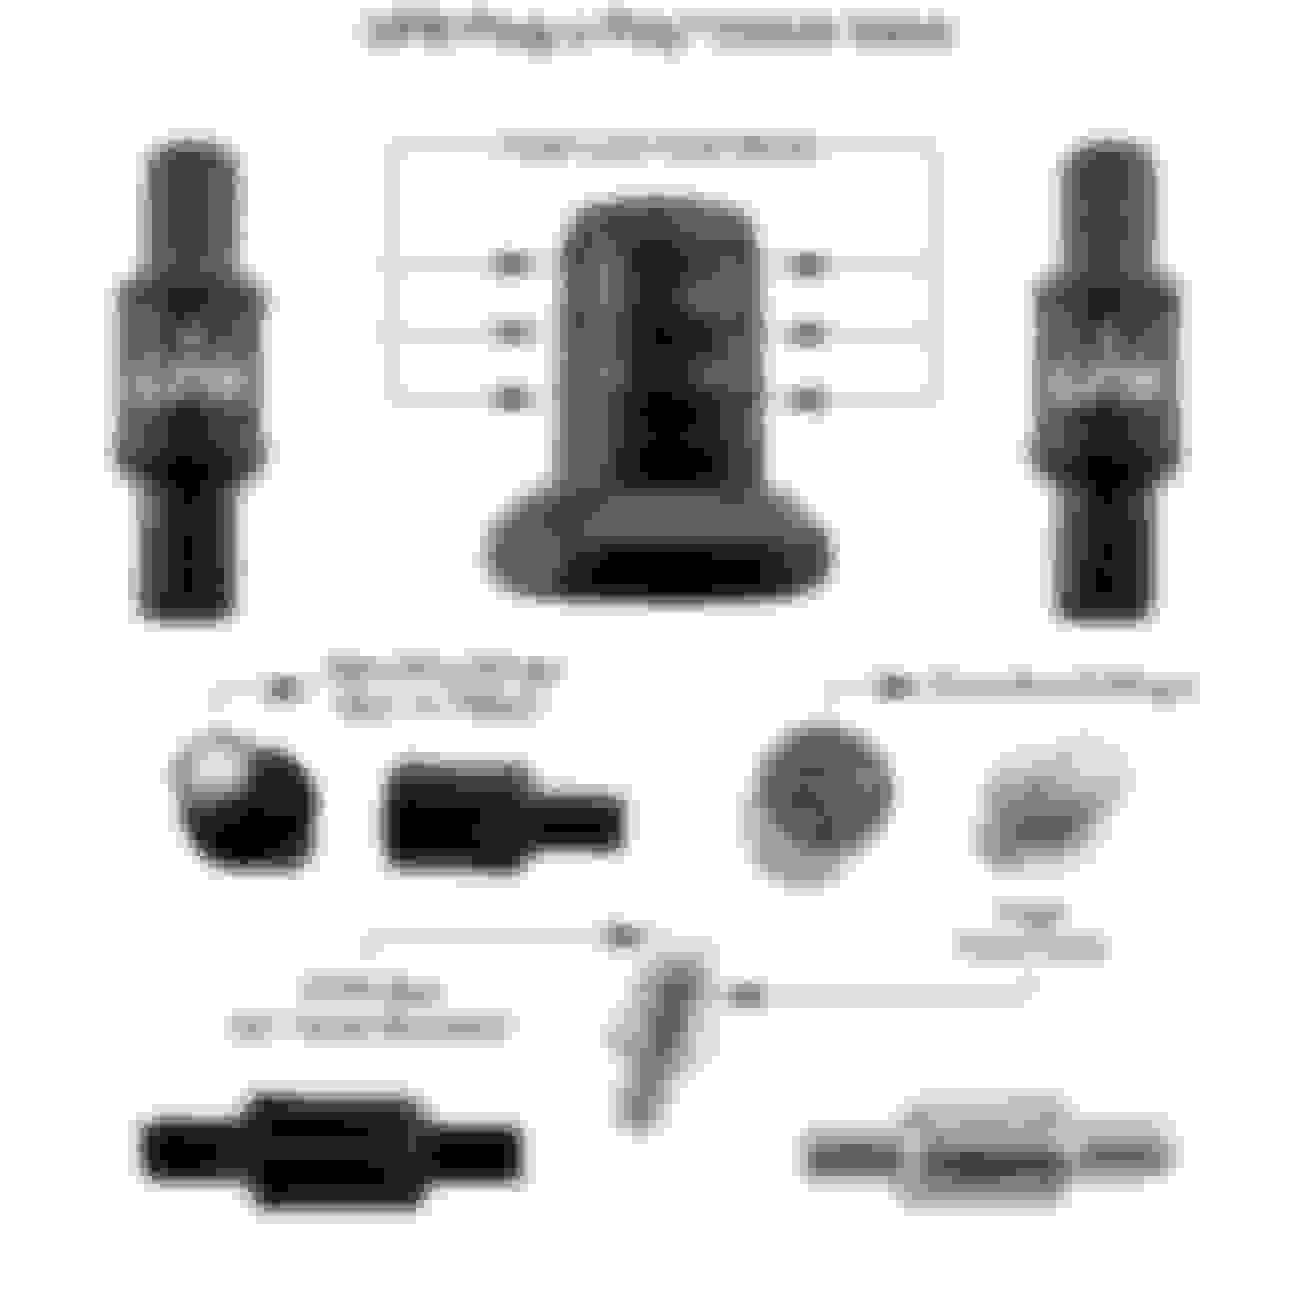
3) Remove the bottom side of the original hose (marked yellow, this picture is of the after shot so the original hose is the one marked with red) and connect that to the outlet of your OCC (assuming I connected it properly) because the top portion of the hose will be insanely hard to snake a needle nose plier into (marked red) to remove.
Great job on the OCC install but you have the hose installed in the wrong ports. You have to connect the Out from the OCC to the manifold and the In from the OCC to the top PCV valve port. Just switch the hoses from the OCC and you are good. Use this below video for reference.
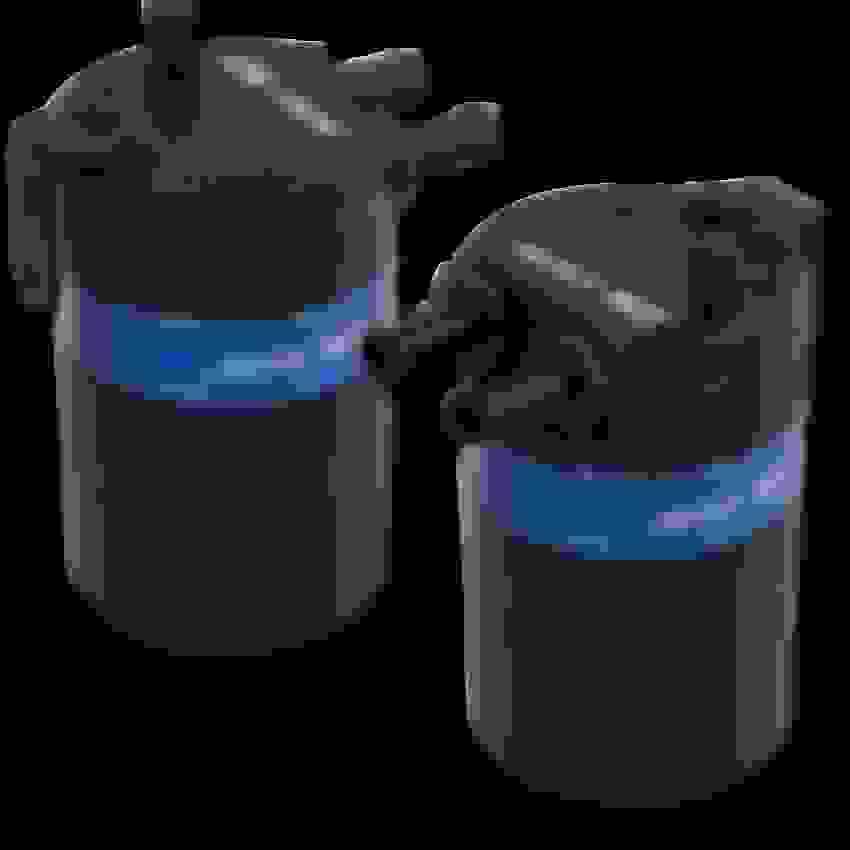
I installed the Mishimoto OCC today. This kit is for 2018+ Honda Accord 1.5T. It does not fit the 2019 RDX and requires major modifications. I had to purchase an L bracket, straighten it to 170 degrees, drilled two holes to match up with the factory fuel line bracket and purchase locknuts to mount OCC. The kit included two spring clamps too small to fit over the hose. Also missing was the 3/8 hose barbed as well as two long screws. I had to get the clamps and locknuts from Homedepot. I had to cut the engine cover to fit the OCC. Nevertheless it is done. Be warned not to purchase this $200 kit.
I could have purchase the kit on this post for $27 on Amazon but decided to go with Mishimoto. In included a check valve to prevent leaks reaching the CC and crankcase.
Note: I zip tied the hoses down and the OCC hole where I can�t access to get a locknut in. Picture taken before I finished. Everything is tightly secure now. I will followup after 1k miles to see if it catches anything.
This one has the universal mount that could have made the installation much easier. The hoses and anti drain is an additional cost. My kit has everything.
I check my oil every 2,000 miles and the oil level is always at the full line on the dip stick. I just don't understand why owners want to modify the factory system and risk unintentionally future damage caused by the modification, and then they'll blame Acura. About 75% of my trips are short duration and I live in a cold state and have no gas in my oil. Honestly I don't believe that this is an issue for the majority of owners. Just my opinion based on what I see with my RDX.
I check my oil every 2,000 miles and the oil level is always at the full line on the dip stick. I just don't understand why owners want to modify the factory system and risk unintentionally future damage caused by the modification, and then they'll blame Acura. About 75% of my trips are short duration and I live in a cold state and have no gas in my oil. Honestly I don't believe that this is an issue for the majority of owners. Just my opinion based on what I see with my RDX.
@mrblase ...first off your comment is misguided and it appears that you do not fully understand what an OCC is for...it has nothing to do with the gas/oil dilution issue. Installing an OCC is actually a very good thing on any engine and will not void any warranties. However, it serves its best purpose on a DIRECT INJECTED engine where the oil coming out from the PCV into the intake manifold can create further fowling of the valves based on no gas over-wash as is found in a non-DI engine. The can does one thing and one thing only...it captures what is coming out of the PCV rather than allowing it to get reinserted into the intake. There is ZERO risk as long as you are diligent about emptying your can every 1000-1500 miles. I have one on all of my new Subaru's and my new 2019 RAM 1500 Limited. The Subaru's are all DI and the RAM is a 5.7L HEMI that is not DI. They are a relatively cheap and highly effective way to capture impurities from being recirculated into your engine.
I live in FL and have not since my purchase found any oil dilution issues and zero smell of gas. They have stated that this happens in colder climates versus the warmer areas of the US so I am not surprised that my RDX has been rock solid (minus a few infotainment issues that we all seem to experience) with no signs of dilution. My wife also drives more than 20 miles each way to work so the engine does get up to operating temps as well which they say is another issue as to why some have oil dilution.
I am replying because your post caught my eye when you stated "risk unintentionally future damage caused by the modification". An OCC can not create damage by this mod and it can quickly be removed should you find it necessary to do so for whatever reason. It is simply just a can allowing oil, gas and condensation to drop into it versus recirculating through the intake...period.
Last edited by securityguy; 07-11-2019 at 08:24 AM.
ToniRDX, I wonder why you did not purchase the kit for Accord 2.0T https://www.mishimoto.com/honda-acco...-can-2018.html
I email them and got the dimensions of the bracket and for sure that it is not a drop-in installation and requires modifying the bracket that comes with the kit.
But, I am assuming that at least the hoses would fit, except that a longer hose maybe needed for the "out" side.
I am planning on getting the 2.0T kit in a month or so.
Because the seller had the description as a 2.0T kit. Besides the bracket not drop-in i.e long enough, the 90 degrees rings mount protruding out will cause the CC obstructing the engine cover. The out hose is not long enough. I got a 3/8� barbed hose fitting and connect factory PCV hose to Mishimoto hose.
The 2.0T kit sold on Mishimoto site was backorder also. That�s why I bought from Amazon.
BTW, I just looked at the 2.0T mounting bracket. It is mounted on the left. The bracket is much longer for the 2.0T. The issue I see here is the fuse box. Check the clearance or you will have more issues than I did.
...BTW, I just looked at the 2.0T mounting bracket. It is mounted on the left. The bracket is much longer for the 2.0T. The issue I see here is the fuse box. Check the clearance or you will have more issues than I did.
Thanks Toni. Mishimoto told me the length if the bracket is about 8.9" and the mounting tab for the can is about 2.5" in diameter. I would flip the bracket so that the mounting tab is on the left side just like yours. I would most likely need to drill new hole(s) on the bracket and maybe on the tab to make sure I have clearance to mount the can.
Since my last post, I upgraded the OCC to Add W1 V3 and installed a check valve from UPR billet check valve. This one has a dipstick on it and I don't need to unscrew the bottom to check.
I am happy to report that the blow-back contaminants are minimal in our cars. I live in NYC and have about 2100 on the odometer. Through the 3 months, I have collected half of a shot glass of blowback. When the weather cools off, I'll post up some new pictures of my setup if anyone is interested.
Thank you for the heads up. Yeah, i did read somewhere when people forget to empty out their OCC in colder weathers, the liquid did freeze. I will definitely not allow that to happen.
Those of us who installed an OCC system can report back. When I have time, I'll open the can and see what it collected after 1500 miles.
Originally Posted by securityguy
@Duna in the winter you will get far more. Mostly water/condensation in the can mixed with little gas and oil.
Since my last post, I upgraded the OCC to Add W1 V3 and installed a check valve from UPR billet check valve. This one has a dipstick on it and I don't need to unscrew the bottom to check.
UPR Product Add W1
@Duna My Mishimoto OCC has a hose with a valve in it. Since the air flow is one way I don�t know certain the airflow direction so I did not install it. The factory PCV hose did not have a check valve either.
My OCC in hose is going to the top cover PCV valve. The out port on OCC is going to the exhaust manifold in the bottom. Should the air valve arrow going downward? I think the valve is there to keep the system pressurized and blowback. Any pictures or suggestions?
Right, you should install the check valve between the out port of the OCC to manifold. The airflow always should be towards the manifold.
Although the pcv valve is a check valve, the additional installed check valve will prevent blowback to our OCC system.
I hope that helps.
Originally Posted by ToniRDX19
@Duna My Mishimoto OCC has a hose with a valve in it. Since the air flow is one way I don�t know certain the airflow direction so I did not install it. The factory PCV hose did not have a check valve either.
My OCC in hose is going to the top cover PCV valve. The out port on OCC is going to the exhaust manifold in the bottom. Should the air valve arrow going downward? I think the valve is there to keep the system pressurized and blowback. Any pictures or suggestions?
The check valve should be on the output side of the can to prevent oil and other "material" from working its way back into the can from the intake. You do not need a check valve on the input side of the can as that would serve no purpose at all.
I am still waiting for Mishimoto's email reply, but I did call them last Friday and was told that for the 2.0T, because the check engine light would go off when the check valve hose is on the OUT port, so they put it at the IN port. I will wait for the email reply or call them again to confirm.
I am still waiting for Mishimoto's email reply, but I did call them last Friday and was told that for the 2.0T, because the check engine light would go off when the check valve hose is on the OUT port, so they put it at the IN port. I will wait for the email reply or call them again to confirm.
Interesting...makes zero sense to me but, if that is truly the case, then I would not use the check valve at all as its purpose is nullified. I have never had to use a check valve on any OCC I have ever installed on any car I've owned.
Below is their email reply that I've just received. If the purpose of the check valve is to keep the boost pressure in the intake manifold from entering the crankcase, the PCV should be enough, so no need to install the check valve. My kit is coming tomorrow and I'd just follow Mishimoto's instruction and put the check valve hose on the IN port.
_____________________ Thank you for reaching out to us here at Mishimoto.
While our production team was designing the catch cans they identified what the best location for the check valve was for each car. In this case, they decided the check valve would be located in different locations.
My RDX is at about 5,000 miles and the PCV hose/port is clean with no oil residue.
I would say that unless you are driving hard on regular basis, you probably don't need to install the oil catch can.
Installed the Mishimoto Accord 2.0T oil catch can kit. I ended up drilling one hole on the bracket and use a nut behind that hole to tighten that screw.
I bent and twisted the bracket a little as you can see in the pictures.
Also, used the 3/8" barb fitting from the Harbor Freight kit to connect the OUT hose with the stock hose.
The IN hose is too long, so I may find another hose with the correct bends to replace it.
Busted only one knuckle, so not too bad of a job Thanks for all your inputs!
Nice job. I did similar modifications to the bracket due to the tight spaces. I put on almost 800+ miles on our last vacation trip. I will check the OCC today. Like you said I think our RDX is fine without the OCC. Due to the summer heat and the engine heat up quicker I wonder if the residuals burn up or evaporated. I will find out when the weather gets colder. I do make a lot of short trips and local driving.
With about 800 miles since I install the OCC. Open up the CC today and saw this. It did catch some oil but not a lot. Any condensation is burn off due to the hot weather.
I�m curious to hear/see why you guys are finding in the cans over the next few months as it starts getting colder. Please keep us updated.
thanks.
You should start seeing far more fluid (more water than anything) in the can due to condensation during the cold months so I suggest everyone check it at least every 1K miles to be safe
So winter is coming and we have started hitting mid 30s here around NY. Its been about 600 or so miles since I last checked the can. Now what I found today surprised me, it looks like light brown particulate matter in the can. After I drained it the dirt like particles were even more apparent. Almost like sludge. I'm wondering if this is possibly fuel? Engine debris?
I went with "Elite Engineering" E2-X 2 outlet can for my Dynamic. A bit pricey but the hook up is pretty straightforward. My biggest headache was the placement where I wanted it, (discreet down in he area of the fans). The can inlet off the PCV valve t on the engine block, then that hose, which goes to the plastic IM (that was disconnected) now connects to one can outlet with a check valve, the other can outlet with a check valve, goes in just before the throttle body of the intake tube (drill the large rubber hose and insert a barb. Not driven it since the install and it is winter here now. Car is parked for winter here so far so will know how well or not next spring.
So winter is coming and we have started hitting mid 30s here around NY. Its been about 600 or so miles since I last checked the can. Now what I found today surprised me, it looks like light brown particulate matter in the can. After I drained it the dirt like particles were even more apparent. Almost like sludge. I'm wondering if this is possibly fuel? Engine debris?
Imagine all of that condensate watery oily mix going back into your intake manifold and being burnt in the engine, also coating the valves. An OCC does make sense.
So winter is coming and we have started hitting mid 30s here around NY. Its been about 600 or so miles since I last checked the can. Now what I found today surprised me, it looks like light brown particulate matter in the can. After I drained it the dirt like particles were even more apparent. Almost like sludge. I'm wondering if this is possibly fuel? Engine debris?
What you see is condensation, mixture of oil, and exhaust from the engine. I have a 5 minute commute to work so my engine barely warm up. Attached is my OCC after 2 months. In the summer all I see is oil. The hot weather and engine heat burn up the condensation.
A 4 month update. Similar to AZ4035, I collected some fluids. I have about 3600 miles on the RDX. As Securityguy mentioned, it will collect more in winter.
To revisit this topic, I was wonder if those who installed catch cans now have significant mileage and experience and can tell us what they are catching in the cans?
Winter vs. Summer?
 05-16-2019, 03:34 PM


 Thanks for all your inputs!