DIY: Advance Running Board Install- 3G MDX
 03-30-2016, 12:27 PM
#1
Intermediate
Thread Starter

DIY: Advance Running Board Install- 3G MDX
(Mods- if this does not go here please move it!)
I installed running boards (08L33-TZ5-200) on my wife's 2016 MDX last night.
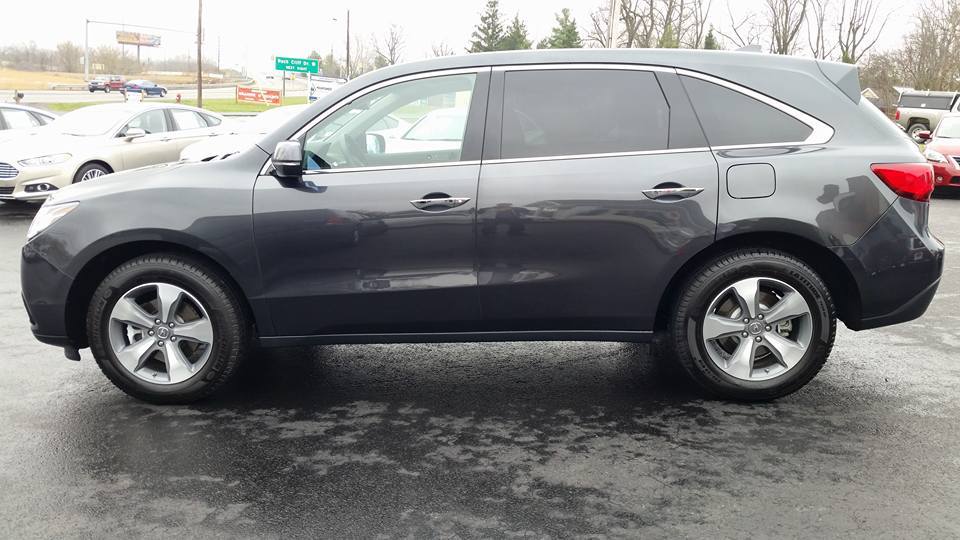
We went with the Advance models and were happy to find them for a good price on Amazon. With the distance to an Acura dealership it made sense to buy them and have them shipped.
While everyone has access to the online directions ( http://www.acurapartssuperstore.com/...ing-boards.pdf ), some people do better with actual pictures versus a line drawing and the work of a technical writer.
That said, I personally followed the online directions, which were simple and straightforward.
As with most car things, the first one took 2x the length of time for the second. I had about 35-45 minutes in the entire install. I have a lift at my house and could have used that to gain more ground clearance to access the bolt holes but it was not difficult with the car on the ground.
The directions state to clean the rockers before you start. I used some Quick Detailer but later found this step to be unnecessary, as the running boards don't actually touch the rockers.

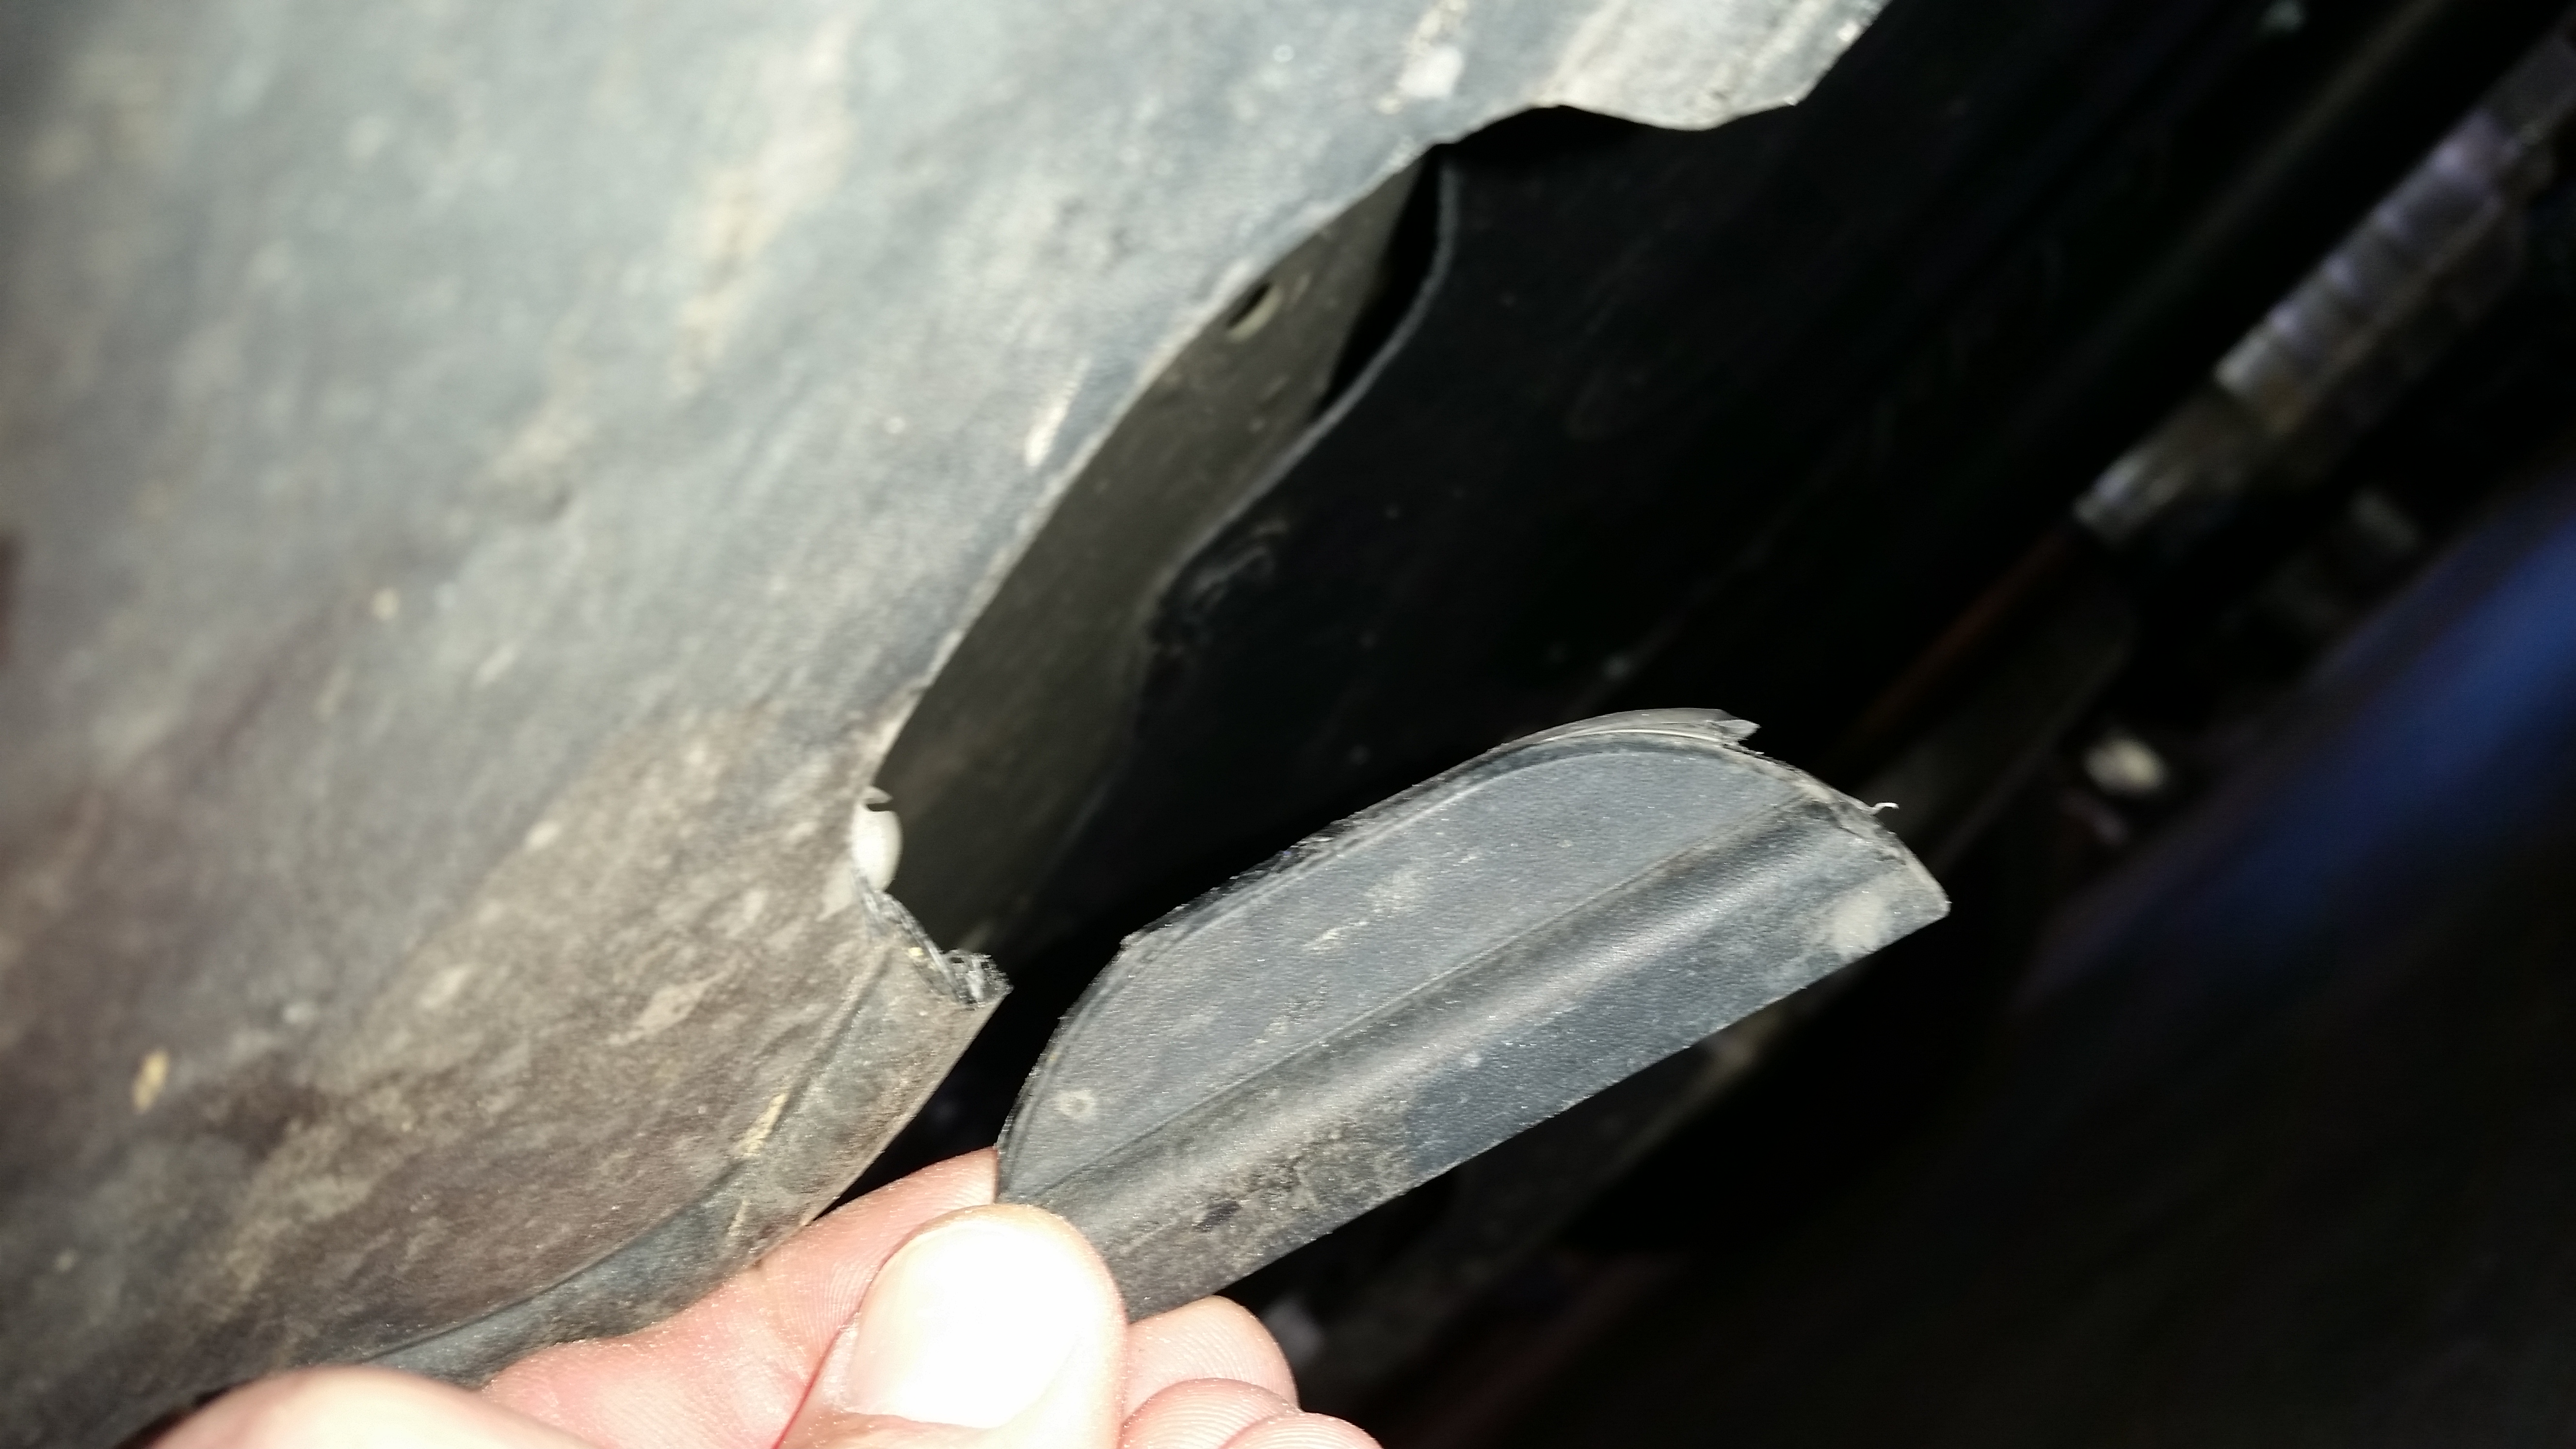
I laid out a moving blanket to help keep track of my tools/parts and to prevent scratching the running boards during the install. The next- and most nerve wracking- step is to use a utility knife to cut out the knockouts from the lower body. Once you get on the ground and look up at them they are really obvious.
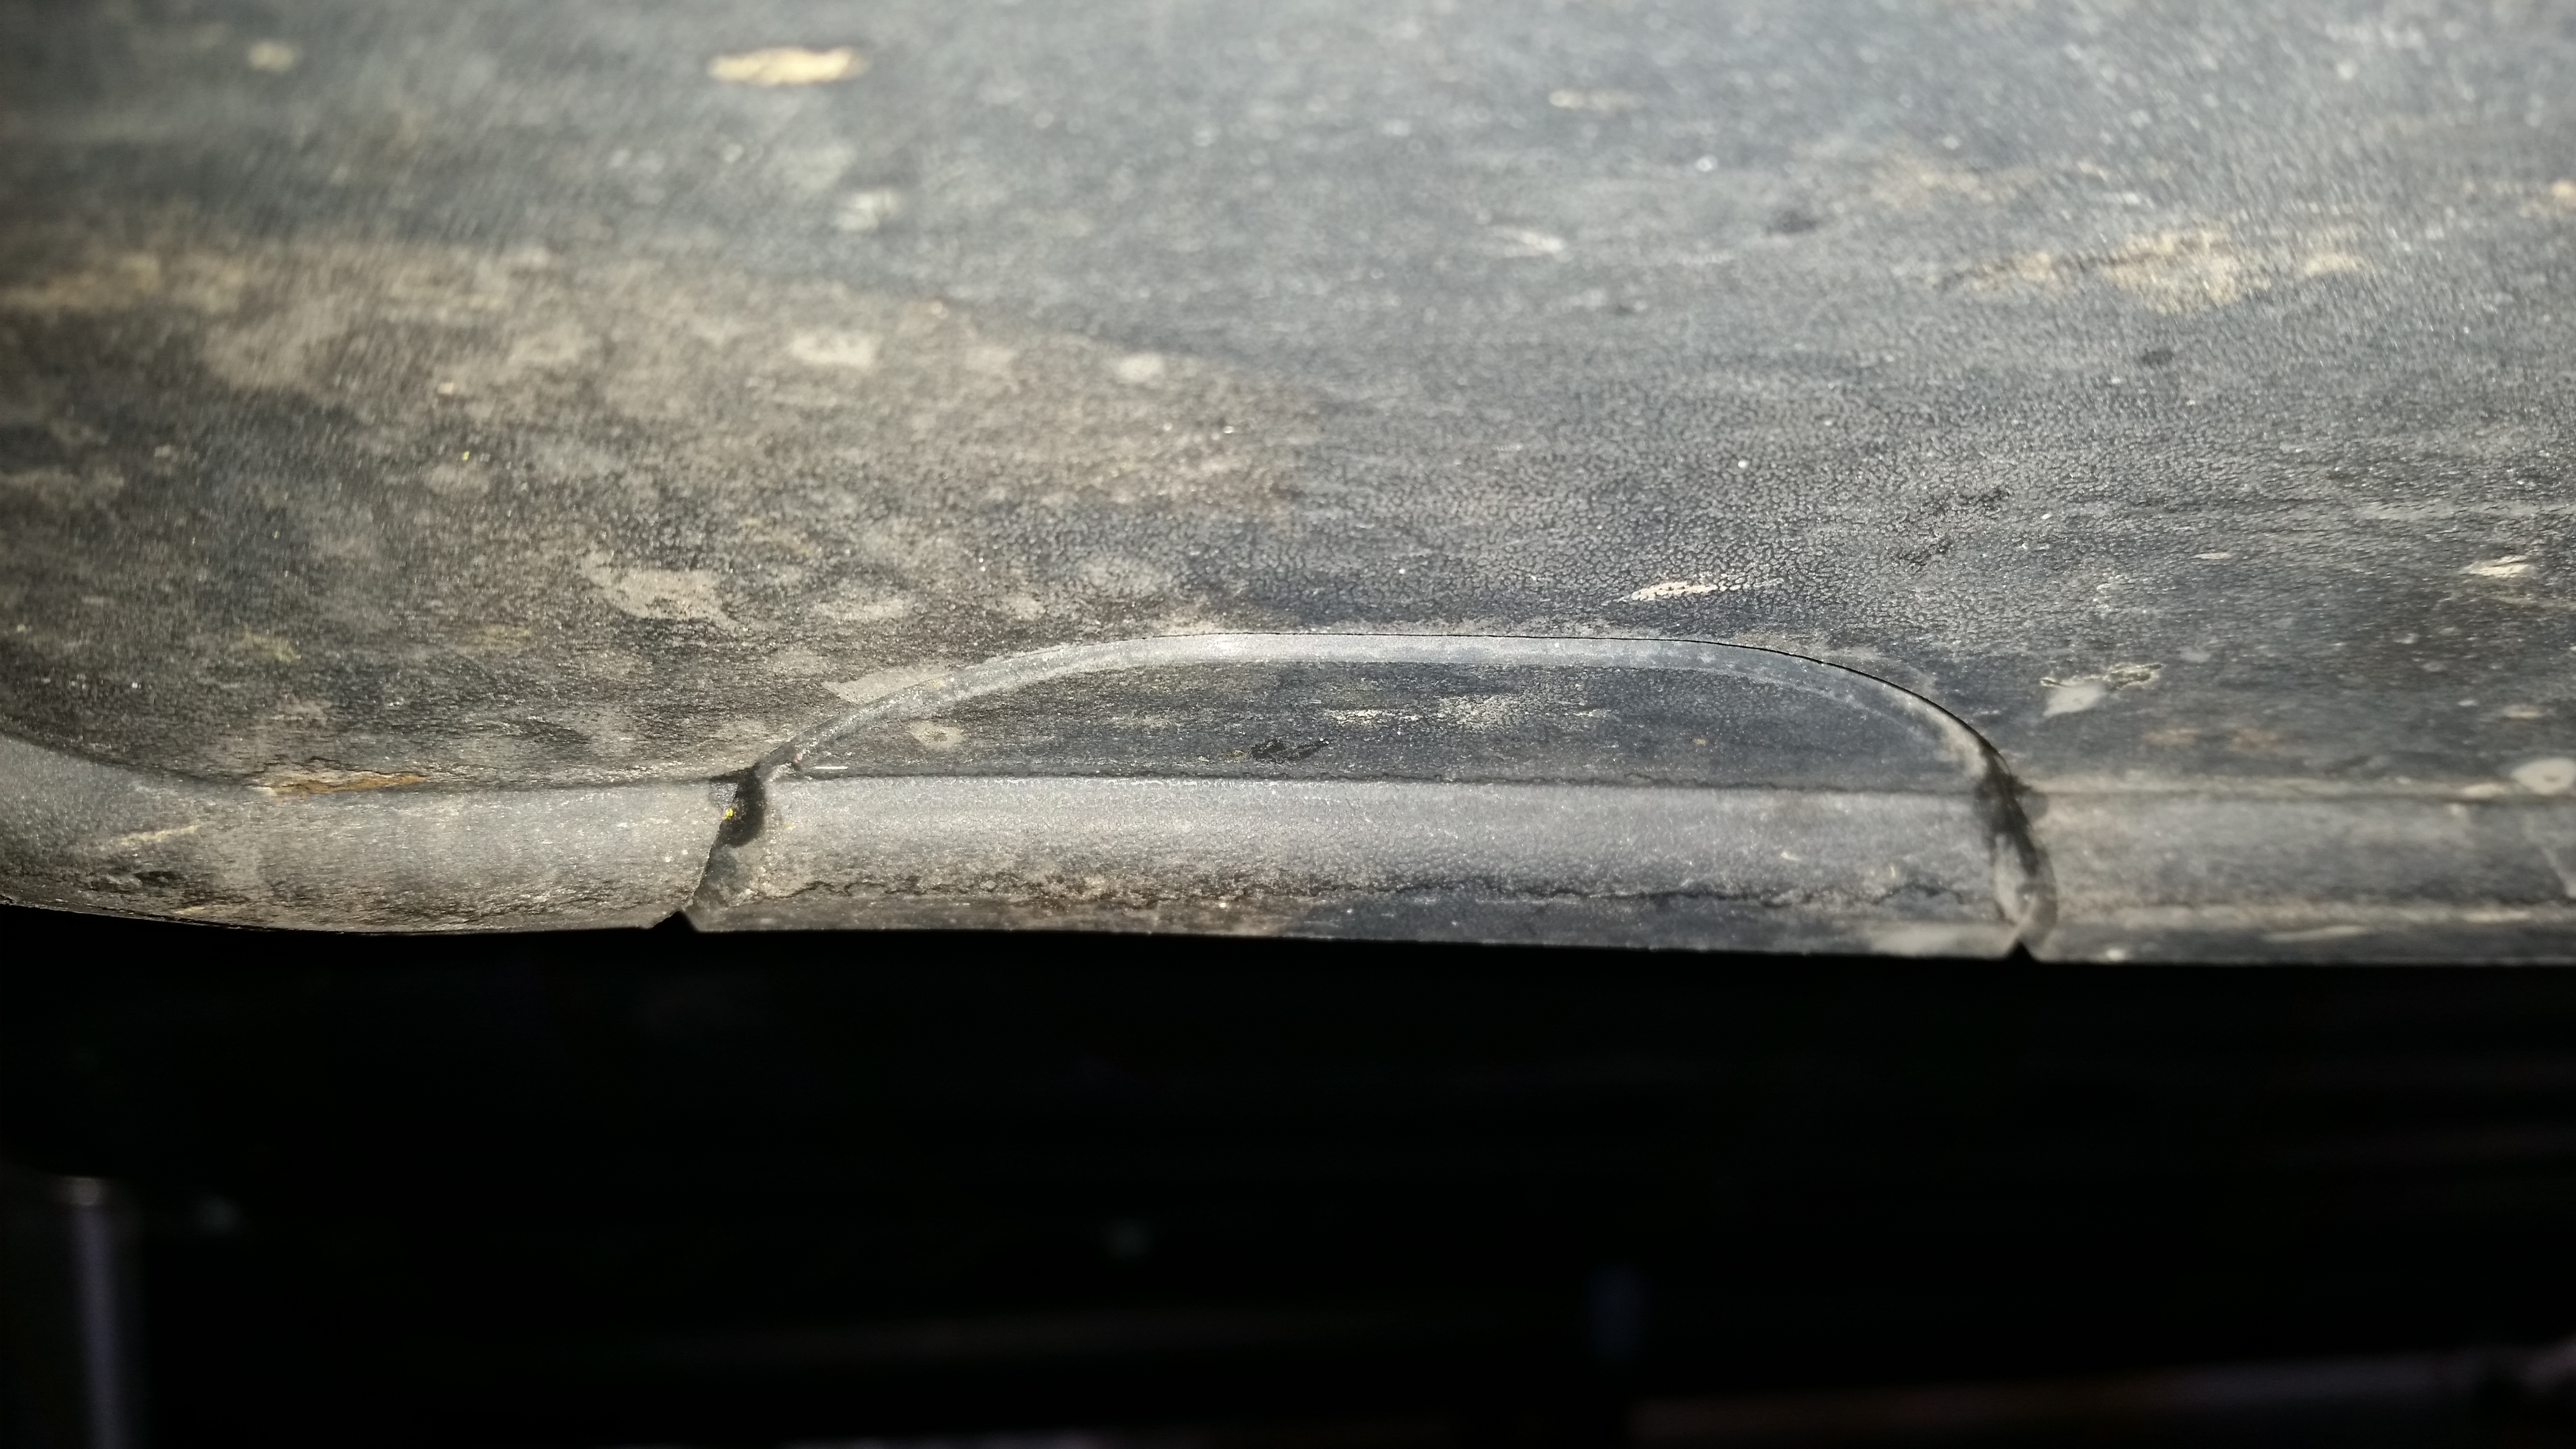
There are three per side. I used a sharp knife and cut from the center to the outside. Don't worry- they cuts don't have to be perfect.
Next, lay out the running board beside the vehicle. I did not notice the "L" and "R" on the packaging and got lucky to grab the correct one but the easy indicator of which side it goes on is that the rear of the vehicle has 2 of the 3 attachment points closer together. The "MDX" logo also goes to the rear.
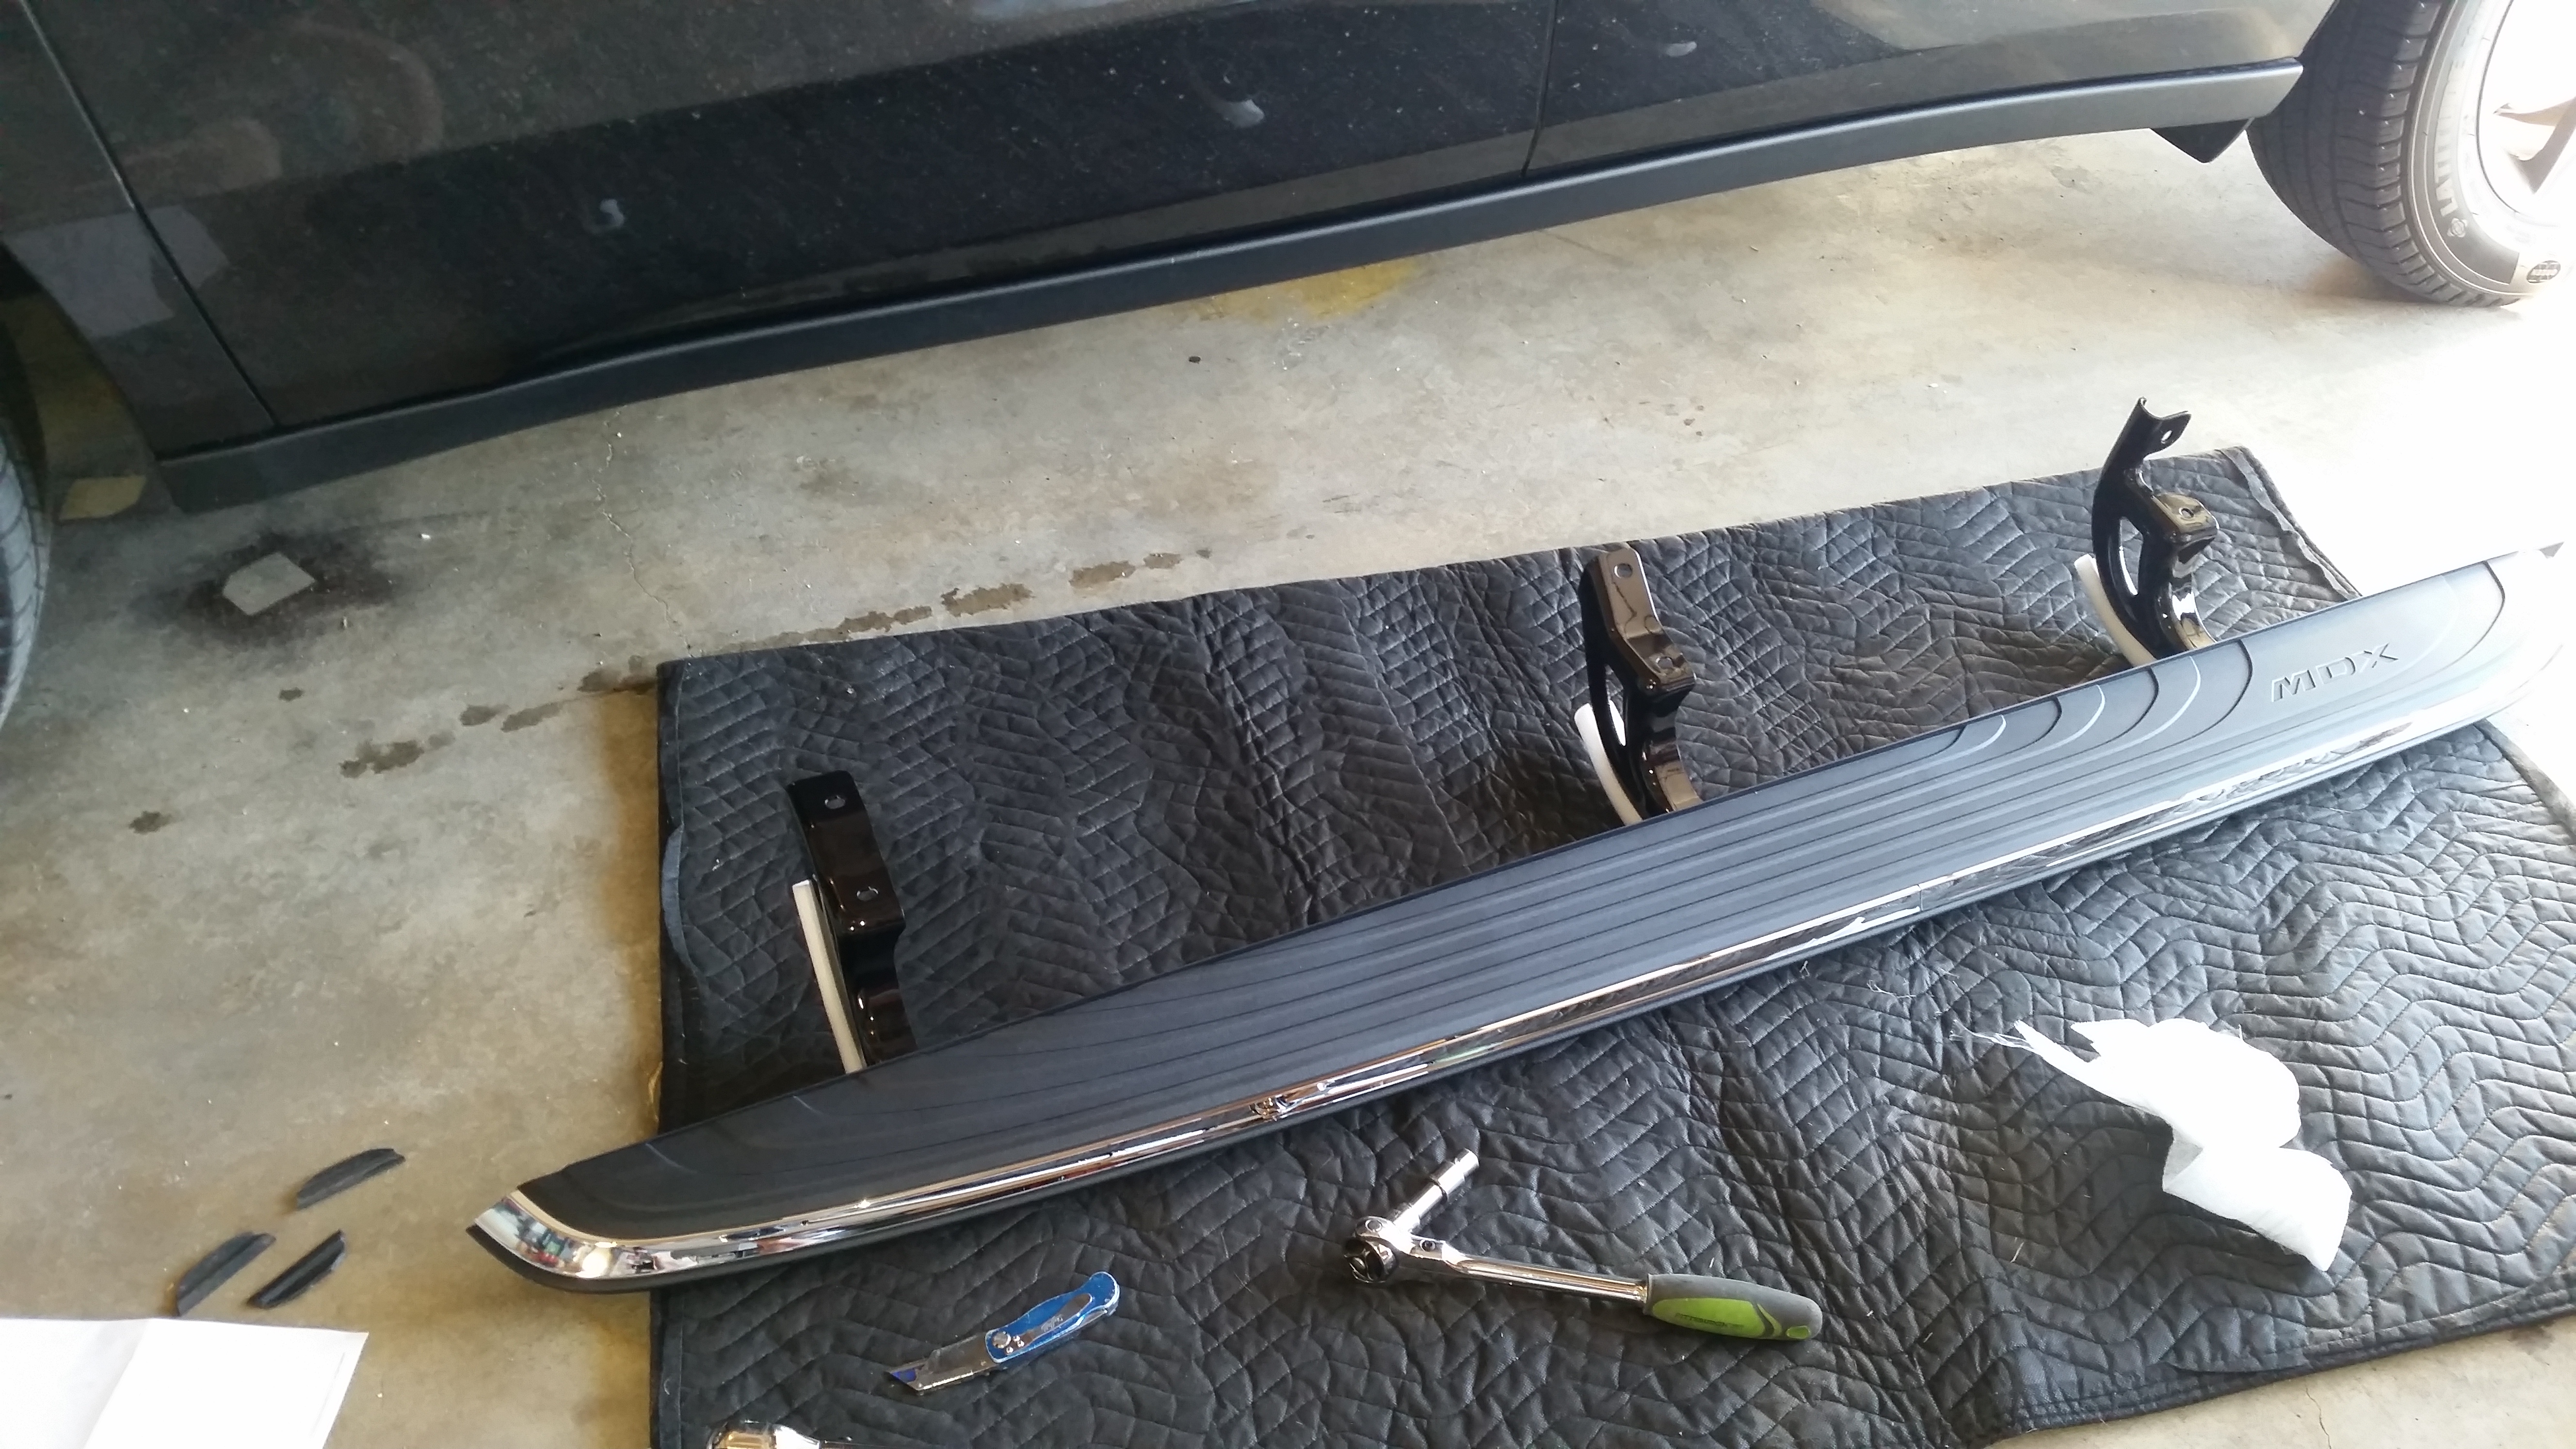
I laid out a 1/2" socket wrench with a pair of extensions- one short and one medium- with a 12mm socket. I also had a torque wrench set to 20 ft/lb.
Lifting the running board in place was pretty easy. They are not very heavy and I held it in place with one hand while I started one bolt in the middle then one in the front. With two bolts in place you can let go of the piecs and start working on the other four bolts.
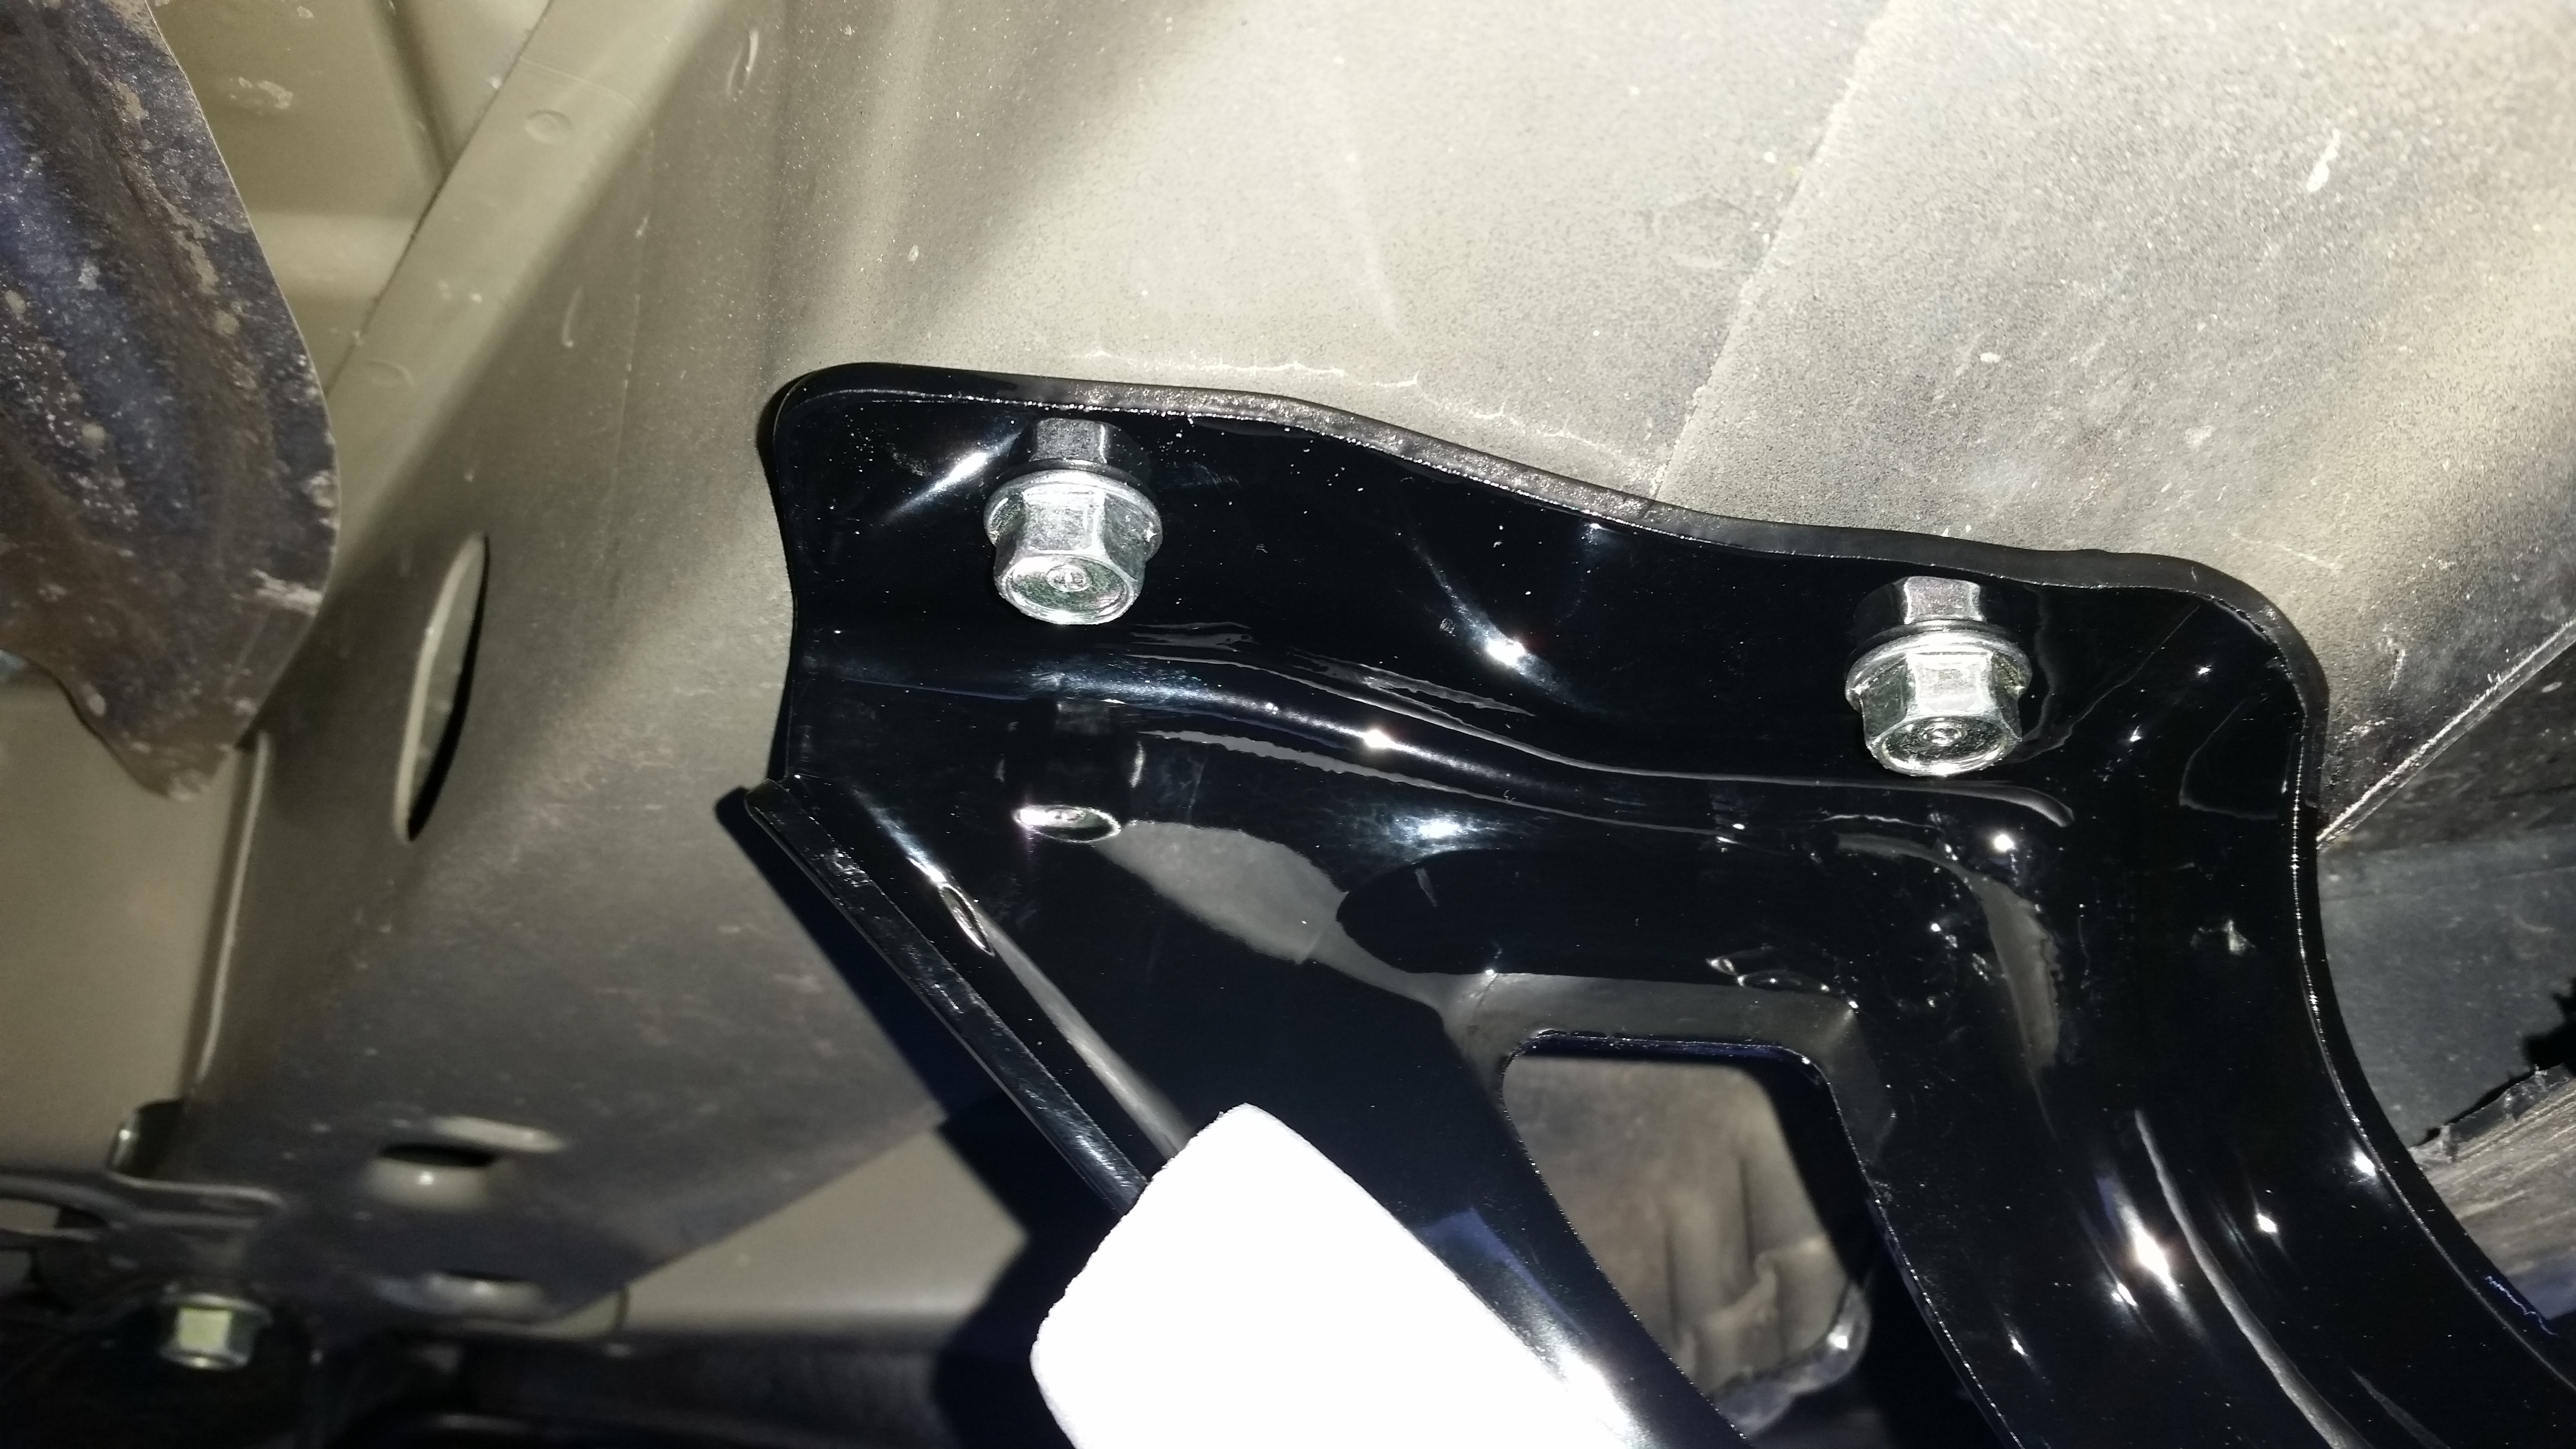
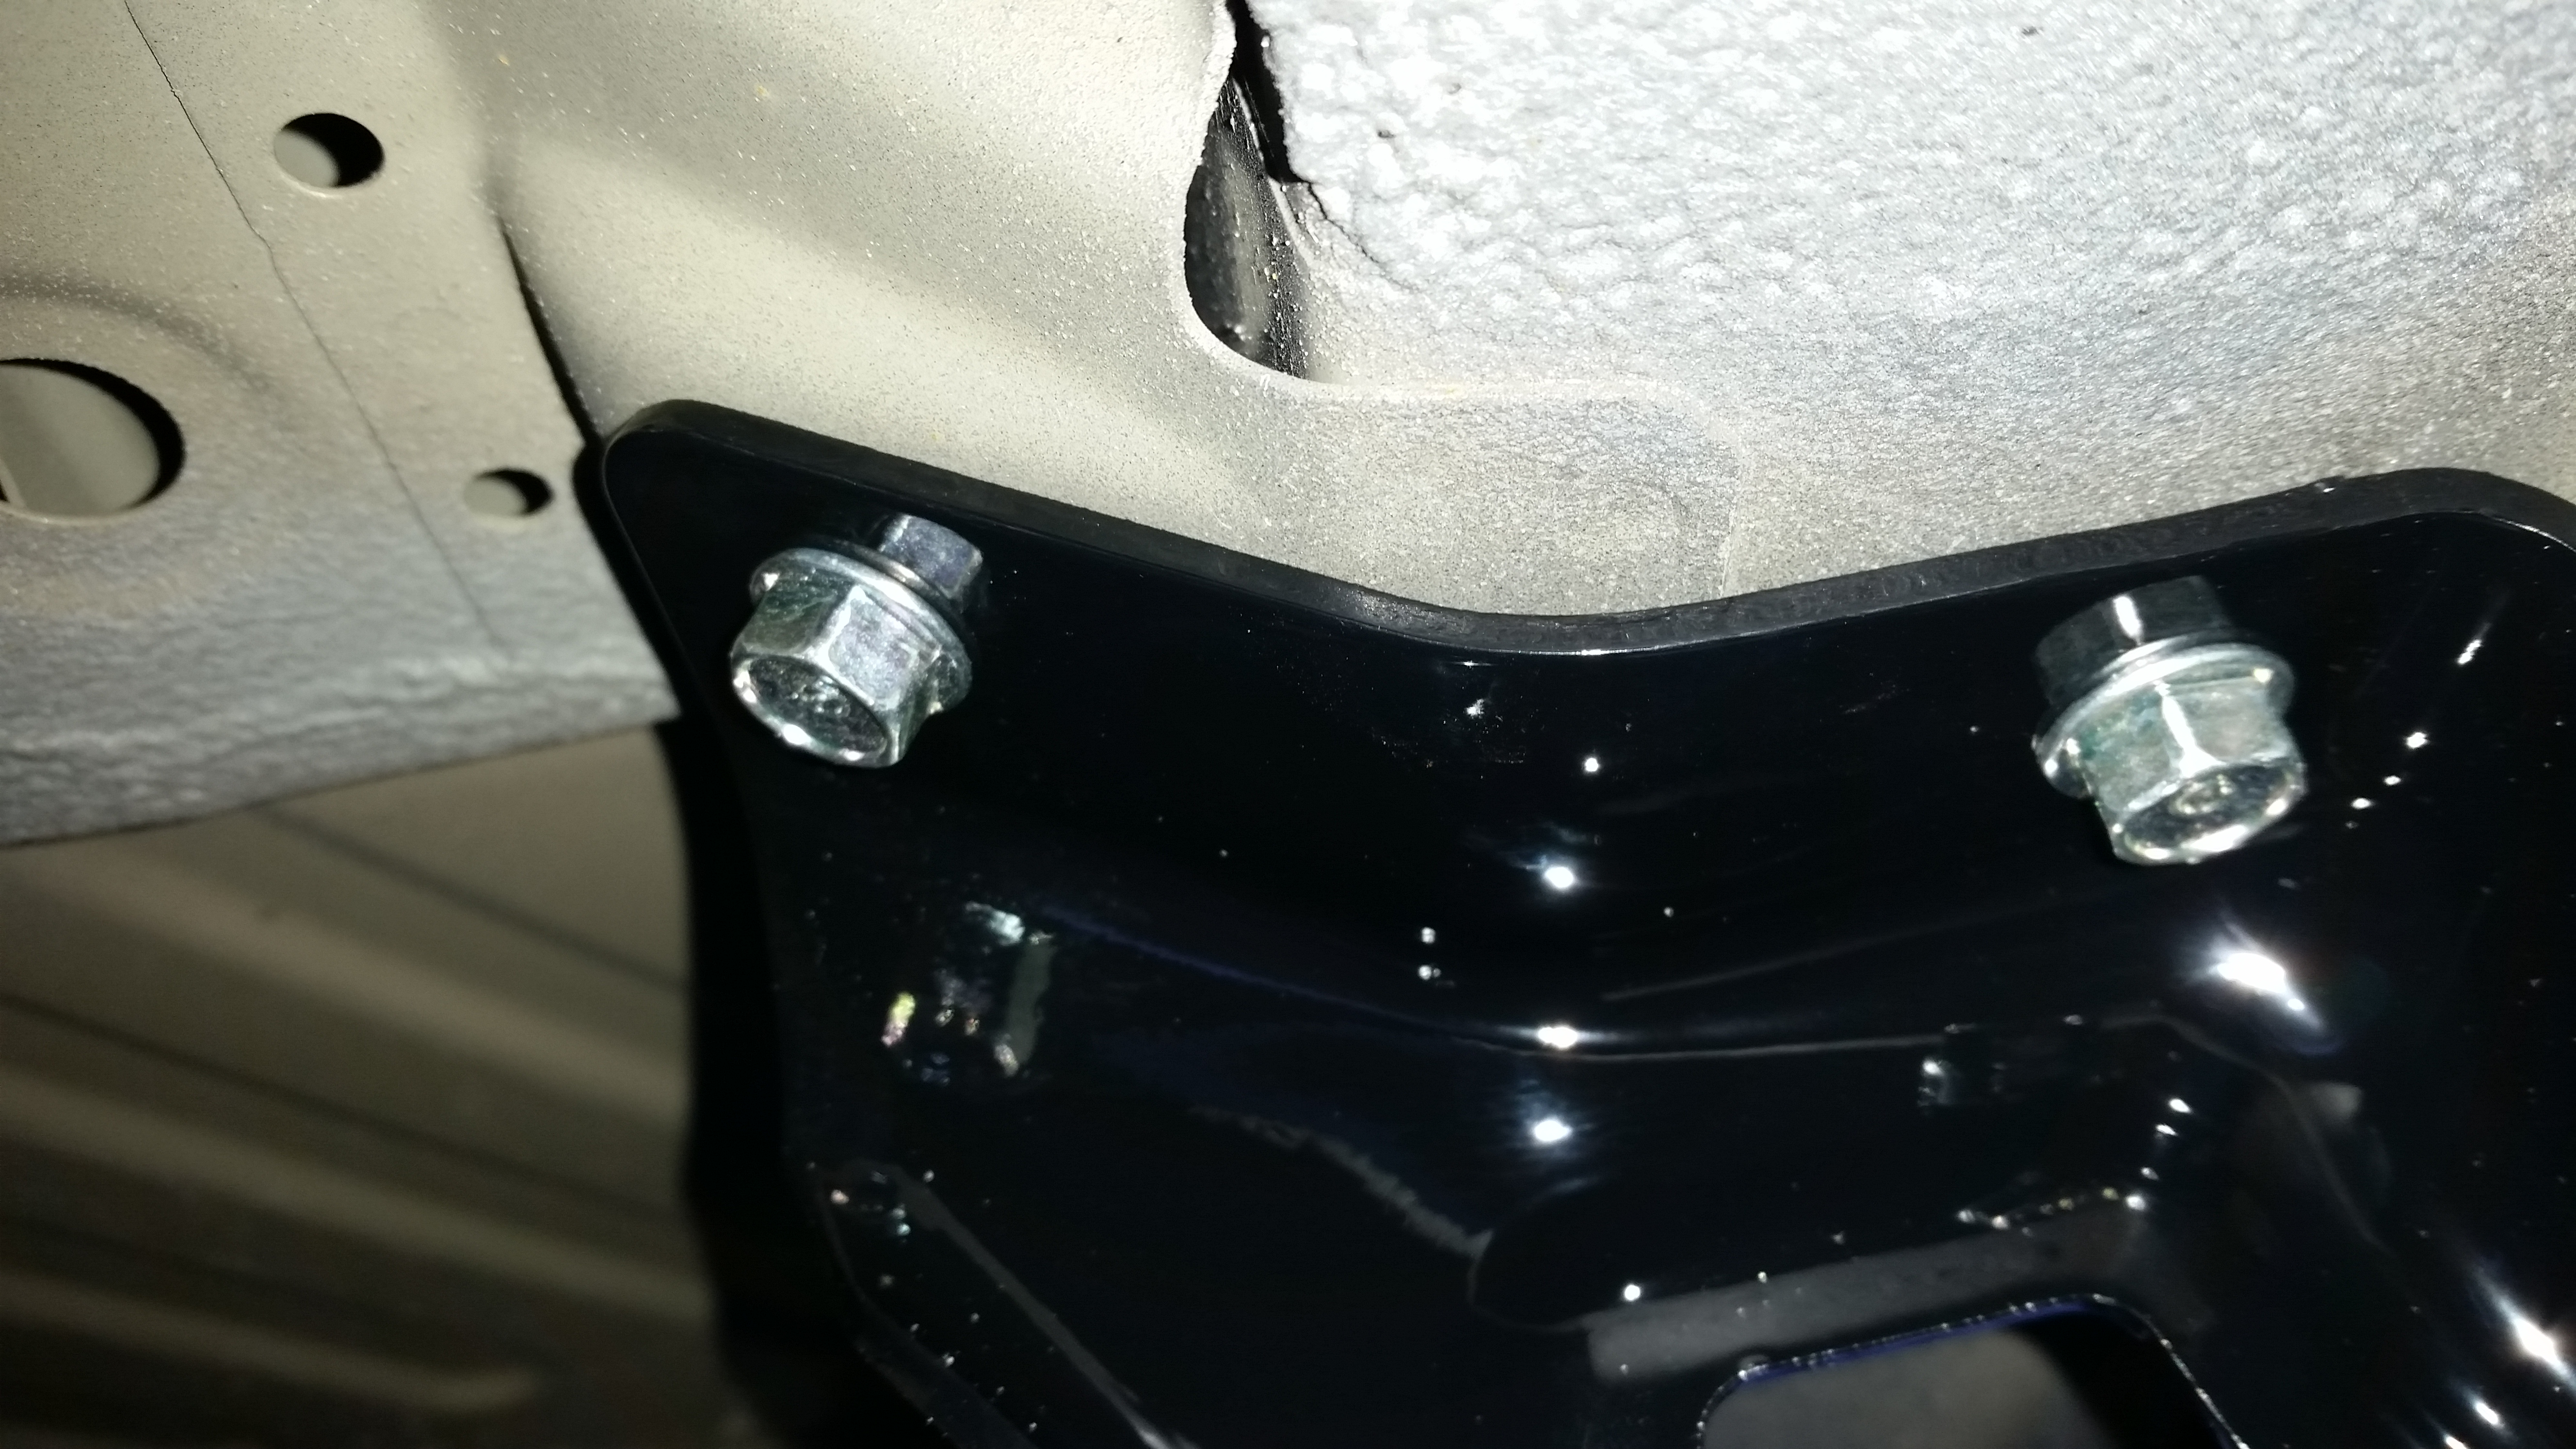
Here are the 3 brackets.
Front:
Middle:
Rear (the other bolt is up and to the left in a 90* bracket...I did not realize that I missed it in the picture):
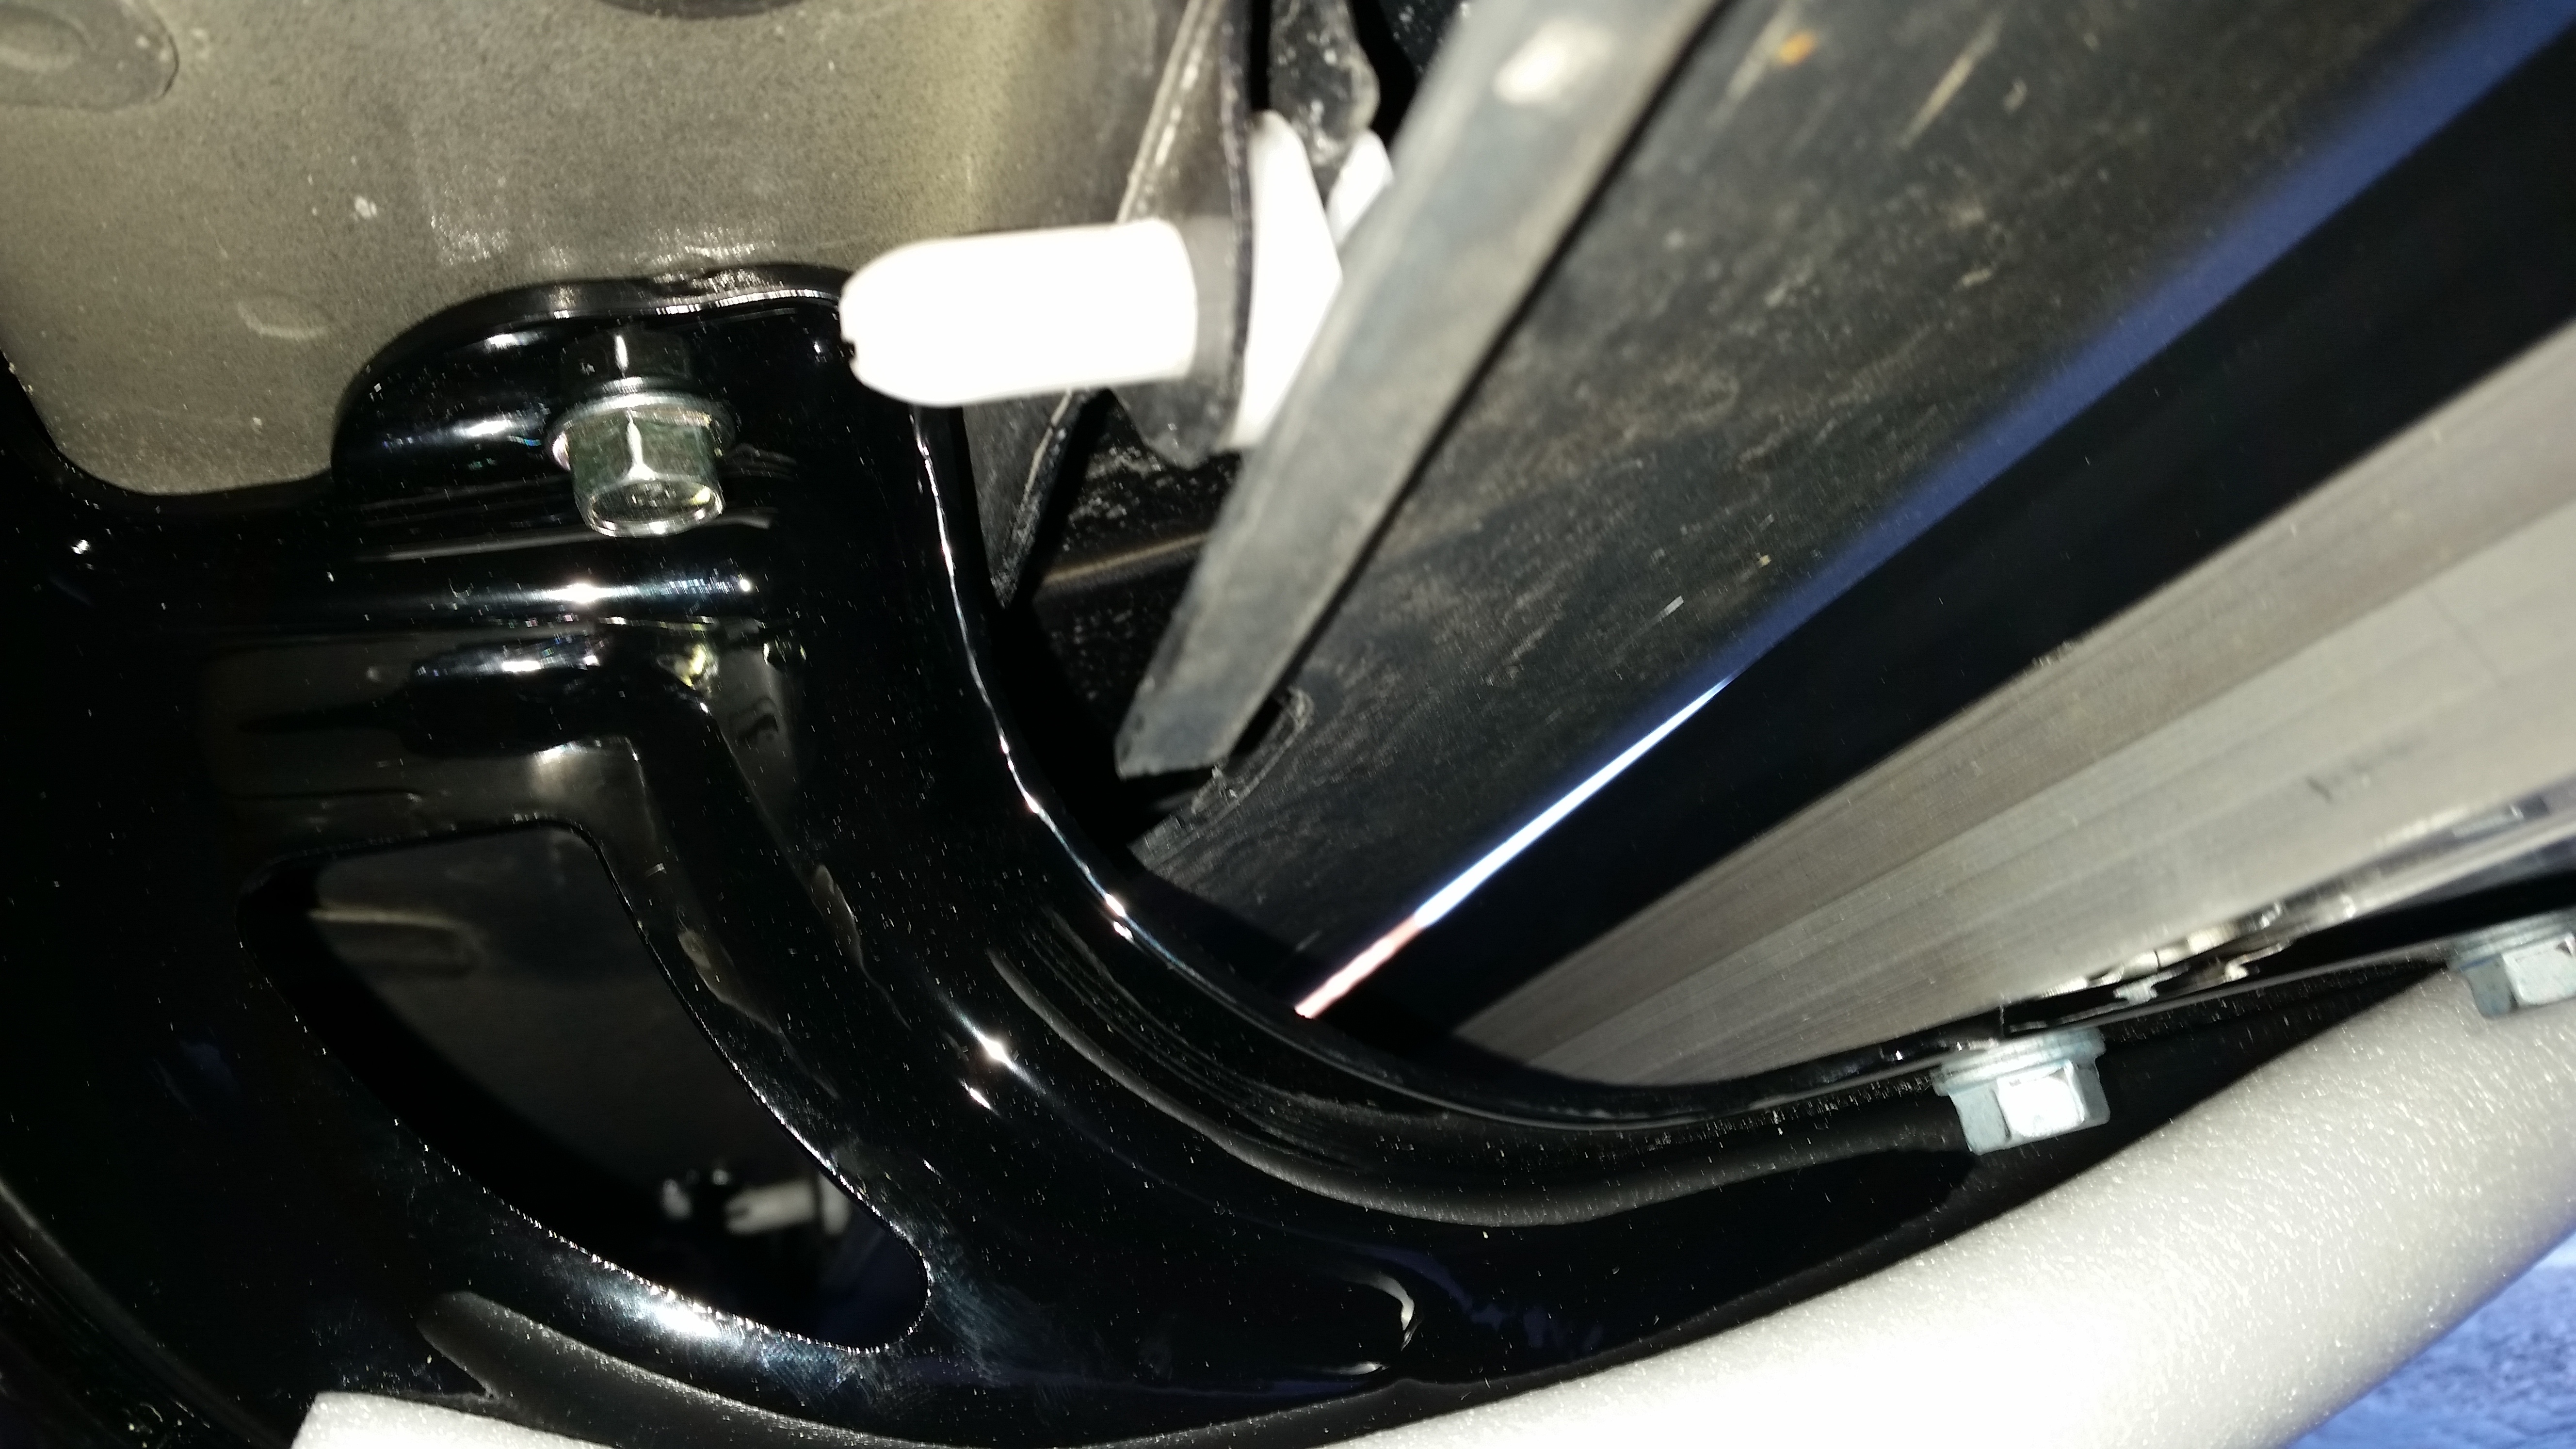
In all cases I did a loose fit and started the bolts, then pulled them to near-snug before tightening them in sequence- middle first, then rear, then front. This was how the directions laid them out and it worked well. I torqued them all down to 20 ft/lb., as instructed.
Done:

Passenger side went on even easier, as the rear bracket has more room to get the socket wrench in there.
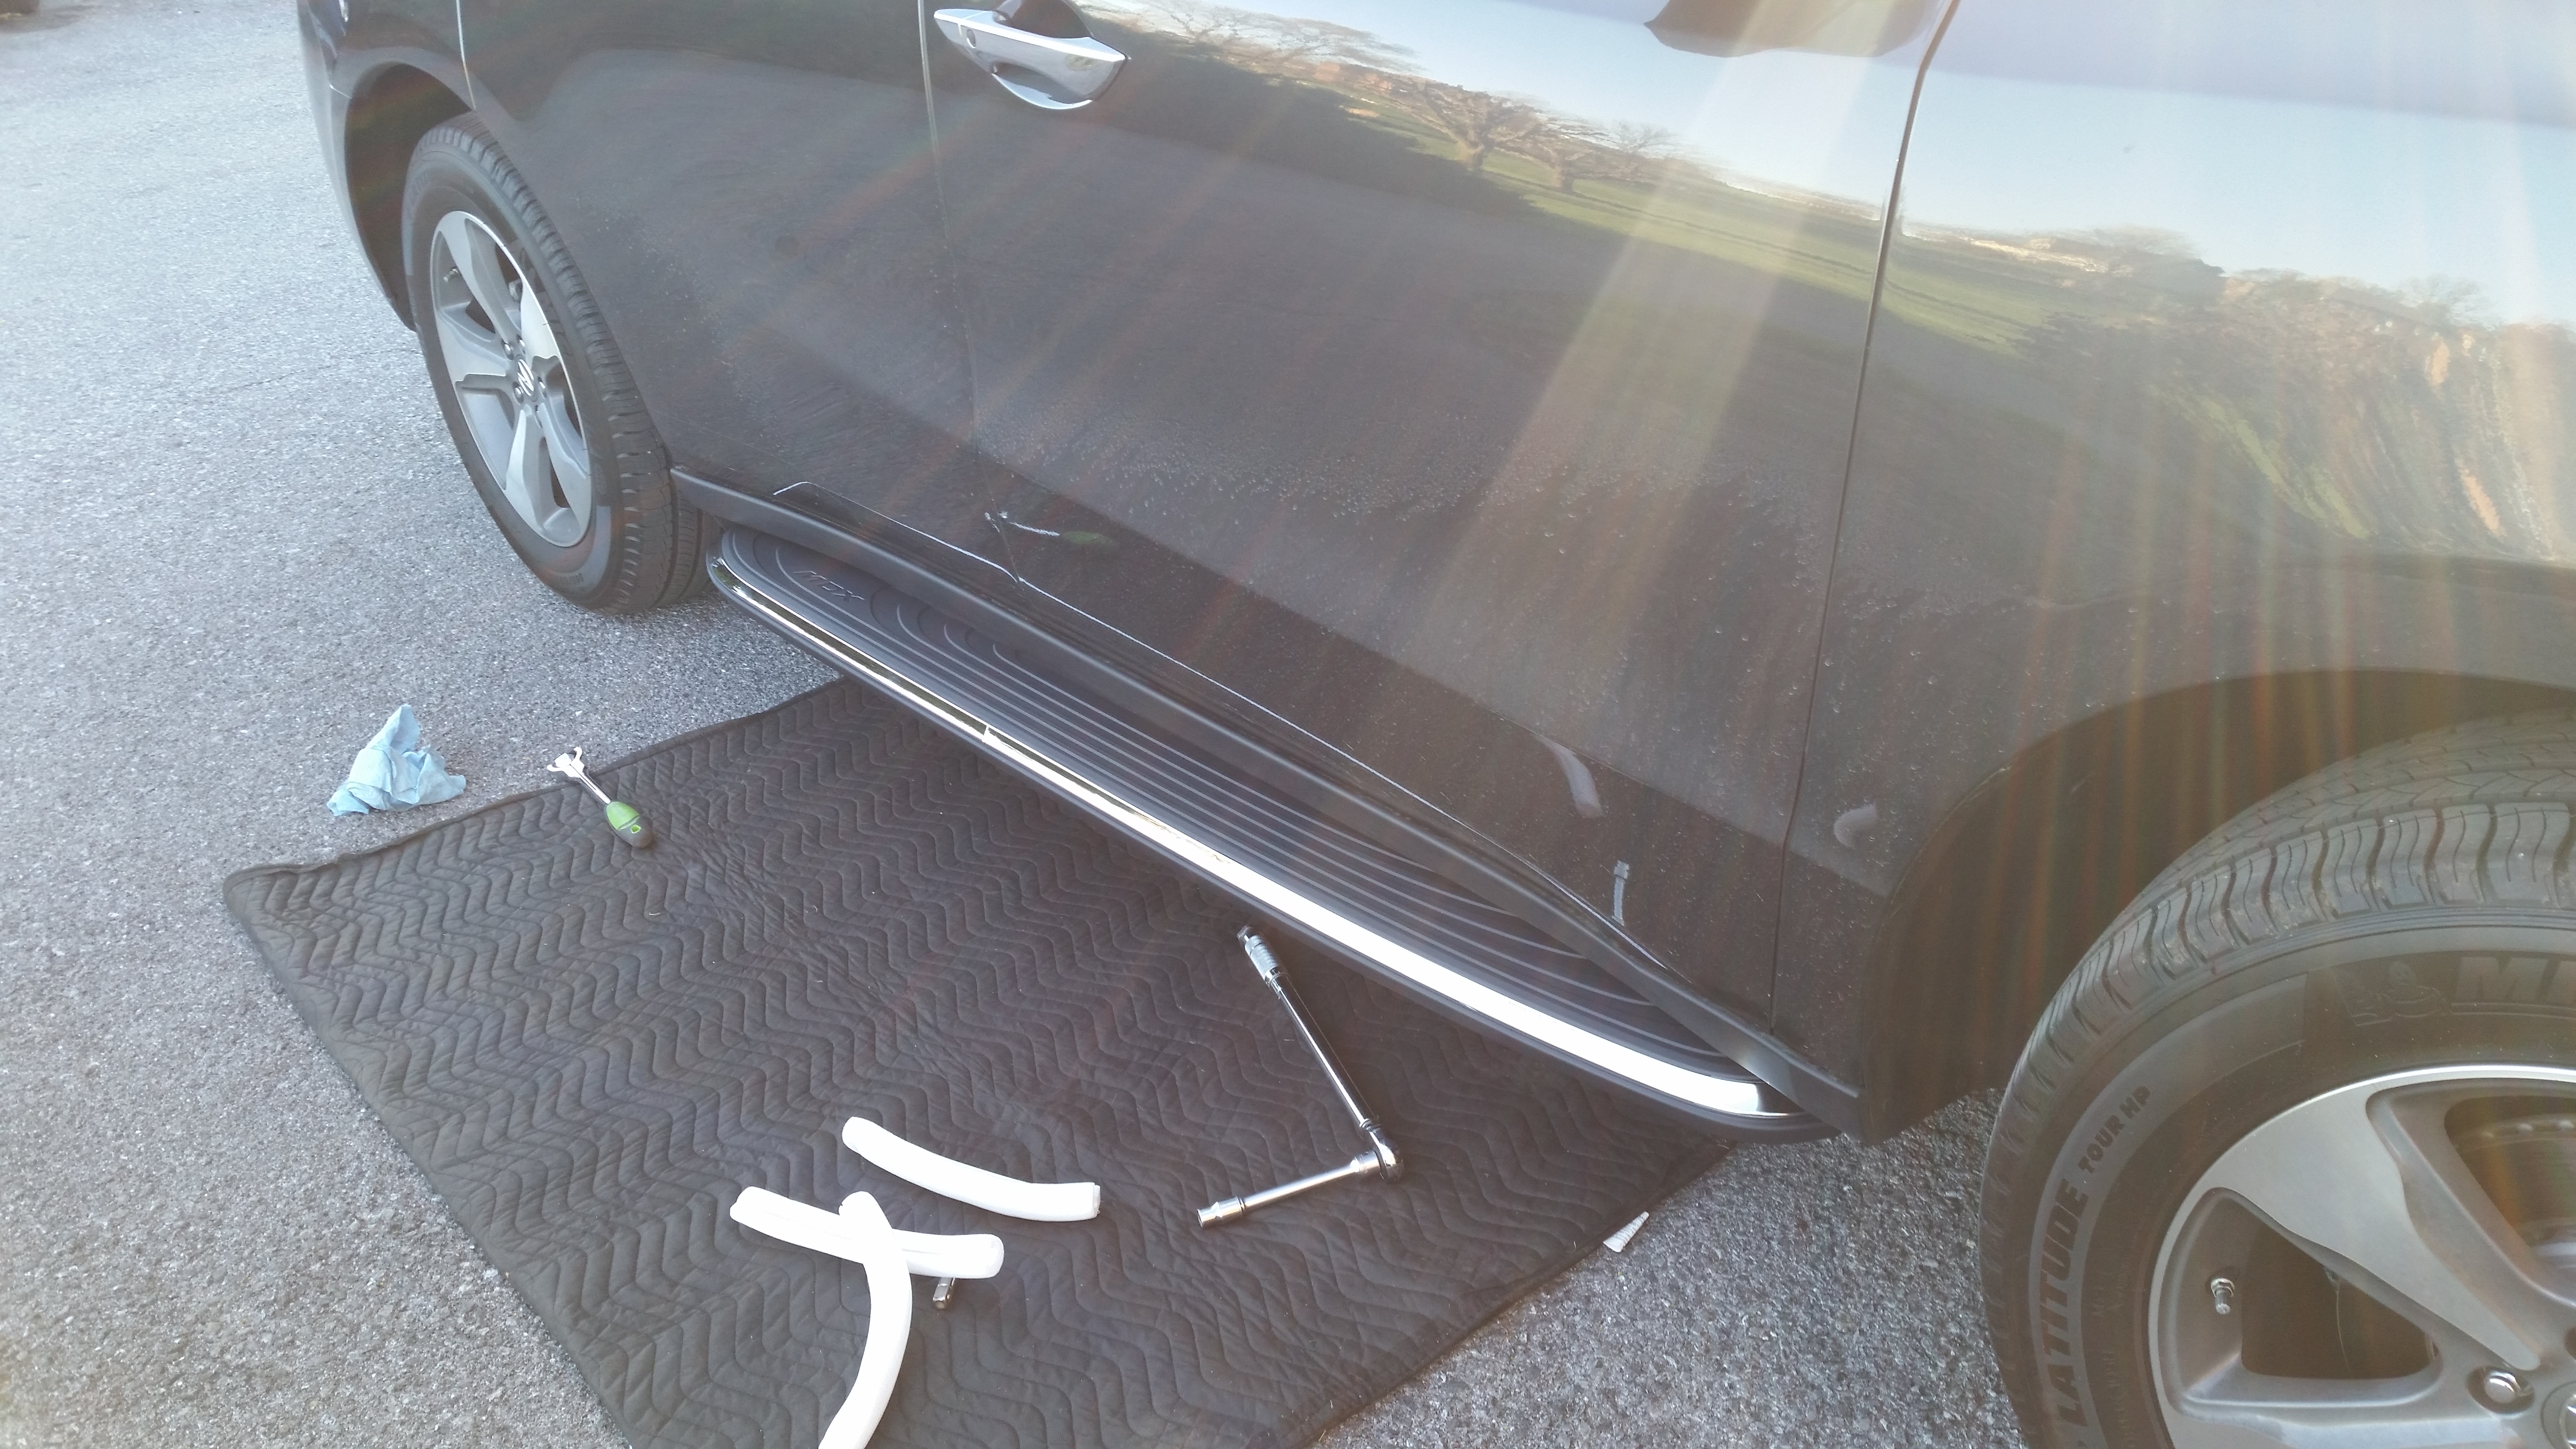
All in all this was a cakewalk compared to most car stuff that I do.
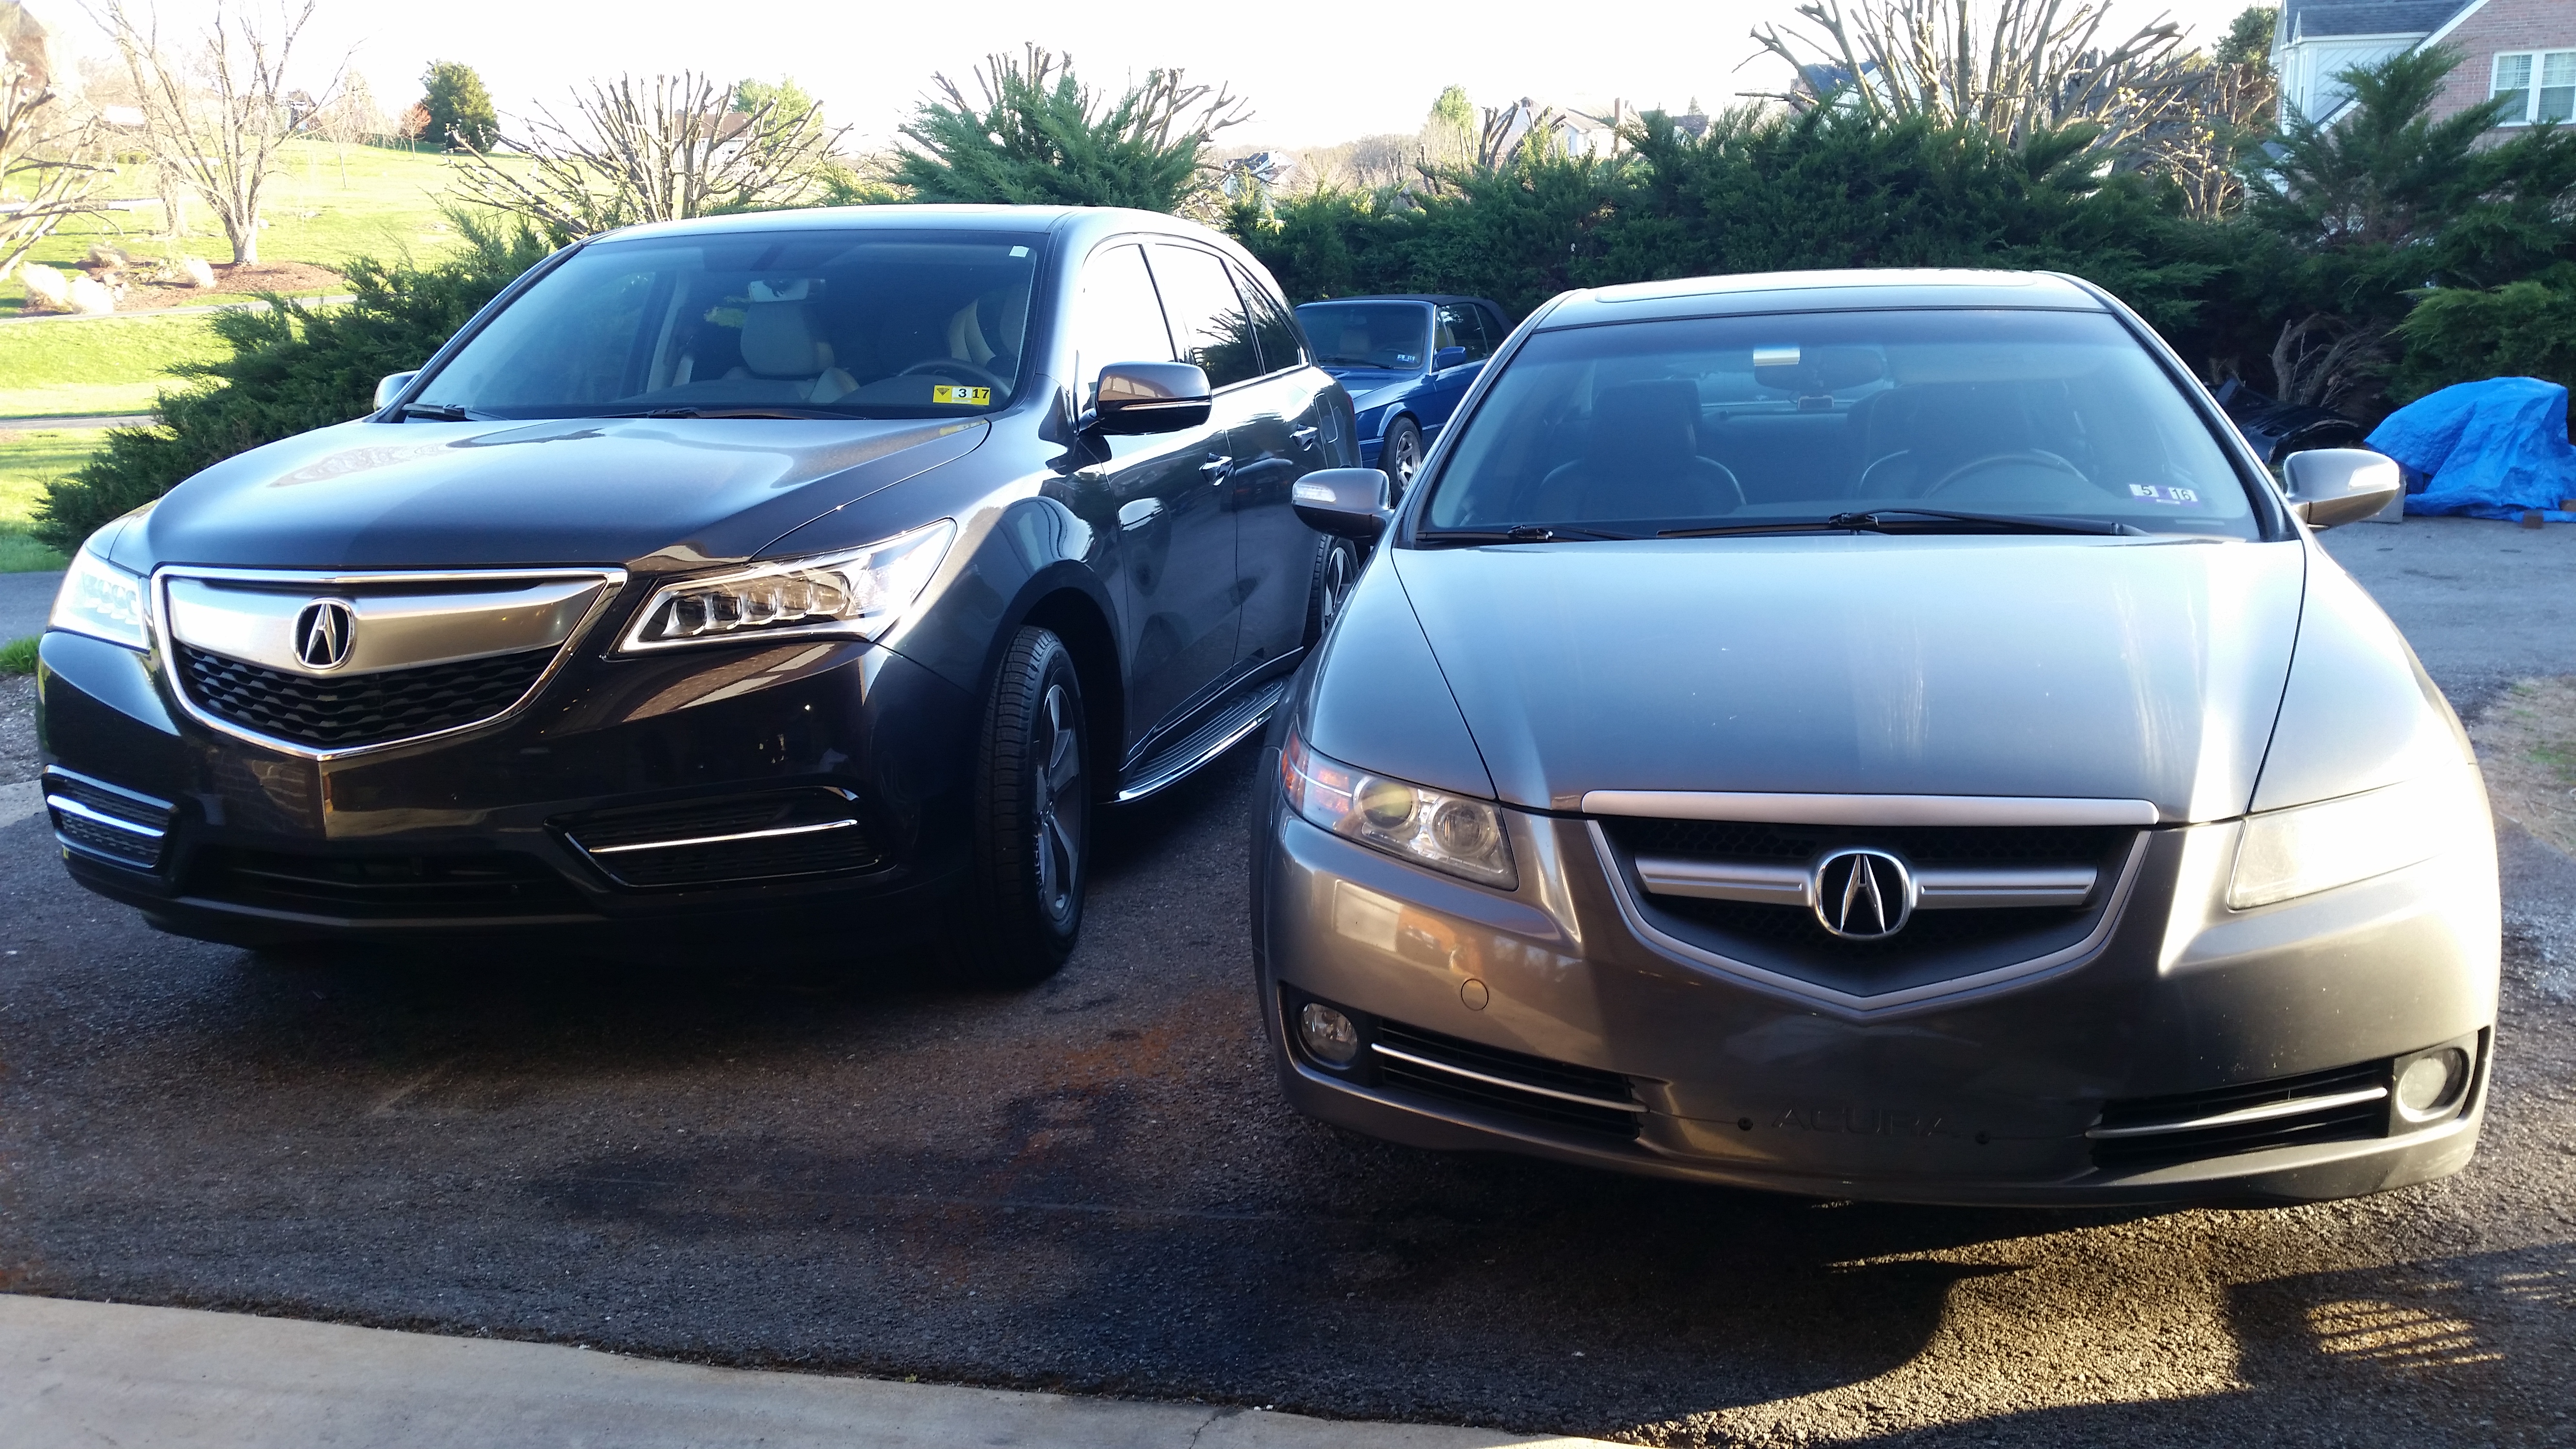
I took one final shot with her MDX and the now-mine TL that she used to drive:
I welcome any question or comments.
I installed running boards (08L33-TZ5-200) on my wife's 2016 MDX last night.
We went with the Advance models and were happy to find them for a good price on Amazon. With the distance to an Acura dealership it made sense to buy them and have them shipped.
While everyone has access to the online directions ( http://www.acurapartssuperstore.com/...ing-boards.pdf ), some people do better with actual pictures versus a line drawing and the work of a technical writer.
That said, I personally followed the online directions, which were simple and straightforward.
As with most car things, the first one took 2x the length of time for the second. I had about 35-45 minutes in the entire install. I have a lift at my house and could have used that to gain more ground clearance to access the bolt holes but it was not difficult with the car on the ground.
The directions state to clean the rockers before you start. I used some Quick Detailer but later found this step to be unnecessary, as the running boards don't actually touch the rockers.
I laid out a moving blanket to help keep track of my tools/parts and to prevent scratching the running boards during the install. The next- and most nerve wracking- step is to use a utility knife to cut out the knockouts from the lower body. Once you get on the ground and look up at them they are really obvious.
There are three per side. I used a sharp knife and cut from the center to the outside. Don't worry- they cuts don't have to be perfect.
Next, lay out the running board beside the vehicle. I did not notice the "L" and "R" on the packaging and got lucky to grab the correct one but the easy indicator of which side it goes on is that the rear of the vehicle has 2 of the 3 attachment points closer together. The "MDX" logo also goes to the rear.
I laid out a 1/2" socket wrench with a pair of extensions- one short and one medium- with a 12mm socket. I also had a torque wrench set to 20 ft/lb.
Lifting the running board in place was pretty easy. They are not very heavy and I held it in place with one hand while I started one bolt in the middle then one in the front. With two bolts in place you can let go of the piecs and start working on the other four bolts.
Here are the 3 brackets.
Front:
Middle:
Rear (the other bolt is up and to the left in a 90* bracket...I did not realize that I missed it in the picture):
In all cases I did a loose fit and started the bolts, then pulled them to near-snug before tightening them in sequence- middle first, then rear, then front. This was how the directions laid them out and it worked well. I torqued them all down to 20 ft/lb., as instructed.
Done:
Passenger side went on even easier, as the rear bracket has more room to get the socket wrench in there.
All in all this was a cakewalk compared to most car stuff that I do.
I took one final shot with her MDX and the now-mine TL that she used to drive:
I welcome any question or comments.

The following 2 users liked this post by phenryiv1:
Sfernandez (01-02-2020),
ShortKarateGi (04-12-2018)
 04-20-2016, 08:35 PM
#4
Intermediate
Thread Starter
08-28-2016, 10:52 PM
#5

I just installed this on a 2017 MDX. Everything fits perfectly, except that you have to take the brackets off the running board and install them on the car first loosely. Then put the running board on and install the nuts back on and then tighten everything. I am very happy with the new running board, except that the front is a bit narrow. Lots of bling bling since the 2017 has the chrome running across below the doors, and now there is even more chrome along the running board.
08-29-2016, 06:49 AM
#6
Intermediate
Thread Starter
I just installed this on a 2017 MDX. Everything fits perfectly, except that you have to take the brackets off the running board and install them on the car first loosely. Then put the running board on and install the nuts back on and then tighten everything. I am very happy with the new running board, except that the front is a bit narrow. Lots of bling bling since the 2017 has the chrome running across below the doors, and now there is even more chrome along the running board.
Knowing that the 2017 has more chrome makes me glad that we have the '16. I am not a big fan of chrome and what chrome is already there is more than enough. I don't want to add the roof rack because of the extra chrome that it brings into the overall effect.
08-29-2016, 12:13 PM
#7
well, if he installed the 2017 version of the advance running boards, they replaced the rocker panel with the step so you would only have one stripe of chrome. but since it seems like he installed a 2014-2016 step on a 2017, now he has the rocker chrome AND the step chrome.
Trending Topics
08-29-2016, 04:38 PM
#8
Oh wait nvm my statement above. I get what he means. He has the 2017 version with the chrome STEP AND the chrome SIDING of the step. There are two versions for 2017s, where one has black steps and chrome siding, and the other has chrome step and siding.
08-06-2017, 05:32 PM
#9
2nd Gear

Join Date: Aug 2017
Age: 44
Posts: 2
Likes: 0
Received 0 Likes
on
0 Posts
Looking to do this.
I just installed this on a 2017 MDX. Everything fits perfectly, except that you have to take the brackets off the running board and install them on the car first loosely. Then put the running board on and install the nuts back on and then tighten everything. I am very happy with the new running board, except that the front is a bit narrow. Lots of bling bling since the 2017 has the chrome running across below the doors, and now there is even more chrome along the running board.
08-07-2017, 03:41 PM
#10
Intermediate
Thread Starter
Those knockouts are designed to be removed so I would not worry about them impacting lease turn-in.
08-07-2017, 09:32 PM
#11
Did that on my lease and took it off before when the lease ended. They didn't even know about it because it wasn't sold with the running board on the lease. So, they won't be checking.

Thread
Thread Starter
Forum
Replies
Last Post
Inspire08
Car Parts for Sale
8
01-13-2016 09:41 PM