
TL-PROJECTOR-Retro - Progress Pics
 06-22-2007, 05:02 AM
#1
Instructor
Thread Starter
Join Date: Feb 2007
Location: San Diego
Posts: 222
Likes: 0
Received 0 Likes
on
0 Posts
TL-PROJECTOR-Retro - Progress Pics
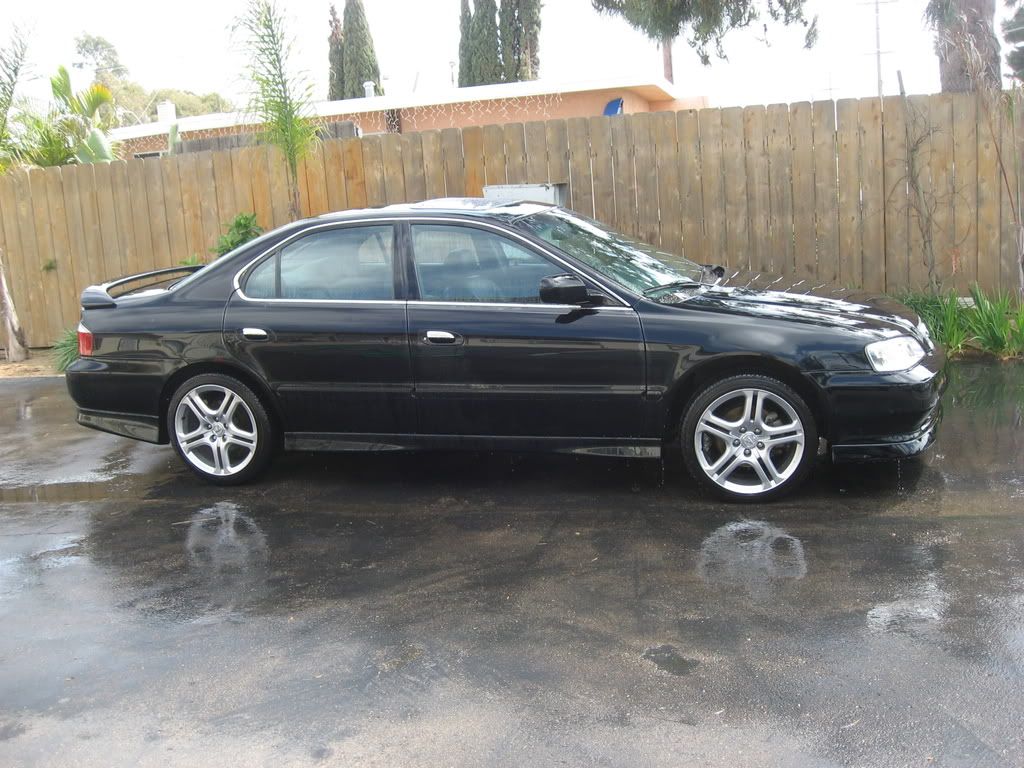
Soo - I saw JNC and a few others - Its my turn. Never done anything like this but I think it will be sweet in the end. I am an artist - I can do it!
So these are merely pics to check out - its no DIY as of yet, but I will make it so, and possibly in PDF format to maybe distribute, and or take orders for, As I am finding this to be quite fun and might be willing to take a stab at the sales of the mod.
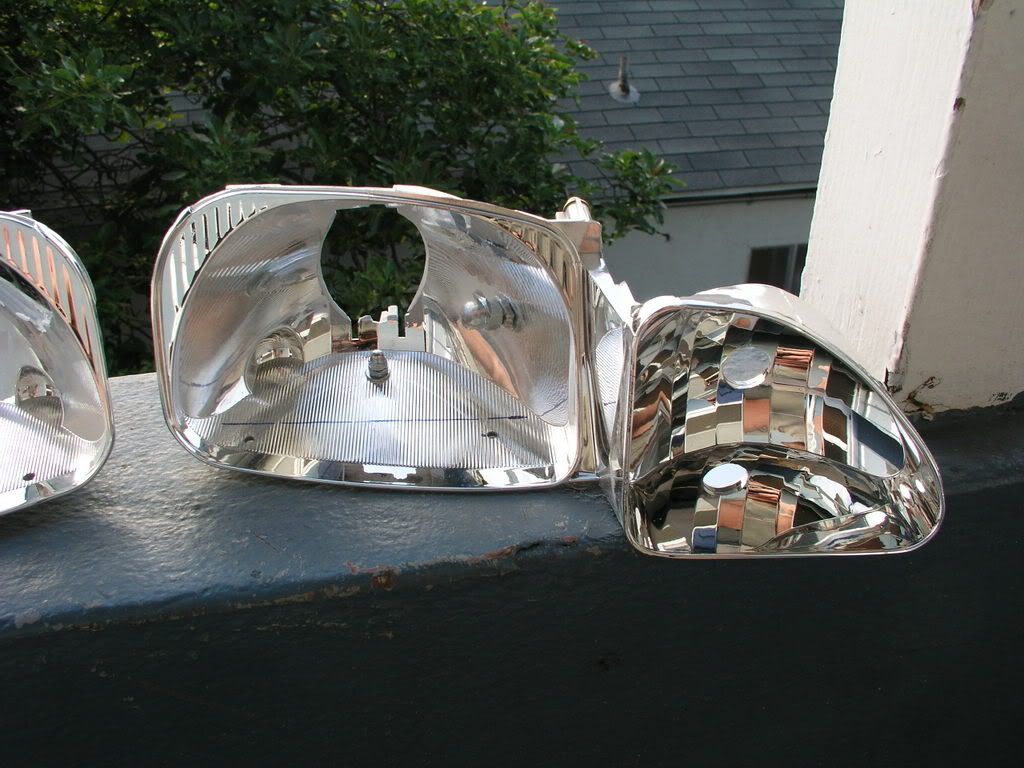
The basics:
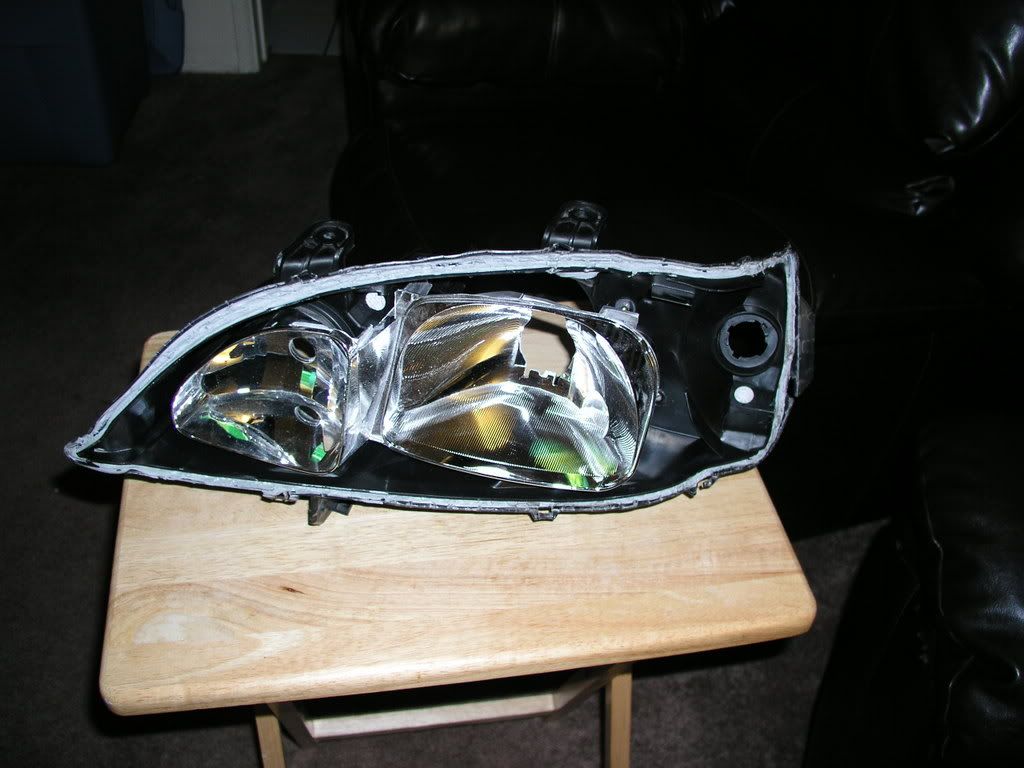
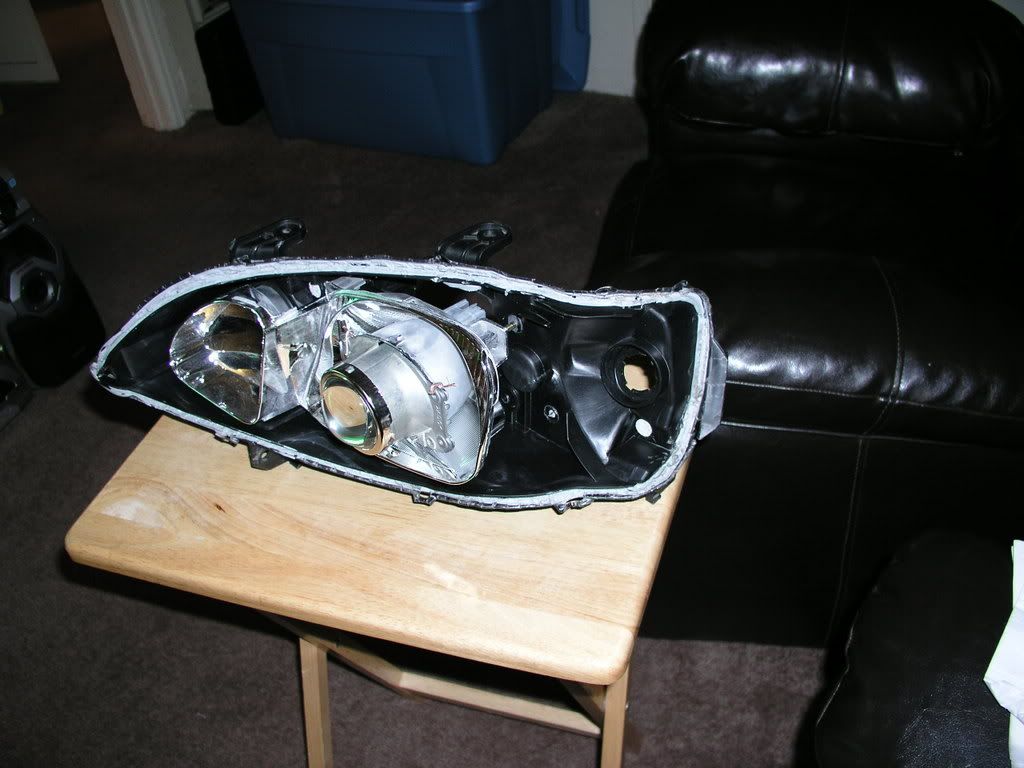
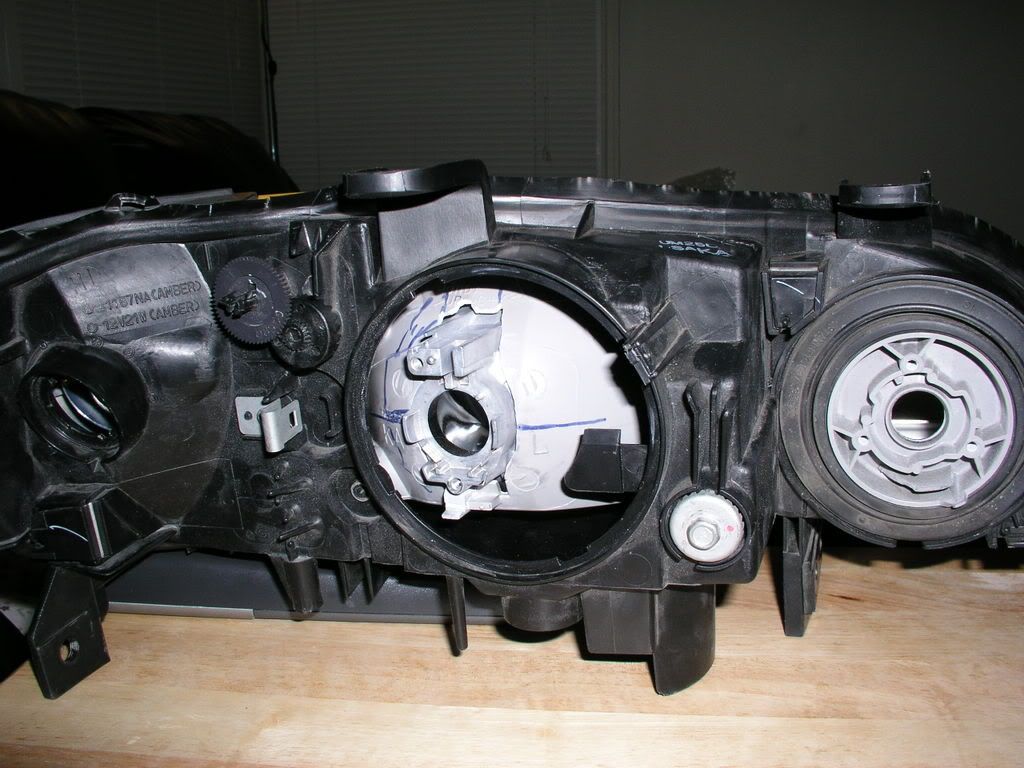
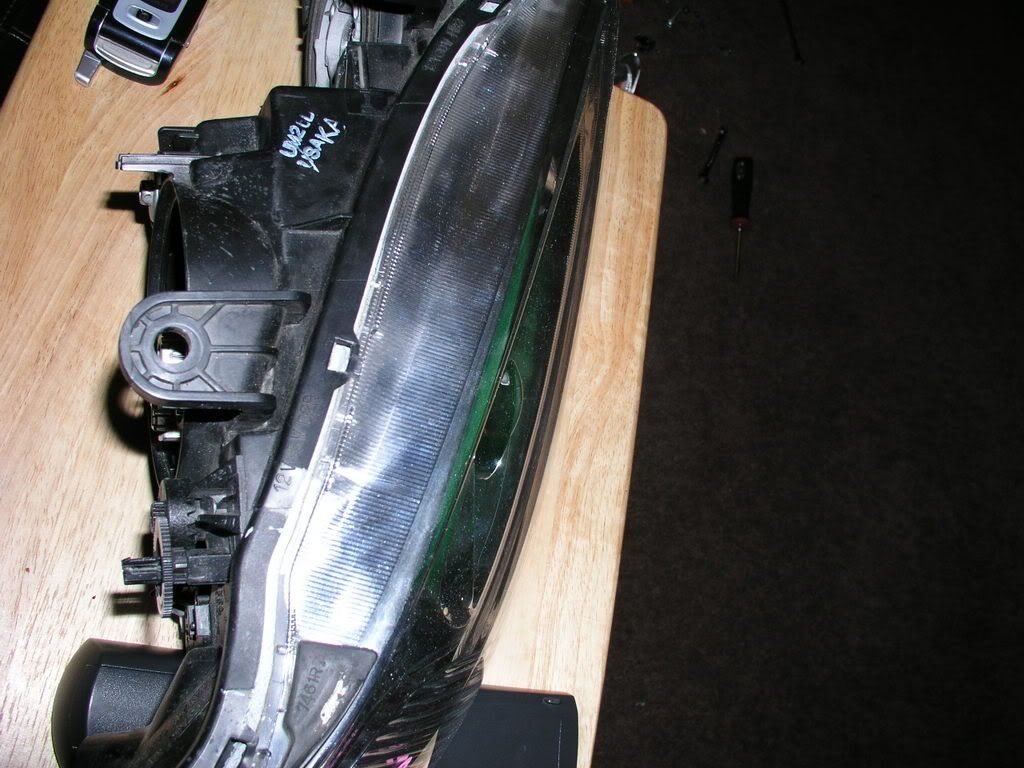
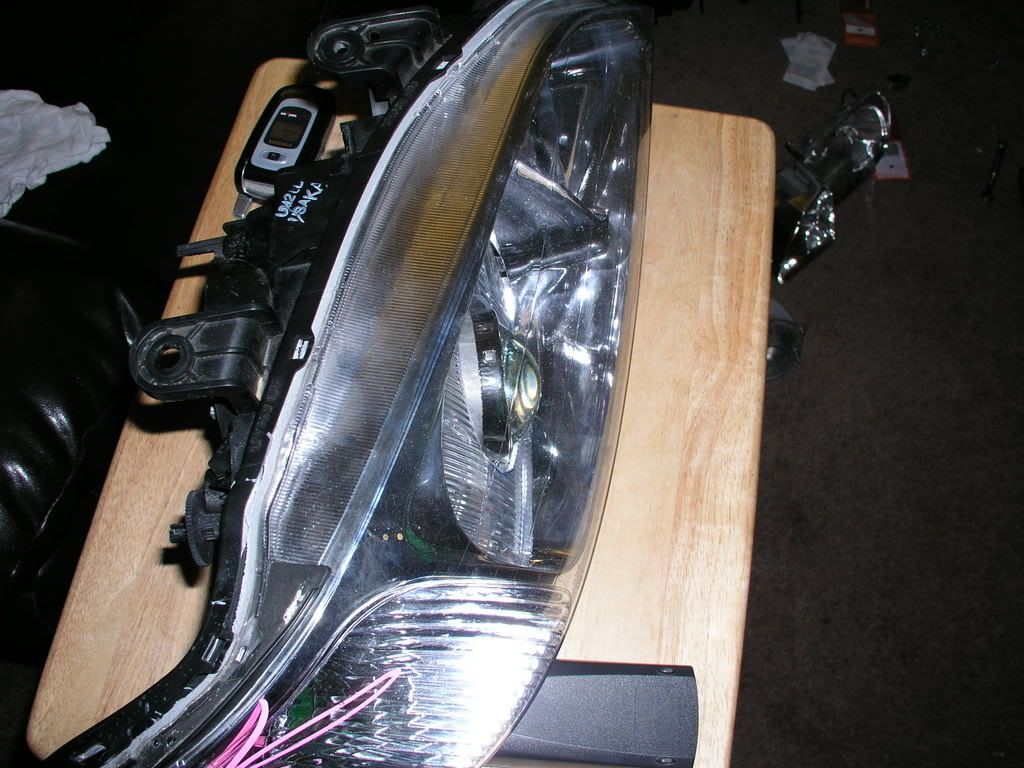
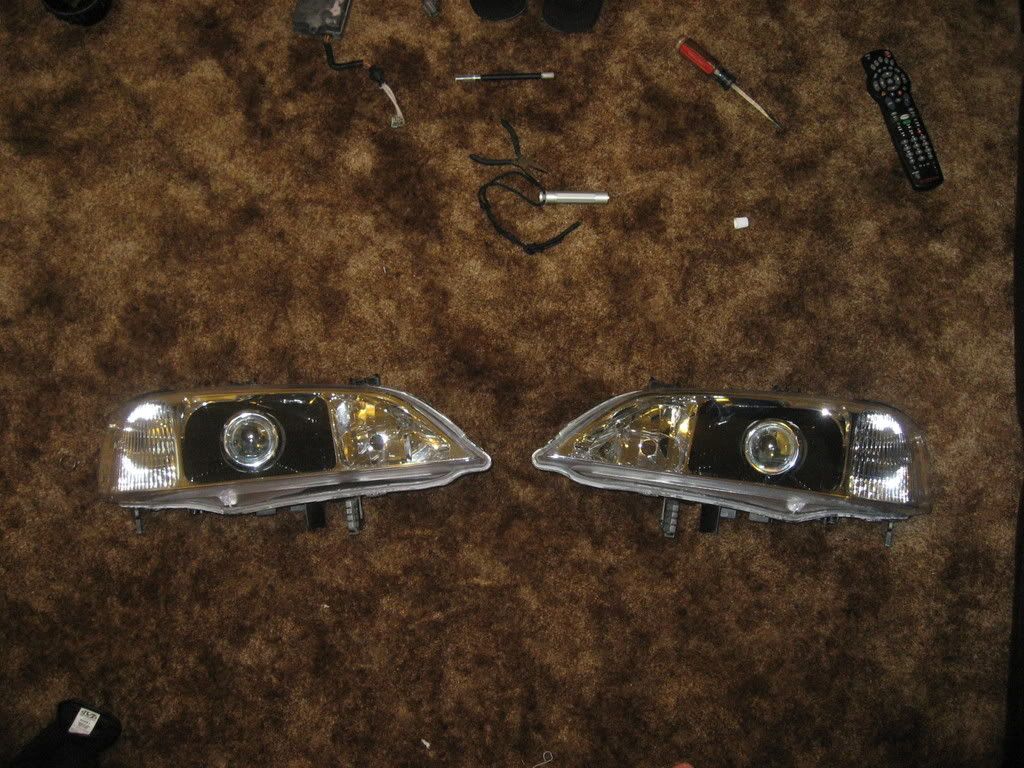
2005 TSX low bean projectors
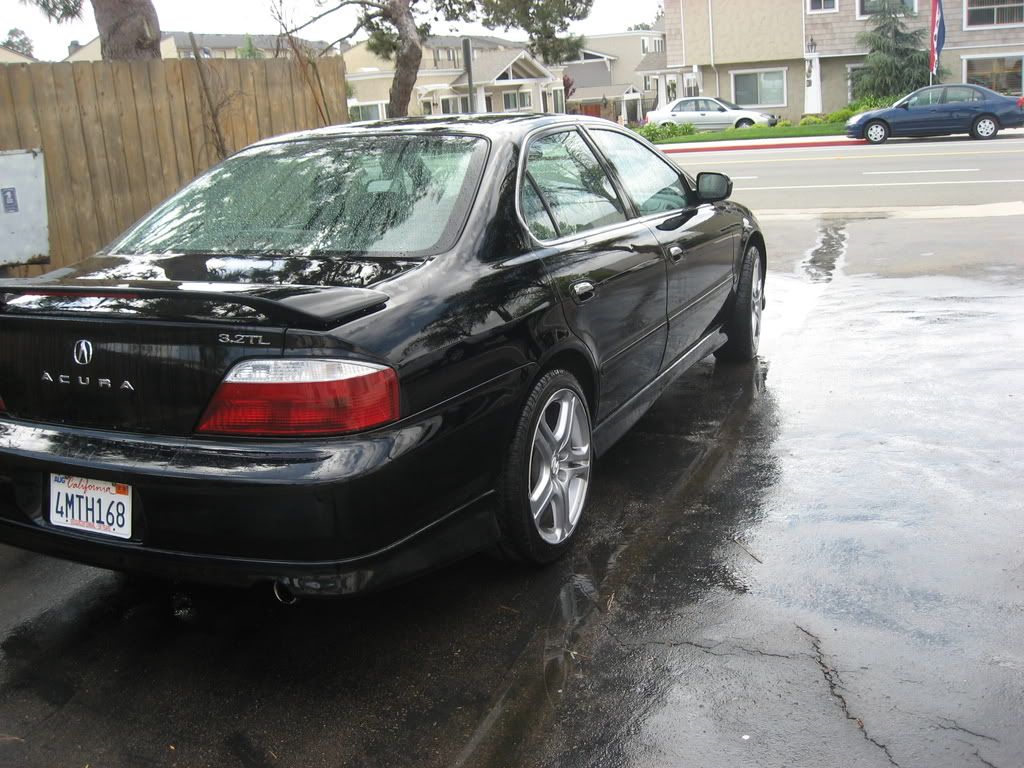
Stock 99-01 TL headlights
A pinch of love for my car
and of dash of Get'r Done!
There is plans to do a little blackout work and to utilize the inner HID sheild (clear platic thing) --- This might be a super clean looking job, and Im STOKED!
Will post more as I go: patience....


So these are merely pics to check out - its no DIY as of yet, but I will make it so, and possibly in PDF format to maybe distribute, and or take orders for, As I am finding this to be quite fun and might be willing to take a stab at the sales of the mod.
The basics:
2005 TSX low bean projectors
Stock 99-01 TL headlights
A pinch of love for my car
and of dash of Get'r Done!
There is plans to do a little blackout work and to utilize the inner HID sheild (clear platic thing) --- This might be a super clean looking job, and Im STOKED!
Will post more as I go: patience....

 06-24-2007, 10:58 PM
#6
Instructor
Thread Starter
Join Date: Feb 2007
Location: San Diego
Posts: 222
Likes: 0
Received 0 Likes
on
0 Posts
MORE Progress!!!
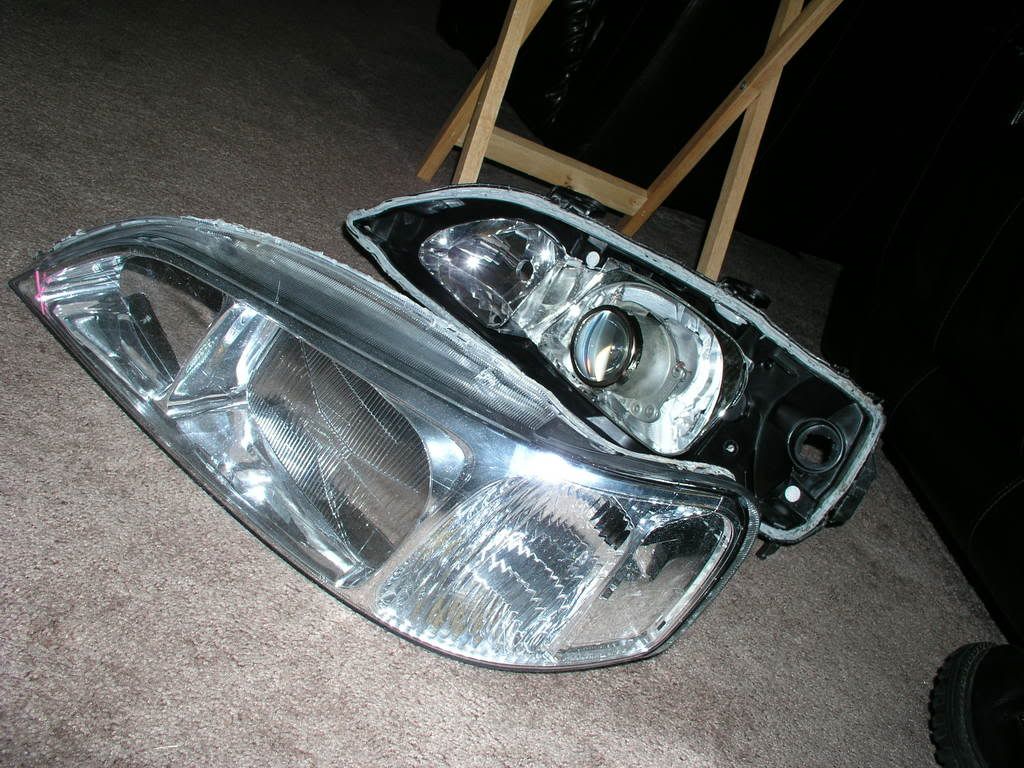
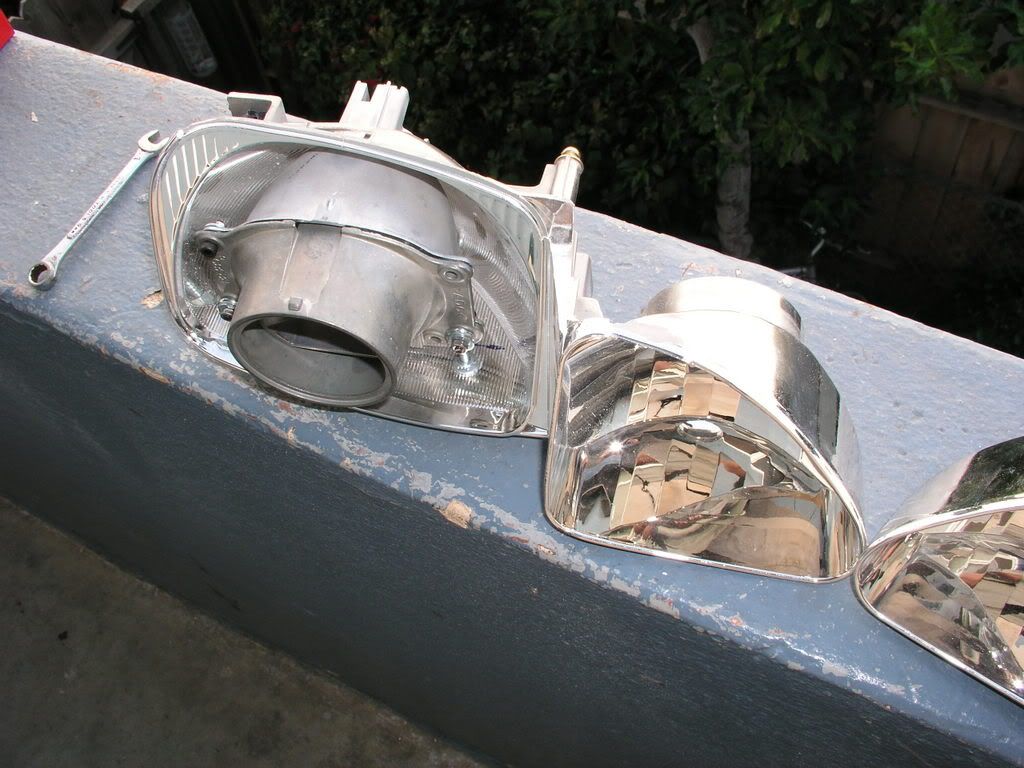
So heres another set of pics to check out... 
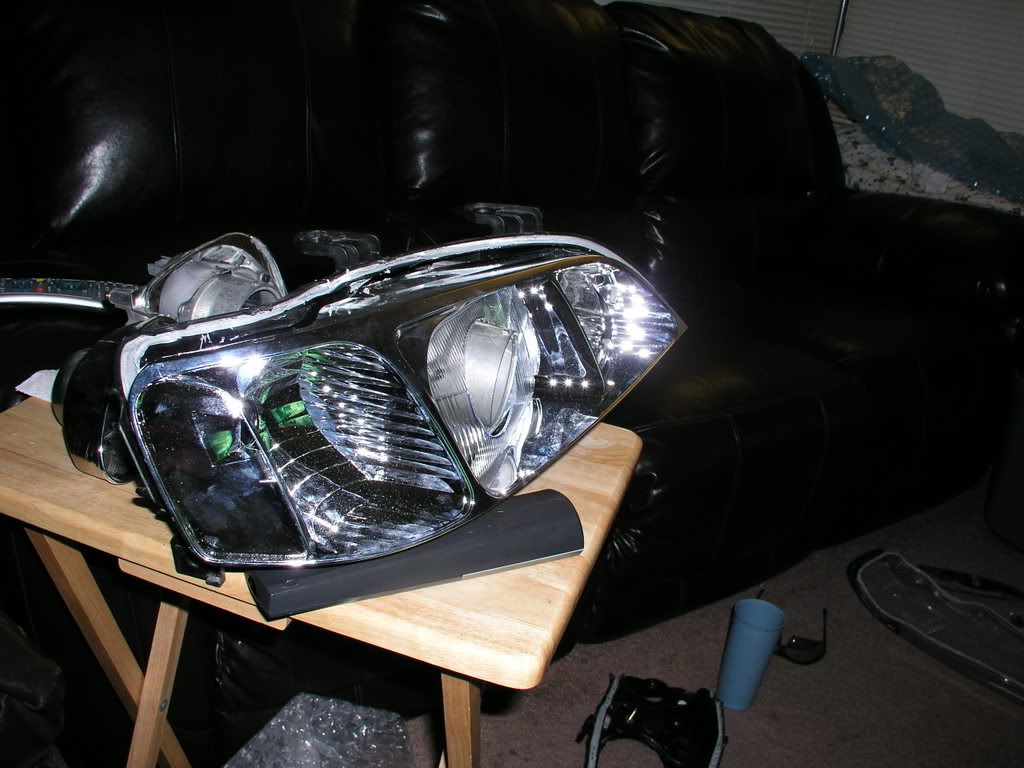
Im feeling pretty darn good thus far - all the "construction" for the most part is finished. I still need to do some black out and am awaiting my damn bulbs so I can test fire em up and see how my adjustments will function for me. I think its gonna go smoothly but we'll see when I get them plugged in.
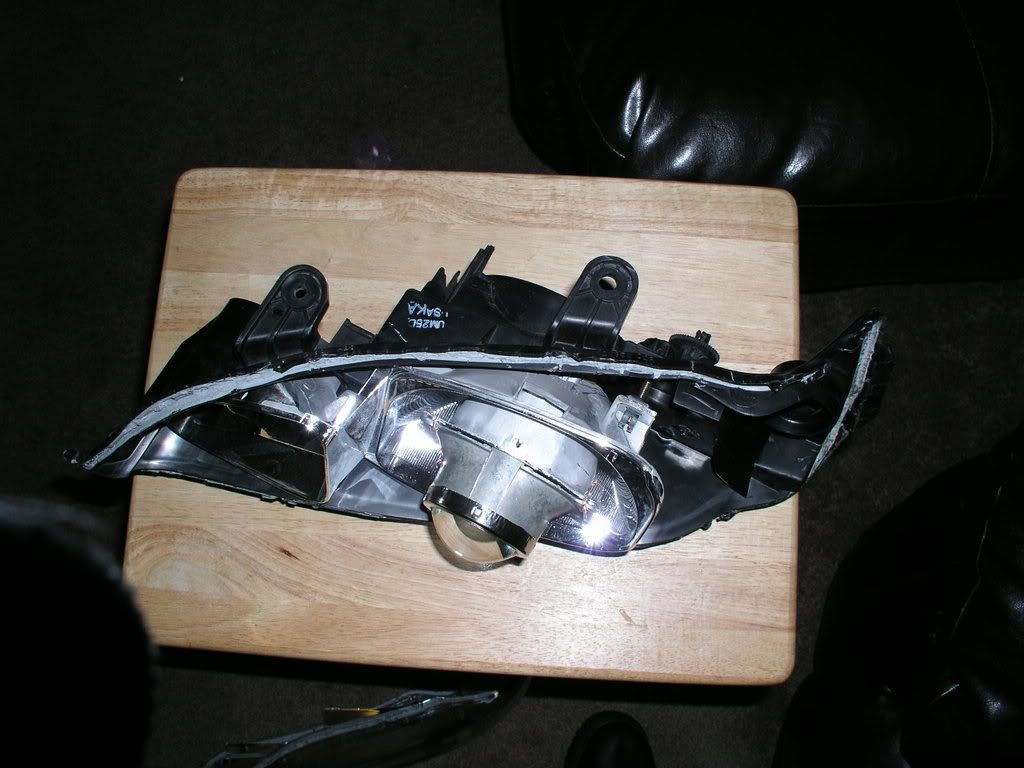
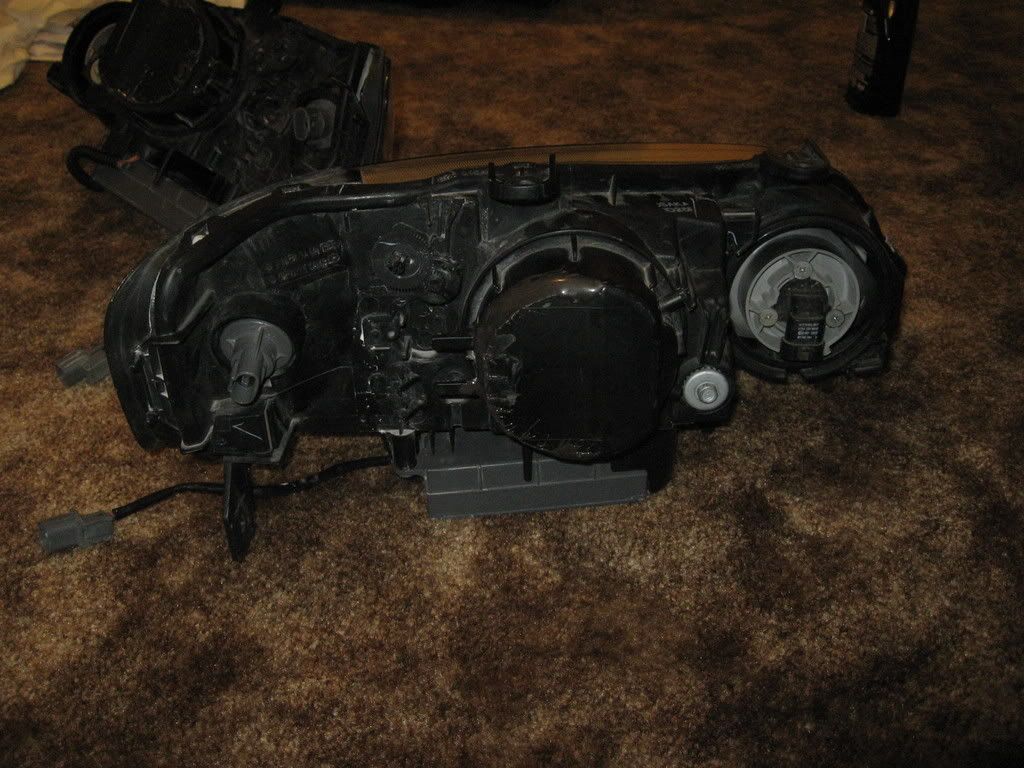
I've gone with a 3 point base for the projector units - 2 fixed left and right and one as a pivot/support in the center rear. Not sure I need to fix a point in either of the top corners... Im thinkin no but if someone has reasons otherwise -PLEASE SHARE
The last pic gives the sneak peak as to my shroud idea. Trial run came out awesome! Not sure who I will finalize the execution but the blackout theme has me going right now. I would NBP the face of the cover and flat black everything that is behind it including the projector housing. The lens has a chrome surround the clips it on the housing, and with that little guy just peaking out of the metallic black cover, I think it will look killer mean and slick! Hope you've all enjoyed this so far. Im certainly having fun! Cant say so much for the neighbors having to deal with my dremel noise - hahahahaaaaaaaaaa!!!
F'n LOVE MY DREMEL!!! Best toy ever!
Thanks for watching everyone~


Im feeling pretty darn good thus far - all the "construction" for the most part is finished. I still need to do some black out and am awaiting my damn bulbs so I can test fire em up and see how my adjustments will function for me. I think its gonna go smoothly but we'll see when I get them plugged in.
I've gone with a 3 point base for the projector units - 2 fixed left and right and one as a pivot/support in the center rear. Not sure I need to fix a point in either of the top corners... Im thinkin no but if someone has reasons otherwise -PLEASE SHARE
The last pic gives the sneak peak as to my shroud idea. Trial run came out awesome! Not sure who I will finalize the execution but the blackout theme has me going right now. I would NBP the face of the cover and flat black everything that is behind it including the projector housing. The lens has a chrome surround the clips it on the housing, and with that little guy just peaking out of the metallic black cover, I think it will look killer mean and slick! Hope you've all enjoyed this so far. Im certainly having fun! Cant say so much for the neighbors having to deal with my dremel noise - hahahahaaaaaaaaaa!!!
F'n LOVE MY DREMEL!!! Best toy ever!
Thanks for watching everyone~
06-25-2007, 05:37 AM
#7
Former Sponsor
iTrader: (12)
Looking great so far . Put the glass lens on the projector and the front lens of the headlight on just to see if they both dont hit each other, you need the glass lens to be atleast 0.5 inchs away from the glass. If its too close or is touching the front cover it would cause heat damage. Also you should have some sort of support screw through the top or else your projector will rattle every time your car hits the bump.
. Put the glass lens on the projector and the front lens of the headlight on just to see if they both dont hit each other, you need the glass lens to be atleast 0.5 inchs away from the glass. If its too close or is touching the front cover it would cause heat damage. Also you should have some sort of support screw through the top or else your projector will rattle every time your car hits the bump.
Trending Topics
06-26-2007, 10:57 PM
#9
Instructor
Thread Starter
Join Date: Feb 2007
Location: San Diego
Posts: 222
Likes: 0
Received 0 Likes
on
0 Posts
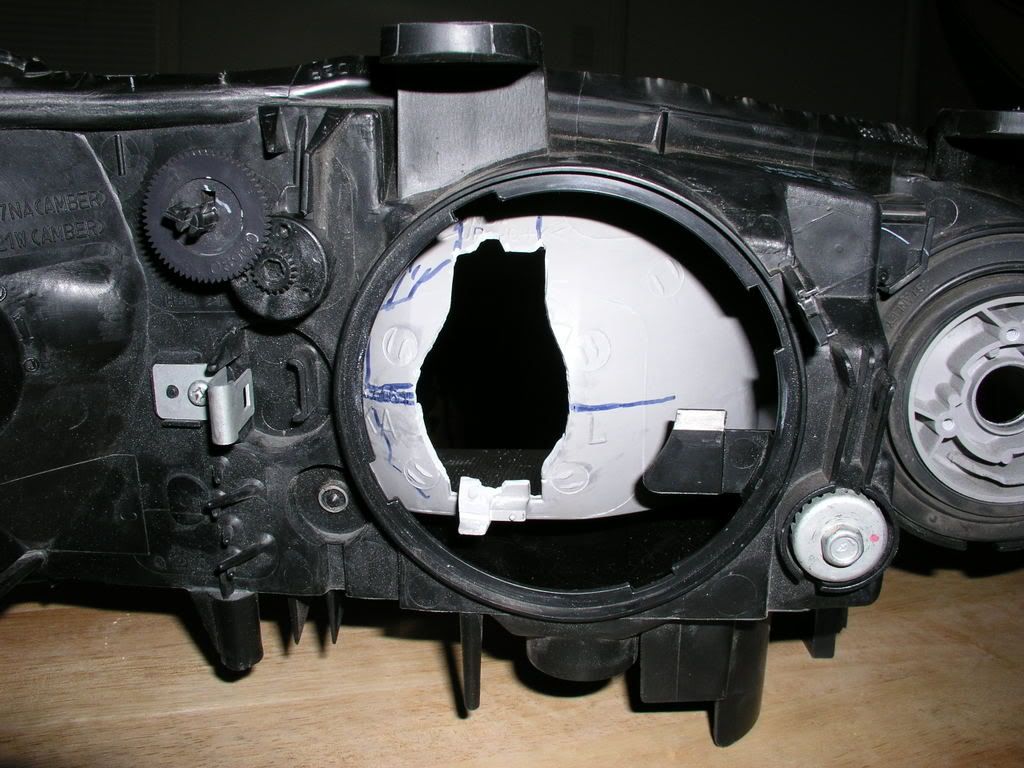
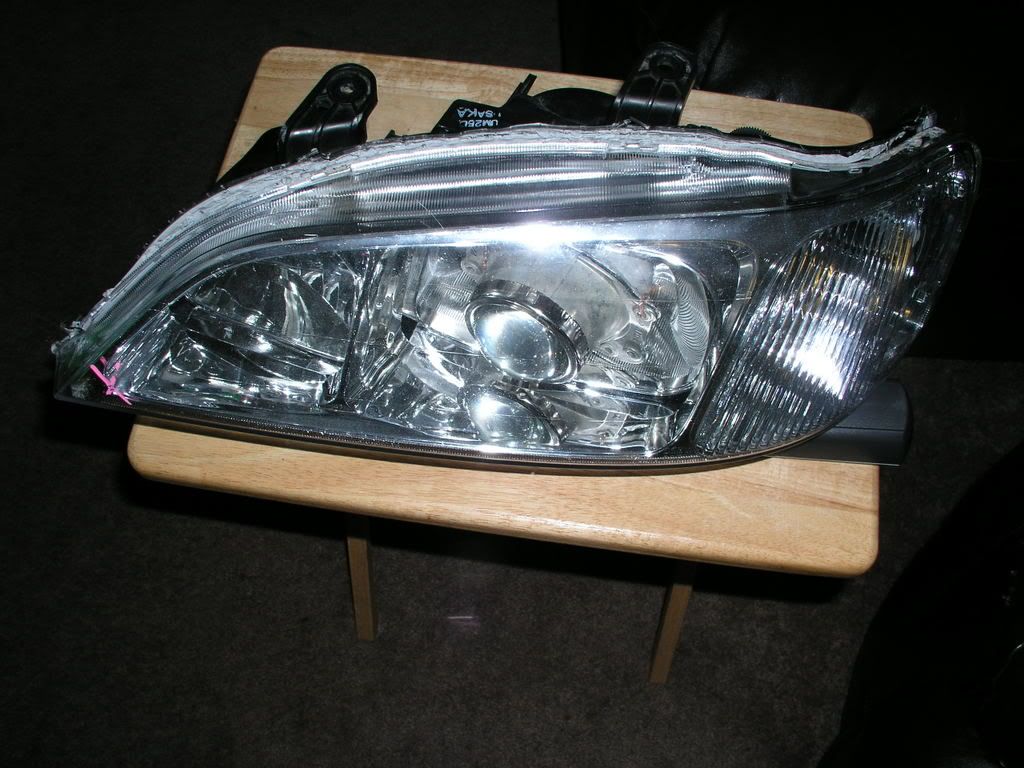
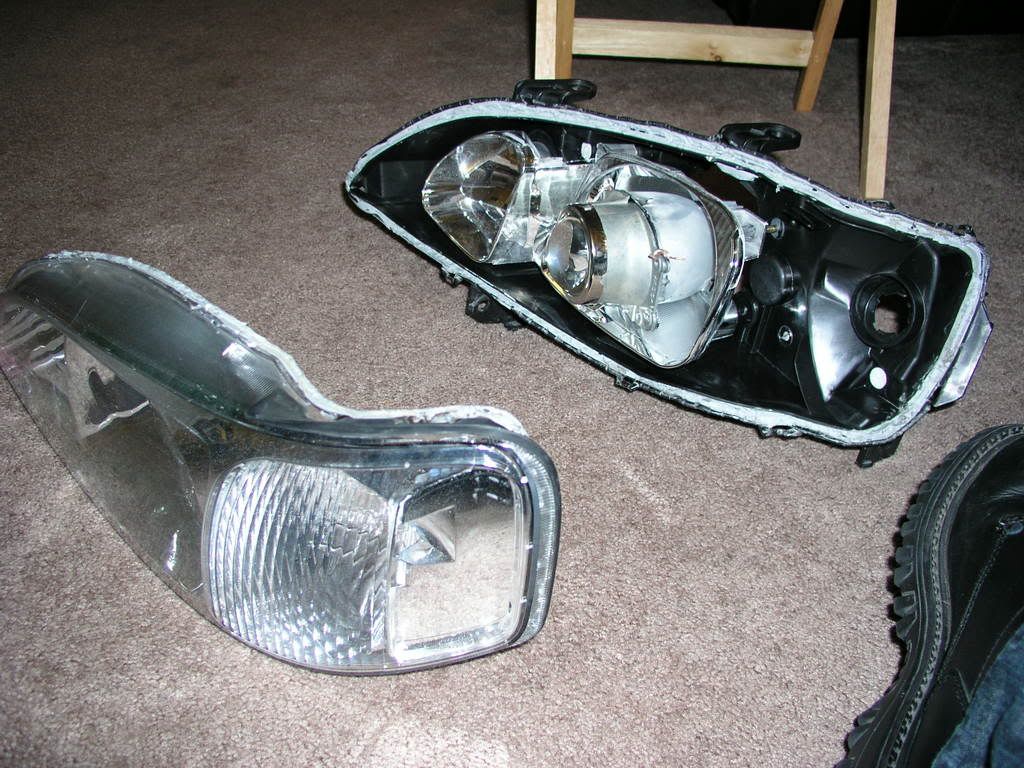
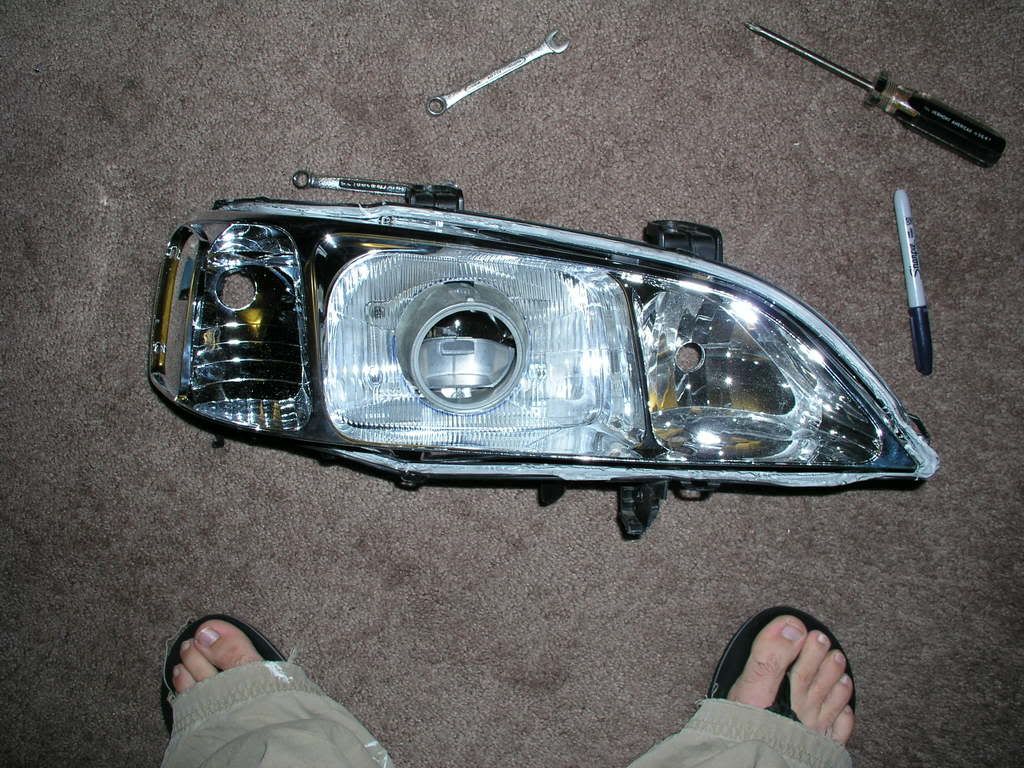
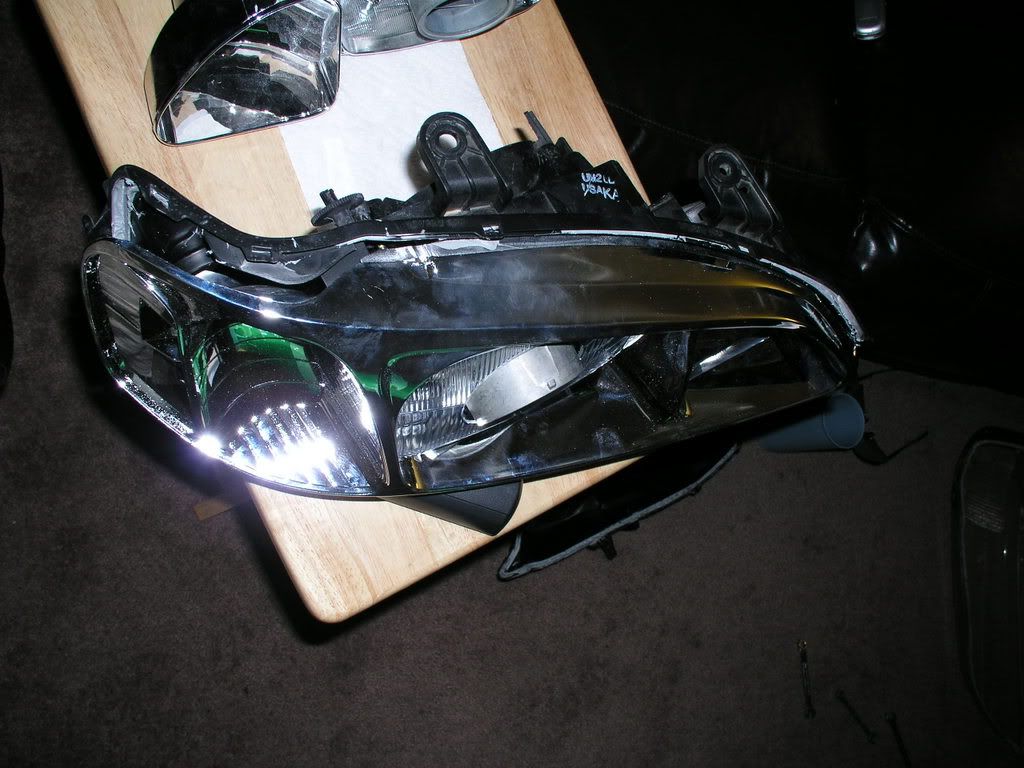
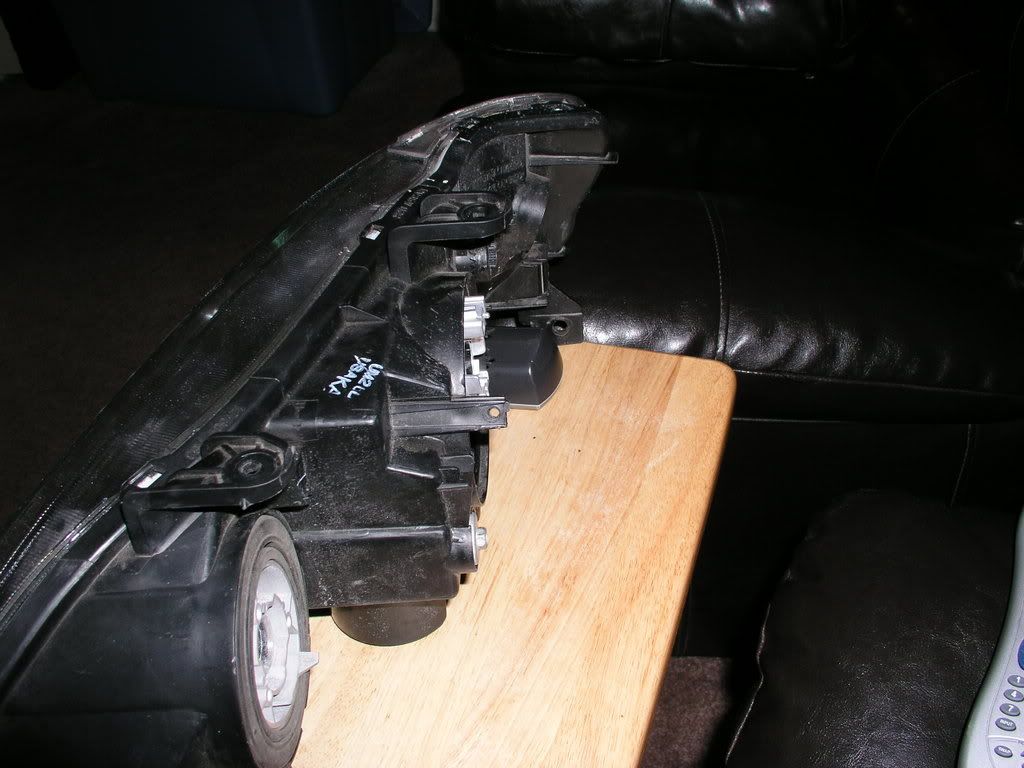
So - as it was in the last pics - I was a little too close for comfort to the housing lens to be sure there wont be any heat damage... So I took em apart again and cleared out a chunk of the chrome shells and was able to move the projector at least .5 inches back and added a solid bit of adjustablilty to the mix. I also added a top mount on each, seems the pitch was needed to be pinned back and they was the way to do it - JNC was right - and now I believe we have clearance on the front and Im hopeing I will have clearance on the back with the bulb clips against the cover that screws on... wish I has a spare to play with, my car is kind of using them right now. When my bulbs come we'll test fire and remove the bumper and see whats up.
Heres what we got now~
So we can see like 1/3 of an inch plus another 1/4 for the clips, think is will fly??? I can move it all forward if I need to, but shes clean right now, would be nice if this is good.
- and now I believe we have clearance on the front and Im hopeing I will have clearance on the back with the bulb clips against the cover that screws on... wish I has a spare to play with, my car is kind of using them right now. When my bulbs come we'll test fire and remove the bumper and see whats up.Heres what we got now~
So we can see like 1/3 of an inch plus another 1/4 for the clips, think is will fly??? I can move it all forward if I need to, but shes clean right now, would be nice if this is good.
06-27-2007, 06:24 AM
#11
Former Sponsor
iTrader: (12)
Paint the inside of that plastic front bezel with the hole in it flat black to avoid any stray light passing through, then color match the front side with your cars color.  . This will solve your problem of any stray light passing through the bezel and creating glare. Also dont seal everything and then check for clearance in the back, take the cap off of your car and see if it fits. It is a very tight fit in the back since the ignitor is right in the cap and only have a couple inchs to work with. Otherwise the front bezel idea looks awesome, props to you. I was stupid enough to through mine away when i did the retro, good luck
. This will solve your problem of any stray light passing through the bezel and creating glare. Also dont seal everything and then check for clearance in the back, take the cap off of your car and see if it fits. It is a very tight fit in the back since the ignitor is right in the cap and only have a couple inchs to work with. Otherwise the front bezel idea looks awesome, props to you. I was stupid enough to through mine away when i did the retro, good luck
06-27-2007, 12:58 PM
#12
Instructor
Thread Starter
Join Date: Feb 2007
Location: San Diego
Posts: 222
Likes: 0
Received 0 Likes
on
0 Posts
My thoughts to a T as far as the shroud goes!!! I am also going to flat black the projector parts and everything inside that area. I will definitely check all fittings and make my aiming adjustments prior to a reseal of the housing. Unfortunately I wont have any room to alter the positioning of the lamp after I reseal other than the factory spots and those really need to be used as a start to get my high beam all set... Just need my darn bulbs!
I could also use some guides on the proper aiming of the projectors: how high and whats center is, etc.... Any thoughts???
Thanks everyone for the feedback so far!
I could also use some guides on the proper aiming of the projectors: how high and whats center is, etc.... Any thoughts???
Thanks everyone for the feedback so far!
Originally Posted by JnC
Paint the inside of that plastic front bezel with the hole in it flat black to avoid any stray light passing through, then color match the front side with your cars color. . This will solve your problem of any stray light passing through the bezel and creating glare. Also dont seal everything and then check for clearance in the back, take the cap off of your car and see if it fits. It is a very tight fit in the back since the ignitor is right in the cap and only have a couple inchs to work with. Otherwise the front bezel idea looks awesome, props to you. I was stupid enough to through mine away when i did the retro, good luck
. This will solve your problem of any stray light passing through the bezel and creating glare. Also dont seal everything and then check for clearance in the back, take the cap off of your car and see if it fits. It is a very tight fit in the back since the ignitor is right in the cap and only have a couple inchs to work with. Otherwise the front bezel idea looks awesome, props to you. I was stupid enough to through mine away when i did the retro, good luck
06-27-2007, 02:43 PM
#13
Former Sponsor
iTrader: (12)
If you are sitting in your car then your output from driver seat should look like this
_______________/''''''''''''''''''''''___________/'''''''''''''''''''''''''''''''''''''''
Thats both of the projectors aligned. At 25' the lower line should have a 3'' dip from the center of the projector, got it? So park your car close to the wall and mark the spot where its the center of the projector, reverse your car back to 25' and the mark should be 3'' higher than the bottom line of the output.
 06-27-2007, 07:15 PM
#16
He probably spent anywhere from 130 to 150 for those projectors, and bulbs around $65 for new bulbs and little things here and there. Around 200 bucks. Maybe you can do this retro while your car's sitting in the garage.. = )
06-27-2007, 07:17 PM
#17
Instructor
Thread Starter
Join Date: Feb 2007
Location: San Diego
Posts: 222
Likes: 0
Received 0 Likes
on
0 Posts
Originally Posted by loojoohnnyl
how much did that cost u
Soo far ---
$150 TSX Projector Headlights
$85 Bulbs : Philips 85122+
$80 Dremel -- by far will pay for itself in time! so kinda doesnt count...
$120 Headlights
$50 Paint, tape, various nuts/bolts/washers, stuff
------------------------------------
$485 ish in parts / $400 minus dremel tool
+
A bunch of labor and love!
Might be a 20 hour project give or take a few hours (think Im into the 12-14 range now with guesstimations of possible refitting once I get the bulbs and strap em up to my front end). I think it will be WORTH IT!!! And if I end up doing it again for myself or someone else, it will be much smoother and less time consuming. But I see why some of these shops charge $1500-2000 to do these retros. Sucks that theres no gaurentee of how long they will last. Im pretty sure mine and any others we've seen done here will last a darn good while, but you know what I mean.
06-27-2007, 07:19 PM
#18
Originally Posted by baddbenny
Soo far ---
$150 TSX Projectors
$85 Bulbs
$80 Dremel -- by far will pay for itself in time!
$120 Headlights
$50 Paint, tape, various nuts/bolts/washers, stuff
------------------------------------
$485 ish in parts
+
A bunch of labor and love!
Might be a 20 hour project give or take a few hours (think Im into the 12-14 range now with guesstimations of possible refitting once I get the bulbs and strap em up to my front end). I think it will be WORTH IT!!! And if I end up doing it again for myself or someone else, it will be much smoother and less time consuming. But I see why some of these shops charge $1500-2000 to do these retros. Sucks that theres no gaurentee of how long they will last. Im pretty sure mine and any others we've seen done here will last a darn good while, but you know what I mean.
06-27-2007, 07:24 PM
#19
Instructor
Thread Starter
Join Date: Feb 2007
Location: San Diego
Posts: 222
Likes: 0
Received 0 Likes
on
0 Posts
Originally Posted by myTaLizaS3.2
those shops don't offer guarentees? sucks. I can see why they can't guarentee the bulbs and ballast, but as for the retro and making it stick to the headlights, they should be able to guarentee it. Unless they know they did a half ass job.
 06-27-2007, 10:19 PM
#21
Former Sponsor
iTrader: (12)
Good to see that you ended up doing it yourself. It is intimidating at first but if you plan it wisely then its not rocket science :p. Plus with my thread and now this, people should have no trouble doing this, I know to some it this whole thing does not make any sense and there are people that would debate the question WHY PROJECTORS? Why not stick with the factory reflector based HIDs? They are still HIDs arent they? Well you wouldnt know the answer to that untill you drive a car with projector equipped headlights. My first retro was in 01 and most of the cars that I have owned over the years either had projectors from factory or I retroed a couple or 4 to get by  .
.
Ben, as far as paint is considered, do not black it out. You have a silver car, leave it chrome. Just take the plastic cover with the hole in it and paint it to match your cars color, would look great.
. Ben, as far as paint is considered, do not black it out. You have a silver car, leave it chrome. Just take the plastic cover with the hole in it and paint it to match your cars color, would look great.
06-27-2007, 11:23 PM
#22
Instructor
Thread Starter
Join Date: Feb 2007
Location: San Diego
Posts: 222
Likes: 0
Received 0 Likes
on
0 Posts
Originally Posted by JnC
Good to see that you ended up doing it yourself. It is intimidating at first but if you plan it wisely then its not rocket science :p. Plus with my thread and now this, people should have no trouble doing this, I know to some it this whole thing does not make any sense and there are people that would debate the question WHY PROJECTORS? Why not stick with the factory reflector based HIDs? They are still HIDs arent they? Well you wouldnt know the answer to that untill you drive a car with projector equipped headlights. My first retro was in 01 and most of the cars that I have owned over the years either had projectors from factory or I retroed a couple or 4 to get by .
Ben, as far as paint is considered, do not black it out. You have a silver car, leave it chrome. Just take the plastic cover with the hole in it and paint it to match your cars color, would look great.
. Ben, as far as paint is considered, do not black it out. You have a silver car, leave it chrome. Just take the plastic cover with the hole in it and paint it to match your cars color, would look great.
Side note - Anyone ever used CHROME spray paint??? Is it really chromey looking or what? Hmmmmmm......
06-28-2007, 04:55 AM
#23
Former Sponsor
iTrader: (12)
Originally Posted by baddbenny
Side note - Anyone ever used CHROME spray paint??? Is it really chromey looking or what? Hmmmmmm......
The inside of the following TL fogs were painted with that chrome paint and you can tell its no where near chrome look or chromey look .
 07-13-2007, 01:24 PM
#25
Instructor
Thread Starter
Join Date: Feb 2007
Location: San Diego
Posts: 222
Likes: 0
Received 0 Likes
on
0 Posts
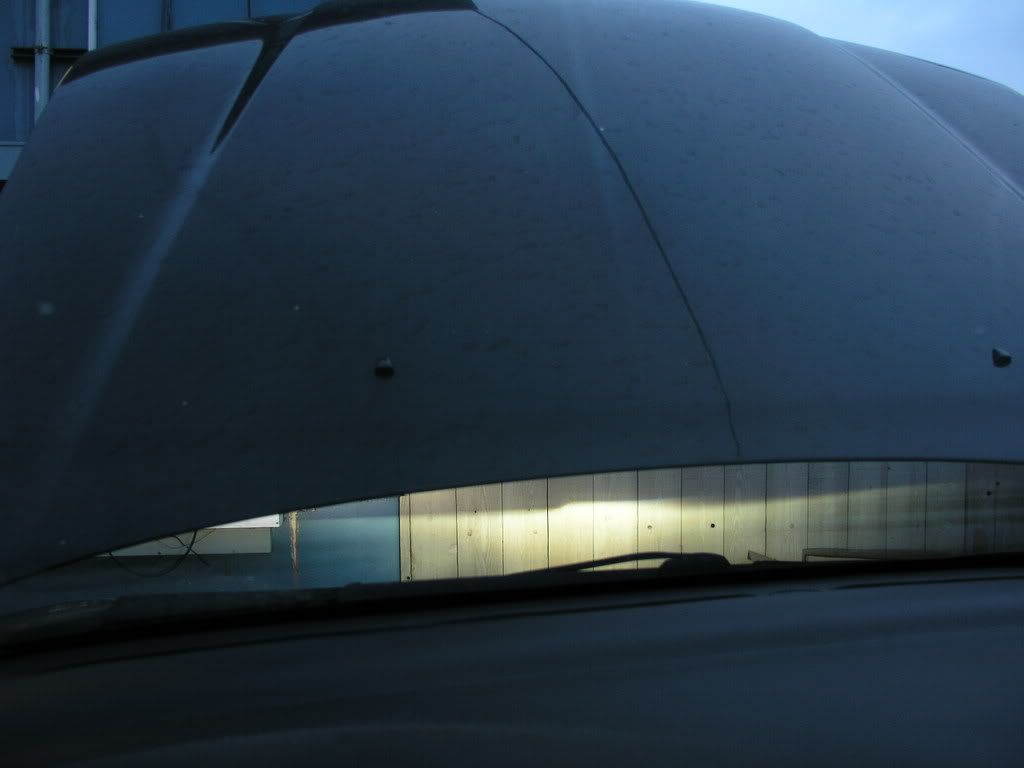
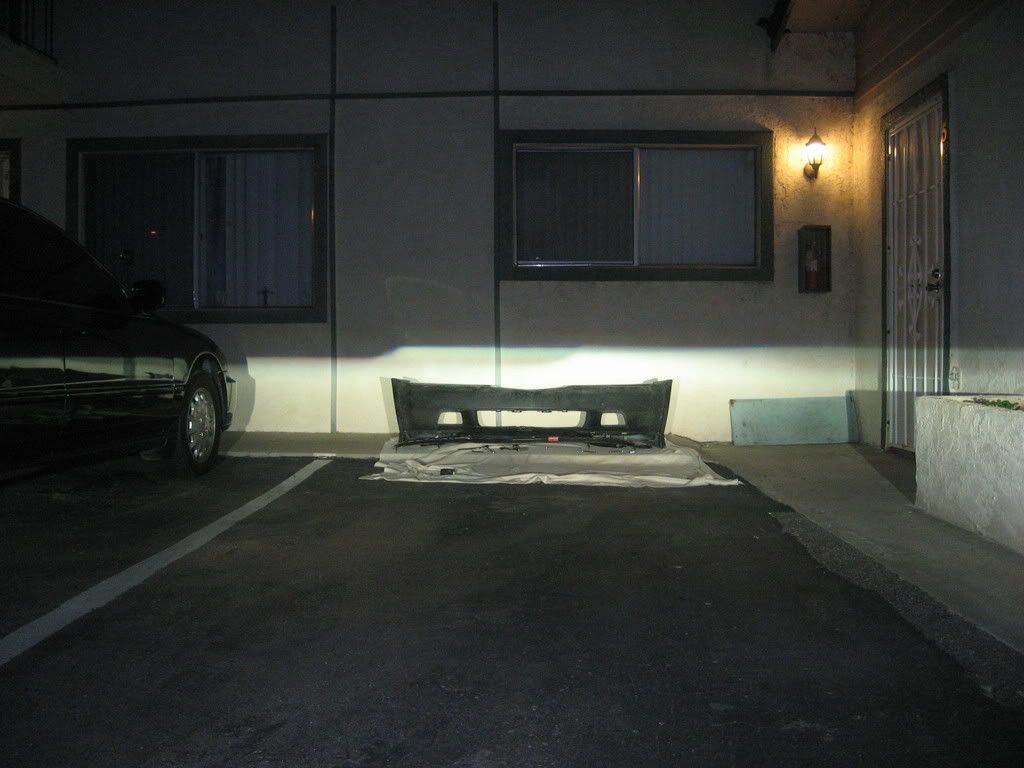
So it's been a few days since last playing. I have been going crazy with my car trying to get 50 things done at once... This isnt much of an update, but I finally tore off my bumper to have a look see at whats back there and test fit the lights. Just one of them, I have to wait for the car to get back from the shop because there will be possible radiator support replacement or adjustments and I want to do my lights when its all set. As far as the support work, its a long story of a bad insurance experience that I hope will come to a happy ending this next week 
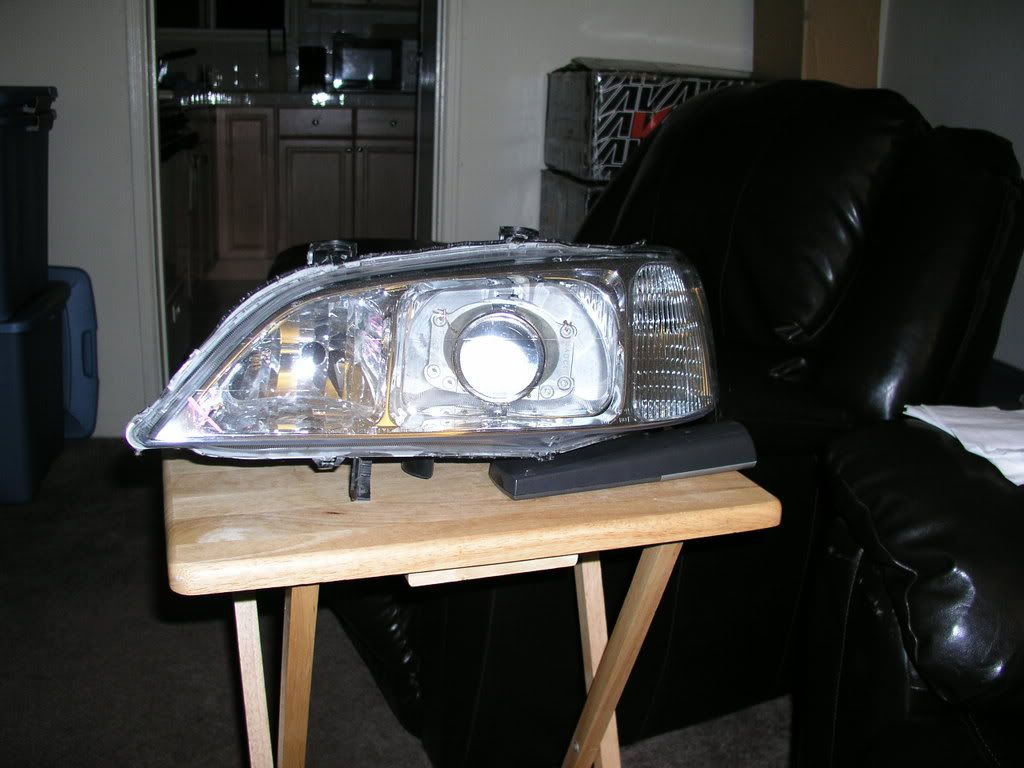
Anyhow - so a few photos, one more step taken!
shot at -2 these a pretty bright! first shot you couldn't even see the thing...!!!
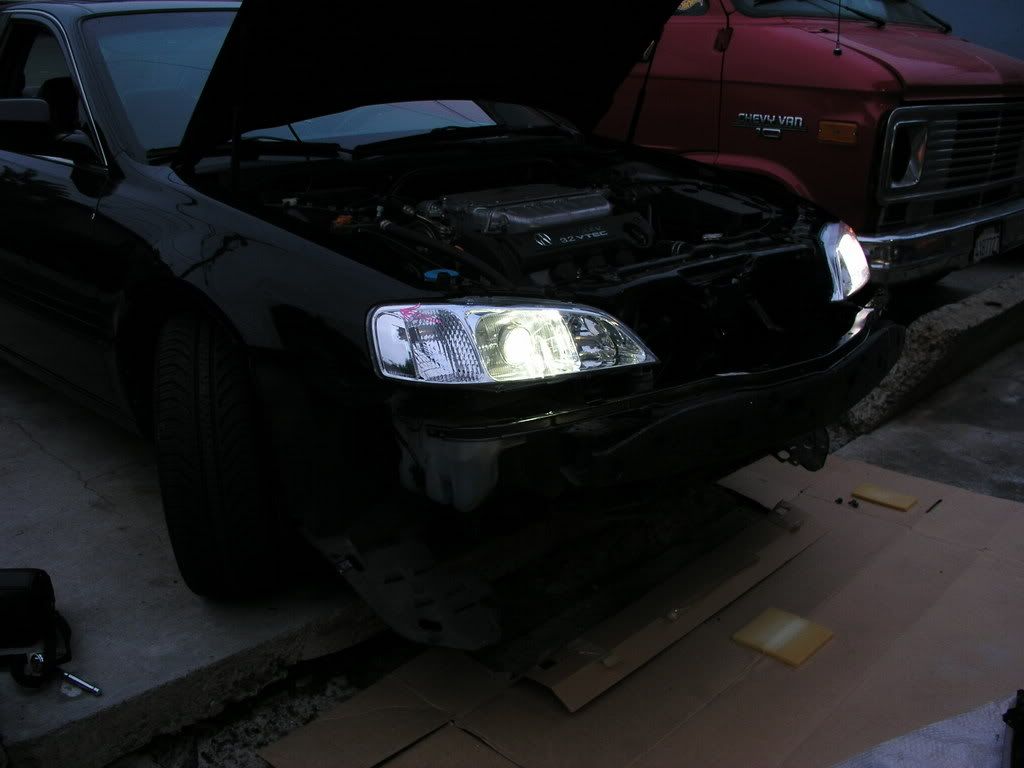
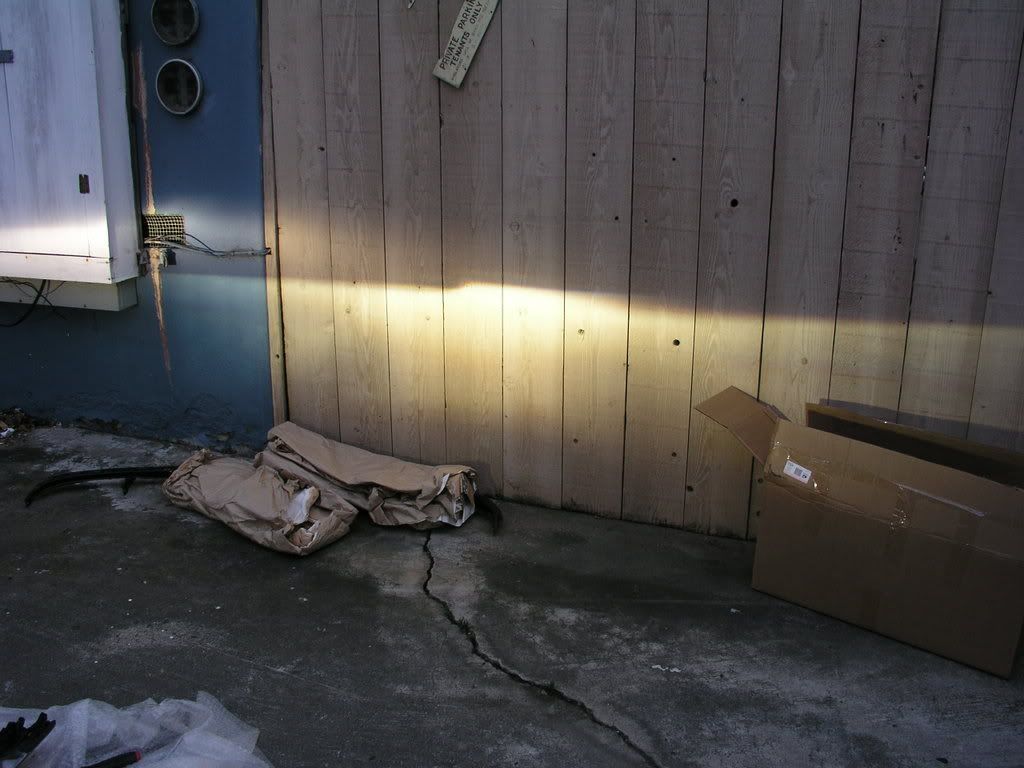
this one is taken at -2
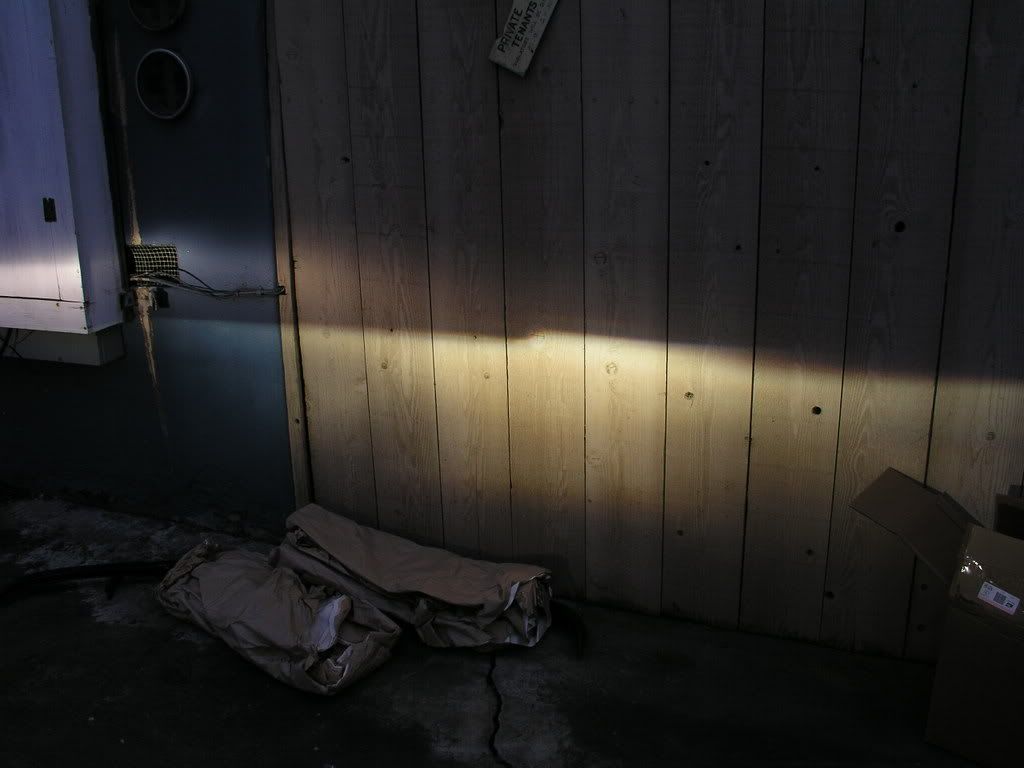
So close - and the SD meet is next weekend.... My car goes into the shop monday to get the kit and other paint work/crap done, If Im lucky I will get it back on thursday and have friday to finish the lights off.
Thanks!!!
Anyhow - so a few photos, one more step taken!
shot at -2 these a pretty bright! first shot you couldn't even see the thing...!!!
this one is taken at -2
So close - and the SD meet is next weekend.... My car goes into the shop monday to get the kit and other paint work/crap done, If Im lucky I will get it back on thursday and have friday to finish the lights off.
Thanks!!!
07-12-2008, 04:46 AM
#27
Instructor
Thread Starter
Join Date: Feb 2007
Location: San Diego
Posts: 222
Likes: 0
Received 0 Likes
on
0 Posts
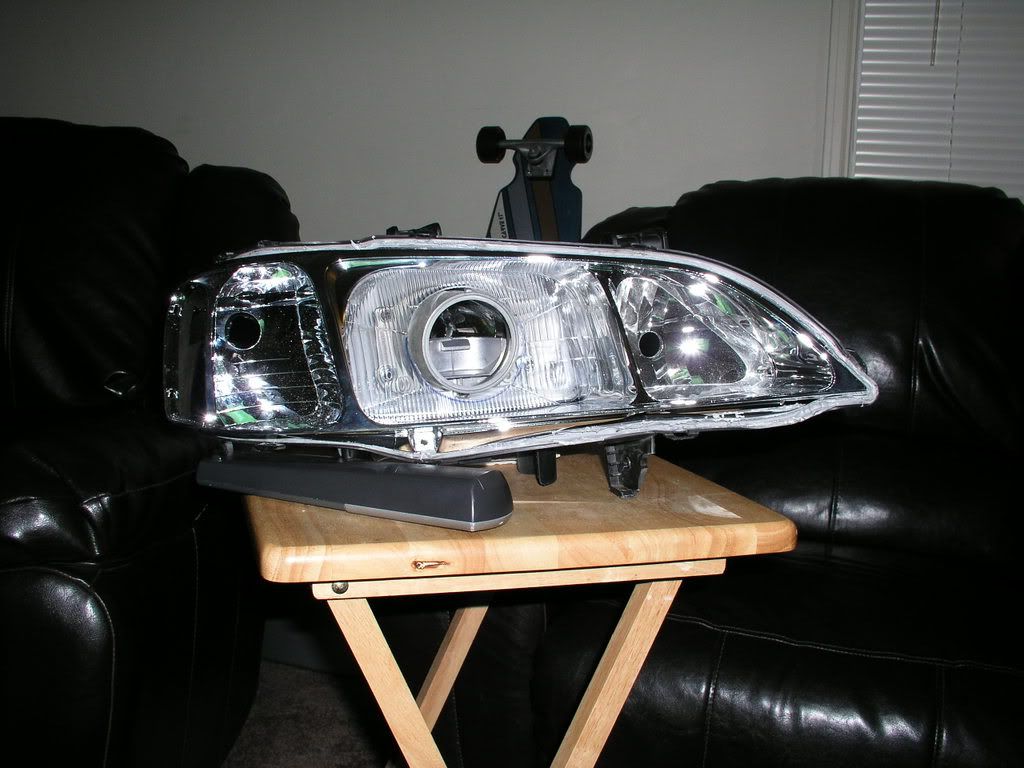
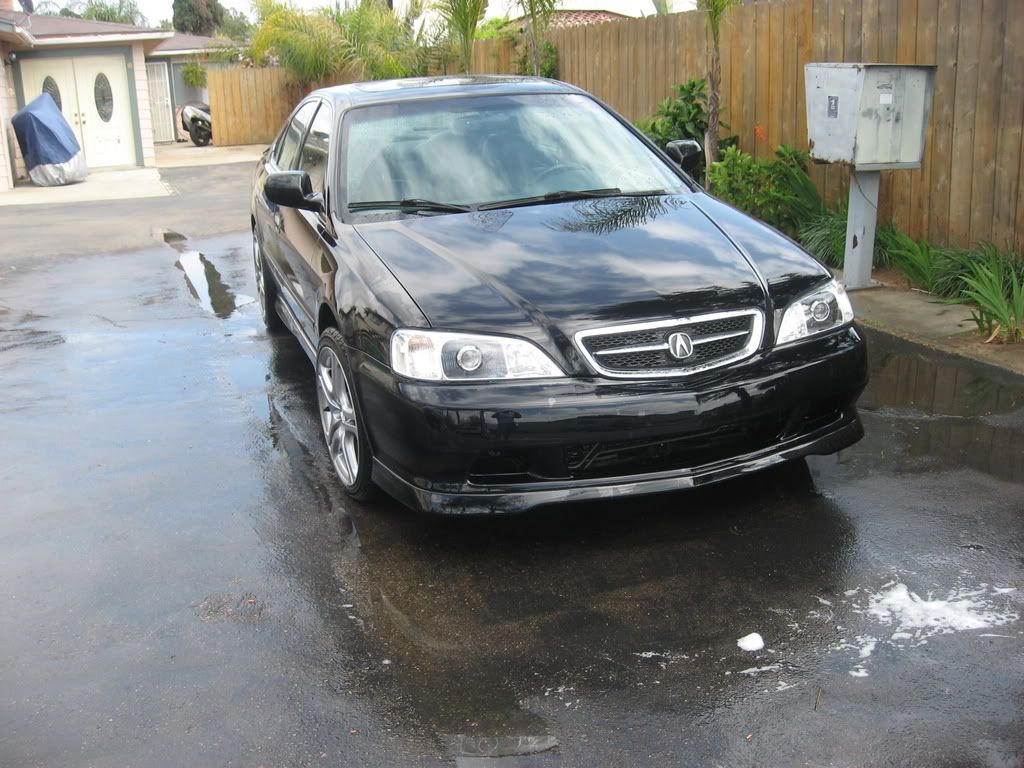
Long over due...
So - I've enjoyed these babies for a like 3 or so months now - IN LOVE!
Finally gonna share the last of my trip to happiness - I do apologize for how long it took. Basically I moved for a new job in the middle of the project and it kinda got set on the dusty back burner...
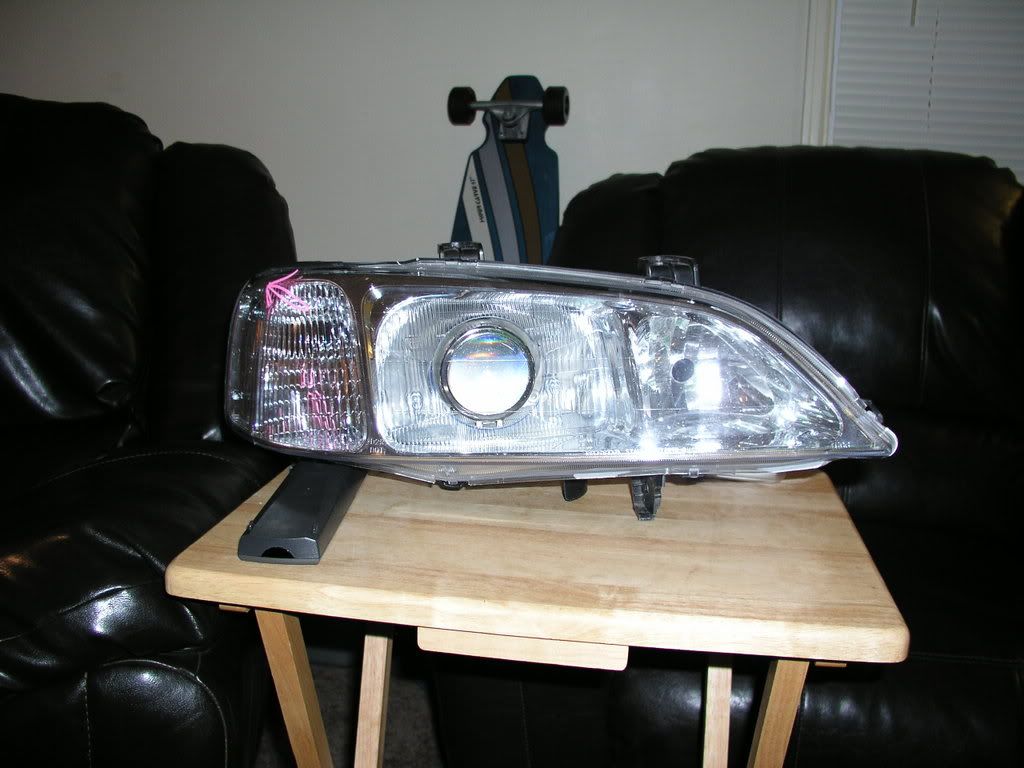
I got things aimed up nice, and set to seal the deal and make it so.
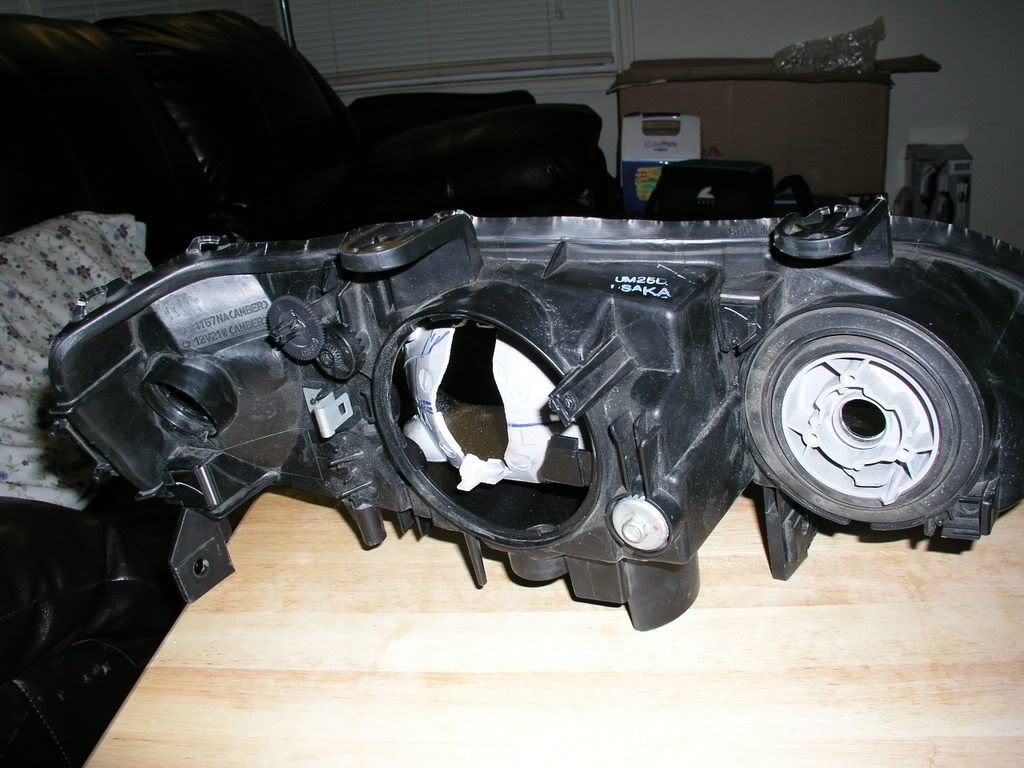
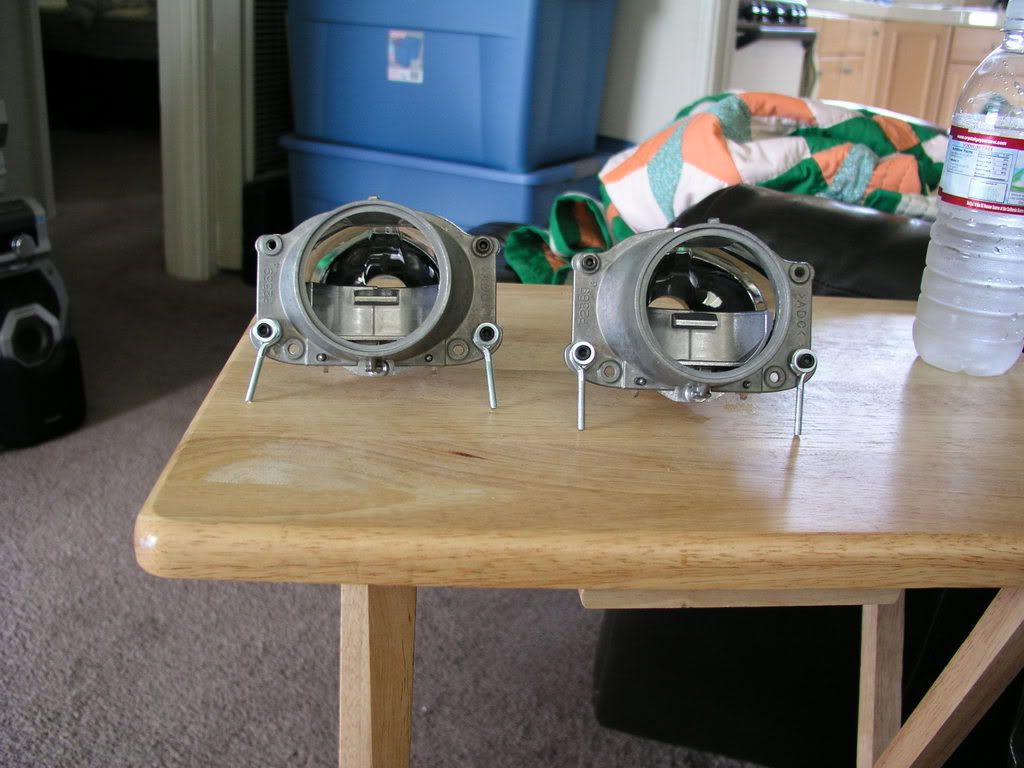
Modified the housing cap to give more room for the projector to set back in the housing. Use some JB Weld mix, tape, and my dremel to alter the cap - Quite easy and could be done super clean if one took the time to sand it all up, I did not.
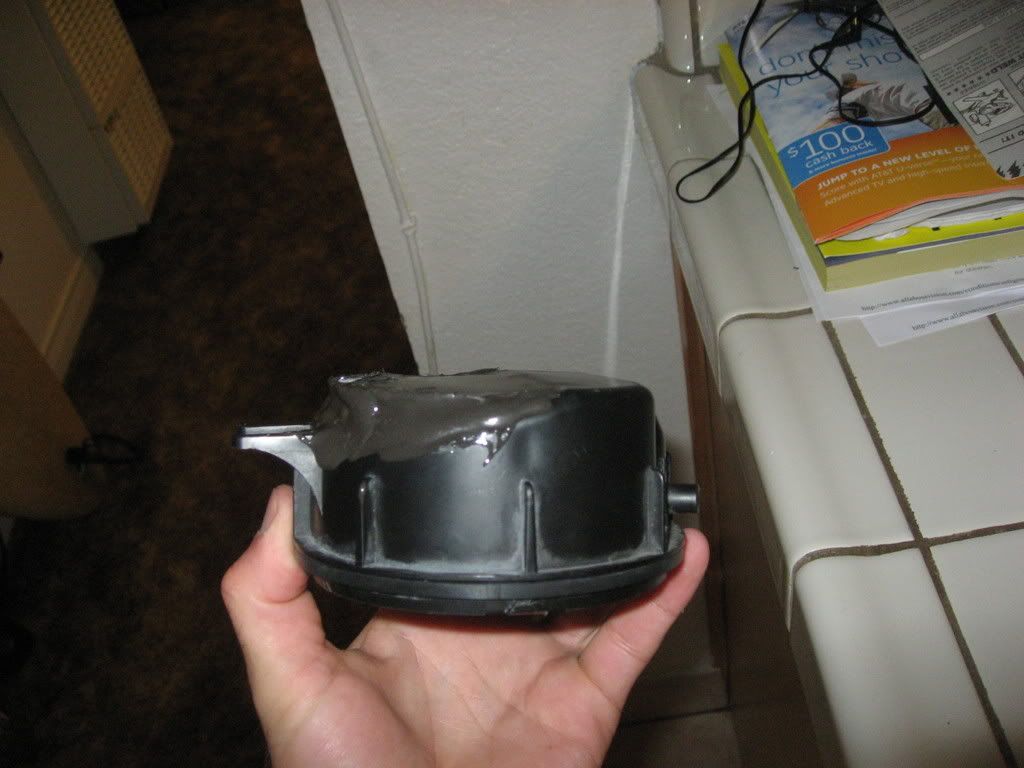
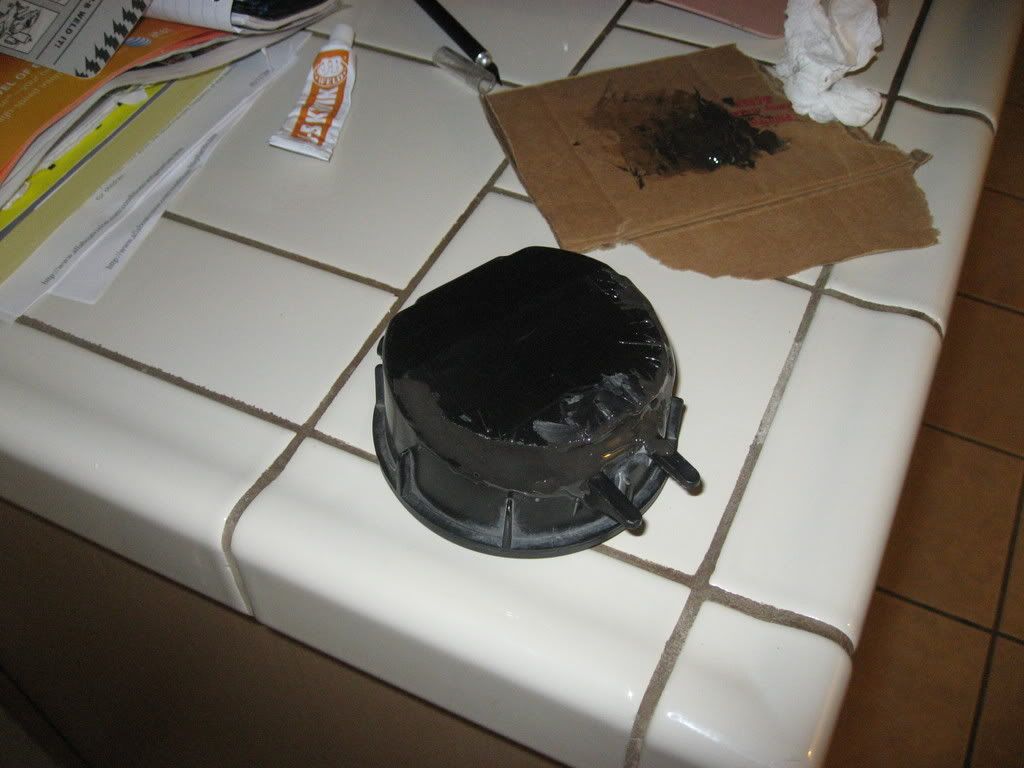
Cap on
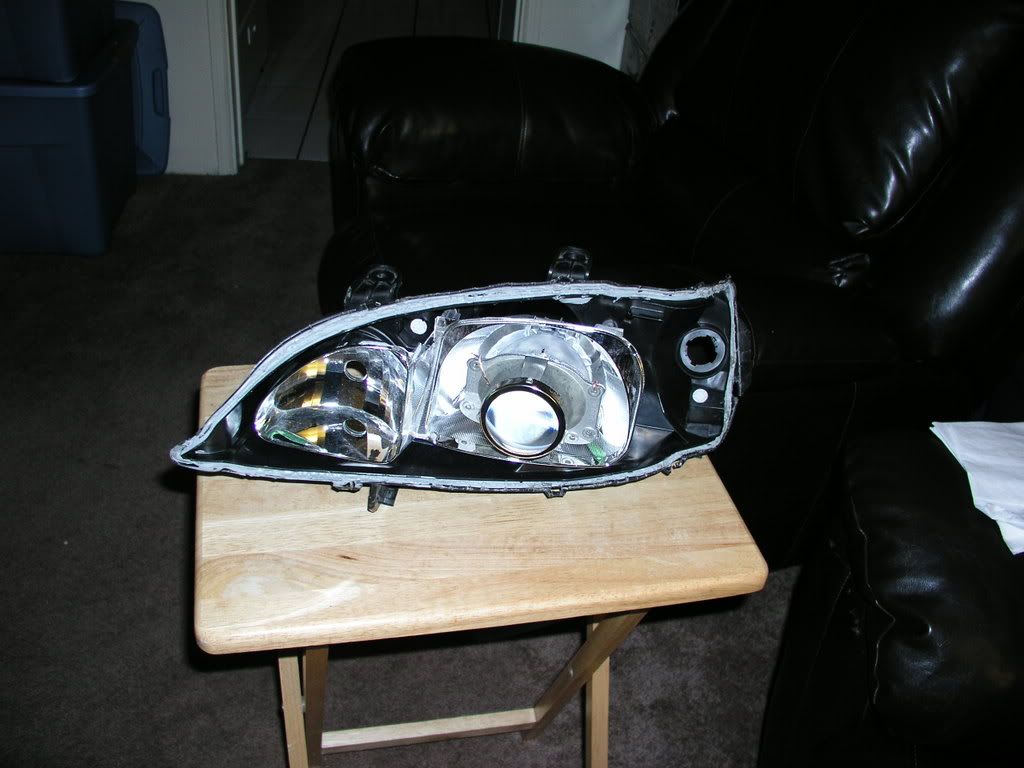
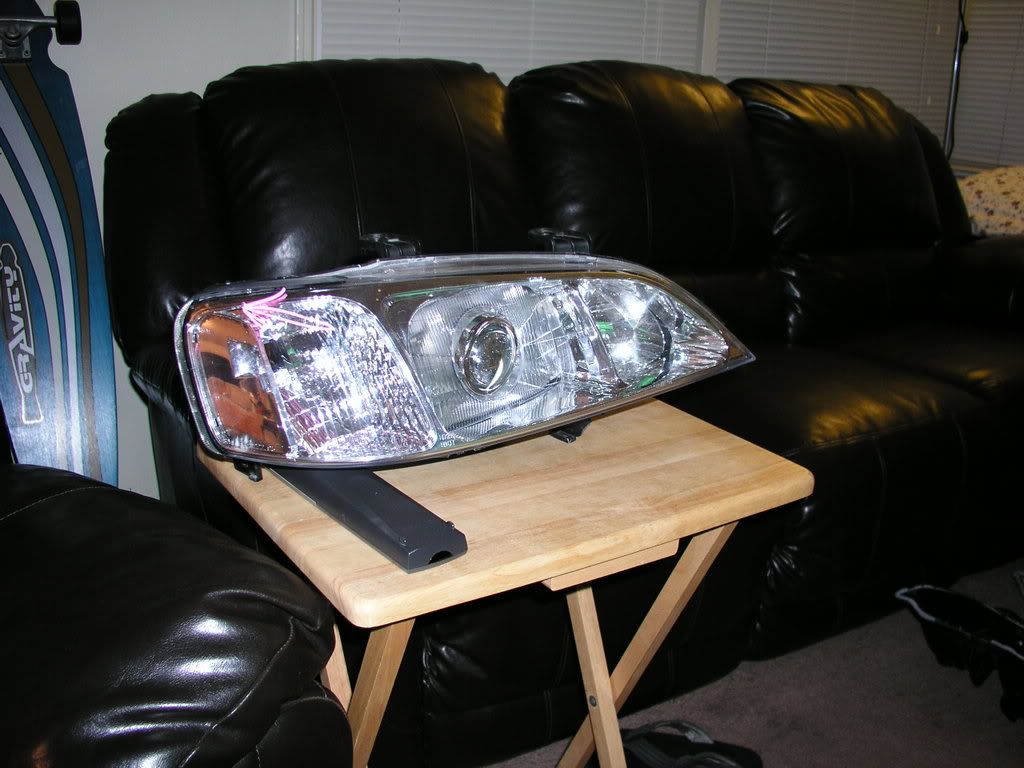
assembled - used a set of HID Planets supplied bezels - chrome - not cheap...
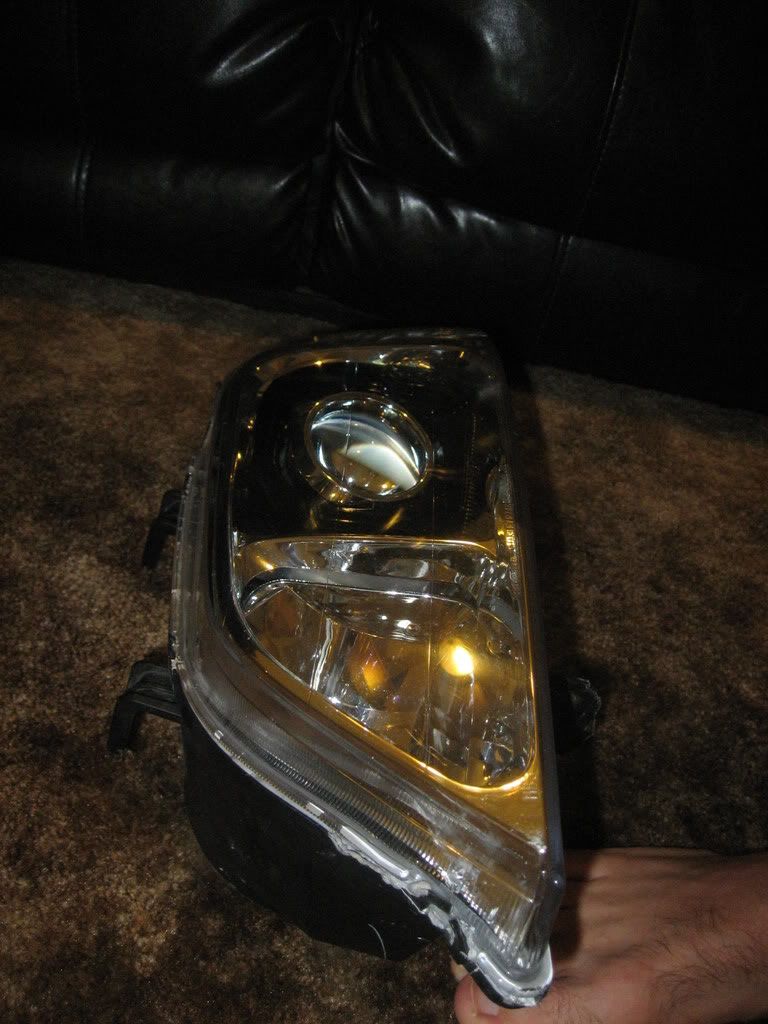
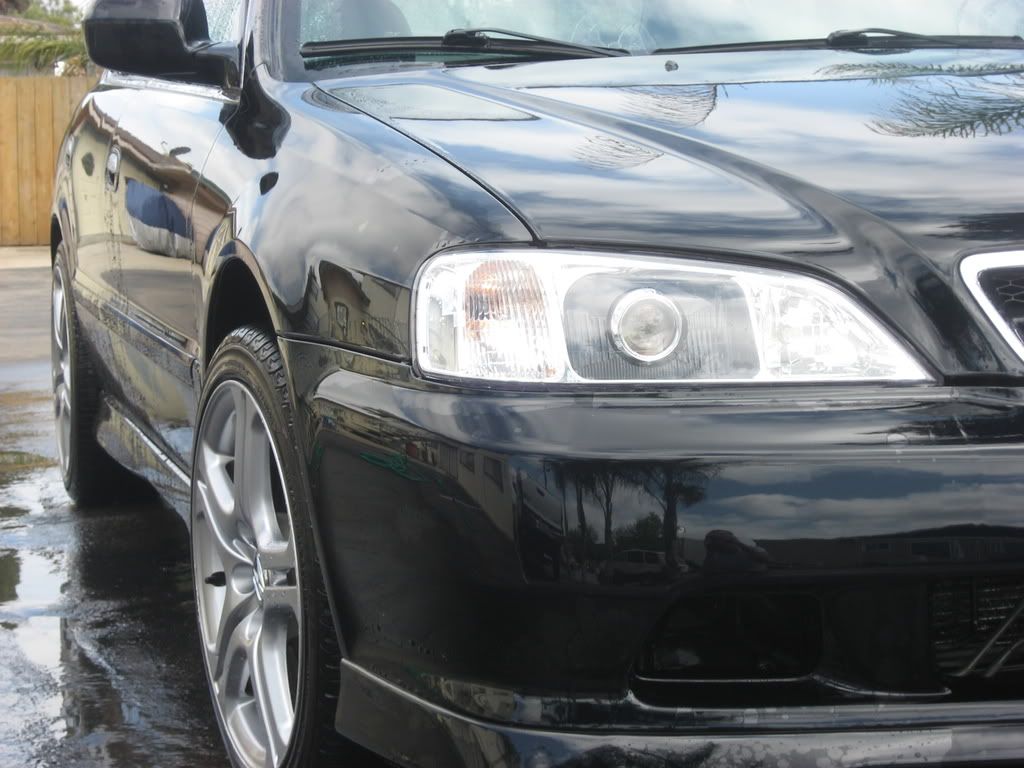
POW! Not too shabby - whatcha think???
Finally gonna share the last of my trip to happiness - I do apologize for how long it took. Basically I moved for a new job in the middle of the project and it kinda got set on the dusty back burner...
I got things aimed up nice, and set to seal the deal and make it so.
Modified the housing cap to give more room for the projector to set back in the housing. Use some JB Weld mix, tape, and my dremel to alter the cap - Quite easy and could be done super clean if one took the time to sand it all up, I did not.
Cap on
assembled - used a set of HID Planets supplied bezels - chrome - not cheap...
POW! Not too shabby - whatcha think???
07-12-2008, 05:06 AM
#28
Instructor
Thread Starter
Join Date: Feb 2007
Location: San Diego
Posts: 222
Likes: 0
Received 0 Likes
on
0 Posts
Long over due...
So - I've enjoyed these babies for a like 3 or so months now - IN LOVE!
Finally gonna share the last of my trip to happiness - I do apologize for how long it took. Basically I moved for a new job in the middle of the project and it kinda got set on the dusty back burner...
I got things aimed up nice, and set to seal the deal and make it so.
Modified the housing cap to give more room for the projector to set back in the housing. Use some JB Weld mix, tape, and my dremel to alter the cap - Quite easy and could be done super clean if one took the time to sand it all up, I did not.
Cap on
assembled - used a set of HID Planets supplied bezels - chrome - not cheap... I had my lens shield color matched NBP
POW! Not too shabby - whatcha think???
Id like to do this again - next time instead of NBP lens' Id like to get them chromed, or black out the whole housing with NBP - on a set of brand new housings - even the cheapo ebay ones - that would look sweet through new outer plastics.
07-12-2008, 10:39 AM
#30
Burning Brakes
Great job! I especially like this pic
It looks really unique. I especially like the fact that you kept most of the stock TL headlight intact. It makes the projector conversion look really clean/stealth.
Any chance you'll be offering this conversion to other members?
It looks really unique. I especially like the fact that you kept most of the stock TL headlight intact. It makes the projector conversion look really clean/stealth.
Any chance you'll be offering this conversion to other members?
07-12-2008, 01:14 PM
#32
Instructor
Thread Starter
Join Date: Feb 2007
Location: San Diego
Posts: 222
Likes: 0
Received 0 Likes
on
0 Posts
Originally Posted by Rajca
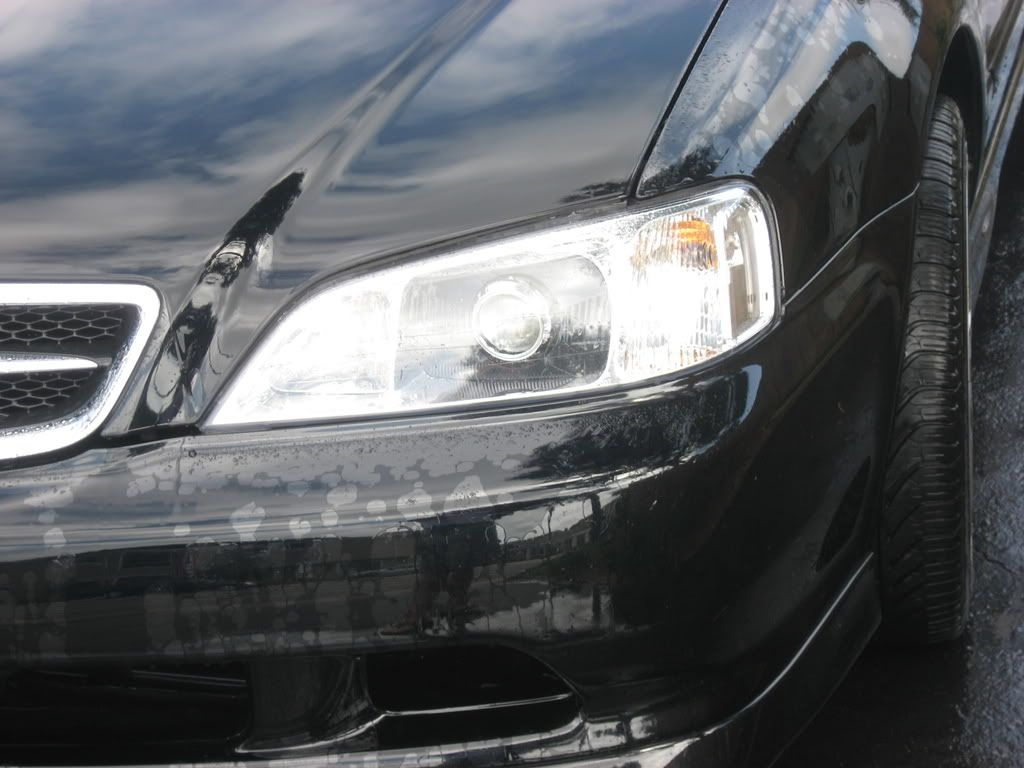
it looks lilke it had two black eyes, should have blacked out the whole headlight, also car looks great need a drop though, and debadge.
I was afraid of going to far into the RICER look with such and obvious mod, and at first I wasn't as happy as I hoped to be, but now I like it!
And aside from looks... F*CK YEAH! Projector headlights are by far - awesome! I cant ever see going back!
07-12-2008, 01:15 PM
#33
Instructor
Thread Starter
Join Date: Feb 2007
Location: San Diego
Posts: 222
Likes: 0
Received 0 Likes
on
0 Posts
Originally Posted by jjashaa
dang, should black out headlight and the grille. would look sick~!
All-Cali?
All-Cali?
07-12-2008, 01:23 PM
#34
Instructor
Thread Starter
Join Date: Feb 2007
Location: San Diego
Posts: 222
Likes: 0
Received 0 Likes
on
0 Posts
Originally Posted by death
Great job! I especially like this pic
It looks really unique. I especially like the fact that you kept most of the stock TL headlight intact. It makes the projector conversion look really clean/stealth.
Any chance you'll be offering this conversion to other members?
It looks really unique. I especially like the fact that you kept most of the stock TL headlight intact. It makes the projector conversion look really clean/stealth.
Any chance you'll be offering this conversion to other members?
My job with all the parts and paint - wasn't cheap $600-650, but I think it could have been less, and the first rounder took somewhere in the 25-30 hour mark over all in time. I wanna think I could so it in 15 or so next time.
I think overall - I did a really awesome clean job for my first attempt and the next set would only be cleaner!
So yeah - Im down! Interested?
07-12-2008, 09:42 PM
#35
Low & Slow w/Dubz On My
Join Date: Jan 2008
Location: MIL-TOWN, WI
Age: 42
Posts: 3,077
Likes: 0
Received 0 Likes
on
0 Posts
Originally Posted by baddbenny
Id love to offer it to others - Depending on the route with the painting of parts - mainly if it all had to go to a paint shop which would be a slightly unknown time factor - I could see finding the extra time and cranking out a set for someone in under a month. Getting all the parts would be the key though.
My job with all the parts and paint - wasn't cheap $600-650, but I think it could have been less, and the first rounder took somewhere in the 25-30 hour mark over all in time. I wanna think I could so it in 15 or so next time.
I think overall - I did a really awesome clean job for my first attempt and the next set would only be cleaner!
So yeah - Im down! Interested?
dude u did an awesome job on ur lights!!!
like they mentioned earlier it looks nice how u left most of the headlight intact so there isnt a lot of empty space in there....i would definitely be interested in a quote for this being done to my car..i have an 03 model though so im not sure how different it would be to do it...but like i said man, AWESOME JOB!!...big props to u...  07-17-2008, 07:50 AM
#36
Racer
Join Date: Nov 2004
Location: Ontario
Age: 53
Posts: 491
Likes: 0
Received 0 Likes
on
0 Posts
Sweet job!
Well done, inexpensive compared to what I paid for my retros, and you aren't kidding about never going back to the original headlight. Projectors are on my shopping list whenever I look for another car.
Well done, inexpensive compared to what I paid for my retros, and you aren't kidding about never going back to the original headlight. Projectors are on my shopping list whenever I look for another car.
07-19-2008, 01:23 AM
#37
Intermediate

Join Date: Feb 2007
Location: San Diego
Age: 46
Posts: 28
Likes: 0
Received 0 Likes
on
0 Posts
That is what I'm talking about! way tight! I'll be e-mailing you soon, when I get those projector's, and mabey you can do the them for me! again," Very PimP!"
07-20-2008, 07:06 PM
#39
Instructor
Thread Starter
Join Date: Feb 2007
Location: San Diego
Posts: 222
Likes: 0
Received 0 Likes
on
0 Posts
Originally Posted by AznWayTL's
Wow been over year now an I still havn't start on the Retro headlight
Yea - I hear ya man - my project got horribly interrupted and set on the side for a while...... So glad its done and I couldn't be any happier with the results.
G E T M O T I V A T E D ! ! !
07-20-2008, 07:07 PM
#40
Instructor
Thread Starter
Join Date: Feb 2007
Location: San Diego
Posts: 222
Likes: 0
Received 0 Likes
on
0 Posts
Originally Posted by OntarioTL
Sweet job!
Well done, inexpensive compared to what I paid for my retros, and you aren't kidding about never going back to the original headlight. Projectors are on my shopping list whenever I look for another car.
Well done, inexpensive compared to what I paid for my retros, and you aren't kidding about never going back to the original headlight. Projectors are on my shopping list whenever I look for another car.