DIY Rotors & Pads **HOW TO w/ PICTURES**
 06-25-2007, 11:03 AM
#1
Instructor
Thread Starter
DIY Rotors & Pads **HOW TO w/ PICTURES**
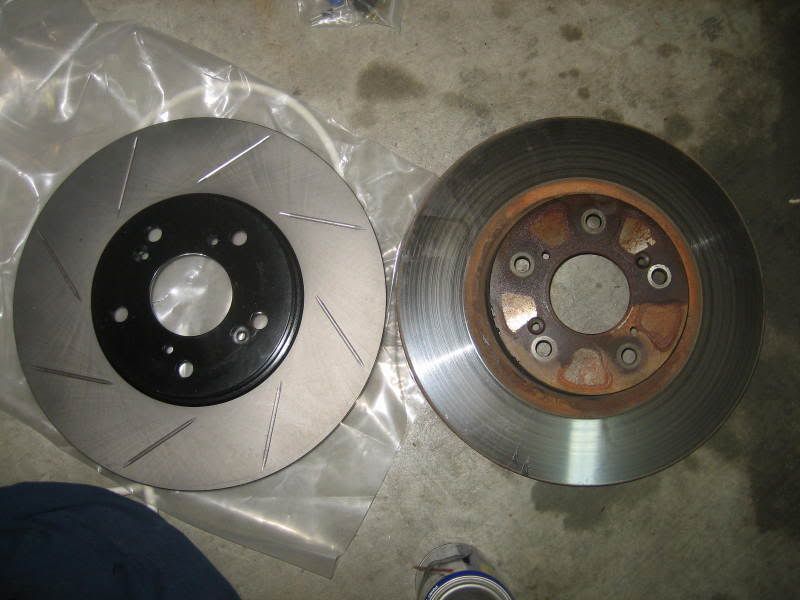
I replaced my front stock rotors and pads with Rotora Slotted Rotors and HAWK Ceramic Pads. I also painted my Calipers Black and you can find my DIY for that here. DIY PAINT CALIPERS .
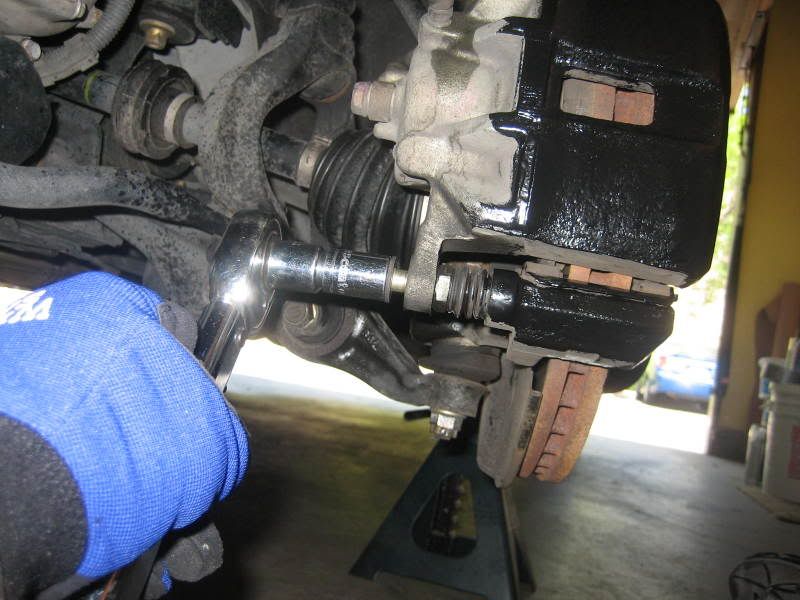
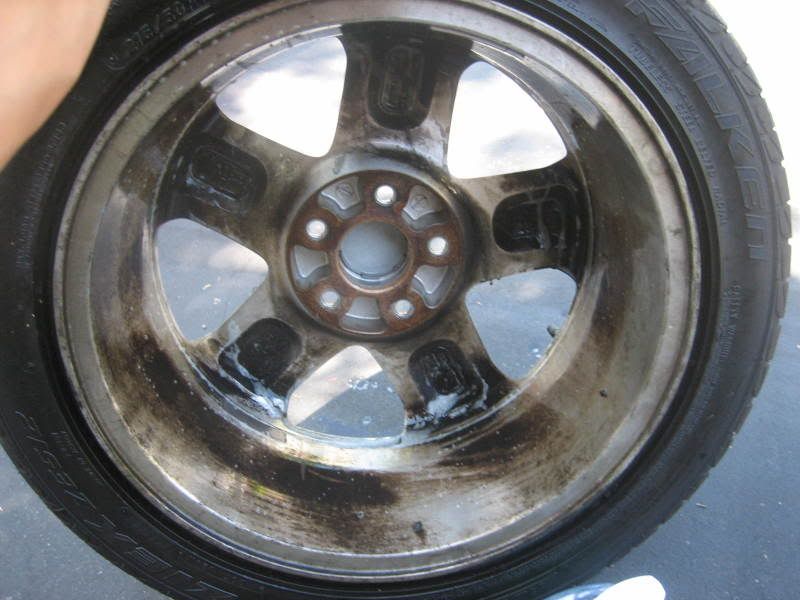
Step 1: Remove Wheel and Expose Old Caliper and Rotor
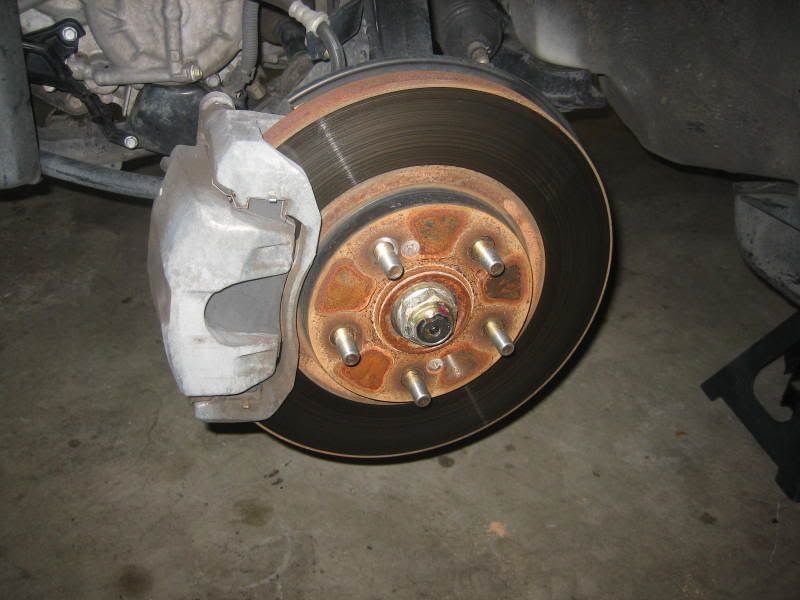
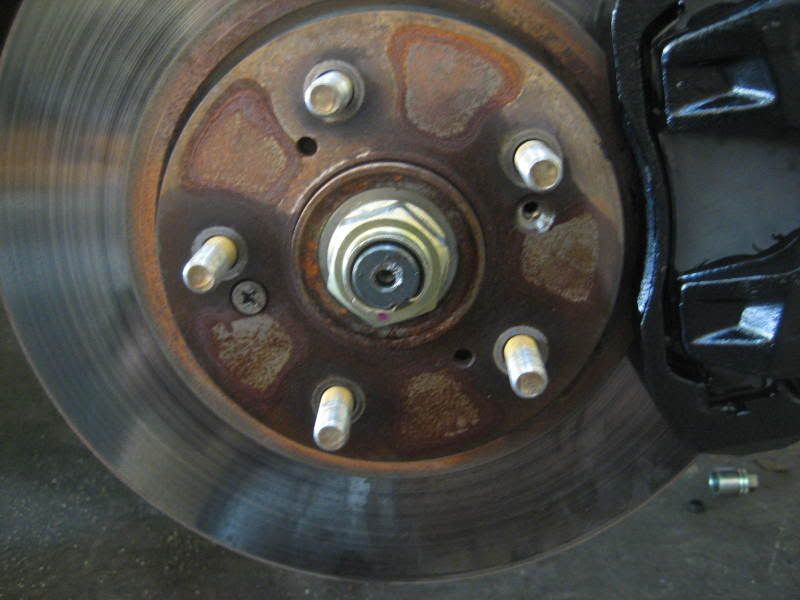
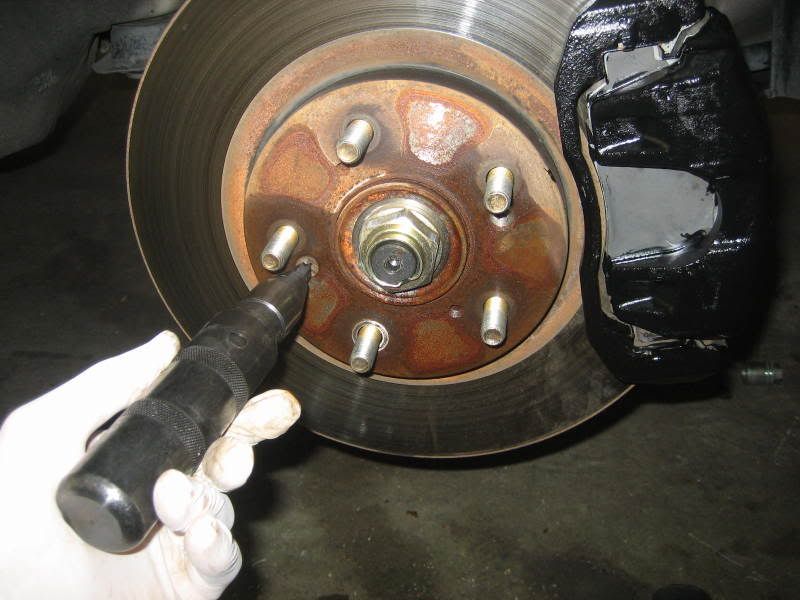
Step 2: Remove Annoying Rotor Screws. I sprayed the screws with WD40 and let sit for 10 minutes. Then I used a Impact Driver and the screws came right out after about 3 or 4 big hits.

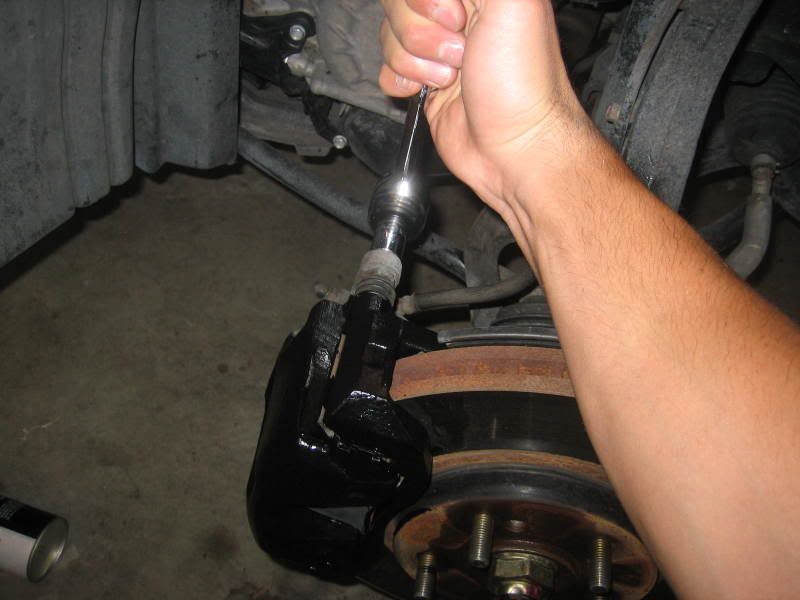
Step 3: Remove Calipers. You will need a 14mm Socket to remove the two bolts that hold on the top of the caliper that holds the pads.
Step 1: Remove Wheel and Expose Old Caliper and Rotor
Step 2: Remove Annoying Rotor Screws. I sprayed the screws with WD40 and let sit for 10 minutes. Then I used a Impact Driver and the screws came right out after about 3 or 4 big hits.
Step 3: Remove Calipers. You will need a 14mm Socket to remove the two bolts that hold on the top of the caliper that holds the pads.

The following 2 users liked this post by CHEWKNOW:
cleptosis (06-15-2012),
Curious3GTL (11-23-2014)
06-25-2007, 11:08 AM
#2
Instructor
Thread Starter
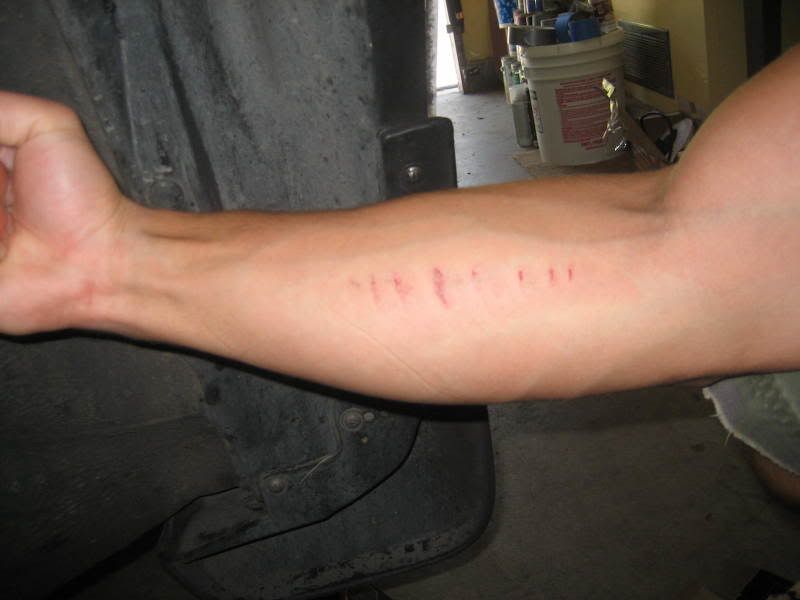
Step 4: Reomve Remaining Part of Caliper. You will need a 17mm Socket and some serious Arm Strength. Remember to be careful! I slipped and smacked my arm into the caliper! haha
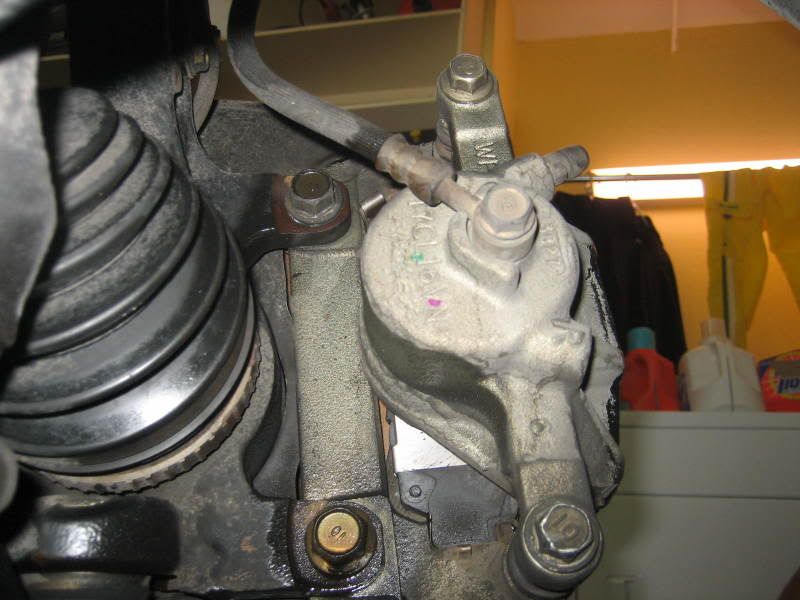
Step 5: Tie up Caliper out of the way. I used a coat hanger.

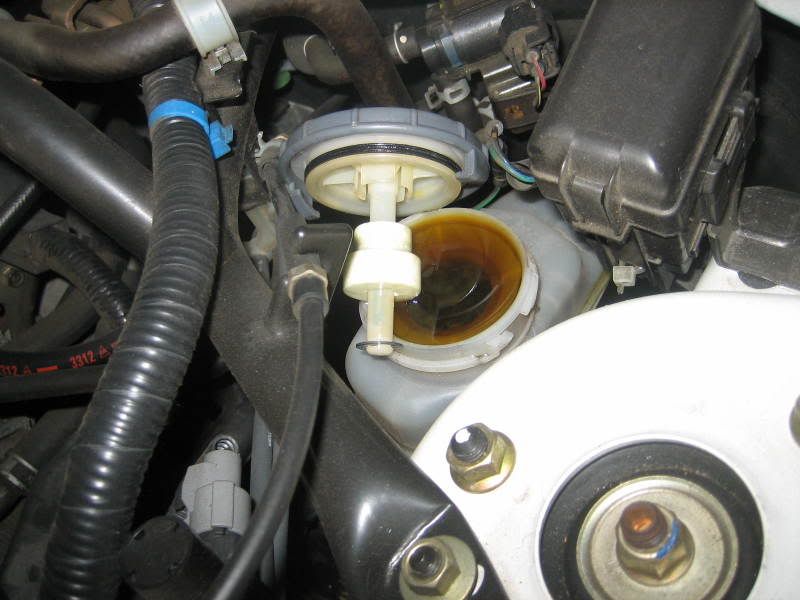
Step 6: Open up Master Cylinder Cover.
Step 5: Tie up Caliper out of the way. I used a coat hanger.
Step 6: Open up Master Cylinder Cover.
The following users liked this post:
Curious3GTL (11-23-2014)
06-25-2007, 11:14 AM
#3
Instructor
Thread Starter
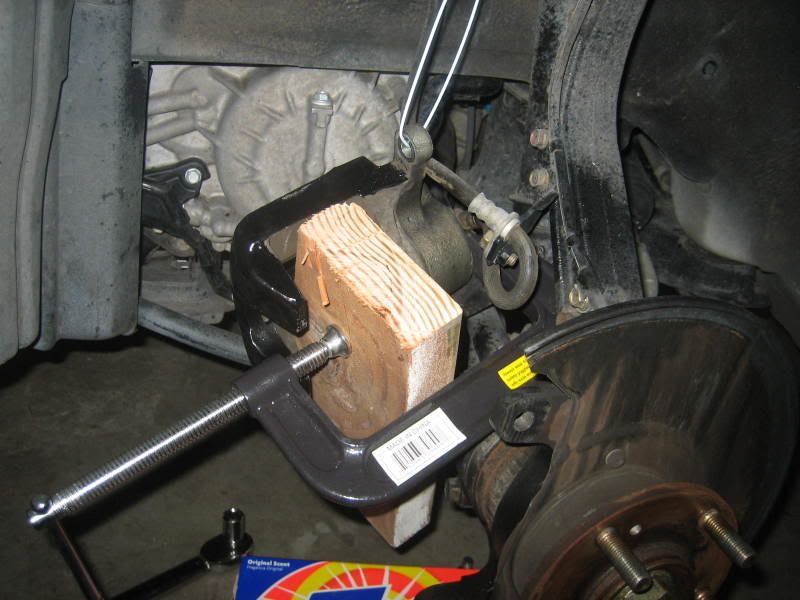
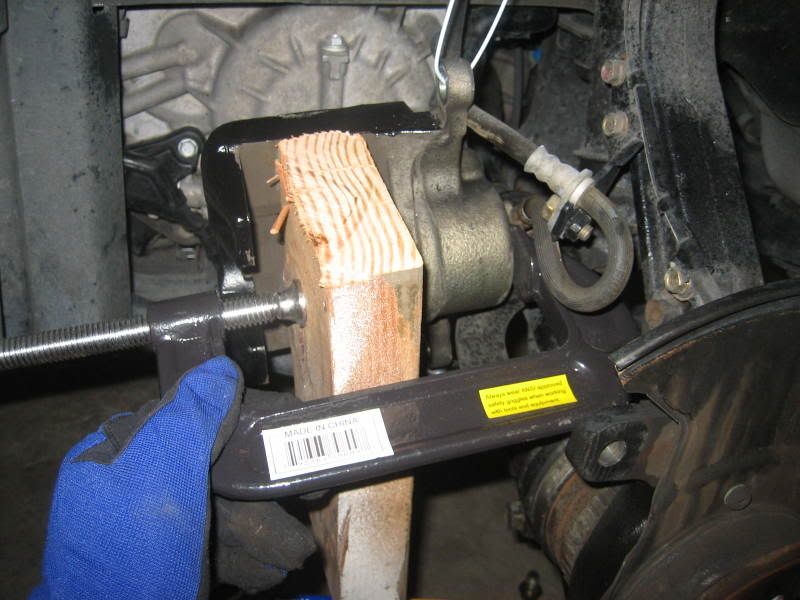
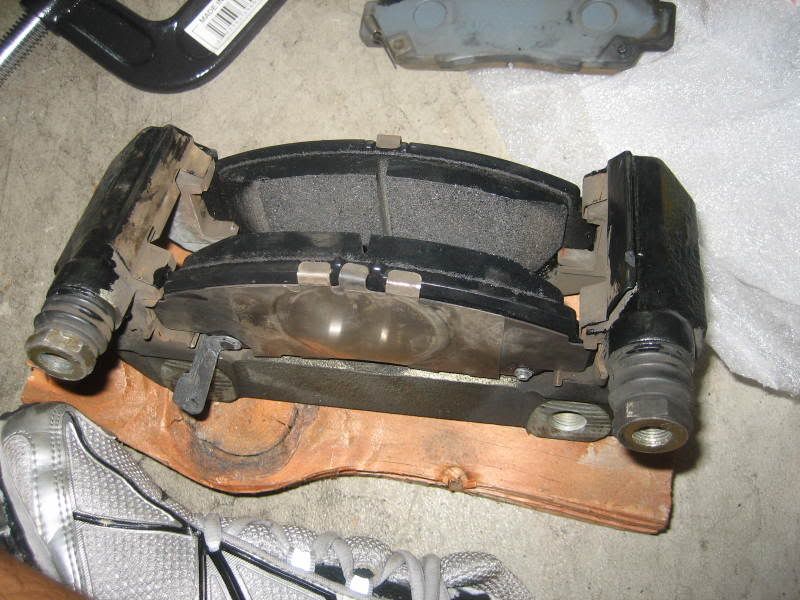
Step 7: Push the Caliper Piston back. I used a huge C-Clamp and an old piece of wood i had in my garage.
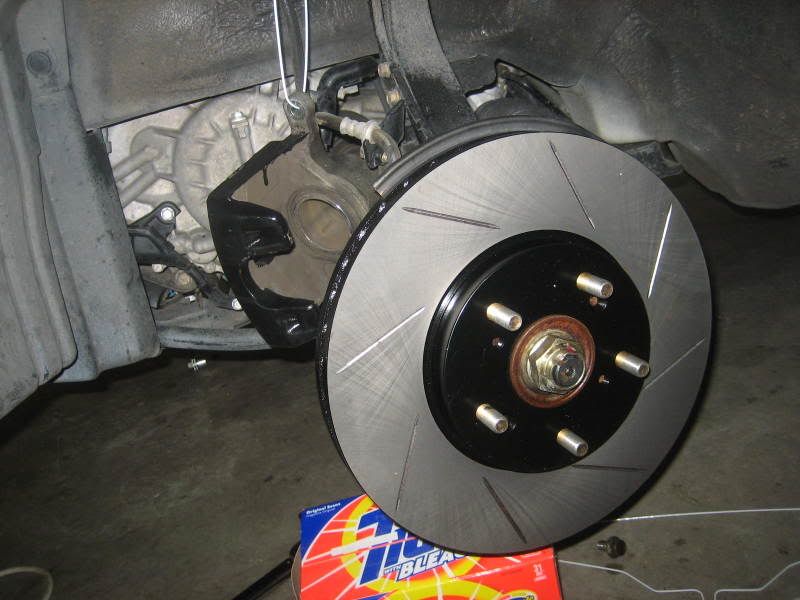
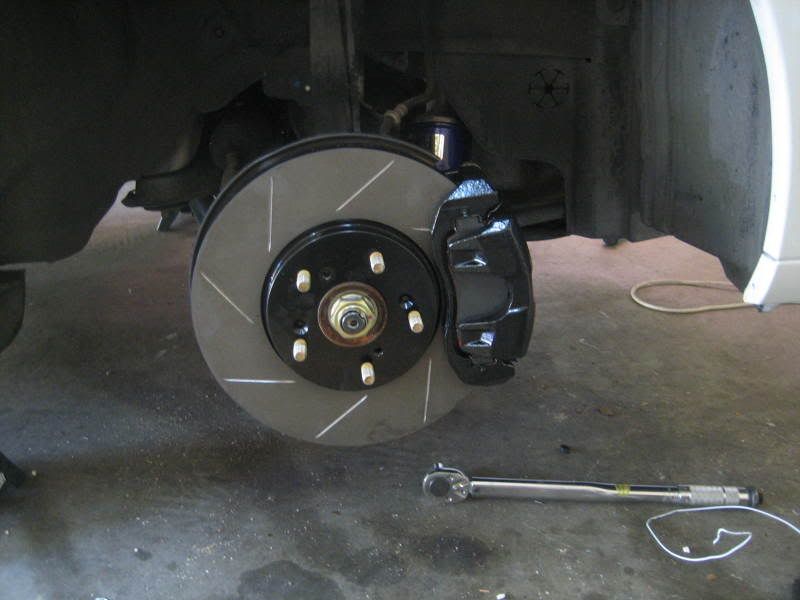
Step 8: Put new Rotor On Wheel.
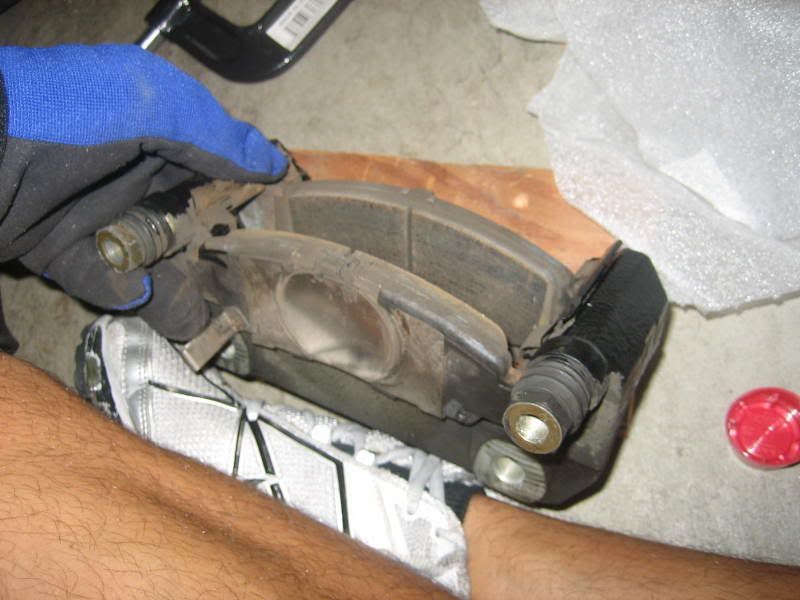
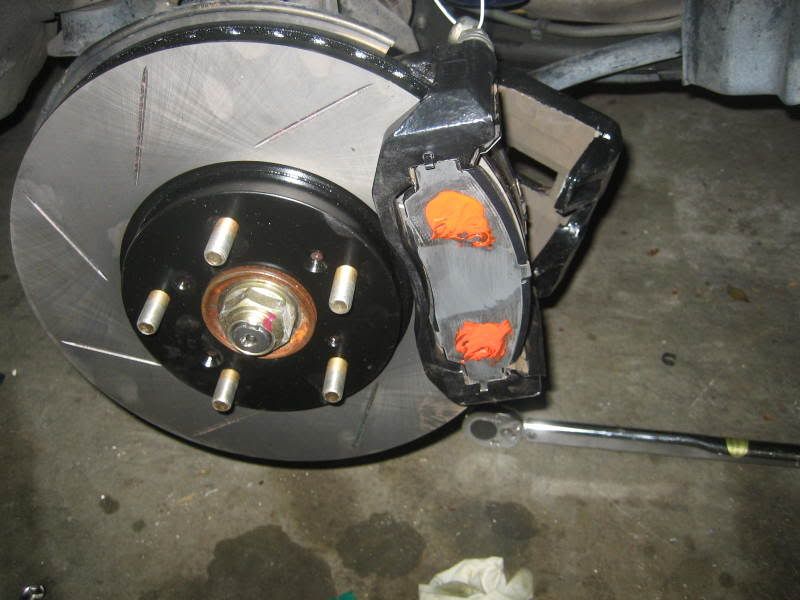
Step 9: Install caliper and new pads. Make sure you take the plates (backs) off the old stock pads and put them on the new pads. I also put a dab of brake quiet on the backs of the pads.
Step 8: Put new Rotor On Wheel.
Step 9: Install caliper and new pads. Make sure you take the plates (backs) off the old stock pads and put them on the new pads. I also put a dab of brake quiet on the backs of the pads.
The following users liked this post:
Curious3GTL (11-23-2014)
06-25-2007, 11:17 AM
#4
Instructor
Thread Starter
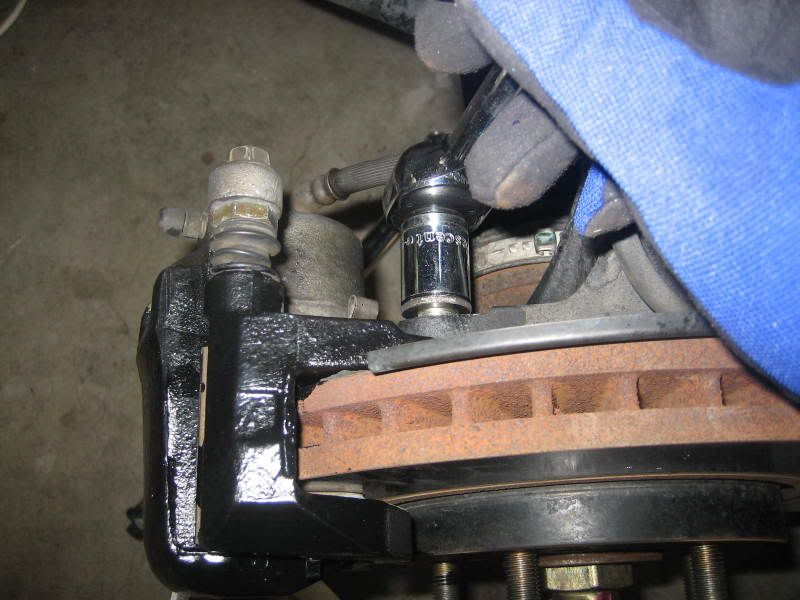
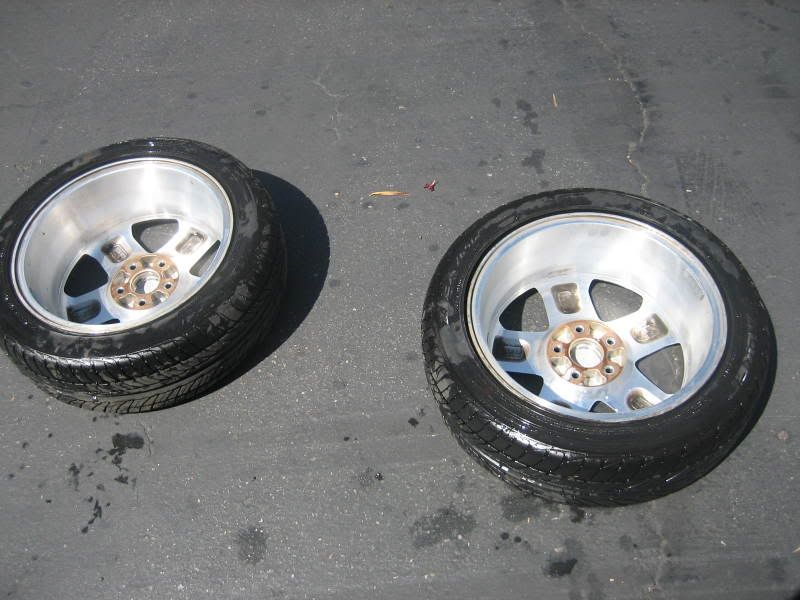
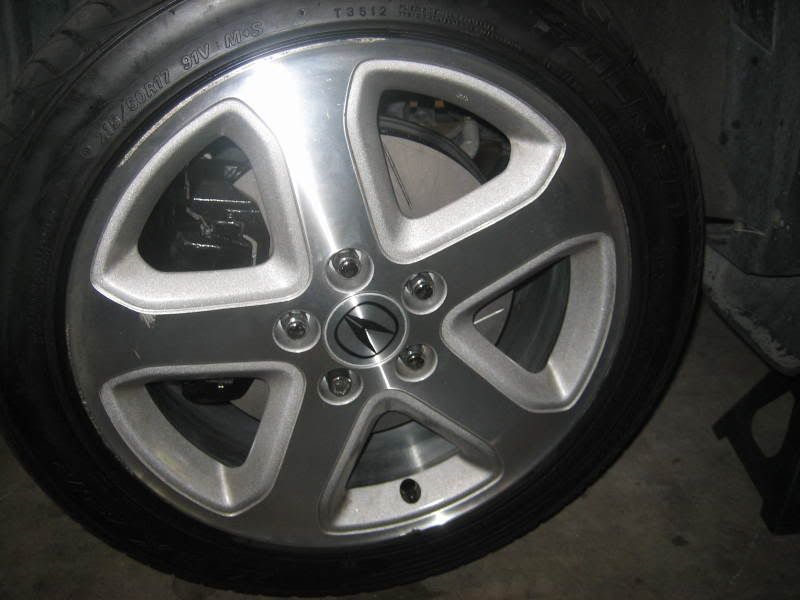
Step 10: Clean Wheels, Install Top part of Caliper, Put Wheels back on. While i had my wheels off i decided to clean the insides as well. They came out great!
The following 4 users liked this post by CHEWKNOW:
06-25-2007, 11:59 AM
#5
Burning Brakes

nice, i notice you didnt put the retaining screws back on either lol!
great write up tho.
you should have greased the slide pins on the pad bracket also.
what did you use to clean the wheels like that?
great write up tho.
you should have greased the slide pins on the pad bracket also.
what did you use to clean the wheels like that?
06-25-2007, 12:05 PM
#6
Instructor
Thread Starter
Yeah..i read that its not necessary to put those screws back in. I hope i'm right! haha. I just used Blue Coral Wheel Cleaner. It was on sale at pep boys so i bought it. haha
06-25-2007, 12:56 PM
#7
Burning Brakes
yeah you dont have to put them back,just make sure ur wheels are torqued evenly and properly.
i broke the tip on the impact driver twice. i ended up drilling them out with a crowned titanium bit dipped in motor oil. 20 seconds a screw lol.
i broke the tip on the impact driver twice. i ended up drilling them out with a crowned titanium bit dipped in motor oil. 20 seconds a screw lol.
Trending Topics
06-25-2007, 02:40 PM
#9
Instructor
Thread Starter
Thanks. No i didnt torque them. I just tightened them up real good. Probly not the best idea but i never have torqued them on any of my other cars either. I didnt have the specs at the time.
The following users liked this post:
2000UA5 (04-28-2013)
06-25-2007, 05:48 PM
#10

torque is important and the specs can be found at kragen.com in the maitenance tips section
DO NOT open the master cylinder when compressing caliper piston- fluid shoots out and you have to repaint a fender!
Suck out a little fluid with turkey baster IF its close to the top and put the cap back on tight
Also a really good idea to flush/bleed the brake fluid first before any other work to rid the sysytem of moisture laden fluid and rust particles
Spend 5 bucks on a caliper tool- the c clamp puts pressure on an area of the back of the caliper- not designed for that
Brake Caliper grease on the bolts where there is no thread and the pad back and end tabs, and the metal rail the caliper sits on upper and lower- clean and grease as the caliper has to slide across that
Same grease on the center hub of rotor where it has contact to axle and the part where the back of wheel touches metal to metal to the hub- a little grease now makes for easy tire change later
The following users liked this post:
rikmorris (11-23-2013)
06-25-2007, 06:17 PM
#11
Instructor
Thread Starter
Thanks for the tips. Everythin he said is right. You really should do everything to torque, and not open the lid because it COULD shoot EVERYWHERE but in my case and MOST cases this does not happen. and it COULD put too much pressure on the rear of the caliper if you dont have a caliper tool. But i would venture to say that it is completely fine to do it this way. But this worked fine and I would bet everything is fine with the caliper if you do it this way. If you have the loot play it safe and just listen to what he said.
08-03-2007, 02:55 PM
#13
Paint drying between each coat takes the longest, besides getting the 2 screws loose on some cars!
Based on hand tools only and being very careful:
First time ever doing brakes 2-3 hours
know what you are doing and have a friend- under 2 hours
really good and have air tools? you wouldnt be asking
Flush the brake fluid- its very important and doing it first keeps
fluid from eating fresh paint and prevents backwash in lines
Keep the master capped tight at all times!!!
Caliper piston tool is under 5$
c-clamp can damage the back of the caliper- it was never designed for that pressure point
08-09-2007, 03:22 PM
#14
Advanced

Join Date: Jul 2007
Location: NY, Upstate
Age: 54
Posts: 91
Likes: 0
Received 0 Likes
on
0 Posts
If you have to use so much pressure to retract the piston that damage to the metal back surface of the caliper is a concern, the piston is likely frozen or partially frozen anyway. It should move easily into the bore w/ slow steady pressure, and not be nearly enough force to cause damage.
08-09-2007, 04:04 PM
#15
call me a fanatic for owning $10 worth of right tools for the job
I figure most members here help neighbors and friends with their cars too,
so may as well have a few things on hand.
The other day the wheels were off to balance, so the pads were all pulled and inspected and regreased- takes minutes once you know how
I keep a tub of caliper grease and use it on the trucks trailer hitch too!
I agree improvised tools do work- and the danger of piston damage is very real-
the rubber boot on the piston fits into a thin slot just past where you can see
Dont push the piston all the way in either- there is no need to
08-09-2007, 04:33 PM
#16
Advanced
Join Date: May 2006
Age: 51
Posts: 67
Likes: 0
Received 0 Likes
on
0 Posts
Originally Posted by 01tl4tl
First time ever doing brakes 2-3 hours
know what you are doing and have a friend- under 2 hours
really good and have air tools? you wouldn't be asking.
know what you are doing and have a friend- under 2 hours
really good and have air tools? you wouldn't be asking.
[QUOTE=01tl4tl]
Flush the brake fluid- its very important and doing it first keeps
fluid from eating fresh paint and prevents backwash in lines
Keep the master capped tight at all times!!!/QUOTE]
Should this be done before the brake job or after? I would think after, since, I remember dicking around with an old jar, a piece of rubber hosing, and paying a friend a 6 pack of beer to sit in my car and pump the brakes while I bled them.
Since I will be having the flush job done by mechanic, and if you don't do the flush until after the brakes are re-assembled, how much will I be putting myself in when I go to bed in the pads and drive down the highway to his shop?
08-09-2007, 04:41 PM
#17
Advanced
Join Date: May 2006
Age: 51
Posts: 67
Likes: 0
Received 0 Likes
on
0 Posts
Additional question:
Also, I looked on kragen.com in the maintenance section and I couldn't find the torque specs. Could you speciy the sub-section? (It's not under the "Brakes" sub-section.)
Also, I looked on kragen.com in the maintenance section and I couldn't find the torque specs. Could you speciy the sub-section? (It's not under the "Brakes" sub-section.)
08-09-2007, 09:16 PM
#18
bolt torque
bracket to car 80 ft lbs
caliper to bracket 40 lbs front calipers
caliper to bracket 28 lbs rear calipers
I flush the brake fluid first to avoid potential backwash of bad crud into system when pushing the caliper piston in- fluid should be replaced every year- and many of us have never had it done after 5-6 years- ugly ugly stuff came out
Impact screwdriver kit has right tip- #3 I think it was- the big one
HAMMER-not rubber mallet LOL IMPACT is the operative word with corrosion
3-4 GOOD solid whacks with the hammer will do
Spray screw with penetrating oil-wd40 to help
Its easy and clean to do brake bleeding with a plastic tube and water bottle catch can
Takes under 1 qt of fluid ( I use Valvoline synthetic 6 bucks) and 5- 10 sets of pump and bleed at each wheel to get all the old fluid out- note special bleed order LF RF RR LR
The only danger in not doing it first is the possible contamination in fluid destroying the caliper seal- not like that EVER happened to someone like me!
then read HeelToe bedding procedure and follow carefully
have fun
The following users liked this post:
rikmorris (11-23-2013)
08-09-2007, 09:19 PM
#19
Yosarian
If it makes you feel better we do have drum brakes too- inside the rear rotor is a small set of drum brakes for the parking brake sysytem! Makes for a good time when they are tight and you dont know why the rotor wont come loose
Always good test of mechanic- if they dont know about the park brake- dont let them near any part of your car
08-09-2007, 09:24 PM
#20
Senior Moderator
 still uses Giant C-Clamp
The following users liked this post:
SpringRubber (08-27-2013)
08-09-2007, 09:54 PM
#21
Advanced
Join Date: May 2006
Age: 51
Posts: 67
Likes: 0
Received 0 Likes
on
0 Posts
Originally Posted by 01tl4tl
bolt torque
bracket to car 80 ft lbs
caliper to bracket 40 lbs front calipers
caliper to bracket 28 lbs rear calipers
I flush the brake fluid first to avoid potential backwash of bad crud into system when pushing the caliper piston in- fluid should be replaced every year- and many of us have never had it done after 5-6 years- ugly ugly stuff came out
Impact screwdriver kit has right tip- #3 I think it was- the big one
HAMMER-not rubber mallet LOL IMPACT is the operative word with corrosion
3-4 GOOD solid whacks with the hammer will do
Spray screw with penetrating oil-wd40 to help
Its easy and clean to do brake bleeding with a plastic tube and water bottle catch can
Takes under 1 qt of fluid ( I use Valvoline synthetic 6 bucks) and 5- 10 sets of pump and bleed at each wheel to get all the old fluid out- note special bleed order LF RF RR LR
The only danger in not doing it first is the possible contamination in fluid destroying the caliper seal- not like that EVER happened to someone like me!
then read HeelToe bedding procedure and follow carefully
have fun
bracket to car 80 ft lbs
caliper to bracket 40 lbs front calipers
caliper to bracket 28 lbs rear calipers
I flush the brake fluid first to avoid potential backwash of bad crud into system when pushing the caliper piston in- fluid should be replaced every year- and many of us have never had it done after 5-6 years- ugly ugly stuff came out
Impact screwdriver kit has right tip- #3 I think it was- the big one
HAMMER-not rubber mallet LOL IMPACT is the operative word with corrosion
3-4 GOOD solid whacks with the hammer will do
Spray screw with penetrating oil-wd40 to help
Its easy and clean to do brake bleeding with a plastic tube and water bottle catch can
Takes under 1 qt of fluid ( I use Valvoline synthetic 6 bucks) and 5- 10 sets of pump and bleed at each wheel to get all the old fluid out- note special bleed order LF RF RR LR
The only danger in not doing it first is the possible contamination in fluid destroying the caliper seal- not like that EVER happened to someone like me!
then read HeelToe bedding procedure and follow carefully
have fun
I asked about the mallet bc I saw it in one of the pictures and was "Wha?"
Maybe I will just make sure I don't have any problems and use my engineers hammer.
That will wack the crap out of them.
I think I may take it to my mechanic to flush the system first and then bleed it on my own. I think I will pick up an extra set of bleeder valves just in case (had one snap on an '87 VW Fox 10 MINUTES after the local auto parts store within walking distance closed on a Sunday afternoon!)
I guess next step is pricing out parts, looking into tool rental (Sears has an all metal impact hammer on sale for $23 bucks. A bit pricey, but if you bust it, they give you a free one regardless of when you bought it.) and arranging for my house mate to leave the house all weekend since I will be using the driveway.
Thanks for the info on the torque weights. What is the recommended torque weights for the lug nuts? Or is it still tighten until your arm falls off?
Someone had mentioned in one thread about brakes puting anti-seize on the screws to the rotor. I was told to grease those as well as the lugs for the wheel with anti-seize and then I was told not to do it. What is the definitive word on it?
Thanks again for answering my questions. Right now I am excited to start. And then the day I do it it will be 110 degrees in the shade and I will be cussing up a storm.
08-09-2007, 10:02 PM
#22
Senior Moderator
if you have someone flush the system it will be bled already. No need to do it afterwards.
08-09-2007, 10:40 PM
#23
you can use anti on the screws if you want but NEVER anything on the wheel stud lugs-- a little caliper grease where the wheel fits against the rotor will help you later if flat tire
I even carb spray the lugs to make sure no caliper grease got on them!
OK- the c clamp and ol brake pad or block of wood is acceptable
PLEASE do not use giant pliers of any kind.
I have seen TLs with DEALER brake jobs with scarred scratched piston edges
and of course- no grease anywhere
I even carb spray the lugs to make sure no caliper grease got on them!
OK- the c clamp and ol brake pad or block of wood is acceptable
PLEASE do not use giant pliers of any kind.
I have seen TLs with DEALER brake jobs with scarred scratched piston edges
and of course- no grease anywhere


 05-29-2008, 07:13 PM
#27
soda and his ~must be runout~
that guy starts more rumors,,,,,, about a car he doesnt even own!!!!
that guy starts more rumors,,,,,, about a car he doesnt even own!!!!
05-29-2008, 07:29 PM
#28
Originally Posted by bibledriver
Dude, you already have one post going about brakes, no need to resurrect this thread
05-29-2008, 09:44 PM
#30
Something is missing...my
Originally Posted by DjMikeSkillZ
DUDE....what are you...the Post Police.....get over it....go out...drive fast...take chances...have fun.....and step away from the trolling
05-30-2008, 01:11 AM
#31
Moderator
Originally Posted by 01tl4tl
soda and his ~must be runout~
that guy starts more rumors,,,,,, about a car he doesnt even own!!!!
that guy starts more rumors,,,,,, about a car he doesnt even own!!!!
 05-30-2008, 02:08 AM
#32
soda- you know I like to give you cr#^% just for fun!
I have yet to encounter AXLE runout as an issue on a tl or any car I worked on in decades of wrenching
It does exist- but the acura prob is usually related to a rotor warp issue or improper install or defect part.
The other prob we get is caliper failing- often Left Front goes out first
If you dont change the brake fluid as directed by acura- starting at year 3 and then once a year from now on....expect problems- I know because my car had never been done by past owner- and I got the caliper probs big time
those unsure -google- hygroscopic, and see how fluid sucks moisture from the air- gets inside- gets compressed and pushed to caliper- hopefully it only rust the caliper and damages the oring, causing crooked piston- or stuck piston, really bad cases trash a very $$$$ abs controller too
brake fluid 6 bucks a bottle- cheap insurance!!!
05-30-2008, 10:02 PM
#33
Something is missing...my
Originally Posted by SodaLuvr
Excuse me, but checking runout is a procedure that is not exclusive to Acura.

You are DYING to find a runout problem haha. Funny stuff, really!
[/THREADJACK]
05-31-2008, 09:52 PM
#34
Moderator
Originally Posted by bibledriver
Come on, how could runout result in a uneven wear only on the perimter of the rotor
You are DYING to find a runout problem haha. Funny stuff, really!
[/THREADJACK]
You are DYING to find a runout problem haha. Funny stuff, really!
[/THREADJACK]
06-01-2008, 12:06 AM
#35
Soda- have you actually found a measured runout on a TL? or any acura? or any car you have worked on? I dont know what all you get your hands on besides the scuubiedoo
06-01-2008, 12:41 AM
#36
Moderator
Originally Posted by 01tl4tl
Soda- have you actually found a measured runout on a TL? or any acura? or any car you have worked on? I dont know what all you get your hands on besides the scuubiedoo
06-01-2008, 01:22 AM
#37
Something is missing...my
Originally Posted by DjMikeSkillZ
DUDE....what are you...the Post Police.....get over it....go out...drive fast...take chances...have fun.....and step away from the trolling
and obviously is jumping to conclusions.I take no chances, don't drive fast, don't go out, have plenty of fun trolling, and THAT'S ALL.
haha, did you check your brakes out yet?
06-01-2008, 08:47 PM
#39
Moderator
Originally Posted by joseph_99tl
is there a DIY on changing brakefluid?
http://www.infinitihelp.com/diy/gsed...luid_flush.htm
06-01-2008, 09:13 PM
#40
there are threads on manual brake bleeding- just search and check the DIY section
Its easy to do and acura says do it at year 3 then every year after= forever
Good synthetic fluid is 6 bucks a qt- best for cars with SS brake lines added.
Regular brake fluid is fine for stock brake lines USE DOT3 or DOT4 spec only
4 has higher boiling point and meets/exceeds spec 3 so either is good for the TL
It will say on the master cylinder cap whats required
Bleed/flush order is LF driver front then RF RR LR
The following users liked this post:
shamal (09-19-2015)

