The Root of Headlight Condensation Culprit
 05-16-2008, 11:36 AM
#1
The Root of Headlight Condensation Culprit
My headlight got condensation a long time ago, and dealer replaced it when it was under 50k miles. A couple months later, it got condensation again. It was surely a new headlight, so that tells me it was not a seal leak. I took out the headlight, seal every gap I can find, cover everything where I think water could run through and sip into, but I still get condensation. A few times I get condensation after a handspray car wash. Not exactly right after car wash, after I washed the car and use the headlight (having it turnon); like wash the car in the afternoon, and drive the car at night, of course you have to have the headlights on. Then, the condensation is built up in the headlight, strangely only on driver side. Dealer replaced driver side only, passenger side is still original. I replaced it with another one, still gets condensation. So, to analyze it from praying the water to wash the car, and carefully trace the water, where is the leak?
It happens again a few days ago, and I have narrowed down to the spot where the water gets in, "The Hole where the Ballast Connects to the Bottom of the Headlight." Depends on how much the leak is, it could be a direct leak, or with a small leak like mine, when using the headlight, the heat around the ballast and headlight heats up the water causing the moisture to get into the headlight.
Evendently, this is manufacturer defect; the connection, big circle on the botton of the headlight, between the headlight and the ballast was not designed to be sealed securely. When installing the headlight all it is is putting the headlight on top of the ballast and that is it. When spraying the water, right below the headlight, there is a gap between the bumper and the headlight, look through it, it is surely the ballast.
I am sure 95% of all condensation headlights are being leaked from the bottom. I am talking about the original undamaged, unaltered headlights. There is no way water can leak through the original honda seal, unless it was originally defective, which is very rare. I have read through most of the condensation problems from other members, sealing it with silicone still did not fix the problem; in my case, replacing headlight twice still did not fix the problem.....
That is because the cause of the problem was not fixed, and "Dealer Did Not Fix the Problem Properly."
 05-16-2008, 12:15 PM
#2
hates the winter
Join Date: Oct 2006
Age: 44
Posts: 2,620
Likes: 0
Received 0 Likes
on
0 Posts
That's odd, My 03 TL with 55k has never had an issue with condesation. (prob just jinxed myself. lol My 94 Integra GSR and 05 RSX-S both had condensation problems though.
05-16-2008, 01:24 PM
#3
That is true, not every 2nd gen headlights will have problem, but if problem exists, it is more likely it leaks from the bottom. I mean if the problem is fixed properly, a new headlight may not be needed, or you could save a new ballast life.
05-16-2008, 02:22 PM
#5
New ride...Acura MDX 2013
there should be a closed cell foam gasket that gets compressed between the ballast and the housing... Part # 20 in this pic. sometimes they will dry up and crack, this will cause a leak if they crack bad enough.

10-23-2008, 09:24 PM
#6
i'm getting the condensation after a drive
Last edited by CAB NY; 10-23-2008 at 09:28 PM.
Trending Topics
05-31-2010, 12:33 AM
#10
Instructor

Join Date: Mar 2010
Location: Jacksonville, NC
Age: 34
Posts: 169
Likes: 0
Received 1 Like
on
1 Post
I know the thread is old but w.e
I had the same problem so i bought a new passenger side headlight. New aftermarket ballast (the oem one was like $200), and the a new D2R connector wires.
Will i have to sell the new ballast and connector wires and get an oem ballast?
Before buying all this i replaced the HID bulb but it still didnt work.
05-31-2010, 03:47 AM
#11

they were wrong- the hole on the bottem is an air vent for hot air escape
Dont spray water into the headlights EVER-
If you have parts- install them-
Dont spray water into the headlights EVER-
If you have parts- install them-
06-16-2010, 01:40 AM
#13
Advanced

Join Date: Apr 2007
Location: Minneapolis, MN
Posts: 63
Likes: 0
Received 0 Likes
on
0 Posts
I don't know if I am having a ballast or condensation problem. When I have the headlights on about 1 out of 10 times the drivers side will go out. I have to turn it off/on a few times to get it to light up again. I also notice if I leave the headlights on and turn off the engine with the headlights on the will turn off automatically after about 10 seconds or so. Think that is a normal energy feature. But when I come back to start the engine, half the time the drivers side headlight will not come on again. I have to then turn off/on several times to get it to light up.
Any suggestions?
Any suggestions?
07-27-2010, 11:56 PM
#14
Headlight Condensation
I was having condensation problems on the driver side headlight in my 2002 TLS so I finally took the time to replace the foam gasket between the ballast and the housing as noted in this thread and it WORKED. I no longer have a condensation problem in the headlight. The part costs about $4.50 a piece from the Acura dealer. since you're going to have to take off the front bumper to remove the headlights for this job, I recommend that you replace both driver and passenger side foam gasket. All in it's a relatively simple job. Just need to be methodical in removing the front bumper and headlight to get to the foam gasket.
 07-28-2010, 10:49 PM
#16
Headlight Condensation
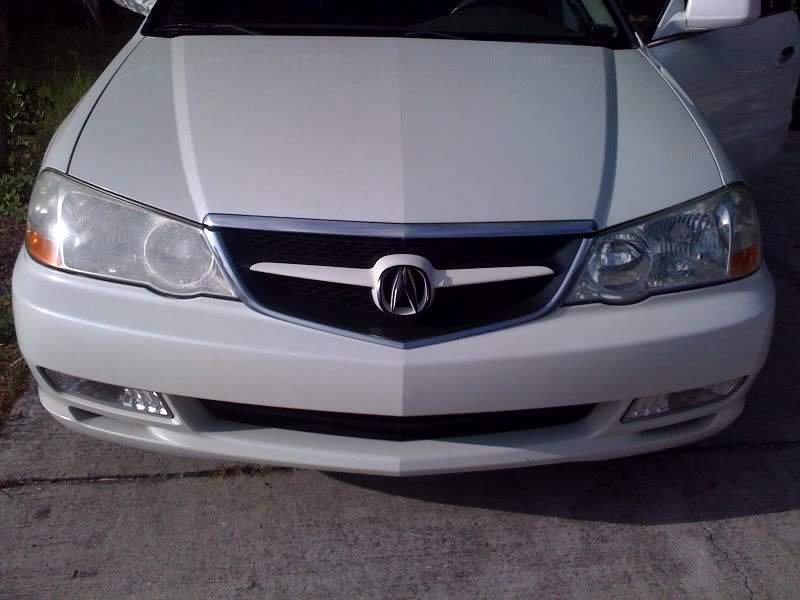
Does the condensation inside your headlight ever clear up? The condensation in my driver side headlight never got as severe as what you have in the picture, but then again I changed these gaskets as soon as I noticed the slightest hint of condensation inside the headlight. Just make sure the headlight isn't damaged anywhere else as you're replacing the gasket. Hopefully the condensation hasn't damaged the lens from the inside and you end up with a clear lens after this fix. Good luck and let us know how it turns out...
07-29-2010, 07:12 AM
#17
10th Gear
Join Date: Mar 2009
Age: 44
Posts: 11
Likes: 0
Received 0 Likes
on
0 Posts
Thanks, I cant wait to get it fix, Last night i took my HID out (now blown)and left the hood open with a hair dryer and it cleared up the lens but then i had water spots plus the moisture is back this morning. Im probably going to have to open the lens. it all began when i parked my car by a sprinkler that sprayed water right in the side of my headlight. ;-(
08-03-2010, 11:17 PM
#18
Headlight Condensation
Well, I guess I spoke too soon.... I think I solved the original problem which was slight condensation at the bottom of the lens from the inside. After replacing the gasket (part #20 in the link below) between the housing and the ballast, the problem went away and I was ok for a couple of months. But now I have condensation all over the inside of the lens. Looks like there are two other rubber gaskets (part #8 and #11 in the link below) I should have replaced when I removed the bumper and took out the headlights. I guess that's what I'll be doing this weekend. I will keep everyone posted as to the results of my ventures... http://www.acurapartswarehouse.com/e...headlight.html
The following users liked this post:
derning (06-09-2011)
08-04-2010, 10:34 AM
#19
When I tried to fix my headlight, I thought of those two rubber gaskets as well. Eventhough they appeared to be in good shape, but I wanted to end the problem and didn't want to take any more chances to blow out the ballast. I thicken up #11 gasket and seal the other one with sealant. It didn't help.
What fixed my problem was not just the new #20 gasket, rather I made the gasket water resistant. The problem is, #20 gasket is made of foam like and it absorbs water over time. You can soak it with some kind of liquid or paste to make it water resistant.
I soaked my #20 gasket with liquid paste wax. While it was still damp, install it and it will get a perfect seal. There was a groove outside the gasket, I think, and I figured putting extra paste wax woundn't hurt before putting them together. Put some extra in the front or all over it since that is where the rain or the water spray hits it. My headlight got condensation after a handspray car wash. That helped me to conclude the root of the problem.
08-04-2010, 11:19 AM
#20
Another note of what I did, as you know, when mounting the ballast to the headlight, you can't make the seal tigher then the gap was designed. The plastic screw footings keep them apart from squeezing the gasket any tighter. In case you need to to seal the gasket tighter, you will have to trim down those 4 plastic screw foottings.
I did that and it didn't help neither. Making the gasket water resistant works for me.
I did that and it didn't help neither. Making the gasket water resistant works for me.
11-05-2010, 12:21 AM
#21
1st Gear

Join Date: Nov 2010
Age: 39
Posts: 1
Likes: 0
Received 0 Likes
on
0 Posts
I am sick of my Acura TL left headlight. I have spent a fortune replacing both the inverter and the bulb twice each. Today, the bulb went out again after a rainy commute from Jersey City to Newark. I'm just over it. Why are these parts so defective?????
12-10-2010, 08:46 PM
#23
I Finally took the time to replace Part # 20 (again), 8, and 11 in this link: http://www.acurapartswarehouse.com/e...headlight.html It has been a couple of months, and I am happy to report that the problem has gone away. You need to make sure that as you are replacing these seals/gaskets, to check the headlight housing itself for any signs of hairline cracks or broken seals, otherwise you're back to square one.
03-29-2013, 11:35 PM
#24

I Finally took the time to replace Part # 20 (again), 8, and 11 in this link: http://www.acurapartswarehouse.com/e...headlight.html It has been a couple of months, and I am happy to report that the problem has gone away. You need to make sure that as you are replacing these seals/gaskets, to check the headlight housing itself for any signs of hairline cracks or broken seals, otherwise you're back to square one.
04-08-2013, 11:37 PM
#25
No sealant or anything additional needed for the replacement seals/gaskets... It's plug and play. I am also happy to report that since I made this repair well over two years ago, I haven't had any issues with headlight condensation. Good luck
04-11-2013, 11:03 PM
#27
The previous link I had posted is no longer valid for some reason. I found a new link for you with all the OEM part numbers for 2002-2003 TL headlights http://www.acurapartswarehouse.com/P...ID=53%20378184
07-18-2013, 01:22 AM
#29

My fix for headlight moisture
I had same problem with my 03 TL driver side lamp here in Canada. It seemed to have started after I drained and changed coolant probably affecting seal on radiator cap. I cheaply fixed by doing ALL of the following. I put silicone around the small tube (coming from the radiator cap) where it enters the coolant recovery bottle. I also put wrap around neck of radiator cap to diffuse any vapor escaping because of poor seal. of Next I cleaned top edge of lamp housing and applied three layers of electrical tape to seal that edge. Do NOT stretch the 1/2" wide electrical tape when you are unwinding it. First layer goes closer (towards the back) the back. Second layer covers front edge of first layer of tape. Then third (topmost) layer overlaps front edge of second layer. This is to ensure incoming air flow does not go "agains"t the edges of tape layers. I used narrow tape to fit into grooves running along edge of housing.
Then I removed lamp (closest to rad) from socket and inserted rubber tube (about size of heater hose) connected (taped) to hose of shopvac. I ran the shopvac while pointing heat gun to oustide of lens of headlamp assembly.
KEEP HEAT GUN AWAY FROM LENS AND WATCH HEAT LEVEL AS TOO CLOSE AND TOO HOT MIGHT AFFECT LENS SURFACE. Moisture INSIDE will slowly disappear. There might be residual vapor and you might have to redo vacuuming step. Have not had any moisture
problem two years now even after carwashing. Probably rad cap wrap and silicone not required but all of the above worked for me.
The following users liked this post:
DAZERkSNIFFA (09-22-2013)
The following users liked this post:
DAZERkSNIFFA (09-22-2013)
07-18-2013, 10:10 PM
#31
Has anyone tried any product like this? Is there any you would recommend that could make the left headlight in the picture look like the right again?
Last edited by tlmane03; 07-18-2013 at 10:12 PM.
09-22-2013, 03:47 PM
#32
2nd Gear

Join Date: Jan 2004
Location: NEWARK,NJ....."THE EVERYTHING CAPITAL"
Age: 45
Posts: 2
Received 0 Likes
on
0 Posts
Some times it's theeeee most obvious answer to a common problem....... (Rat.-Res.Tank
I had same problem with my 03 TL driver side lamp here in Canada. It seemed to have started after I drained and changed coolant probably affecting seal on radiator cap. I cheaply fixed by doing ALL of the following. I put silicone around the small tube (coming from the radiator cap) where it enters the coolant recovery bottle. I also put wrap around neck of radiator cap to diffuse any vapor escaping because of poor seal. of Next I cleaned top edge of lamp housing and applied three layers of electrical tape to seal that edge. Do NOT stretch the 1/2" wide electrical tape when you are unwinding it. First layer goes closer (towards the back) the back. Second layer covers front edge of first layer of tape. Then third (topmost) layer overlaps front edge of second layer. This is to ensure incoming air flow does not go "agains"t the edges of tape layers. I used narrow tape to fit into grooves running along edge of housing.
Then I removed lamp (closest to rad) from socket and inserted rubber tube (about size of heater hose) connected (taped) to hose of shopvac. I ran the shopvac while pointing heat gun to oustide of lens of headlamp assembly.
KEEP HEAT GUN AWAY FROM LENS AND WATCH HEAT LEVEL AS TOO CLOSE AND TOO HOT MIGHT AFFECT LENS SURFACE. Moisture INSIDE will slowly disappear. There might be residual vapor and you might have to redo vacuuming step. Have not had any moisture
problem two years now even after carwashing. Probably rad cap wrap and silicone not required but all of the above worked for me.
Then I removed lamp (closest to rad) from socket and inserted rubber tube (about size of heater hose) connected (taped) to hose of shopvac. I ran the shopvac while pointing heat gun to oustide of lens of headlamp assembly.
KEEP HEAT GUN AWAY FROM LENS AND WATCH HEAT LEVEL AS TOO CLOSE AND TOO HOT MIGHT AFFECT LENS SURFACE. Moisture INSIDE will slowly disappear. There might be residual vapor and you might have to redo vacuuming step. Have not had any moisture
problem two years now even after carwashing. Probably rad cap wrap and silicone not required but all of the above worked for me.
12-13-2013, 11:15 PM
#33
When I tried to fix my headlight, I thought of those two rubber gaskets as well. Eventhough they appeared to be in good shape, but I wanted to end the problem and didn't want to take any more chances to blow out the ballast. I thicken up #11 gasket and seal the other one with sealant. It didn't help.
What fixed my problem was not just the new #20 gasket, rather I made the gasket water resistant. The problem is, #20 gasket is made of foam like and it absorbs water over time. You can soak it with some kind of liquid or paste to make it water resistant.
I soaked my #20 gasket with liquid paste wax. While it was still damp, install it and it will get a perfect seal. There was a groove outside the gasket, I think, and I figured putting extra paste wax woundn't hurt before putting them together. Put some extra in the front or all over it since that is where the rain or the water spray hits it. My headlight got condensation after a handspray car wash. That helped me to conclude the root of the problem.
What fixed my problem was not just the new #20 gasket, rather I made the gasket water resistant. The problem is, #20 gasket is made of foam like and it absorbs water over time. You can soak it with some kind of liquid or paste to make it water resistant.
I soaked my #20 gasket with liquid paste wax. While it was still damp, install it and it will get a perfect seal. There was a groove outside the gasket, I think, and I figured putting extra paste wax woundn't hurt before putting them together. Put some extra in the front or all over it since that is where the rain or the water spray hits it. My headlight got condensation after a handspray car wash. That helped me to conclude the root of the problem.

Thread
Thread Starter
Forum
Replies
Last Post
AmplifiedDetails
3G TL Problems & Fixes
9
09-24-2015 02:55 PM
2003, a4, acura, audi, carwash, cl, condensation, condesnsation, headlight, headlights, integra, leaking, stop, tl, water