
I-018: Heavy Vs NavTool...

I-018: Heavy Vs NavTool...
As promised here we go, another DIY. 
The NavTool comes nicely packaged

In the box you get a hard wired harness (to the box), a power cable, the factory splice harness, and instructions.
I took pics to help you guys figure out where to connect these wires, please remember that I am not a technician so go easy on the flames.
First things first... THIS IS NOT THE BOX YOU ARE HOOKING INTO!!

I talked to a few people who were severely confused about this because the NavTool harness matches perfectly with this harness.
With that out of the way, the nave unit is hanging from the rear deck lid and to get it out you have to pull the under carpet down.
The hardest part of this whole job was getting this damn clip out, good luck.

You have to pop this off to get the deck lid carpet to drop. Once you have it off you can get the 4 screws out of the nav unit and drop it down.

Here is the back of the unit. The NavTool plug only fits one plug


Once you have it plugged in correctly just hang the nav unit back up...
Now for the other wires...

Pull down the driver side carpet wall to access the taillight harness.
You will fist notice this local ground point, this is where both of the white wires go, along with the ground for the power plug (solid black wire).

Now on to the blue wire, this is connected to the brown/gray wire (also the back up light power) NOTE I also used this wire to power the back up camera.

This wire is found in the harness below the ground cluster

Now you have grounds, and power to activate the camera when in reverse, the last connection is "accessory" power. I use quotes because the instructions say not to use constant power.
I'm sure there are a lot of places to get this, I found it in the XM harness (the box I told you not to use)
The yellow wire in the lower plug works perfectly, connect the power side of the DC plug from the box (this is the black wire with the faint white line.) I realize this looks like a hack job but I did tape it up.

The NavTool comes nicely packaged
In the box you get a hard wired harness (to the box), a power cable, the factory splice harness, and instructions.
I took pics to help you guys figure out where to connect these wires, please remember that I am not a technician so go easy on the flames.
First things first... THIS IS NOT THE BOX YOU ARE HOOKING INTO!!
I talked to a few people who were severely confused about this because the NavTool harness matches perfectly with this harness.
With that out of the way, the nave unit is hanging from the rear deck lid and to get it out you have to pull the under carpet down.
The hardest part of this whole job was getting this damn clip out, good luck.
You have to pop this off to get the deck lid carpet to drop. Once you have it off you can get the 4 screws out of the nav unit and drop it down.
Here is the back of the unit. The NavTool plug only fits one plug
Once you have it plugged in correctly just hang the nav unit back up...
Now for the other wires...
Pull down the driver side carpet wall to access the taillight harness.
You will fist notice this local ground point, this is where both of the white wires go, along with the ground for the power plug (solid black wire).
Now on to the blue wire, this is connected to the brown/gray wire (also the back up light power) NOTE I also used this wire to power the back up camera.
This wire is found in the harness below the ground cluster
Now you have grounds, and power to activate the camera when in reverse, the last connection is "accessory" power. I use quotes because the instructions say not to use constant power.
I'm sure there are a lot of places to get this, I found it in the XM harness (the box I told you not to use)
The yellow wire in the lower plug works perfectly, connect the power side of the DC plug from the box (this is the black wire with the faint white line.) I realize this looks like a hack job but I did tape it up.
The last connection is to the camera video cable.

Now I went with the eBay camera that GS400 used: 2005 RL Rear View Camera Installation w/pics - AcuraZine Community
Here is the eBay user profile: eBay My World - possbay2008
That install went smooth, I too cut the wires to fish them through the trunk arm.


I hope this helps you guys.
Now I went with the eBay camera that GS400 used: 2005 RL Rear View Camera Installation w/pics - AcuraZine Community
Here is the eBay user profile: eBay My World - possbay2008
That install went smooth, I too cut the wires to fish them through the trunk arm.
I hope this helps you guys.

nice work.
i might have to do this soon. i have the autotoys part and a back up camera also.
what made you go with this unit vs the autotoys one? are you going to use audio for music videos/movies etc?
i might have to do this soon. i have the autotoys part and a back up camera also.
what made you go with this unit vs the autotoys one? are you going to use audio for music videos/movies etc?
My goal in the near future is to use the USA Spec for Audio and then this for video, with an iPod dock in the center console.
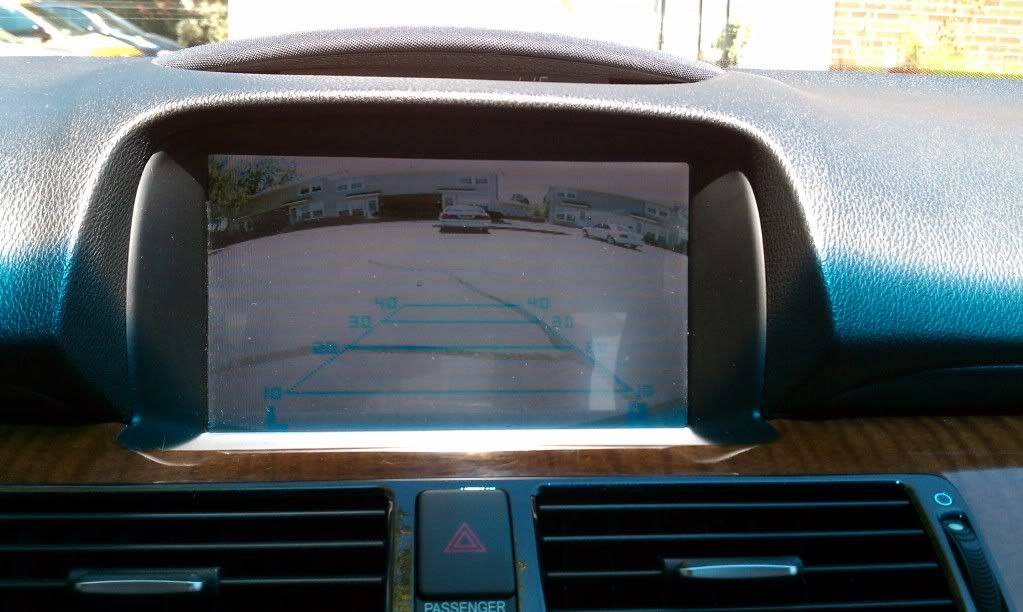
I took a quick cellphone vid of the switch between nav and camera.
The green is my garage door.
http://www.facebook.com/video/?id=1083728548#!/video/video.php?v=1404377064472
The green is my garage door.
http://www.facebook.com/video/?id=1083728548#!/video/video.php?v=1404377064472

Trending Topics

Torch & Pitchfork Posse
Joined: Feb 2007
Posts: 4,729
Likes: 1,807
From: Tampa, Florida
Very nice. The resolution looks about the same as the Acura dealer installed camera on my 06. The fish eye view is greater, and a bit more wide view. The grid lines are also a nice addition.
I would be tempted to install a video file of someone being backed over with a surprised face of fear, panic and pain. Passengers would just LOVE it.
But I am like that.
I would be tempted to install a video file of someone being backed over with a surprised face of fear, panic and pain. Passengers would just LOVE it.
But I am like that.
Haha, a vid file of someone getting hit would be fantastic.
The lines were a big selling point for me. I know which grid line puts me where in the spot and I'm slowly getting dependent on those lines for parallel and deck parking.
The lines were a big selling point for me. I know which grid line puts me where in the spot and I'm slowly getting dependent on those lines for parallel and deck parking.
Three Wheelin'

Joined: Feb 2009
Posts: 1,491
Likes: 65
Good job man. Yeah it sure comes in handy for parralel parking. Especially on my 1G RL. The thing is huge in the rear. lol
The lines are actually pretty acurate once you get used to it.
Oh and these perticular model, the coldest Ive ever used it was at 40F. worked well. At below freezing I would expect the lcd display itself to be more of a concern though.
The lines are actually pretty acurate once you get used to it.
Oh and these perticular model, the coldest Ive ever used it was at 40F. worked well. At below freezing I would expect the lcd display itself to be more of a concern though.


Instructor
Joined: Feb 2009
Posts: 249
Likes: 5
From: Kansas City, MO
Heavy,
I got the Navtool Unit and the Camera. I started working on my car yesterday and almost died in the 98 degree weather!
After trying to remove the carpet around the Nav unit for more than an hour, I gave up. Acura has the carpet on so tight around the unit, and the subwoofer.
I will try again in a few days. Any advised on removeing the carpet?
Thanks!
Pull down the push tabs one at a time until that left back corner is left and then try to get in behind it.
The clips that hold that trim ring on are on the left and right sides of the nav unit at and slide out towards you once they are released.
I cant see my pics at work (thanks firewalls) but I posted one of the DVD drive with the clips out.
I used a pair of needle nose pliers to flatten the clips while I pulled the carpet outward.
Straight PIA...
Last edited by HEAVY_RL; Aug 13, 2010 at 10:42 AM.

Instructor
Joined: Jun 2010
Posts: 106
Likes: 0
Hey Heavy RL,
I just bought a Navtool and looking to purchase a camera. Can You post a pic of your Nav screen at night? I want to have a better idea what that camera looks like when you backup in the dark.
thanks
I just bought a Navtool and looking to purchase a camera. Can You post a pic of your Nav screen at night? I want to have a better idea what that camera looks like when you backup in the dark.
thanks


Nice work.
No sir, you just take that other video wire and ground it instead of using the parking brake like the instructions call for.
I extended the wires to a switch in the console, and grounded the line and it works while the car is in motion.
No sir, you just take that other video wire and ground it instead of using the parking brake like the instructions call for.
I extended the wires to a switch in the console, and grounded the line and it works while the car is in motion.


3rd Gear
Joined: Sep 2010
Posts: 3
Likes: 1
Why do we need navtool or similar interface to connect backup camer? There is a dedicated backup camera interface in the navigation unit (connector G, Upper left green 7 pin connector). I got this info from navigation unit service manual. I wonder 2005 RL has that this camera interface enabled or not. Has some body tried to connect a camera directly to this interface?
Interface details;
pin description
---- -------------
1. Power source for rearview camera
2. GND rearview camera
3. GND for video signal
4. Composite video from rearview camera
5. Shield for 1,2,4,5,7
6. Control signal for rearview camera.
Please correct me if I am wrong.
Interface details;
pin description
---- -------------
1. Power source for rearview camera
2. GND rearview camera
3. GND for video signal
4. Composite video from rearview camera
5. Shield for 1,2,4,5,7
6. Control signal for rearview camera.
Please correct me if I am wrong.
Three Wheelin'
Joined: Feb 2009
Posts: 1,491
Likes: 65
the navtool unit is more for adding the ability to play video on ur nav screen. The backup cam is a secondary option
from the info you provided looks like it's possible. Just need to figure out what the trigger is. Positive or ground.
from the info you provided looks like it's possible. Just need to figure out what the trigger is. Positive or ground.

5th Gear
Joined: Oct 2010
Posts: 5
Likes: 0
From: Irving, TX
RL 2006
I am new to this site, have been looking to add new gadgets to the car (dvd playback, rear camera). Wanted to know if someone can help me out on the camera aspect of things. I have read a few posts and there is not direct reference to the camera being used--can someone point me in the direction of what camera is ideal w/night vision, does night vision make a difference?
I am new to this site, have been looking to add new gadgets to the car (dvd playback, rear camera). Wanted to know if someone can help me out on the camera aspect of things. I have read a few posts and there is not direct reference to the camera being used--can someone point me in the direction of what camera is ideal w/night vision, does night vision make a difference?

Racer
Joined: Jun 2009
Posts: 393
Likes: 18
From: Canada
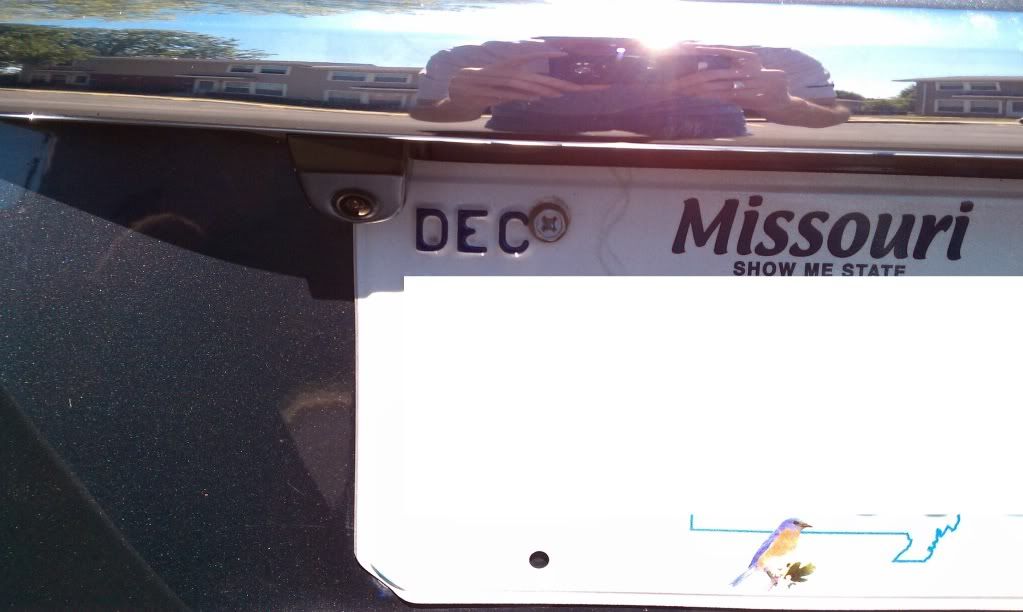
When installing the camera unit, is there any kind of sealant around the base of the camera housing to keep moisture from potentially getting under it and entering the trunk lid? I know it's tucked up under the trunk lid release "lip" above the plate, but I seem to get a fair bit of roadspray on my plate when driving in the rain and I am concerned about salt water once the winter months arrive and the roads start getting salted.

When installing the camera unit, is there any kind of sealant around the base of the camera housing to keep moisture from potentially getting under it and entering the trunk lid? I know it's tucked up under the trunk lid release "lip" above the plate, but I seem to get a fair bit of roadspray on my plate when driving in the rain and I am concerned about salt water once the winter months arrive and the roads start getting salted.
The camera itself was totally sealed in the housing so I'm not sure if we will have issues there.
Someone could easily do it on their own if they dont mind pulling the dash area apart to mount the box.
No I have not, I only lost the XM1 as its dedicated to the USASpec, XM2 still works.
Last edited by HEAVY_RL; Nov 1, 2010 at 08:54 PM.
Just remember I am not a technician nor an artist.
Lets try this for the visual learners. (yes I drew it in PPT haha)
Purchased:
UsaSpec, NavTool, Camera, RCAs (red, white, yellow), iPod converter to RCA

