
RL Racing Pedals Mod
 05-27-2012, 10:16 AM
#1
Instructor
Thread Starter

RL Racing Pedals Mod
I had a TL which I upgraded to the MT6 aluminum racing pedals that came out in 2007.
Since owning the RL I've wodered if those same parts would fit the RL. Good news! they do (with a slight mod).
I've only done the parking brake and the foot brake, but will shortly tackle the accelerator. The footrest may need never get changed but that's how most vehicles are (pedals only). I'm a 6 out of 10 DIY person and I would say this project had a difficulty level of 3 out of ten. It's quick fairly easy. Looks great.
Cost:
$54.00 (oemacuraparts.com)
The parts list is as follows: (2007 Acura TL)
46545-SEP-A81 Cover Parking brake
46545-SNV-A21 MT Brake
Tools:
Pliers
Rivet Crimp tool ($10 at Ace Hardware)
Drill with metal bit
Foot brake:
1. Pull off the OEM rubber cover. You will see the 4 predrilled holes where the rivets will attache the new pedal cover. The new cover comes with the rubber stud pad and the metal cover plate and 4 rivets.
2. Put just the new rubber studded cover over the foot brake. Be sure that the new covers goes around all the corners and that the cover is completely around the top and bottom edge and is snug. Just like the OEM cover you just pulled off was over the pedal. There are grooves that the metal needs to sit in on the back of the rubber pad.
3. Next take the metal cover and place it over the studded cover being sure that all the studs come through the holes in the metal cover. It's a tight fit so play with each stud to be sure they come through. The aluminum cover should be flush with the rubber and will ALL the studs coming throught the holes.
4. Use the 4 rivets that come with the set and the crimping tool and rivet it all together.
Parking brake: (Put it in the release position to do this mod.)
1. Use the pliers to rip off the rubber cover on the parking brake. It's partly glued so pull hard. Pull from driver side to passengerside. Tear it off. You can't break anything.
2. The new aluminum cover is bigger than the OEM rubber cover but don't worry. So now you need to hold up the new brake cover so that the bottom rivet hole aligns with the center bottom of the raw metal frame that held the old rubber pad. (Yes, you will only use 1 rivet to attach it)
3. Through the rivet hole I marked the place where to drill. Again, just below the center of the metal and down slightly. Just so that the new pad covers the raw metal pedal. (you'll see what to do when you get there)
4. Use a metal drill bit and drill a small hole through the raw metal assembly.
5. Use 1 rivet to attach the new aluminum pad. There should be little play in the new aluminum cover even with one rivet.
6. Done.
Tips:
Be sure you keep the parts tightly together when using the rivet crimper. If you don't do the rivit correctly you can drill it out with a small bit and use one of the 2 extra rivets from the parking brake cover that you don't need.
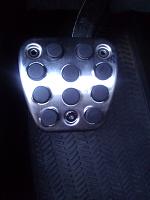
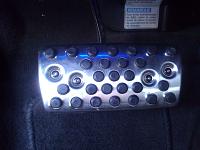
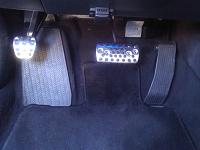
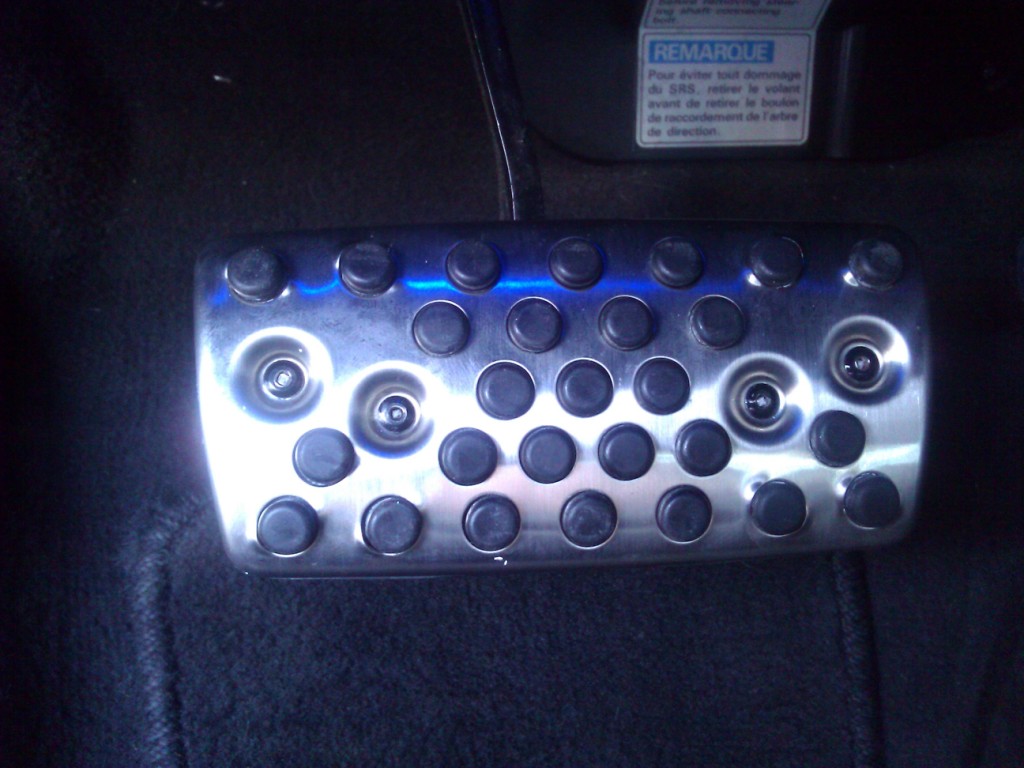
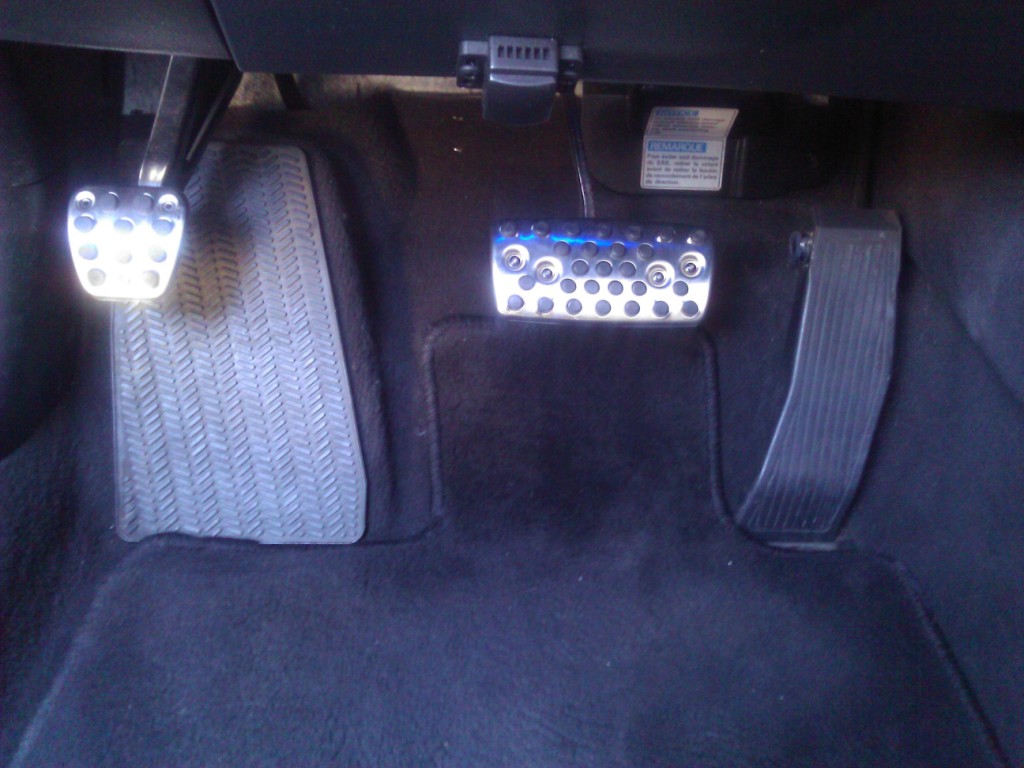
I didn't take step by step pictures but here's the end result using my cellcam:
Since owning the RL I've wodered if those same parts would fit the RL. Good news! they do (with a slight mod).
I've only done the parking brake and the foot brake, but will shortly tackle the accelerator. The footrest may need never get changed but that's how most vehicles are (pedals only). I'm a 6 out of 10 DIY person and I would say this project had a difficulty level of 3 out of ten. It's quick fairly easy. Looks great.
Cost:
$54.00 (oemacuraparts.com)
The parts list is as follows: (2007 Acura TL)
46545-SEP-A81 Cover Parking brake
46545-SNV-A21 MT Brake
Tools:
Pliers
Rivet Crimp tool ($10 at Ace Hardware)
Drill with metal bit
Foot brake:
1. Pull off the OEM rubber cover. You will see the 4 predrilled holes where the rivets will attache the new pedal cover. The new cover comes with the rubber stud pad and the metal cover plate and 4 rivets.
2. Put just the new rubber studded cover over the foot brake. Be sure that the new covers goes around all the corners and that the cover is completely around the top and bottom edge and is snug. Just like the OEM cover you just pulled off was over the pedal. There are grooves that the metal needs to sit in on the back of the rubber pad.
3. Next take the metal cover and place it over the studded cover being sure that all the studs come through the holes in the metal cover. It's a tight fit so play with each stud to be sure they come through. The aluminum cover should be flush with the rubber and will ALL the studs coming throught the holes.
4. Use the 4 rivets that come with the set and the crimping tool and rivet it all together.
Parking brake: (Put it in the release position to do this mod.)
1. Use the pliers to rip off the rubber cover on the parking brake. It's partly glued so pull hard. Pull from driver side to passengerside. Tear it off. You can't break anything.
2. The new aluminum cover is bigger than the OEM rubber cover but don't worry. So now you need to hold up the new brake cover so that the bottom rivet hole aligns with the center bottom of the raw metal frame that held the old rubber pad. (Yes, you will only use 1 rivet to attach it)
3. Through the rivet hole I marked the place where to drill. Again, just below the center of the metal and down slightly. Just so that the new pad covers the raw metal pedal. (you'll see what to do when you get there)
4. Use a metal drill bit and drill a small hole through the raw metal assembly.
5. Use 1 rivet to attach the new aluminum pad. There should be little play in the new aluminum cover even with one rivet.
6. Done.
Tips:
Be sure you keep the parts tightly together when using the rivet crimper. If you don't do the rivit correctly you can drill it out with a small bit and use one of the 2 extra rivets from the parking brake cover that you don't need.
I didn't take step by step pictures but here's the end result using my cellcam:


The following 3 users liked this post by mayflowerman:


Thread
Thread Starter
Forum
Replies
Last Post
rp_guy
Member Cars for Sale
9
07-16-2017 07:33 AM
InFaMouSLink
Car Parts for Sale
6
10-27-2015 06:52 PM