Trailer Hitch / LED Lighting / Dashcam Install
 09-10-2020, 12:20 AM
#1
Advanced
Thread Starter

Trailer Hitch / LED Lighting / Dashcam Install
Hi everyone!
Thought I'd share the modifications I've made so far to my 2017 Acura RDX Elite. I've owned it for a couple weeks now and we've definitely gotten to know each other better over that time.
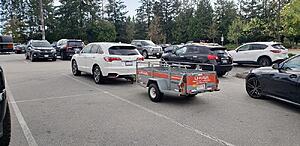
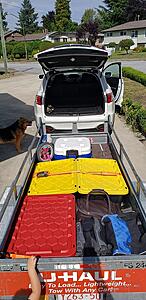
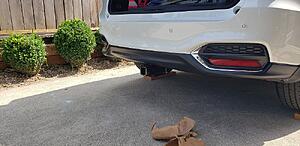
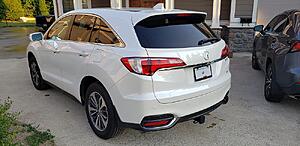
TRAILERINGI downsized from a Mazda CX9 so the storage capacity in the RDX is a little low for 2 dogs and a 2 year old on any road trips. I decided to install a hitch and pull a small 600lb uhaul utility trailer: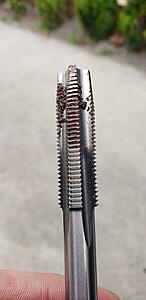
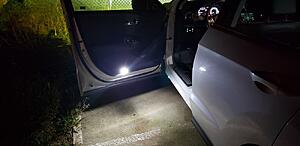
LIGHTINGI was a little disappointed to find that the RDX is a mix of Halogen and LED lighting. I found the interior lighting to be especially dim and dated looking compared to the crisp white light of a 6000k LED. I purchased everything on Amazon for the sheer convenience. I realize that my selection isn't the absolute top of the line, but I invested a lot of time researching these purchases to get the best performance per dollar. I'm extremely happy with the result and the only variable at this point will be the longevity of the bulbs. Another note, get yourself a cheap plastic trim removal tool set to save yourself from scratching any of the plastic trim.
All the following links are taken from the Canadian Amazon site.
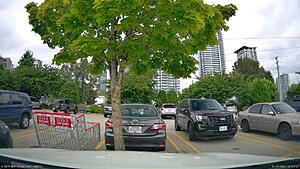
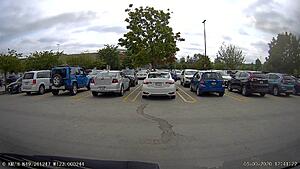
DASHCAMAfter exhaustive research, I decided on the VIOFO A129 Pro Duo. I think it really depends on what your objective is, but there are a lot of garbage dash cams out there. If you want a reliable unit that can produce usable video with a good amount of detail, you'll have to stay away from the entry level units. Cheaper ones are known to require constant reformatting of the SD card If you look at the top right corner of the parking lot in the following image, I am able to zoom in enough to read the licence plate of the Lexus SUV. (Not on here of course, after all the compression)
Front Camera:
[Rear Camera:
Hopefully this write-up can provide some help for anyone considering any of the mods. Everything was really easy and well worth the time and investment!
Thank-you for reading this far, and I welcome any suggestions, feedback or constructive criticisms.
-jason
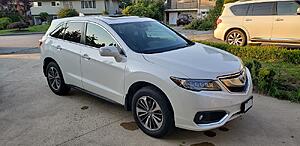
Thought I'd share the modifications I've made so far to my 2017 Acura RDX Elite. I've owned it for a couple weeks now and we've definitely gotten to know each other better over that time.
TRAILERING
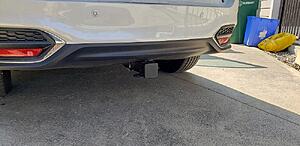
- I went with the Curt #13130, the matching Curt #57008 wiring harness and finished off with the Curt #21728 hitch cover for a cleaner look when not in use. I previously used all Curt parts for pulling the boat with my truck and I've found them to be one of the better brands for trailering equipment.
- I had a tough time getting the bolts started into the weld-nuts on the frame. I started out thinking, how bad could it be? Since then I learned that there is a zinc coating applied to the frame which makes getting the bolts started next to impossible without chasing the threads with the proper sized tap first. Even after going to town on it with a brass brush fitted into the end of my power drill, I still had to use a tap. Save yourself the aggravation and time by just having the tap on hand before you start. The size of the tap you'll need is M12 x 1.25. Lots of lubricating oil and patience are your friends. WD40 worked fine for me, and I screwed the tap a few rotations and and backed it out repeatedly to slowly get all the coating, rust and gunk out of the threads. Watch some YouTube videos first if you've never used a tap before.

- I managed to pull the trailer wiring down into the spare tire cavity from inside the rear driver's side access panel without removing too many of the trim pieces. The Curt installation video shows them removing everything in sight, but I didn't find that necessary. Try using a straightened-out wire coat hanger to shove through and pull the wires through. I decided to stow the harness with the spare tire as I'm not going to be trailering often enough to warrant installing it on the outside of the vehicle. I used zip-ties to secure the module and keep the wiring nice and tidy. It's not too difficult to locate the OEM trailer harness to plug into. Just make note of the orientation of the plugs as you'll be doing it blindy and by feel.
- Remember to torque your nuts to the specs included in the Curt installation guide. I also recommend checking the torque after the first few uses of the hitch.
- The hitch cover leaves a much cleaner look and can stay in place while the hitch is in use. I have one on the truck and it does fade over time but nothing that Mother's Back to Black can't fix.
- Like many, I was disappointed by the low trailering capacity of 1500lbs but also realized that this isn't really what the vehicle is designed for. That being said, it performed very well pulling the little trailer through some high mountain roads. It's got more than enough power but I suspect the limitation is from the transmission, drive train or the actual mounting of the hitch itself. It doesn't seem to be the most "heavy duty" mounting solution.
- For anyone in the Greater Vancouver area, check out "Burnaby Hitch", located near Lougheed Highway. They had the hitch available on the same day, and had the best price I could find.


LIGHTING
All the following links are taken from the Canadian Amazon site.
- The RDX uses eight of either #168 and #194 bulbs. These are interchangeable as they both use the same T10 base. When talking halogen, the #168 is a brighter bulb. I found a 10 pack on Amazon which was perfect, as you'll need 8. Doesn't hurt to have 2 spares left over. The bulb base is a little narrower than the stock bulbs, so on many of the below installations I used a small pair of needle nose pliers to squeeze the electrical connection tighter in the stock housing. Be sure there's no power to the bulb before you do this as you'll probably short it out. Also some of the bulbs were hard for me to get out of the housings with my fingers so had to use pliers to do it� Luckily I didn't break any of them.
- Licence Plate Bulbs (x2)
- Gain access through the larger panel of the cargo door's interior. Not too difficult to pop out the housings. I disconnected the wiring and pulled the whole housing out to make it easier to change the bulbs. Do one at a time so you don't forget the orientation of the housing when reinstalling.
- Cargo Door Bulbs (x2)
- Easy to remove the panel that the bulb housing mounts to. Also easy to remove just the bulb housing with a small, flat head screwdriver. Be patient not to scratch anything but it pops out quite easily.
Note: If you're doing the reverse bulbs as well, do them now as they're located in the same spot. See the next section as they're a different sized bulb. 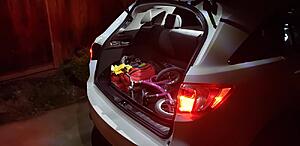
- Easy to remove the panel that the bulb housing mounts to. Also easy to remove just the bulb housing with a small, flat head screwdriver. Be patient not to scratch anything but it pops out quite easily.
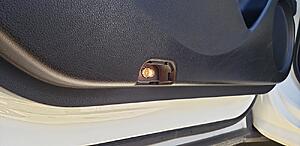
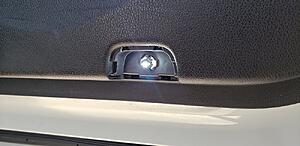
- Front Door Puddle Bulbs (x2)
- Again, easy to pop the housing out by carefully using a small flat-head screwdriver. Look carefully for the small indentation in the lens that will show you where to pry from.
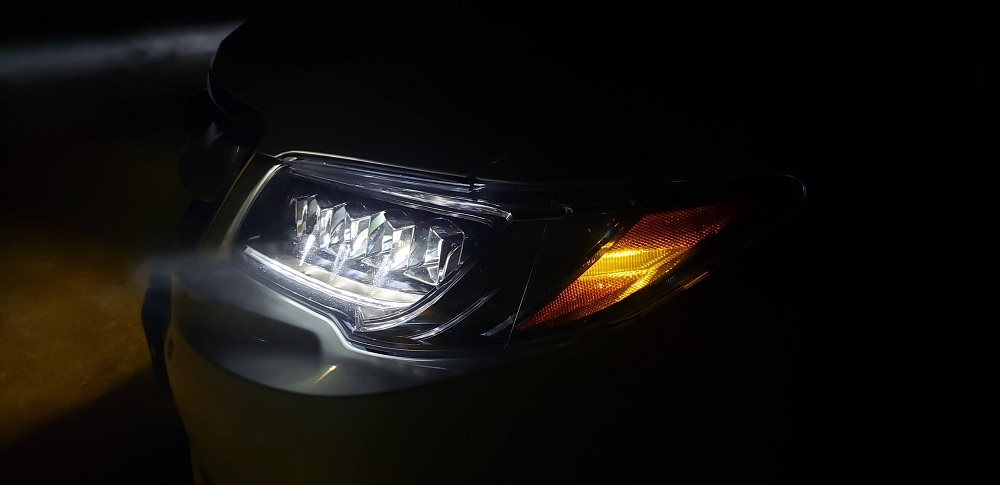
- Front Marker Lights (Inside the Jewel Eye Housing (x2)
- On the passenger side I was able to reach in and feel around to rotate the bulb and pull it out. I've got fairly large hands so I don't see many people having an issue with this. The Driver's side was a little trickier, only because I needed to remove some of the trim piece that covers above where the housing is mounted. The battery ground will get in your way otherwise.

- Licence Plate Bulbs (x2)
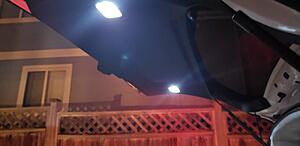
- Interior Dome Light (Rear)
- It took a bit of patience to carefully pop off the plastic lens. Just take your time not to scratch anything and changing out the bulb itself is super simple. You only need one. Link below comes with 2, which doesn't hurt either.
- The bulb isn't even a close match for the (unserviceable) front dome lights which I'm guessing are in the 4000k range. It bugs me a little, but I'll take the increased brightness in the back any day.
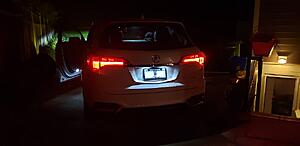
- Rear Turn Signals (x2)
- The sky's the limit with these things, and you can spend a bunch of money on VLEDs. The V6 Extreme Amber from VLED are $175 USD which is way up and beyond what I was willing to spend. I do wonder the difference in quality and brightness, but I'm more than happy with the result of these "TUINCYN".
- You'll need to pop off the plastic trim piece inside the cargo door frame to reveal the Phillips screws underneath. The housing easily pops out and it's self explanatory after that. I�ll also add that I haven�t had any issues with Hyper Flash.
- Here's a link to a video I took of the turn signals at night!
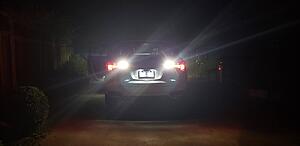
- Reverse Bulbs (x2)
- Again, you can spend big money on the VLED variant at $35 USD each. I'm very happy with the upgrade that I chose. The dim and dated OEM halogens are no comparison to the LUYED bulbs. Not only are they actually more functional while reversing in low light conditions, I find that it really modernized the look of the car.
- With these new bulbs, I've really noticed a difference in clarity and image quality with the backup camera at night.
- Change these out when you're changing the cargo door bulbs. Again just pop out the trim in the cargo door and the rest is easy enough.
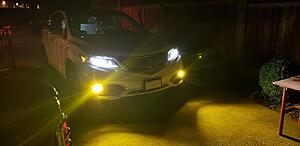
- Fog Lights (x2)
- Much to the disapproval of my wife, I was determined to try out yellow bulbs. I�ve always heard about them giving much better visibility during wet and foggy weather. I haven�t been able to put them to the test yet, as the weather�s been very nice. The �Alla� bulbs are easily brighter than the stock halogens, and again I think it adds some modernization to the look of the car. I�m not totally sold on the yellow and maybe I�ll try to match the jewels in the future, depending on how well they perform in the rain. If you know what the color temperature is that is the closest match of the Jewel Eyes, please do let me know!!!
- I started by parking the car with the wheels turned in the opposite direction of the side I was working on. I only removed one Phillips screw so I could gently pull the fender liner out of the way to reach inside to make the swap. Very easy to do especially if you can do it by feel so that you limit how much of the fender liner you need to pull out of the way.


DASHCAM
Front Camera:

[Rear Camera:

- I wanted a dual channel camera that has 4k and parking mode. Also the price point was right in the sweet spot. You can spend big money on these things but I found the A129 to be the best value. I picked up a 256GB High Endurance Micro SD card, and I don�t recommend using any card other than a High Endurance card. Due to the constant writes and harsh conditions (heat) it�s a good idea not to skimp. I purchased the camera from blackboxmycar.com� There�s always a coupon code available to save at least 5%. I was lucky and managed to find one that took $50 off the price. Sales are frequent, but I was impatient.
- Installing a 2 Channel Dashcam is a bit more challenging than the lighting upgrades I�ve covered so far. I wanted to have the result be as �OEM� as possible. I started at the back of the vehicle and worked my way forward.

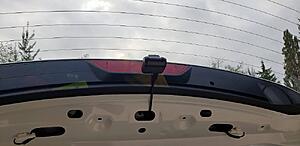
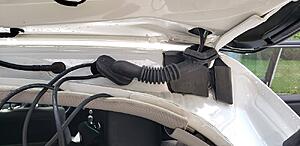
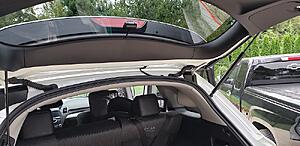
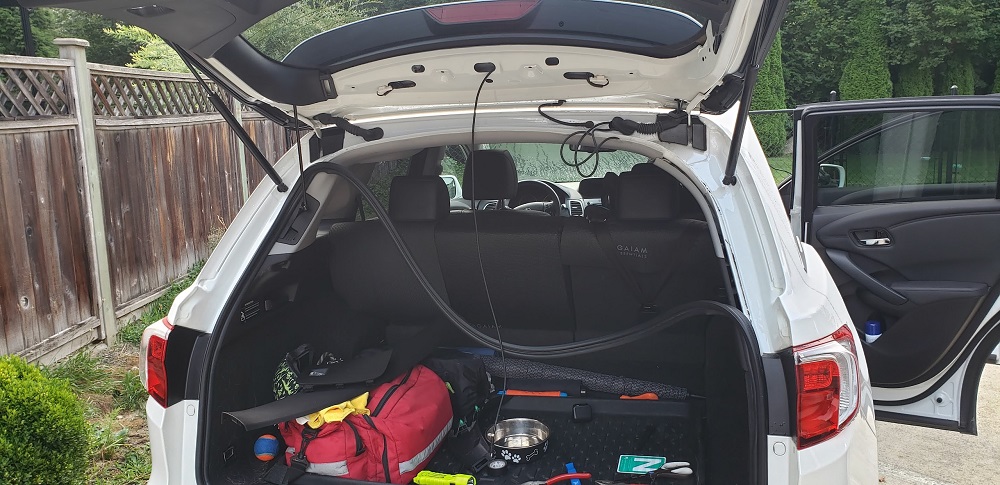
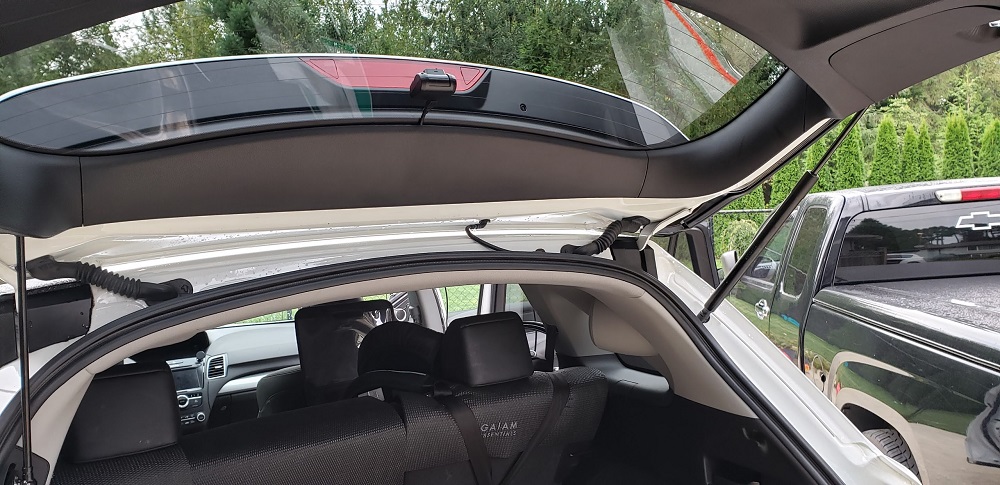
- The hardest part was getting the USB cable pulled through the rubber boot of the rear cargo door. I�ve always used discarded chain link fence with a vinyl coating for pulling wires. It�s strong, extremely flexible yet it holds its shape quite well when you need it to. I got some through the boot and taped on the cable and was barely able to get it through. Happy I did. I also used the fencing to pull wire through as much of the headliner as I could, thus eliminating the need to remove as much trim as possible.
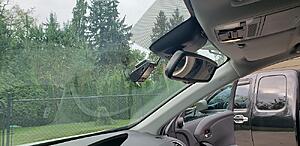
- Plan your run well as it�s easier to go in one direction or the other from certain starting points. I started pulling wire from the B Pillar and worked by way back and into the door. After the rear camera install was done, it was easy to go back to the B pillar and continue working my way forward while hiding the cable in the headliner. Removal of the plastic trim around the rear view mirror was hard on my nerves but with enough persuasion it pops off. Remember not to pry on anything and only pull on the trim pieces straight back. I tucked away all of the slack wire above the B pillar as there�s lots of space in the headliner.
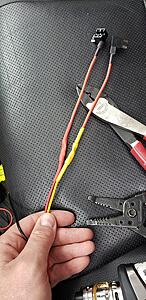
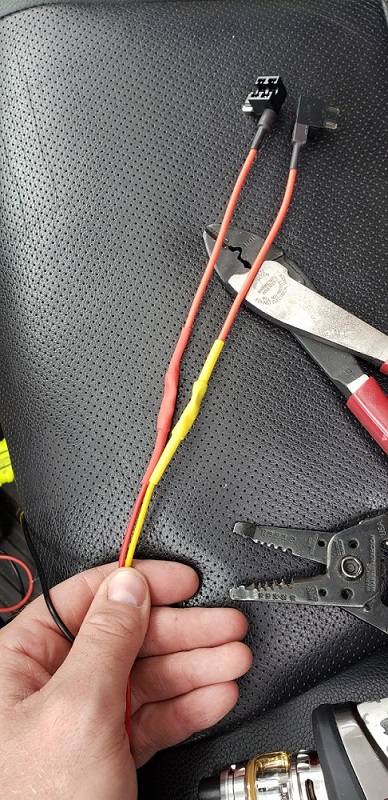
- I picked up a few low profile add-a-circuit fuse holders and hardwired the dashcam into the fuse box located on the drivers side. I used a fuse for seat reclining for the always on power and the Option fuse for switched accessory power. I loosened a grounding bolt using a 10mm socket and added my ground to that.
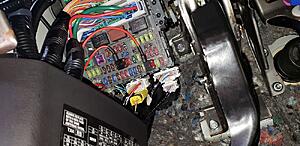
- Be aware of where the airbags are located and only run wire behind them.
- These are most of the vehicle specific points I can think of for installing the dashcam. You can find limitless resources online, especially on YouTube for more generic details. If there's much demand, I may consider going into more detail with the install.
- Apart from a magnetic cell phone mount, that's it for now! I'm not a fan of wireless charging and I'm super impressed by the mount I chose. It's very small and very subtle. my S9+ hasn't fallen off yet! I'm considering tapping into the fuse box for powering my phone and routing the wire to possibly come out of one of the vents for a nice clean look. I'm not big on having the console open at all times with the unsightly cable strung up to my phone. First world problems.


Hopefully this write-up can provide some help for anyone considering any of the mods. Everything was really easy and well worth the time and investment!
Thank-you for reading this far, and I welcome any suggestions, feedback or constructive criticisms.
-jason


The following 11 users liked this post by rubinox:
Comfy (09-20-2020),
DUCRDX (09-11-2020),
fcostantini (09-11-2020),
Gadgetjq (09-13-2020),
JUSTJATS (11-03-2022),
and 6 others liked this post.
09-10-2020, 05:04 PM
#2
Three Wheelin'

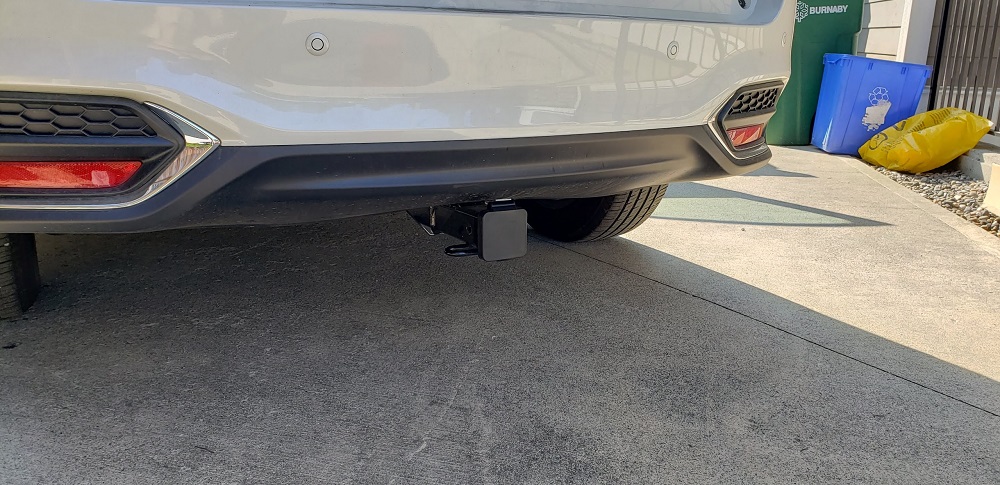
I also noticed that the top of your trailer hitch is making contact with the bottom of your bumper and is actually pushing up on it. You do realize that Acura put a step in the frame rails on each side which is why when you buy the factory trailer hitch, they use spacers between the frame rail and the trailer hitch at the rear mounting holes. No big deal if you are happy with that. I used a 3 mm thick stainless steel fender washer as a spacer. It worked great.
Pics: Curt 13130 - Class III, 2" Trailer Hitch Install
By the way, nicely done write-up.
Last edited by Tech; 09-10-2020 at 05:07 PM.
09-10-2020, 07:40 PM
#3
Senior Moderator
Man, using a tap instead of just grabbing the ol' electric impact and giving it a few extra ugga duggas... that's impressive 

09-10-2020, 07:50 PM
#4
Advanced
Thread Starter
Exactly! I had a tap on hand since I have a slew of SKF/Dormer taps in my shop. Nothing like doing it right and saving yourself a botch job by forcing threaded fasteners.
I also noticed that the top of your trailer hitch is making contact with the bottom of your bumper and is actually pushing up on it. You do realize that Acura put a step in the frame rails on each side which is why when you buy the factory trailer hitch, they use spacers between the frame rail and the trailer hitch at the rear mounting holes. No big deal if you are happy with that. I used a 3 mm thick stainless steel fender washer as a spacer. It worked great.
Pics: Curt 13130 - Class III, 2" Trailer Hitch Install
By the way, nicely done write-up.
If that is indeed the case, I'll certainly be looking into adding the spacers that you recommended.
Thanks!
-jason
09-11-2020, 09:12 AM
#5
Intermediate

Outstanding post! Great photos, information & links, appreciate the time and research that went into it.
Just ordered the bulbs based on your recommendation. Looking forward to upgrading the back up lights, as the originals are nearly worthless. Same for the cargo area lights, should be a great improvement!
Just ordered the bulbs based on your recommendation. Looking forward to upgrading the back up lights, as the originals are nearly worthless. Same for the cargo area lights, should be a great improvement!
09-11-2020, 01:45 PM
#6
Advanced
Thread Starter
Outstanding post! Great photos, information & links, appreciate the time and research that went into it.
Just ordered the bulbs based on your recommendation. Looking forward to upgrading the back up lights, as the originals are nearly worthless. Same for the cargo area lights, should be a great improvement!
Just ordered the bulbs based on your recommendation. Looking forward to upgrading the back up lights, as the originals are nearly worthless. Same for the cargo area lights, should be a great improvement!
I look forward to hearing your impression of the lighting upgrade!
-jason

Trending Topics
09-13-2020, 01:17 PM
#8
Advanced
Thread Starter
09-13-2020, 06:55 PM
#9
Intermediate
Tremendous improvement!! The reverse lights are now useful for my dark driveway! Interior lights are a welcome improvement, not just a faint glow in the sockets! All bulbs arrived the next day, unfortunately the reverse light box was empty. Amazon sent another the next day.
Debating a trailer hitch. Little need for one now, but a luggage basket or bike rack would be helpful at times.
Thanks for your research, and the effort to make such a detailed post.
Debating a trailer hitch. Little need for one now, but a luggage basket or bike rack would be helpful at times.
Thanks for your research, and the effort to make such a detailed post.
 09-13-2020, 07:48 PM
#11
Advanced
Thread Starter
Tremendous improvement!! The reverse lights are now useful for my dark driveway! Interior lights are a welcome improvement, not just a faint glow in the sockets! All bulbs arrived the next day, unfortunately the reverse light box was empty. Amazon sent another the next day.
Debating a trailer hitch. Little need for one now, but a luggage basket or bike rack would be helpful at times.
Thanks for your research, and the effort to make such a detailed post.
Debating a trailer hitch. Little need for one now, but a luggage basket or bike rack would be helpful at times.
Thanks for your research, and the effort to make such a detailed post.
It's a bit of a story, but I never intended to buy the RDX when I did. The CX9 crapped out and required an expensive repair that just wasn't worth it. Long story short, I drove from my mechanic straight to the Acura dealership and purchased it. (I did already know that the RDX was going to eventually be my next vehicle)
I scrambled to get a hitch for it to save the viability of a long planned road trip. The CX9 was a squeeze at the best of times so pulling a trailer made life a lot easier.
-jason
09-13-2020, 07:51 PM
#12
Advanced
Thread Starter
Thanks for the kind compliment. It's always fun to put my little projects into words after they're all said and done.
I will keep this thread updated with anything I do in the future.
Will be adding spacers to the hitch, vinyl wrapping the beak and I've got some research to regarding a ceramic tint on the front windows.
-jason
I will keep this thread updated with anything I do in the future.
Will be adding spacers to the hitch, vinyl wrapping the beak and I've got some research to regarding a ceramic tint on the front windows.
-jason
The following users liked this post:
Kelsen (07-05-2021)
09-15-2020, 01:45 AM
#13
Advanced
Thread Starter
I also noticed that the top of your trailer hitch is making contact with the bottom of your bumper and is actually pushing up on it. You do realize that Acura put a step in the frame rails on each side which is why when you buy the factory trailer hitch, they use spacers between the frame rail and the trailer hitch at the rear mounting holes. No big deal if you are happy with that. I used a 3 mm thick stainless steel fender washer as a spacer. It worked great.
I must also add that you're absolutely right about the torque spec indicated by Curt. I really don't think it should be that high. It felt like way too much the first time around, and this time I stripped the handle nut way before getting to even 100 lbs. Luckily I had another on hand. On the other side, the handle part of the handle nut started to twist and pull inside it's entry hole. Holding itself against 110lbs is asking a bit much from the little handle.

Do you recall what torque spec you went with?
-jason
10-01-2020, 06:03 PM
#14
Three Wheelin'
10-01-2020, 06:11 PM
#15
Three Wheelin'
As for the front dash cam wiring, did you have to remove the A pillar plastic trim and if so, how did it come off and how many plastic clips hold it on and where are they located on the trim, if you happen to remember.
Did you have to remove the half-moon shaped trim panel at the side of the dash?
Did you have to remove the half-moon shaped trim panel at the side of the dash?
10-05-2020, 09:55 AM
#16
Advanced
Thread Starter
As for the front dash cam wiring, did you have to remove the A pillar plastic trim and if so, how did it come off and how many plastic clips hold it on and where are they located on the trim, if you happen to remember.
Did you have to remove the half-moon shaped trim panel at the side of the dash?
Did you have to remove the half-moon shaped trim panel at the side of the dash?
I did remove the vertical panel on the side of the dash. (The panel that is covered when the door is closed) This made pulling the wire down to the fusebox location a cinch.
-jason
10-06-2020, 09:29 AM
#17
Three Wheelin'
I'll feed the wire in at the front edge of the A-pillar trim.
Thanks!
10-06-2020, 10:08 AM
#18
Advanced
Thread Starter
I do recommend removing the trim around the rearview mirror as well for a super clean look. There's plenty of room in there to route the cable, even with a ferrite core on it. Even with the cable protruding from there, the cover goes perfectly back into place. The headliner is forgiving enough to allow for it. Using the plastic pry tool again, work your way around and around it, pulling straight back and away from the windshield.
Embarassing moment, I stuck the camera onto the windshield before replacing the trim, and the placement of the camera interfered with the trim when I tried to put it back. Be sure to test fit everything before you stick the sticky!
Also, there's plenty of room in the kick plate trim panel located approximately where your left foot sits to tuck away any excess wiring near the fuse panel. No need to remove it, you can just tie-wrap the excess and shove it down in there.
if you're not wiring a rear cam, it's a pretty simple install. I think that covers the minor details... Let me know if you hit any snags and hopefully I can help.
-jason
10-06-2020, 07:56 PM
#19
Three Wheelin'
Part Number: 91561-TV1-E11. Certainly different from any other clip I have seen in all my years working on vehicles.

The Garmin Dash Cam Mini is an experiment so I am trying it out on the Acura, it being my first dash cam. And if all goes well, I'll put a front and rear Garmin Mini in the Porsche 991 GTS next spring.
10-06-2020, 11:51 PM
#20

Thank you for sharing your experience with pictures!
I'm looking into getting yellow bulbs for the fog lights and came across the same bulbs as you. However, another similar one by the same company also caught my eye:
It appears that it is 3800 lumens vs 2800 lumens. I assume that the bulb life for the 3800 lumen bulbs have a shorter life. What else did I miss?
Thanks again for sharing your research results!
10-07-2020, 01:17 AM
#21
Advanced
Thread Starter
I'll be running the cable down the right side A-Pillar and then feeding the wire probably behind the glove compartment and to the center console to plug into the 12V outlet (will have to check if it is switched). At the moment, I'll just be using one camera. If it is acceptable, I'll get the polarizing filter. No plans to use the Parking Mode Cable; my motorcycles or Porsches are either under my butt or locked in the garage.
All you'll need is a low profile fuse tap. Many come with butt connectors preinstalled.
I do recommend using the polarizing filter. I can't compare the end result to not using one with my dash cam, but I can certainly attest to the difference that my polarized sunglasses make with glare on the water while boating. Also, the camera peering directly though a pane of glass can produce crazy artifacts that can at least be reduced by using a filter.
-jason
10-07-2020, 01:36 AM
#22
Advanced
Thread Starter
Hello fellow Vancouverite!
Thank you for sharing your experience with pictures!
I'm looking into getting yellow bulbs for the fog lights and came across the same bulbs as you. However, another similar one by the same company also caught my eye: https://www.amazon.ca/Alla-Lighting-...2045741&sr=8-1
It appears that it is 3800 lumens vs 2800 lumens. I assume that the bulb life for the 3800 lumen bulbs have a shorter life. What else did I miss?
Thanks again for sharing your research results!
To be honest, while I really like the look of the yellow bulbs as they give a bit of a "JDM Look", I do wish they were brighter...
This was a bit of a trial run to see how I liked them, and I think without them being brighter, it's more of a cosmetic thing. I've done the off-on-off-on test at night while driving and it's a bit of a stretch to notice much difference. Still haven't had a chance to use them in rain or fog.
2800 vs 3800 lumens is a considerable difference, so I'd be very interested in hearing your opinion if you go ahead with them. I worry that the beam pattern of these bulbs isn't doing me any favors and a larger investment is going to be required to see any functional results. I'll be doing more research on the subject, but I'm pleased with them for now. At least now I know the yellow is a go! And, you're probably right about the shorter bulb life.
Also note the shipping fees and speed on the Amazon link you provided. I just wanted to try them out on the cheap, hence the $30 Canadian Rupee price tag. $19 shipping on a $28 set of bulbs is a tad steep...
I think, maybe, it's hard to make much difference when up against the Jewel Eye headlights. I'm extremely impressed with them and that's coming from a guy with 3 sets of 55 watt 6000k HIDs on my pickup truck.
Also, now I'll be on the lookout for another RDX with yellow fogs!!
On a side note, where do you take your RDX for service? I didn't go for Acura Care Plus, so I'm on my own for scheduled maintenance. I'm hoping to find a reputable shop that has experience with Hondas, Acuras and the J35 engine. I don't mind paying a higher price for good service, but stealership prices don't seem warranted in my case.
-jason
Last edited by rubinox; 10-07-2020 at 01:50 AM.
10-08-2020, 10:35 PM
#23
Happy to see another member from the Lower Mainland! How exciting!
To be honest, while I really like the look of the yellow bulbs as they give a bit of a "JDM Look", I do wish they were brighter...
This was a bit of a trial run to see how I liked them, and I think without them being brighter, it's more of a cosmetic thing. I've done the off-on-off-on test at night while driving and it's a bit of a stretch to notice much difference. Still haven't had a chance to use them in rain or fog.
2800 vs 3800 lumens is a considerable difference, so I'd be very interested in hearing your opinion if you go ahead with them. I worry that the beam pattern of these bulbs isn't doing me any favors and a larger investment is going to be required to see any functional results. I'll be doing more research on the subject, but I'm pleased with them for now. At least now I know the yellow is a go! And, you're probably right about the shorter bulb life.
Also note the shipping fees and speed on the Amazon link you provided. I just wanted to try them out on the cheap, hence the $30 Canadian Rupee price tag. $19 shipping on a $28 set of bulbs is a tad steep...
I think, maybe, it's hard to make much difference when up against the Jewel Eye headlights. I'm extremely impressed with them and that's coming from a guy with 3 sets of 55 watt 6000k HIDs on my pickup truck.
Also, now I'll be on the lookout for another RDX with yellow fogs!!
On a side note, where do you take your RDX for service? I didn't go for Acura Care Plus, so I'm on my own for scheduled maintenance. I'm hoping to find a reputable shop that has experience with Hondas, Acuras and the J35 engine. I don't mind paying a higher price for good service, but stealership prices don't seem warranted in my case.
-jason
I have a couple of places, with mechanics that I trust. DM me you email and I'll send you a couple recommendations

I'm not sure if I should start a new thread, but I haven't been able to find side window visors for sale in Canada. I was looking for the WELLvisors, but may have to wait until the borders re-open
 10-08-2020, 11:10 PM
#24
Advanced
Thread Starter
I agree, the $19 shipping is more than I want to spend for these bulbs, I'll be patient and see if there are any sales on during Prime days or Black Friday! I figure, if I can't get the fogs to match the headlights, then I might as well get good contrast with the yellow fogs.
I have a couple of places, with mechanics that I trust. DM me you email and I'll send you a couple recommendations
I'm not sure if I should start a new thread, but I haven't been able to find side window visors for sale in Canada. I was looking for the WELLvisors, but may have to wait until the borders re-open
As for the window visors, I've looked into them, and right you are... Well visors are the only option, and eBay is going to be your best bet. I haven't had the RDX through rainy season yet, so I'll wait to see how badly I want them before making any decisions. They don't look too bad IMO, and I wouldn't live without them on my pickup. We'll see how the RDX channels rain away from open windows.
I suppose it wouldn't hurt to start your own thread, but the 2G RDX section of this forum seems rather quiet. If you find a good price on them, please do let me know!!!
I'll send you a message soon, as my oil life has hit 50% and I'd like to build a relationship with a shop I can trust right off the bat. I've done enough oil changes that I'd rather pay the extra bucks just to get it done. I can do without the mess and used oil disposal.
-jason
10-21-2020, 03:09 PM
#25
How has the fog lights held up?
I'm trying to see if the extra $20 is worthwhile in going for the 3800lumen bulbs. I also note that the 2800lumen pair has a projector lens designed into them which seems to throw light out of the housing more effectively.
What are your thoughts on the design between the two?
I'm trying to see if the extra $20 is worthwhile in going for the 3800lumen bulbs. I also note that the 2800lumen pair has a projector lens designed into them which seems to throw light out of the housing more effectively.
What are your thoughts on the design between the two?
10-21-2020, 06:41 PM
#26
alexmed2002
How has the fog lights held up?
I'm trying to see if the extra $20 is worthwhile in going for the 3800lumen bulbs. I also note that the 2800lumen pair has a projector lens designed into them which seems to throw light out of the housing more effectively.
What are your thoughts on the design between the two?
I'm trying to see if the extra $20 is worthwhile in going for the 3800lumen bulbs. I also note that the 2800lumen pair has a projector lens designed into them which seems to throw light out of the housing more effectively.
What are your thoughts on the design between the two?
10-24-2020, 11:10 PM
#27
I prefer the contrasting color of the yellow far more than the mismatched headlight/fog lights combo. Hope that helps!
10-24-2020, 11:34 PM
#28
alexmed2002
So I bit the bullet and ordered the same fog light bulbs as Rubinox. I installed them today and no error codes after driving around for about 30min. Definitely brighter than stock halogens to my untrained eye.
I prefer the contrasting color of the yellow far more than the mismatched headlight/fog lights combo. Hope that helps!
I prefer the contrasting color of the yellow far more than the mismatched headlight/fog lights combo. Hope that helps!
10-24-2020, 11:57 PM
#29
I'm a complete amateur but it was pretty easy.
Left side has more room than the right, so start there if you're unfamiliar.
1) turn wheel opposite direction of side you are working on
2) unscrew one screw for the fender liner
3) I removed 2 clips under the bumper, think you can get away with one.
4) pull the liner back (the liner and the painted bumper are much more flexible than I imagined)
5) reach to the fog light housing, press the release button to detach the electrical from the bulb, and turn bulb counter-clockwise to loosen and pull straight out
Putting everything back together was pretty easy, although I put both clips back on the fender liner before Tucker the liner back behind the bumper cover.
The right side has some other electrical unit made by Denso. Does anyone know what that is?
Whatever the case, you have to reach under and past that unit to reach the fog on the right side.
Good luck and report back with how it went!
10-25-2020, 01:12 PM
#30
Advanced
Thread Starter
How has the fog lights held up?
I'm trying to see if the extra $20 is worthwhile in going for the 3800lumen bulbs. I also note that the 2800lumen pair has a projector lens designed into them which seems to throw light out of the housing more effectively.
What are your thoughts on the design between the two?
I'm trying to see if the extra $20 is worthwhile in going for the 3800lumen bulbs. I also note that the 2800lumen pair has a projector lens designed into them which seems to throw light out of the housing more effectively.
What are your thoughts on the design between the two?
Also, I'm happy to hear that you haven't experienced any error codes, and neither have I. I'm not sure if the car "knows" if the fog lamps are present or not. The rear turn signals haven't given me any error codes either, but I do think you need to select a compatible bulb to be sure it doesn't happen. The ones I selected (linked above) were marketed as being compatible. A bonus fact: for pre-facelift 2G RDX owners, you can only change either the fronts or the rear turn signals to LED without causing hyper-flash. If you want to change both, you'll need to add load resistors to the circuit. Not sure the amount of impedance you need to add though.
As for the install, I think wasabimaniac summed it up quite nicely. I didn't even go that far and only made enough room to stick my hand in and did the rest by feel. Didn't see much need to take anything more apart that I didn't have to. It's a very easy job.
-jason
01-16-2021, 05:27 PM
#31

Thanks for this. I had a look at your thread and got the LED turn signals and reverse lights for a 2016 RDX, back in November. Installed them and had them for about 2 months now.
Just an update for anyone curious about these two products.
The reverse lights still work fine as far as I'm aware (i check in the reflection of windows when in reverse sometimes).
The turn signals hyper-flashed about 7 or 8 times so far, intermittently (so about 4 times a month). About 5-8% of the time, if I put an estimate on the number of times I had my indicators on. I have no resistors on, so those might come in handy, even though they are advertised as not having to use that. Not sure if the cold has any effect (winter in Canada), probably not?
Other than that, pretty satisfied with both. Thanks again.
01-16-2021, 09:18 PM
#32
Advanced
Thread Starter
Thanks for this. I had a look at your thread and got the LED turn signals and reverse lights for a 2016 RDX, back in November. Installed them and had them for about 2 months now.
Just an update for anyone curious about these two products.
The reverse lights still work fine as far as I'm aware (i check in the reflection of windows when in reverse sometimes).
The turn signals hyper-flashed about 7 or 8 times so far, intermittently (so about 4 times a month). About 5-8% of the time, if I put an estimate on the number of times I had my indicators on. I have no resistors on, so those might come in handy, even though they are advertised as not having to use that. Not sure if the cold has any effect (winter in Canada), probably not?
Other than that, pretty satisfied with both. Thanks again.
Just an update for anyone curious about these two products.
The reverse lights still work fine as far as I'm aware (i check in the reflection of windows when in reverse sometimes).
The turn signals hyper-flashed about 7 or 8 times so far, intermittently (so about 4 times a month). About 5-8% of the time, if I put an estimate on the number of times I had my indicators on. I have no resistors on, so those might come in handy, even though they are advertised as not having to use that. Not sure if the cold has any effect (winter in Canada), probably not?
Other than that, pretty satisfied with both. Thanks again.
You purchased the identical bulbs that I linked in the original post? Does it only occur on one side, or both?
As an absolute stab in the dark, try flipping the bulb around. I have doubt that this would make a difference, but it's worth a shot...
-jason
The following users liked this post:
chilly731 (01-17-2021)
01-17-2021, 12:59 PM
#33
I'm sorry to hear about the hyper-flash!! I haven't experienced it, not even once with these bulbs! I am not running resistors either.
You purchased the identical bulbs that I linked in the original post? Does it only occur on one side, or both?
As an absolute stab in the dark, try flipping the bulb around. I have doubt that this would make a difference, but it's worth a shot...
-jason
You purchased the identical bulbs that I linked in the original post? Does it only occur on one side, or both?
As an absolute stab in the dark, try flipping the bulb around. I have doubt that this would make a difference, but it's worth a shot...
-jason
Either way, appreciate the post, I just wanted to put this out there in case anyone reading this is curious about the possibility of hyperflash!
07-04-2021, 03:42 PM
#34
10th Gear

I will revive an older post to give an opinion on the trailer weight rating that Acura uses.
IMHO, only trailer hitch receiver that Acura sells for the RDX is a class one hitch.
This is a 1 1/4" receiver hitch. They are rated at a max of 1500 lbs. for this size.
Being that this is the only size sold by Acura, 1500 lbs. is the max they will rate the vehicle for.
This being said as my 06 Ody that Honda sells a class 2 hitch for with basically the same engine and worse transmission
is rated for up to 3500 lbs.
Mike
07-04-2021, 07:21 PM
#35
Advanced
Thread Starter
I will revive an older post to give an opinion on the trailer weight rating that Acura uses.
IMHO, only trailer hitch receiver that Acura sells for the RDX is a class one hitch.
This is a 1 1/4" receiver hitch. They are rated at a max of 1500 lbs. for this size.
Being that this is the only size sold by Acura, 1500 lbs. is the max they will rate the vehicle for.
This being said as my 06 Ody that Honda sells a class 2 hitch for with basically the same engine and worse transmission
is rated for up to 3500 lbs.
Mike
IMHO, only trailer hitch receiver that Acura sells for the RDX is a class one hitch.
This is a 1 1/4" receiver hitch. They are rated at a max of 1500 lbs. for this size.
Being that this is the only size sold by Acura, 1500 lbs. is the max they will rate the vehicle for.
This being said as my 06 Ody that Honda sells a class 2 hitch for with basically the same engine and worse transmission
is rated for up to 3500 lbs.
Mike
Regardless of what the vehicle is capable of pulling, the rating remains a rating and going beyond the limitation given to us by Acura, you can find yourself in a lot of trouble in the event of an accident.
Also consider:
- The method that the hitch itself mounts to the vehicle... Perhaps the frame of the RDX isn't capable of a load over 1500lbs? Personally, I don't have too much faith in the strength of the frame where I mounted the hitch to.
- How about the Tare Weight of the vehicle with > 1500lbs pushing it around from behind?
- Is the braking system up to the task?
- Will there be a loss of steering control with an increased tongue weight?
There's many variables at work apart from just the engine and transmission.
I've never found a solid answer as to what the limiting factor of the RDX actually is. Just be very careful when pushing the limits because if you're found to be exceeding these limits in the event of an accident you'll probably be found fully liable for any damage or injuries you may have caused.
-jason
07-05-2021, 09:45 PM
#36
Instructor

It has been my experience that the weight rating for Honda vehicles is constrained first by the suspension; certainly, in the case of the RDX, it is not the engine.
RFT!!!
Dave Kelsen
--
It is not easy to find happiness in ourselves, and it is not possible to find it elsewhere. -- Agnes Repplier
RFT!!!
Dave Kelsen
--
It is not easy to find happiness in ourselves, and it is not possible to find it elsewhere. -- Agnes Repplier
07-10-2022, 06:07 AM
#37
Instructor
Jason, I am wondering how your Viofo camera(s) have held up, after nearly 2 years. Can you give us an update?
Thanks.
RFT!!!
Dave Kelsen
--
It takes at least one person cursing the darkness before someone has sense enough to light a candle.
Thanks.
RFT!!!
Dave Kelsen
--
It takes at least one person cursing the darkness before someone has sense enough to light a candle.
07-10-2022, 05:48 PM
#38
Advanced
Thread Starter
I think the general idea with dashcams is that if installed correctly, you pretty much forget it's even there.
Apart from formatting the SD card monthly, I've not touched it at all. You can set it to remind you to perform this task as it supposedly keeps the filesystem on the SD card healthy.
Any time I've gone to review footage, it's always been intact and the quality is great. Overall very happy with the purchase.
-jason
The following users liked this post:
Kelsen (07-10-2022)
07-21-2022, 03:32 PM
#39
Instructor
@rubinox Any chance you could elaborate a bit on where and how you did your fishing to the back of the vehicle? I dug around and looked at trying to go from a bit back of the B-pillar, but it's quite busy under there, and I don't want to proceed without a little assurance that I'm at least in the right place.
Thanks.
RFT!!!
Dave Kelsen
--
I am known all over the world for my tendency to exaggerate...
Thanks.
RFT!!!
Dave Kelsen
--
I am known all over the world for my tendency to exaggerate...
07-21-2022, 06:54 PM
#40
Advanced
Thread Starter

Unfortunately I didn't take a whole lot of photos during the install.
I routed along the passenger side. Remove the weather stripping as much as needed from the rear cargo doorframe and the rear passenger side door frame.
Using a straightened wire hanger, or my tool of choice has always been chainlink fence. The kind that's covered in a rubber/plastic material. Holds its shape so well and is very strong.
May take a bit of patience but you'll be able to get it through somehow. Doesn't matter which side you start, tape the cable to the end of your hanger after you've got it fished through.
It's been a while but I recall pulling down on the headliner as much as possible and using a flashlight to get an idea of where to insert and start from.
Let me know if that helps, and how it goes.
-jason
Edit: I'll also mention to break up the job into smaller chunks. Just get it out the rear headliner first and then continue to route towards that boot that carries other cables into the door.
The following users liked this post:
Kelsen (07-22-2022)