When you click on links to various merchants on this site and make a purchase, this can result in this site earning a commission. Affiliate programs and affiliations include, but are not limited to, the eBay Partner Network.
I've installed one in every car that I have bought.
I never have starting issues even on the coldest of sub-zero days even if I don't use one; I just like to keep wear and tear on my engines down to a minimum.
And since I found very little on the subject, I thought I'd post.
Before anyone tackles this installation, they should check if they can easily get to the block heater screw plug with the tools that they have. Its a tight fit in that part of the engine compartment. Only then should they drain the radiator and engine block of engine coolant.
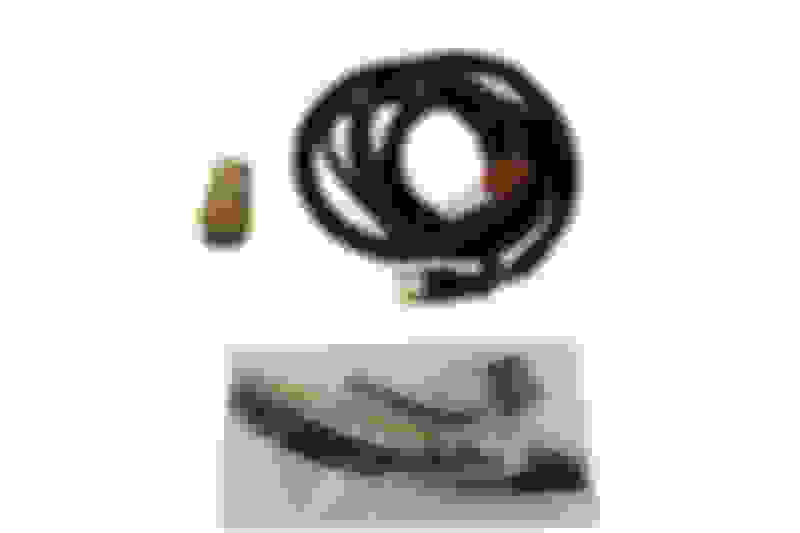
This is what it looks like. Its a screw-in, exactly like the one I installed in 1999 on my Honda CR-V back then.
This is what comes in the box from Acura.
The hex at the end takes a 24 mm socket.
An aluminum sealing washer is included in the kit.
Torque specification is: 75 - 85 Nm (55 -63 lbf.ft.)
Remove the air duct for better access.
The best way to get to the block heater screw plug is from a 45 degree side angle instead of straight down past the valve cover and ignition packs that are in the way.
Unplug the connector that goes to the front O2 sensor by depressing the tab on it and pulling up on it. (yellow circle)
Unplug the O2 sensor connector from the metal bracket by depressing the tab on it and pushing it downwards.
Unbolt the bolt holding the bracket (yellow dot) using a 14 mm socket.
Lift the automatic transmission fluid dip stick up five millimeters and rotate it toward the radiator to get it out of the way,
Move the bracket and attached wiring towards the battery and stick it between the radiator hose. Tie it away if necessary.
With the bracket removed, I had ample space to get a 1/2 inch square drive 19 mm deep socket onto the block heater screw plug and used a long flex handle to loosen the block heater screw plug. It then unscrewed by hand.
Even with the radiator drained and the engine block drained via the rear engine drain bleeder screw, almost a liter of engine coolant drained from the block heater screw hole.
A 19 mm socket is used to remove the plug and aluminum sealing washer.
The radiator drain valve is located above this access hole in the plastic underbelly pan.
Access is tight for larger hands.
Unfortunately, unlike the radiator drain in a Toyota which has a spigot that you can attach a vinyl drain hose to, Honda/Acura failed to do so. The drain is flush with the radiator. A very small funnel can be used to drain the engine coolant into a "clean" container for reuse into the engine when refilling the system.
The radiator drain valve. Turn counter-clockwise (as viewed from the end of the white plastic drain valve) to open the valve.
This engine coolant drain is located at the rear of the engine on the passenger side.
A 12 mm box end wrench or deep socket is used to loosen the bleeder screw. A box end wrench is then used to open and shut the bleeder screw.
A two and half foot vinyl tube that fits tightly over the bleeder screw is used to drain the engine coolant into a "clean" container if it will be reused.
Another view of the engine coolant drain's location.
View of the block heater screw plug location with it removed.
Make sure the threads in the engine block and block heater element are clean prior to installation.
Do not forget to install the aluminum sealing washer.
Apply a thin coat of Permatex 2 Form-A-Gasket (No. 2BR, UPS 80500) to the threads of the block heater element. This sealant is non-hardening and was recommended by the installation instructions of the Honda block heater element that I installed in my 1999 Honda CR-V when I bought it new.
The hex at the end of the block heater element takes a 24 mm socket.
Post Installation
Make sure all engine coolant drains are closed.
Refill the engine with the engine coolant that was drained (or with fresh engine coolant if what was drained was old) and top up as necessary. Topping up is performed after the engine has warmed up and the radiator fans have cycled on and off a few times and the thermostat has opened. Make sure the level in the engine coolant reservoir is between the MIN and MAX lines. When that level no longer changes, your coolant system level has stabilized. When the engine coolant has cooled to ambient temperature, remove the radiator cap. The level of the engine coolant should be right at the top of the radiator neck.
Check for leaks.
Routing the block heater's wiring is a matter of personal choice and best done when the engine is at ambient temperature.
Although I downloaded the Acura Block Heater Installation PDF, until I lowered a digital camera down into the gap between the radiator and engine, I wasn't sure where the block heater screw plug was and Googling it didn't come up with any images. You can actually see it if you peer through the long slot where the hood latches to the lock. You'll need a flashlight to light up the area. As my pics show, its right next to the engine casting with the type and engine serial number.
Great write-up. I opted to have this done when I purchased the vehicle. I haven't used it yet, but there are times that the temps in CO will get way down there, even in my garage where the RDX always sits.
 10-13-2017, 08:03 PM