Acura TL rear lip project bumper removal DIY
 02-23-2009, 02:34 PM
#1
Wait...I just blacked out
Thread Starter
Join Date: Oct 2006
Location: Gainesville Florida
Age: 38
Posts: 639
Likes: 0
Received 0 Likes
on
0 Posts
Acura TL rear lip project bumper removal DIY
So I started my TL rear lip over the weekend. It actually has come together at lot easier and quicker than I thought it would. I know there are other "DIY" threads about the process, but more can't hurt. so here we go.
Tools:
- Dremel
- socket set (8 mm is the only end you'll need)
- phillips head screw driver
- flat head screw driver
- pliers
- epoxy resin/plastic weld/bondo
- paint (if you aren't going to take it to the paint shop after)
--TEST FITTING THE LIP
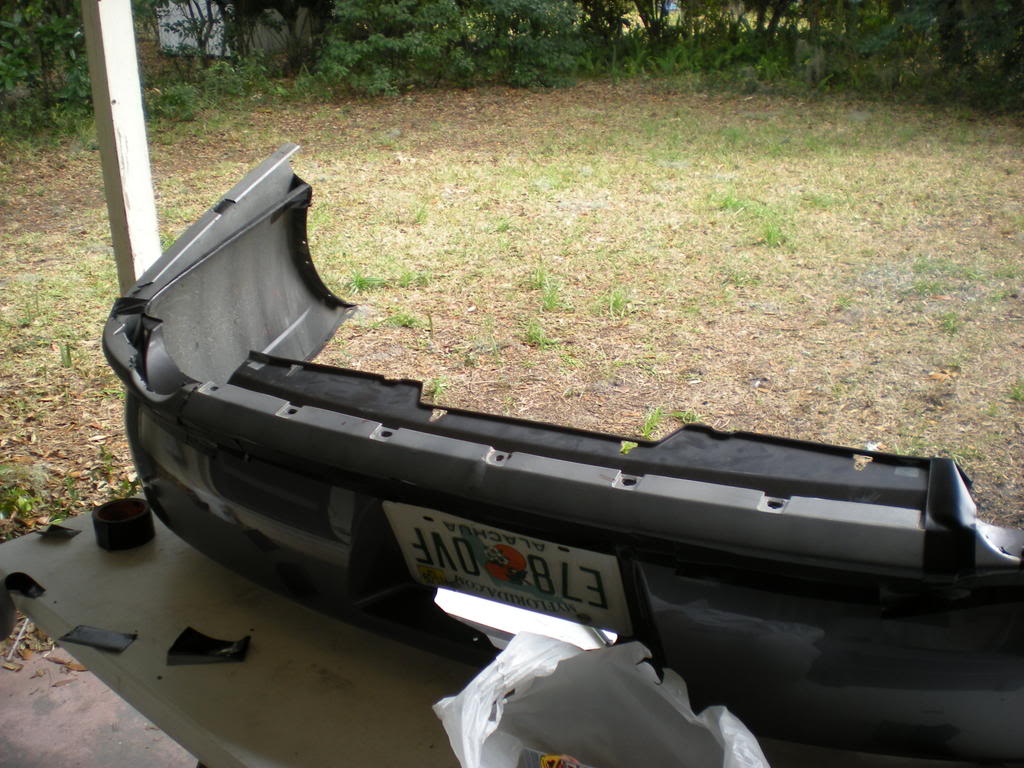
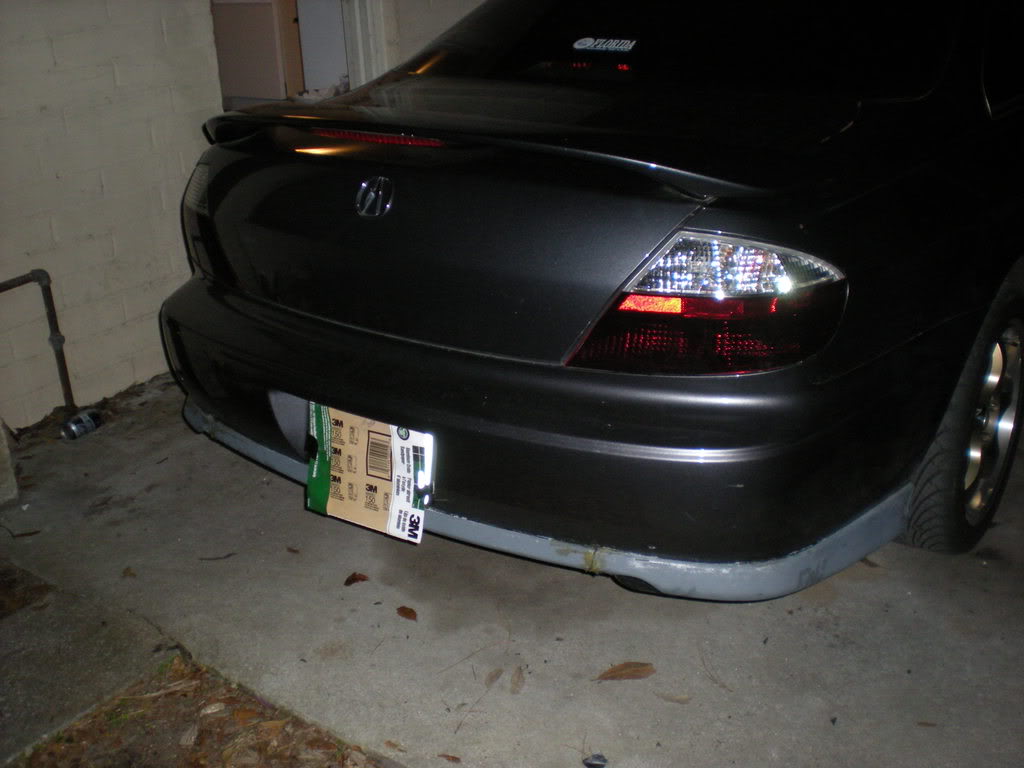
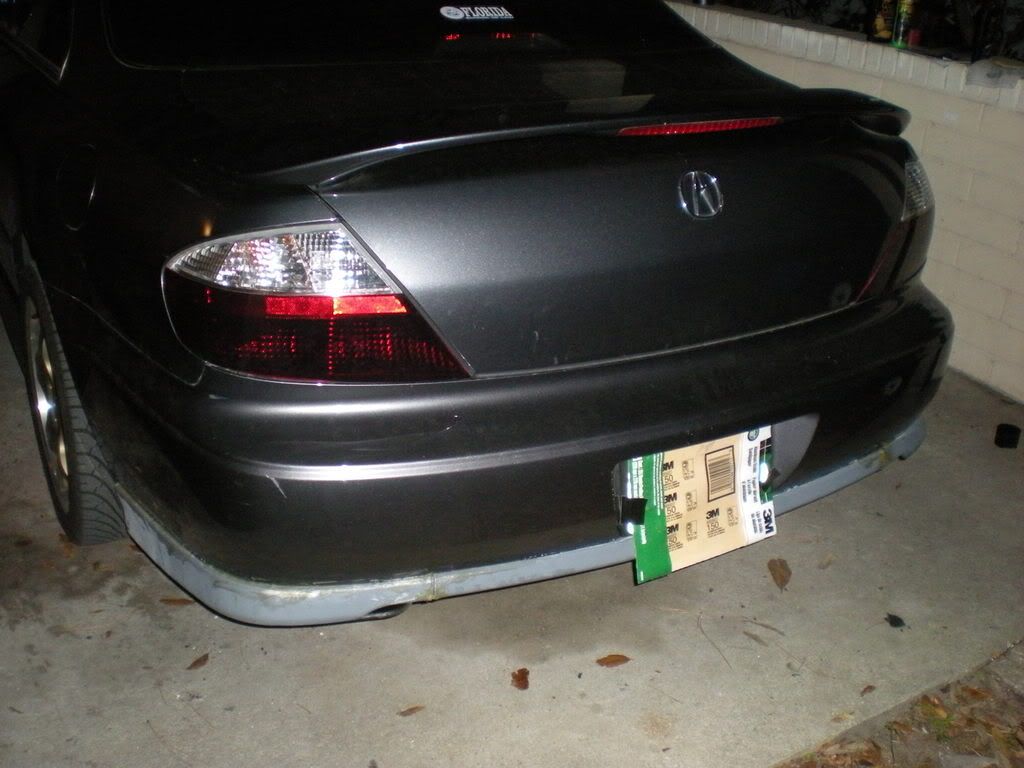
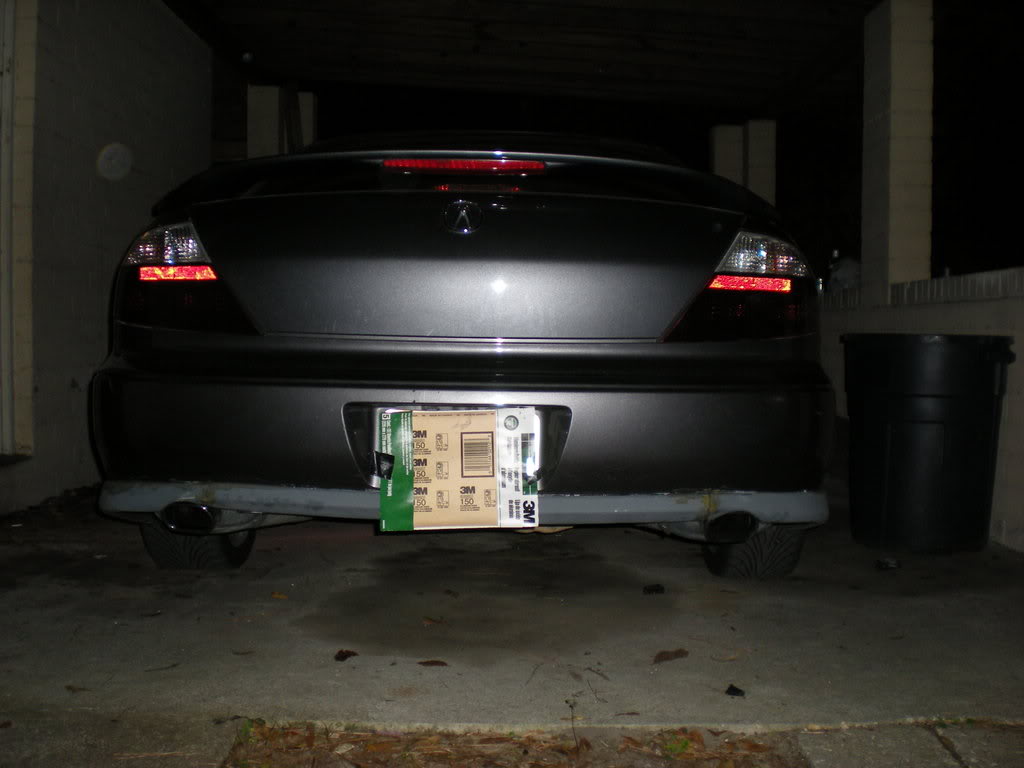
So you have your TL lip. You're going to want to cut it into three pieces. Although you could probably line it up as one complete piece this will just help because you'll have to bend/flex the end pieces to get them to fit properly and this will just take some stress off the rest of the pieces.
I made the cuts right after the exhuast cut outs on the lip:
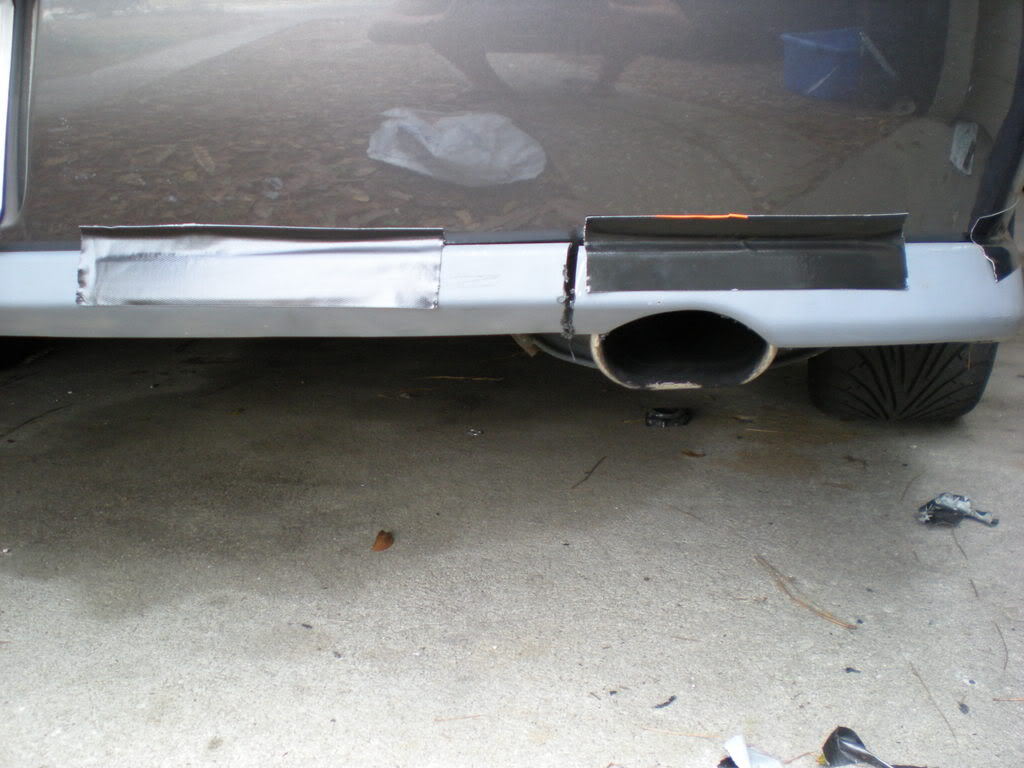
You're also going to want to trim some of the end near the wheel well out. that won't fit without a couple inches removed
Here is the lip cut up and fit onto the bumper:
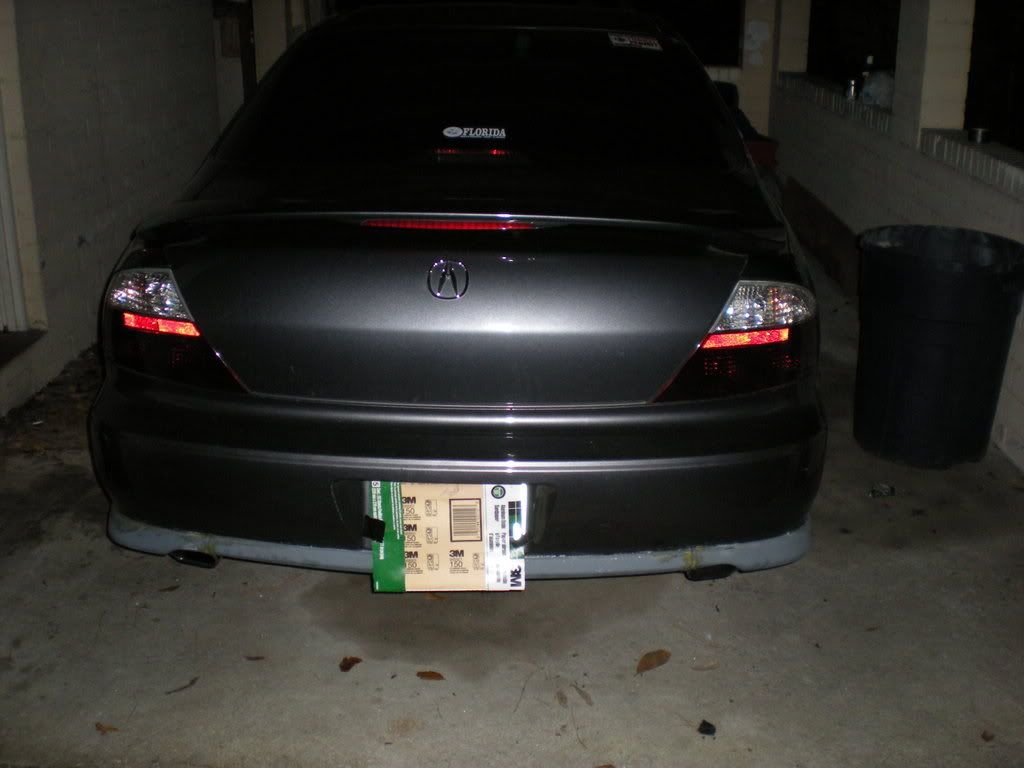
--TAKING THE REAR BUMPER OFF
There should be the following screws/bolts to remove
1. two screws on the rear of each wheel well (one at the top of the rear wheel well and one in the middle of the rear) also there are two plastic "stoppers" that you can pop off with a flathead
2. plastic bolts under the trunk lid where the bumper attaches between the tail lights
3. two plastic bolts underneath the bumper near the mufflers. (i just broke these off, they were awful to get off nicely.)
4. the last were underneath the tail lights, so take the 8mm ratchet and unbolt the tail lights and take these screws:
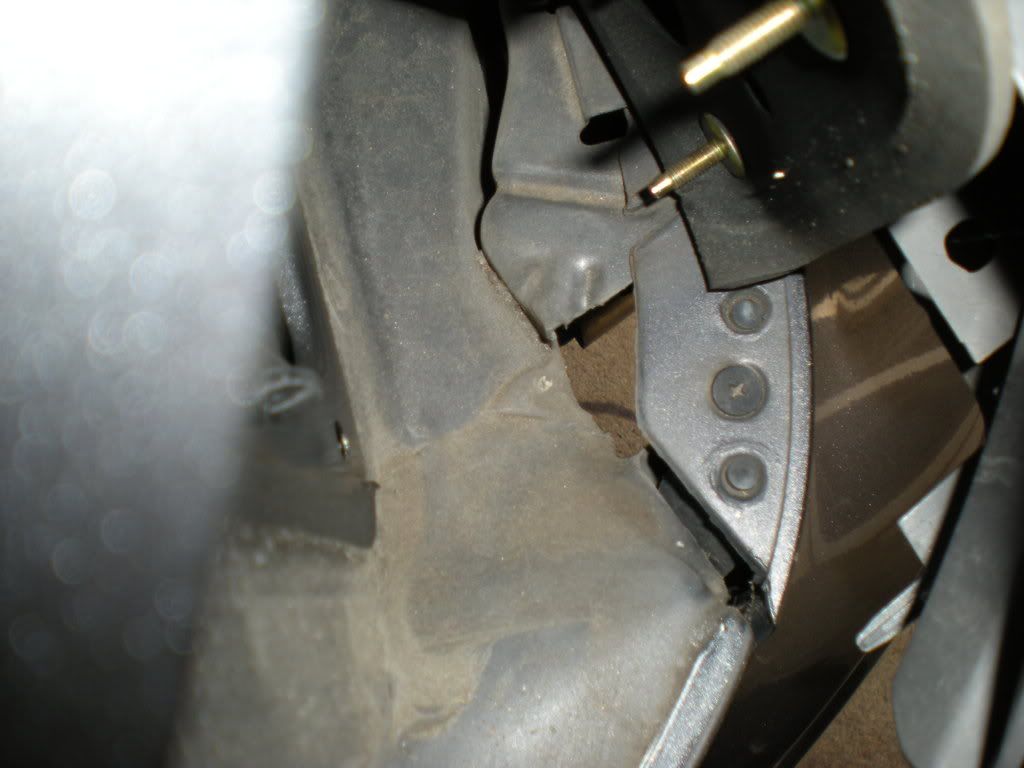
off
....after this the rear bumper should just slide right off (you'll have to unclip the license plate light)
And heres what you get.
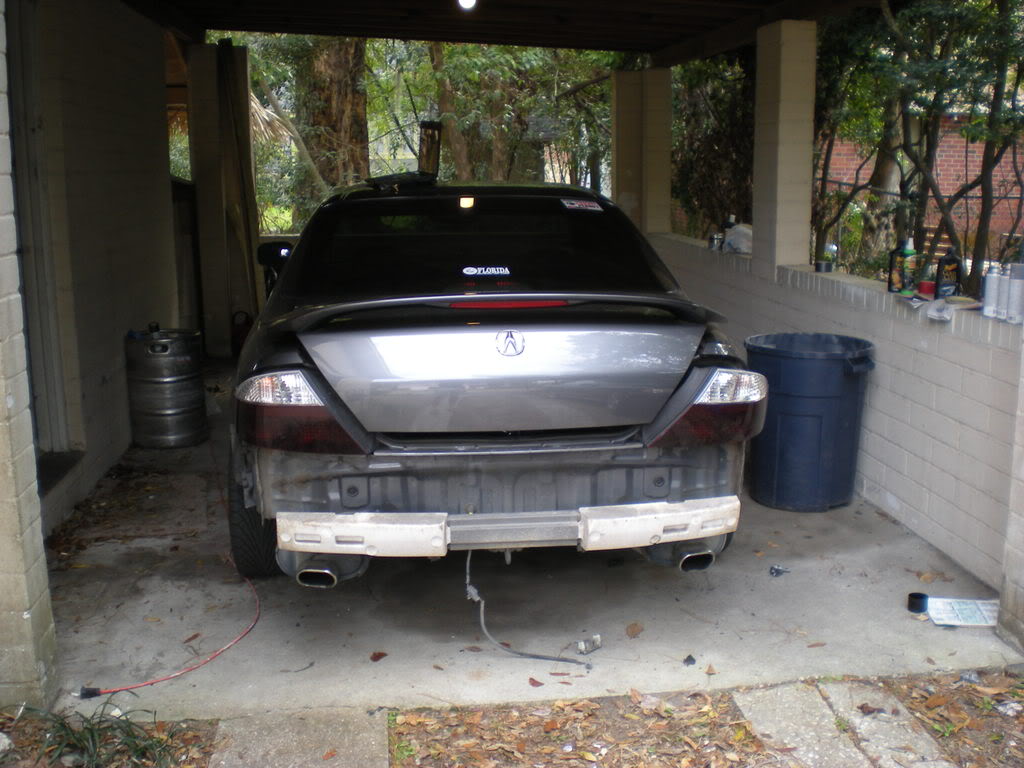
Now you can work on the actual rear lip.
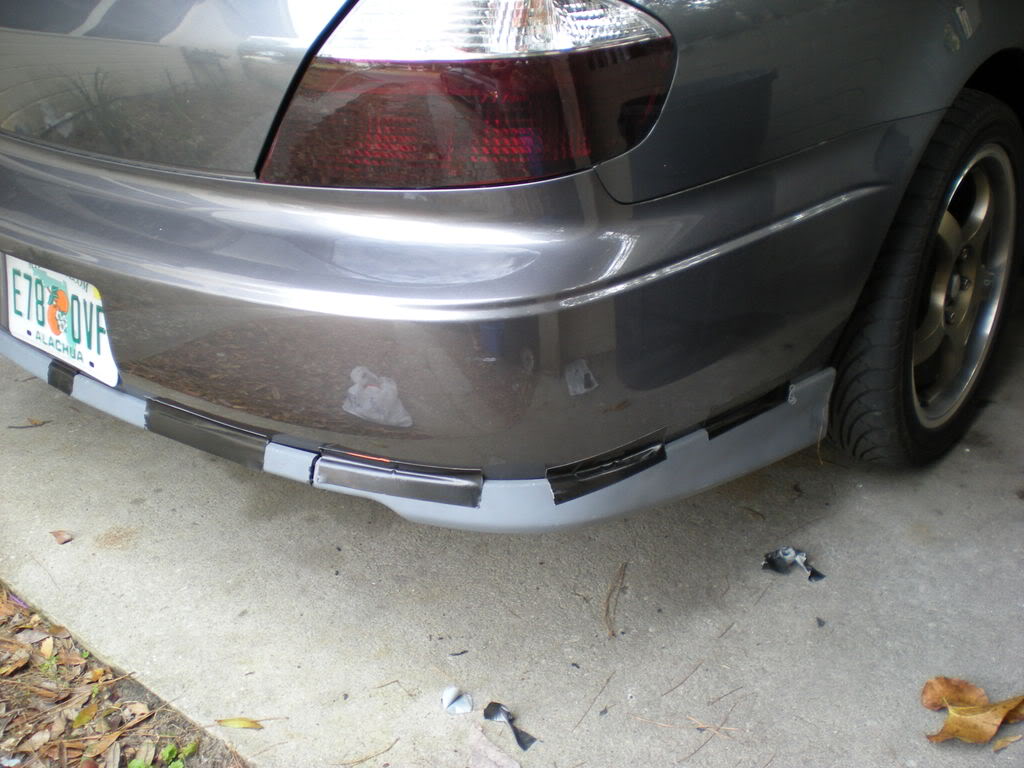
I removed the test fitted lip and then etched where the lip layed with some 150 grit sand paper. This helps the lip bond better to the plastic. I then replaced the lip.
Then you're just going to want to start layering epoxy along the edges. What I did is since the lip wont fit exactly flush, you're going to want to tape it down, this way it sits closest to the bumper and also the epoxy wont drip onto the rest of the bumper. I used "Gorilla tape" and i really liked the way it worked. Held very fast, and easy to remove.
Anyways, it's mounted on the car now, I just need to reassemble, and sand/bondo/paint it to make it look pretty.
more pics and info to come!
Tools:
- Dremel
- socket set (8 mm is the only end you'll need)
- phillips head screw driver
- flat head screw driver
- pliers
- epoxy resin/plastic weld/bondo
- paint (if you aren't going to take it to the paint shop after)
--TEST FITTING THE LIP
So you have your TL lip. You're going to want to cut it into three pieces. Although you could probably line it up as one complete piece this will just help because you'll have to bend/flex the end pieces to get them to fit properly and this will just take some stress off the rest of the pieces.
I made the cuts right after the exhuast cut outs on the lip:
You're also going to want to trim some of the end near the wheel well out. that won't fit without a couple inches removed
Here is the lip cut up and fit onto the bumper:
--TAKING THE REAR BUMPER OFF
There should be the following screws/bolts to remove
1. two screws on the rear of each wheel well (one at the top of the rear wheel well and one in the middle of the rear) also there are two plastic "stoppers" that you can pop off with a flathead
2. plastic bolts under the trunk lid where the bumper attaches between the tail lights
3. two plastic bolts underneath the bumper near the mufflers. (i just broke these off, they were awful to get off nicely.)
4. the last were underneath the tail lights, so take the 8mm ratchet and unbolt the tail lights and take these screws:
off
....after this the rear bumper should just slide right off (you'll have to unclip the license plate light)
And heres what you get.
Now you can work on the actual rear lip.
I removed the test fitted lip and then etched where the lip layed with some 150 grit sand paper. This helps the lip bond better to the plastic. I then replaced the lip.
Then you're just going to want to start layering epoxy along the edges. What I did is since the lip wont fit exactly flush, you're going to want to tape it down, this way it sits closest to the bumper and also the epoxy wont drip onto the rest of the bumper. I used "Gorilla tape" and i really liked the way it worked. Held very fast, and easy to remove.
Anyways, it's mounted on the car now, I just need to reassemble, and sand/bondo/paint it to make it look pretty.
more pics and info to come!

 02-23-2009, 09:29 PM
#7
Wait...I just blacked out
Thread Starter
Join Date: Oct 2006
Location: Gainesville Florida
Age: 38
Posts: 639
Likes: 0
Received 0 Likes
on
0 Posts
yea it was used. it used to be silver. Got the entire lip kit. Now its just primered until I paint it (probably wednesday)
MORE PICS!
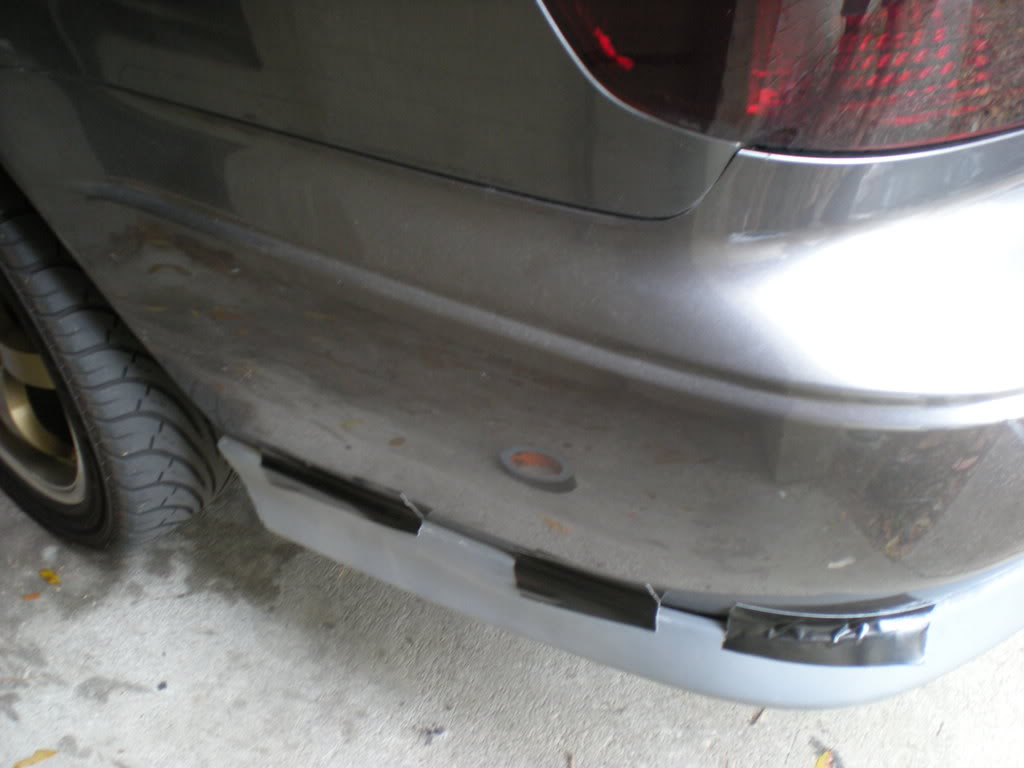
So after all the epoxy resin and plastic weld sets heres what it should like:
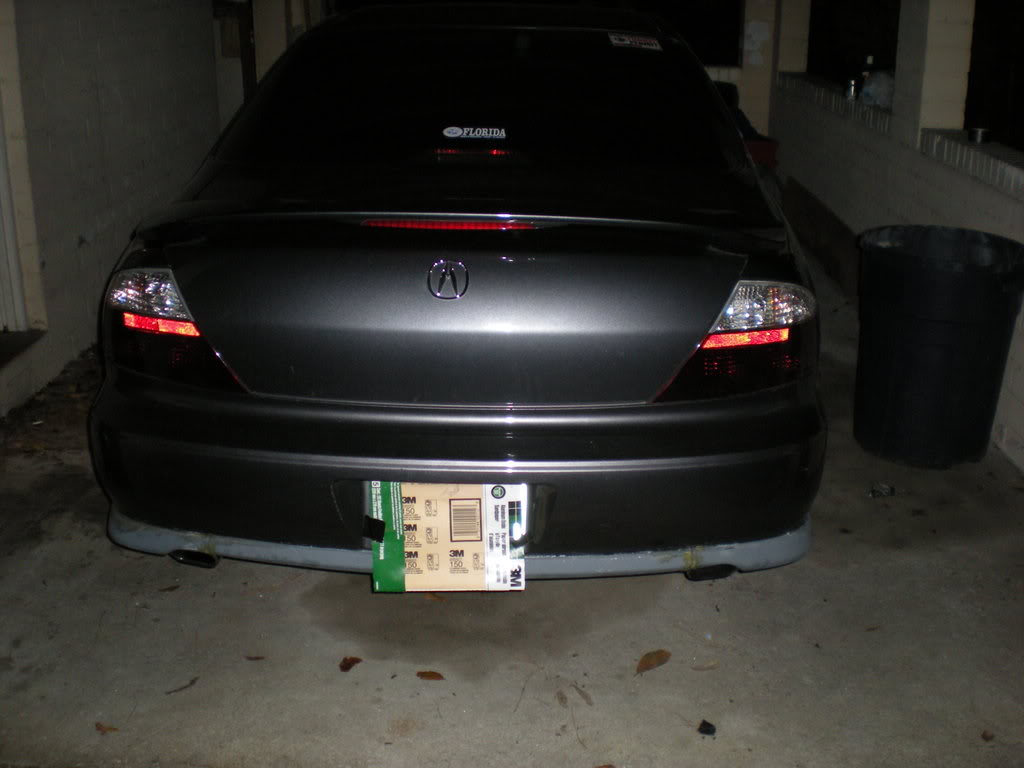
its not bondo'ed/feathered into the bumper or painted.....ill get to that wednesday...more pics to come!
MORE PICS!
So after all the epoxy resin and plastic weld sets heres what it should like:
its not bondo'ed/feathered into the bumper or painted.....ill get to that wednesday...more pics to come!
Trending Topics
The following users liked this post:
Pacura2006 (03-19-2015)


 02-24-2009, 07:24 AM
#14
Wait...I just blacked out
Thread Starter
Join Date: Oct 2006
Location: Gainesville Florida
Age: 38
Posts: 639
Likes: 0
Received 0 Likes
on
0 Posts
I wasnt trying to hide it. I couldnt get a good picture with it and the flash. it was about 9 oclock at night when I shot it. So I would have posted pics of nothing but a big flash of light on the license plate.
And the tires on on backwards because when I got them I did a "swap" with my old rims from this guy in Jax, and I wasn't really paying attention, I was just trying to get back to Gainesville because I drove up there in a break I had from class. I'm getting them fixed this weekend when I take it in.
And the tires on on backwards because when I got them I did a "swap" with my old rims from this guy in Jax, and I wasn't really paying attention, I was just trying to get back to Gainesville because I drove up there in a break I had from class. I'm getting them fixed this weekend when I take it in.
02-26-2009, 01:27 PM
#19
Wait...I just blacked out
Thread Starter
Join Date: Oct 2006
Location: Gainesville Florida
Age: 38
Posts: 639
Likes: 0
Received 0 Likes
on
0 Posts
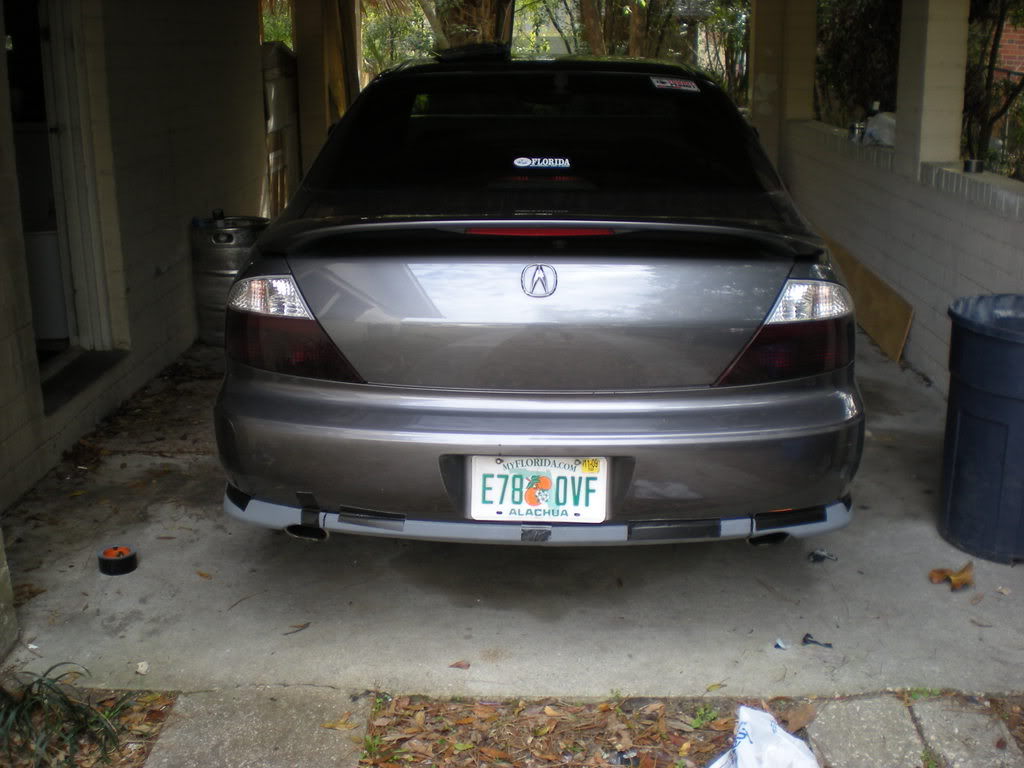
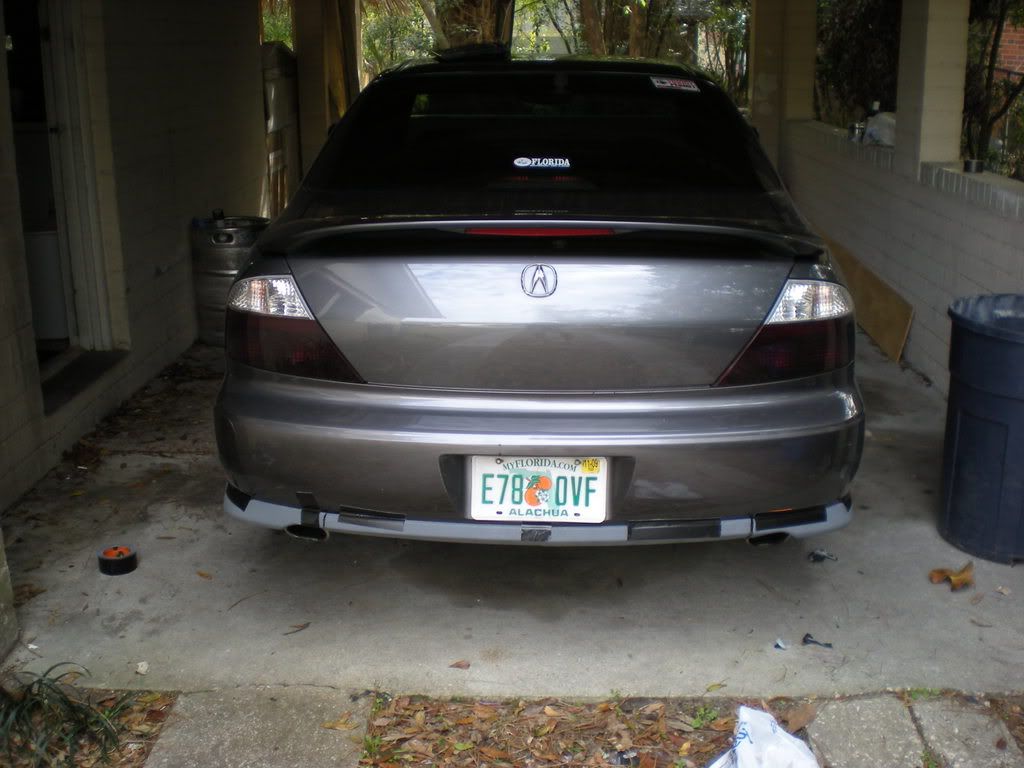
LIP KIT IS DONE! it feels good to have it complete (kind of)
the rear lip needs a bit more work....But its getting there. Anyways, here are the updated pics.
picture taken infront of my mansion.

beautiful florida day
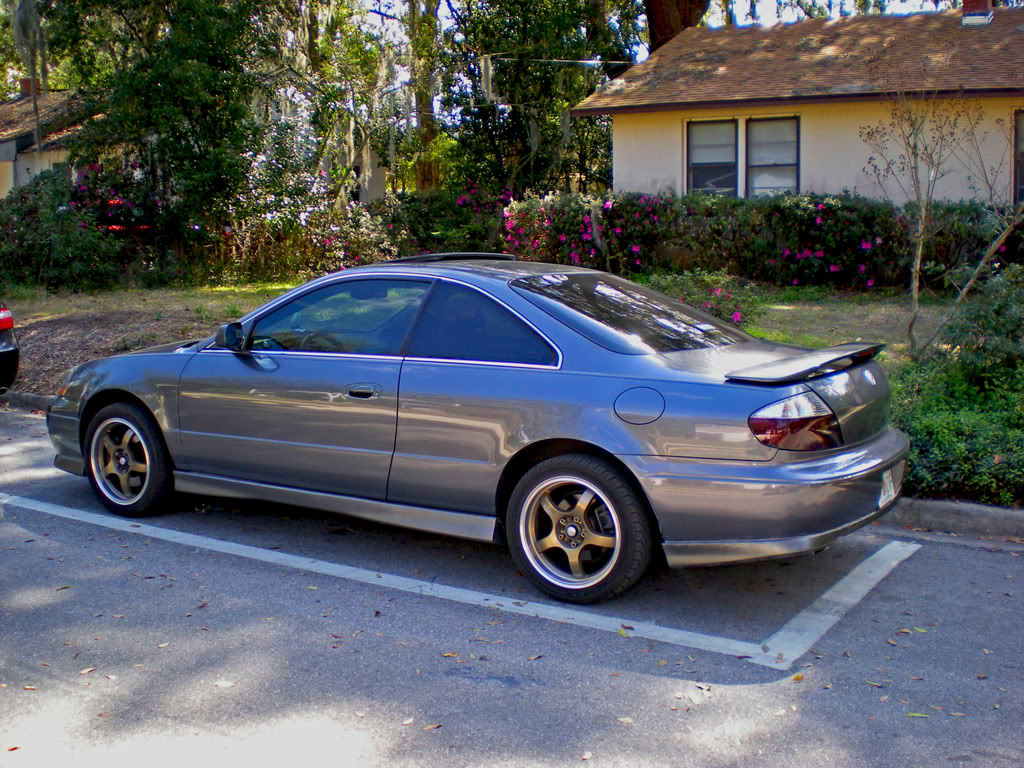
haven't been washed in a while, but still not looking TOO bad...
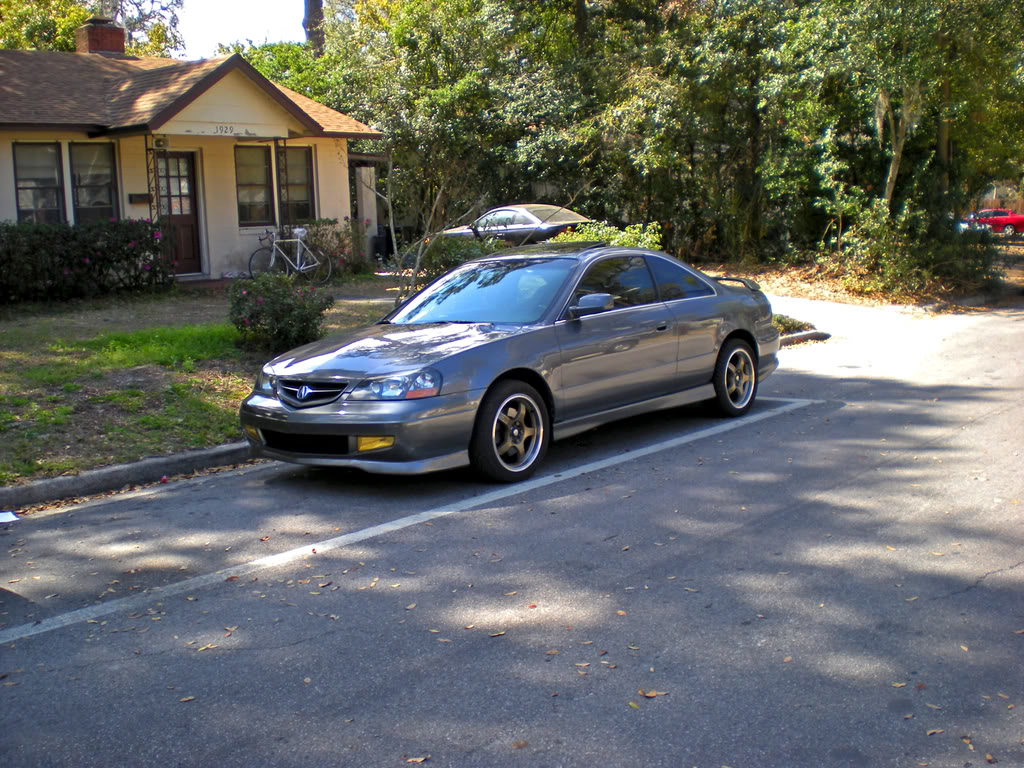
oh and before anyone says it...
yes. I need a drop.
BOOM!
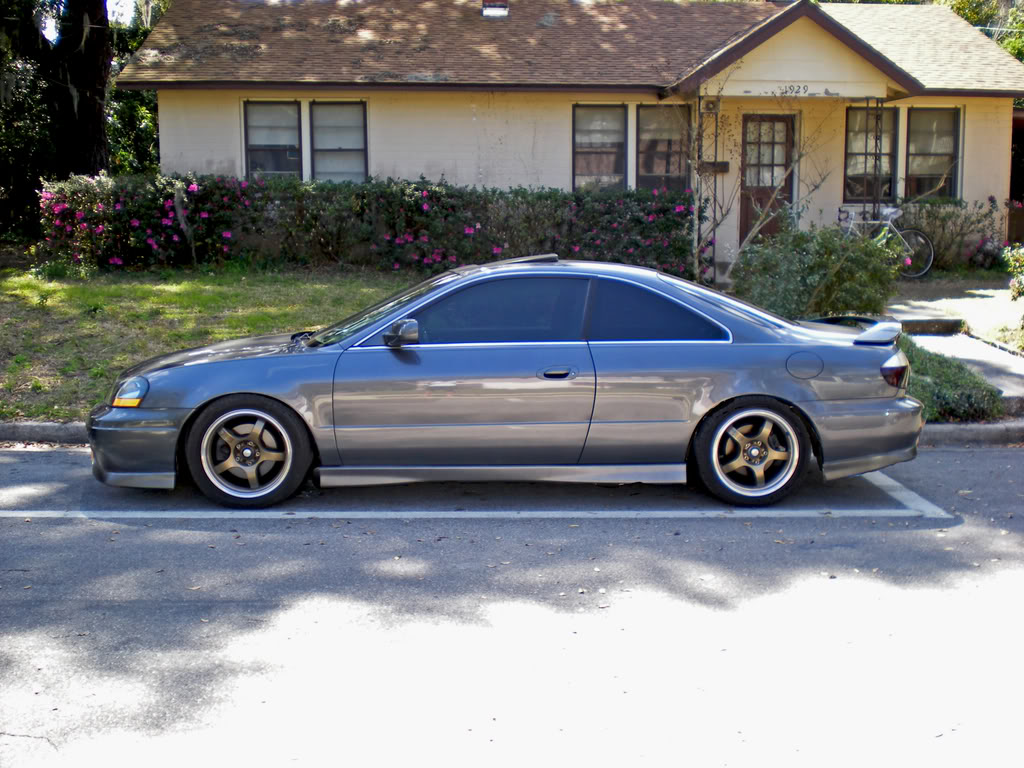
....its a photoshop.
work on the grill coming next week....
the rear lip needs a bit more work....But its getting there. Anyways, here are the updated pics.
picture taken infront of my mansion.
beautiful florida day
haven't been washed in a while, but still not looking TOO bad...
oh and before anyone says it...
yes. I need a drop.
BOOM!
....its a photoshop.
work on the grill coming next week....


 02-27-2009, 07:44 AM
#31
Wait...I just blacked out
Thread Starter
Join Date: Oct 2006
Location: Gainesville Florida
Age: 38
Posts: 639
Likes: 0
Received 0 Likes
on
0 Posts
appreciate all the compliments guys!
there is still a bit more work to do but i'm really happy with how it all turned out
there is still a bit more work to do but i'm really happy with how it all turned out
02-27-2009, 10:21 AM
#33
Wait...I just blacked out
Thread Starter
Join Date: Oct 2006
Location: Gainesville Florida
Age: 38
Posts: 639
Likes: 0
Received 0 Likes
on
0 Posts
02-27-2009, 11:59 AM
#35
Don't Mess With Texas
your sideskirts look too long, they are flared out funny, the rear lip is slanted in a way that it doesnt match the body lines, and the front lip is all crooked. i can see the seam from reconnecting the pieces in your pic standing 10 feet away from the car.
fitment needs work dawg.
fitment needs work dawg.
 02-27-2009, 12:10 PM
#37
Wait...I just blacked out
Thread Starter
Join Date: Oct 2006
Location: Gainesville Florida
Age: 38
Posts: 639
Likes: 0
Received 0 Likes
on
0 Posts
and it looks like you didnt scrape the excessive resedue from between the rear bumper and lip... you can see it from the pics from far away


 02-28-2009, 12:50 AM
#40
Wait...I just blacked out
Thread Starter
Join Date: Oct 2006
Location: Gainesville Florida
Age: 38
Posts: 639
Likes: 0
Received 0 Likes
on
0 Posts

anyways. thanks for the all the compliments....and/or "constructive" criticism guys!

