When you click on links to various merchants on this site and make a purchase, this can result in this site earning a commission. Affiliate programs and affiliations include, but are not limited to, the eBay Partner Network.
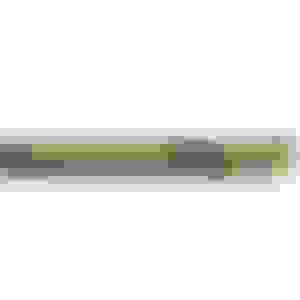
3.2 vs 3.7. You might be able to fit the mdx spacer with the thinner IM and close the hood.
I was thinking if I ever got the 3.7 manifold I'd have to make up some height so the s/c elbows still line up. Just wondering how much. (Could use thermo gaskets)
I took measurements long time ago and posted when Rajca asked. Can't remember what thread it was in. I actually bought the 3.7 TL IM before a while back but ended up selling it before installing.
Think it was something like 1/2 inch shorter but I can measure it again. Would use the thinner P2R Spacer and would definitely have hood clearance. The only thing to think about is Strut Bar clearance. The spacer would not fit with CT strut bar and stock IM with P2R Plenums(barely fits without spacer). Think it will fit fine with smaller 3.7 TL IM.
Not sure the spacer is worth it. There is the extra money and also the spacer will just move the weight of the IM, TB, etc. further up and have a higher center of gravity. Then I would want a before and after dyno to see if it is worth it.
For the 3.7 IM the bottom of the TB Flange is the same length as where the IM connects to lower runners. It all touches ground at the same time. If you measure from the ground to the bottom of the TB opening it would only be about 1/4 inch.
For the 3.2 IM, the TB Flange hangs much lower then the rest of the IM.
If you hang the flange over the edge of the box then the TB opening is basically at ground lever or slightly higher. Hard to tell.
Ordered Prank Parts IM Thermal Gasket. Gonna use that and runners as reference to open up lower IM ports. Are there any special precautions I should take when grinding/sanding since it is magnesium? Don't want to set myself or garage on fire.
The Road America Course looks fun. Much better then the tight courses I run full of cones. Maybe I can go to some next year but it is a far drive. Will look into it.
I know about MVP. Some guys I know run with them. I will be going to their autobahn event most likely, maybe more.
Want to run more events next year. Never done a full year yet because of down time working on car and other priorities.
I will have to look you up when these events come around this year!
Originally Posted by fsttyms1
You too huh? Ever go to the ice racing events in the winter? Absolute blast.
Yessir Haven't been to the ice racing events, they look sweet, first on is this Sunday! tempted...
Originally Posted by brian6speed
Ah you run with them too. We should plan to attend some events. Always love seeing other honda and acura's. I drive down to national azine meet also if anyone local wants to caravan there in June.
Originally Posted by fsttyms1
I didnt attend any this year due to my car being down most of it. Next year i plan on attending more.
I will be heading down this year too to the national meet. My car WILL be done this time.
Going to the national meet would be really cool! I will have to see where work has me that time of year. So far the only 2015 FVSCC event is August 16th at Road America
Here are some weights of titanium hardware vs steel and stainless counterparts. Titanium is lighter, stronger, and looks better. Only negative is cost. Keep in mind that the weight savings is less with smaller items and smaller items cost more for the weight you save. I would say it is probably not worth it unless the car competes competitively. I would also just use titanium for parts that require extra strength. Ones that don't require extra strength just go with stainless steel.
Seat Hardware
Steel Hardware. 4 Bolts & 4 Washers.
Titanium Hardware. 4 Bolts & 4 Washers.
Steel Seat Hardware for Both Seats. 8 Bolts & 8 Washers = 160G or .35 lbs.
Thought I'd post a more in depth DIY on removing a bracket that is spot welded on.
Here is what was used:
Gloves
Safety Goggles
Ventilator
Tape
Screwdriver
Work Light
JB Weld
Sandpaper
Primer
Rubberized Undercoating
Dremel with Flex Shaft Attachment
Metal Cut-Off Wheel & Sanding Drum
Taped off the Exhaust Hanger.
Cut off Exhaust Hanger Rod to have more room.
Grind down the 4 spot welds. It is better to use a worn down metal cut-off wheel so there is more clearance to get in tight areas.
Once you get down close to the bottom of the weld a line will form around it. I circled it in red in the picture below. This tells you when to stop grinding.
Once it is ground down enough use a screwdriver to pry it off.
Exhaust Hanger removed. Weighs 130G or .29 lbs.
Taped it up again for sanding. Used Dremel with sanding drum and sandpaper.
Sanded down.
Filled in a few small grooves left from grinding with JB Weld just to smooth it out. Not necessary.
Masked and sprayed primer.
Rubberized Undercoating applied.
Last edited by brian6speed; 01-04-2015 at 07:06 PM.
here is a little tip for you. There is a spot weld drill bit. It can be found at places like Napa, harbor freight and other shops. It makes quick work of spot welds and doesnt drill thru the back sideb easily like normal drill bits. Takes seconds to drill thru.
here is a little tip for you. There is a spot weld drill bit. It can be found at places like Napa, harbor freight and other shops. It makes quick work of spot welds and doesnt drill thru the back sideb easily like normal drill bits. Takes seconds to drill thru.
Thanks for the tip.
I already know about those drill bits, the problem would be that there was no space to use my drill. The dremel extension barely had room.
Never used those drill bits before. Will try them out on the rear seat brackets. Can buy some from local Harbor Freight.
I might not use the best or fastest techniques with my limited tools, but I find a way to get job done with what I have.
In case any one else wants to get spot weld drill bits, don't waste your time calling or driving to local stores, they do not carry them. Order online instead. I called Napa, Harbor Freight, and Home Depot. None carry them.
Prank Parts IM Gasket should arrive today. Then I can get to work opening up the lower IM ports. Then it is off to the powdercoater.
Received Prank Parts Thermal IM Gasket, so time for porting to begin.
Supplies.
Nice thing about buying a used IM, besides price, is that there are gasket marks left that you can use as guides to porting. Pic below shows this.
Prank Parts Thermal Gasket placed on ports. Fitment isn't perfect, but it should work.
The one part I am concerned about is the EGR Port. The Gasket only covers around 1 MM past the hole. Could this cause a leak issue? Wonder if I would be better off using P2R 3.7 TL Gasket or P2R CL Gasket?
Took a pic with gasket lifted up to show how close fitment is.
Here is the size of the previous OEM TL Gasket from marks.
Prank Parts Gasket Opening Size.
TB Opening Slightly Ported and Smoothed Out.
One port opened up. Could use a little more porting/sanding.
What grit sandpaper should I finish with? 180, 400, 600?
I appreciate the refund offer without even asking for one. That is a first for me, and amazing customer service. Will let you know. Will be buying your TB Adapter soon.
I am not sure if you can tell clearly in the pics, but the gasket does cover the entire opening and overlaps about 1-2 MM. That dark gasket spot might be deceiving. Should I still worry about leaking?
I don't blame you or the gasket. I am sure it fits CL IM perfect. The P2R CL gasket would be same way.
Emailed P2R about which gasket to use. They said either one should work and not leak, but they typically use 09 TL Gasket on their installs.
Guess I will order that gasket and decide which to use.
Still need to decide if I want to run P2R IM Spacer or hook up IMRC. I think the IMRC might be good for pulling out of tight corners in autocross where the revs drop in 2nd gear, but shifting to 1st isn't a better option.
BBK from XLR8 arrived. Great customer service and price, like always.
Must say these pieces are so beautiful. Best looking BBK I've ever seen. The Calipers are pretty massive and bigger than I expected for some reason. Fitment will be really close. Won't know till I try.
Kit Contents plus Titanium Shims.
The Titanium Shims won't fit until the pads wear down some. They will help with heat and protect the dust boots.
Trophy Sport Caliper.
These are anodized instead of painted like the standard ST40. Color should not fade from heat but have to be careful what cleaner you use. They machined out more material to make them 20% lighter than ST40 Calipers. They also have extra bolts on the inside.
Stoptech 328x28 AeroRotors.
These are such quality and great design. There is a lot of vanes and cooling. Tried capturing it in the pics. The hats on these are also anodized instead of painted.
Weights.
These are actually very light for their size. Will compare to other parts when removed.
Last edited by brian6speed; 01-09-2015 at 08:38 PM.
That looks awesome! Those will set the exterior off for sure. I'm sure at your weight, you'll notice an even bigger braking difference.
Hopefully. I find the brakes as the weak point performance wise on my car. Just not really happy with the initial bite or modulation. Fade and heat resistance will also be a plus.
Any recommendations on pads? Thinking Carbotech XP8 or XP10. Wonder how noisy they would be on the street. Tried emailing Carbotech about what pads to run but they never replied.
Those brakes look great , can't wait to see them installed.
Thanks. I can't wait either. Printed out the template to test fit wheels. Will do that later. Still not sure that will guarantee fitment since template is for 04-08 TSX, and 04-08 TL.
Hmmm. After emailing P2R about IM setups, I am not sure if 3.7 Magnesium IM is the way to go.
Noticed P2R is still running the 3.2 IM Ported with Plenums and MDX Horns. Asked why and was told "3.2 IM allows us to port it to exact size ports we want. The Magnesium IM does not really allow for that". They are pushing 308whp and like 280 wtq so that tells me 3.2 IM is not restrictive besides TB neck area, especially for my setup.
They welded more material around the neck to be able to port 3.2 TB Opening to 76 MM and run a 76 MM TB.
There is a claim on forums that 3.7 IM with 76 MM TB makes 3 HP more than the 3.2 IM ported with Plenums and Bored OEM TB which is basically 70 MM TB. Have no idea how that would compare to P2R's current setup.
I was able to open up 3.7 Magnesium IM some, but not a full job.
Wonder if it would help if I Port 3.2 IM TB Opening to 72 MM. Then open up the P2R TB Spacer to 72 MM on IM side and taper to 74 or 76 MM on TB side. Then run a 74 or 76 MM TB.
Could just weld and port 3.2 IM like P2R to run 76 MM TB.
Then there is the 10 lbs less weight from Magnesium IM to consider.
Would love to get dynos to compare them all but rather unlikely.
For my car I might not need as much porting as P2R with their freer flowing exhaust and other mods, so maybe 3.7 IM is enough. Hard to say.
Last edited by brian6speed; 01-13-2015 at 11:50 AM.
Was hoping someone would chime in. P2R didn't want to give me any advice on my setup and what to run(I can understand why). They just told me what they run. I appreciate them taking time to reply and their insight.
Seems to me 3.2 IM with neck welded and bigger TB is the way to go for max power gains.
Btw when the 3.7 IM posted 3 hp over 3.2 IM(ported with plenums, mdx horns, and oem bored tb), that was just with a basic port job. P2R has done more extreme porting on theirs and said it has been ported multiple times.
The 3.7 IM would make a few hp more than my setup (76 MM TB is what makes power, not IM). Only a 3 hp gain tells me the actual IM probably flows worse after the neck area. Then there is the 10 lbs of less weight. I would prefer 2-3 hp or torque over the 10 lb loss.
i think stick with the 3.7 plan. You already have everything and it'll be close in power and less weight. If you do go with the oem then you would need an aggressive port on the manifold and more material to the neck to fit the bigger TB....too much work for not enough gain I think.
i think stick with the 3.7 plan. You already have everything and it'll be close in power and less weight. If you do go with the oem then you would need an aggressive port on the manifold and more material to the neck to fit the bigger TB....too much work for not enough gain I think.
Don't have everything yet. Still need to purchase TB Adapter & Gaskets, TB, IM Cover Assembly & Gasket, and Powdercoat it.
Could port the 3.2 IM more myself. Already has a good port since came off P2R car that was making great numbers. Taking it off and bringing it to someone to weld more material on neck would be annoying part. Then I would want to powdercoat it or send it off to Swaintech to ceramic coat it.
Could just install the 3.7 IM and see what gains it makes. Then get to work on the 3.2 IM after it is removed. Then maybe re-install it with bigger TB and dyno again. Otherwise it is all just guessing.
Think if I just port my 3.2 IM neck to 72 MM and run a 72 MM TB, or port 3.2 IM to 72 MM then the TB Spacer from 72 to 74 MM and run 74 MM TB that will post just as good or better numbers than 3.7 IM and 76 MM TB.
Can't use the P2R IM Spacer with 3.2 IM due to strut bar clearance but should be fine with 3.7 IM.
Either way I go is a lot of work and money for not much gain. Don't want to sell my current setup now, so won't get any money back. Would have been better off spending money on wheels, tires, or aero mods.
Just wanted to see what numbers it could make and get some definitive info for forums. You would think there would be more after 12 years.
Last edited by brian6speed; 01-14-2015 at 02:18 PM.
The 3.7 will be lighter and it also won't get as hot.
In the end it would weigh around 7-8 lbs less probably.
Heat isn't as much of a concern since my IM is ceramic coated already and has thermal gaskets. I have driven for 2 hours with aggressive driving in summer. Stop and open the hood. I can leave my hand on the IM Top Plate as long as I want. It never gets hot enough to make me pull my hand away.
The issue would be that you can't reach inside the 3.7 IM to really port it properly. Spending a grand to gain 3 hp and lose 7-8 lbs seems rather disappointing.
It is a nice mod tho, especially for ppl without ported IM, bored TB, Plenums or Plenum Spacers, etc. already. Just doesn't have as much potential as modding the 3.2 Aluminum IM. Exhaust Manifolds might be my limiting factor anyway, in which case the 3.7 might be better choice solely from weight alone.
From a looks perspective I still prefer 3.2 IM with the Plenums.
Last edited by brian6speed; 01-14-2015 at 05:27 PM.
Taking it off and bringing it to someone to weld more material on neck would be annoying part.
What exactly would be involved in adding more material on the neck? I thought I observed an extra IM in one of your 'for sale' threads?
Surely, you could find a competent metal shop locally that would be able to do this. It would be just a matter of understanding what is involved in the process. Maybe P2r could fill in the gaps so that you could convey what you need if said metal shop is located to meet your need?
Bored TB $150
Ported IM $200 cheaper if do it yourself
P2R Plenums $400 if you can find them, cheaper if you go spacer route.
MDX Horns $40
P2R TB Gasket $18 Total $868
3.7 IM Setup
3.7 IM $180
76 MM Blox TB $227
TB Adapter & Gaskets $140
TL IM Cover $192 cheaper if you get Accord Top Plate and don't run IMRC.
P2R B Series TB on J32a2 Kit $76 Total $815
Last edited by brian6speed; 01-14-2015 at 05:46 PM.
What exactly would be involved in adding more material on the neck? I thought I observed an extra IM in one of your 'for sale' threads?
Surely, you could find a competent metal shop locally that would be able to do this. It would be just a matter of understanding what is involved in the process. Maybe P2r could fill in the gaps so that you could convey what you need if said metal shop is located to meet your need?
Just weld on more material and stack welds till it is desired thickness I would assume.
I do have my original IM still. Dunno if I want to start porting all over again when one on car already has good port job by P2R.
Reese is running 74 MM TB on 3.2 IM without welding extra material to neck. Not sure of gains though.
Last edited by brian6speed; 01-14-2015 at 05:51 PM.
Just weld on more material and stack welds till it is desired thickness I would assume.
Understood. Therefore, it would be just a matter of finding a good aluminum welder that can follow your direction. You could bring along your original IM, if you found a shop(s), and use that as an example to see if they can work the magic that you need, then if you are feeling lucky, remove your current IM and go all in.
Maybe those contacts over at King you made could give you some recommendations, as well. Hell, just chew their ear for giggles, you never know.
Originally Posted by brian6speed
I do have my original IM still. Dunno if I want to start porting all over again when one on car already has good port job by P2R.
yeah, I would not want to have to recreate all that effort. See above.
Understood. Therefore, it would be just a matter of finding a good aluminum welder that can follow your direction. You could bring along your original IM, if you found a shop(s), and use that as an example to see if they can work the magic that you need, then if you are feeling lucky, remove your current IM and go all in.
Maybe those contacts over at King you made could give you some recommendations, as well. Hell, just chew their ear for giggles, you never know.
yeah, I would not want to have to recreate all that effort. See above.
Would just let King do it most likely.
For the cost might as well go all out and get a sexy custom IM like Gerzand.
Last edited by brian6speed; 01-14-2015 at 06:06 PM.
There you go then. It would be just a matter of getting the cost to around the range that you mentioned above, if possible. Float it by them, after all the excellent work they did for your last year, they may be able to work it to your liking.
There you go then. It would be just a matter of getting the cost to around the range that you mentioned above, if possible. Float it by them, after all the excellent work they did for your last year, they may be able to work it to your liking.
I was kind of joking on the full custom IM. That isn't really necessary on a stock internal 3.2 motor. Not really wanting to spend much more on IM Setup. Would prefer custom exhaust manifolds over custom IM.
Pretty close to being finished. Spent some hours porting and sanding.
The lower port openings originally were 42-43 MM. Opened them all up to 44.5 MM. Didn't want to go overly aggressive on port opening in case gasket doesn't line up perfect. Did not want to create a lip that would cause turbulence.
Ended up using a pencil and this sand paper with rubberized backing to reach further than my fingers could.
Want to see if I can find something curved or flexible to reach further on the other side( top curved section) of runner.
Openings ported to 44.5 MM and smoothed by hand with 220 grit sandpaper.
Opened TB Neck Area to just under 76 MM. Sanded/smoothed the back of the neck area that transitions to manifold. It was rather rough.
Thinking of cutting off these posts that look ugly and aren't needed. Started thinking I could use them to mount my catch can so not sure yet.
Last edited by brian6speed; 01-17-2015 at 11:22 AM.
The clamping functionality of the forceps would enable you to grab, securely, the soft rubberized backing side of the sand paper, and the curved length of the instrument would facilitate getting to the deeper areas a little better. It would only be a matter of figuring out what overall length of instrument you would need the forceps to be. The page states that they offer various sizes. Another would be a 'right angle' clamp, as well,
 12-31-2014, 01:39 PM


 Haven't been to the ice racing events, they look sweet, first on is this Sunday! tempted...


 The Calipers are pretty massive and bigger than I expected for some reason. Fitment will be really close. Won't know till I try.


