When you click on links to various merchants on this site and make a purchase, this can result in this site earning a commission. Affiliate programs and affiliations include, but are not limited to, the eBay Partner Network.
The only time I have a problem is speed bumps. A lot of places have speed bumps higher than they need to be here. When I go over those speed bumps my j pipe of the headers taps the top of the speed bump. I haven't notice any real scrape marks on the bottom yet. I only worry about the cusco bar but since it is between the front wheels it might not be a problem. Good to know you haven't really scraped the bars yet
Yes it is in the plans. Should have car back from body shop and re-assembled by then, so I plan to go. Depending on work I may not be able to come up until Saturday. Do they have a date set yet?
Yes it is in the plans. Should have car back from body shop and re-assembled by then, so I plan to go. Depending on work I may not be able to come up until Saturday. Do they have a date set yet?
Considering it is basically same weekend every year, I would assume the Weekend of June 12th. Will have to weigh my options since that weekend has most car events of the year for me to attend. Have autocrosses, track days, local car show, and King Motorsports Dyno Day all on same weekend.
Considering it is basically same weekend every year, I would assume the Weekend of June 12th. Will have to weigh my options since that weekend has most car events of the year for me to attend. Have autocrosses, track days, local car show, and King Motorsports Dyno Day all on same weekend.
What state is it generally in? I might consider making the road trip if my car is done / running prime.
Here are main points I took away from reading article:
* Ran 1:46.3 time at ButtonWillow 13 CW. That is faster than Chris Rado's time in his 1000whp plus F-Wing Scion TC.
* Build is rather conservative for Time Attack Build, besides Full Flat Underbody.
* Car weighs 2295 lbs, doesn't specify with driver, etc.
* Exhaust vents out of the hood which saves a lot of weight and makes running a full flat floor much easier. This would be illegal in most racing series.
* 4 Cylinder Turbo Engine with Motec ECU makes 430whp and 295 lb/ft tq.
* It runs Endless/Zeal Coilovers with Swift Springs like me, but much stiffer spring rates of 28 kg/mm front and 22 kg/mm rear.
* They seam welded parts of front chassis around front suspension, but use a bolt-in cage and the harness installation/geometry is all wrong for safety.
* This seems more like a do minimum necessary to chassis stiffening to save weight, and make up for it by being stiffly sprung. Other way of thinking would be to stiffen chassis to run less stiff springs for more compliance and better mechanical grip. More downforce you run, stiffer springs need to be also.
* Their front lower arm is adjustable for camber, caster, and corrects roll center.
* They run 9 degrees of positive caster. Stock Honda/Acura typically run 3 degrees. My car is at 3 degrees, might want to try adjusting that. The civic does run mac strut setup in front.
* Run Stock Sway Bars. Wonder if stock front bar would be better choice over Eibach at my spring rates, hmm.
* They left cowl removed, and here is their reasoning:
"The base of the windshield is usually an area of high pressure but this car has a higher engine compartment pressure than most due to the flat bottom and the windshield has a lot of rake". Interesting
My take-away from this:
With this being one of the fastest FWD Time Attack Cars in both Japan and North America tells me that there aren't many well built and fast fwd cars.
Last edited by brian6speed; 03-03-2016 at 04:22 AM.
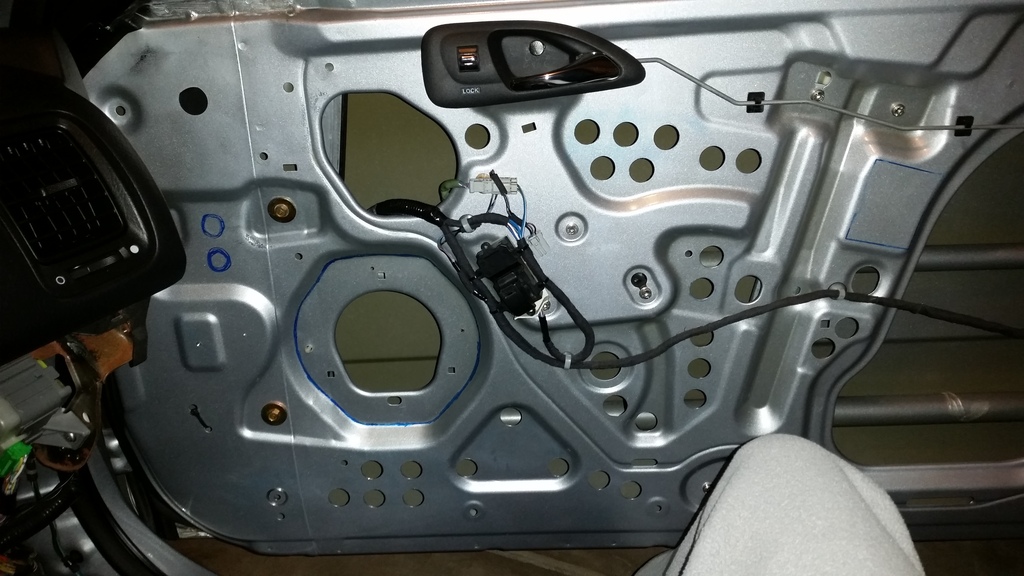
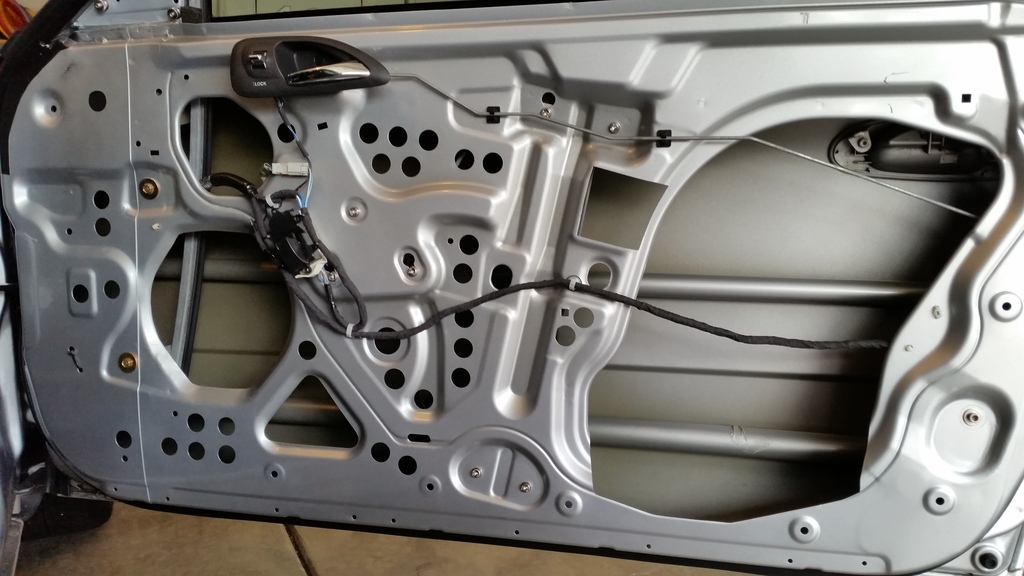
Could remove more material, but want to make sure it is sturdy enough for window and not create more noise/rattles. Also made it so can re-install door panels and not notice anything was done. Being able to go through drive-thru's is a must.
Love how doors look with exposed metal and the swiss cheese holes. Did not bother weighing anything.
2016 To Do List
Here is what I'll be working on next month or 2. Thinking will run minimal aero/downforce. Main focus is drag/lift reduction. Like how the car is setup and drives on relatively conservative 12k/8k spring rates and works for autocross, track and street. Any serious amount of downforce would require much stiffer springs, which would make it unbearable to drive on street. Just need to accept my car is a compromise and not full time attack car. Plan on having car down to 2600 lbs with full fluids and 1/2 tank of gas with full glass(besides Moonroof panel), functioning windows, AC, Heater, and Defrost.
- Finish Hood Venting
- Remove more metal from trunk and front of car
- Finish Side Skirts
- Finish Rear Diffuser
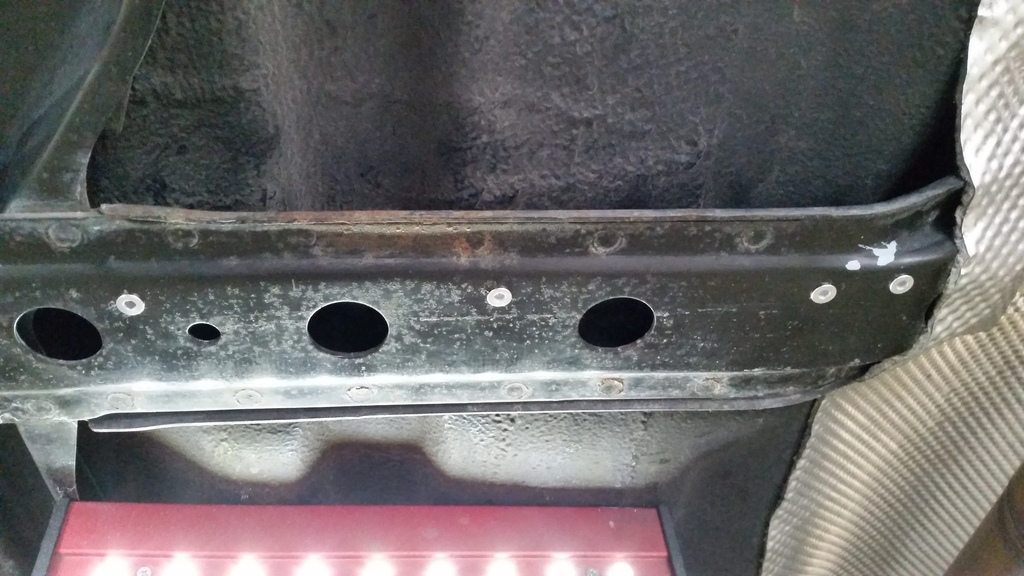
- Finish Under-Body Panel(just to block big open gap in front of fuel tank and rear subframe
- Build Front Splitter
- Finish Front Canards
- Reseal Headlights
Last edited by brian6speed; 03-07-2016 at 06:47 PM.
If you wanted to really take it a step further, you could create a removable inner panel from a spare door that's slightly larger at every dimension than the hole you would cut out. Then you could completely remove the inner panel at the track with the motor, glass and regulator in one fell swoop.
If you wanted to really take it a step further, you could create a removable inner panel from a spare door that's slightly larger at every dimension than the hole you would cut out. Then you could completely remove the inner panel at the track with the motor, glass and regulator in one fell swoop.
Interesting idea.
My first thought is what if the door warps from cutting too much material. What if the glass and associated parts don't fit perfectly anymore. Not an issue for trailored track car. Need to be able to still mount door panel. Think that is too far for my liking. Besides having no radio or cruise control my car still behaves like street car. Radio isn't needed with smartphone and Bluetooth speaker anyway.
There is already enough prep to do before track day to add this to list. Dealing with mounting and removing aero will be annoying enough by myself. Keep in mind I do all my track prep by myself, drive to and home by myself, and have to be able to fit everything in my CL.
Also, would probably end up breaking or scratching glass or Tint if remove it that often.
Thanks for idea though, keep em coming.
Last edited by brian6speed; 03-07-2016 at 07:24 PM.
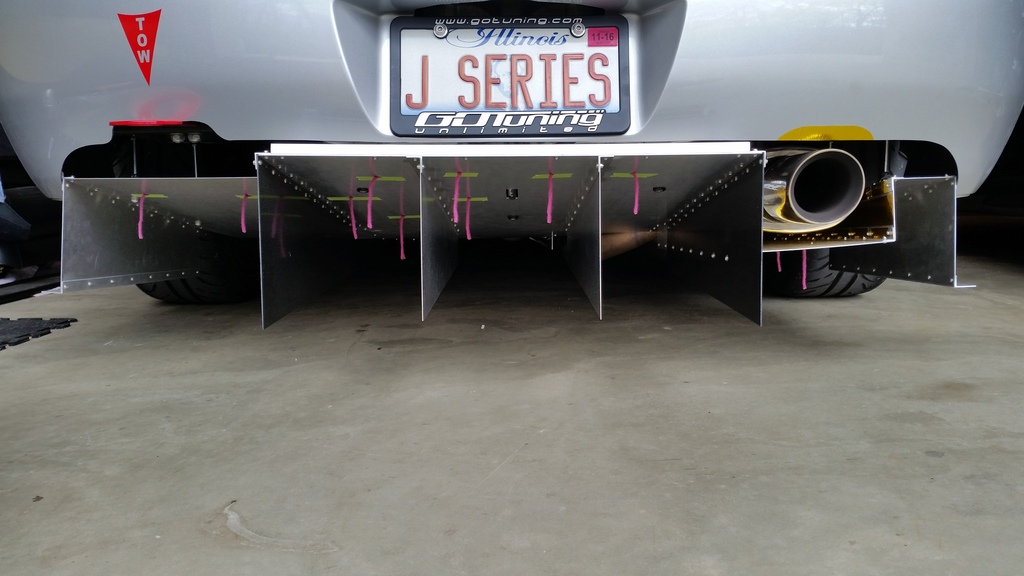
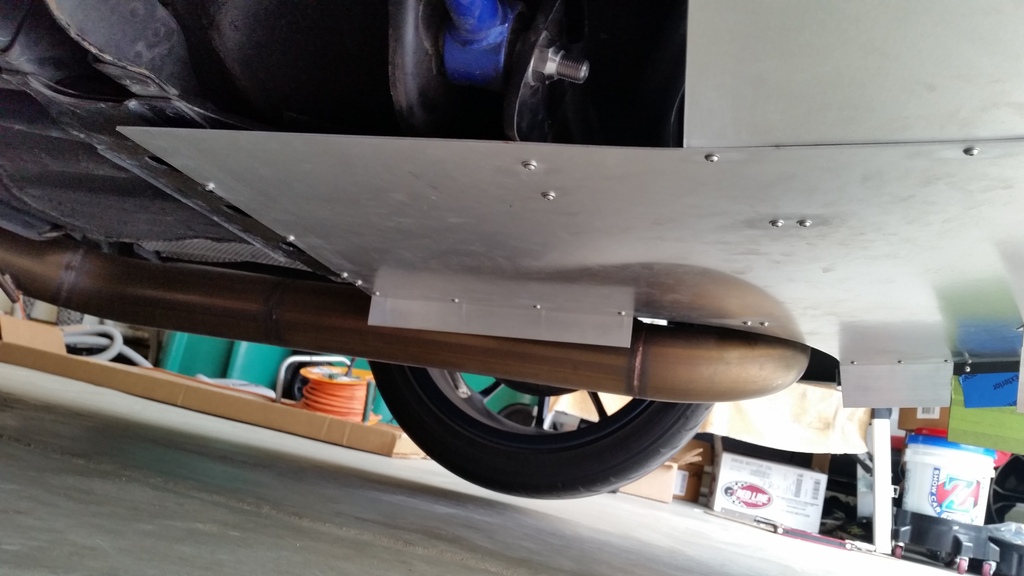
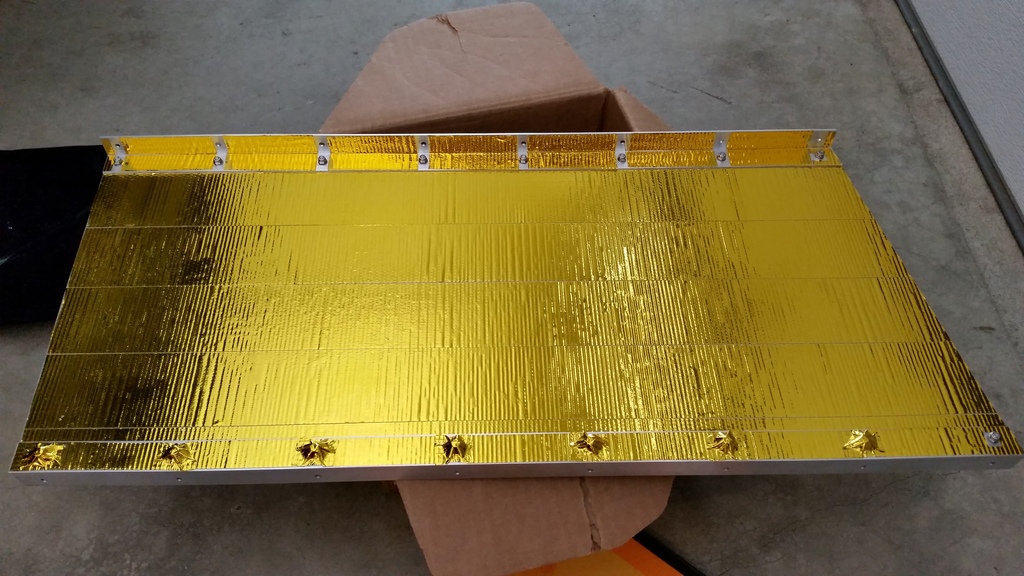
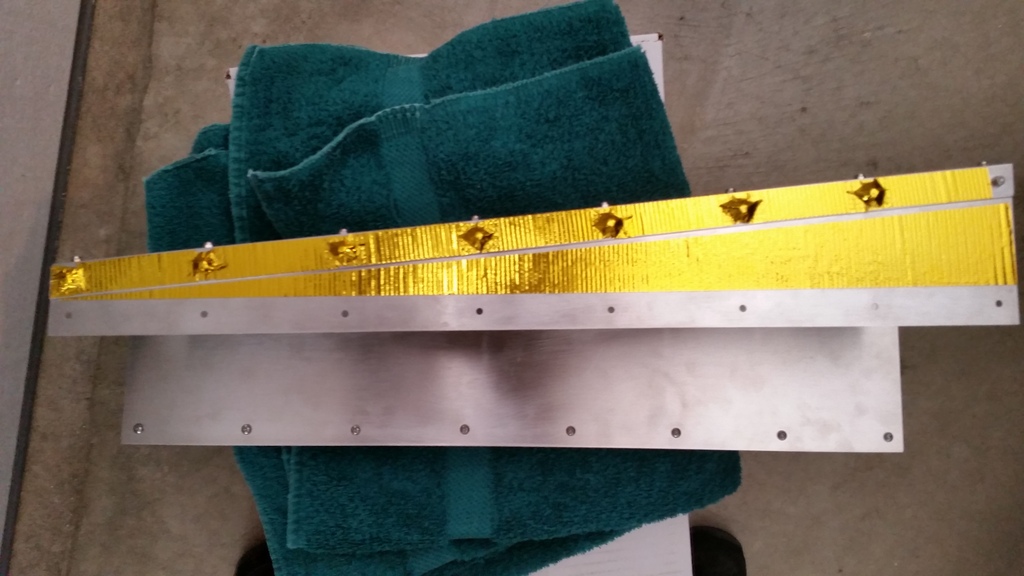
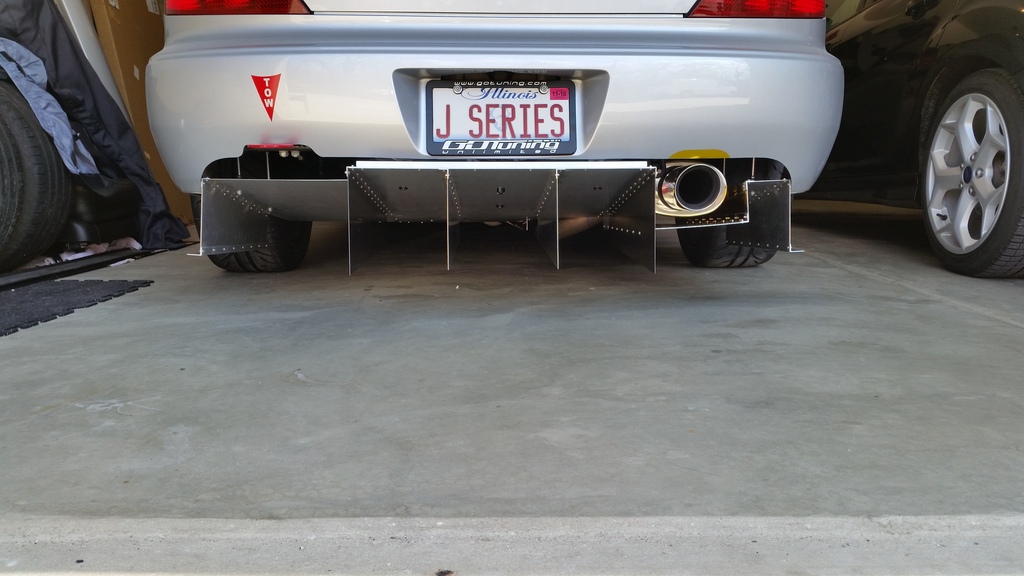
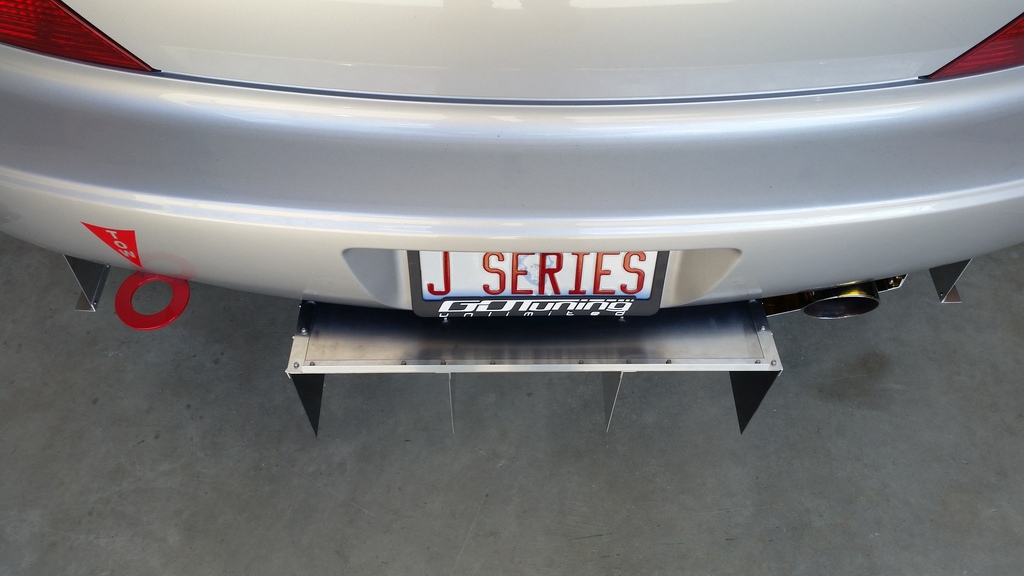
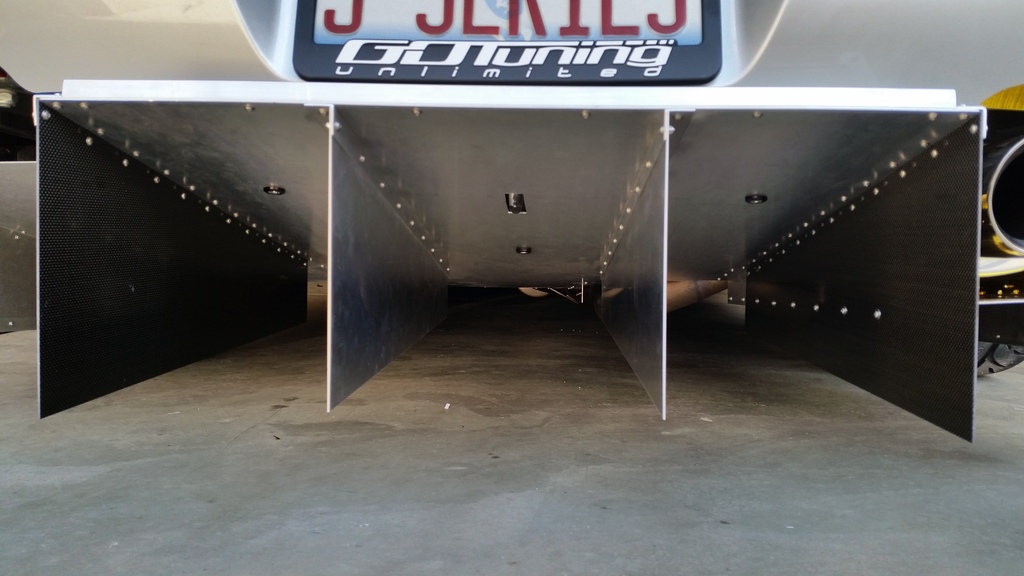
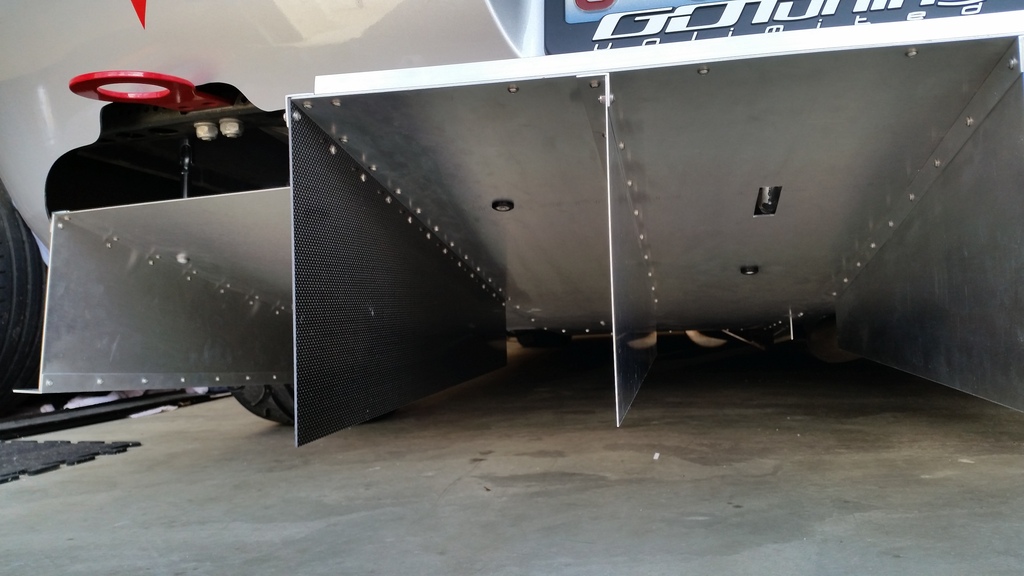
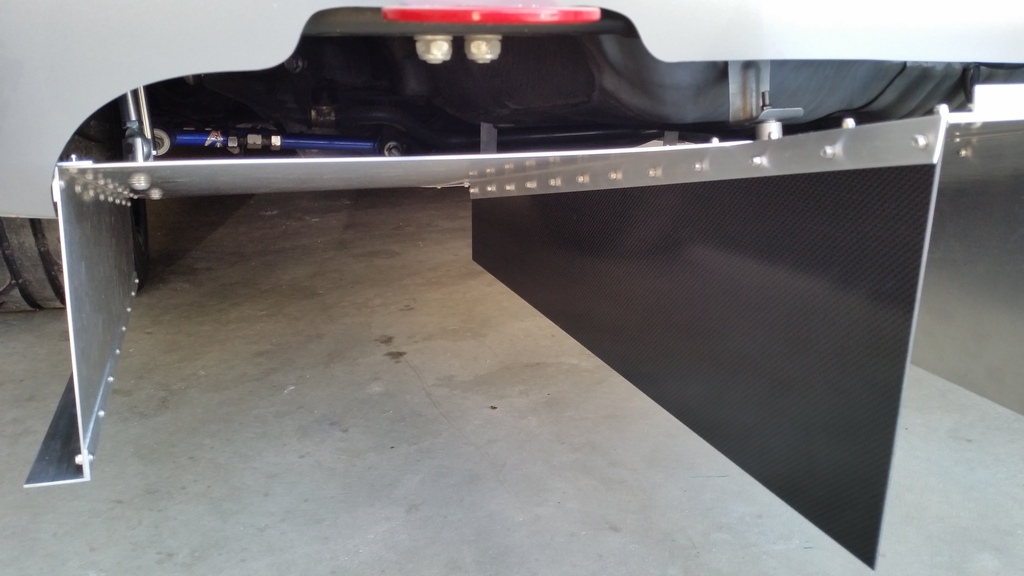
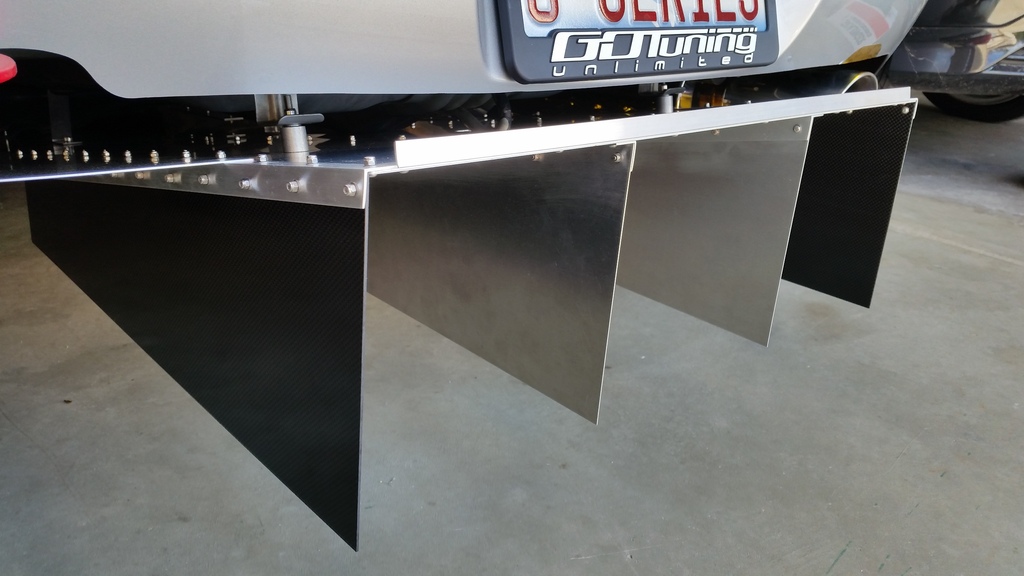
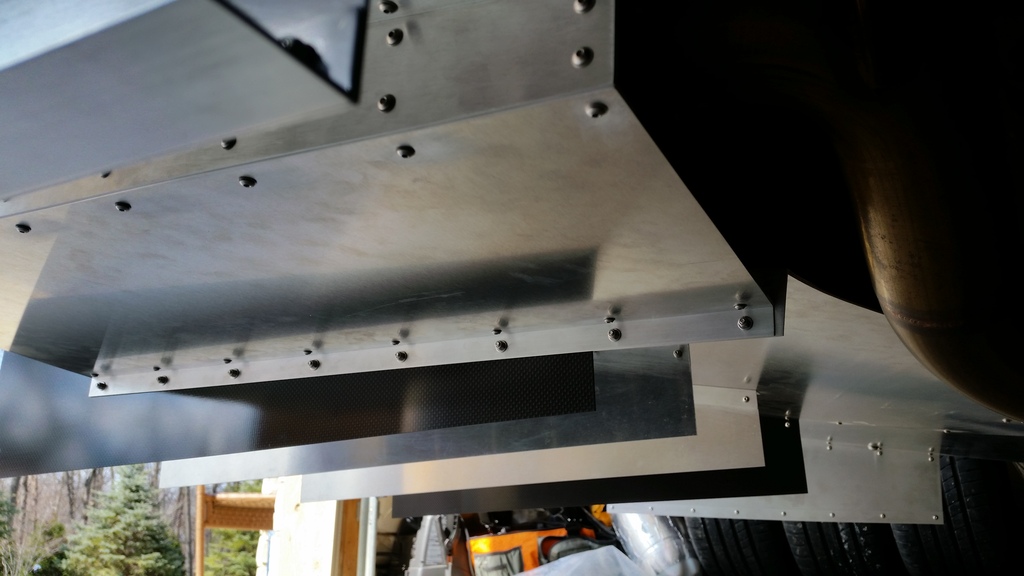
Purchased a Metric Rivet Nut Kit to make installing and removing rear diffuser and side skirts easier.
Should have rear diffuser finished this weekend(besides powdercoating), then hopefully can do some aero testing to make sure air isn't stalling from too steep an angle.
Rear diffuser is done. I must say it looks sick. Pics will be posted Wednesday. Waiting on heat tape to arrive on Wednesday so I can tape around muffler to avoid heat damage. Might hold off powdercoating, it looks fine in raw form and keeps the built in my garage look.
Starting to reconsider whether to use rear wing or not. Not using rear wing will save me 2-3 grand. Wouldn't have to worry about packaging so can still use trunk. Wouldn't need to buy spare trunk. Then worrying about mounting wing to trunk and flexing/moving at high speed. Final issue is my spoiler has 3rd Brake light. Could ditch light and hope cops don't notice. Would hate to have someone rear end me, yet me be blamed because lack of 3rd light. Could just wire up led strip.
The last concern would be the attention wing brings on street from cops and street racers. Everyone will just think I'm a ricer like every other Honda with wing.
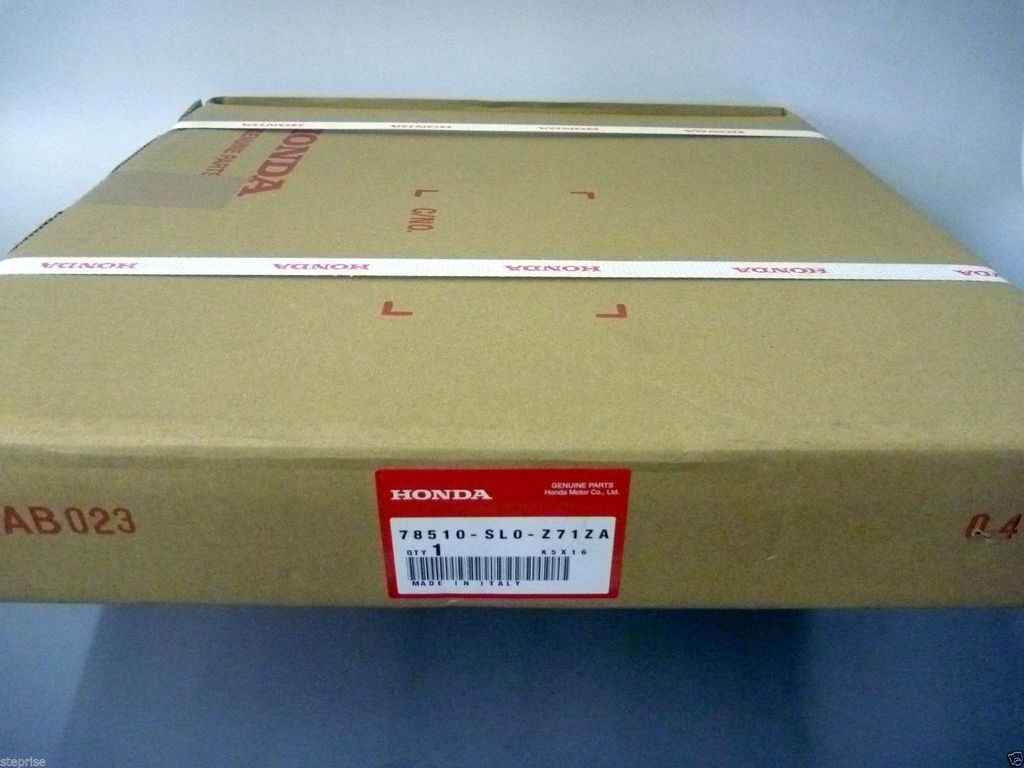
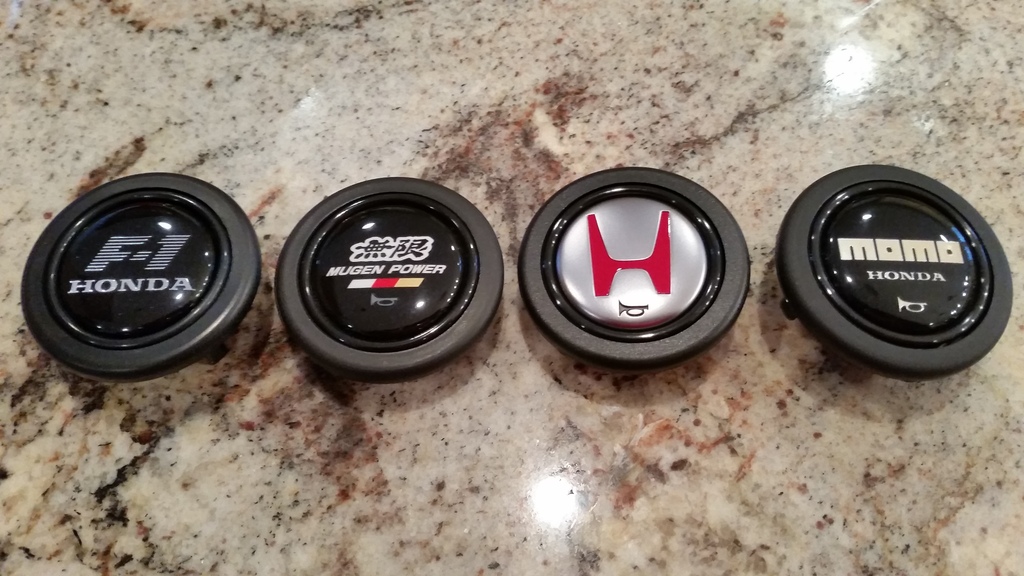
Picked up a new steering wheel from Japan. This is genuine Honda Momo NSX Type S Steering Wheel from Japan.
Had option of getting Type S or Type R. Prefer look/uniqueness of Type S. Type R is basically same as Momo Tuner and Mugen Steering Wheel.
Steering Wheel Box
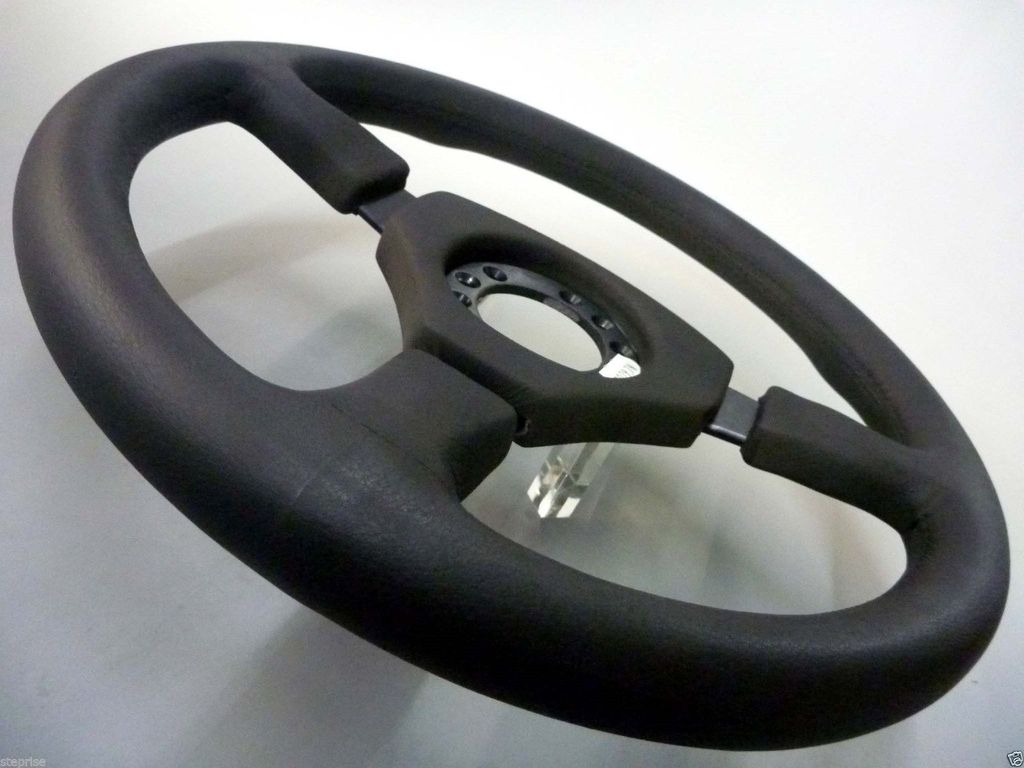
This steering wheel was manufactured in 1997. Since then it has been mounted to a display inside a glass showcase in a Japan Honda Dealership. The leather has been suspended in air for almost 2 decades which means the leather is perfect. Wheel was never mounted in a car till now.
Here you can see the steering wheel mounted to display. You can also see how the NSX Steering Wheels come with extra mounting holes versus typical Momo wheels. Not really sure why, but horn ring will cover it.
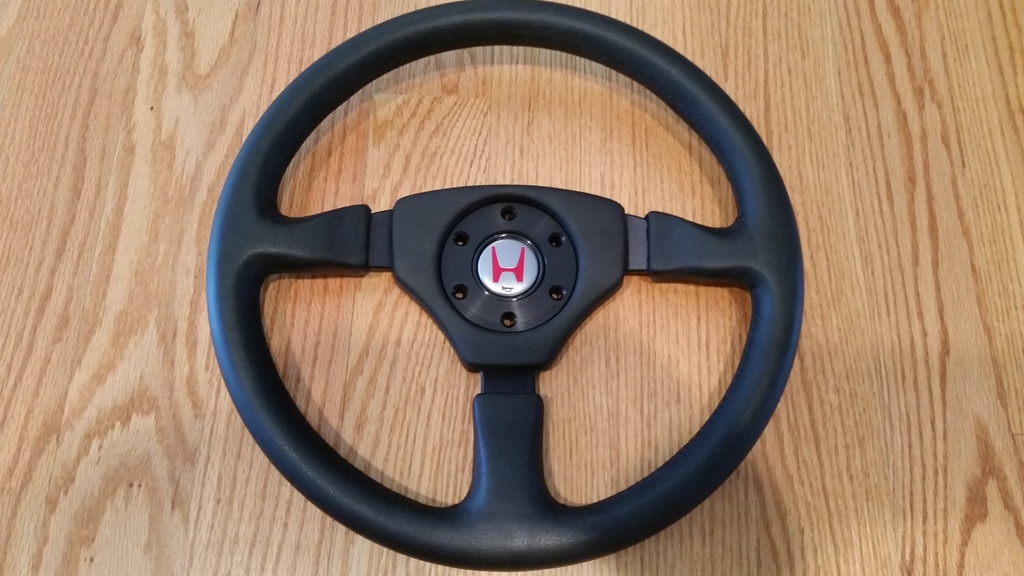
Steering Wheel with Trim Ring & NSX Type R Horn Button
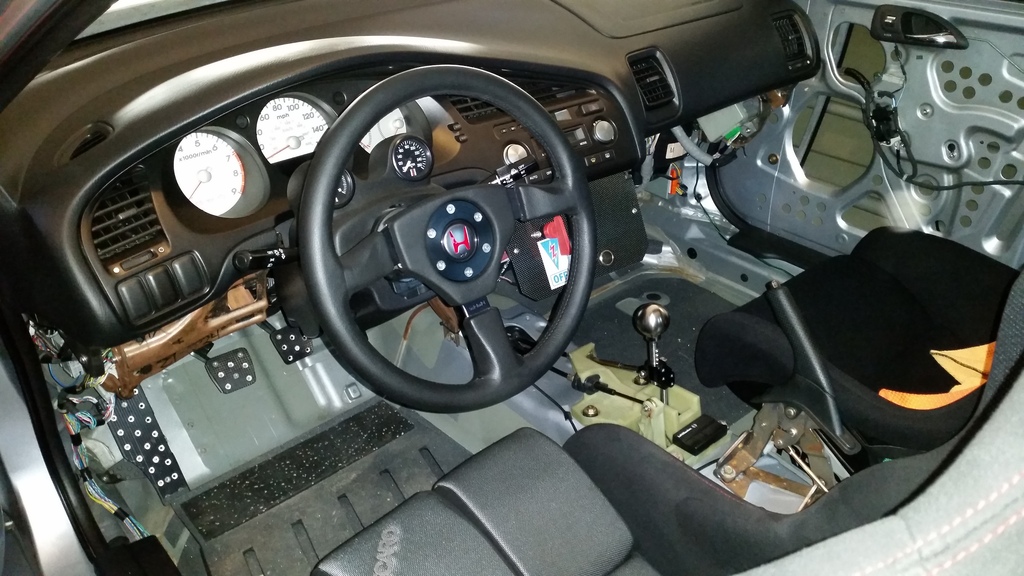
Steering Wheel Installed
Horn Button Collection
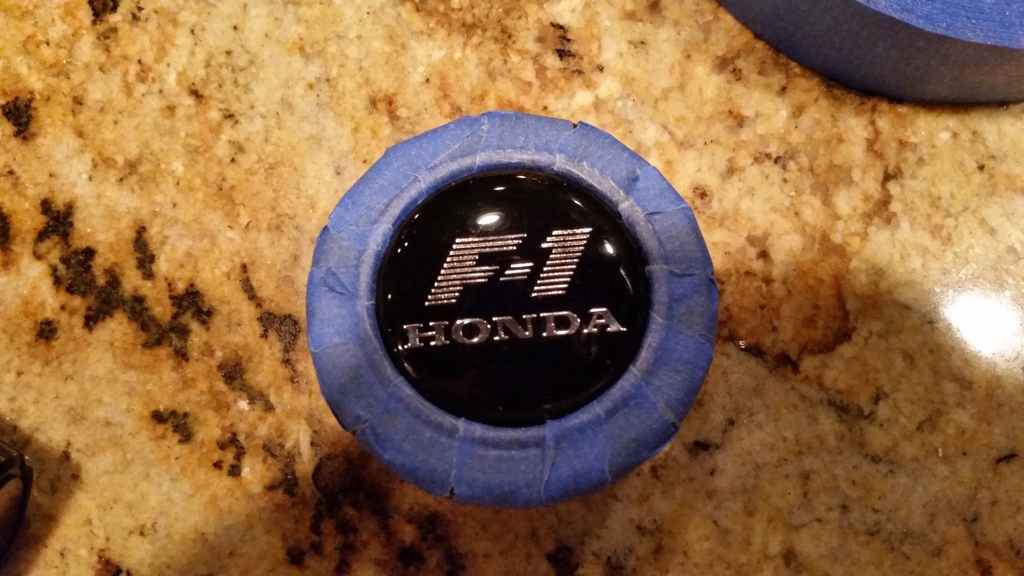
Only way to really get F-1 Honda Button is by buying steering wheel with Horn Button. The steering wheels were optional dealer add-ons in Europe in 80's and 90's.
Horn arrived rather scratched up. Took Horn apart, then sanded and polished it. Looks good now.
Last edited by brian6speed; 03-18-2016 at 05:21 AM.
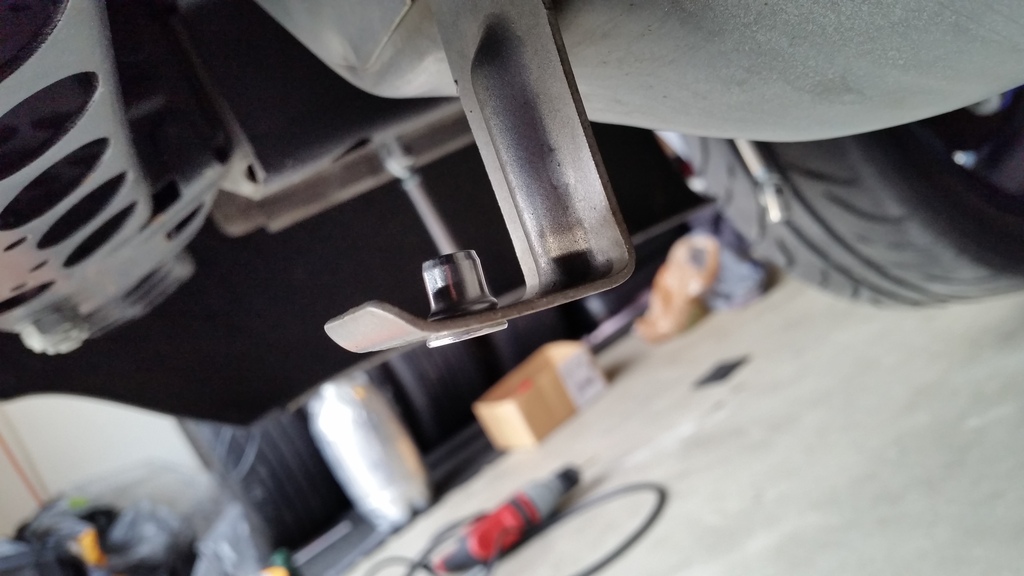
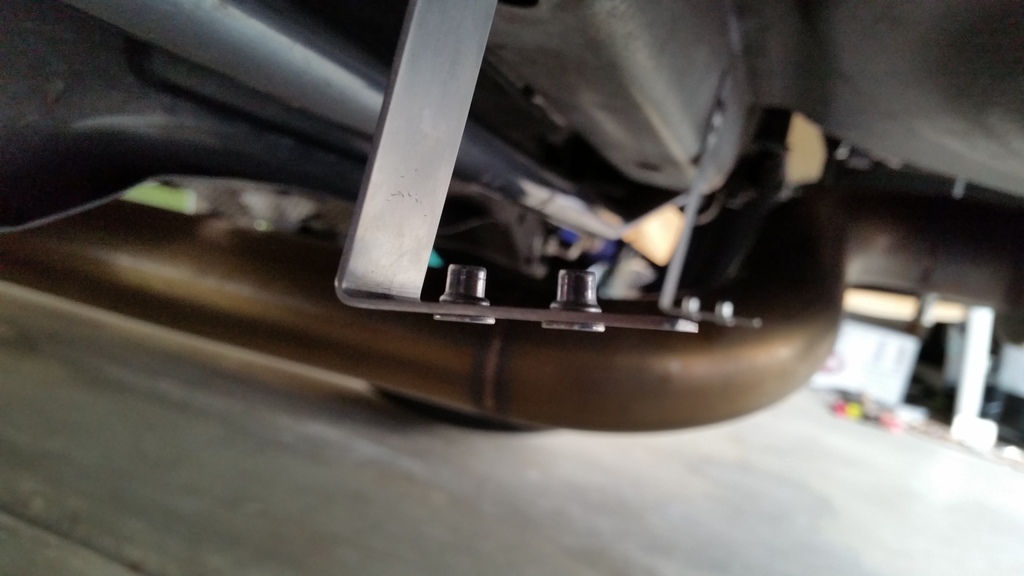
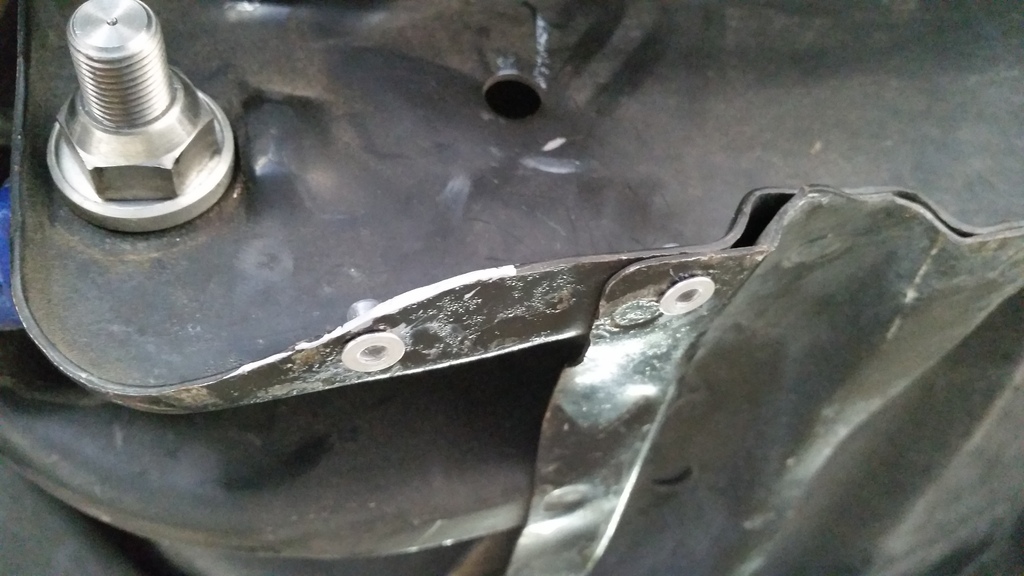
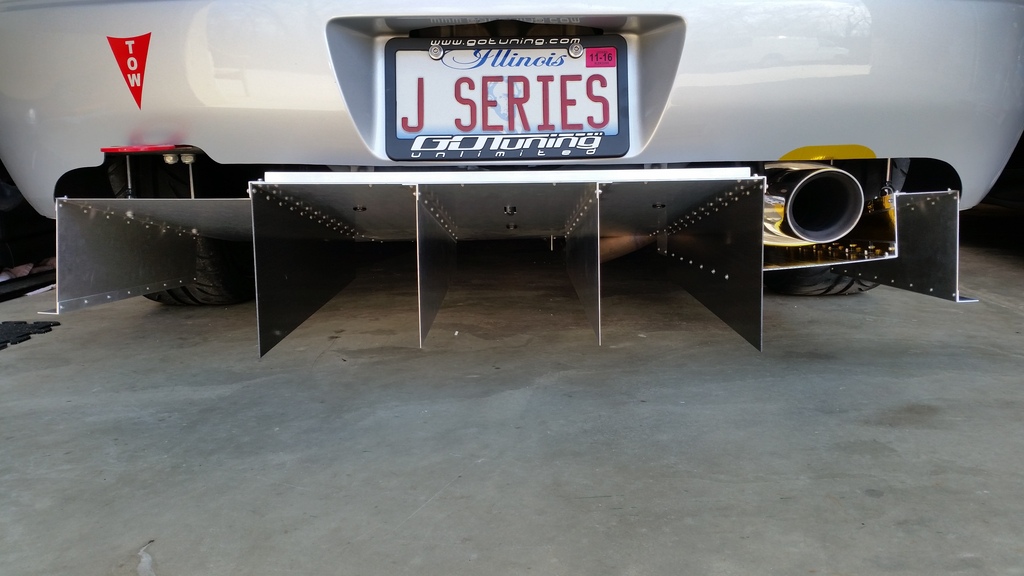
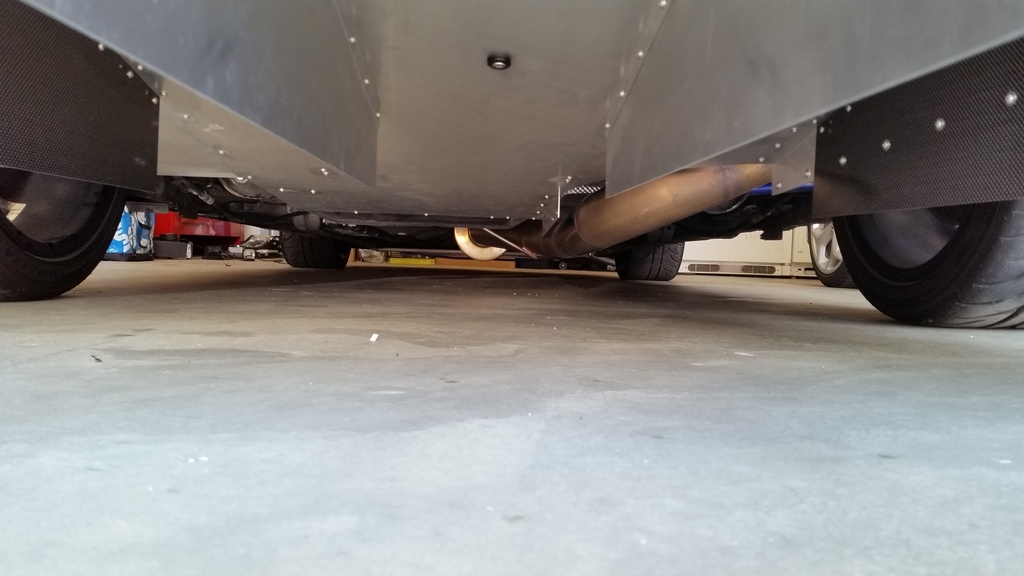
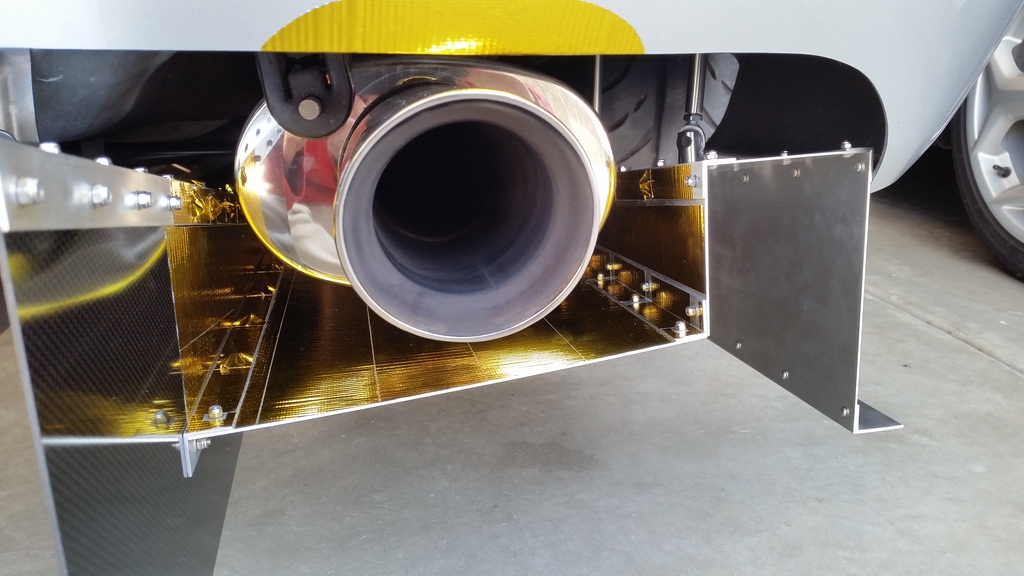
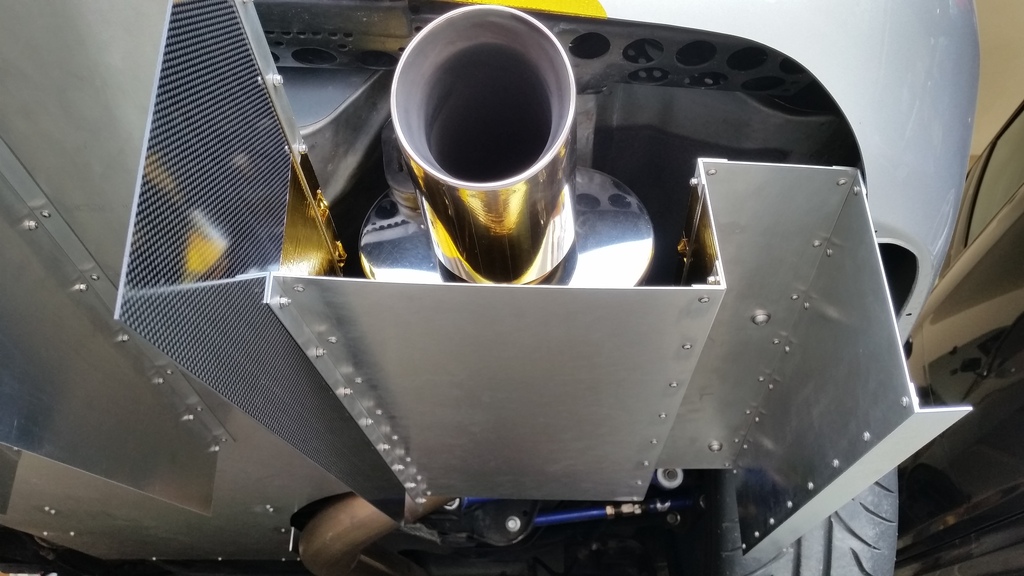
Bolted up the diffuser and took it for test drive. Was worried it would make noise, but didn't notice any. Want to add 2 more brackets just to make sure it is secure enough. Might make some of the fins/strakes smaller also.
Did notice a slight change in exhaust sound, probably from muffler basically being boxed in. It echoes a little more and sounds little more metallic(extra bracket might help).
The most impressive or sad(depending how you look at it) part is that I made whole thing with just a dremel. Only need 1 socket and a few allen keys to install it by myself. Jacking up rear driver side and removing rear wheel makes install easier.
Pics
Will do some wool tuft testing to see how smooth the flow is and whether it stays attached.
Last edited by brian6speed; 03-18-2016 at 07:58 PM.
What size mid muffler are you using? hows ground clearance?
Thanks. Resonator is massive. 3"inlet/outlet, 6" round canister, and 36" long. Right now it is probably just under 3" of ground clearance at lowest point.
My front Lip is probably 3-4" off the ground. Will be difficult running front splitter at all on street. Might just end up with 2-3" lip sticking out.
that looks freaking awesome....if you feel like testing a prototype out on track in race scenarios (even though you are already doing that) let me know....happy to pay for materials ....come up with a splitter as well and we might have to do a road trip to a race closer to you and put you in the car for a couple stints...nothing like a 2 hour stint in full race gear when it is 90 degrees out
that looks freaking awesome....if you feel like testing a prototype out on track in race scenarios (even though you are already doing that) let me know....happy to pay for materials ....come up with a splitter as well and we might have to do a road trip to a race closer to you and put you in the car for a couple stints...nothing like a 2 hour stint in full race gear when it is 90 degrees out
Thanks. Rear diffuser design would depend on exhaust, how much ground clearance wanted, whether want to box in exhaust or work around it for better heat dissipation, etc.
Will be doing a front splitter, but my front lip will make design little different. Mounting might change depending on if bumper beams are removed. Need to figure out whether to remove plastic panels under engine or just build splitter below them.
For the rear diffuser, typically want an angle between 5 to 12 degrees. Front splitter usually 5 to 20 degrees. This helps create venturi under the car.
Let me know if you ever go to Blackhawk Farms, Autobahn, Road America, or Gingerman. Would love to spectate.
Probably need more experience before during any endurance races. I still use my A/C in pits when waiting to keep cool.
Here is a pic after tuft testing and driving for 1 hour. Flow seems very good and laminar. More testing will be done, but lap times will be ultimate test.
Was reading Time Attack Build on MotoIQ where a team used a rear diffuser where the side sections were lower than the middle. They claimed this made it more effective at a wider range of speeds/corners. Thought that was interesting.
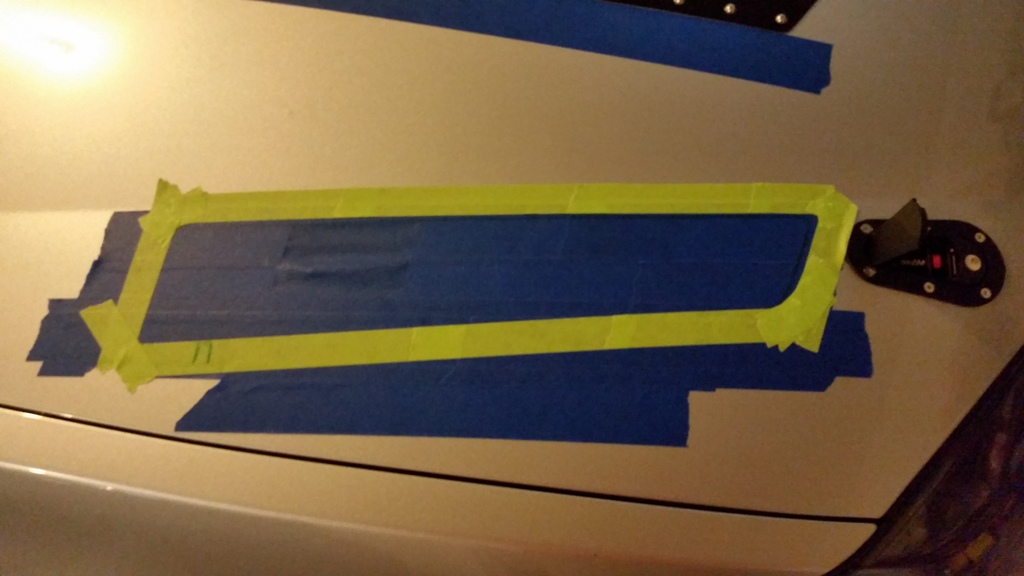
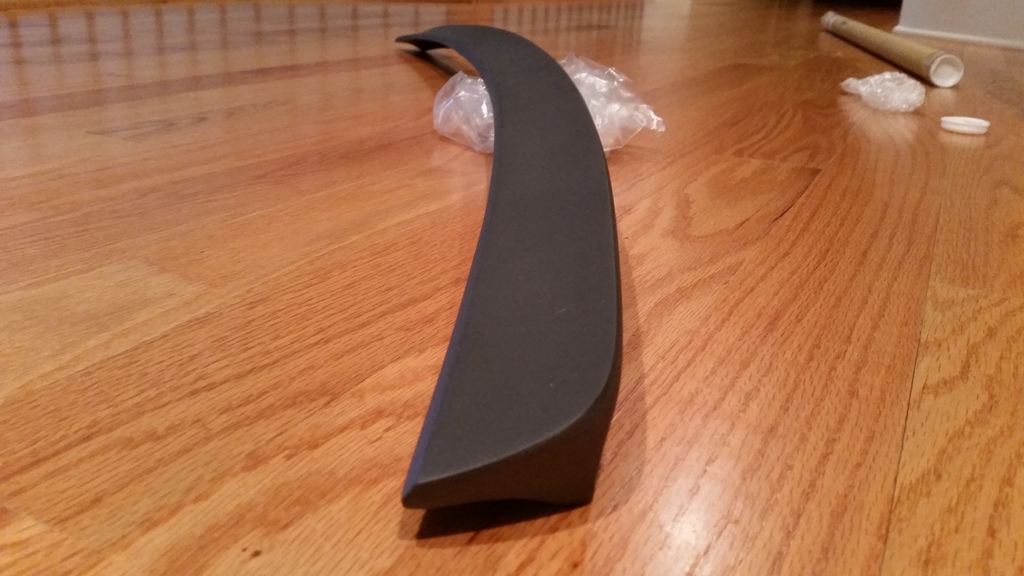
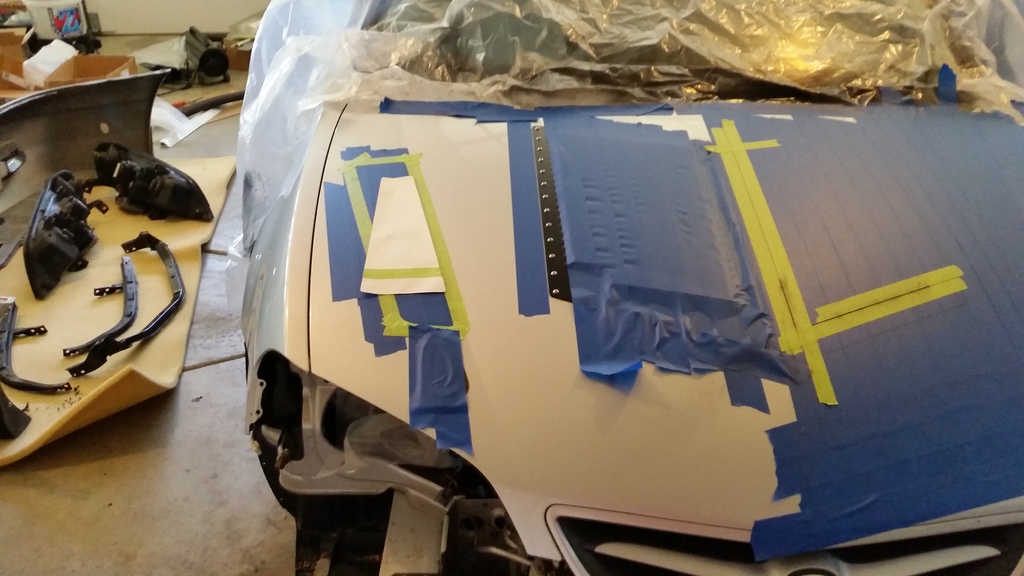
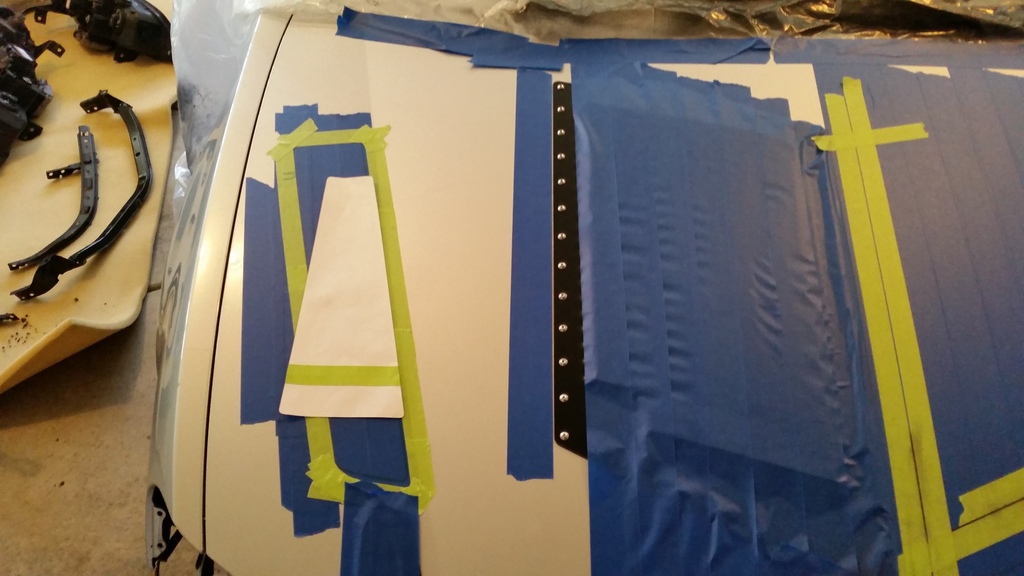
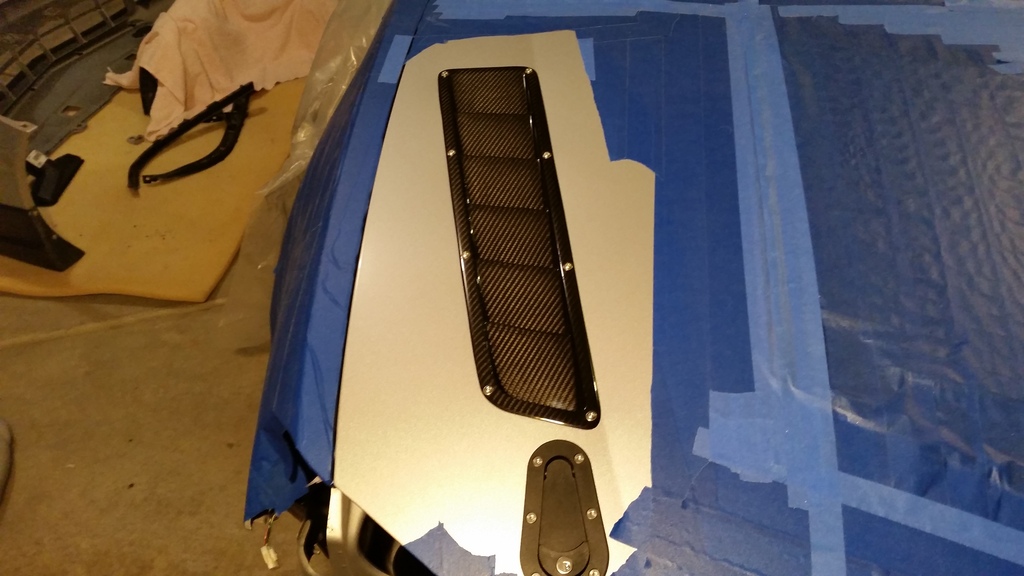
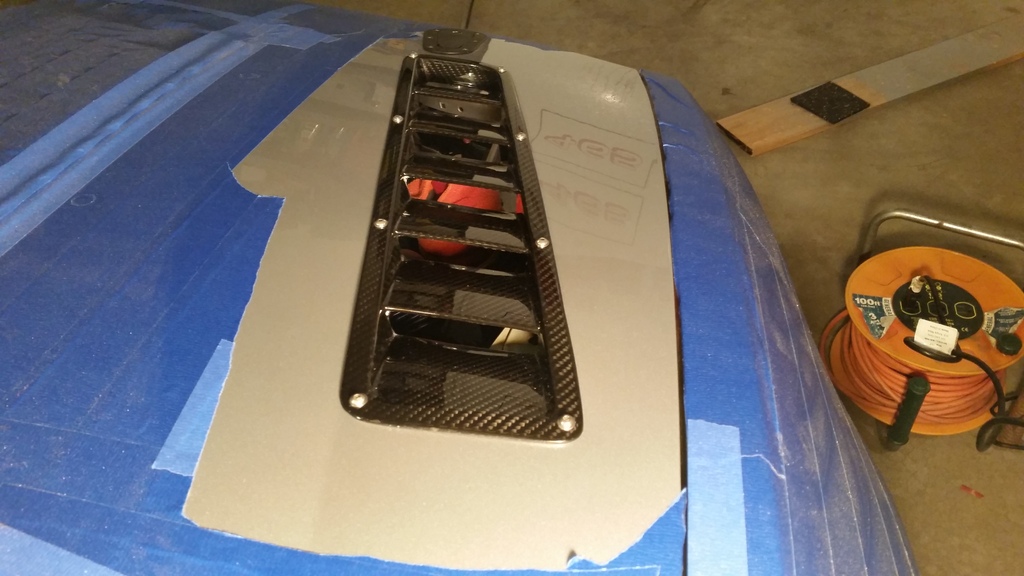
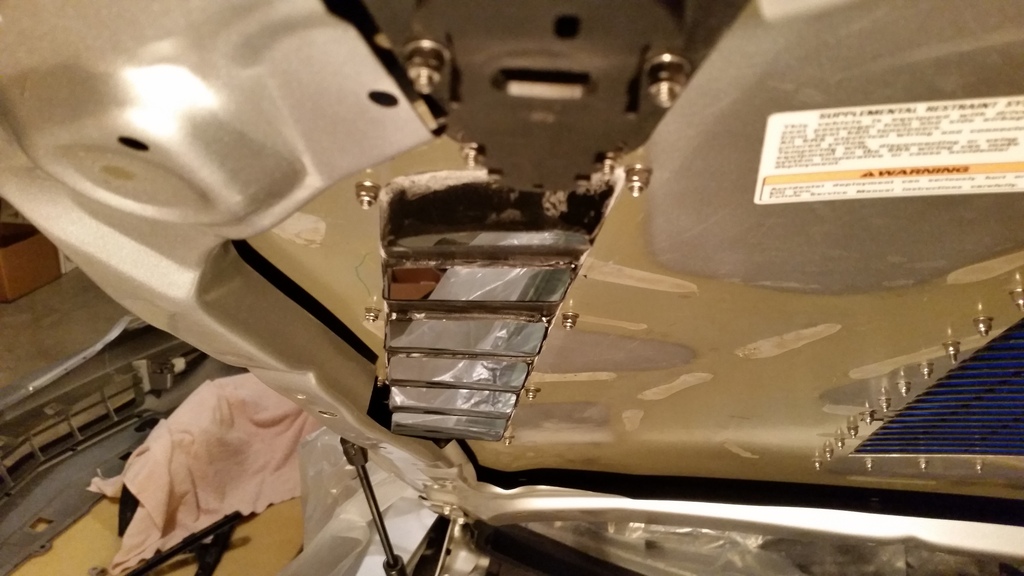
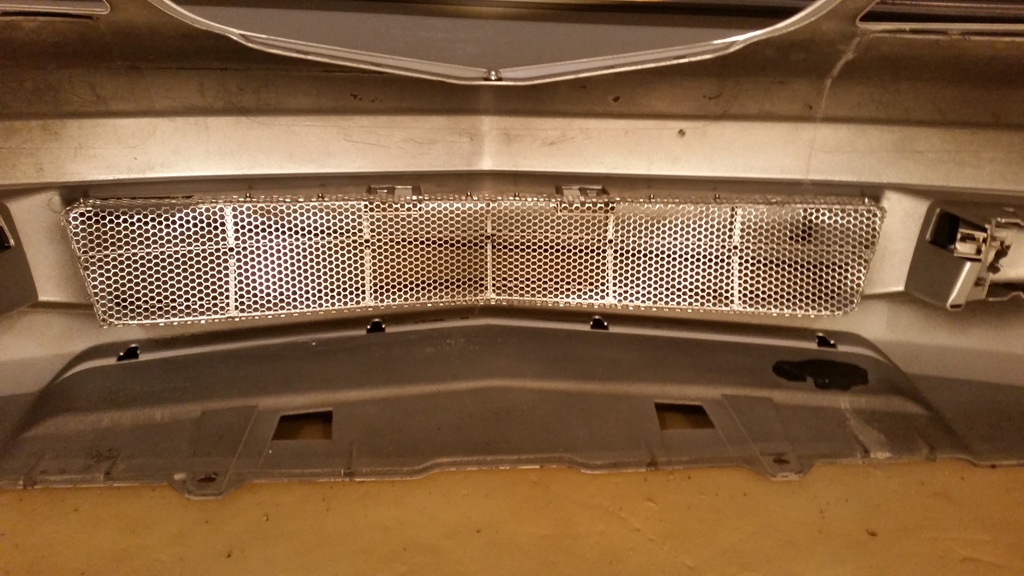
Working on Side Hood Vent Placement with APR Vents.
There might be an issue. This is basically as far forward as I can place it because of Hood Pins. I also cant go in any further because vent edge is already against the hood crease line.
Since the Vents sink down into the hood/engine bay, there might be clearance issues with the Hood under-skeleton and Hood Damper bolt/stud/nut.
Would need to cut little moe out of the skeleton, but still hope it is secure enough for Hood Struts.
Hmm might try different vents, need to think about it more. Really wanted to use APR vents, they are sexy.
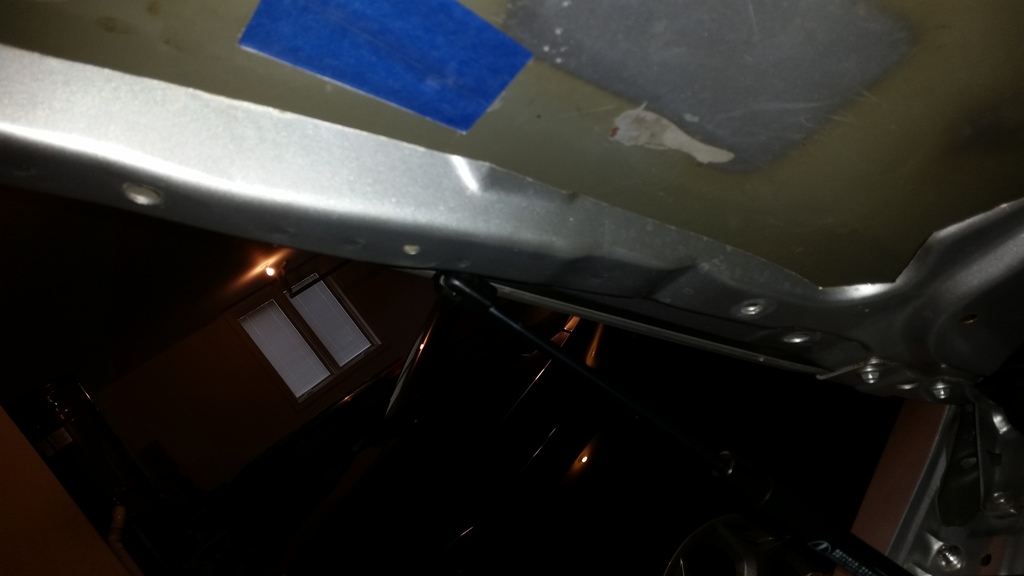
Was thinking about buying a spare trunk lid from junk yard so I don't have to weld OEM Spoiler holes closed or plug them which looks bad.
Found a used VIS Carbon Fiber Trunk painted white for sale yesterday for $150 shipped. Could not pass up that deal. It also comes with full Trunk Badging and extra trunk release mechanism. Hopefully it arrives safe in one piece.
Need to decide whether to use trunk hinges and my custom trunk strut setup, or ditch that for Latches and Pins. Would need to remove trunk panel and set it on ground so can still use trunk though. That might become a hassle. If I use strut setup might need to change struts for lighter weight lid.
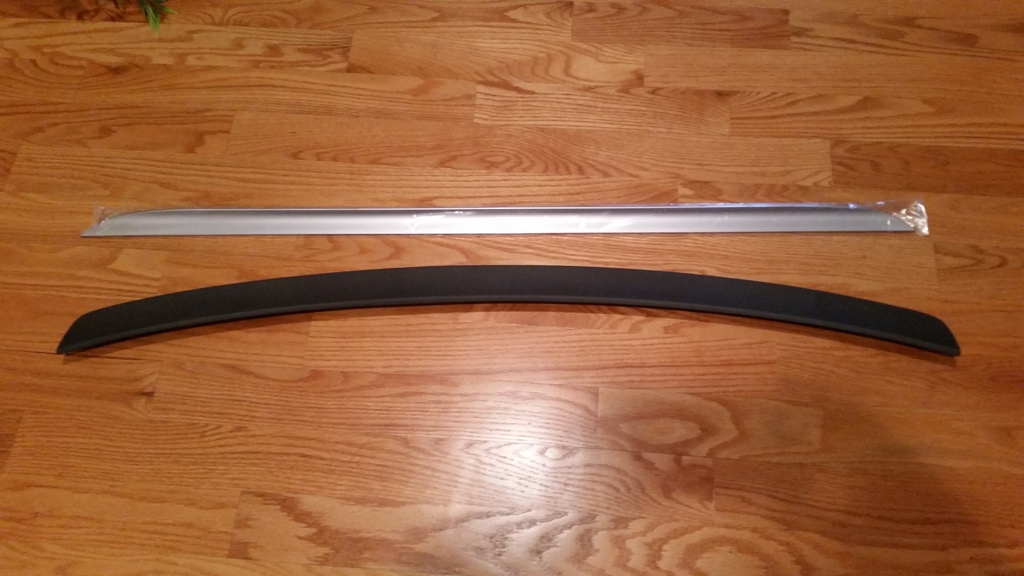
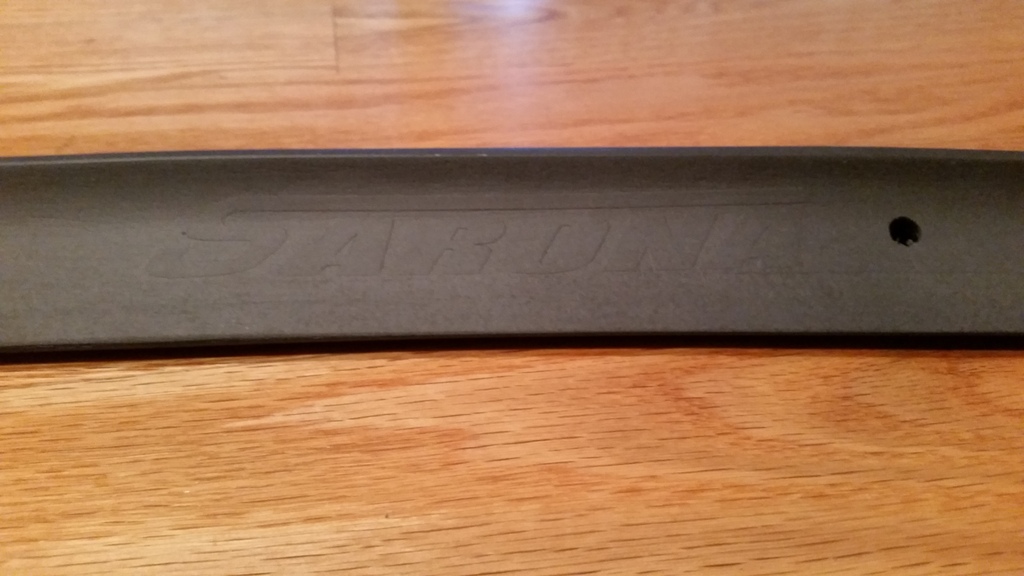
Thinking of adding Sarona Lip Spoiler and using it as my street/autocross trunk lid, then using OEM trunk lid maybe for rear wing setup.
Here are a few shots of Sarona Lip. Also have a Deltalip from Amazon to compare.
Will Paint CF Trunk Lid Silver. Should do Sarona lip silver also or flat black?
The Sarona Lip Spoiler is really great quality, no complaints. Will try mounting with just tape first, but there are 3 mounting holes on bottom of lip.
Has anyone else seen a CL with this same lip spoiler installed?
Last edited by brian6speed; 03-24-2016 at 10:13 AM.
looking good Brian. Would be nice to see the tufts in action, but you'd need someone to drive behind you and film I guess.
I think MSW 6SP had the sorona: 2003 CL-S by MSW 6SP | AcuraZine.com
looking good Brian. Would be nice to see the tufts in action, but you'd need someone to drive behind you and film I guess.
I think MSW 6SP had the sorona: 2003 CL-S by MSW 6SP | AcuraZine.com
Thanks. That is the plan, just gotta convince someone to drive behind me and attach GoPro to their vehicle. Has been raining a lot and snow expected tonight, so that will be on hold. Wonder how well a strong fan and smoke machine would work. Could film driving in wet also.
Think that is smaller lip spoiler Sarona makes you listed. Have not seen other 2 mounted besides Sarona's pics on their website.
Right now I plan on removing front bumper and headlights so I can finish hood.
Want to Redo intake and duct it to front grill and enclose filter.
Will use foglight holes for Brake ducts with 2-3" tubing.
Want to duct radiator so air is forced through it and does not escape around sides and top.
Need to figure out front canards.
Need to figure out front splitter.
This section of build might take awhile. Car might be off the road for a month. Better now than later. Need to be ready before end of April. Will be busy year.
Last edited by brian6speed; 03-24-2016 at 12:42 PM.
VIS trunk arrived. One of the corners got smashed up in shipping. Will take it to body shop this week and see if they think it is worth fixing and painting.
Not really impressed with quality and it is rather heavy. It seems pointless to me now.
If not worried about weight just stick with oem. If worried about weight just gut oem and pin it down.
Was working on hood yesterday. Was using a cutting disc with safety glasses on.
A small speck of metal got behind the glasses and wedged into my eye. It was stuck in there for over 12 hours, that was a bitch.
Really need to make sure to wear goggles that seal against my face, getting sick of getting metal stuck in my eyes. My car isn't worth losing an eye.
Only issue is goggles seem to fog up every 2-5 minutes which gets annoying having to stop working and clear goggles. It also makes seeing what I am cutting harder.
Any advice? Maybe just need better goggles or a full face mask like welders wear.
This project has been a pain in the butt and am only half way done.
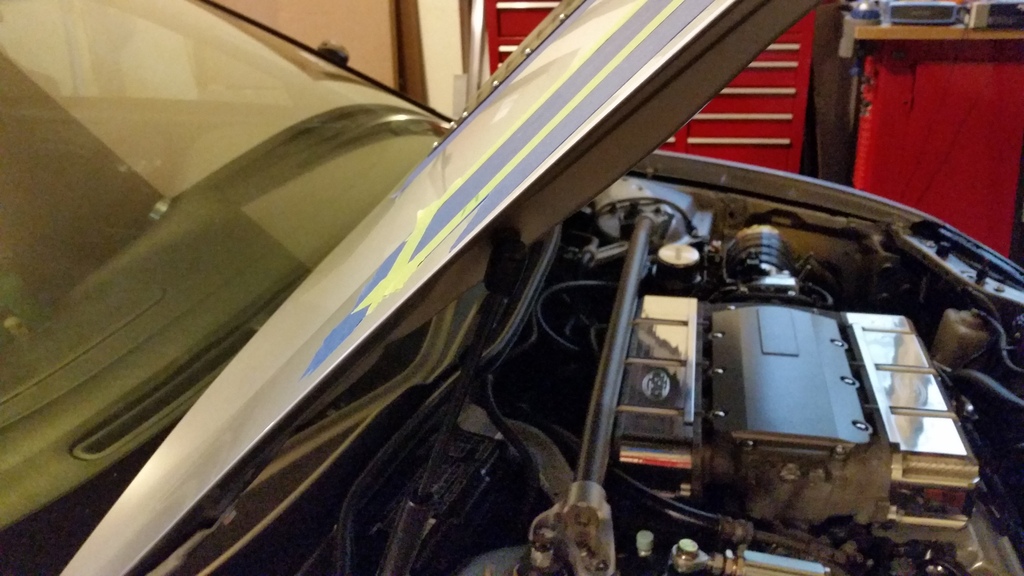
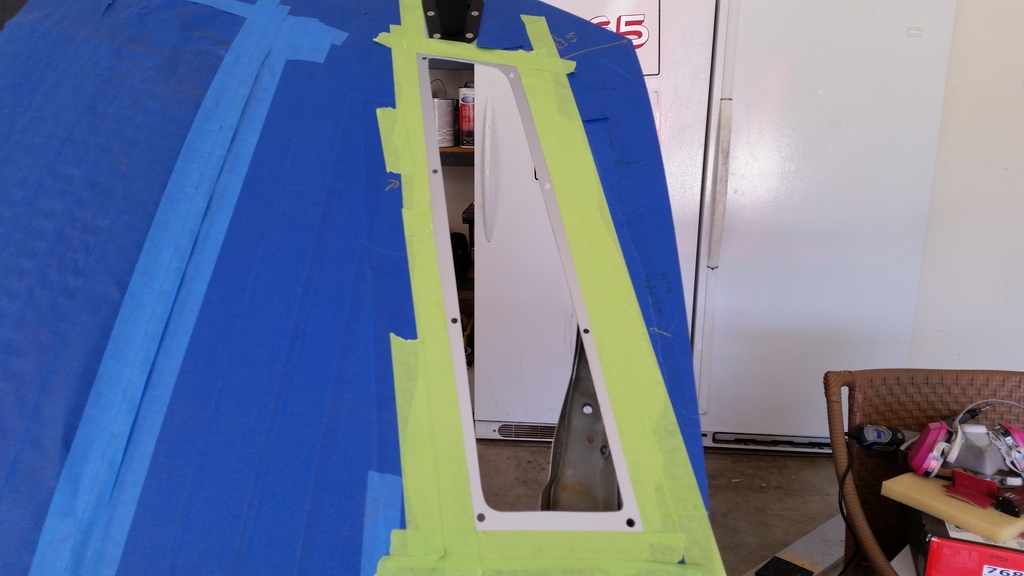
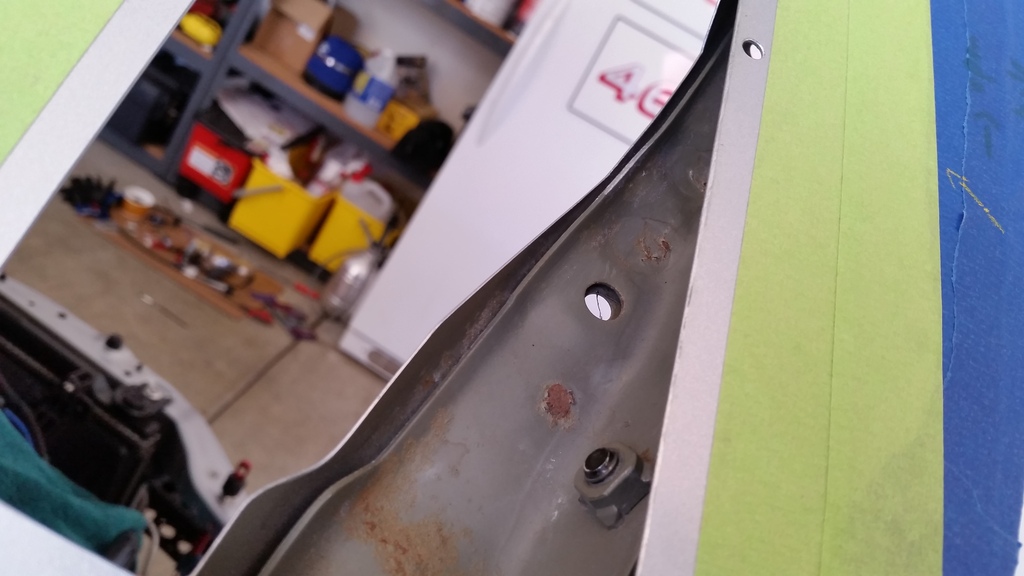
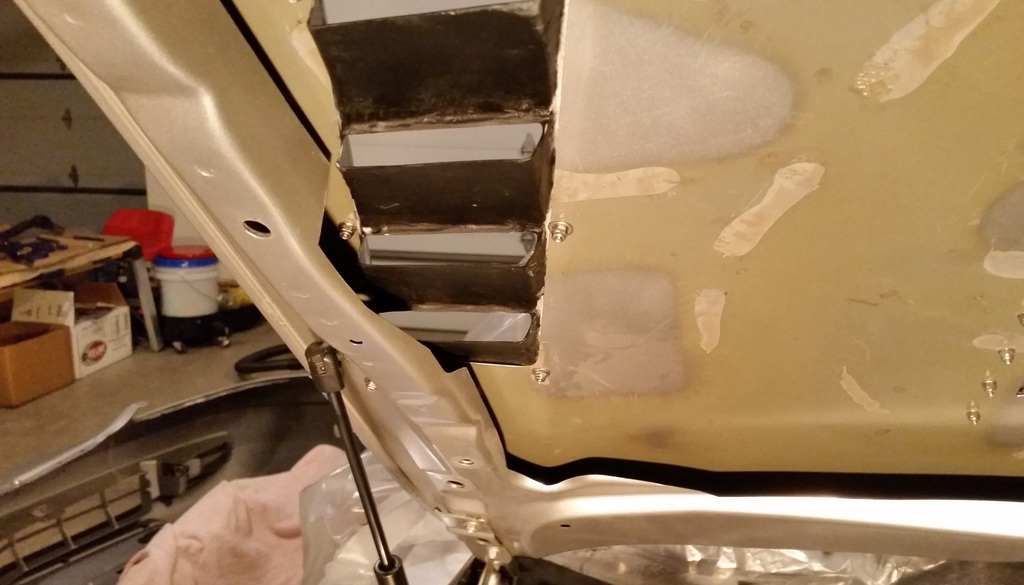
Hood Cut.
Cutout from underneath and Skeleton cut for clearance.
Here you can see part of Skeleton that sticks out and where I cut.
Vent Installed.
See Through Shot.
Can see in these pics sanded down some of the fiberglass backing to smooth it for fitment reasons. I also cleaned up the edge of the Skeleton around whole under-hood.
Found out last month that local shop I used to go to (Project X Customs) closed at end of last year. Hadn't been there since June. That is a shame, had nice relationship with them and using their lift.
Could try ILL Garage which is closer. Want to find a close welder to use and maybe machinist.
Still have King Motorsports atleast.
Also just read there will be No National Meet this year in KC.
Seems like everything is coming to end in my honda/acura world.
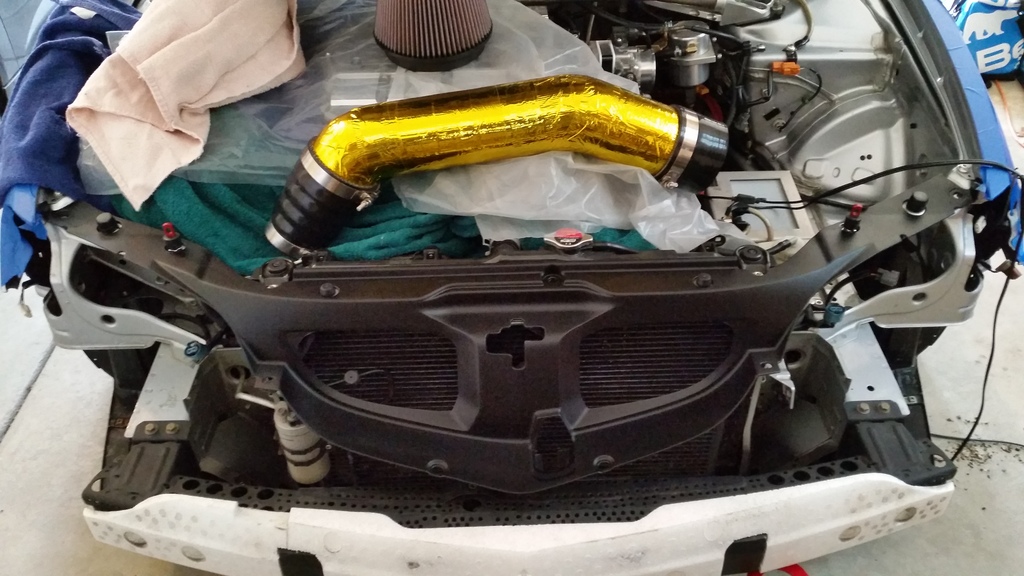
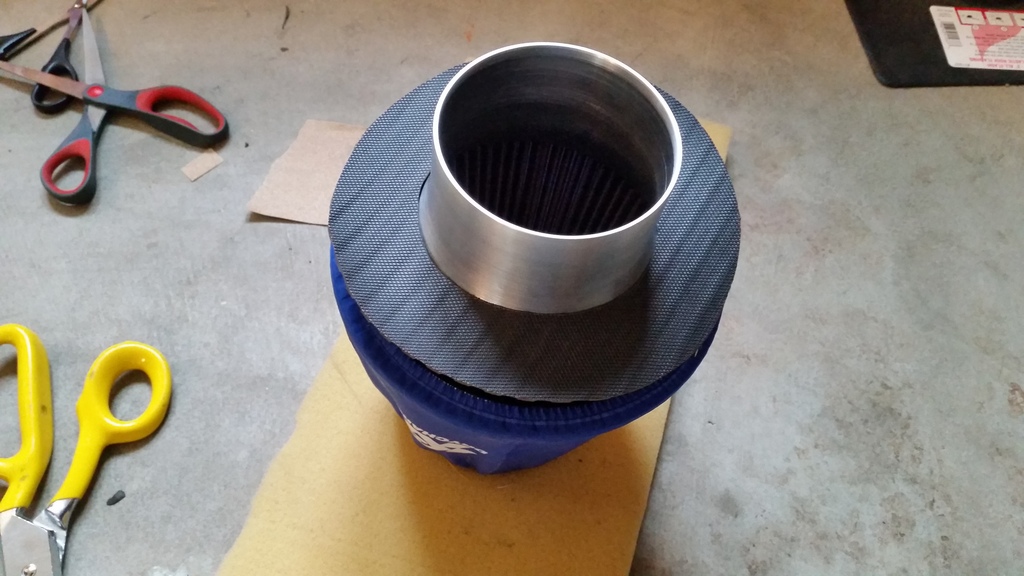
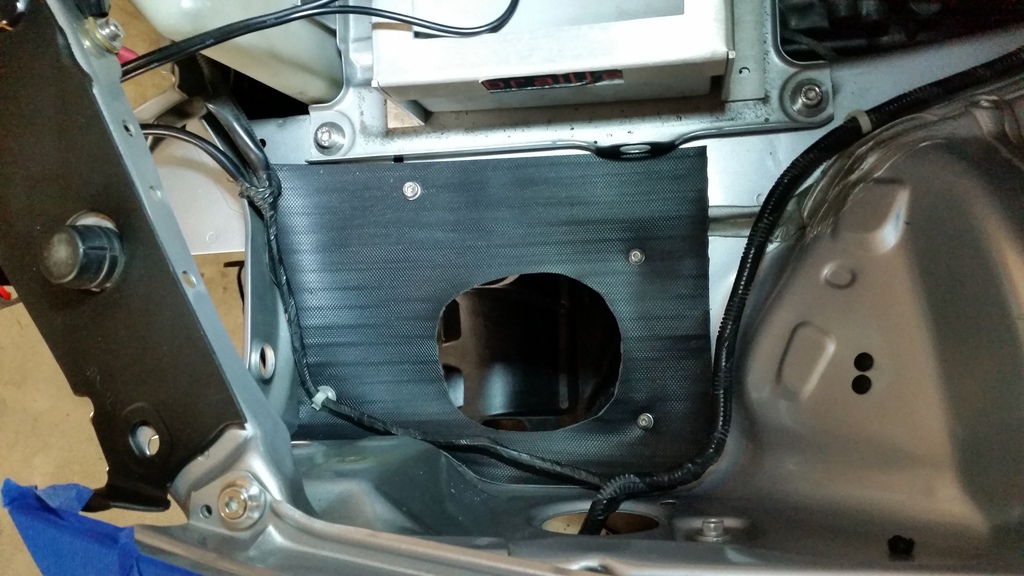
Trying to brainstorm ideas on building intake filter box/cylinder to use Ram Air and seal Filter from water and debree. Also want to seal hole into engine bay. Nothing pre-made will work, has to be custom. Since my Filter is Massive, there is limited room to work with.
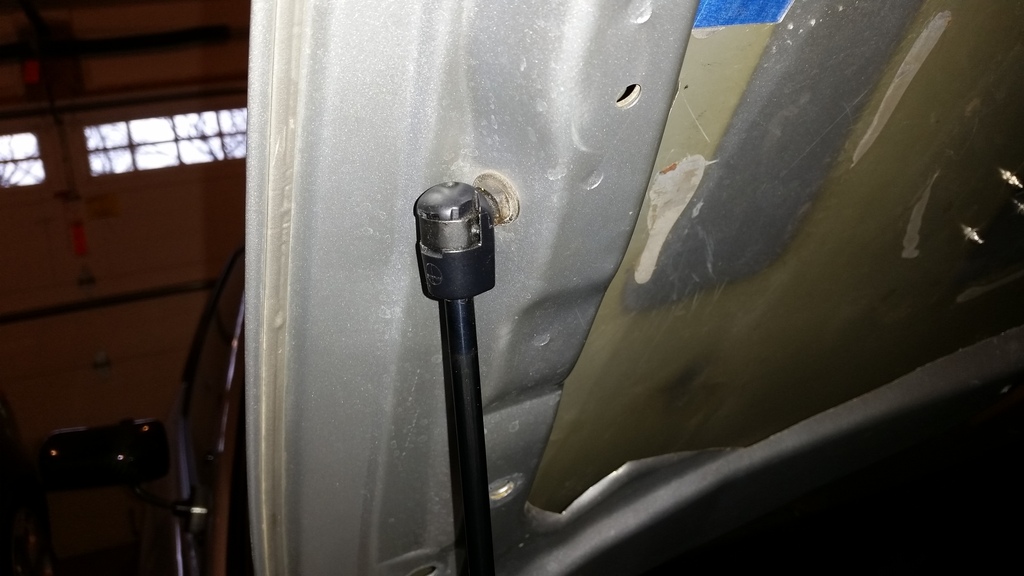
Decided to re-install OEM Radiator Shroud and front hood seal instead of trying to make my own. Will save me time and money and still get job done of sealing top of radiator so air doesn't spill over and is forced through radiator. Should help radiator and A/C efficiency a bit. Think this is all I will do for now since don't even have heat issues.
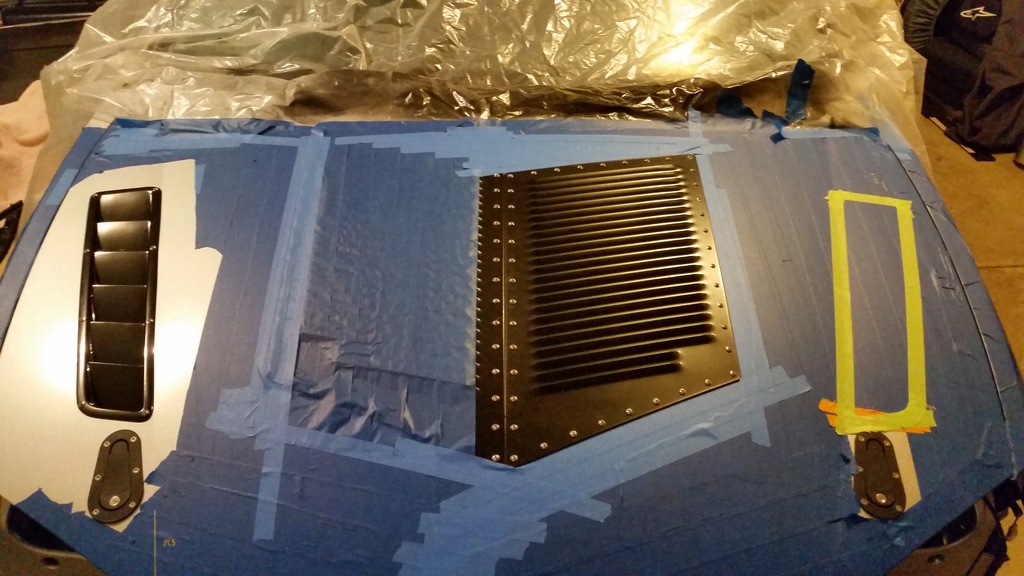
Trimmed it a bit. Cut out holes for Hood Pins and so you can see Fender Beauty Washers. Also cut off the horn cover part.
Who would have thought that Acura Engineers actually have some idea what they are doing.
Last edited by brian6speed; 04-04-2016 at 02:29 PM.
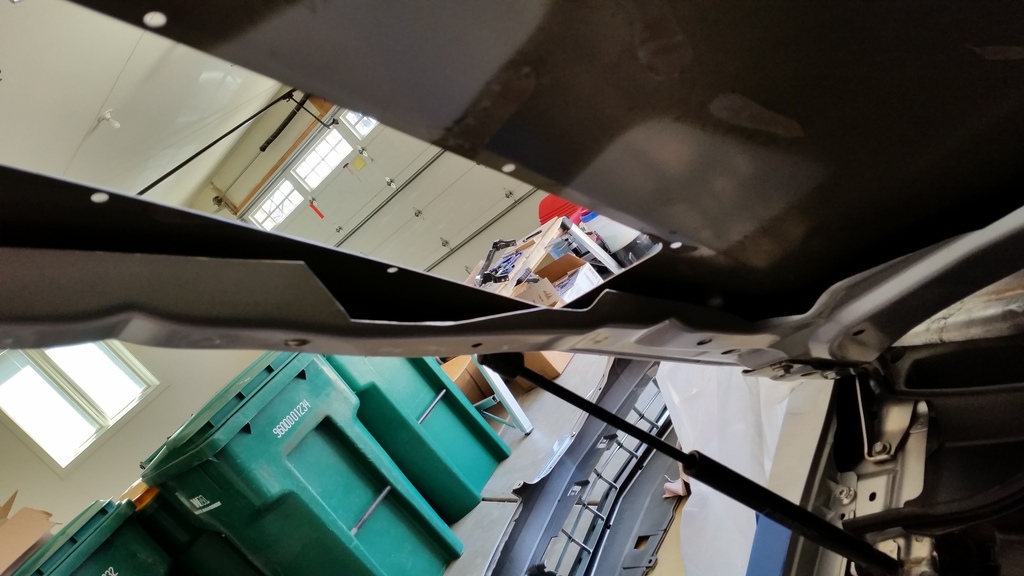
When I first looked at this pic of Spoon Civic, assumed holes were for weight loss. After looking at pic again, I am wondering if the holes also are to help relieve pressure inside cabin by giving air places to escape. The CL has one vent in the trunk, maybe I should add another or do like civic did.
I always thought the vents in the rear of cars served to combat moisture build-up. I guess they do both regardless of what their intent was.
The placement and how it has the rubber part that needs air pressure to push it open, tells me it is for air. Not certain though.
When you have the windows down, that is creating higher pressure in cabin and a whole lot of drag. The easier it is for air to escape the less drag. For track days have to atleast keep driver window down for easier extraction in a rollover. Reducing that drag would help on straights.
Lots of racecars have holes cut in their Lexan rear windshields for this exact reason.
I can't put holes in mine because it is glass and have water to consider. Could use trunk side panels for venting or have holes that go into and out of the frame rails. Could use frame rails as air channels.
Last edited by brian6speed; 04-05-2016 at 07:35 PM.
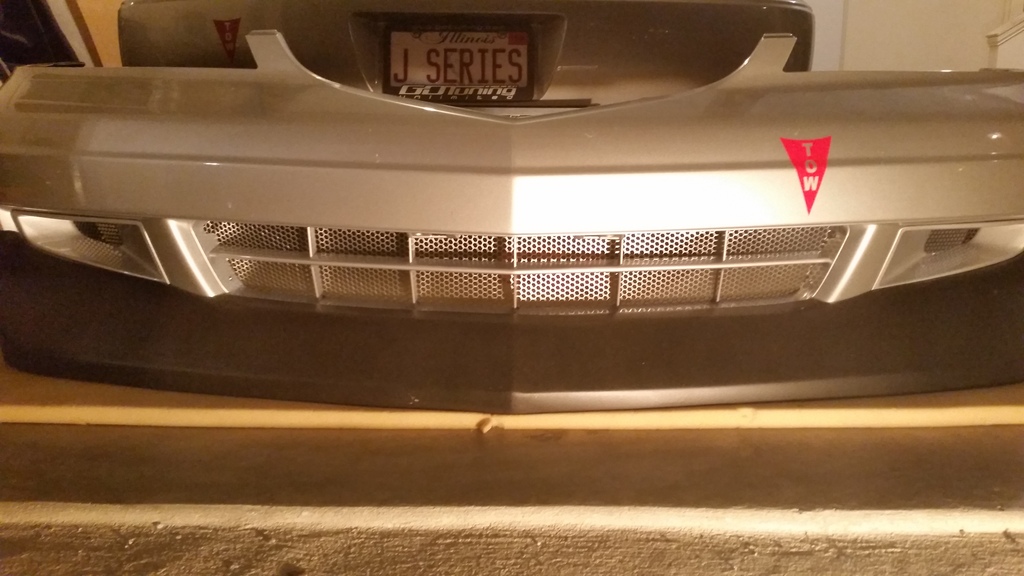
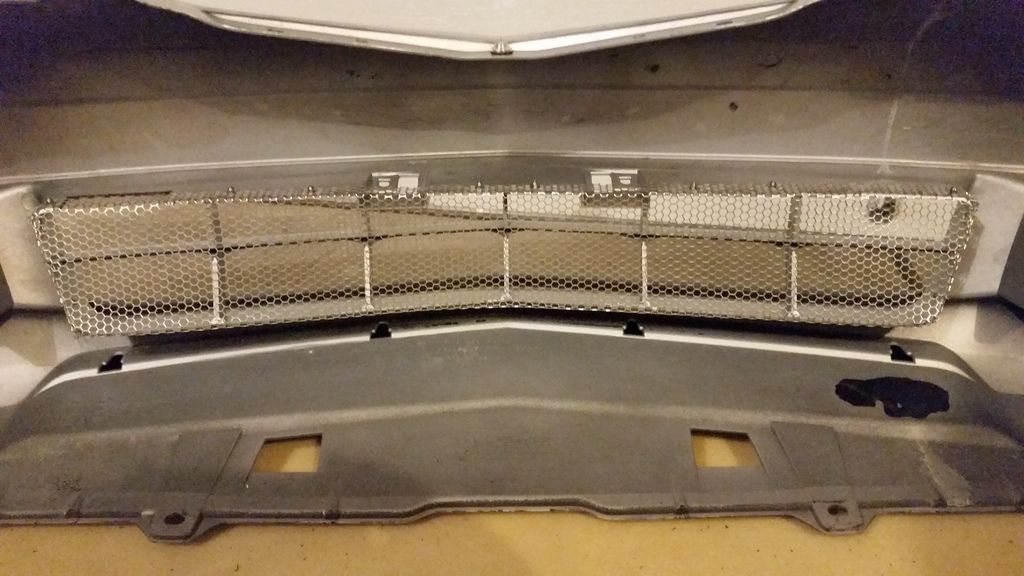
If anyone was wondering why I installed mesh in front lower grill, let's just say I have found a few chunks of rubber/pavement sealant about the size of golf balls inside bumper and other crevices.
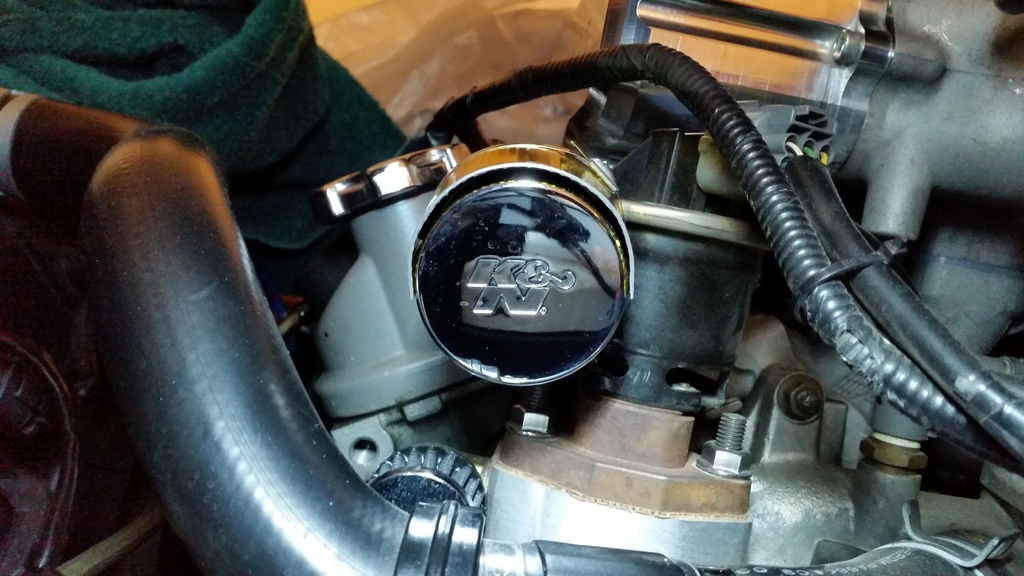
Decided against making a filter box based on limited room with my setup, limited time, and extra weight. Wanted to do a few improvements to protect filter.
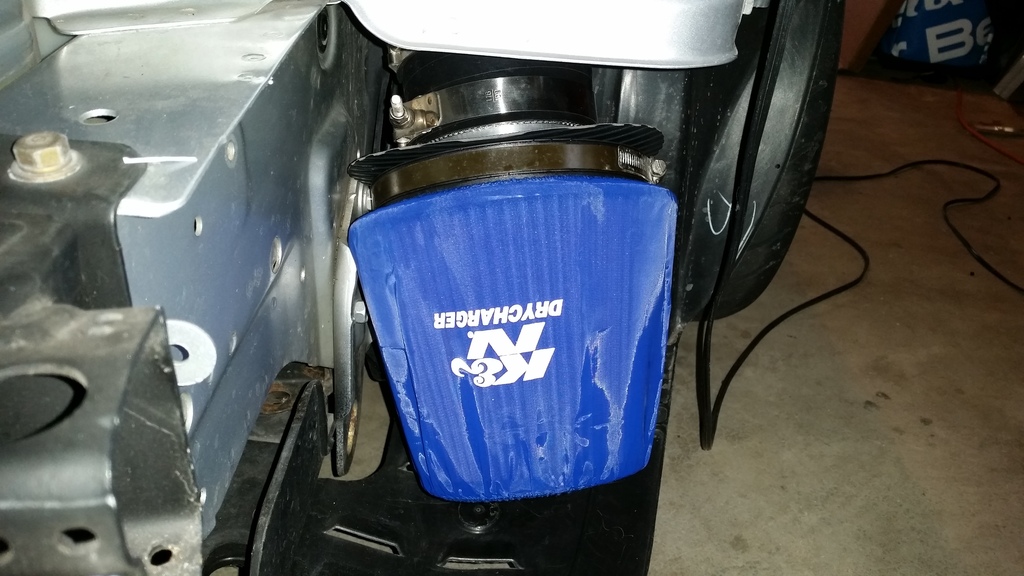
Can see limited room here and the K&N Drycharger Filter Cover installed.
One issue was that removing the top section of fender liner left a gap for tires to shoot rocks and water at filter. Not good, plus liner was filling up with rocks that adds weight and needs to be cleaned out.
Zip-tied the top sections back on both sides. Driver side below.
Was getting rocks and nut shells stuck in this lip of the velocity stack.
Decided to cut a piece out of an exercise type rubber mat to use as a guard just in case some rocks get through.
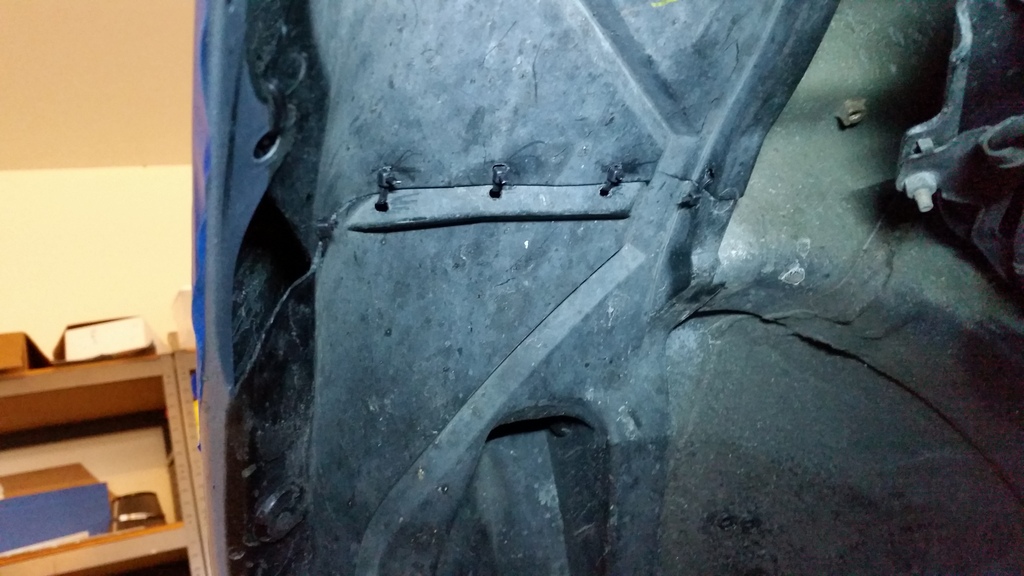
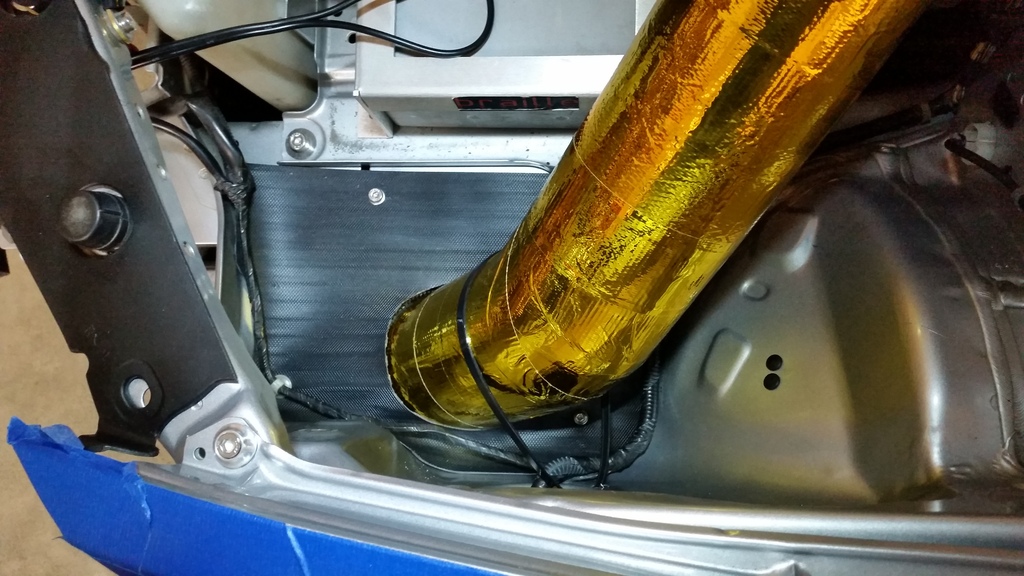
Used the same exercise mat and cut a piece to cover hole in engine bay/bumper where tube goes through. Used 3 bolts and 1 clip to hold it down.
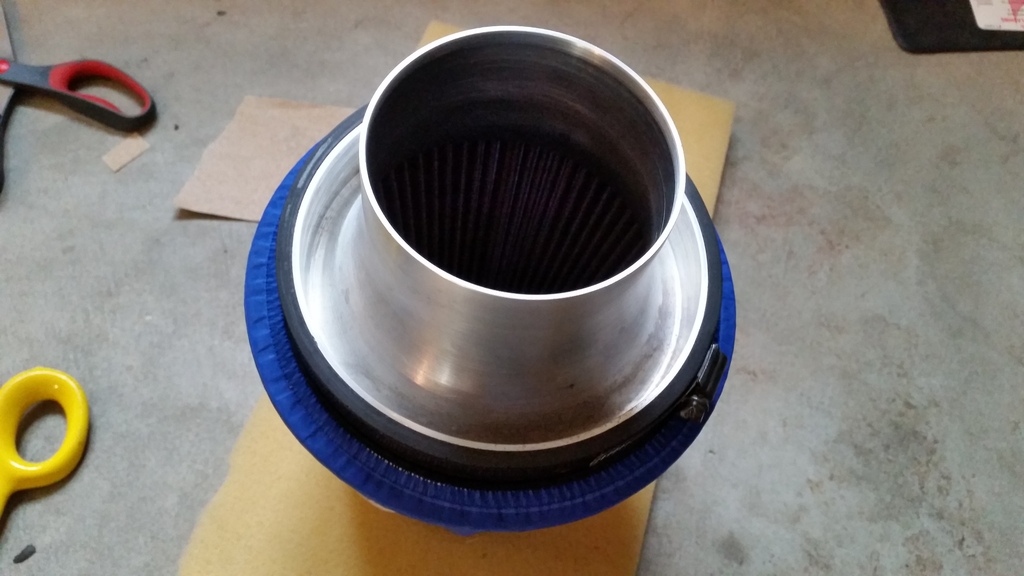
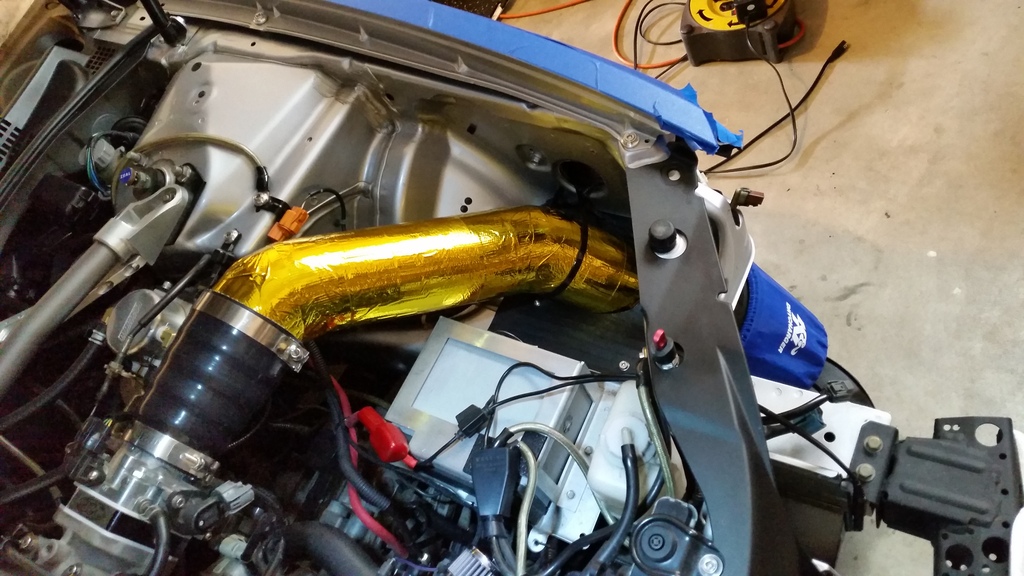
This pic shows nice view of whole intake.
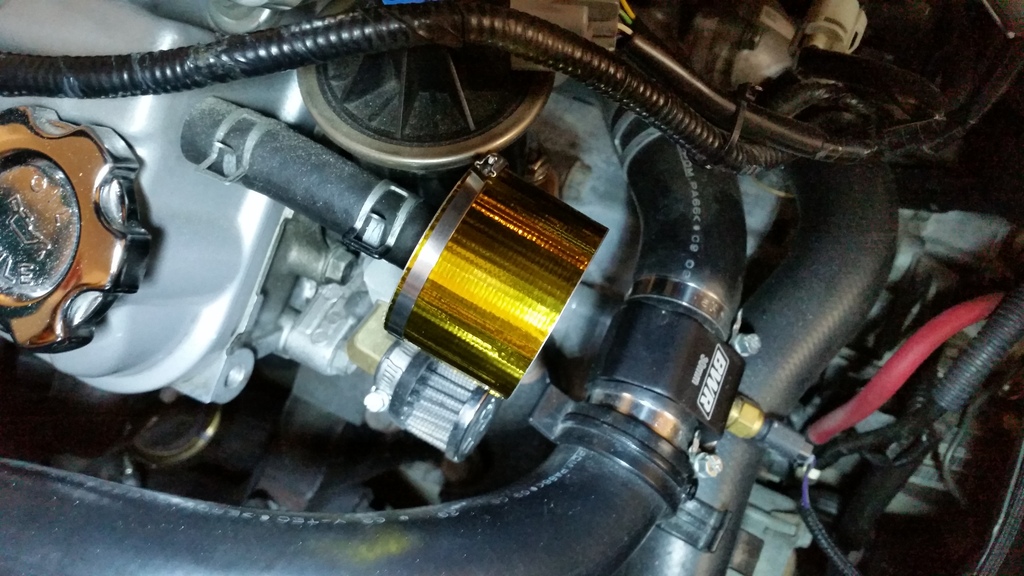
Made cover for breather filter to protect from water with vented hood. Still need to do other one.
You can see in full intake pic that I covered negative battery terminal with a terminal cover. Am thinking of making a battery cover. Are there any other parts I should make covers for?
Last edited by brian6speed; 04-13-2016 at 08:44 PM.

 02-28-2016 | 08:37 PM


 ....come up with a splitter as well and we might have to do a road trip to a race closer to you and put you in the car for a couple stints...nothing like a 2 hour stint in full race gear when it is 90 degrees out