
DIY Euro R kit install
 05-31-2008, 03:49 PM
#1
Burning Brakes
Thread Starter
DIY Euro R kit install
TOOLS:
Phillips screwdriver
Phillips stubby screwdriver
90 degree Phillips or an adjustable wrench and a phillips bit (improvised lol)
Flat-Tip screwdriver
Ratchet(10mm - Honda bolts & 8mm socket - Pepboys bolts)
Isopropyl alcohol
Shop towel
Allen wrench set
Needlenose Pliers
floor jack (nice but not mandatory)
3M double sided tape
HARDWARE:
FROM HONDA:
(10) Spring Clips - {Part # 90305-SM4-00} $1.50 each
They come individually packaged -
FROM PEPBOYS:
(10) Black Trim Screws - {Part # 45861}$1.99 each
They come 3 to a box, so you will need 4 boxes -
(8) Speed Nuts - {Part # 45406}$1.99 each
They come 3 to a box, so you will need 3 boxes -
(11) Body Bolts - {Part # 45595}$1.99 each
They come 2 to a box, so you will need 6 boxes -
First make sure the car is clean and the areas were the tape is going to be has been wiped down with the alcohol pad. and use the foam cloth the part's come rapped in to keep the parts from getting scratched on the floor.
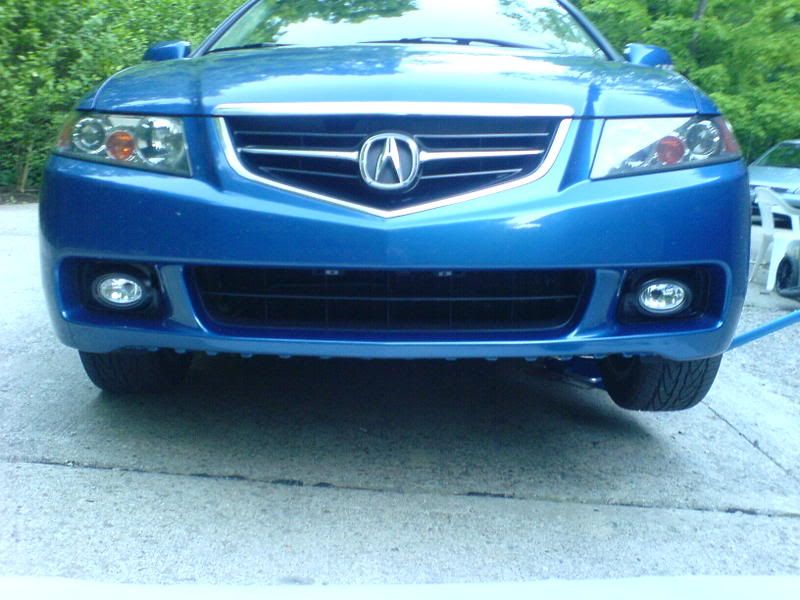
Im going to start with the front.
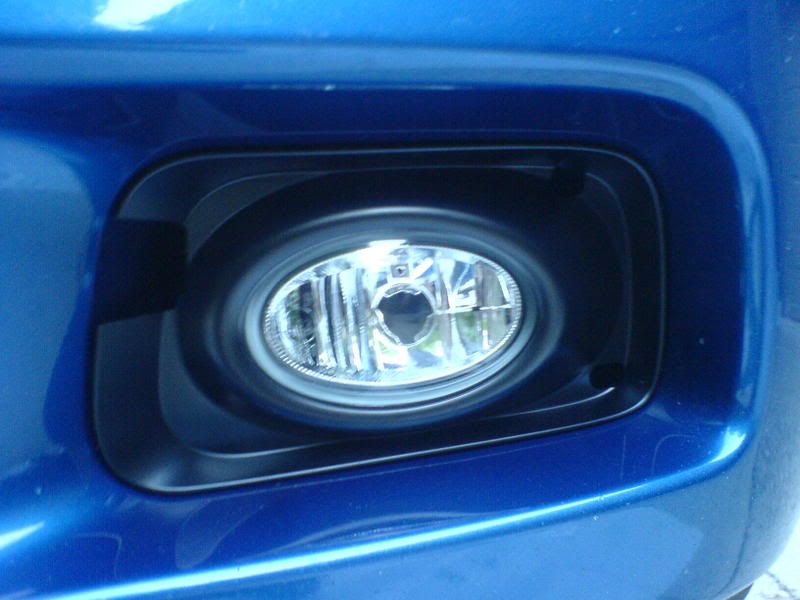
Pop the fog covers out, yes they just pop out. Then jack the car up from one of the sides (you dont have to but it makes it easier) take 2 of the speed nut's and clip them where the fog's bolt up to the OEM bumber sorry no pic.
Place assembled foglamp in the OEM bumper but dont put the trim screw's in the speed nut's yet
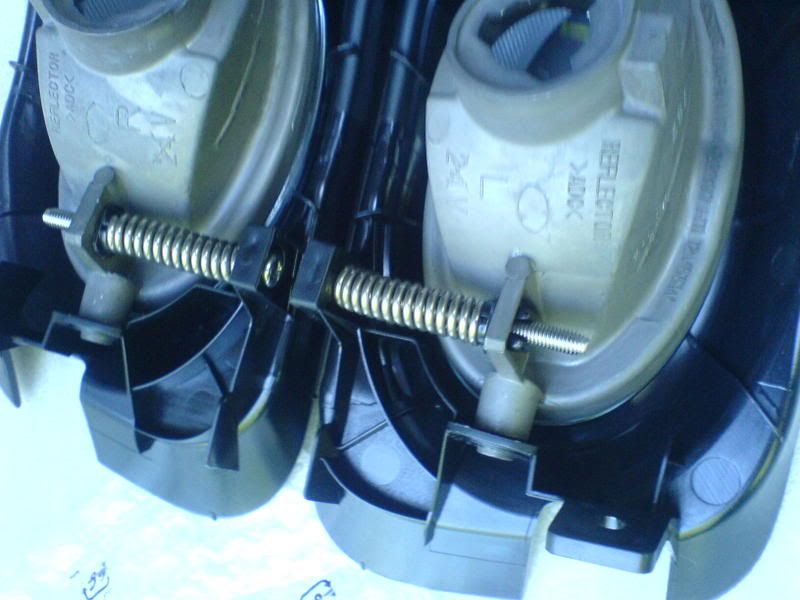
Note how the bolt/washer/spring/clip goes in because thier are no instruction's
Remove the slim black plastic trim piece from under the bumper with the 10mm this part does not go back on . Now you will notice some (2) of the bolt hole's do not line up with the new lip and thier are some open slot's without spring clip's. Simply remove the clip's from the unused hole's and put them in the open slot's and fill the other USED slot's with the spring clip's you bought from honda you can figure out what hole's are used buy comparing the lip bracket's to it .
Now you want to slide the lip on making sure the bracket's around the foghole's on the lip go in the hole's on the foglight houseing's.
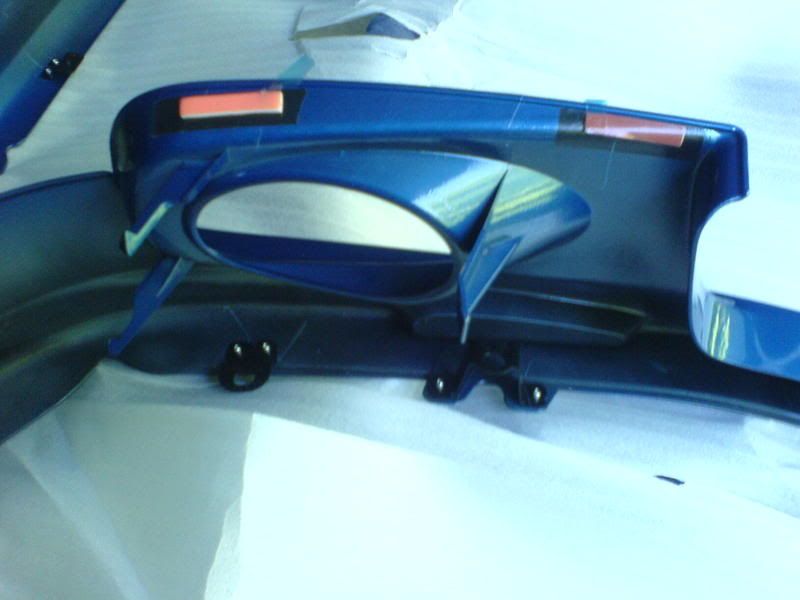
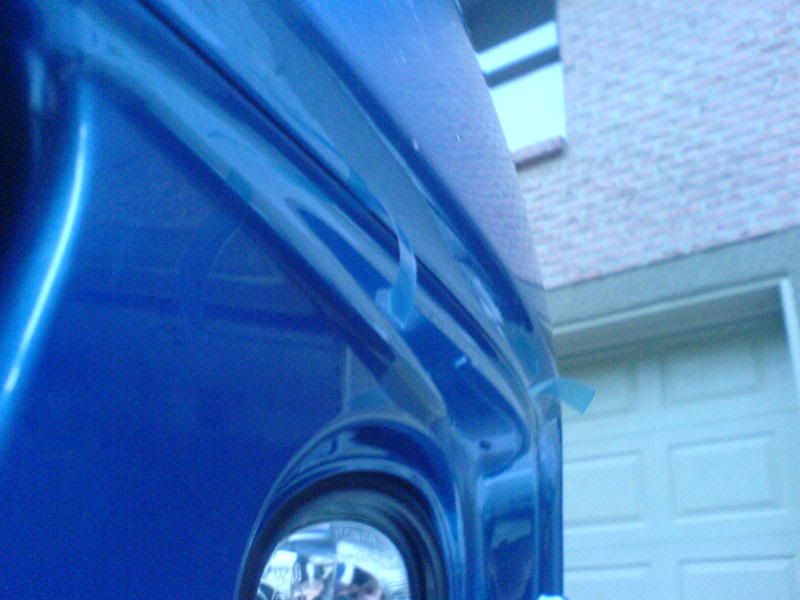
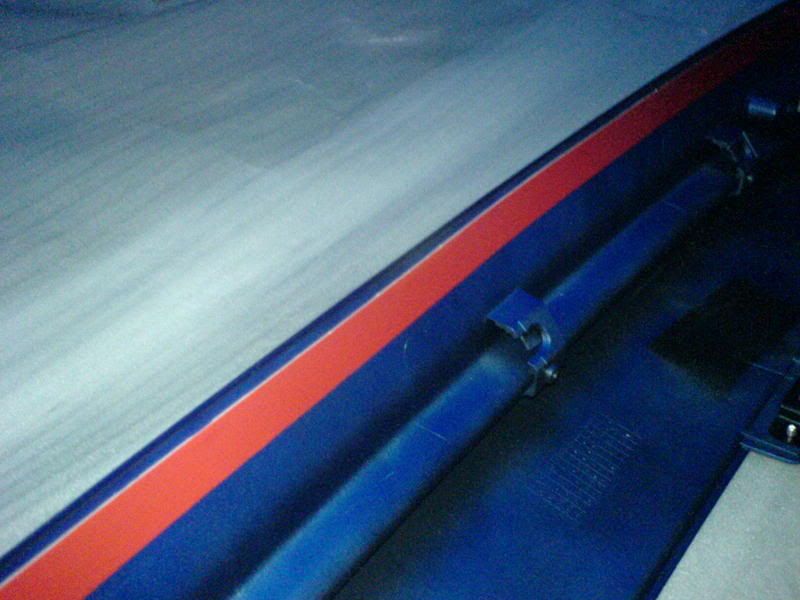
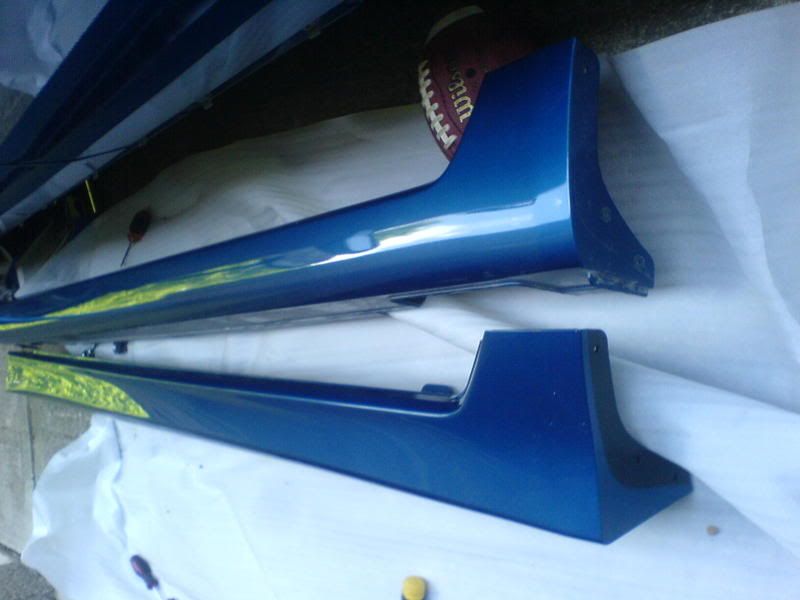
DO NOT REMOVE THE MASKING FROM THE DOUBLE SIDED TAPE but make sure the tab's are poping out the top wonce its on like in this photo.
Now take 2 trim screw's and secure the lip & foglight housing to the speed nut you put on the oem bumper fog hole. Use the bolt's you took out of the trim piece + some of the pepboy's bolt's and lightly bolt in the lip from underneath so that there is a lil free play to line it up.
Now for the trim screw's and speed nuts in the wheelwell part of the lip (Note turning the wheel twards wich ever side you are working on will give you more room to work) , there are 2 on each side so slip the speed nuts flat side facing out over the OEM bumper THERE ARE SMALL INDENTS that tell you where to place them , pull the lip over the bumper tight and line up the holes and put in the trim screws (they tap themselves).
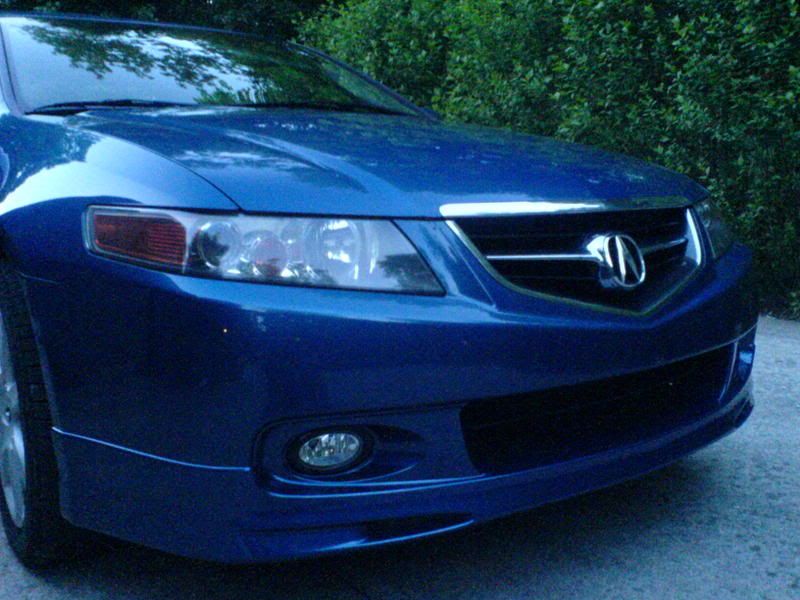
Now secure all the bolt's after makeing sure everthing is lined up to your likeing. Now its time to pull the tabs SLOWLY and peal the masking off the double sided tape and press and hold the areas for a cupple of min's.
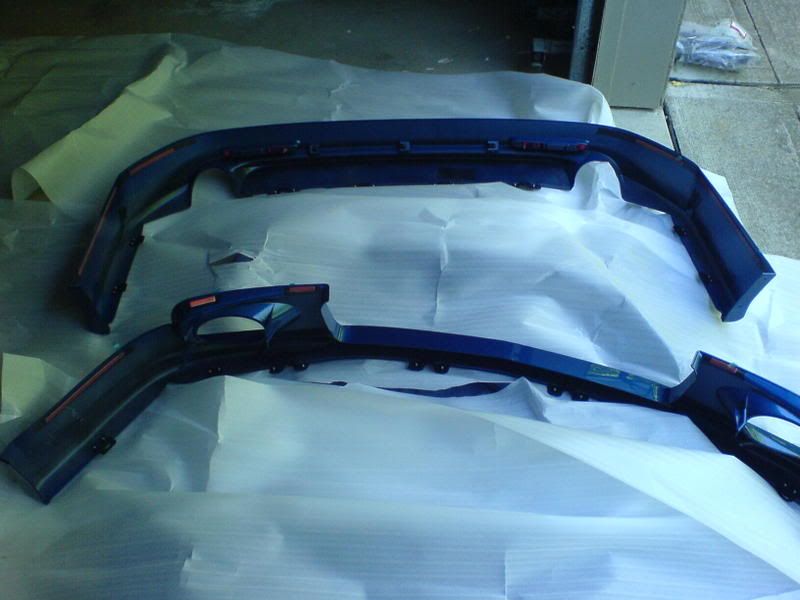
Ok now for the back its pritty much self explanatory at this point but there are some differences.
First you will notice 4 cone shaped bolt's coming fron the center of the lip thier is nowhere to put this so im guessing they want you to cut hole's on your OEM bumper FUCK THAT ! I took them off and put a strip of double sided tape acrossed the top fo the lip .
Now slide the spring clip's in the hole's, slide the lip on making sure the tab's are up, lightly put in the Pepboy's bolt's then repeat the wheel well fastnut's and trim screw's like you did on the front useing a stubby Phillip's. there is also 2 allen bolts re use thies and dont ask why but i could only get the Pepboy bolt's for the side piece's to go in fron the top down, you will see.
Now line it up, bolt it down snug, pull the tabs and the mask off the double sided tape you put on and hold it for a few min's .
Now your rear lip will probably bow out a lil ive been told that this happen's just lean something against it and let the tape set.
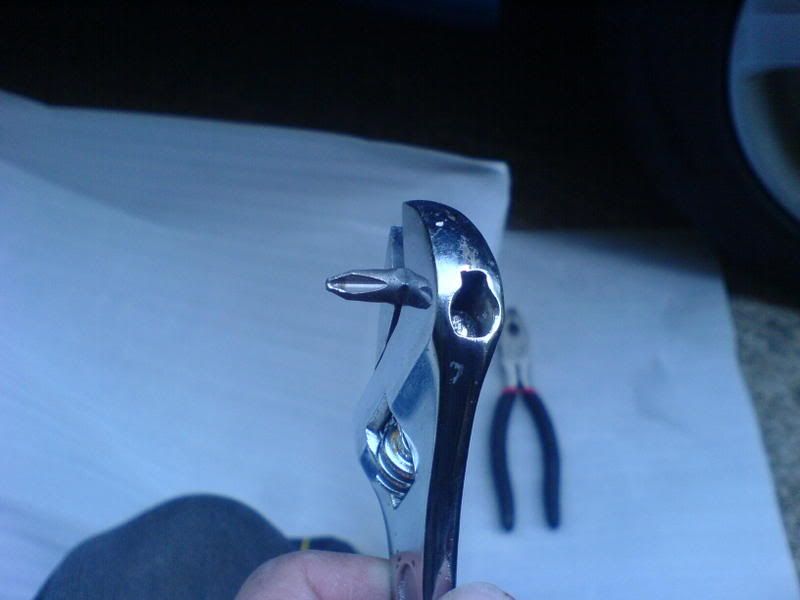
Now for the side's skirt's the side's are easy (sept for one small thing you cant turn your back wheels) so i improvised a tool because i didnt have a 90 degree Phillip's .
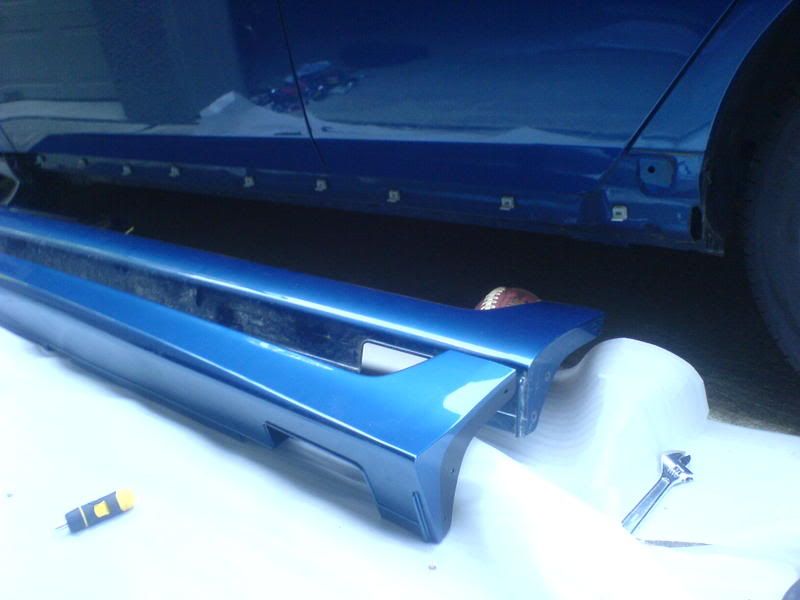
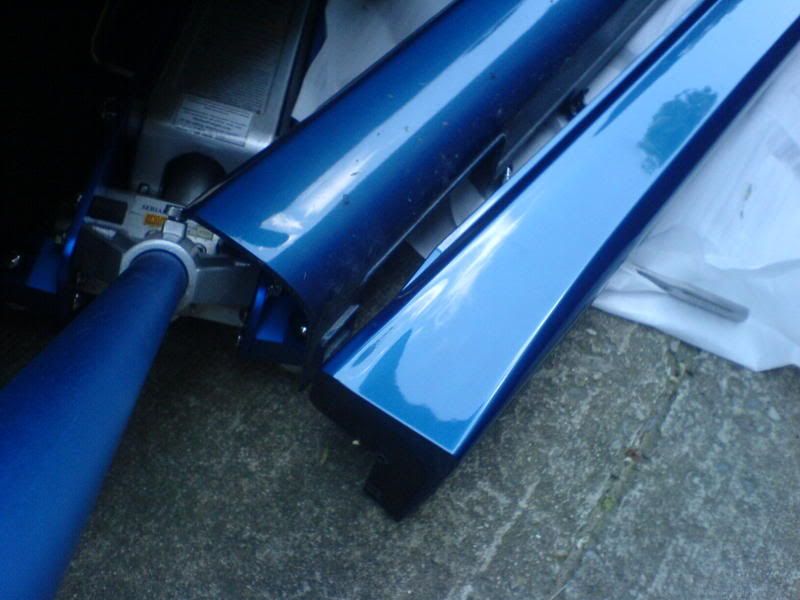
take out the 3 set screw's on eather side of the wheel well's then take out the 10mm bolt underneath and the 4 clips with the flat head or pliers. now go to your back well open the rear door ,and pull out on the top wing looking part of the skirt till the top pops loose wonce you have that one loose you can pull back hard on the skirt twards the rear tire it should just pop off.
Now remove the white clip's by truning them clockwise and then pulling out. Now all you have to do is reverse the process to put the new skirt on.
DONE :P
Ill take better pics later im pooped :P and yes i didnt check spelling im too tire so deal with it.
Phillips screwdriver
Phillips stubby screwdriver
90 degree Phillips or an adjustable wrench and a phillips bit (improvised lol)
Flat-Tip screwdriver
Ratchet(10mm - Honda bolts & 8mm socket - Pepboys bolts)
Isopropyl alcohol
Shop towel
Allen wrench set
Needlenose Pliers
floor jack (nice but not mandatory)
3M double sided tape
HARDWARE:
FROM HONDA:
(10) Spring Clips - {Part # 90305-SM4-00} $1.50 each
They come individually packaged -
FROM PEPBOYS:
(10) Black Trim Screws - {Part # 45861}$1.99 each
They come 3 to a box, so you will need 4 boxes -
(8) Speed Nuts - {Part # 45406}$1.99 each
They come 3 to a box, so you will need 3 boxes -
(11) Body Bolts - {Part # 45595}$1.99 each
They come 2 to a box, so you will need 6 boxes -
First make sure the car is clean and the areas were the tape is going to be has been wiped down with the alcohol pad. and use the foam cloth the part's come rapped in to keep the parts from getting scratched on the floor.
Im going to start with the front.
Pop the fog covers out, yes they just pop out. Then jack the car up from one of the sides (you dont have to but it makes it easier) take 2 of the speed nut's and clip them where the fog's bolt up to the OEM bumber sorry no pic.
Place assembled foglamp in the OEM bumper but dont put the trim screw's in the speed nut's yet
Note how the bolt/washer/spring/clip goes in because thier are no instruction's
Remove the slim black plastic trim piece from under the bumper with the 10mm this part does not go back on . Now you will notice some (2) of the bolt hole's do not line up with the new lip and thier are some open slot's without spring clip's. Simply remove the clip's from the unused hole's and put them in the open slot's and fill the other USED slot's with the spring clip's you bought from honda you can figure out what hole's are used buy comparing the lip bracket's to it .
Now you want to slide the lip on making sure the bracket's around the foghole's on the lip go in the hole's on the foglight houseing's.
DO NOT REMOVE THE MASKING FROM THE DOUBLE SIDED TAPE but make sure the tab's are poping out the top wonce its on like in this photo.
Now take 2 trim screw's and secure the lip & foglight housing to the speed nut you put on the oem bumper fog hole. Use the bolt's you took out of the trim piece + some of the pepboy's bolt's and lightly bolt in the lip from underneath so that there is a lil free play to line it up.
Now for the trim screw's and speed nuts in the wheelwell part of the lip (Note turning the wheel twards wich ever side you are working on will give you more room to work) , there are 2 on each side so slip the speed nuts flat side facing out over the OEM bumper THERE ARE SMALL INDENTS that tell you where to place them , pull the lip over the bumper tight and line up the holes and put in the trim screws (they tap themselves).
Now secure all the bolt's after makeing sure everthing is lined up to your likeing. Now its time to pull the tabs SLOWLY and peal the masking off the double sided tape and press and hold the areas for a cupple of min's.
Ok now for the back its pritty much self explanatory at this point but there are some differences.
First you will notice 4 cone shaped bolt's coming fron the center of the lip thier is nowhere to put this so im guessing they want you to cut hole's on your OEM bumper FUCK THAT ! I took them off and put a strip of double sided tape acrossed the top fo the lip .
Now slide the spring clip's in the hole's, slide the lip on making sure the tab's are up, lightly put in the Pepboy's bolt's then repeat the wheel well fastnut's and trim screw's like you did on the front useing a stubby Phillip's. there is also 2 allen bolts re use thies and dont ask why but i could only get the Pepboy bolt's for the side piece's to go in fron the top down, you will see.
Now line it up, bolt it down snug, pull the tabs and the mask off the double sided tape you put on and hold it for a few min's .
Now your rear lip will probably bow out a lil ive been told that this happen's just lean something against it and let the tape set.
Now for the side's skirt's the side's are easy (sept for one small thing you cant turn your back wheels) so i improvised a tool because i didnt have a 90 degree Phillip's .
take out the 3 set screw's on eather side of the wheel well's then take out the 10mm bolt underneath and the 4 clips with the flat head or pliers. now go to your back well open the rear door ,and pull out on the top wing looking part of the skirt till the top pops loose wonce you have that one loose you can pull back hard on the skirt twards the rear tire it should just pop off.
Now remove the white clip's by truning them clockwise and then pulling out. Now all you have to do is reverse the process to put the new skirt on.
DONE :P
Ill take better pics later im pooped :P and yes i didnt check spelling im too tire so deal with it.


Trending Topics
 Having the tips recessed like that looks kinda goofy IMHO
06-06-2008, 01:32 AM
Having the tips recessed like that looks kinda goofy IMHO
06-06-2008, 01:32 AM
#11
Burning Brakes
Thread Starter
Originally Posted by lilasiian8
Can I ask who you got the kit from? Thanks for the DIY and congrats on the kit. 
http://www.heeltoeauto.com/
Answered all my emails in a timely fashion no defects in the kit

Thread
Thread Starter
Forum
Replies
Last Post
cycdaniel
1G TSX Performance Parts & Modifications
8
12-17-2019 10:58 AM
Skirmich
2G TL (1999-2003)
37
09-15-2015 06:41 PM
nuldabz
3G TL Tires, Wheels & Suspension
3
09-03-2015 05:49 PM