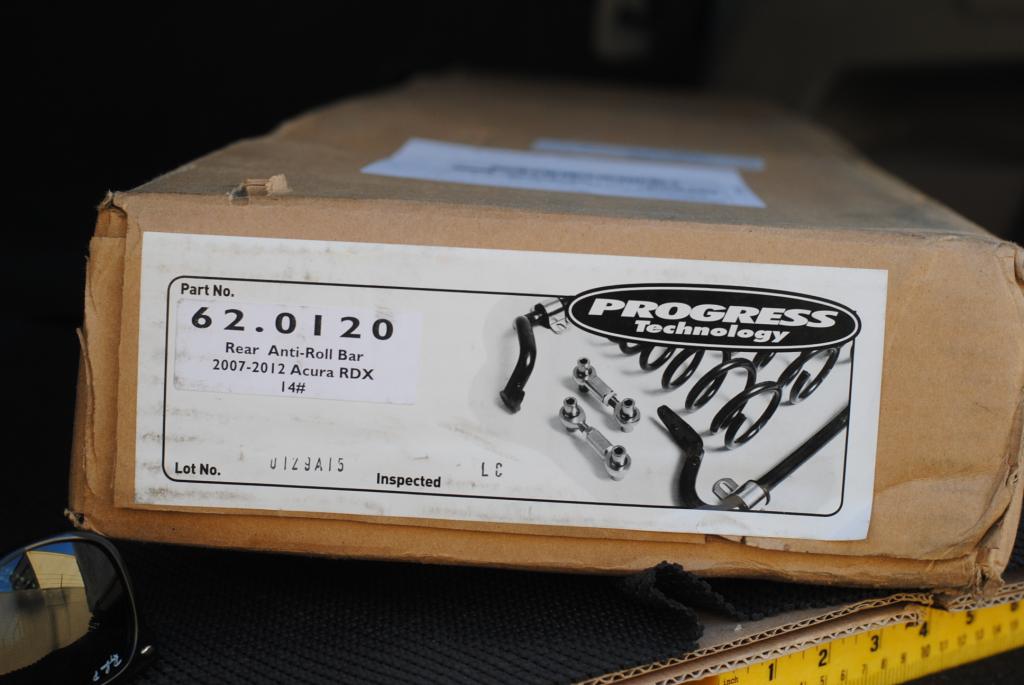
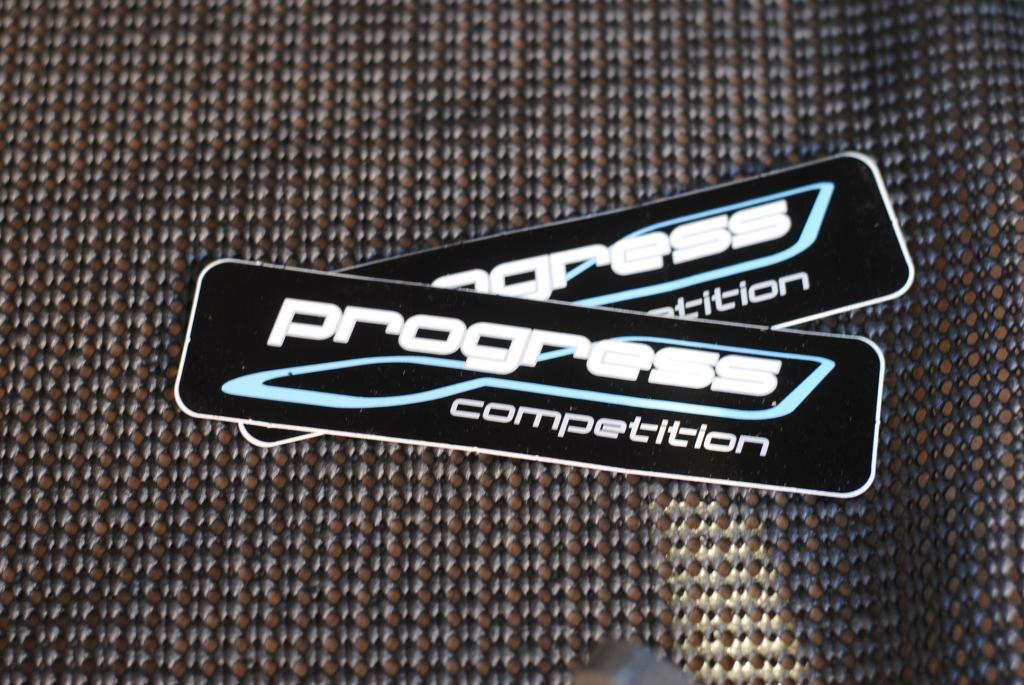
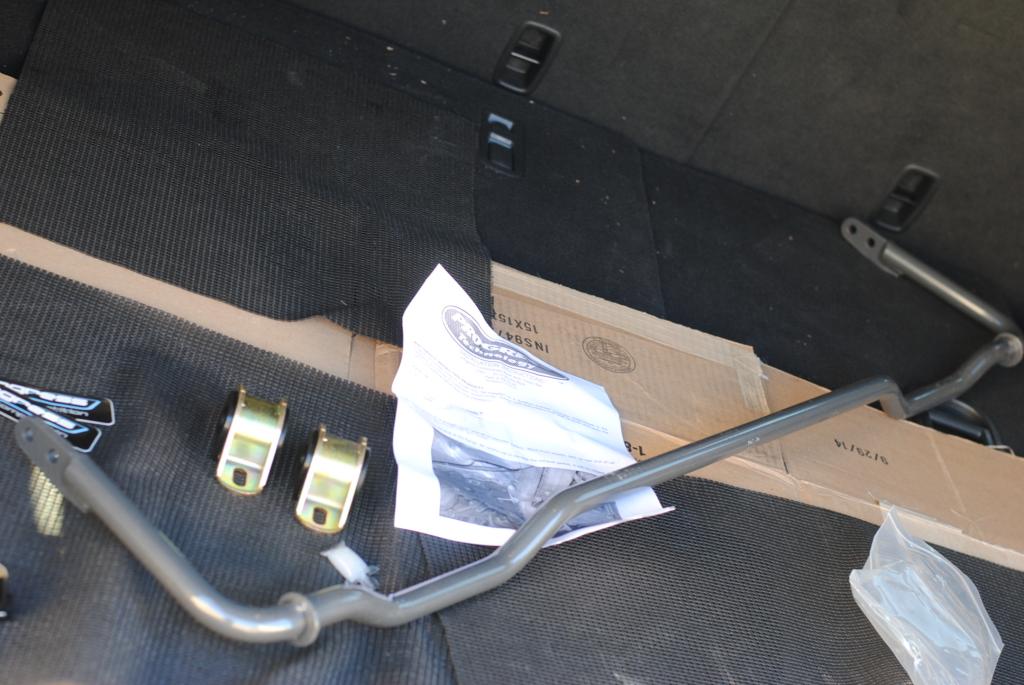
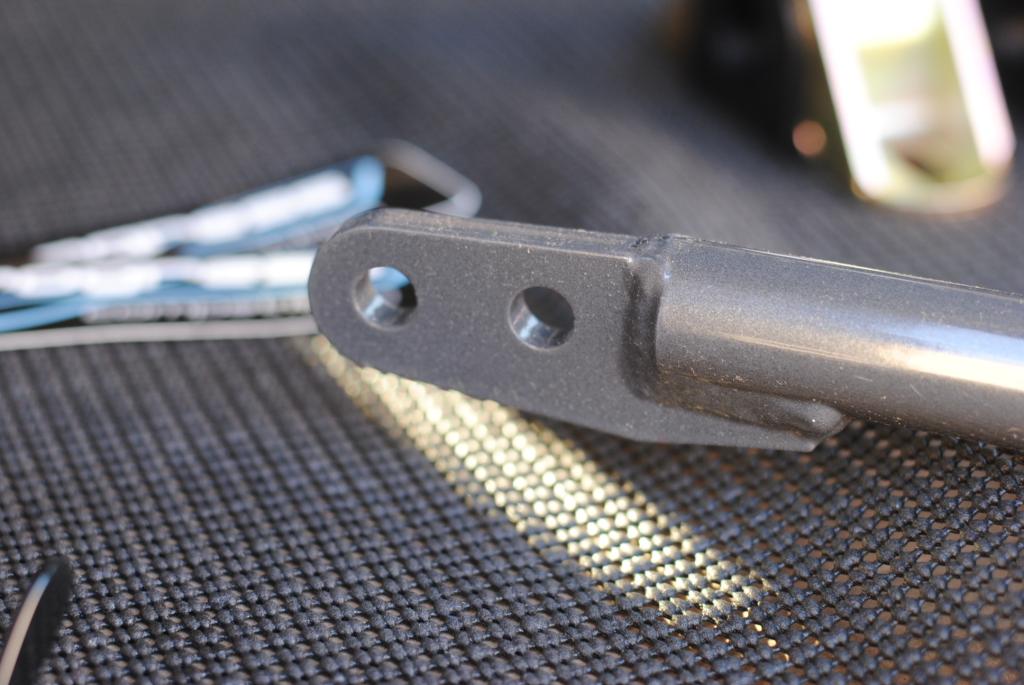
Progress Group Rear Sway-Bar UNBOXING! LQQk!
 02-06-2015, 09:08 AM
#1
Drifting
Thread Starter
Progress Group Rear Sway-Bar UNBOXING! LQQk!
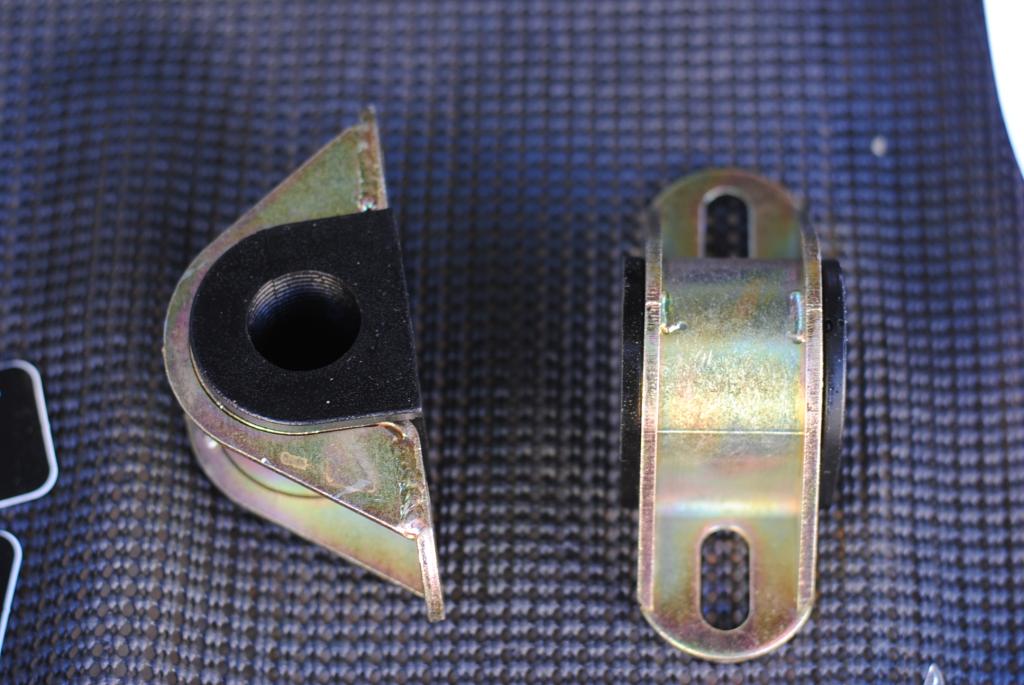
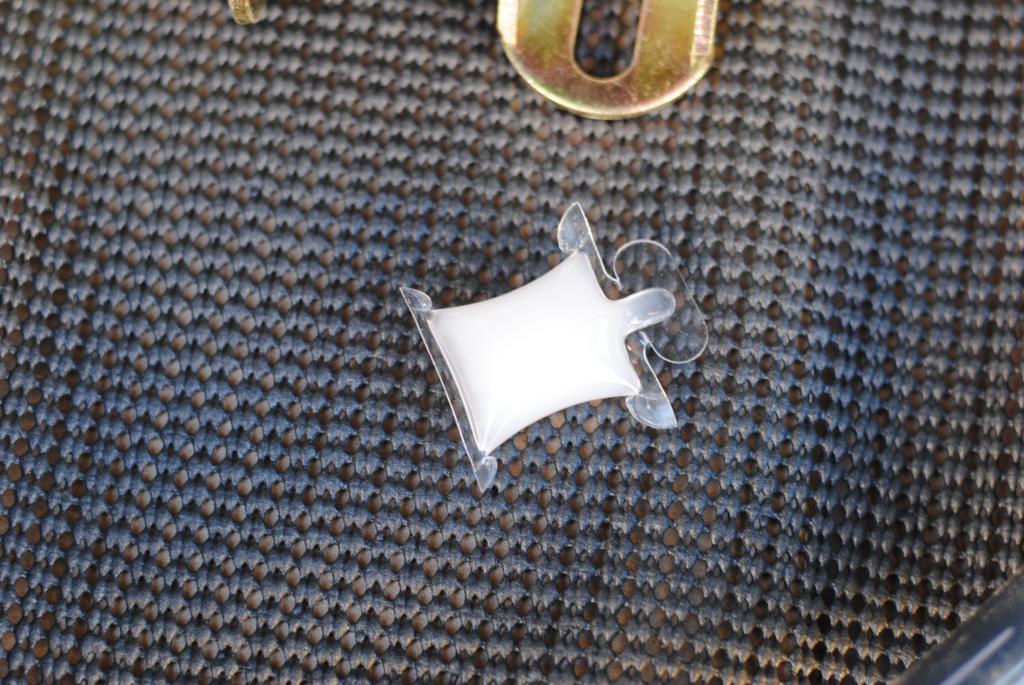
Just picked up the sway bar from UPS. Now I know what the sway bar looks like and what comes with it. I will have to wait to put the sway bar on, as most you know why. It looks good, nicely put together. I can't wait to put it on. For those of you that have it, let me know how it does!!


The following users liked this post:
AlLtHiNgSaCuRa (04-30-2015)
02-06-2015, 09:17 AM
#3
Drifting
Thread Starter
02-06-2015, 09:22 AM
#4
mrgold35
Waiting for my RSB to come in also. I'm assuming the inter hole is for a stiffer RSB? I was also thinking about putting on new endlinks front/back, upgrade the front sway bar bushings, and replace the OEM shock/struts to KYB (already have Eibach springs). My RDX is starting to feel a little rough around the edges on less than perfect roads with almost 120,000 miles on her.
 02-06-2015, 09:28 AM
#5
Drifting
Thread Starter
Waiting for my RSB to come in also. I'm assuming the inter hole is for a stiffer RSB? I was also thinking about putting on new endlinks front/back, upgrade the front sway bar bushings, and replace the OEM shock/struts to KYB (already have Eibach springs). My RDX is starting to feel a little rough around the edges on less than perfect roads with almost 120,000 miles on her.
02-06-2015, 09:45 AM
#6
it's a torsion bar that SITS UNDERNEATH everything.
certainly, your pictures covered what it looks like, as it's just a bar.
as for a review; it made daily driving a little better by tightening up the rear. in my FWD TL, switching lanes didnt feel as floaty any more.
furthermore; i can swing the back end out with some lift off oversteer action.
certainly, your pictures covered what it looks like, as it's just a bar.
as for a review; it made daily driving a little better by tightening up the rear. in my FWD TL, switching lanes didnt feel as floaty any more.
furthermore; i can swing the back end out with some lift off oversteer action.
The following users liked this post:
Aman (02-11-2015)
02-06-2015, 10:23 AM
#7
Drifting
Thread Starter
it's a torsion bar that SITS UNDERNEATH everything.
certainly, your pictures covered what it looks like, as it's just a bar.
as for a review; it made daily driving a little better by tightening up the rear. in my FWD TL, switching lanes didnt feel as floaty any more.
furthermore; i can swing the back end out with some lift off oversteer action.
certainly, your pictures covered what it looks like, as it's just a bar.
as for a review; it made daily driving a little better by tightening up the rear. in my FWD TL, switching lanes didnt feel as floaty any more.
furthermore; i can swing the back end out with some lift off oversteer action.
Trending Topics
02-06-2015, 11:28 AM
#11
Drifting
Thread Starter
02-06-2015, 11:46 AM
#12
Drifting
Thread Starter
Nobody asked you anything, You don't even have an RDX. So, why troll around. You have no information that will be helpful for me... Turn the page dude..
02-06-2015, 12:06 PM
#14
A torsion bar is a type of suspension system that is typically used in wheeled vehicles such as cars, vans and trucks. A suspension system is an important and critical element of a vehicle�s design. Regardless of the design, all suspension systems perform the same important functions. They keep the tires in contact with the surface of the road, support the weight of a vehicle and absorb the forces generated by the movement and motion of the vehicle.
Torsion bars are essentially metal bars that function as a spring. At one end, the bar is fixed firmly in place to the chassis or frame of a vehicle. The other end of the bar may be attached to the axle, suspension arm, or a spindle, depending on the specifics of a vehicle�s design. As a vehicle moves along the road, the forces generated by the motion of the vehicle create torque on the bar, which twists it along its axis.
Counteracting the torque is the fact that the torsion bar naturally wants to resist the twisting effect and return to its normal state. In doing so, the suspension provides a level of resistance to the forces generated by the movement of the vehicle. This resistance is the key principle behind a torsion bar suspension system.
Last edited by TheWrench116; 02-06-2015 at 12:10 PM.
The following 3 users liked this post by TheWrench116:
02-06-2015, 12:11 PM
#15
im really glad that this finally happened.. it took a bit but its finally here =) i dont know how many phone calls i made and then finally talking to marcus at heeltoe in person to say what would it take for all of us to get this.. I feel like i was the dad he is the mother hahaha progress was the dr and boom the baby is born haha im a happy dad
The following users liked this post:
MrHeeltoe (02-11-2015)
02-06-2015, 12:39 PM
#18
Drifting
Thread Starter
im really glad that this finally happened.. it took a bit but its finally here =) i dont know how many phone calls i made and then finally talking to marcus at heeltoe in person to say what would it take for all of us to get this.. I feel like i was the dad he is the mother hahaha progress was the dr and boom the baby is born haha im a happy dad
02-06-2015, 01:40 PM
#19
is the RSB not connected to the chassis?
is the RSB NOT connected to the control arms?
to answer both of those questions, YES. the RSB connects to the chassis and also connects to both control arms, LIMITING movement or torque between the two wheels.
I'm not trolling.
a RSB does the same, NO MATTER what vehicle you are putting it on to.
How thick is the Progress bar?
how thick is the stock bar?
now, why would you upgrade to a thicker bar, if you werent trying to control movement?
Last edited by justnspace; 02-06-2015 at 01:42 PM.
02-06-2015, 01:46 PM
#20
this quote
Will be true when you're trying to uninstall the old bar....
since its stiff with lots of tension, it'll be tough to fish it out
same thing when installing the new bar. it will be TOUGH to position since it always wants to return to its normal state.
Counteracting the torque is the fact that the torsion bar naturally wants to resist the twisting effect and return to its normal state. In doing so, the suspension provides a level of resistance to the forces generated by the movement of the vehicle. This resistance is the key principle behind a torsion bar suspension system.
since its stiff with lots of tension, it'll be tough to fish it out
same thing when installing the new bar. it will be TOUGH to position since it always wants to return to its normal state.
02-06-2015, 01:50 PM
#21
Drifting
Thread Starter
I will have to do an update when I get my suspension back from Prothane, because this bar in combination with the bushing should be killer!
The following users liked this post:
bluecarbonfiber (02-06-2015)
02-06-2015, 02:14 PM
#22
vit is about an hour
hondata about 14 hours
not sure what ets would want to do i contacted them about doing a FMIC they pretty much said they dont have the time to do it.. but had the feeling of you got a tmic dont ever bug us again
vit i would deff like to see but not sure he can do much since we are all waiting on hondata to fix any other bugs with the flashpro which leads me to hondata i would gladly go visit them except my time is crunch so im not sure how long they would need the vehicle and it seems like lately they dont really want to take the time to look at it
Last edited by bluecarbonfiber; 02-06-2015 at 02:18 PM.
02-06-2015, 02:16 PM
#24
Team Owner
02-06-2015, 02:21 PM
#25
Team Owner
A RSB WILL do the same on an RDX as a TL, no two ways about it.
also, are you internet thugging Crabz? Daaaamn boy, you'd better look out!
 grow up
The following 2 users liked this post by TacoBello:
04WDPSeDaN (02-10-2015),
iCrap (02-24-2015)
02-06-2015, 02:38 PM
#28
just because you didnt like my answers; you resorted to name calling.
last time i checked this is a free forum; regardless if I own an RDX or not.
if a moderator does decide to come in here; they'll see both of you name calling me.

I did not throw the first punch here.
now can we discuss RSB's like gentlemen?
 02-06-2015, 03:41 PM
#30
Drifting
Thread Starter
ets is 30 minutes from me
vit is about an hour
hondata about 14 hours
not sure what ets would want to do i contacted them about doing a FMIC they pretty much said they dont have the time to do it.. but had the feeling of you got a tmic dont ever bug us again
vit i would deff like to see but not sure he can do much since we are all waiting on hondata to fix any other bugs with the flashpro which leads me to hondata i would gladly go visit them except my time is crunch so im not sure how long they would need the vehicle and it seems like lately they dont really want to take the time to look at it
ETS could make a turbo kit for us if the buyer is serious. That is what I've been through for all the current R&D I have going. Hopefully I can get some time this summer and drive my car there and flight back, and let them have it for the time needed for R&D for a turbo kit.
02-06-2015, 03:45 PM
#31
Drifting
Thread Starter
I was never hostile to you or KenB.
just because you didnt like my answers; you resorted to name calling.
last time i checked this is a free forum; regardless if I own an RDX or not.
if a moderator does decide to come in here; they'll see both of you name calling me.
I did not throw the first punch here.
now can we discuss RSB's like gentlemen?
Oh this one?

I have no interest in discussing about this sway bar.
02-06-2015, 04:12 PM
#32
Drifting
Thread Starter
02-06-2015, 04:15 PM
#33
Drifting
Thread Starter
02-06-2015, 05:22 PM
#34
ETS could make a turbo kit for us if the buyer is serious. That is what I've been through for all the current R&D I have going. Hopefully I can get some time this summer and drive my car there and flight back, and let them have it for the time needed for R&D for a turbo kit.
 02-06-2015, 06:22 PM
#36
Drifting
Thread Starter
Waiting for my RSB to come in also. I'm assuming the inter hole is for a stiffer RSB? I was also thinking about putting on new endlinks front/back, upgrade the front sway bar bushings, and replace the OEM shock/struts to KYB (already have Eibach springs). My RDX is starting to feel a little rough around the edges on less than perfect roads with almost 120,000 miles on her.

The following users liked this post:
mrgold35 (02-09-2015)


 02-09-2015, 10:37 AM
#38

Wow this thread was hopping on Friday. Anyway, I posted this in the thread in the main RDX forum, but re-posting here since a lot of people seem to be watching.
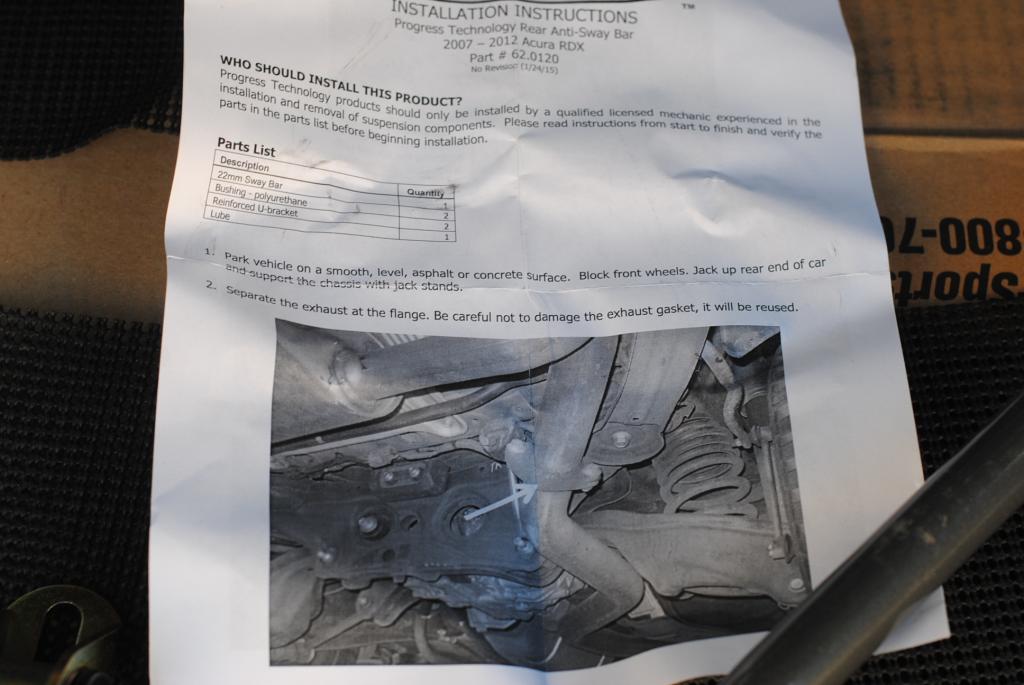
So I threw mine on over the weekend. Took about 90 minutes and was very easy. Instructions that came with the bar were very easy to follow (hence no pics - instructions have you covered). All you need are some metric sockets (don't recall the sizes but nothing a basic set won't have), a 14mm wrench, and a the instructions say a 6mm allen but I think it might have been a 4. Either that or the labels on my set are wonky. 3 and 12 inch extensions make life easier, but not required. An impact might also be handy if you play in the snow often, but I had no trouble with any of the bolts with just the socket wrench.
I also suggest you lift the ass end nice and high as you'll need to support the rear subframe with a jack while you do this, as it's much easier for maneuvering if you can slip the jack in from between your jack stand and rear tire rather than from the rear of the car where you'll be working.
As it is, the replacement bar is a good deal thicker than stock, and comes with some hardy-looking bushings. Lining up the bushing brackets was a bit of a hassle (seems like the welds on the bar could have been 1/8 - 1/4 inch further apart, but ultimately it all bolted in. I recommend threading upper bolt on each side first, then each lower bolt, then tighten all four.
For the set-up I used the outer holes, but the difference is still noticeable over stock. Haven't tried the inner holes but adjustments should be fairly easy. Just lift up the rear to unload the suspension and relocate the endlink bolts to the inner holes.
02-09-2015, 10:46 AM
#39
Drifting
Thread Starter
Wow this thread was hopping on Friday. Anyway, I posted this in the thread in the main RDX forum, but re-posting here since a lot of people seem to be watching.
So I threw mine on over the weekend. Took about 90 minutes and was very easy. Instructions that came with the bar were very easy to follow (hence no pics - instructions have you covered). All you need are some metric sockets (don't recall the sizes but nothing a basic set won't have), a 14mm wrench, and a the instructions say a 6mm allen but I think it might have been a 4. Either that or the labels on my set are wonky. 3 and 12 inch extensions make life easier, but not required. An impact might also be handy if you play in the snow often, but I had no trouble with any of the bolts with just the socket wrench.
I also suggest you lift the ass end nice and high as you'll need to support the rear subframe with a jack while you do this, as it's much easier for maneuvering if you can slip the jack in from between your jack stand and rear tire rather than from the rear of the car where you'll be working.
As it is, the replacement bar is a good deal thicker than stock, and comes with some hardy-looking bushings. Lining up the bushing brackets was a bit of a hassle (seems like the welds on the bar could have been 1/8 - 1/4 inch further apart, but ultimately it all bolted in. I recommend threading upper bolt on each side first, then each lower bolt, then tighten all four.
For the set-up I used the outer holes, but the difference is still noticeable over stock. Haven't tried the inner holes but adjustments should be fairly easy. Just lift up the rear to unload the suspension and relocate the endlink bolts to the inner holes.
Thank you, thank you, thank you! Finally have someone that actually has an RDX that installed this bar, that is willing to share their experience. That's good that you can even notice it on soft. Can't wait to get this thing on!!
