
headlight makeover
 07-09-2007, 03:59 PM
#1
Racer
Thread Starter
Join Date: Mar 2007
Age: 36
Posts: 374
Likes: 0
Received 0 Likes
on
0 Posts
headlight makeover
Well while my car is in the body shop i decided to take this oppurtunity to black house my headlights. so i went to the shop picked up my old headlight and new headlight and one looks pristene and the other looks like a pile of sh!t. so i used "search" and found a helpfull post :
https://acurazine.com/forums/showthr...ing+headlights
and from the way he described it it seems like you can easily fuck up your headlights? any one sand there headlights down? share your experience or any tips on things i should be aware of? im kinda worried i will mess up my headlight but the new one looks way to clean to have the dirty one next to it. a
and about blackhousing, you just paint right over the chrome housing? should i be worried about paint chipping? and do i need any special paint?
I apologize if some questions have been posted before, but i have to return the headlights back by wedsnday so that leaves today and tomorrow to blackhouse//sand my headlights so i gotta hurry =(
 07-09-2007, 06:44 PM
#2
1999 CL3.0
careful you dont put the oven too high (temp), careful you dont leave them in the over too long.
careful you dont snap any plastic clips, careful you dont smear silicone.
the painting part has got to be simple.
I'd sand it down (the chrome) with a low grit, and then go gradually higher.
I'd use some good plastic high-temp primer.
Sand it down with the higher grit sand paper.
Paint it with some high-temp plastic paint.
you can be creative.
remember it doesn't just have to be black.
everyone and there mother has done black housings.
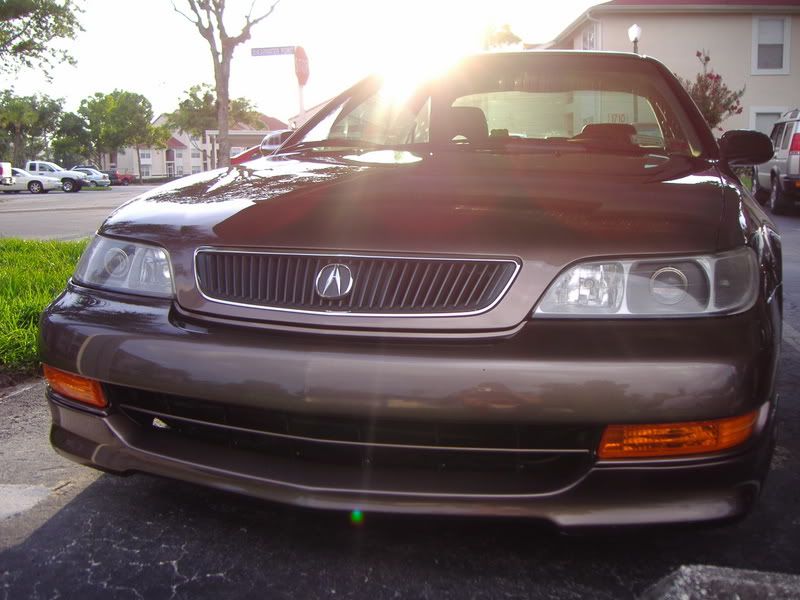
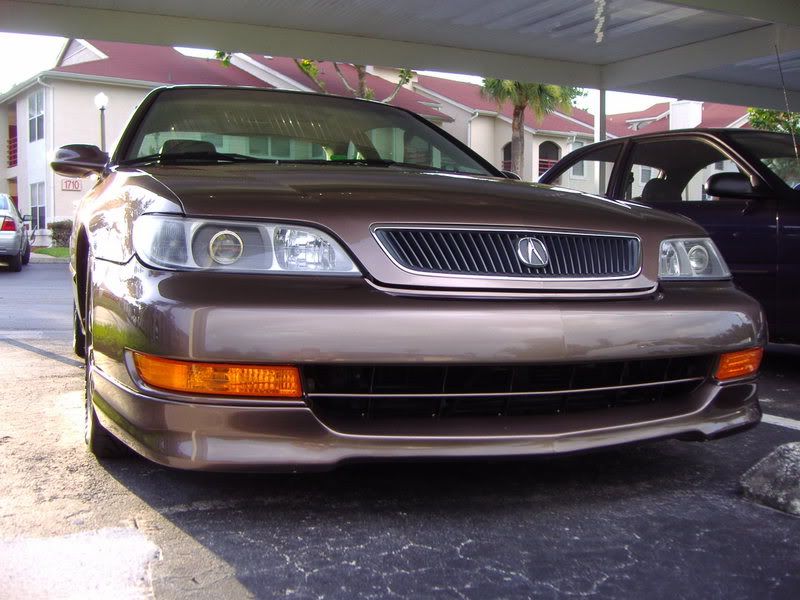
mine are a matte silver.
i have some black shrouding inside mine (which is a whole different mod).
against silver/primrose i'd go with probably black, but go with a matte rather than gloss.
heres what mine look like:
careful you dont snap any plastic clips, careful you dont smear silicone.
the painting part has got to be simple.
I'd sand it down (the chrome) with a low grit, and then go gradually higher.
I'd use some good plastic high-temp primer.
Sand it down with the higher grit sand paper.
Paint it with some high-temp plastic paint.
you can be creative.
remember it doesn't just have to be black.
everyone and there mother has done black housings.
mine are a matte silver.
i have some black shrouding inside mine (which is a whole different mod).
against silver/primrose i'd go with probably black, but go with a matte rather than gloss.
heres what mine look like:
07-09-2007, 06:55 PM
#3
^^ that looks pretty darn good
what kind of shroud is that? Just a custom piece of abs sheet or something?
I'm going for a similar look with my retro, except with cf eyelids to top it off
what kind of shroud is that? Just a custom piece of abs sheet or something?
I'm going for a similar look with my retro, except with cf eyelids to top it off

 07-09-2007, 09:27 PM
#5
Senior Moderator
Regional Coordinator
(Mid-Atlantic)
Regional Coordinator
(Mid-Atlantic)
iTrader: (6)
Too bad he paid for his to be done  yet he talks like he did all the work.
I did the same proj retro as his and left the housings chrome and they look sick as fook
yet he talks like he did all the work.I did the same proj retro as his and left the housings chrome and they look sick as fook
07-09-2007, 10:16 PM
#7
Drifting
Originally Posted by 97BlackAckCL
Too bad he paid for his to be done yet he talks like he did all the work.
I did the same proj retro as his and left the housings chrome and they look sick as fook
yet he talks like he did all the work.I did the same proj retro as his and left the housings chrome and they look sick as fook

But where are your pics, Chris?

Trending Topics
07-09-2007, 10:18 PM
#8
Senior Moderator
Regional Coordinator
(Mid-Atlantic)
Regional Coordinator
(Mid-Atlantic)
iTrader: (6)
Originally Posted by 03silvertypeS
But where are your pics, Chris?
 I'm waiting a week till I can take pics on the car, since I'm out of town right now, if people keep asking me, I may have to let the surprise go early
 07-09-2007, 10:28 PM
#10
Racer
Thread Starter
Join Date: Mar 2007
Age: 36
Posts: 374
Likes: 0
Received 0 Likes
on
0 Posts
Originally Posted by dragon084
careful you dont put the oven too high (temp), careful you dont leave them in the over too long.
careful you dont snap any plastic clips, careful you dont smear silicone.
the painting part has got to be simple.
I'd sand it down (the chrome) with a low grit, and then go gradually higher.
I'd use some good plastic high-temp primer.
Sand it down with the higher grit sand paper.
Paint it with some high-temp plastic paint.
you can be creative.
remember it doesn't just have to be black.
everyone and there mother has done black housings.
mine are a matte silver.
i have some black shrouding inside mine (which is a whole different mod).
against silver/primrose i'd go with probably black, but go with a matte rather than gloss.
heres what mine look like:
wow thats very helpful thankyou. any one else have advise prefferably on sanding? my main problem is watermarks on the plastic.
and your car is hot as hell
 07-09-2007, 10:32 PM
#11
Senior Moderator
Regional Coordinator
(Mid-Atlantic)
Regional Coordinator
(Mid-Atlantic)
iTrader: (6)
Originally Posted by Nautsiju
Well while my car is in the body shop i decided to take this oppurtunity to black house my headlights. so i went to the shop picked up my old headlight and new headlight and one looks pristene and the other looks like a pile of sh!t. so i used "search" and found a helpfull post :
https://acurazine.com/forums/showthr...ing+headlights
and from the way he described it it seems like you can easily fuck up your headlights? any one sand there headlights down? share your experience or any tips on things i should be aware of? im kinda worried i will mess up my headlight but the new one looks way to clean to have the dirty one next to it. a
and about blackhousing, you just paint right over the chrome housing? should i be worried about paint chipping? and do i need any special paint?
I apologize if some questions have been posted before, but i have to return the headlights back by wedsnday so that leaves today and tomorrow to blackhouse//sand my headlights so i gotta hurry =(
https://acurazine.com/forums/showthr...ing+headlights
and from the way he described it it seems like you can easily fuck up your headlights? any one sand there headlights down? share your experience or any tips on things i should be aware of? im kinda worried i will mess up my headlight but the new one looks way to clean to have the dirty one next to it. a
and about blackhousing, you just paint right over the chrome housing? should i be worried about paint chipping? and do i need any special paint?
I apologize if some questions have been posted before, but i have to return the headlights back by wedsnday so that leaves today and tomorrow to blackhouse//sand my headlights so i gotta hurry =(
https://acurazine.com/forums/showthread.php?t=171826
07-10-2007, 12:13 AM
#12
1999 CL3.0
Originally Posted by 97BlackAckCL
Too bad he paid for his to be done yet he talks like he did all the work.
yet he talks like he did all the work.mike has experience.
i coulda done black housings in a snap.
but i wanted some custom snazzyness.
and mike is the man for the job.
until u post pix,
go shoot gophers son.
07-10-2007, 12:18 AM
#13
1999 CL3.0
Originally Posted by 97BlackAckCL
I did the same proj retro as his
oh yeah, and i never really claimed to have done the mod myself.
as a seasoned AZ veteran, I've done and seen a lot of shit (DIY mods).
So I feel that I can pretty much dish out cliff's notes whenever I feel.
07-10-2007, 12:22 AM
#14
W WHIP.
Join Date: Jun 2006
Location: 412, PA & always ballin in FLO RIDA.
Age: 35
Posts: 3,859
Likes: 0
Received 1 Like
on
1 Post
Originally Posted by 97BlackAckCL
Around I'm waiting a week till I can take pics on the car, since I'm out of town right now, if people keep asking me, I may have to let the surprise go early
I'm waiting a week till I can take pics on the car, since I'm out of town right now, if people keep asking me, I may have to let the surprise go early 
 07-10-2007, 12:33 AM
#17
1999 CL3.0
Originally Posted by Nautsiju
as of now im pretty confident with the blackhousing.
though im still unsure about sanding the lenses.
any advice or tips on that?
though im still unsure about sanding the lenses.
any advice or tips on that?
then use toothpaste and really get in there good.
see if that does anything.
if you need more help, google "headlight polish"
and you should find some shit (its in a red can or container).
I think its meant for metal but does wonders on a headlight.
I dont know how quick I'd be to put sandpaper to clear plastic.
maybe wetsand, but I'd be reluctant to start experimenting.
maybe find a plastic scrap or a plexiglass scrap... something clear plastic
so you can test it out, similar to buffing on old body panel before buffing your car.
capish
07-10-2007, 07:48 AM
#18
Senior Moderator
Regional Coordinator
(Mid-Atlantic)
Regional Coordinator
(Mid-Atlantic)
iTrader: (6)
Originally Posted by dragon084
One of a kind... I don't think Mike's level of work is easily matched,
oh yeah, and i never really claimed to have done the mod myself.
as a seasoned AZ veteran, I've done and seen a lot of shit (DIY mods).
So I feel that I can pretty much dish out cliff's notes whenever I feel.
oh yeah, and i never really claimed to have done the mod myself.
as a seasoned AZ veteran, I've done and seen a lot of shit (DIY mods).
So I feel that I can pretty much dish out cliff's notes whenever I feel.
 07-10-2007, 10:39 AM
#19
Bagel Bomber
Originally Posted by 97BlackAckCL
Mike is def the man, but I def feel that I've matched or exceeded your retro in doing my own
 07-10-2007, 11:31 AM
#20
Racer
Thread Starter
Join Date: Mar 2007
Age: 36
Posts: 374
Likes: 0
Received 0 Likes
on
0 Posts
Originally Posted by dragon084
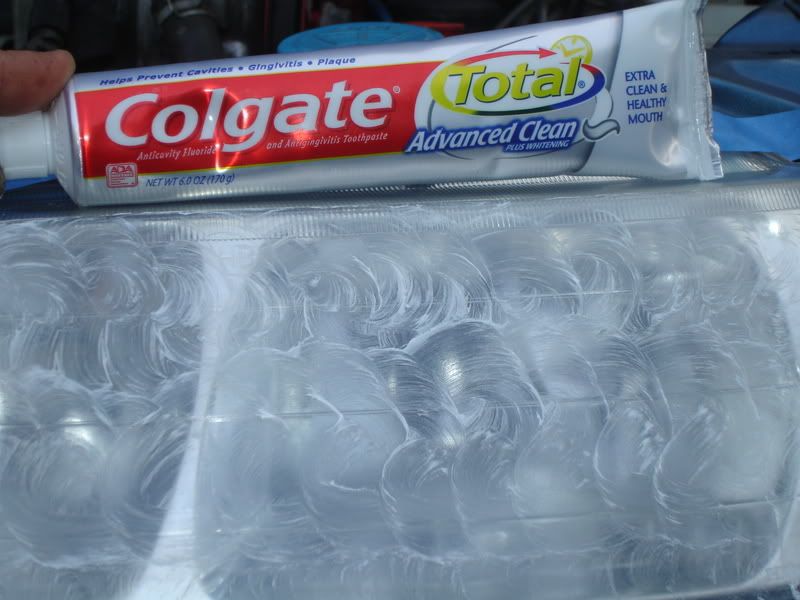
first clean with dishwasher soap.
then use toothpaste and really get in there good.
see if that does anything.
if you need more help, google "headlight polish"
and you should find some shit (its in a red can or container).
I think its meant for metal but does wonders on a headlight.
I dont know how quick I'd be to put sandpaper to clear plastic.
maybe wetsand, but I'd be reluctant to start experimenting.
maybe find a plastic scrap or a plexiglass scrap... something clear plastic
so you can test it out, similar to buffing on old body panel before buffing your car.
capish
lol really toothpaste??
07-10-2007, 12:25 PM
#22
speaking from experience, sanding your headlight lenses can provide some nice 'temporary' results, but when you sand them you're also sanding down their protective clearcoat, which means after some time they will become a bit hazed and yellowed (even if you regularly maintain them). A way to get around this is to buy some 3m clear vinyl uv overlays and cut them to fit your lenses.
I've sanded one of my jdm headlights on my 4th gen because of severe pitting, and though it looked good for a few months, after exposure to the sun I did notice the lense slowly hazing over time, even though I polished them regularly
I've sanded one of my jdm headlights on my 4th gen because of severe pitting, and though it looked good for a few months, after exposure to the sun I did notice the lense slowly hazing over time, even though I polished them regularly
07-10-2007, 12:27 PM
#23
oh and certain toothpastes do work for polishing, because they contain fine level abrasives. though I'd opt to just spend a couple bucks and buy some real plastic polish. I mean, who the hell wants aqua fresh on their car? lol
07-10-2007, 12:30 PM
#24
1999 CL3.0
Originally Posted by fliplyricist1
I mean, who the hell wants aqua fresh on their car? lol
I think his headlights are off of the car.
 07-10-2007, 06:26 PM
#26
Senior Moderator
Regional Coordinator
(Mid-Atlantic)
Regional Coordinator
(Mid-Atlantic)
iTrader: (6)
Originally Posted by Mach30SiR
Useless statement with out pictures....
and greg I wasn't tryin to hate on ya, just sounded like you were saying you did it, and I know mike is god, he's been my inspiration for 4 years to do my retro
07-10-2007, 08:09 PM
#27
Land of Pleasant Living
Join Date: Sep 2005
Posts: 2,619
Likes: 0
Received 0 Likes
on
0 Posts
Originally Posted by 97BlackAckCL
I did the same proj retro as his and left the housings chrome and they look sick as fook
i'm really curious how you are handling the shroud.. using something off another car or making your own or using some other obscure piece from something else..
hopefully i can come check it out next month if i finally get my ass up to pittsburgh
07-10-2007, 08:22 PM
#28
Nom Nom Nom Nom
Blackhousings are a lot easier to than they sound. I was scared as shit when I did my first one. But once I got though the first one the second one was cake.
I hit the chrome with some sandpaper (not a lot, just enough to scuff them up), then 2 coats of grey primer, Then 2 coats of paint. The whole thing took me 2 days. I wanted to make sure the housings were dry. I let them dry overnight, then threw them back in the next day... Be careful putting them back together though, just because of smearing the new silicone bead you put around them. Make sure you are thorough with the new bead though so you dont get any gaps where moisture could get into.
As far as cleaning the lenses, I have no clue. Mine were perfect.
Main thing. Be careful, take your time, and dont force anything. Once you take them out of the oven, they should just pry right apart with a little amount of force. You will know when the silicon is heated up just right. Just TAKE YOUR TIME!!!!!!!
07-10-2007, 09:36 PM
#31
Senior Moderator
Regional Coordinator
(Mid-Atlantic)
Regional Coordinator
(Mid-Atlantic)
iTrader: (6)
Originally Posted by shnee420
whenever i get the money to get my projectors in, i want to keep everything chrome too.
i'm really curious how you are handling the shroud.. using something off another car or making your own or using some other obscure piece from something else..
hopefully i can come check it out next month if i finally get my ass up to pittsburgh
i'm really curious how you are handling the shroud.. using something off another car or making your own or using some other obscure piece from something else..
hopefully i can come check it out next month if i finally get my ass up to pittsburgh
 07-10-2007, 10:03 PM
#32
Racer
Thread Starter
Join Date: Mar 2007
Age: 36
Posts: 374
Likes: 0
Received 0 Likes
on
0 Posts
thanks u guys were a great help.i didnt do anything lol cuz from what i heard 1 day isnt enough time since i shouldnt rush. so its a project for later. though on the bright side i told the body shop to take out my intake resonater and install my new headlight bulbs so i dont have to =)
07-10-2007, 11:49 PM
#33
I did my first retrofit into my accord housings in 1 day, no joke. I had to complete it because I had to drive my car the next day. Needless to say, it was straight work beginning to end, but really taught me a bunch. My second retro only took me about 3 hours (minus jb weld setting time and blackhousing drying time). But to all those that may be scared to open up their headlights...don't. Just be smart and take your time if it's your first time.
I personally leave mine in the oven at 275 degrees for about 7 minutes at a time. Pry them open with a then flathead screwdrive wrapped with a thin towel (so you won't warp the housing plastic) and gently pull them appart. Once you have established an opening big enough to stick an object in, place it in there (another screwdriver is good)...and use the second screwdriver to pry the rest of the housing open. It's cake.
Then what I do is use clear silicone (i dont like colored ones as sometimes a small amount might seep and be visible) and put the headlights back together and stick them in the oven for 5 minutes at 275
then take them out and let them cool off for a good hour before putting them back on your car
heating them up with the silicone will allow it to flow and become consistent and really fill in the gaps.
07-11-2007, 12:37 AM
#34
Land of Pleasant Living
Join Date: Sep 2005
Posts: 2,619
Likes: 0
Received 0 Likes
on
0 Posts
Originally Posted by fliplyricist1
I personally leave mine in the oven at 275 degrees for about 7 minutes at a time. Pry them open with a then flathead screwdrive wrapped with a thin towel (so you won't warp the housing plastic) and gently pull them appart. Once you have established an opening big enough to stick an object in, place it in there (another screwdriver is good)...and use the second screwdriver to pry the rest of the housing open. It's cake.
I would like to make this sound very wrong, but I don't have the energy

 07-11-2007, 01:02 PM
#37
Nom Nom Nom Nom
Originally Posted by shnee420
I would like to make this sound very wrong, but I don't have the energy
The only thing I would do differently is the temp. I think I did mine at 315.. But I could be off.
07-11-2007, 03:10 PM
#38
Land of Pleasant Living
Join Date: Sep 2005
Posts: 2,619
Likes: 0
Received 0 Likes
on
0 Posts
Originally Posted by SwervinCL
Thats because, for the most part, he is right.... So you can't really make him sound wrong.
The only thing I would do differently is the temp. I think I did mine at 315.. But I could be off.
The only thing I would do differently is the temp. I think I did mine at 315.. But I could be off.
Um, I meant change a few words to make it very sexual.
I'm not arguing what he said.
07-11-2007, 06:10 PM
#39
Racer
Thread Starter
Join Date: Mar 2007
Age: 36
Posts: 374
Likes: 0
Received 0 Likes
on
0 Posts
well i got some plastX and my dads oscilating (sp?) buffer and went to work and it turned out pretty good. i wish i did another coat but we didnt. i returned the headlights this morning and can wait to get my car back friday

Thread
Thread Starter
Forum
Replies
Last Post
AmplifiedDetails
3G TL Problems & Fixes
9
09-24-2015 02:55 PM