
G-031: [DIY] Accord Fogs with Type-S Grills on '04-'06 TL
 04-29-2011, 07:58 PM
#1
Race Director
Thread Starter
iTrader: (8)
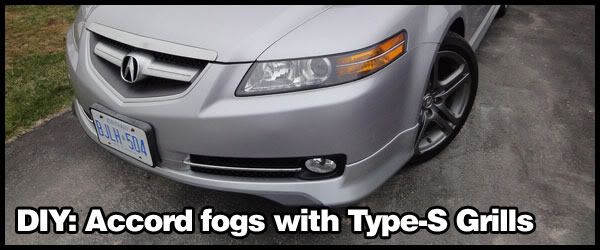
G-031: [DIY] Accord Fogs with Type-S Grills on '04-'06 TL
Click Here to check out NSXCessive's wiring and mounting DIY for EVEN MORE Accord Foglight information - the more the merrier, right? =)
Hey guys,
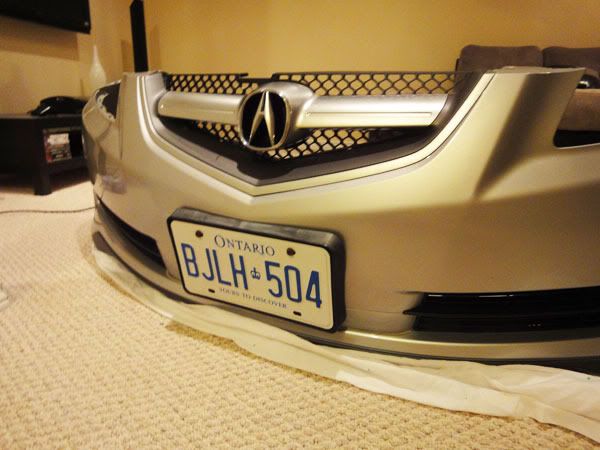
A few weeks ago, I posted a teaser picture of parts I purchased, and some people thought it couldn't be done.
I present you... the DIY to Accord Fogs with the Type-S grills.
Just letting you know in advance, that for this mod, I can not tell you exactly where to cut, measurements, etc, since this is a retrofit.
Everyone's results turn out different.
Materials:
+ Dremel (with cutting bit and sanding bit)
+ Drill (and drill bits)
+ Various Screws and screwdrivers that you probably have in your garage.
+ Safety Goggles (you DO NOT want pieces of plastic in your eyes)
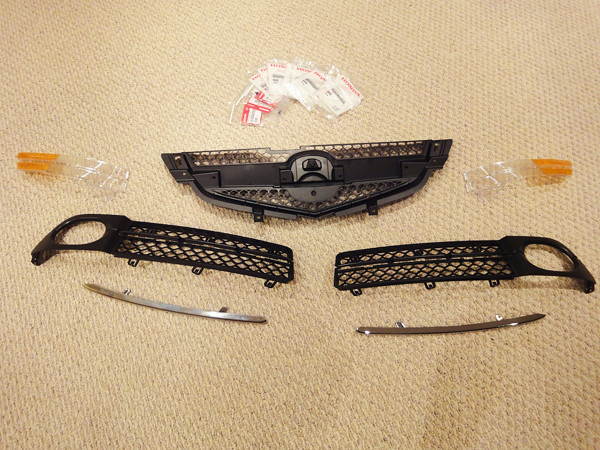
Getting the Parts:
Okay, so here is what you have to buy:
Type-S Lower Grills: 71107-SEP-A20ZA, 71102-SEP-A20ZA
Type-S Chrome Bars (for the lower grill): 71126-SEP-A20ZA, 71121-SEP-A20ZA
Center Grill: 71120-SEP-A10ZA
Alternately, you can get the base 07/08 lower grill bars if you want it to match your silver (non-chrome) upper grill.
Get those 5 parts ordered, and order some Accord fogs too.
In my install, I used OEM 03-05 Accord Sedan Fogs.
Okay so now that we have all our parts, we're ready to start working!
Disclaimer:
This modification requires you to cut your grills, fogs, and bumpers. If you mess up, I will not be held liable.
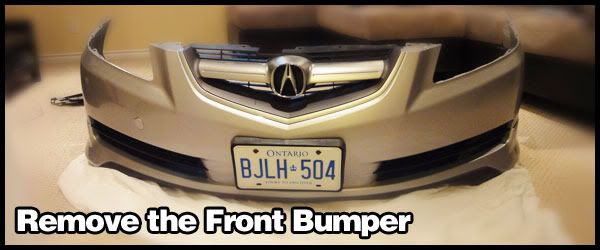
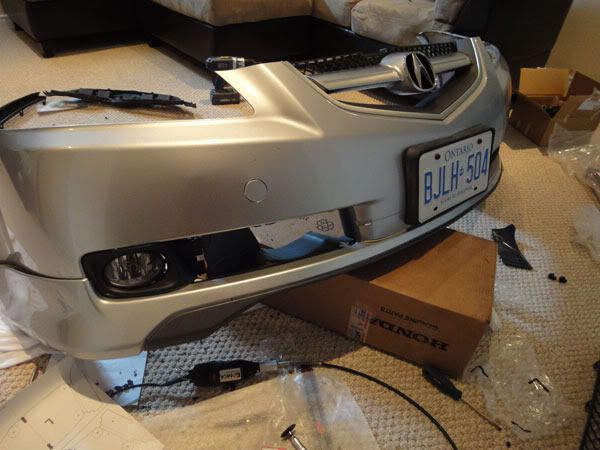
For this mod, you have to remove your front bumper.
Check out this cool video showing you how:
http://www.youtube.com/watch?v=U1C5VJtetN8
Last edited by Bearcat94; 07-12-2011 at 04:56 PM.

The following 3 users liked this post by guitarplayer16:
04-29-2011, 07:59 PM
#2
Race Director
Thread Starter
iTrader: (8)
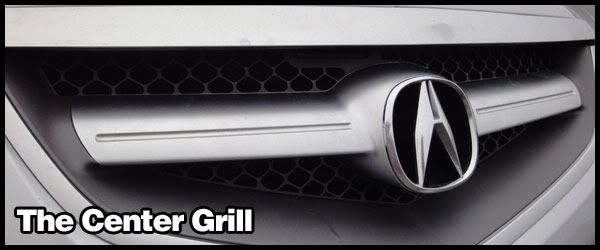
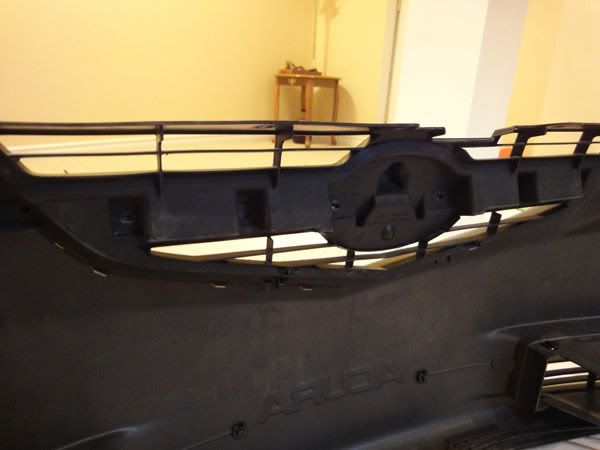
Step 1: Remove your old grill
There should be a lot of screws that hold the grill in. Remove them with a Philips Screwdriver and place them aside.
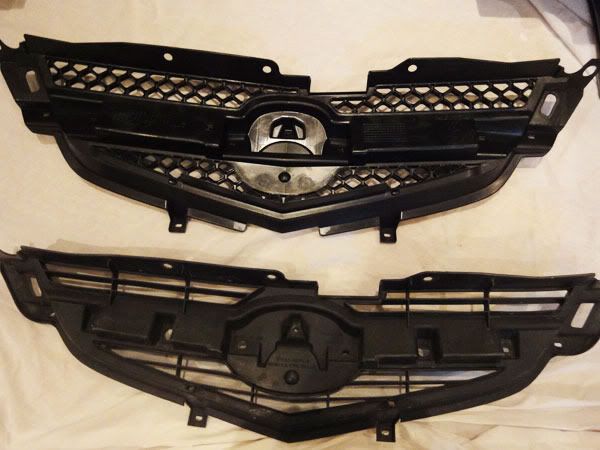
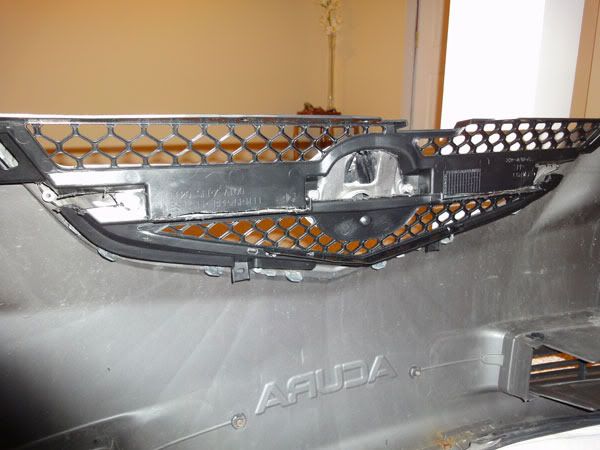
Comparison between the two grills:
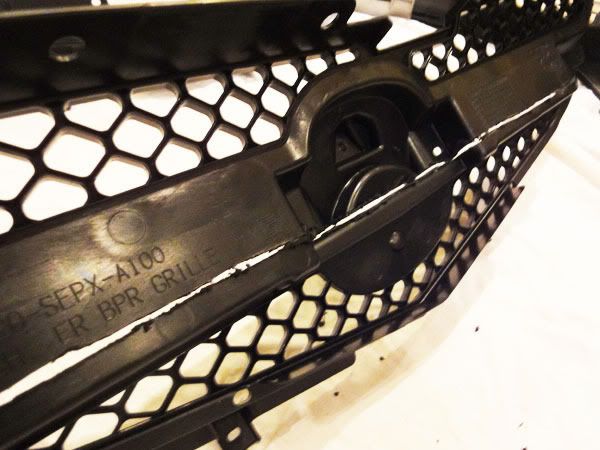
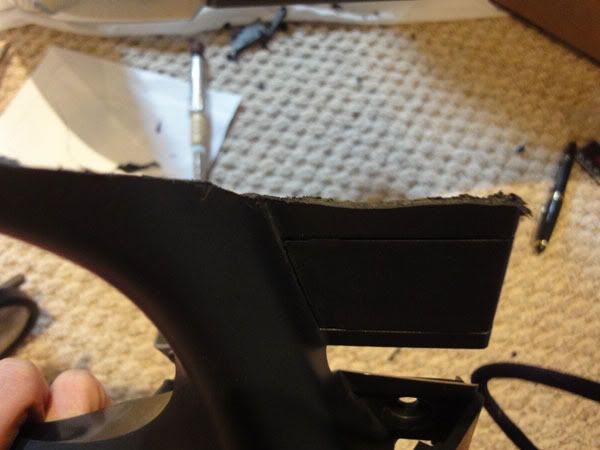
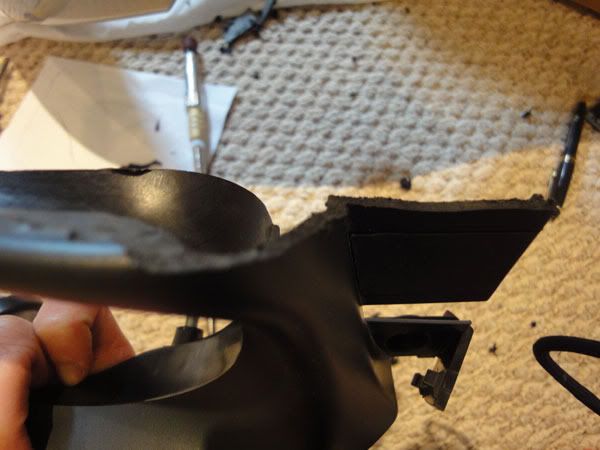
Step 2: Cut your new Type-S grill in half
The Type-S grill is a little tall, so we'll be removing some of the middle section which is behind the bar, so nobody can see your cuts.
You can see where I cut it in half, using the labels as reference:
I suggest you cut higher than where I cut, because I found out I cut a little too close to where the cuts would be visible lol

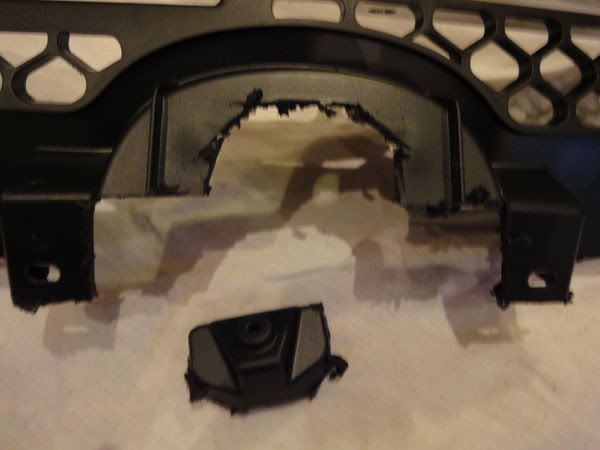
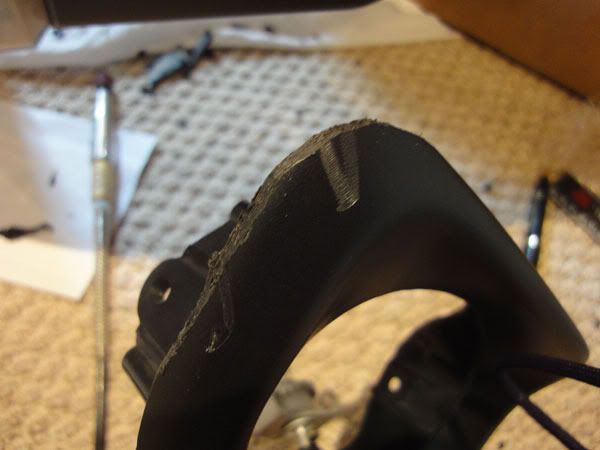
Step 3: Cut out this little mounting nub.
Step 4: Mount this upper half onto the bumper
Using the stock mounting points, you can screw in a few screws to mount the top half.
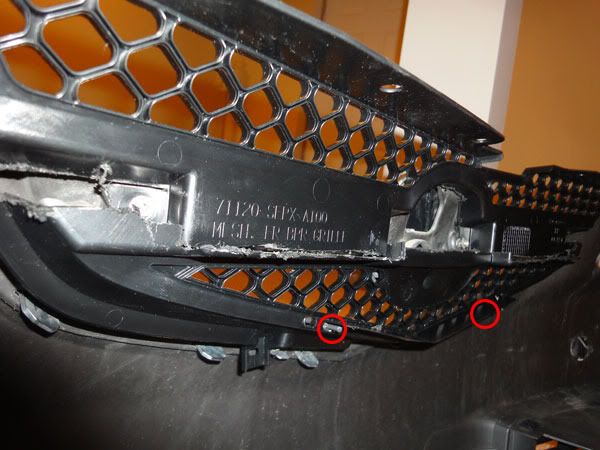
Step 5: Mounting the bottom half
Okay, for this bottom half to fit, you have to make new holes at the bottom of the grill so it would fit with the two little sticks that point out from the bumper.
Just grab your drill and a drill bit that's the same size as the things that stick out of the bumper, and drill away.
Make sure you DO NOT drill into places where you don't want to drill, so watch the angle that you drill at or you might go through the other side.
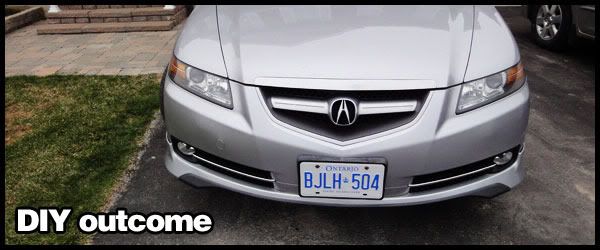
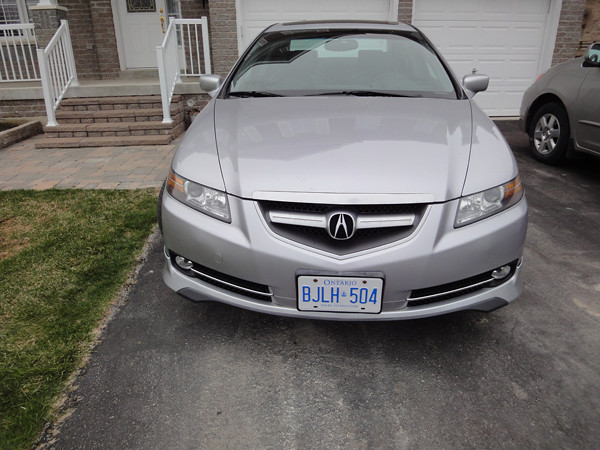
Final product after cutting/trimming:
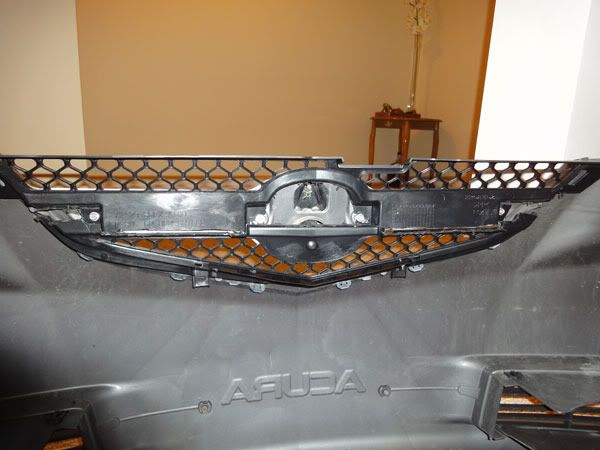
Step 6: Mounting everything onto the bumper for good
Okay, so I'll tell you the exact steps for what I did to finalize everything.
Don't worry if the grill doesn't look like it fits right, because the curvature is different, but it will look good when the bumper is back on the car.
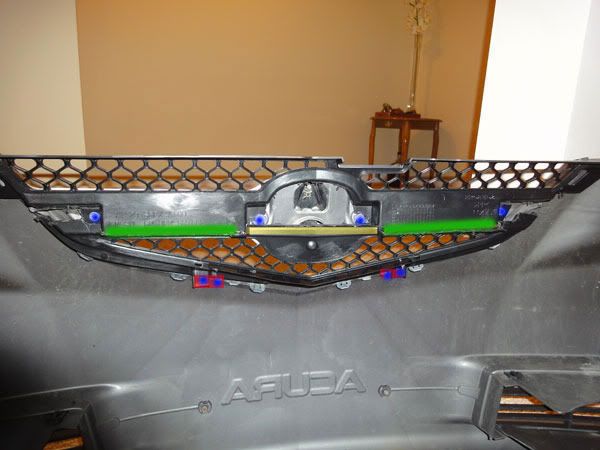
The top half got mounted using 4 screws (blue)
The bottom half got mounted using a custom bracket I used made out of plastic, so always save the plastic you make with your cuts. I then drilled two holes in the piece of plastic bracket. Then I used the mounting screws and screwed everything in. So yeah, all you have to do is find a piece of plastic and drill 2 holes in it to make a custom bracket lol (red)
Then lastly, I JB-Welded the top half to the bottom half. (green)
Legend:
Blue: OEM screws from old grill (6)
Green: JB Weld
Red: Plastic bracket made from plastic scrap lol
Yellow: This section of the bottom half pushes in perfectly with the opening of the top half.
That's it!
The center grill is done and mounted!
If you spot any light around the edge your grill, just remember it's okay and when the bumper is on the car, you won't see it.
Last edited by guitarplayer16; 04-29-2011 at 08:12 PM.
04-29-2011, 07:59 PM
#3
Race Director
Thread Starter
iTrader: (8)
Here comes the Accord DIY.
The hardest part.
I made my fogs point inwards as much as possible so everything is flush with the bumper and doesn't glare oncoming traffic.
This was inspired by AckTL05's installs.
Just a warning: the install will take a long time, with this DIY or not.
You have to cut behind the bumper, the fog lights, and the (brand new) lower grills.
You can DO IT. It will take a long time.
My install spanned me a whole week, which days I spent 6 hours doing nothing, trying to figure how to make the fogs fit.
Also, my fogs were trimmed for my A-Spec front lip, so if you don't have one, you can't really follow my instructions too detailed LOL
Step 1: Un-Attach A-Spec Lip
If you have an A-Spec lip, don't fully remove it; just un-attach the side, and have the lip still mounted from the middle screws.
Step 2: Remove the lower grill
There are 6 tabs, 3 on top, 3 on bottom. Make sure you don't scratch your lip kit if you have one.
Step 3: Cutting the Area Behind the Fogs
Cut the area behind the fogs so they can fit in.
This is the first cut I did:
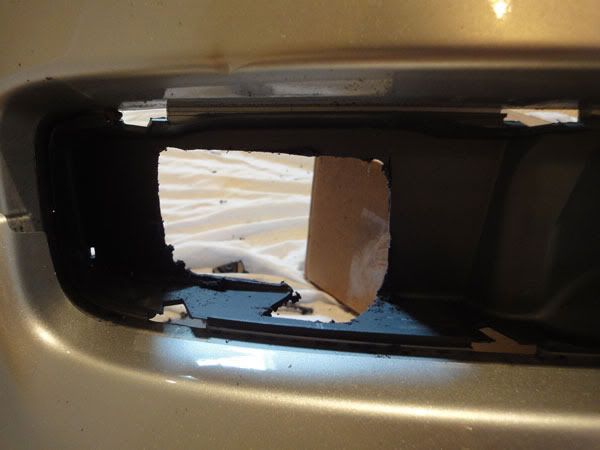
I was then told the cut was too small and I had to widen it.
Step 4: Trimming the fogs
Okay, this step is the hardest because it requires you to trim, then test fit.
Then you do that about 100 times again until it fits nicely.
You want your A-Spec lip in position while trimming the fogs.
DO NOT GIVE UP DURING THIS STAGE!
I was actually about to give up, but then everyone convinced me that all I have to do is keep trimming it down mm by mm.
When I tried placing it in:
You'll notice the fogs have a weird curve to it, so we're gonna try to level things out.
First thing I trim is the plastic on top of the tabs.
Then I trim the inner-top.
Then I trimmed the upper outside edge.
Be careful when you're trimming and take your time.
I went a little fast and the bit caught the edge and dragged it down on the accord fog housing. It also caught my A-Spec lip and made an inch mark in it DAMN ME!!!!
Really hardly noticeable though, so if you do happen to screw up, let it slide lol.
Then I trimmed along the whole bottom to make everything fit with the A-Spec lip. Didn't trim too much though, just a few mm's.
Then I had to make a notch on the outside edge to fit with the A-Spec lip.
Make sure everything is just flush with the bumper.
How much did I end up cutting behind the fog area?

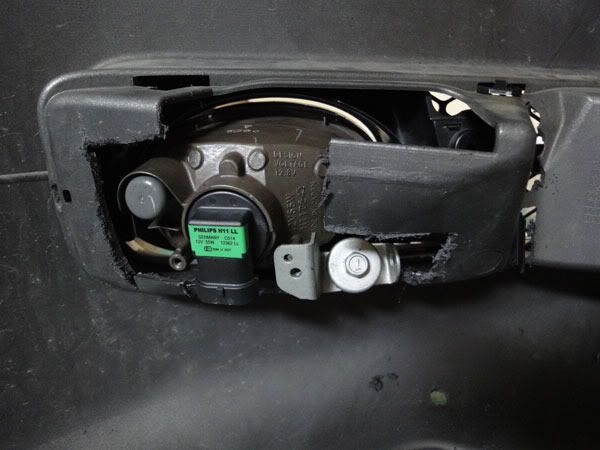
Step 5: Mounting the Fogs
You can really mount them any creative way you want.
I decided since the foglights were already really jammed in the opening, I only need one screw into the bumper.
So what I did was I dremeled (with sanding bit) a small hole big enough to fit the screw on the outmost side behind the bumper, found a long screw that fit with the screw hole on the fogs, and used a BIG washer. Did the same for the other side.
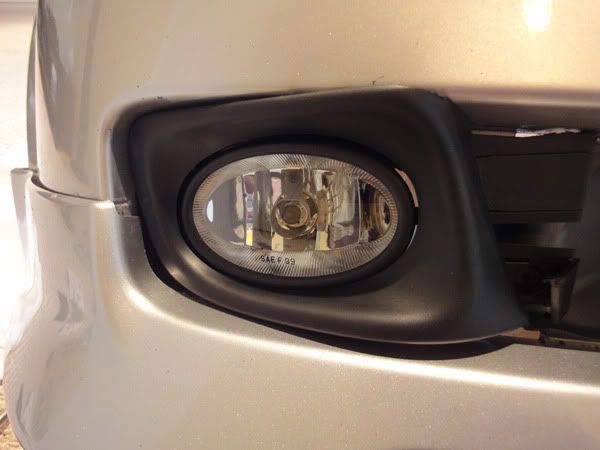
Make sure everything is flush and nice how you want it.
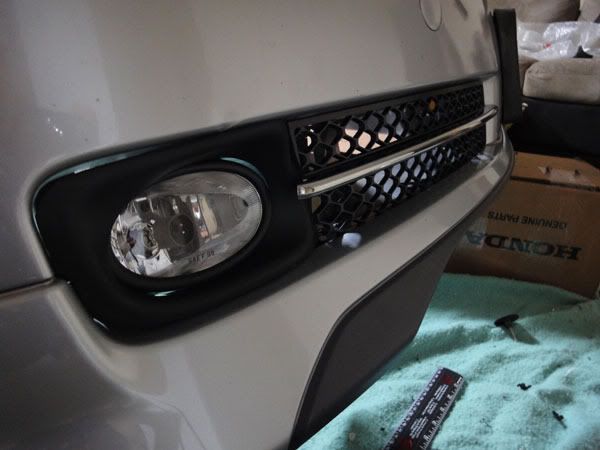
Here's a picture:
Make sure those are tight, and screw in the other side, with the screw that came with the fogs, and screw in the screw that's directly behind the fogs (that are hooked to the silver bracket).
So yeah, I only used 3 screws for each fogs to mount them LOL
They're not going anywhere either.
You can use the tabs and a really long screw too, but I felt that my fogs were already jammed tight so no need; plus my Type-S grill is holding them really tight.
Step 6: Cutting the Type-S grill
Start by cutting the fog light section of the grill.
Stupid me didn't take any pictures of the cutting.
Then put the grill against the bumper, and mark off where you need to cut so it would fit in with the Accord fogs.
You can really eye-ball where to cut.
Step 7: Mounting the Type-S Lower Grills
To mount them, you have to widen the mounting holes.
I only widened the 2 (top and bottom) inner mounting holes. I made the holes wider and closer to the other holes.
Use a dremel (sanding bit) to widen them.
Then you partially remove the A-Spec lip and slip them in.
This step might take a few tries and trims.
The cool thing about when I put my lower grills in, and then I pushed the A-Spec lip in, it caught my Accord fogs and made them perfectly flush with the bumper lol.
Step 8: Mount the chrome bars
We're almost done!
Take your chrome bar, then line it up with the mounting holes at the bottom and push in until the mounting clips click in. I then found out that the mounting holes had some "play" left and right, so I pushed the chrome bar as close inwards as it will go.
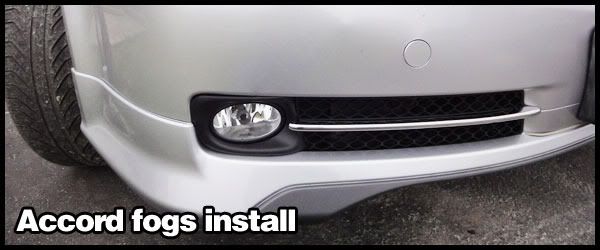
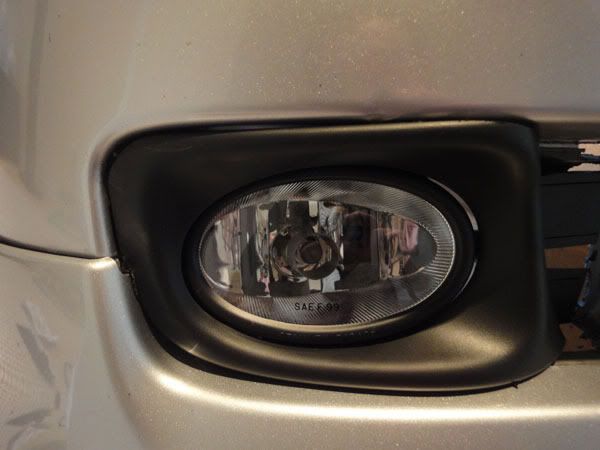
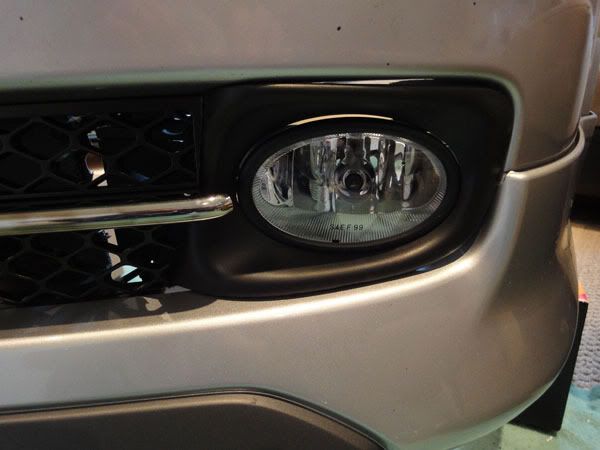
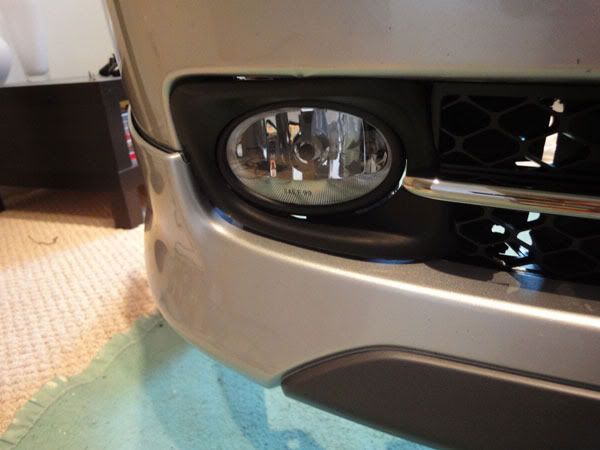
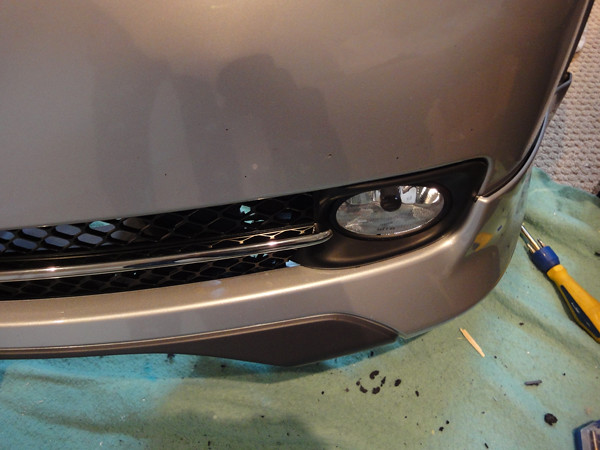
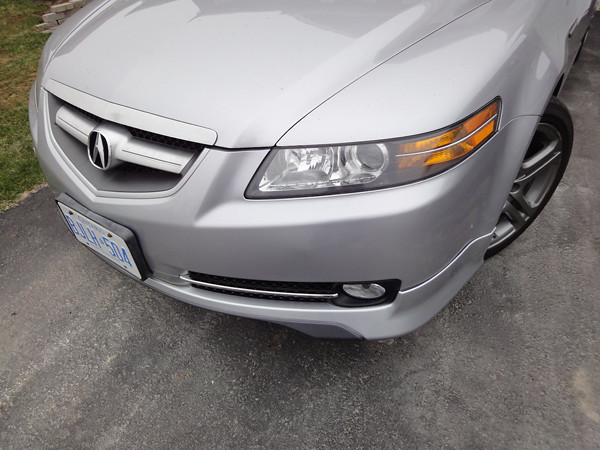
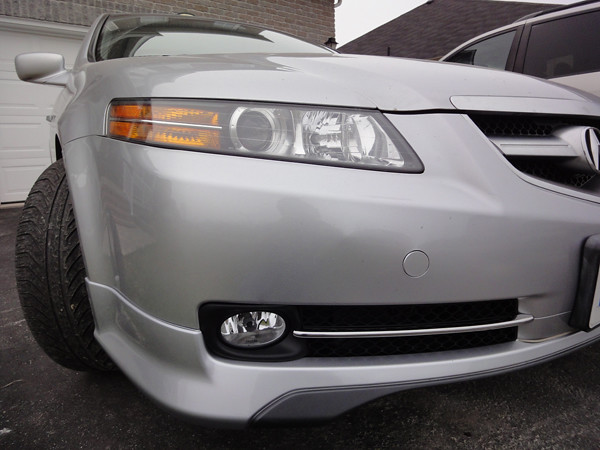
All done!
Everything should look flush.


Last edited by Bearcat94; 04-30-2011 at 01:55 PM.
The following 4 users liked this post by guitarplayer16:
04-29-2011, 08:00 PM
#4
Race Director
Thread Starter
iTrader: (8)
Materials:
Screwdrivers, electric tape, wire (16 gauge is what I used), ring terminal, butt-connectors, T-Tap or Splice connectors, in-line fuse.
This is how you wire the fogs up so they come on when your parking lights turn on. I DO NOT recommend you do this if you plan on using an HID kit for your fogs.
We will be starting the wiring from the inside.
Step 1: Remove the driver's lower dash panels
All I had to do was remove a screw on the right most side, and just a lot of force to take out the driver lower dash panel.
The bottom panel will fall out too.
Unplug all connectors
Step 2: Remove the dummy switch
We have to remove the dummy switch in order to put in our new foglight switch.
All you have to do is pinch in the top and bottom and push it out to remove the dummy switch.
Step 3: Place in the foglight switch
Now since the dummy switch is out, we now place our foglight switch in.
All you do is push the switch in from the outside.
Step 4: Plug in the blue skinny connector to the switch
Pretty simple,. Take your switch harness and find the skinny blue connector. Just push it in until it clicks.
Step 5: Ground the switch
There will be a black wire with a ring terminal at the end. All you have to do is bolt the terminal onto a ground point. The point I used was directly under the steering wheel.
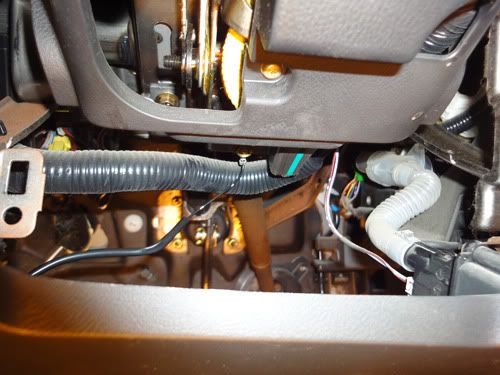
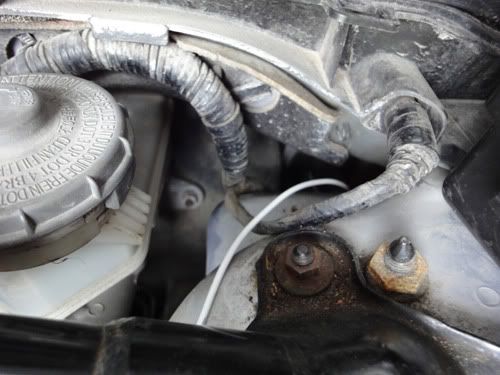
Step 6: Run a long wire through the firewall
For this, you're going to have to use your brand new roll of 16 gauge wire.
From inside the car, look to the left under the driver's dash. You should see a big bunch of wires coming from one big hole in the firewall.
What I did, was just taped wire to the end of a coat hanger, and POKED using little force, through the rubber. Then you grab the wire through the engine bay. Remove the plastic covers in the engine bay of course.
Step 7: Hook that new wire up!
Now, that the hard part is over, cut the wire to a good size that will reach your relay. Then inside your car, connect the "new wire" to the green wire on the switch harness.
You'll have to remove some plastic from the harness to connect the wires.
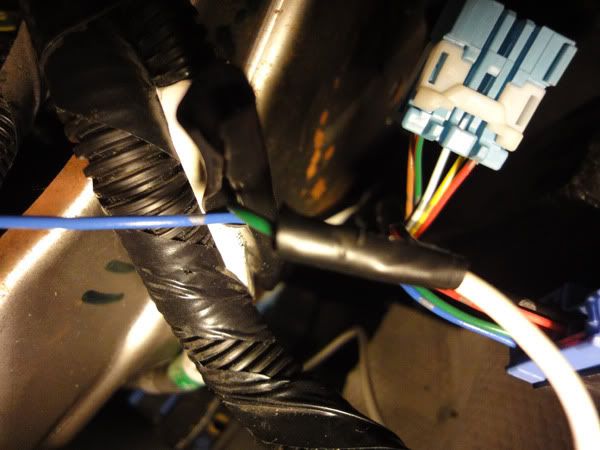
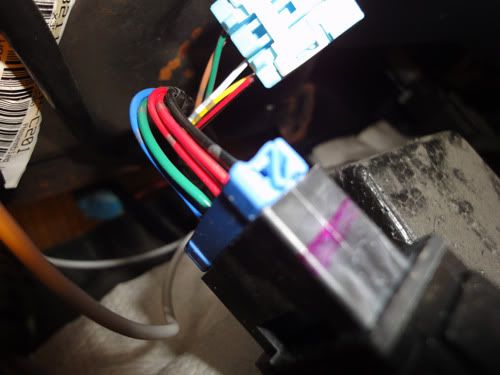
Last step inside the car: Tapping into the parking lights.
See the solid blue wire on your switch harness?
Yeah, that wire taps into the parking light wire.
The parking light wire is the top left wire that is red and black.
I used splice connectors, so it was difficult.
All done inside the car!!!!
Now onto the engine bay.
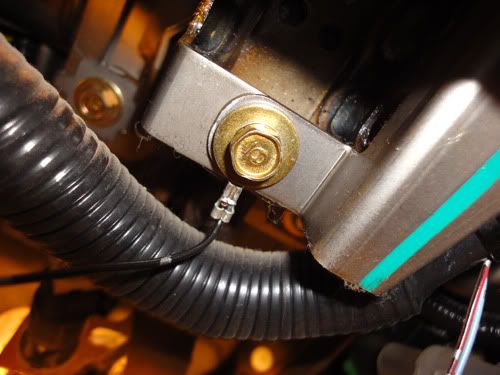
Step 1: Bolt down the relay.
Your kit came with two relays. One black and one gray.
Use the black one only, and put the gray one away haha
You want to bolt down your relay somewhere.
I bolted mine beside the battery using the engine air filter box.
Step 2: Connect the harness to the relay.
Next, take the brown connector from your fog harness, and plug it in the relay.
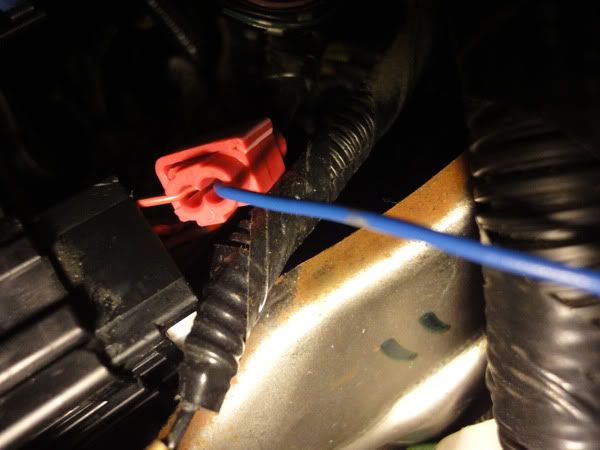
Step 3: Getting the POWAH!!
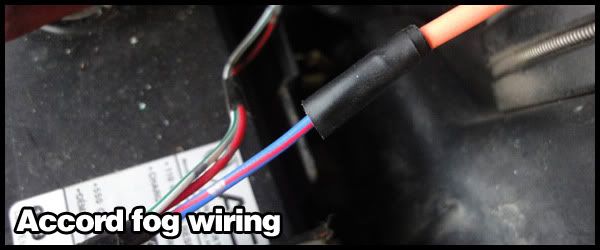
On your fog harness, there should be a red and blue wire.
Clip off the end, and connect it to an in-line fuse holder.
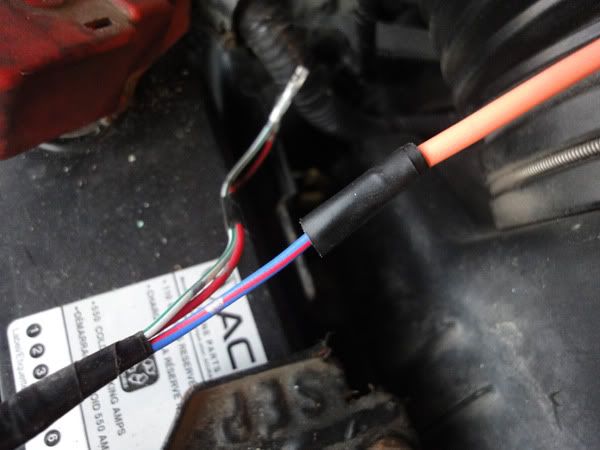
Then at the end of your in-line fuse holder, add a ring terminal to it.
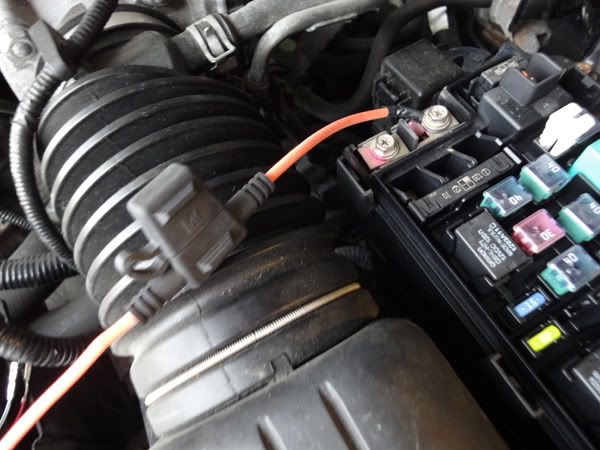
Then open the fuse box, and unscrew the bolt farthest from the front.
Put the terminal in, then bolt her down.
Step 4: Connect the wire that we ran though the firewall
So you still have that "new wire" hanging around.
Now we're going to connect that new wire, to the green wire on the brown skinny connector.
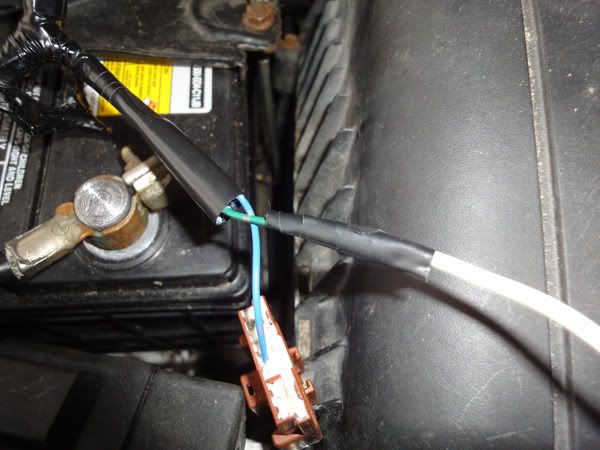
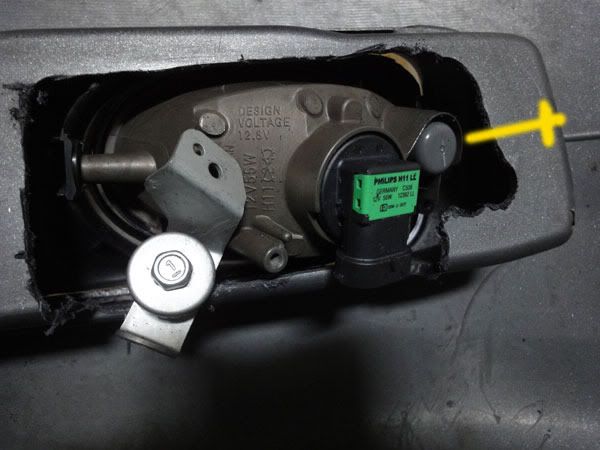
Step 5: Grounding
In-between the two fog connectors, there are two black ground wires with a ring terminal. Cut off the ring terminal (with an inch of wire still on it so you can splice later!). Then place this aside.
Then take your roll of new wire your bought and cut two 3' long wires. What we're doing is extending the ground wires.
Then you're going to connect the new wires to the ground wires.
Then at the other end of these new wires, connect the ring terminal (with the inch of wire so that we can splice) that we cut off earlier.
Then bolt this ring terminal to the body ground. I used the same ground as the battery.

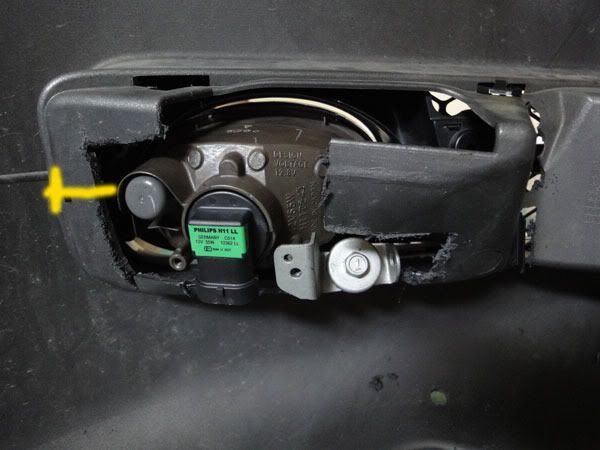
Last Step: Connect the fogs.
Well, this one should be the easiest.
All you do is take the fog connector, and push it into the bulb until it clicks.
YAY! All done!
It wasn't so hard, was it?
Now, I'm telling you right now; how you organize or place your wires are all up to you. I'm probably going to clean my wiring up myself, when I have time. I'm just glad mine light up LOL
Special thanks to omnuts and rockstar143 who helped me throughout the whole process.

If you have any questions, just let me know and I'll do my best to answer it.
I'd like to thank DeathMetal, jwr0ng626, Mem04TL, rockstar143, omnuts, Roger555, AckTL05, el.profe for helping me with this mod, which in turn helps me make this DIY for you guys to use.
Cheers!
Last edited by Bearcat94; 05-01-2011 at 10:24 PM.
The following 11 users liked this post by guitarplayer16:
04socalTL (09-03-2011),
Bladehopper82 (04-09-2012),
CometVR4 (12-14-2011),
d5civic (05-03-2012),
DeathMetal (04-10-2012),
and 6 others liked this post.


Trending Topics
04-29-2011, 09:52 PM
#8
Race Director
Thread Starter
iTrader: (8)
Hope you find this DIY useful! =)
The Accord fog install DIY is done.
I'm just waiting for a moderator to edit my post =P
04-30-2011, 03:23 PM
#9
AZ Community Team

Join Date: May 2007
Location: N35�03'16.75", W 080�51'0.9"
Posts: 32,488
Received 7,771 Likes
on
4,342 Posts
Updated posts with add'l pics and info from guitarplayer.
Good job on the DIY.
Good job on the DIY.
04-30-2011, 04:04 PM
#10
Nice write up. I copied this guy's method from an old post back in 2007.
https://acurazine.com/forums/showthr...ght=grate+grin
https://acurazine.com/forums/showthr...ght=grate+grin
04-30-2011, 04:06 PM
#11

can't wait for the DIY wiring!
04-30-2011, 05:01 PM
#12
Race Director
Thread Starter
iTrader: (8)
Nice write up. I copied this guy's method from an old post back in 2007.
https://acurazine.com/forums/showthr...ght=grate+grin
https://acurazine.com/forums/showthr...ght=grate+grin
In all honesty, I did view your thread, though it wasn't really detailed, so I asked many others who have done it and they told me the same method; cut the grill in half to remove some height.
So then I made my own DIY.
Imagine if everybody who made an Accord fog DIY came in this thread, and said "You copied my method"...
If you want, I could post a link to your thread, and credit you
 04-30-2011, 09:12 PM
#17
Never thought you copied. That thread was old and buried so deep in the forum that I actually thought you never saw it along with everyone else. I figured it would be a good supplement to your thread with some additional pics. It's all about helping the newer folks out so no need to give me any credit. You did a good job on the mod and the write up.
04-30-2011, 10:56 PM
#18
Race Director
Thread Starter
iTrader: (8)
Thanks for the kind words, guys!
Thanks Crook!
Your pictures helped me do the mod, so it's best I credit you
Never thought you copied. That thread was old and buried so deep in the forum that I actually thought you never saw it along with everyone else. I figured it would be a good supplement to your thread with some additional pics. It's all about helping the newer folks out so no need to give me any credit. You did a good job on the mod and the write up.
Your pictures helped me do the mod, so it's best I credit you
04-30-2011, 11:35 PM
#19
Team Owner
iTrader: (2)
Join Date: Jan 2008
Location: Kansas City, MO (Overland Park, KS)
Posts: 36,545
Received 6,470 Likes
on
5,162 Posts
Very nicely done-your patience paid off!
2011 National AcuraZine Meet-Kansas City-June 12, 2011-Details Here!
.
2011 National AcuraZine Meet-Kansas City-June 12, 2011-Details Here!
.
05-01-2011, 08:23 PM
#23
Race Director
Thread Starter
iTrader: (8)
Thanks!
I was really growing impatient lol
Thanks =)
danke!
Thanks man.
Just an update guys: I finished the wiring today, so the DIY is coming up!
It's an idiot-proof wiring DIY, trust me.
I was really growing impatient lol
Thanks =)
danke!
Thanks man.
Just an update guys: I finished the wiring today, so the DIY is coming up!
It's an idiot-proof wiring DIY, trust me.
05-02-2011, 07:10 PM
#29
Race Director
Thread Starter
iTrader: (8)
You'll also get bragging rights for doing it yourself haha.
There were just so many people saying that there is not a DIY for the fogs that are detailed enough, so I decided if I'm doing the install, why not document it and write a DIY up?
Special thanks for the help !
Thanks !
05-03-2011, 09:11 AM
#30

Great write up and DIY guitarplayer, we thank your contribution!!
Do you know if the Type-S lower grill fit directly once the mounting holes are made bigger? Do they have a mount for the 07-08 fogs in the grill? I am thinking this maybe the easier option for a newb like me, although its more $$$$.
Do you know if the Type-S lower grill fit directly once the mounting holes are made bigger? Do they have a mount for the 07-08 fogs in the grill? I am thinking this maybe the easier option for a newb like me, although its more $$$$.
05-03-2011, 05:34 PM
#31
Race Director
Thread Starter
iTrader: (8)
Great write up and DIY guitarplayer, we thank your contribution!!
Do you know if the Type-S lower grill fit directly once the mounting holes are made bigger? Do they have a mount for the 07-08 fogs in the grill? I am thinking this maybe the easier option for a newb like me, although its more $$$$.
Do you know if the Type-S lower grill fit directly once the mounting holes are made bigger? Do they have a mount for the 07-08 fogs in the grill? I am thinking this maybe the easier option for a newb like me, although its more $$$$.
The Type-S grill will fit directly once the mounting holes are made bigger. It's probably the easiest step in this DIY =)
They indeed do have the mount for 07-08 fogs, but the shape of the bumper is different, so you don't use it and you just cut it off.
05-12-2011, 12:19 PM
#32
Instructor
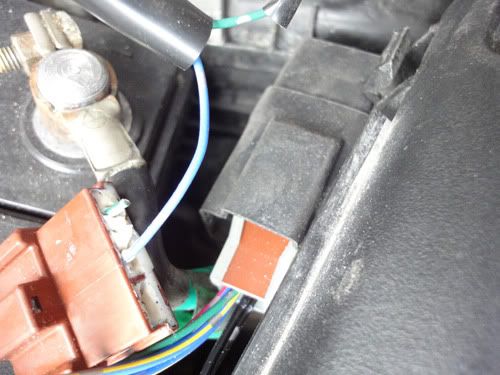
Great write up, but I'm stuck on one thing. Which wire did you tap in to for the parking lights? Maybe my '04 is different, but ALL my wires on that plug are red and black. From another thread I saw this picture:
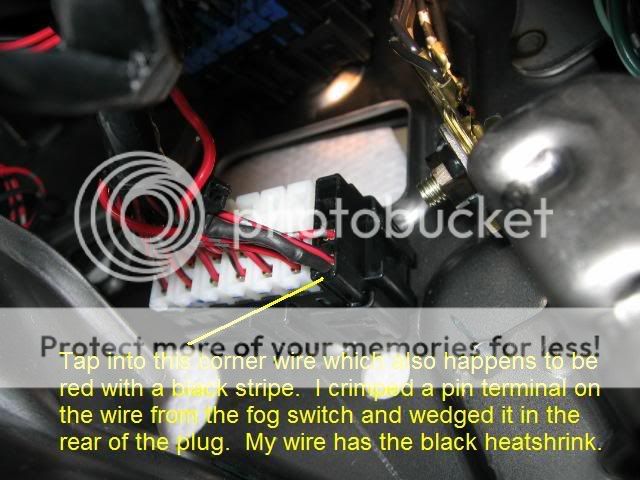
Is this the same one you used? It looks to be the bottom right, in the black clip (instead of the white), closest to the pedals. It's just tough for me to tell from what orientation you took the picture.
Is this the same one you used? It looks to be the bottom right, in the black clip (instead of the white), closest to the pedals. It's just tough for me to tell from what orientation you took the picture.
05-13-2011, 08:12 PM
#34
Race Director
Thread Starter
iTrader: (8)
Glad you got it working.
I think the picture you posted was taken upside down.
When you're looking at it, it's the top left wire you tap into.
In the picture it's the bottom right (upside down/reverse).
I think the picture you posted was taken upside down.
When you're looking at it, it's the top left wire you tap into.
In the picture it's the bottom right (upside down/reverse).
05-16-2011, 11:56 PM
#36
Fearless DIY Guy
iTrader: (2)
Wow, dude, thanks for the props!
Seriously, though - you've REALLY helped the community by taking the time from your install to help walk people through one of the more frustrating DIYs out there. This is seriously great stuff and you should be really proud of not only the outcome, but the quality of this DIY. Awesome, awesome job.
Seriously, though - you've REALLY helped the community by taking the time from your install to help walk people through one of the more frustrating DIYs out there. This is seriously great stuff and you should be really proud of not only the outcome, but the quality of this DIY. Awesome, awesome job.
05-17-2011, 12:01 AM
#37
Fearless DIY Guy
iTrader: (2)
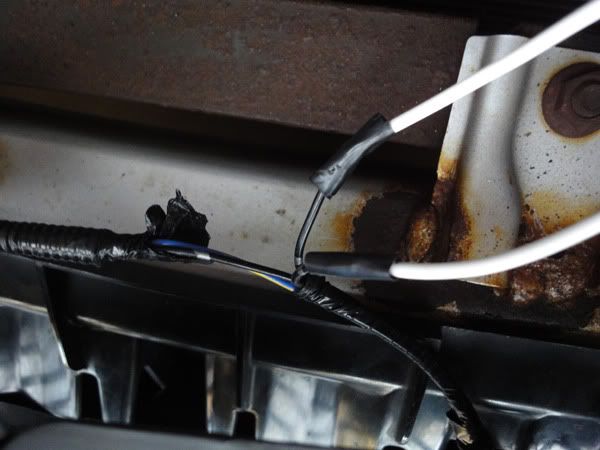
ONE OTHER QUICK NOTE TO YOU DIY'ERS:
There is a "blank" plastic grommet in the middle of the firewall. Acura was so kind and insightful as to leave us with a nice hole in the firewall for we DIY'ers to route our wires with relative ease.
Pop the grommet off and route your wires through here, if you wish. You can use this hole for your audio system power or the wires such as those stated above.
I apologize for the awful pic.
05-17-2011, 09:17 PM
#38
Race Director
Thread Starter
iTrader: (8)
Just tapping the trigger wire is different.
Wow, dude, thanks for the props!
Seriously, though - you've REALLY helped the community by taking the time from your install to help walk people through one of the more frustrating DIYs out there. This is seriously great stuff and you should be really proud of not only the outcome, but the quality of this DIY. Awesome, awesome job.
Seriously, though - you've REALLY helped the community by taking the time from your install to help walk people through one of the more frustrating DIYs out there. This is seriously great stuff and you should be really proud of not only the outcome, but the quality of this DIY. Awesome, awesome job.
Thanks for such the kind words!
Means a lot to me coming from a DIY writer =)
05-21-2011, 10:21 PM
#40
Race Director
Thread Starter
iTrader: (8)
Just make sure you won't wire the trigger wire to the parking lights. You don't want your HIDs to blink when you unlock/lock your car.
Wire it to your low beam fuse instead =)