Acura TL 2009-2014: How to Replace Shocks and Review
If your TL's ride is bouncy and your handling performance has diminished, it's probably time to swap out those old, worn out shocks. This article will walk you through the process of replacing your shocks and review some of the most popular options on the market.
This article applies to the Acura TL (2009-2014).
The 4th generation Acura TL received revised front end geometry for better ride and handling, but if your shocks have gone away, you are not going to get those benefits. You car's shocks take on an extreme amount of punishment every day, serving to smooth out the bumps and potholes you drive over. They are what separates the modern automobile suspension from a horse and buggy, and we can all be thankful for that, but when your shocks wear out, the magic disappears and your ride quality and handling suffer. Follow our handy DIY and swap those old shocks out for some new ones.
Table of Contents
How to Replace Your Shocks

Materials Needed
- Jack and jack stands
- Ratchet and assorted common size sockets
- Torque wrench
- Spring compressor tool
- Impact wrench (optional) or breaker bar
- Hex wrench
Before you start on the suspension, loosen the lug nuts on all four wheels. Then jack up the car and put it on jack stands, front and back, and take off all four wheels for easy access. If you only have two jack stands, do one end at a time.
Step 1 – Remove the front shocks/struts
- Pop the hood and remove the engine compartment covers on the left and right rear, as well as the right side fender, so you can access the upper strut mount nuts.
- Remove the four bolts on each side holding the shock tower brace on and pull it out.
- Remove the pinch bolt from the bottom of the strut and through bolt holding the wishbone to the lower control arm.
- Remove the three remaining nuts from the top of the strut tower under the hood and the entire coil over should be able to be pulled out.
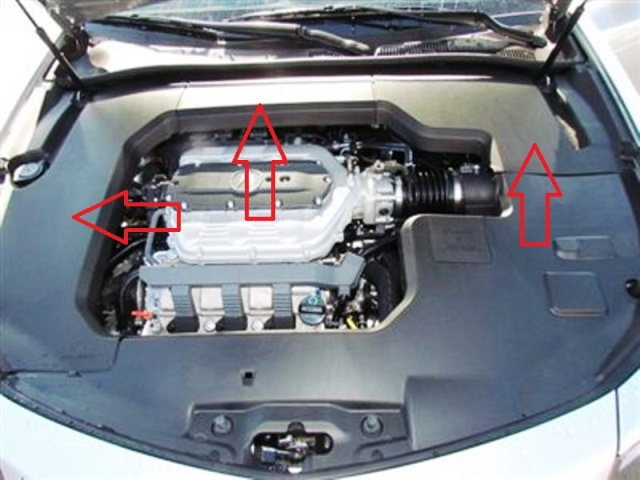
Figure 2. Remove these three engine covers. 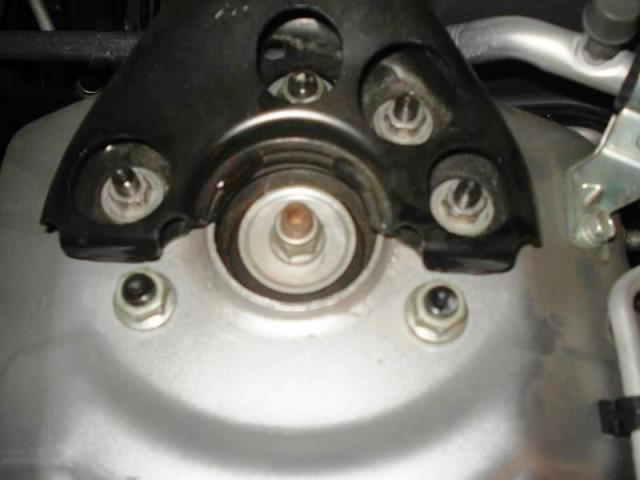
Figure 3. Unbolt and remove the shock tower brace. 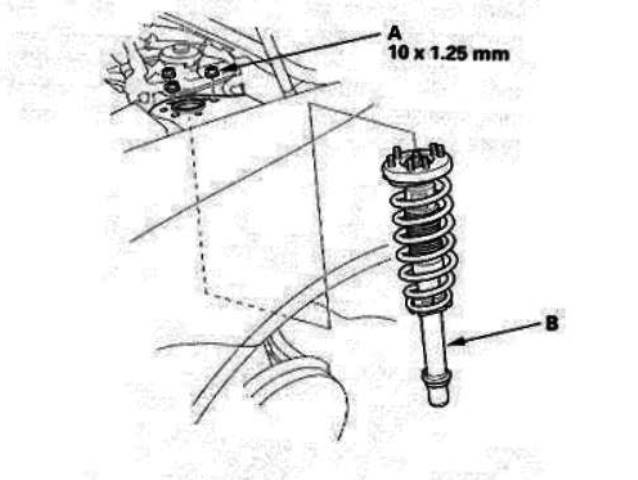
Figure 4. Unbolt the upper shock mount bolts. 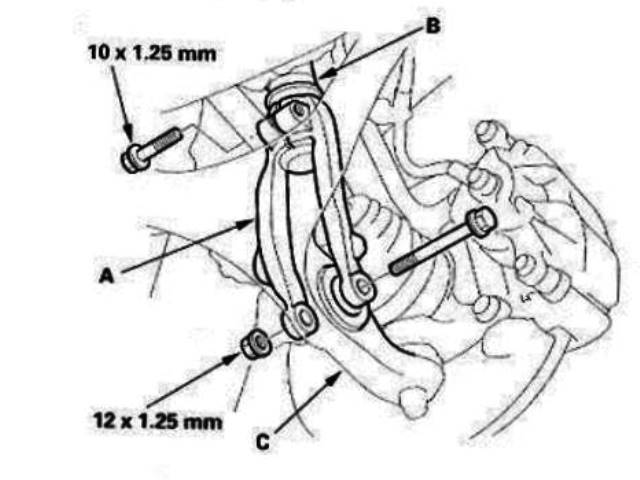
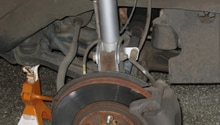
Figure 5. Unbolt pinch bolt and lower wishbone, and you will have room to remove the shock.
Step 2 – Install new shocks
- Use a spring compressor tool to compress the spring just enough to take pressure off the top nut.
- Remove the nut from the top of the coil over while holding the shaft from moving with a hex wrench.
- Release the compressor tool and disassemble the spring from the shock.
- Depending on which shocks you buy, you may need to reuse some of the parts.
- Insert the new shock into the spring and reinstall all the necessary parts except the top washer and nut.
- Compress the spring, making sure the bottom is aligned with the stepped part of the lower spring seat and the stud bolt is aligned with the aligning tab.
- Reinstall the top washer and nut, tighten, then remove the spring compressor.
- Reinstall the shock in the car and loosely tighten the pinch bolt, and top as well as bottom mounting nuts.
- Place a jack under the lower control arm and lift the suspension up so the vehicle's weight is on it.
- Tighten all the bolts, then reinstall the strut brace and engine covers.
Step 3 – Remove rear seat
Unfortunately, the only way to remove the rear shocks is to first remove the rear seat. This isn't hard, but if you don't know where the fasteners are you'll spend hours trying to find them.
- Press down on the seat cushion, and pull out the anchors holding it to the floor.
- Pull up and out, then feed the seat belts through the slits in the seat.
- Remove the four 10mm bolts holding the seat back to the floor.
- Pull the lower part of the seat back forward, then slide the whole seat up to unhook it at the top.
- Now you should be able to reach the upper bolts holding the shocks to the rear towers.
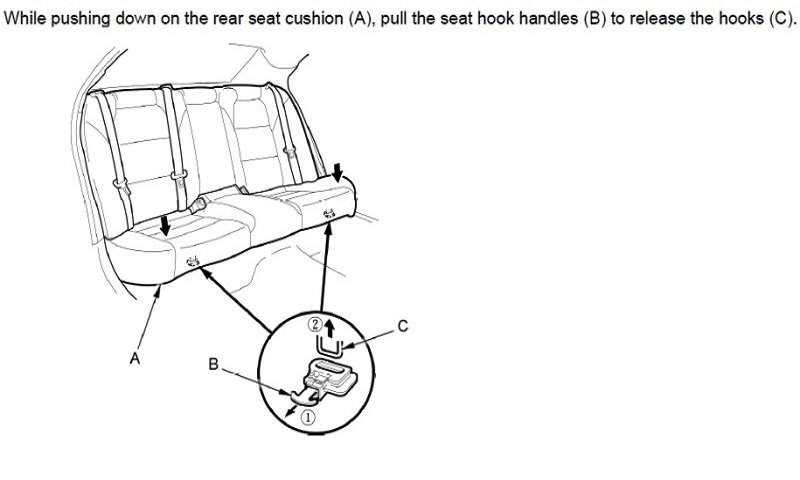
Figure 6. Pull out the anchors. 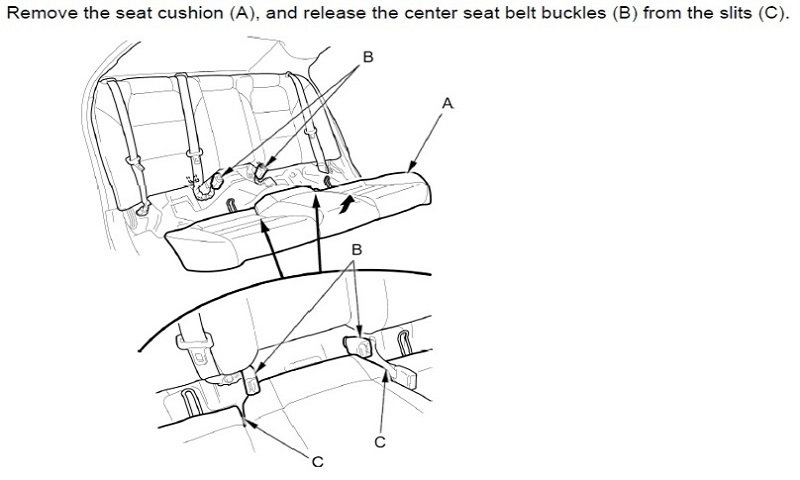
Figure 7. Pull the cushion up and forward. 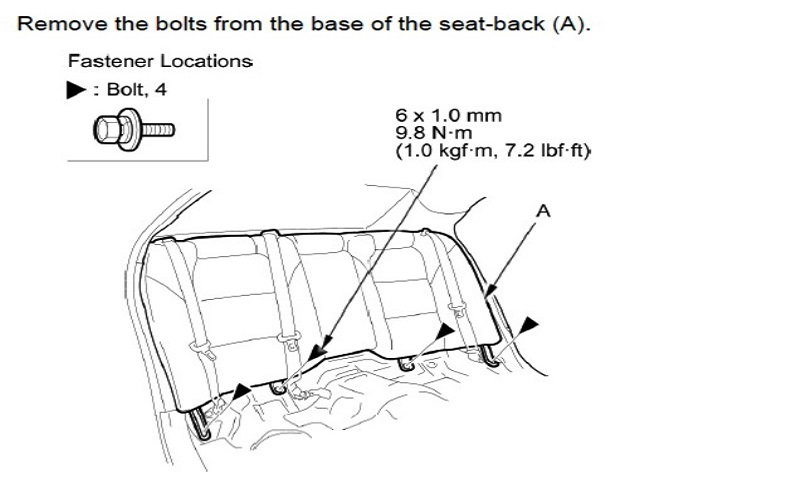
Figure 8. Unbolt the four 10mm bolts. 
Figure 9. Tilt seat back and slide upward.
Step 4 – Remove the rear shocks
- Remove the two nuts from the top of the shock tower.
- Remove the sway bar end link bolt, then disconnect the stabilizer link from the link bracket.
- Remove the lower shock mounting bolt from the knuckle.
- Lower the rear suspension until you have enough clearance to pull the shock out.
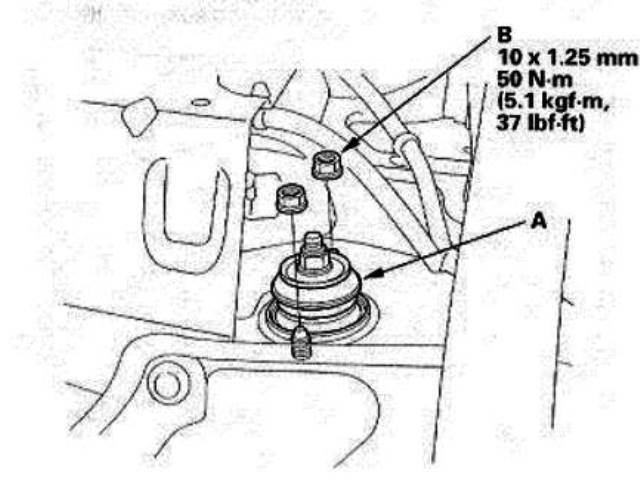
Figure 10. Upper shock mount. 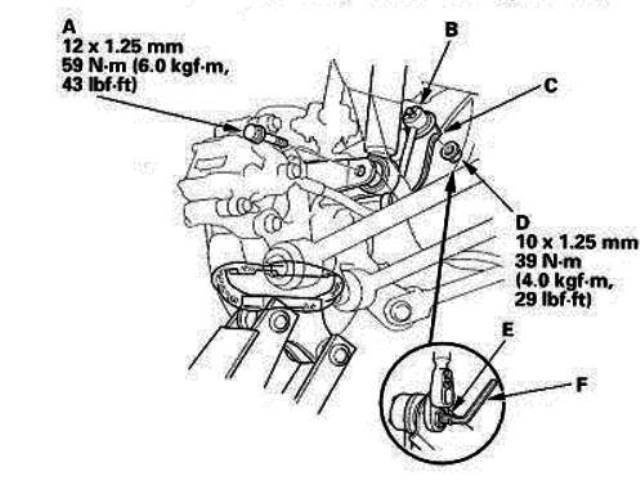
Figure 11. Lower shock mount.
Step 5 – Install new rear shocks
- Compress the spring using a spring compressor, just enough to take pressure off the top nut.
- Remove the top nut and disassemble the shock.
- Reinstall all necessary parts on the new shock except the top nut and washer.
- Make sure the bottom of the spring is lined up with the stepped part of the lower spring seat and the damper mounting base is aligned.
- Install the top nut and washer, then decompress the spring.
- Reinstall the coil over in the car.
- Loosely reinstall the top as well as bottom mounting bolts and the stabilizer link.
- Place the rear suspension under load with the jack, then tighten all the bolts.
- Reinstall the rear seat.
Featured Videos
-
How to Install Coilovers/Lowering Springs on an Acura TL
-
Acura TL Rear Strut Removal
Shocks Review
Worn out shocks can not only have a negative effect on your back side, they also put extra strain on your suspension parts and hinder your handling performance. There are a ton of options available on the aftermarket, ranging from basic, OEM replacements to full on lowered shocks and racing shocks. Here are some of the most popular options available among Acura TL owners and enthusiasts.
Koni Sport |
KYB GR-2 |
TruHart |
TEIN Street Advance |
KW Variant 1 | |
|---|---|---|---|---|---|
Price |
$560 set of 4 | $500 set of 4 | $300 set of 4 | $660 set of 4 | $1,650 set of 4 |
Type |
OEM Type | OEM Type | Lowered OEM Type | Race Coil over | Race Coil over |
Ride |
Sporty | Slightly Sporty | Sporty | Very Sporty | Race |
Adjustable |
Yes | No | No | Yes | Yes |
Handling |
Excellent | Good | Excellent | Near Track Ready | Track Ready |
Best Value: TruHart
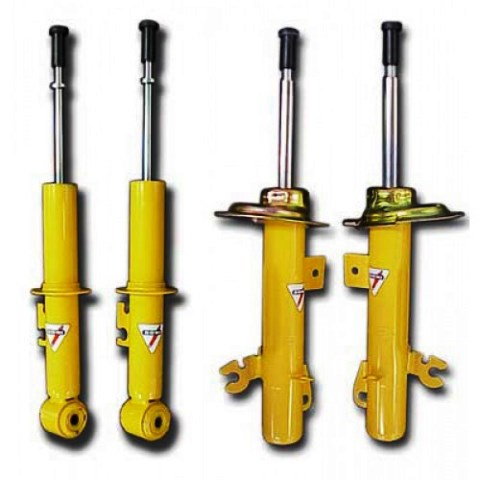
Koni
Price – $560 for 4
Type – OEM
Ride – Sporty
Adjustable – Yes
Handling – Excellent
Koni shocks are hard to beat for the TL, for a variety of reasons. For one, they are not considerably more expensive than OEM replacement shocks, yet they offer top notch quality. Koni shocks are also adjustable for damping, so they can be used with virtually any springs. This is also a great option for weekend warriors, who may want to change their settings for track and road use. They generally have the longest lifespan of all shocks as well, making them an excellent choice for the TL. Recommended for pretty much anyone, from weekend warrior to daily driver, who doesn't mind spending a little more than OEM.
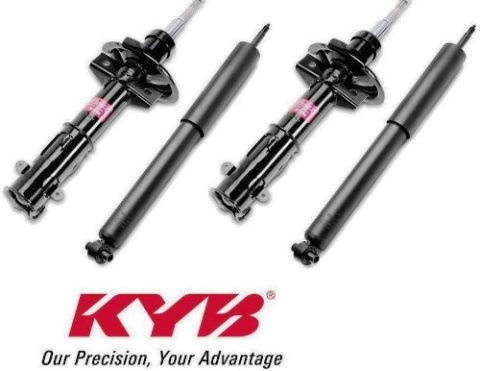
KYB GR-2
Price – $500 for 4
Type – OEM
Ride – Slightly Sporty
Adjustable – No
Handling – Good
If you don't care about having adjustable shocks and you simply want to replace your OEM units with a high quality, suitable shock, the KYB GR-2 is a solid option. They provide a smooth ride that is like-new, while retaining a car's handling performance. Plus, you'll save a few hundred bucks over our other, fancy shocks. Recommended if you don't need adjustability and just want to regain your car's OEM performance as well as ride quality.
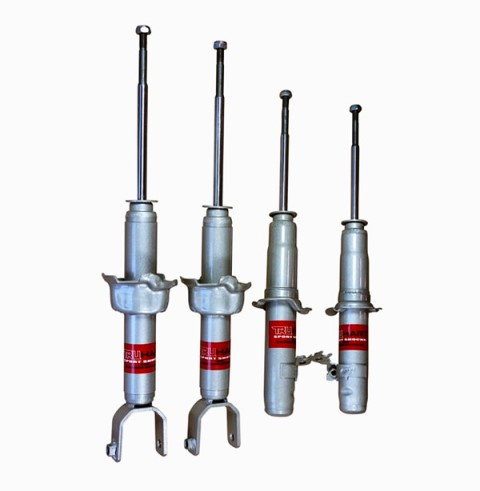
TruHart
Price – $300 for 4
Type – Lowered OEM
Ride – Sporty
Adjustable – No
Handling – Excellent
TruHart have a reputation for being nearly as good as a Koni shock, but at a lower price. They are also not adjustable. But if you want a stock type shock that works with a lower stance, and handles better than stock, the TruHart is the way to go. Recommended for those who want a high quality OEM type shock for their lowered car at a lower price.
TEIN Street Advance
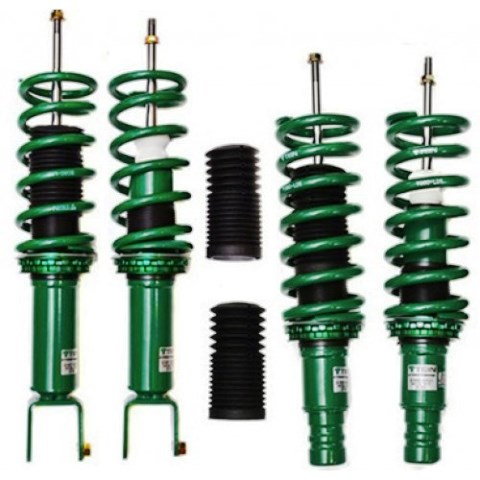
Price – $660 for 4 with springs
Type – Race Coil over
Ride – Very Sporty
Adjustable –Yes
Handling – Near Track Ready
TEIN are a good quality, race type coil over that are adjustable for ride height as well as damping. With a set of these on your car, you will have the type of handling you need to attack the track, and drive home, or commute every day. Recommended for those who want a race quality coil over that is fully adjustable at the lowest price.
KW Variant 1
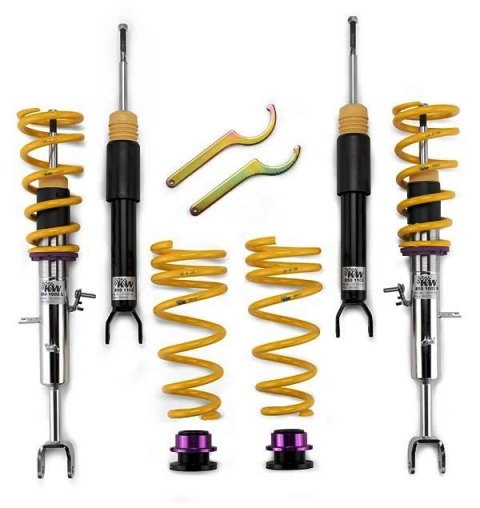
Price – $1,650 for 4 with springs
Type – Race Coil over
Ride – Race
Adjustable – Yes
Handling –Track Ready
If you are planning on tracking your car, the KW Variant is the coil over you want. These are the gold standard for street car coil overs with spring and damping races engineered to the specific application. You are not going to find a better set up without doing a lot of custom engineering. Recommended for those who want the best and don't mind paying for it.
Related Discussions and Sites
- Torque Spec Shock Assembly - AcuraZine.com
- Shocks and Struts for My TL - AcuraZine.com
- Replacing Shocks and Springs - AcuraZine.com
- Rear Seat Removal - AcuraZine.com
- Accord 8 Gen Coilovers Install - DriveAccord.net