Acura TL 2004-2008: How to Replace Timing Belt, Water Pump and Thermostat
The timing belt/water pump/thermostat replacement is one of those jobs which can be pretty tough if you don't know what's going on. Luckily, Honda/Acura made it fairly easy by making their J series motors pretty much the same. If you have a J32, J35, or J37 engine, this article will help. Read through to have a good understanding of what's involved.
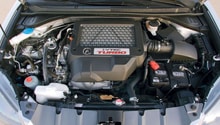
This article applies to the Acura TL 3.2 J32 (2004-2008).
The timing belt does exactly what it sounds like it does...keeps everything in time. This job is labor intensive, which means it will take anyone a bit to get it done. The main reason you'd want to do this job yourself is to save money. On most overhead cam (OHC) engines, it is a necessary evil to change it out to protect valves from contacting pistons, should the belt break or slip. The big reason to not do this yourself is if you do not have the time, patience, or tools to accomplish the task. In that case, you'd be far better off to take it to the dealership or your favorite repair shop to handle the work.

Materials Needed
- Tool set with ratchet, breaker bar, sockets, and wrenches
- Jack, jack stands, and wheel chocks
- Torque wrench
- Impact gun
- 19mm harmonic balancer bolt socket (Lisle 77080)
- Crankshaft pulley holding tool (Lisle 77260)
- Pliers
- Blue Locktite
- Shop rags
- Nitrile gloves
- Coolant drain pan
- Funnel
You can get and replace just the timing belt if you really want to, but it is highly recommended you replace the water pump, idler rollers, and tensioner while you are doing this job. You'll most likely want to replace the coolant while you are at it, since you'll be draining most all of it as you change out the pump. Also, while using an impact gun and the 19mm Lisle socket listed isn't absolutely necessary, it is highly recommended. Ask anyone who has attempted to remove the harmonic balancer bolt with a breaker bar and 6-foot of cheater pipe and still cannot get the bolt to come free.
Step 1 – Jack and support vehicle
Place wheel chocks in front and back of one rear wheel. Set the parking brake. Break free the lug nuts on the passenger side front wheel, but don't remove. Jack up the front end of the vehicle and place on jack stands. When safely on stands, remove the passenger side wheel by finishing to remove the lug nuts. Place the wheel aside out of the way. In the passenger side wheel well, remove the plastic shrouding piece to expose the harmonic balancer and bottom half of the engine.
Step 2 – Remove the serpentine belt
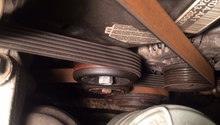
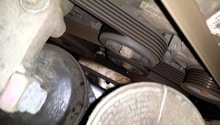
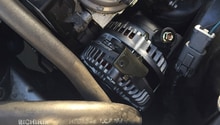
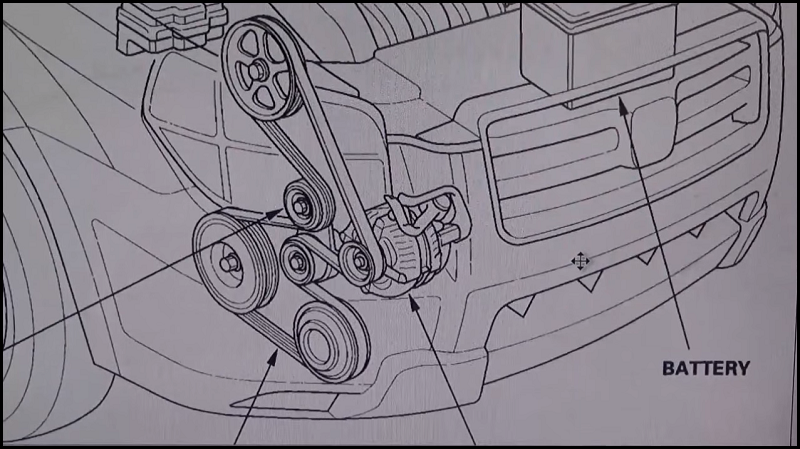
If not already open, unlatch, lift, and support the hood. Remove engine covers (if present) to expose the front end of the engine (passenger side). Place the coolant drain pan under the radiator, open the drain cock and allow the radiator to drain. Locate the tensioner pulley. With a 14mm socket or wrench, turn the tensioner counterclockwise to relieve tension on the belt and remove the belt from either the tensioner pulley or the power steering pump pulley. Allow the tensioner to move back and remove the wrench or socket. Finish removing the serpentine belt. In some way, on the serpentine belt, mark its rotation for when it is replaced on the pulleys.
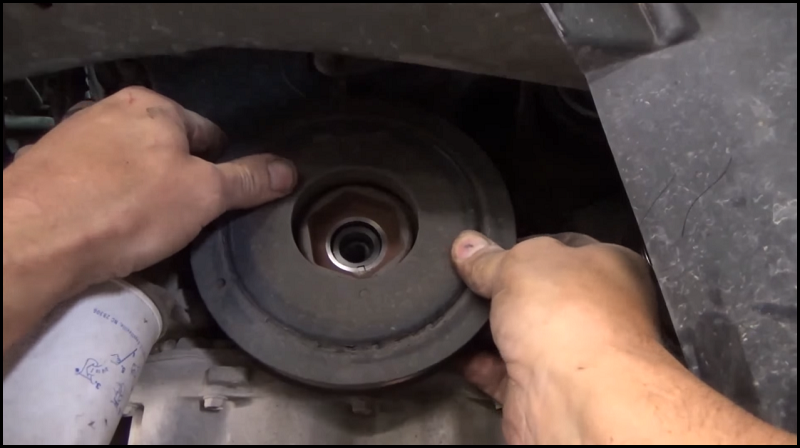
Step 3 – Remove the crankshaft pulley
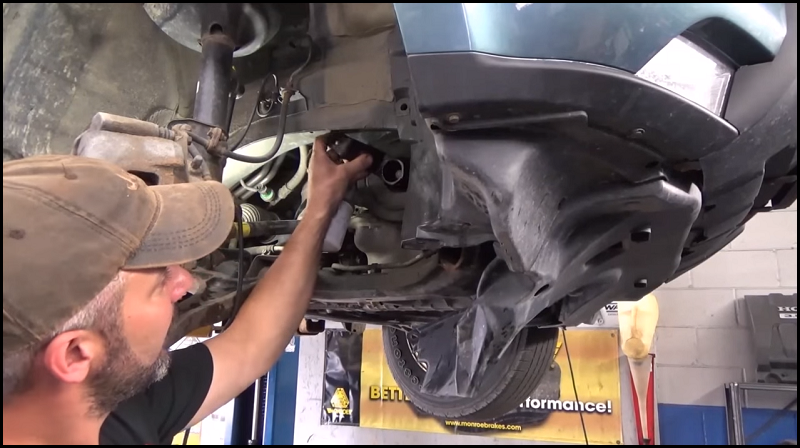
Using the 19mm Lisle crankshaft bolt socket and impact gun, remove the crankshaft bolt. Wiggle the crankshaft pulley back and forth while pulling to remove it (Figure 3). Be careful of the keyway, which locates the pulley, as it can easily drop away from the crankshaft and be lost.
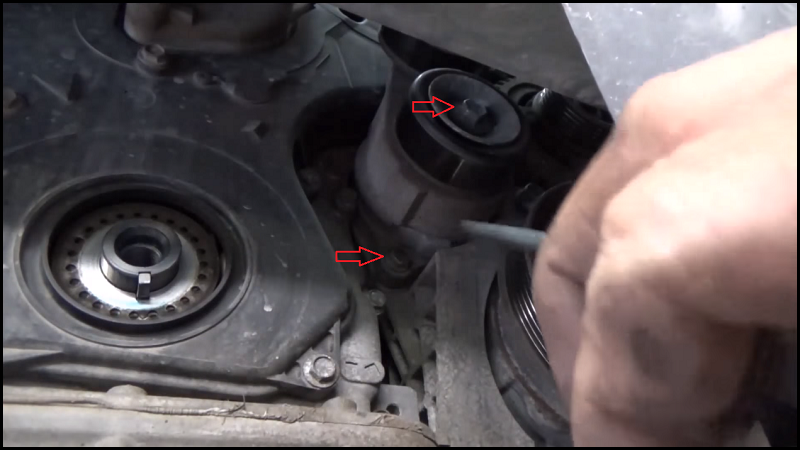
Step 4 – Remove belt tensioner
Remove the two bolts shown with red arrows in Figure 4 to remove the belt tensioner.
Step 5 – Remove timing belt covers
While around the bottom of the engine, remove the 10mm bolts which holds the bottom part of the cover onto the engine (Figure 5). The cover will not come off yet, as the two top covers will hold it in place until they are removed. Remove all of the bolts, which can be reached from the bottom side.
Back up top, continue to remove timing cover bolts until all are removed. When ready, remove the two top covers to expose the cam gears and timing belt. Once the top covers are off, remove the lower cover.
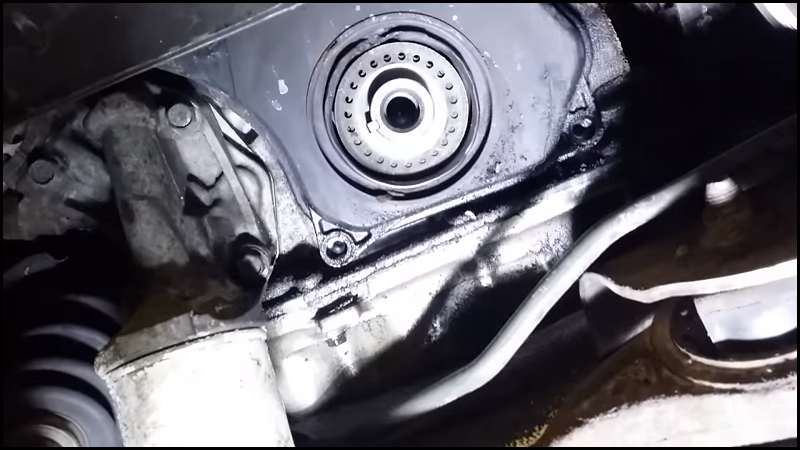
Step 6 – Align the timing marks
Remove the timing belt alignment washer from the crankshaft and place with plastic timing belt covers, so it does not get misplaced (Figure 6).
Insert and hand-tighten the crankshaft bolt back into the crankshaft (without the pulley). Finish tightening the crankshaft bolt until the engine starts to move using a socket and breaker bar (or long ratchet). Slowly rotate the engine crankshaft until the crank alignment marks line up (center image in Figure 7). The keyway should be straight up when aligned. This will take some patience, as each piston enters the compression stroke and then is allowed to relieve pressure. When the crankshaft timing marks are aligned, check both cam timing marks to ensure all marks are aligned (left and right sides, Figure 7). As Murphy's Law will have it, the crankshaft will most likely be 360° out. If it is, turn the crank another 360°.
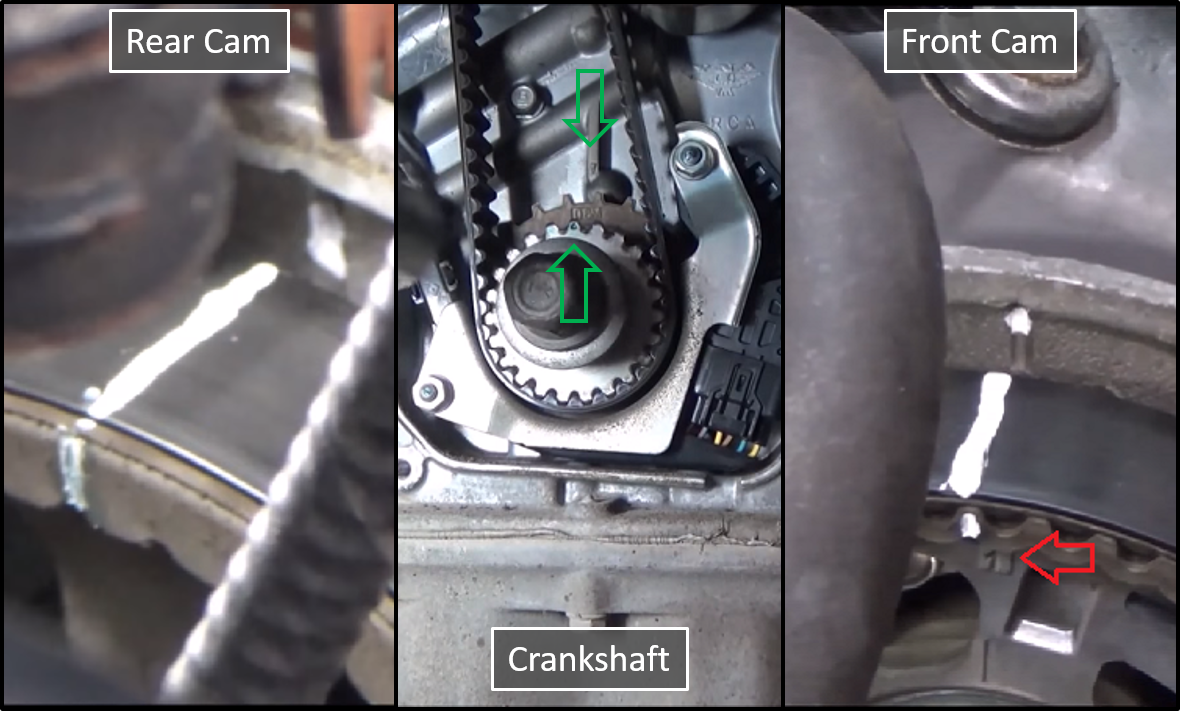
Note
It is important to realize the front cam has a mark, which will align with the timing mark in the cover when the crankshaft timing marks align, but this might not be the correct timing mark. The pseudo mark will have a "5" below it, while the correct one will have a "1" below it, as annotated with the red arrow in the right side of Figure 7. Also note that the white marks on the timing belt and gears were placed there for understanding. Your timing belt will not have these marks on them unless you place them there.
Step 7 – Remove the motor mount
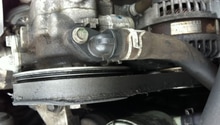
Place the floor jack under the engine with a piece of scrap wood between the jack and engine. Jack up the engine just enough to support it (just enough so the engine starts to move). Remove two 12mm bolts to detach the power steering pump from the engine. Place a rag under the power steering hose, which has the hose clamp. Loosen the clamp on the power steering hose, moving it back onto the hose. Pull the hose from the power steering pump, being careful to spill as little fluid as possible. Folding the hose back upon itself, tuck it out of the way. Move the power steering pump out of the way towards the back of the vehicle. Remove the bolts holding the mount and remove it. If the power steering reservoir is in the way, remove it. It should be an interference fit and should pull right up. Remove the bolt which connects the bracket to the top of the engine side of the motor mount bracket. Remove the three bolts holding the engine side motor mount bracket to the engine, which will allow you to remove it. One of the bolts inside of the engine side motor mount bracket is recessed and hidden, which may make it more difficult to remove.
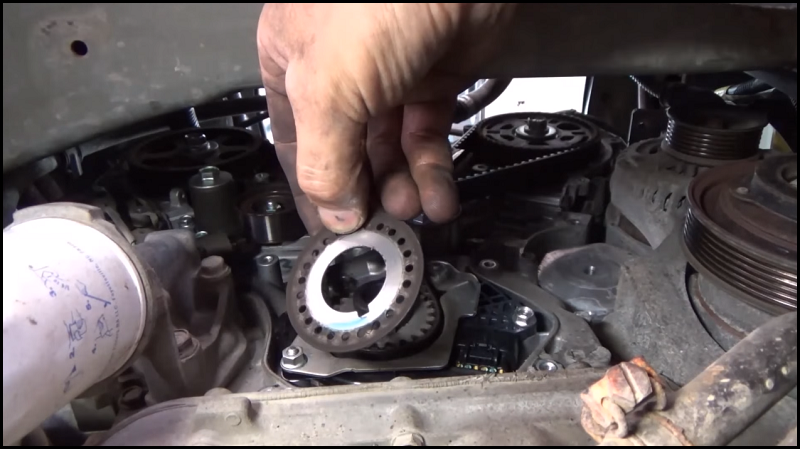
Step 8 – Remove old timing belt components
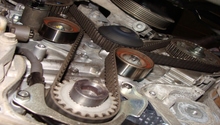
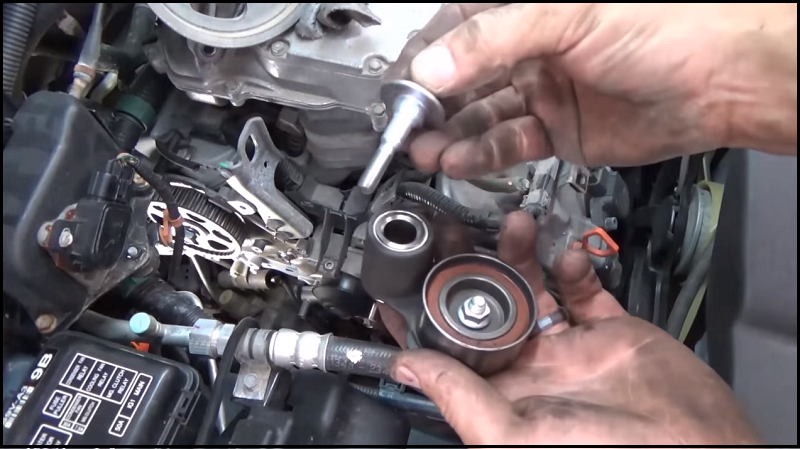
Double check your timing marks to ensure proper alignment. For quick removal, use a pair of diagonal cutters and cut the timing belt. If the timing marks move a little bit, it's no big deal. Remove the remains of the timing belt. Remove the timing belt tensioner pulley (Figure 9) by taking out the center bolt. This bolt is a special shouldered bolt, so be careful not to lose it. Inside the tensioner is also a guide. Both the bolt and the guide will be reused to install the new tensioner pulley.
Remove the two bolts holding the hydraulic tensioner to remove it from the engine. Remove the idler pulley with the center bolt. This bolt will most likely have Locktite on it, so be prepared for a little bit of a struggle. Remove the five remaining bolts from the water pump to allow removal. Some residual coolant may drain from the engine as the pump is removed. Please note there are rolled dowel pin locators on the water pump, which may keep it fastened to the block. A small pry bar or long screwdriver will help facilitate removal. Using a rag, clean the pump area dry. Close the drain petcock on the radiator if it isn't already done. Ensure the front of the engine is completely clean of grease, oil, and coolant before you continue.
Step 9 – Install new timing belt and components
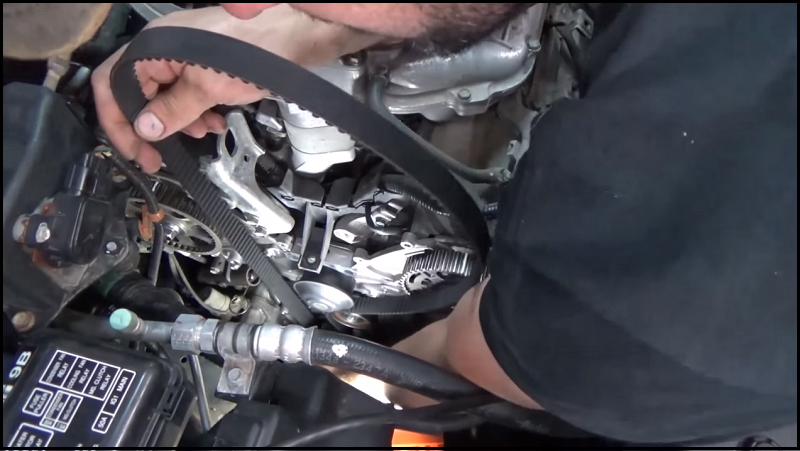
Ensure the O-ring seal is in place on the new water pump and install it in the block using the five bolts. Torque these to 8.8 lb-ft or 108 in-lbs. Install the new hydraulic tensioner. It is imperative to leave the grenade pin in place! If you don't, it all becomes terribly difficult. Install the new idler pulley using blue Locktite to ensure it stays secure, torquing it to 33 lb-ft. Double check to ensure the timing marks are still lined up. Use a small mirror if needed to ensure alignment. Starting at the crankshaft, thread the new timing belt going counterclockwise through the gears (Figure 10). This means from the crankshaft, up over the idler, to the front camshaft, gear under the water pump, over to the rear camshaft gear, leaving the slack where the tensioner pulley will be located. The idea is to ensure the belt stays tight all the way around until you get to where the tensioner is located, this will ensure the timing should be correct when all is together.
Remove the sleeve from the old tensioner pulley and install it onto the new one through the back side. Using the special shouldered bolt, install the tensioner pulley torquing it to 19 lb-ft. Again, double check the timing marks to ensure they are aligned correctly. When satisfied, remove the grenade pin from the hydraulic tensioner. All should be installed, so turn the crankshaft 720° or two complete rotations to bring the crankshaft timing mark back up into alignment with the mark on the block. If everything still looks aligned, refill the coolant to ensure a leak-less installation. Reinstall the motor mount bracket to the block. Use some blue Locktite on the lower of the three bolts. Torque these to 33 lb-ft. These go through the water pump, so it is good to have them torqued properly to ensure the pump doesn't get warped and leak. Install the small bolt which goes into the top of the bracket. Reinstall the motor mount and bracket so the engine is solid once again to the frame. Remove the jack from below the engine.
Step 10 – Install timing covers
Remove the crankshaft bolt from the crank. Install the timing belt alignment washer onto the crankshaft. Place the lower timing belt cover into place, securing it with the bolts. Replace the crankshaft pulley and bolt. Tighten the bolt to 181 lb-ft. If done correctly, the pulley holding tool will rest against the body as the bolt is torqued.
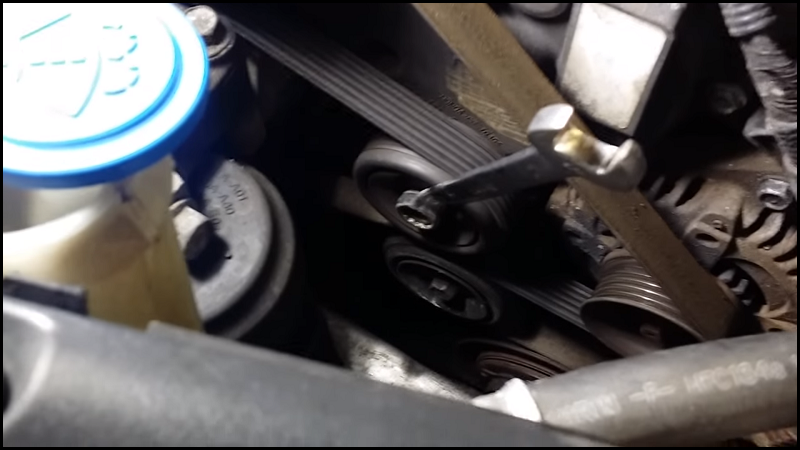
If all looks good thus far, ensure all tools are away from any moving parts and start the vehicle. This will not harm anything and will allow you to check the operation of the engine prior to buttoning it up the rest of the way. Let the engine run for a maximum of about a minute. If all seems well, shut the engine off. Continue by replacing the top timing belt covers and bolts, along with the wiring harnesses. Bolt the power steering pump back into place. Replace the power steering reservoir if it was previously moved. Reattach the power steering hose to the pump and secure the clamp. Install the serpentine belt tensioner pulley. Replace the serpentine belt (Figure 12). Replace the wheel well covers. Install the tire. Raise the vehicle to remove the jack stands.
Step 11 – Replace thermostat
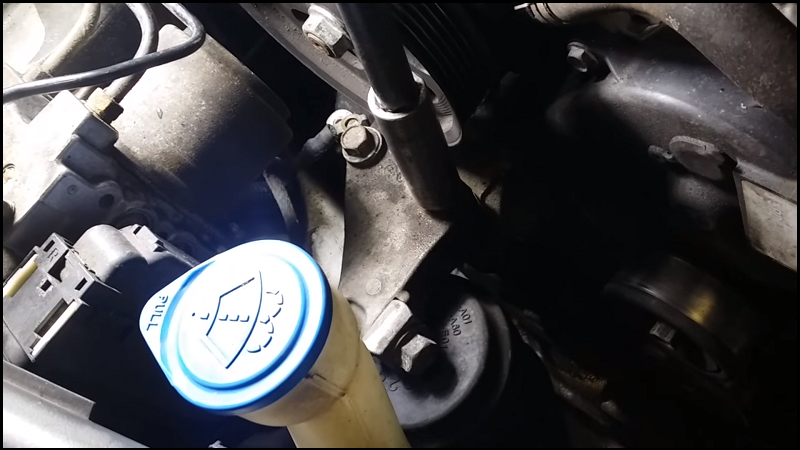
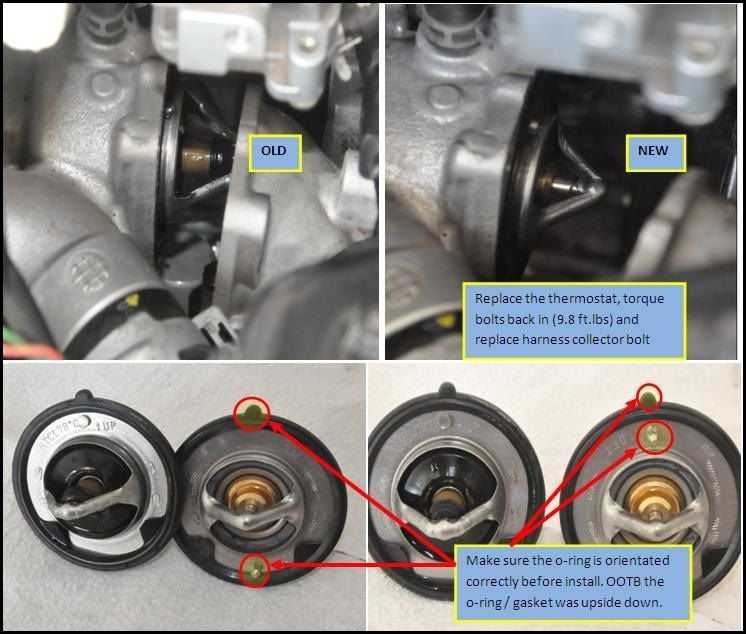
Remove the air intake ducting (tubing from air cleaner to intake manifold). In the mess that is there, find the thermostat housing under the intake manifold. Remove two 10mm bolts to pull housing from mount. Inside, find the thermostat and remove it. On the new thermostat, ensure the gasket tab is oriented in the correct direction (thermostat should have be marked accordingly, Figure 13). Place the new thermostat with the correct orientation, then replace the thermostat housing. Tighten the two bolts to about 9.8 lb-ft. Refill the radiator with coolant. Check for leaks. If none present, start and run the engine until warmed up without the radiator cap in place, filling as needed. Ensure there is no air in the system, then put the radiator cap back into place.
Featured Videos
-
How to Replace Honda/Acura Timing Belt
-
Setting Timing Belt on Honda/Acura V6
Related Discussions
- DIY 105k Service Timing Belt Water Pump Spark Plugs Thermostat - AcuraZine.com
- Bleeding Coolant System Antifreeze Thermostat Replacement 3G Garage - AcuraZine.com
- Timing Belt Water Pump Replacement - AcuraZine.com
- When Do You Replace Timing Belt - AcuraZine.com