
G-100: DIY LED Interior Conversion, Part IV: Center Vents
 10-11-2009, 07:40 PM
#1
Fearless DIY Guy
Thread Starter
iTrader: (2)
G-100: DIY LED Interior Conversion, Part IV: Center Vents
Alright, fellow AZiners...I present to you part 4 in our LED conversion quest, and make no mistake, this one can be a doozy. There are two different methods we are going to be using here...one will be quick and straightforward, the latter, a terrible trail of anal angles appropriate for only the nouveau nazis of persistent perfectionism. Huh? Right. Read on, you'll understand as we plunge in to the abyss...
Thanks go to dwb993 for specifying the exact bulb to use.
LET'S GO!
TOOLS NEEDED
Dremel
Soldering Iron
Angle cutters
Flat head screwdriver
MATERIALS
1 x 3mm bulb to your liking...I am used wide-angle flat headed 3mm bulbs
Solder
FLUX, I CANNOT STRESS THIS ENOUGH
1 x 560-ohm resistors
TIME
Plug-and-play method - 15minutes
Alternative-for-the-insane - 60 minutes
Working Knowledge of LED Retrofit CLICK HERE FOR LINK
STEP I - NO TOOLS NEEDED
Ok, you're going to need to remove the center vents. You actually don't need any tools here, just some good ol' fashion hand/forearm strength. You single guys probably will need a tool, we married folk have to take care of things on our own a bit more, so suffice to say we have a bit moar powah in the ol' arms, for better or for worse (no pun intended...well, yeah, pun fully intended).
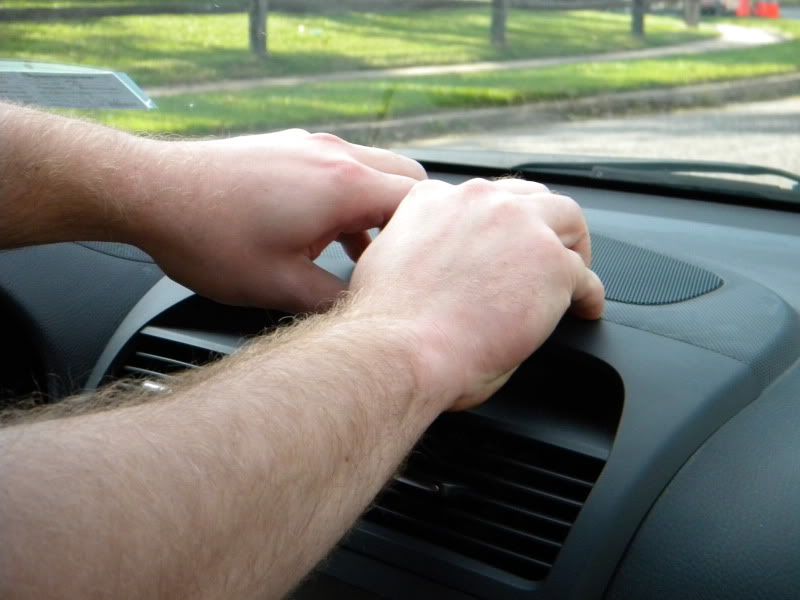
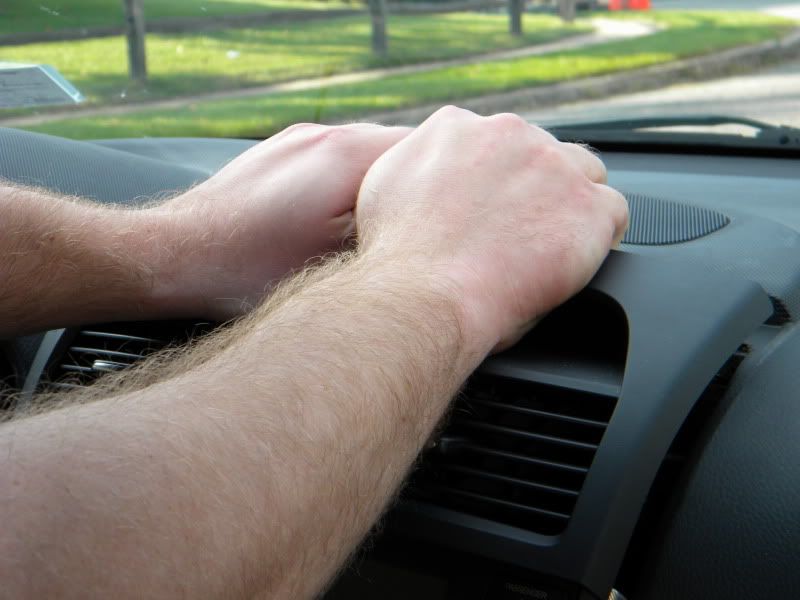
Press down on the dash, and pull up. No thumbs needed.
STEP II - ONE AND DONE
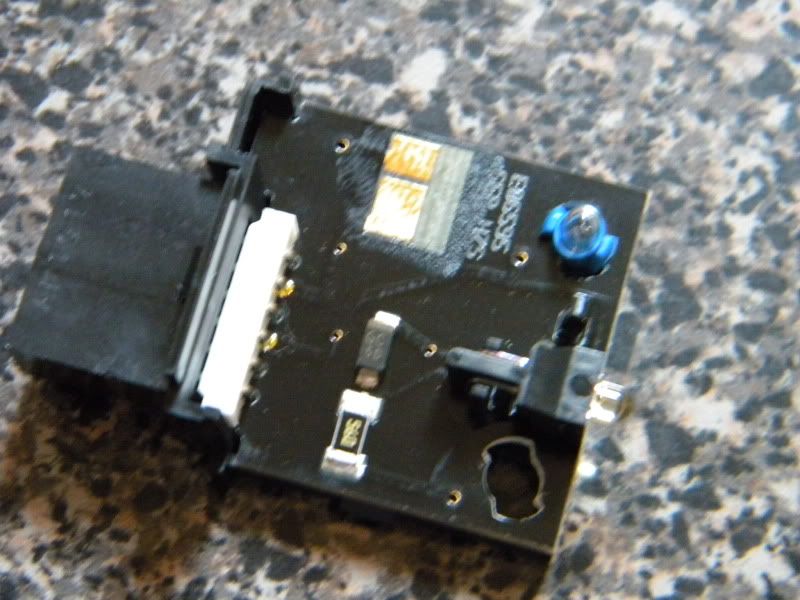
Here we're only going to take the top one out...you can do the bottom one, but it's kinda pointless seeing as how the plastic is tinted red.

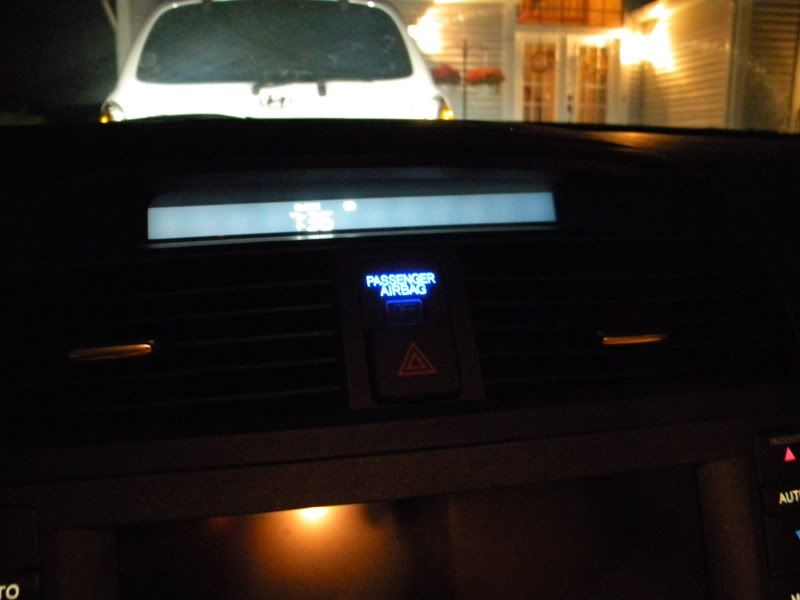
Plug it in and you're done. Since I am such a super-terrific-A-#1 kinda guy, I'm going to specify the polarity of the base you'll need to use...piece of cake. Yeah, it's incorrect in the pic, I just didn't reshoot after I tested it.
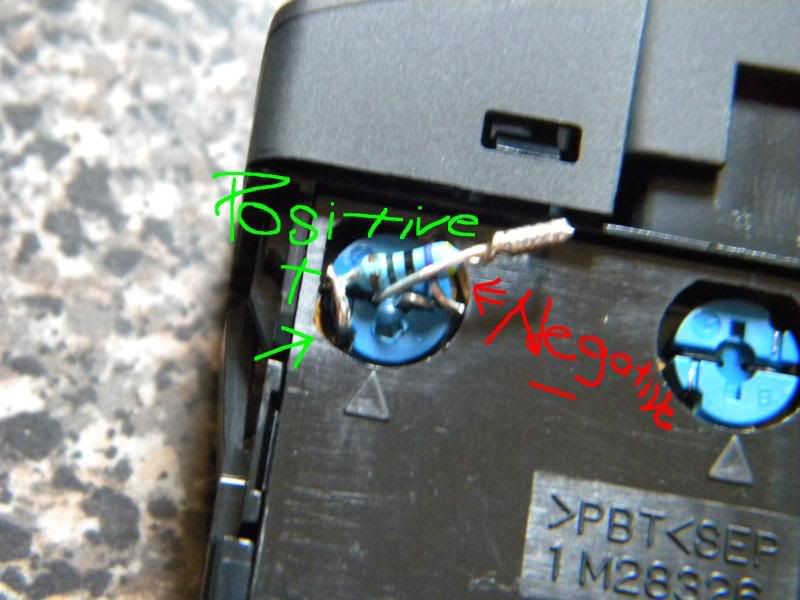
IF YOU STOP HERE AND HAVE USED THIS METHOD, ONLY HALF OF THE BUTTON WILL ILLUMINATE...THERE IS NO WAY AROUND THIS THAT I AM AWARE OF.
Want to fix that? Read on...but don't say I didn't warn ya.
Thanks go to dwb993 for specifying the exact bulb to use.
LET'S GO!
TOOLS NEEDED
Dremel
Soldering Iron
Angle cutters
Flat head screwdriver
MATERIALS
1 x 3mm bulb to your liking...I am used wide-angle flat headed 3mm bulbs
Solder
FLUX, I CANNOT STRESS THIS ENOUGH
1 x 560-ohm resistors
TIME
Plug-and-play method - 15minutes
Alternative-for-the-insane - 60 minutes
Working Knowledge of LED Retrofit CLICK HERE FOR LINK
STEP I - NO TOOLS NEEDED
Ok, you're going to need to remove the center vents. You actually don't need any tools here, just some good ol' fashion hand/forearm strength. You single guys probably will need a tool, we married folk have to take care of things on our own a bit more, so suffice to say we have a bit moar powah in the ol' arms, for better or for worse (no pun intended...well, yeah, pun fully intended).
Press down on the dash, and pull up. No thumbs needed.
STEP II - ONE AND DONE
Here we're only going to take the top one out...you can do the bottom one, but it's kinda pointless seeing as how the plastic is tinted red.
Plug it in and you're done. Since I am such a super-terrific-A-#1 kinda guy, I'm going to specify the polarity of the base you'll need to use...piece of cake. Yeah, it's incorrect in the pic, I just didn't reshoot after I tested it.
IF YOU STOP HERE AND HAVE USED THIS METHOD, ONLY HALF OF THE BUTTON WILL ILLUMINATE...THERE IS NO WAY AROUND THIS THAT I AM AWARE OF.
Want to fix that? Read on...but don't say I didn't warn ya.

The following users liked this post:
rockyfeller (06-04-2015)
10-11-2009, 07:52 PM
#2
Fearless DIY Guy
Thread Starter
iTrader: (2)
STEP II (HELL VERSION) - TABS AWAY
Fuck, well, after taking the airbag light cover off, we can see why this is not fully lighting up. Since we don't have any type of reflector, I could half ass this and put some tin foil in to reflect, OR put it in properly. I am going with the latter of the two.
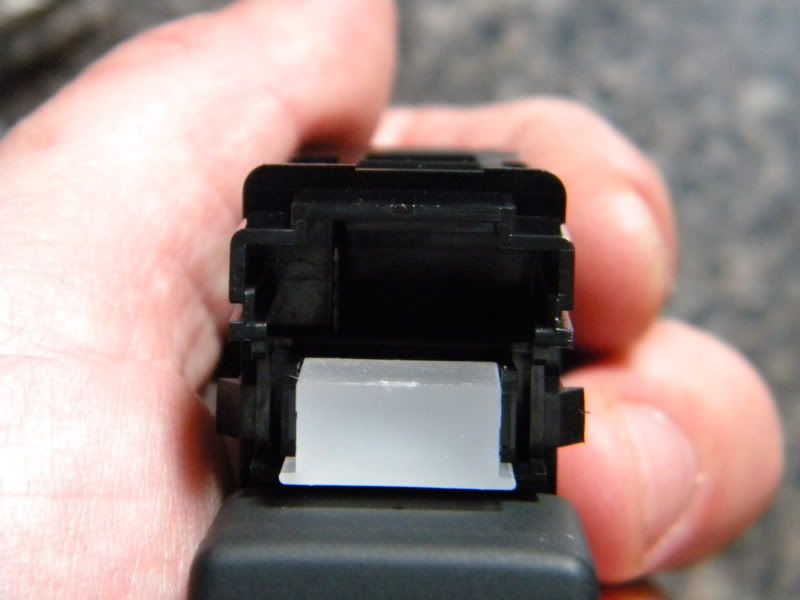
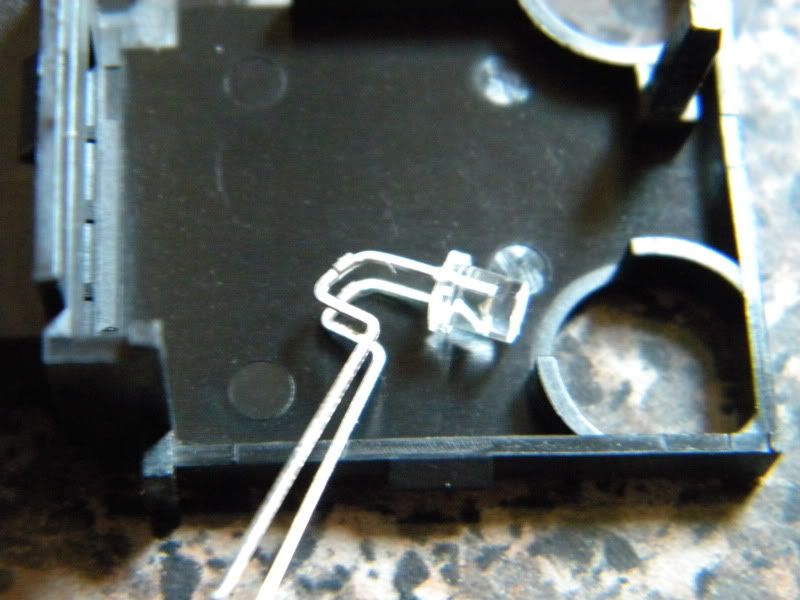
There are three tabs to open the switch. One on the top, one on the bottom, and one PITA tab in the rear. Crack 'em open. Here's what you've got:
STEP III (HELL VERSION) - BEND IT LIKE BECKHAM
Ok, well here's the deal...we're going to need a centerline to square the light output away, so I am using the OFF button as my point of reference. Using a flathead screwdriver and about 3 minutes, I bent it up like so...
STEP IV (HELL VERSION) - FOLLOW THE LEADER...
And by leader, I mean, the anode side. What you're going to do is lead it through and place the anode side closest to the OE copper lead, and solder. Don't fergit yer flux.
THEN, you will cut almost the entire cathode side off and be left with just a small tip, then bend the cathode to make up the balance lead. Here's what you'll be left with.
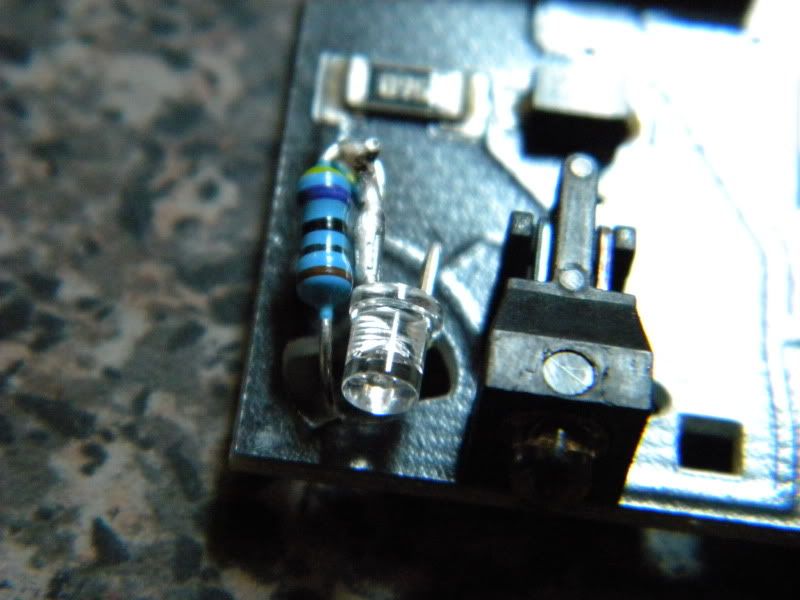

Put it all back together and enjoy. ZERO hotspots. On to the next adventure...
Fuck, well, after taking the airbag light cover off, we can see why this is not fully lighting up. Since we don't have any type of reflector, I could half ass this and put some tin foil in to reflect, OR put it in properly. I am going with the latter of the two.
There are three tabs to open the switch. One on the top, one on the bottom, and one PITA tab in the rear. Crack 'em open. Here's what you've got:
STEP III (HELL VERSION) - BEND IT LIKE BECKHAM
Ok, well here's the deal...we're going to need a centerline to square the light output away, so I am using the OFF button as my point of reference. Using a flathead screwdriver and about 3 minutes, I bent it up like so...
STEP IV (HELL VERSION) - FOLLOW THE LEADER...
And by leader, I mean, the anode side. What you're going to do is lead it through and place the anode side closest to the OE copper lead, and solder. Don't fergit yer flux.
THEN, you will cut almost the entire cathode side off and be left with just a small tip, then bend the cathode to make up the balance lead. Here's what you'll be left with.
Put it all back together and enjoy. ZERO hotspots.
On to the next adventure...
The following 2 users liked this post by DeathMetal:
EvilVirus (09-29-2015),
rockyfeller (06-04-2015)
01-23-2010, 11:42 PM
#3
Fearless DIY Guy
Thread Starter
iTrader: (2)
UPDATE: NOTE FOR THOSE USING WHITE LEDS
I hate to bump all of the threads, but there is an important item that needs to be noted; some of the white LEDs have been burning out, which can be attributed to one thing and one thing only: thermal overload. Therefore,
IT IS HIGHLY RECOMMENDED THAT A 1K-OHM RESISTOR BE USED FOR ALL WHITE LEDS.
I have begun the process of replacing LEDs/resistors for the dearly-departed and can state that the new resistors seem to do the trick.
09-29-2015, 03:40 PM
#5

so I'm waiting for my blue led's to arrive but i have been reading these threads over and over again to make sure i know the process. curious though, since you were kind enough to mark +/- for us, couldn't we just angle the bulb in the housing in the direction it needs to be? not sure if it will work or not i will post pictures since thats the first one I'm going to do. basically exactly like you bent it for part 2 but still use the housing. what do you think?
09-29-2015, 04:46 PM
#6
Burning Brakes
so I'm waiting for my blue led's to arrive but i have been reading these threads over and over again to make sure i know the process. curious though, since you were kind enough to mark +/- for us, couldn't we just angle the bulb in the housing in the direction it needs to be? not sure if it will work or not i will post pictures since thats the first one I'm going to do. basically exactly like you bent it for part 2 but still use the housing. what do you think?
10-04-2015, 01:44 AM
#7
Fearless DIY Guy
Thread Starter
iTrader: (2)
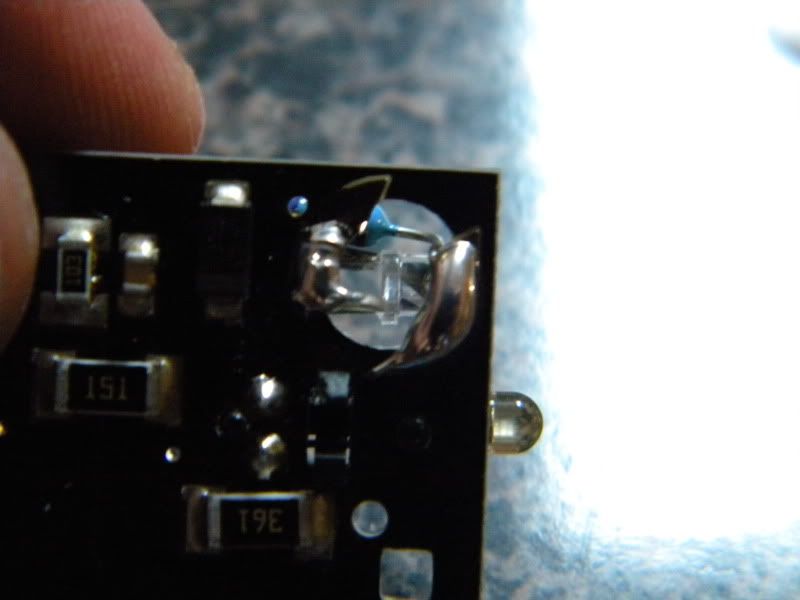
That likely will not work. I did this LED conversion a few months ago and I took each stem of the LED and made a full "L-Shaped" (AKA 90 degree) bend in them to get the light to shine towards the button cap. I kept the stems as long as I could so I could position them as close to the button cap as possible. Even so, there is still a minor portion of the wording that is dim due to blockage by the circuit board.
Note how my installation is nearly flush if not recessed from the board; you'll need to do the same in order to eliminate this.
Trending Topics
10-17-2015, 02:42 PM
#8
i just finished all of them minus the heater switches since im going to do that one tomorrow when I do the HVAC controls and the radio. this one being the last one I did. i didn't have an issue getting it to light up, DM did a great job giving us these write ups and all that is left is a little thinking. i mounted the LED as close as i could to the connectors and angled it a little bit down. doing the sweatshirt test it looks great, ill know tonight when it gets dark if i need to adjust it at all.
DM thanks again for these. i couldn't stand the OEM color of everything
DM thanks again for these. i couldn't stand the OEM color of everything
The following users liked this post:
DeathMetal (10-17-2015)
10-18-2015, 12:05 AM
#9
Burning Brakes
Your LEDs are too close to the button. Beam pattern does not come to full dispersion until several cm from the source, so in positioning your LEDs within minimal distance from the diffuser, you've induced a hotspot.
Note how my installation is nearly flush if not recessed from the board; you'll need to do the same in order to eliminate this.
Note how my installation is nearly flush if not recessed from the board; you'll need to do the same in order to eliminate this.
The following users liked this post:
DeathMetal (10-18-2015)

Thread
Thread Starter
Forum
Replies
Last Post
Oakes
Wash & Wax
10
10-12-2015 11:17 AM