
E-073: DIY Custom grill mod cutting the "A" and adding the Grill Mesh LOTS OF PICS!
 10-17-2009, 11:16 AM
#1
200,000 mile club
Thread Starter
Join Date: Jul 2007
Location: Charlotte, NC
Age: 48
Posts: 1,774
Likes: 0
Received 35 Likes
on
15 Posts
E-073: DIY Custom grill mod cutting the "A" and adding the Grill Mesh LOTS OF PICS!
Hey guys, some have known me on here to do a couple of DIY's (headrest monitors, painted brembo calipers, Type -S rear aspec mod on a base bumper)
Here is a mod I wanted to do for a long time but really didn't know if I wanted to put the time and money into it to do the job right. I decided to do this considering I am keeping this car for a very long time....I know some might say it is a permant mod and you can never bring it back to stock when you sell it and they are right. With 160,000 miles on the clock and adding 5000 miles a month, the car is going to be worthless after I sell it....
On with the DIY......
First thanks to this form for letting me see what look is out there and getting some ideas as I search....
Thanks to ACCURATin for having the balls to do this mod to his brand new 04 TL back in the day.....The Original Griller!!!!!
Darksom1- Thanks for giving us the idea of the floating A
Sk8ter4life- Thanks for thinking of the idea to wrap the grill parts in vinyl
Rockyfeller- This DIY is to help the non-stop questions you have been getting about your grill mod! Keep up the great work on your ride!
OK on with this already....
If you are planning to tackel this job, you need to make sure you have these before you start anything......

Your gonna need them if you are going to be cutting your grill
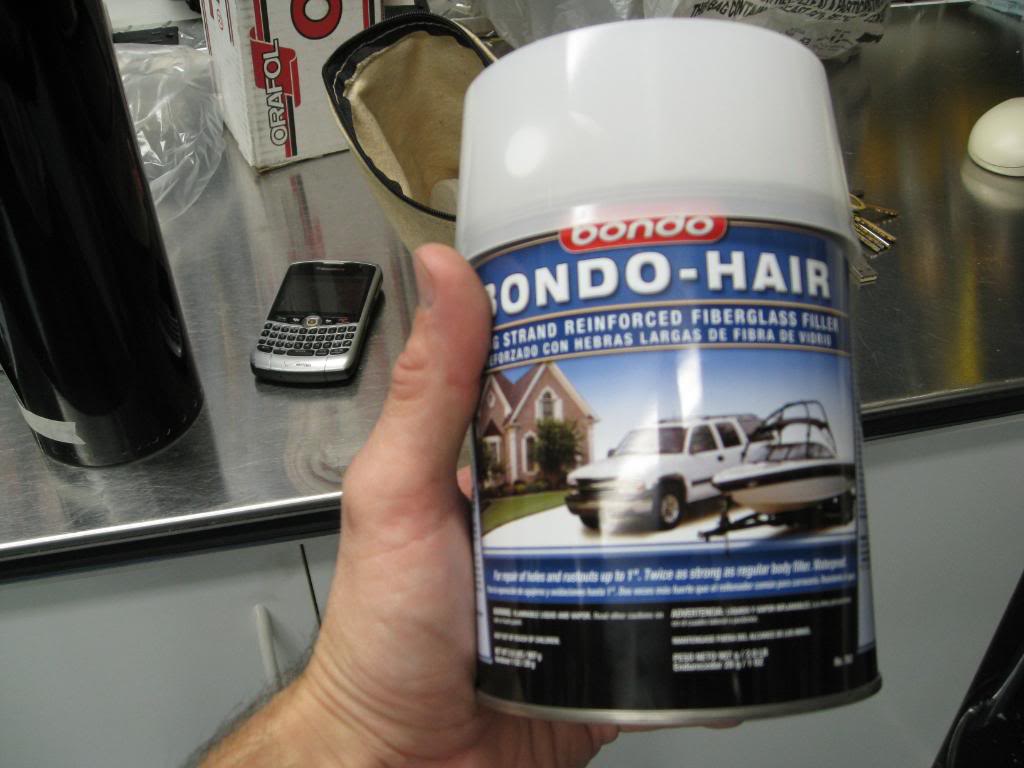
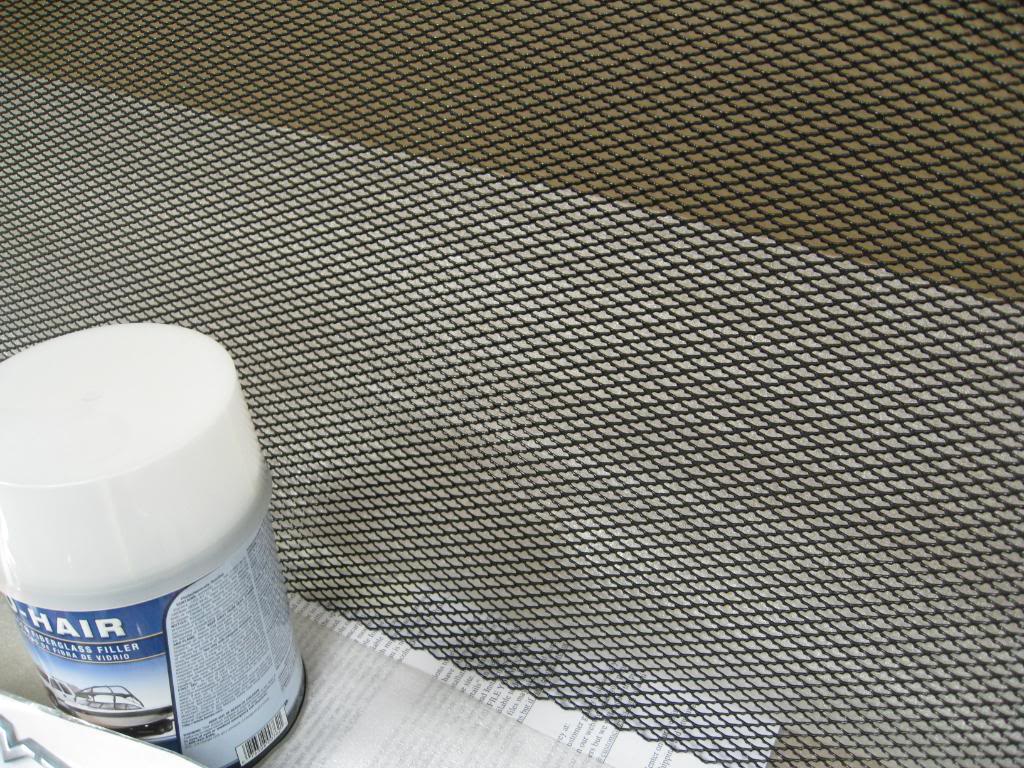
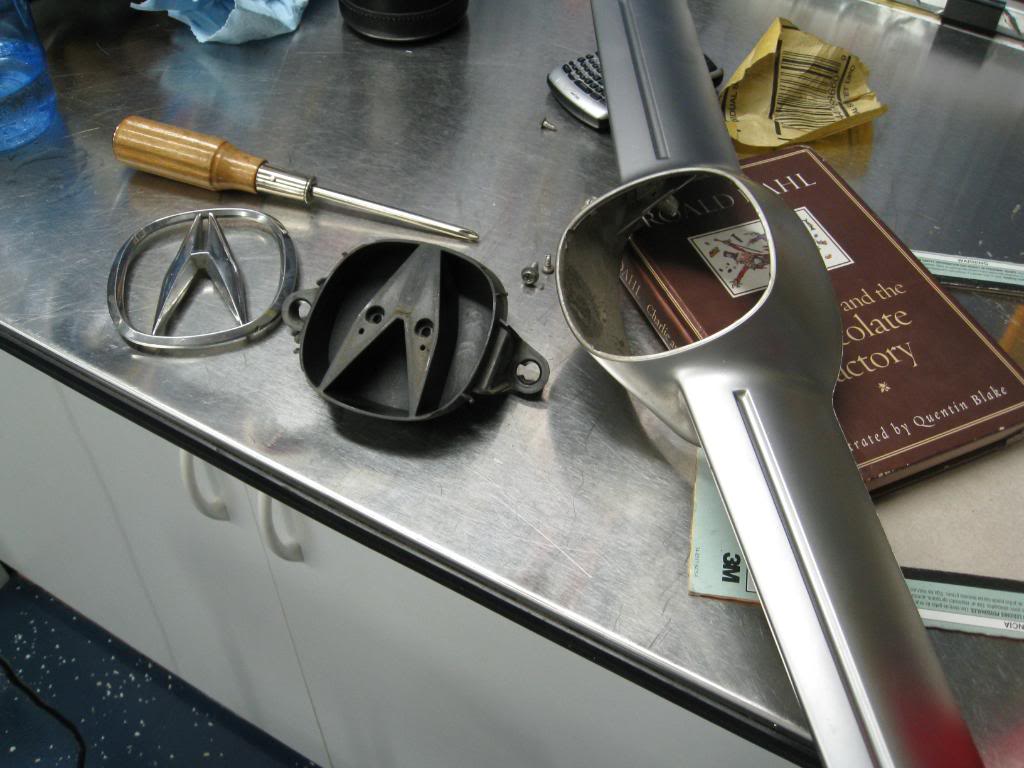
Tools parts, emblems, and grill mesh......
Autozone has it all but most good auto parts will have what you need...
Bondo Hair (fiberglass) $13.99
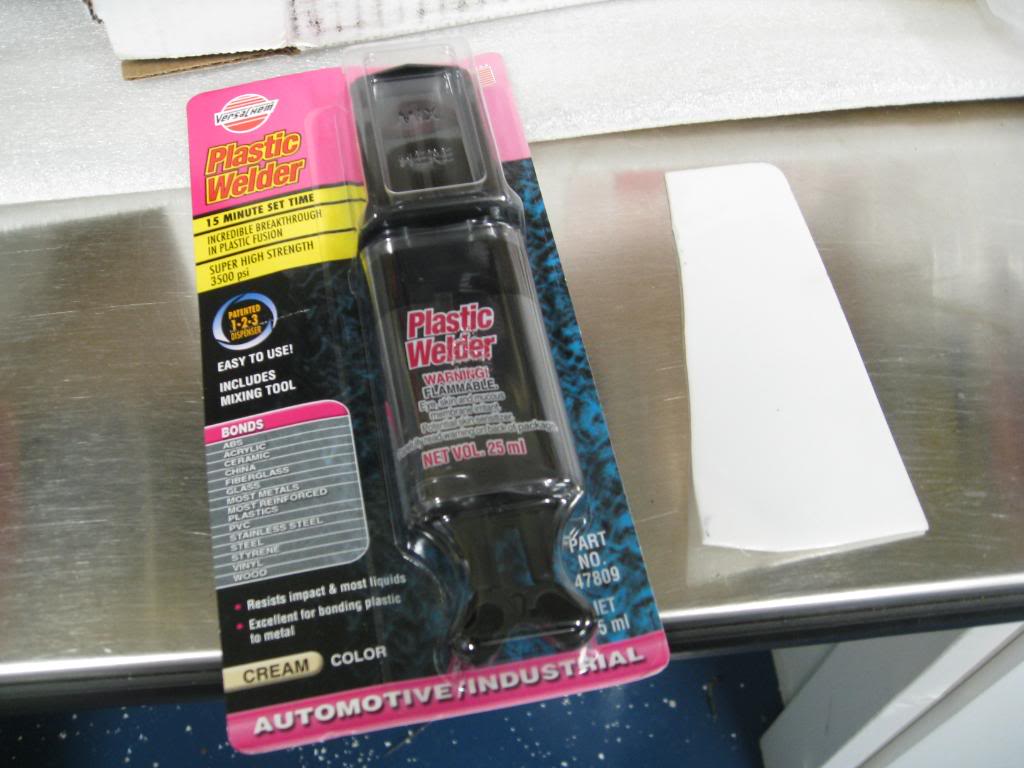
Plastic Welder epoxy $4.99
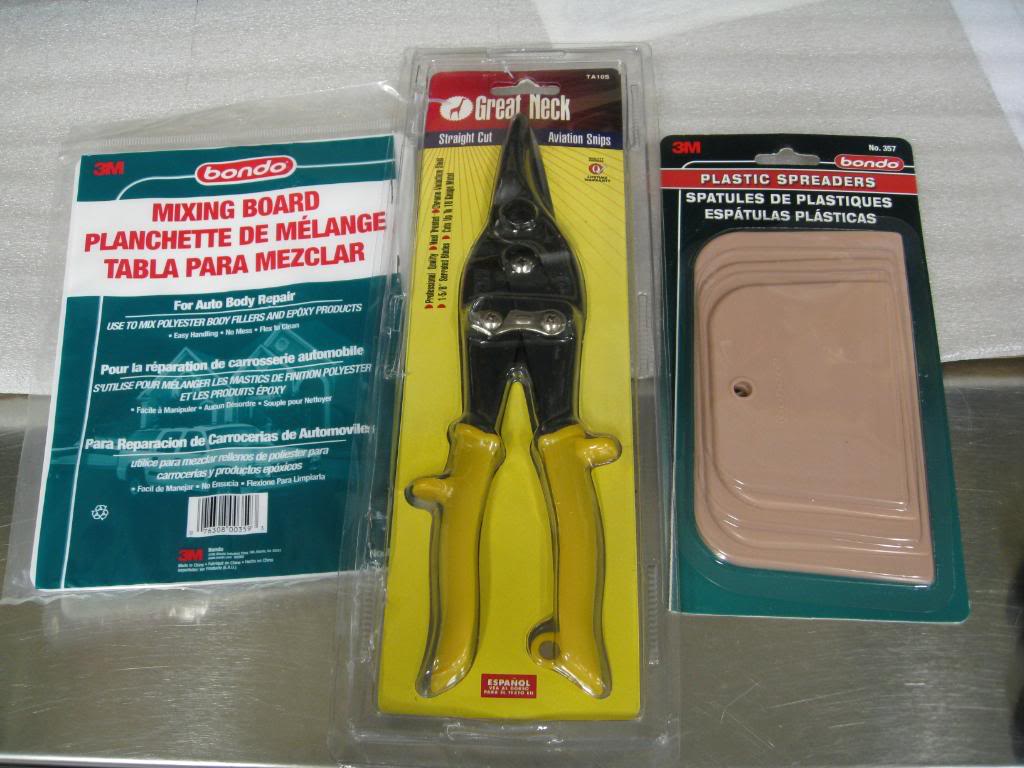
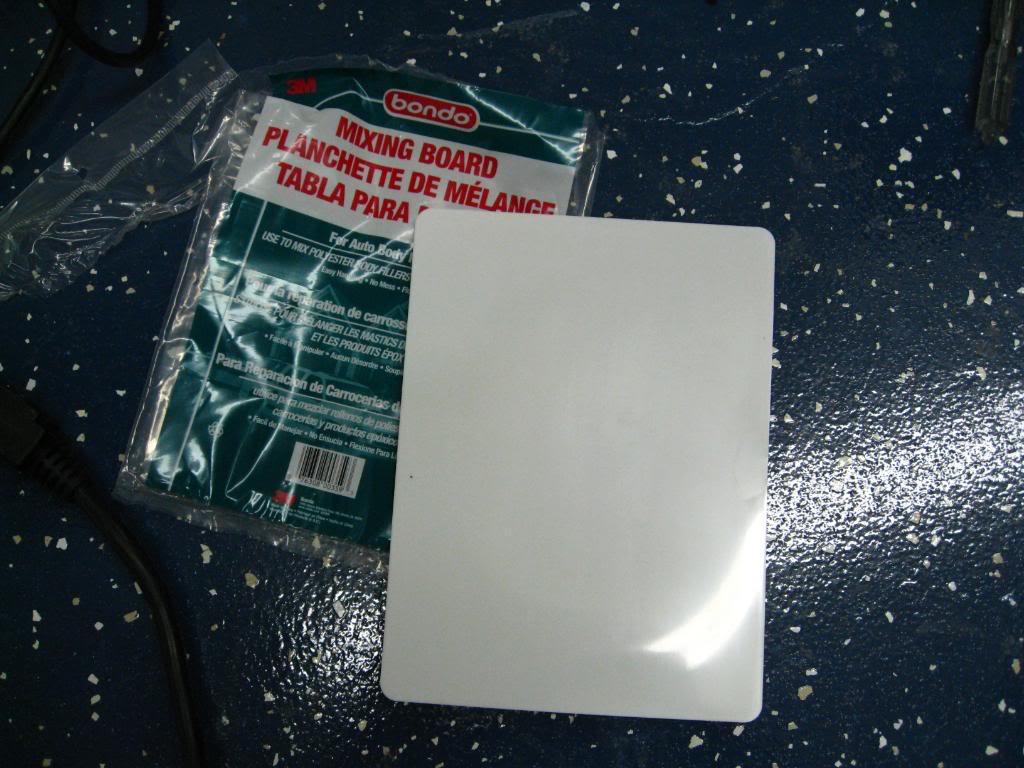
Bondo spreader (2.99) Plastic mixing board used for the back parts of the hole (2.99) Straight cut tin snips for cutting the grill mesh (9.99)
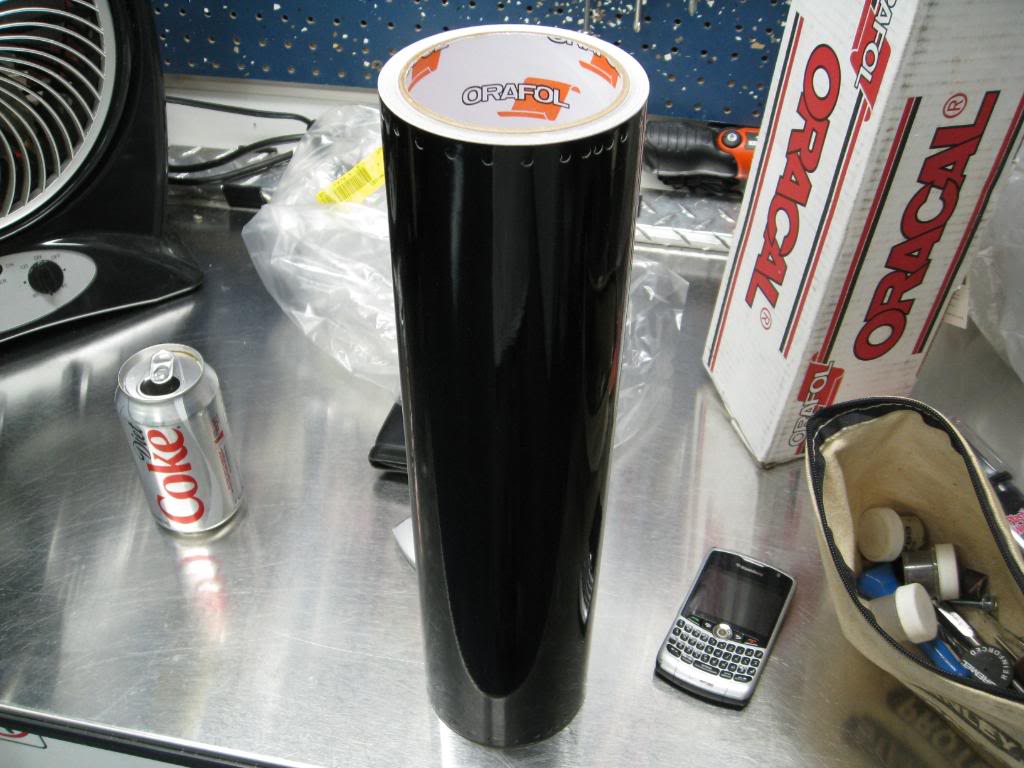
Oracle Vinyl Black wrap (17.00 shipped)
Here is the Vinyl wrap link---->http://www.uscutterdirect.com/ORACAL...hed_p_260.html
Poweder coated grill Mesh by customgrills.com 12*48 inch sheet (60.00 shipped)
Here is the link for the grill Mesh--->http://cgi.ebay.com/ebaymotors/CCG-U...Q5fAccessories
Or go to customgrills.com to see the store.
Don't cheap out on this part because if you paint it, it will chip. Powder coating is the only way!!!
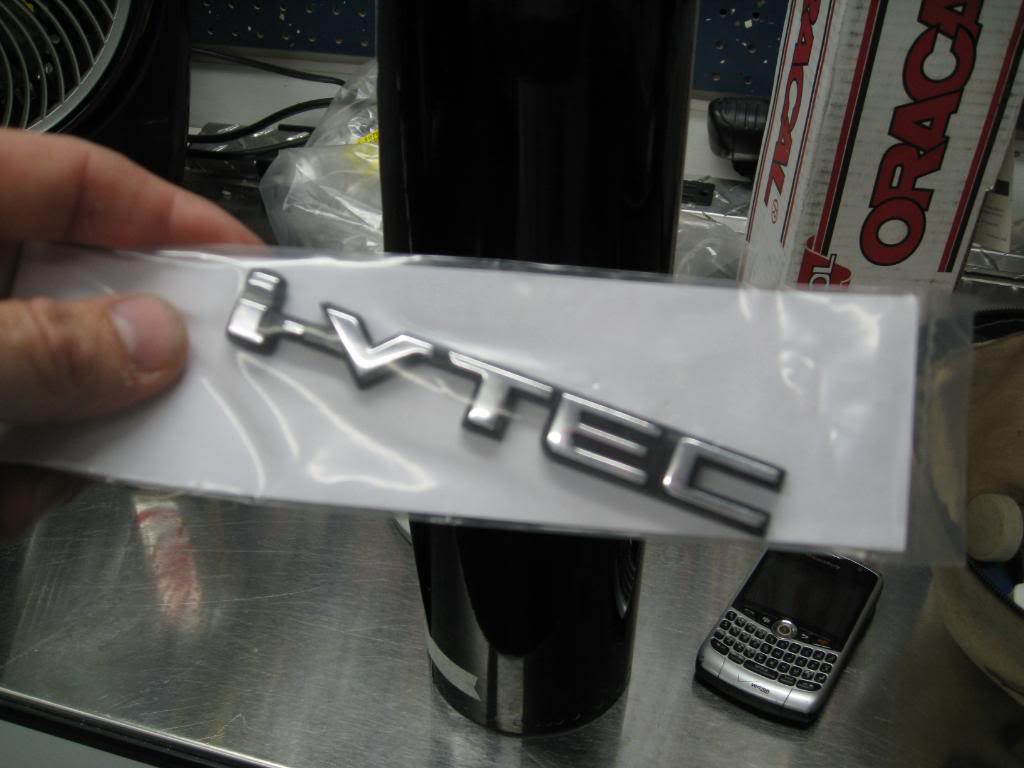
Cheap V-Tec emblem.....I will be getting an aspec badge when I find one at a good price!
I cut the I off and just used the Vtec part.
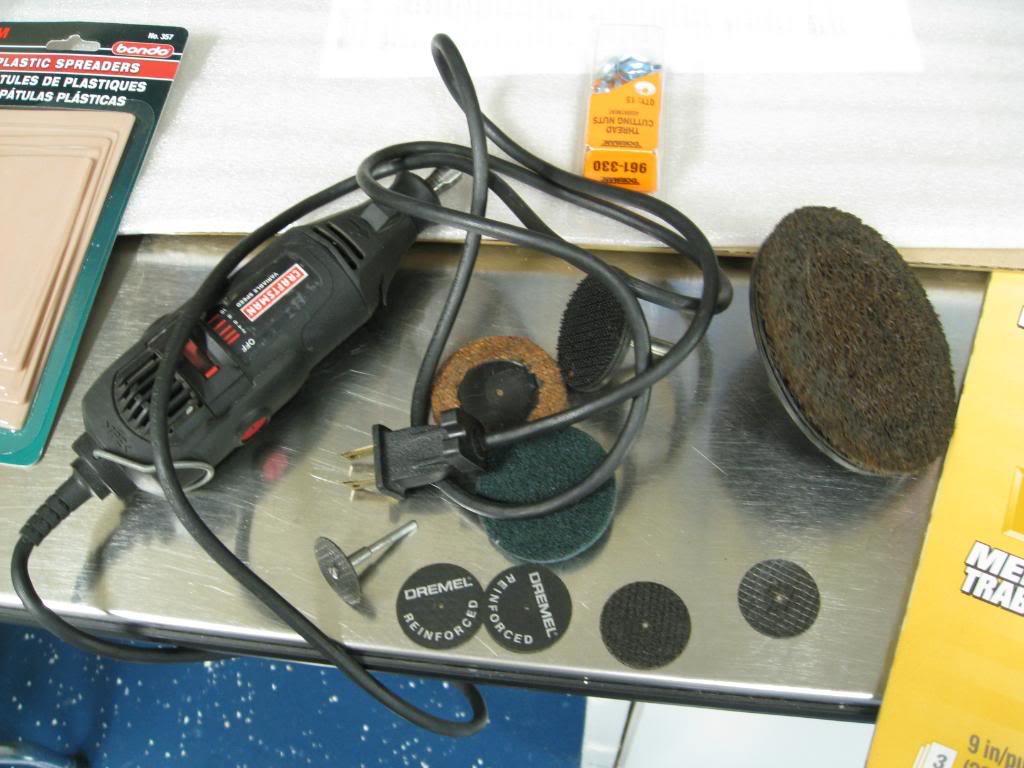
Tools.........
Dremel/80-300 grit sandpaper/
OK on with taking the car apart......
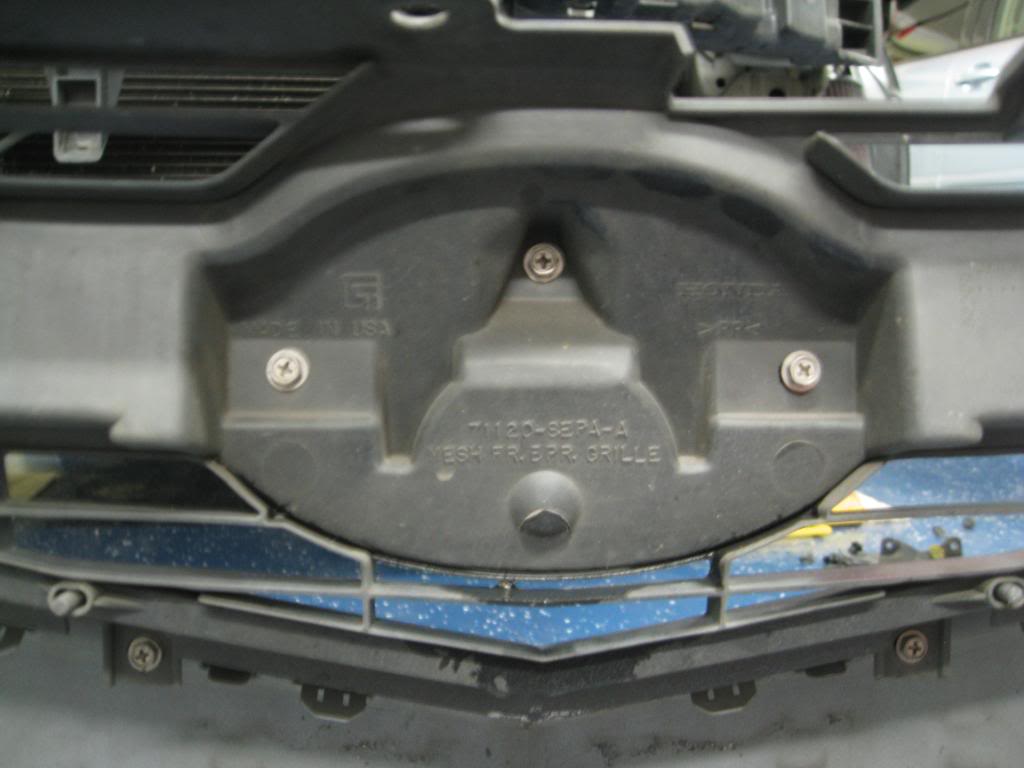
First pop the hood and remove the black plastic covers to expose the four 8mm nuts. Take all of them out...
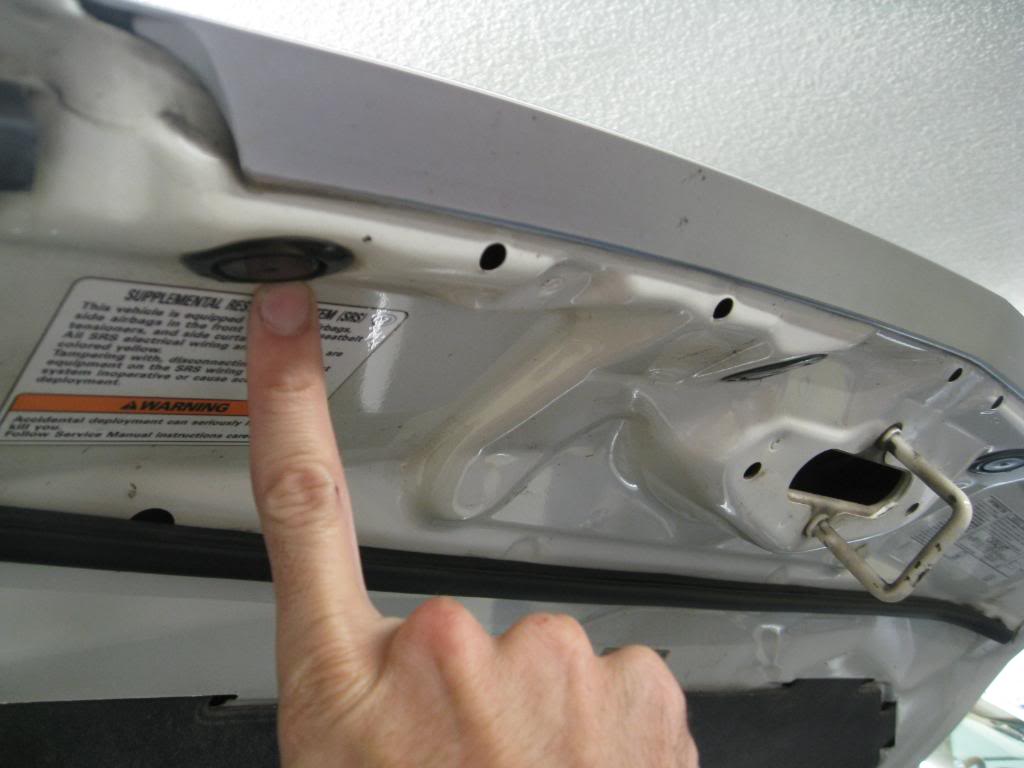
In the middle there is a clip that must be popped out with a srewdriver and the top part will come off the hood...
Now that the part is off the car, clean it with alcohol to make sure the vinyl will stick.....
Cut a piece of vinyl to fit and wrap it up....I am horrible at this and must admit, it took me forever to get it looking ok...I am going to see how it holds up for a month or two with the road chips and if it does well, I am going to have new ones wrapped by the pros when I do my roof
Install the part back on the car and this part is done....
Here is the video link on how to remove the front bumper from the car....
https://acurazine.com/forums/showthr...bumper+removal
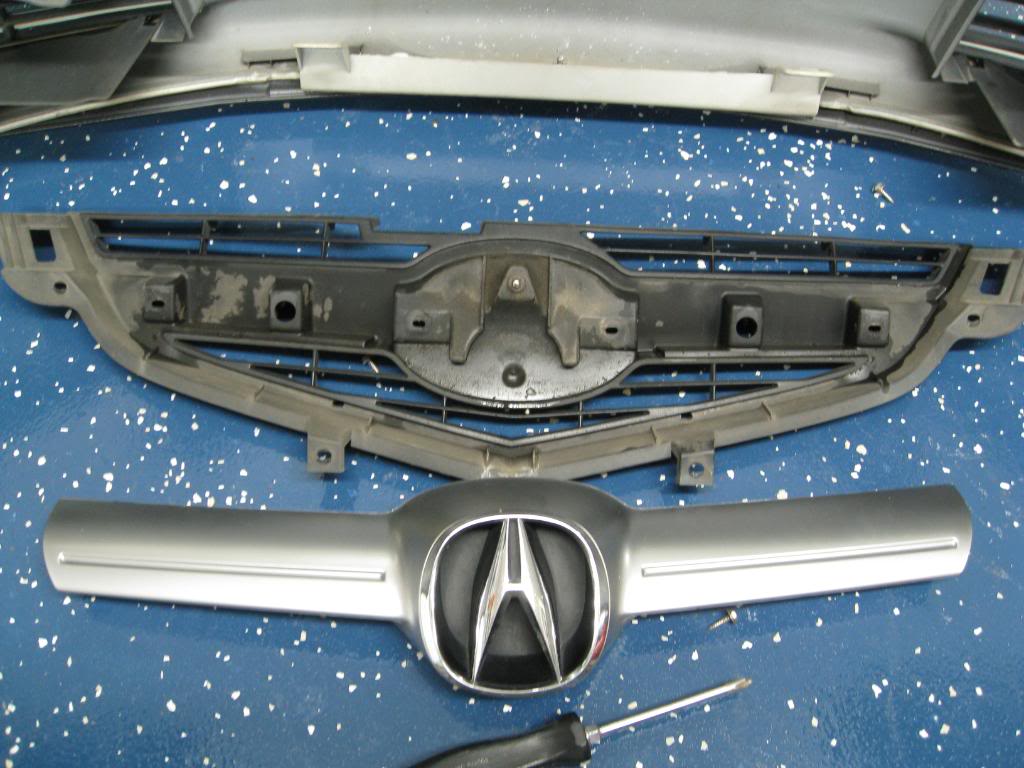
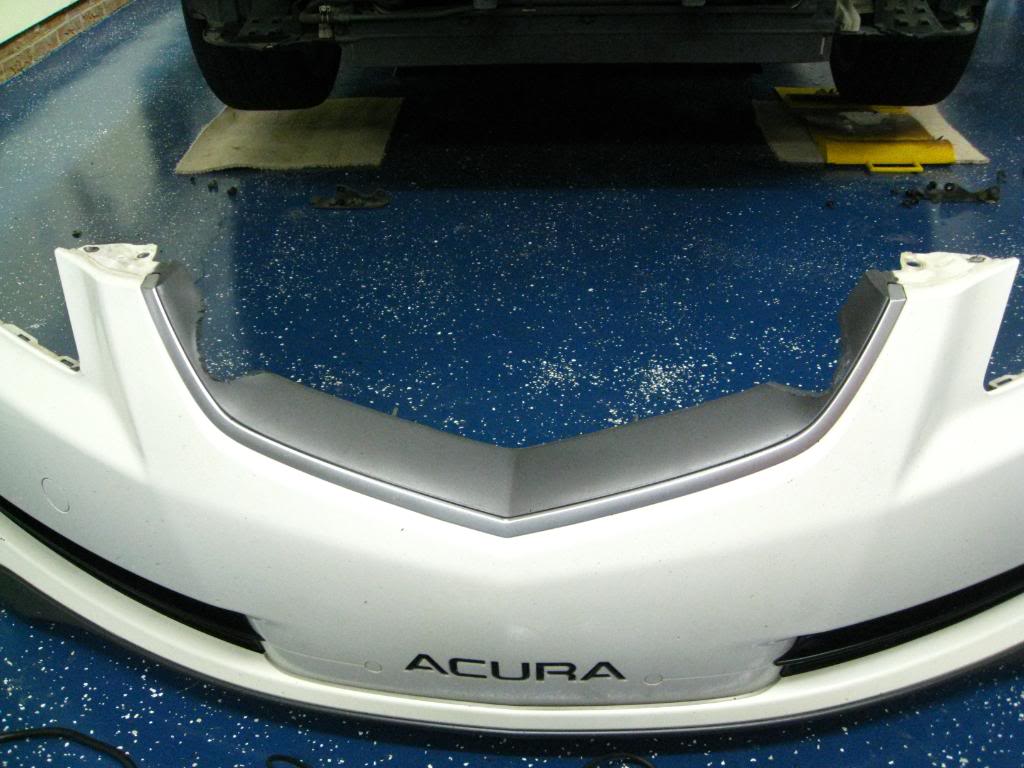
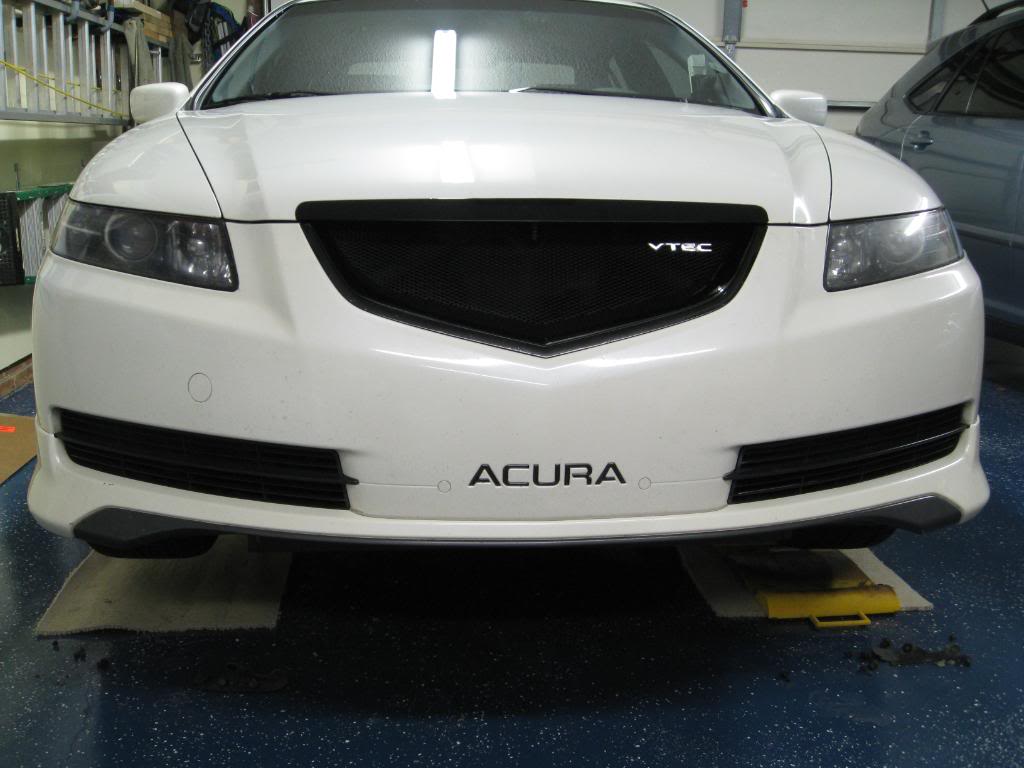
Here is the bumper off.....
Turn the bumper around and take all of the phillips head screws off and keep them to use later on....You will need those screws to attach the mesh....

All the parts are off and we are almost ready to cut.......
OK...Remember back what I said you will need first before you do anything?!?!
Reminder before you go forward....
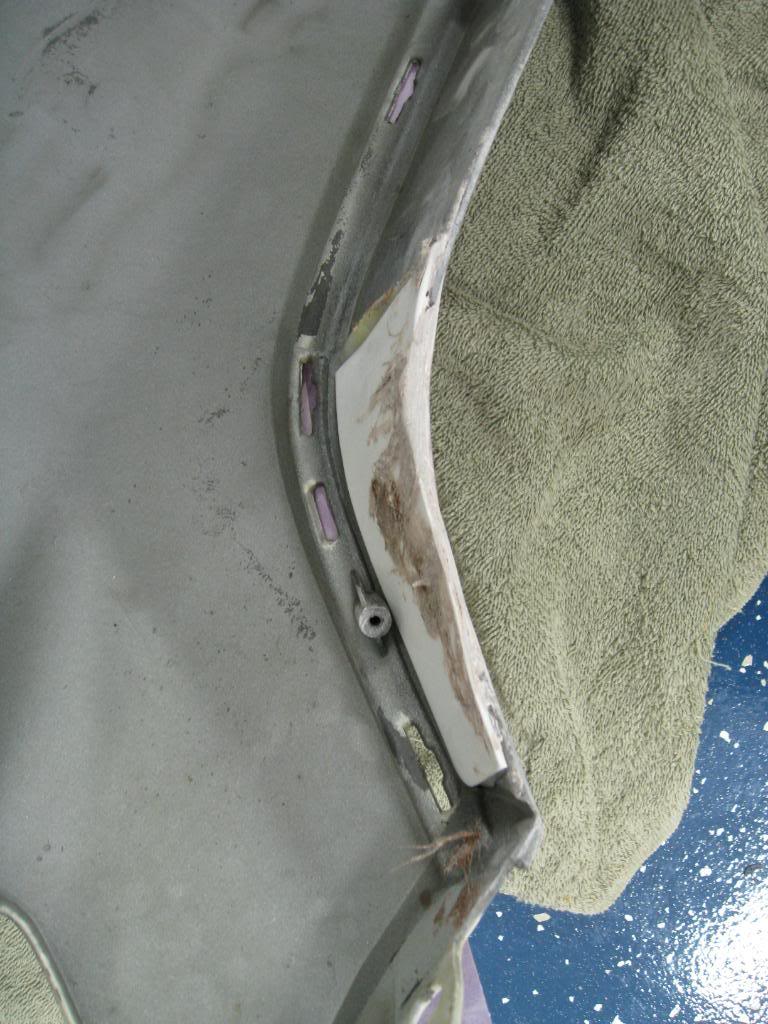
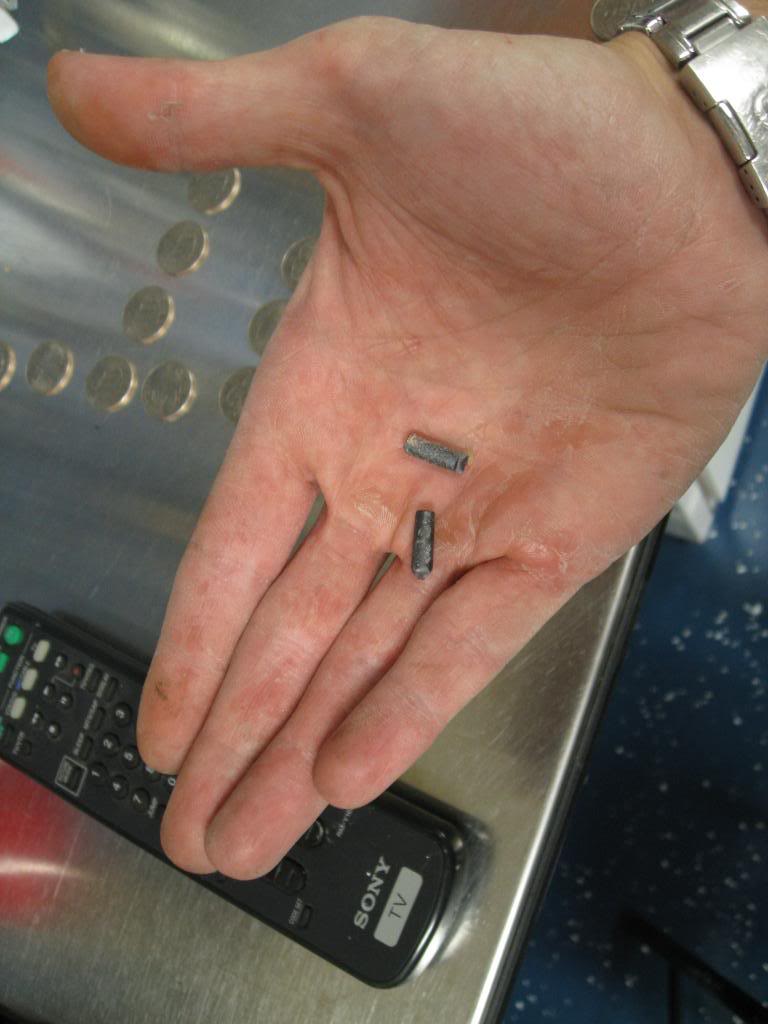
OK break out the Dremel tool. This is the second time I used this tool on the car and it isn't so bad now that she is getting older and paid for!
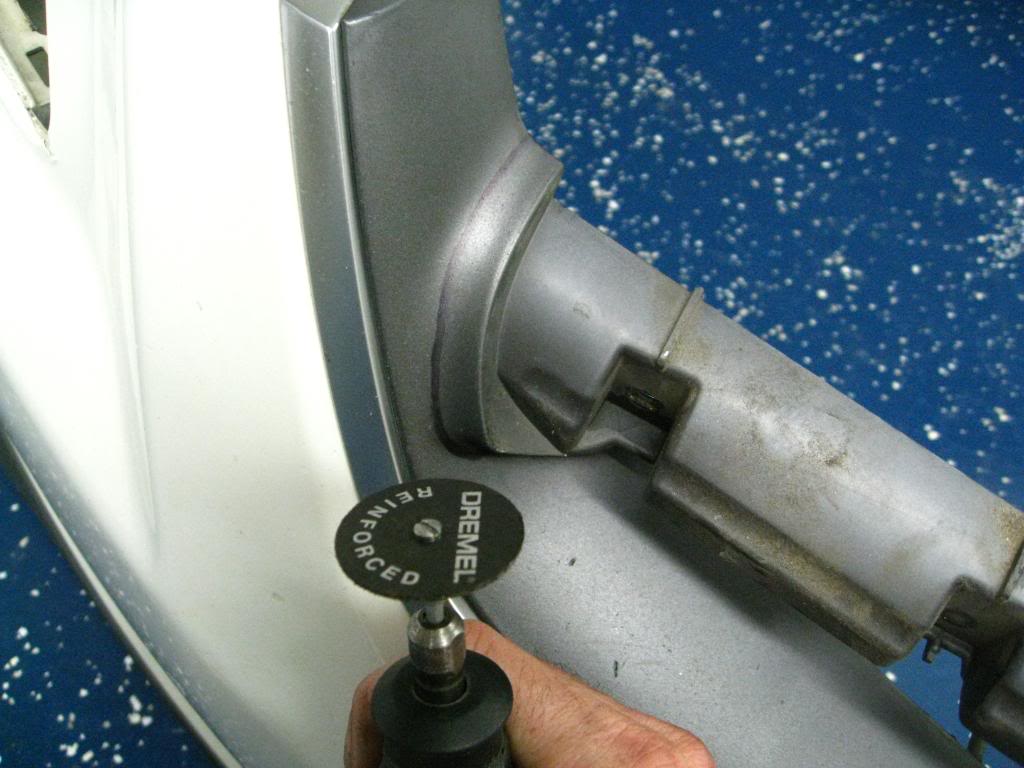
Cut as close to the edge and make sure using your hands, you don't feel any raised areas....
ZING ZING................Point of No return!!!!!
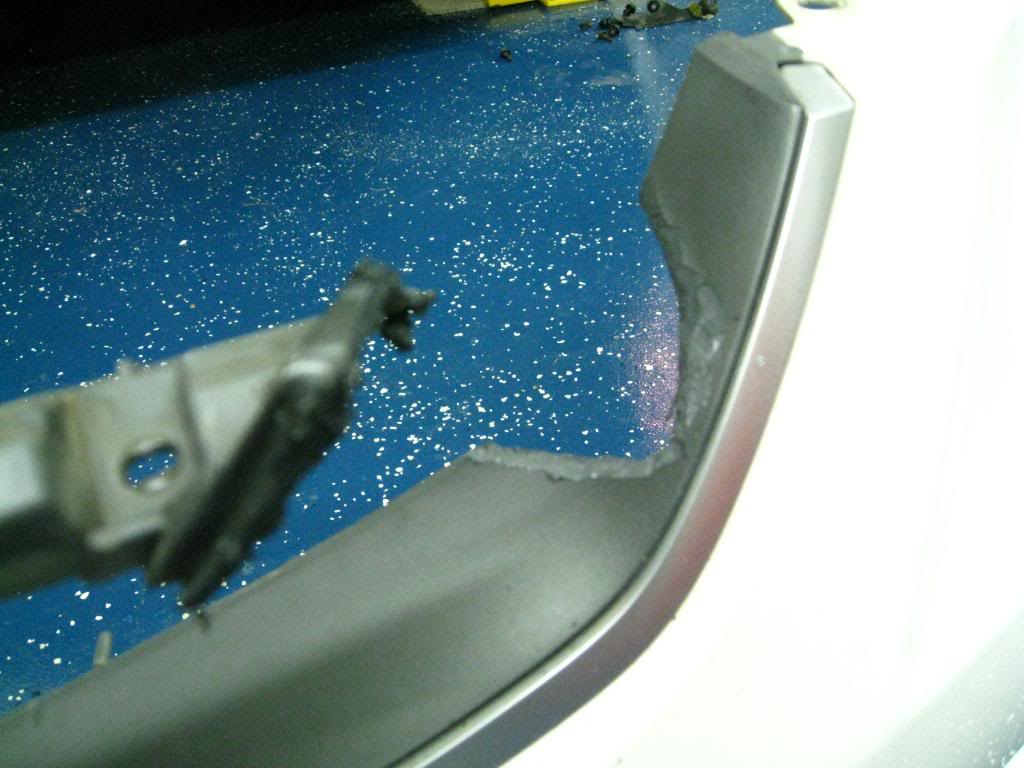
AHHH The smell of plastic melting....
It should look like this....
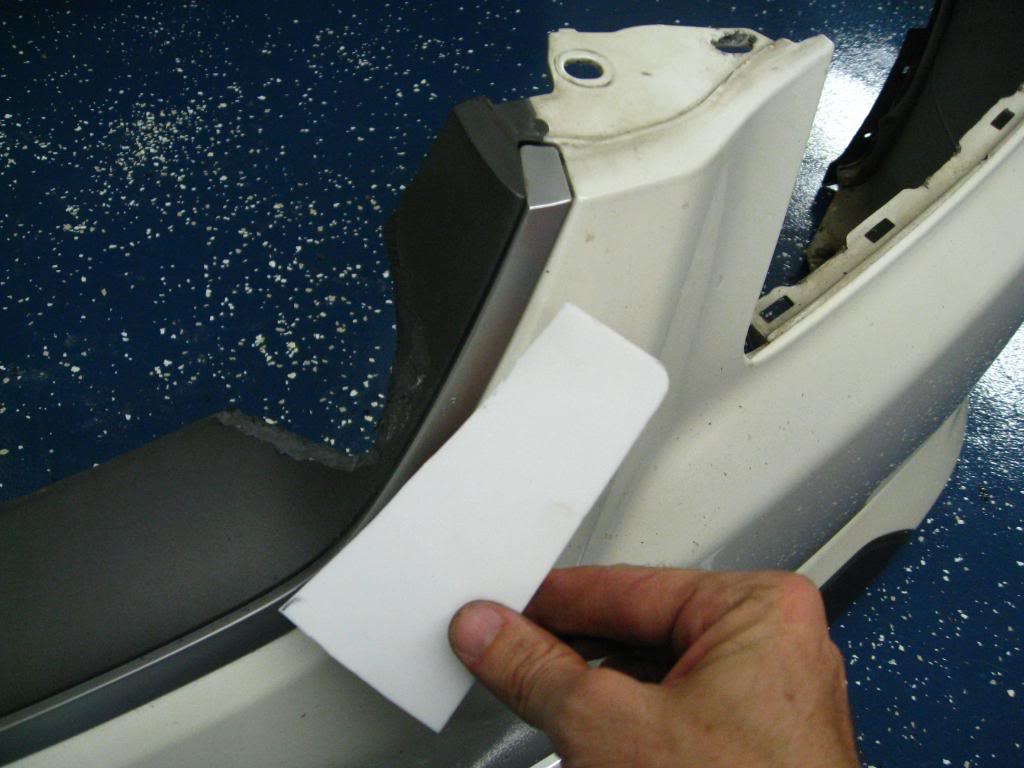
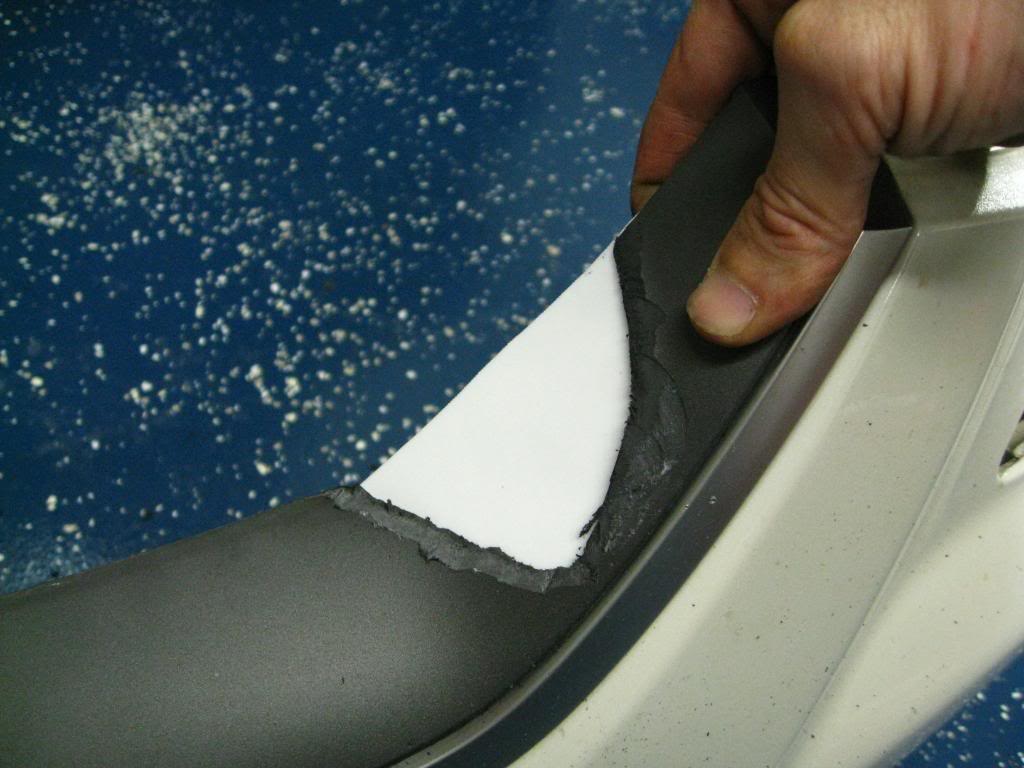
OK now break out the bondo plastic mixing board and cut it to fill in the holes on either side.....
Should look like this...Nice and flush on the back end.
Now get your 180 grit sandpaper out and sand the area TOP AND BOTTOM OF THE AREA THAT IS GOING TO BE FILLED!!!

MAKE SURE YOU SAND THE WHITE PLASTIC SO THE BONDO AND EPOXY WILL STICK!!!!!
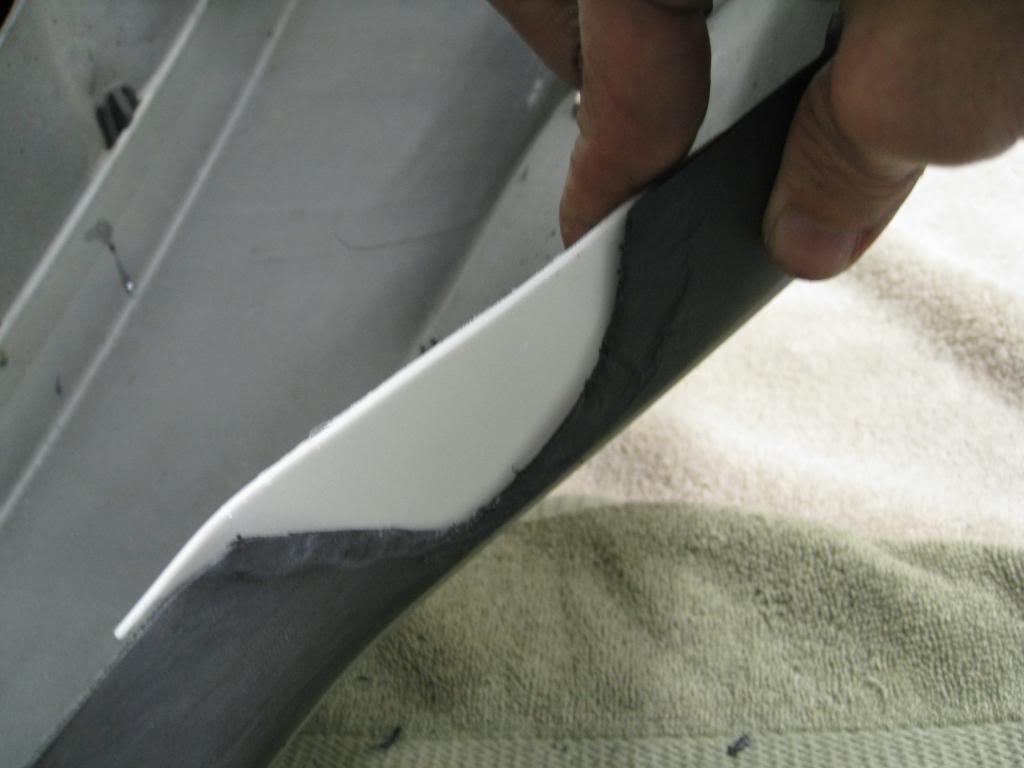
Break out the EPOXY and mix a small amount to put on either side to hold it in place...
Bend the plastic to shape as shown in the pictures and use a clamp or clips to make sure it stays in place......Take a break for 15 minutes to let it dry.
Nice to have a TV in the garage with the playoffs on.....
Dodgers tie it in the eight.....
OK, back to work.....
Take the clips off and it should be attached well and look lie this....
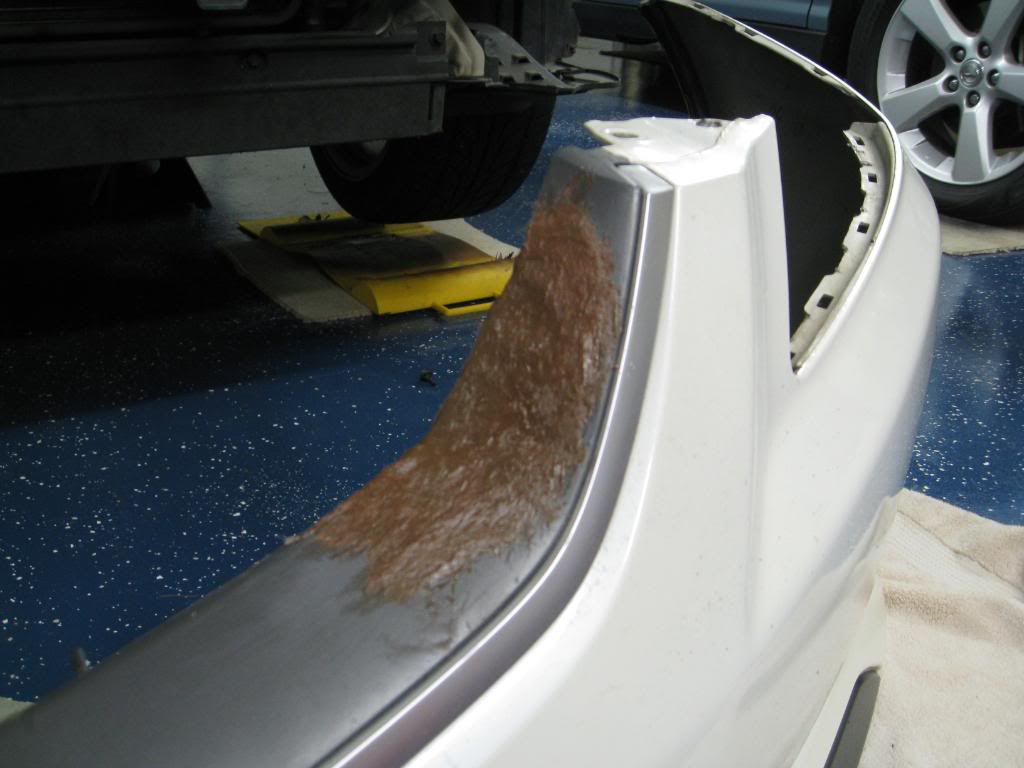
Break out the Fiberglass bondo or regular bondo and mix as described on the can...This fiberglass drys fast so be prepared to move quick.....
Spread it on like so.....
Take a break, drink a beer and watch some more Baseball.....Come on Yankees!!!!!
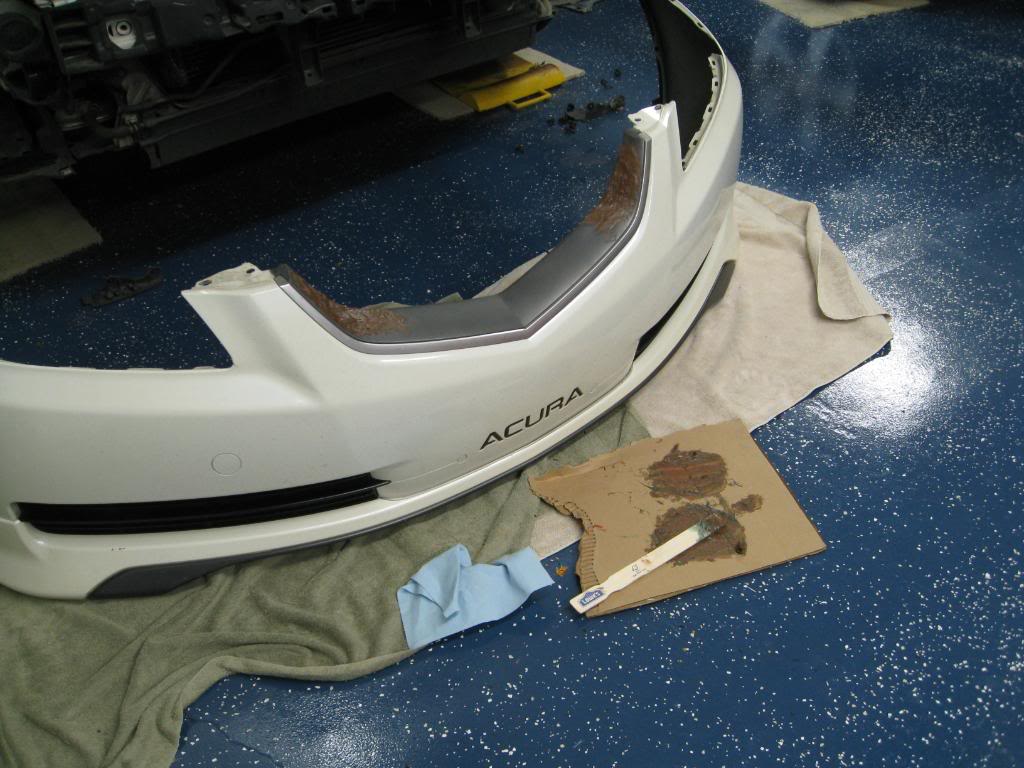
OK now sand the crap out of this with a file or 80 grit sandpaper... I did this outside for many reasons and I wish I didn't lay it on so thick because I had a lot of sanding to do.
Tape off the areas around to make sure you don't sand your paint off. If you are panting this, it needs to be perfect....Smooth and not one hole or bump...My vinyl covered up most of this but if you look really closely, you can see where I could have sanded more. I can always do this if I decide to paint it next summer....
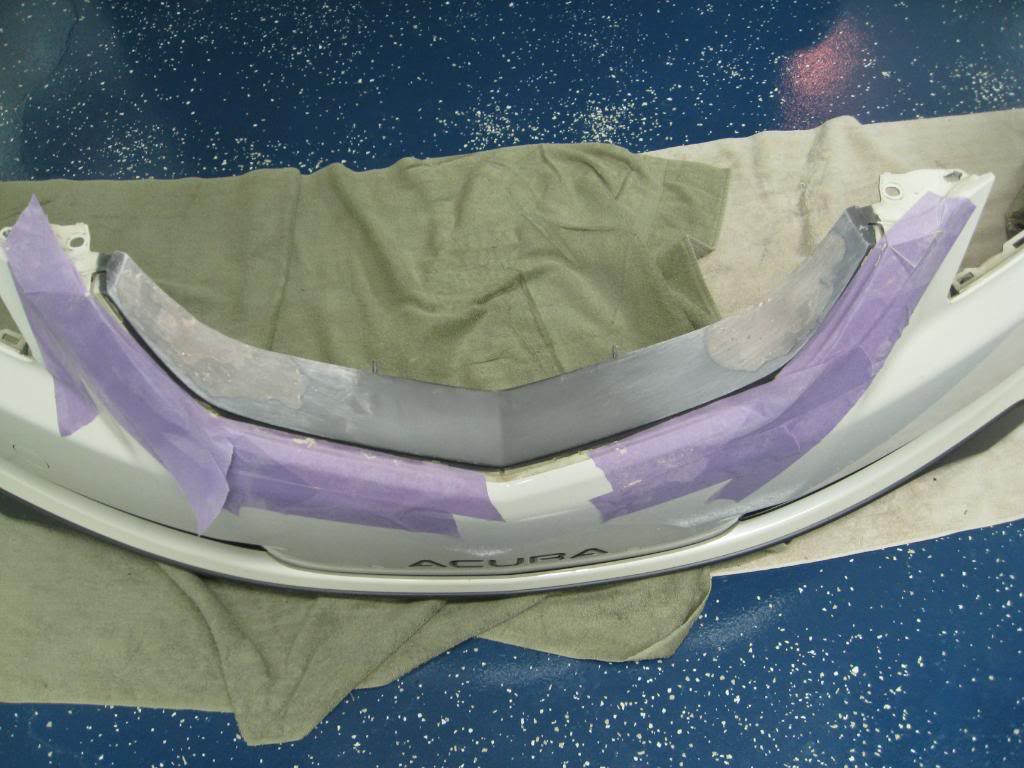
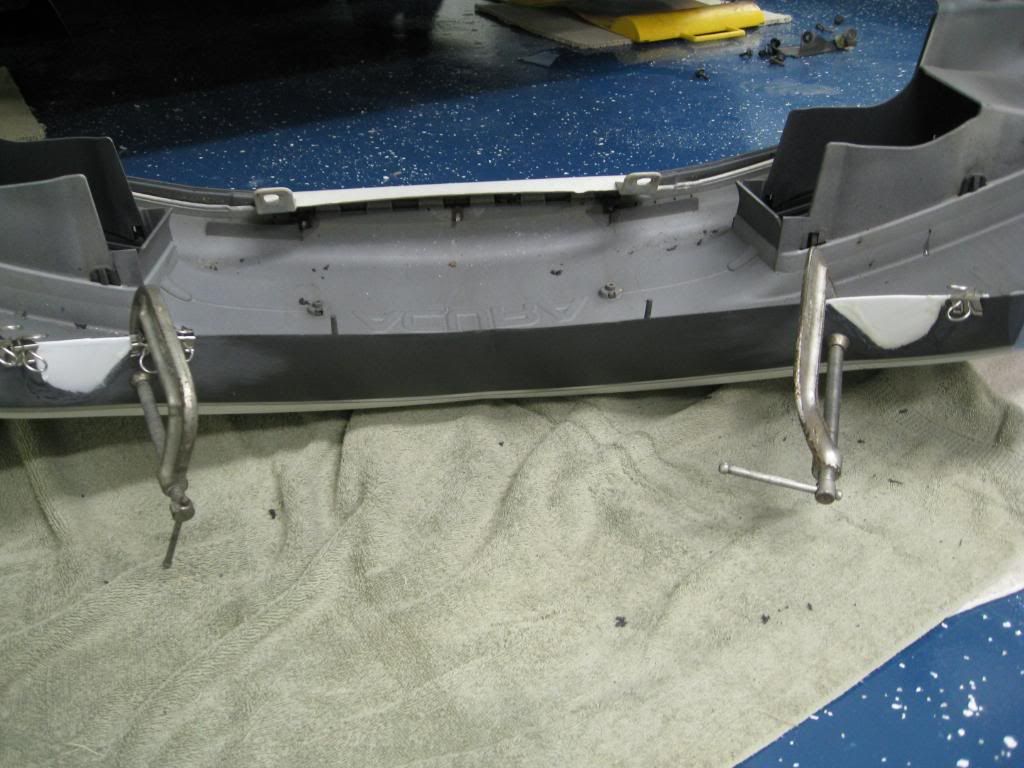
PPLAWPW's DIY thread said to use the two poles to hold the mesh in place but I decided to go a different route.
I cut the two poles off and made them flush...
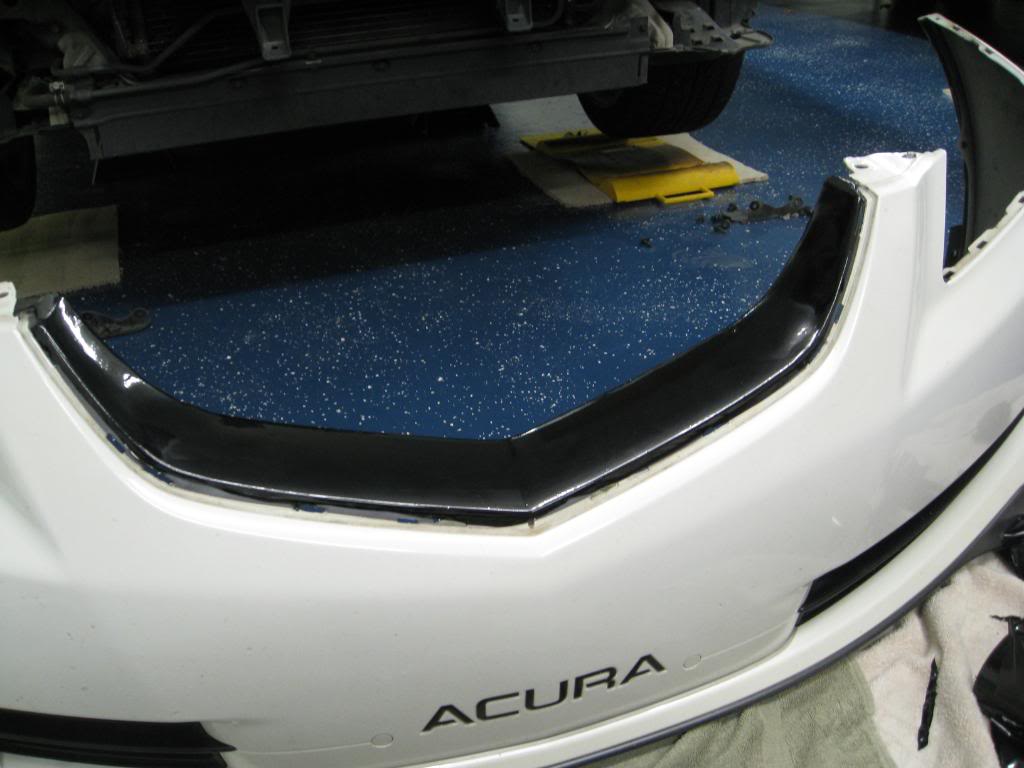
Clean the area to be wrapped with alcohol so tyhe vinyl sticks well.
Wrap it up and it should look like this...
Now on with the grill mesh...
As I went on, I realized I could have saved a lot of the mesh and used a lot less but I had an idea on top that I ended up not needing any where need the amount.
I suggest to make the top grill mess level with the top part of the bumper and not have as much as I do because I eneded up cutting a lot...
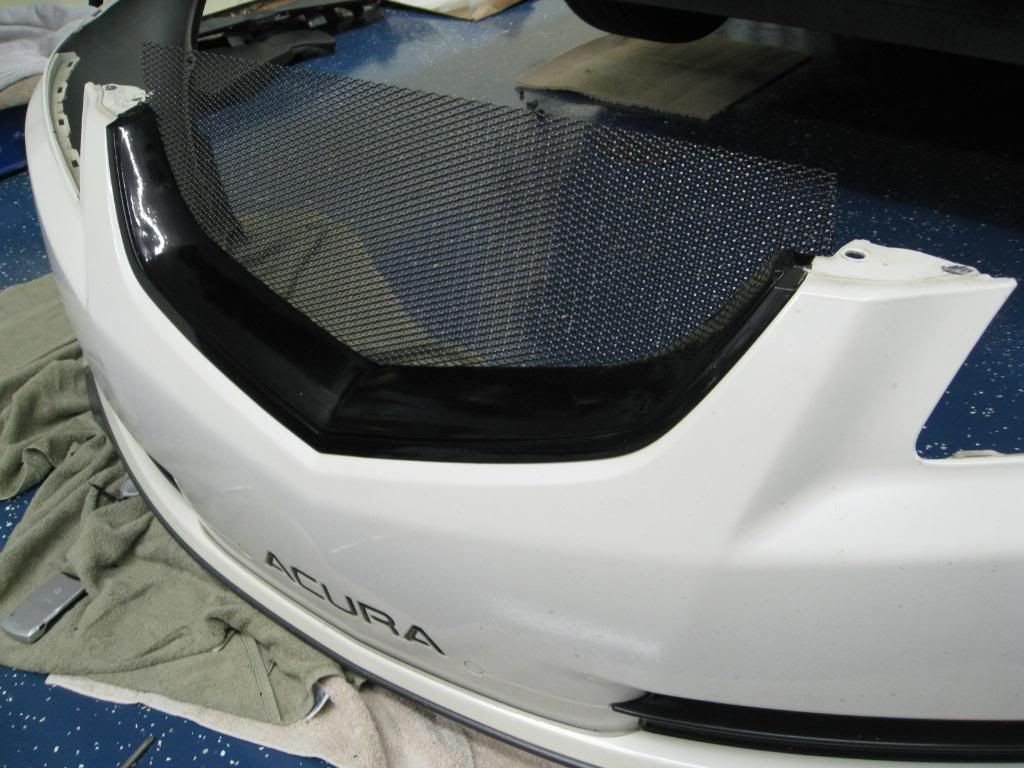
Break out those phillips screws that held the old grill in and also cut the mesh so it can be bent and formed like this. I bent it enough so it had presser on the screws but not a lot...
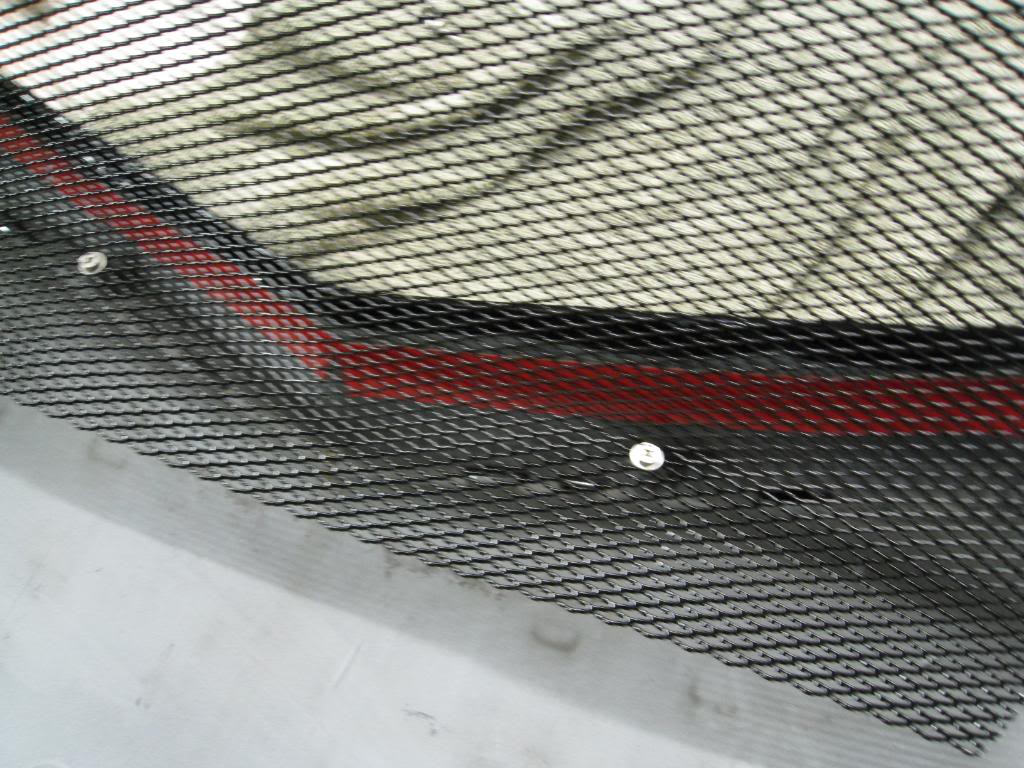
Form the rest of the grill and use the other two screws on top (one on each side)
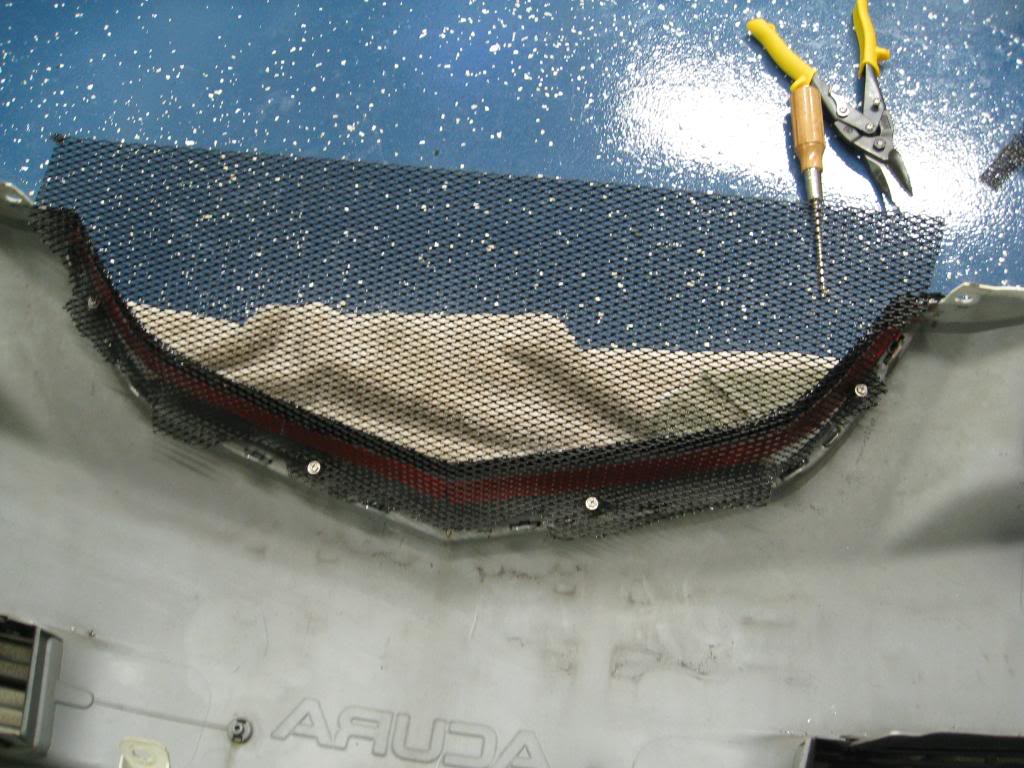
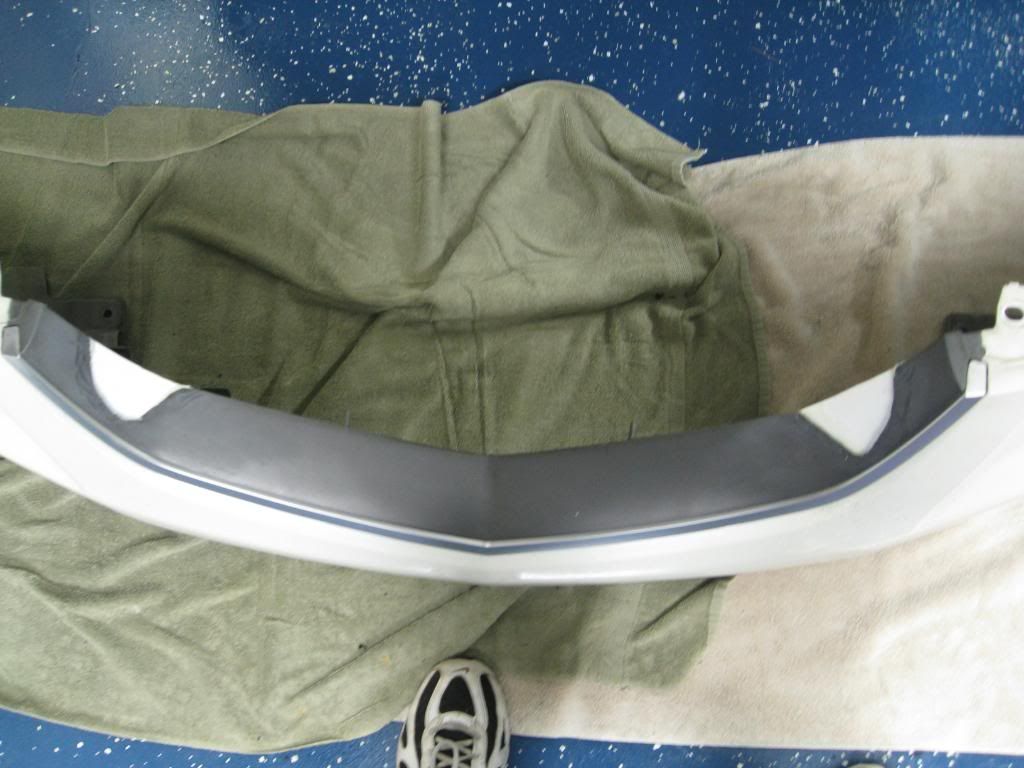
Bend and form the grill so it's against the bumper..
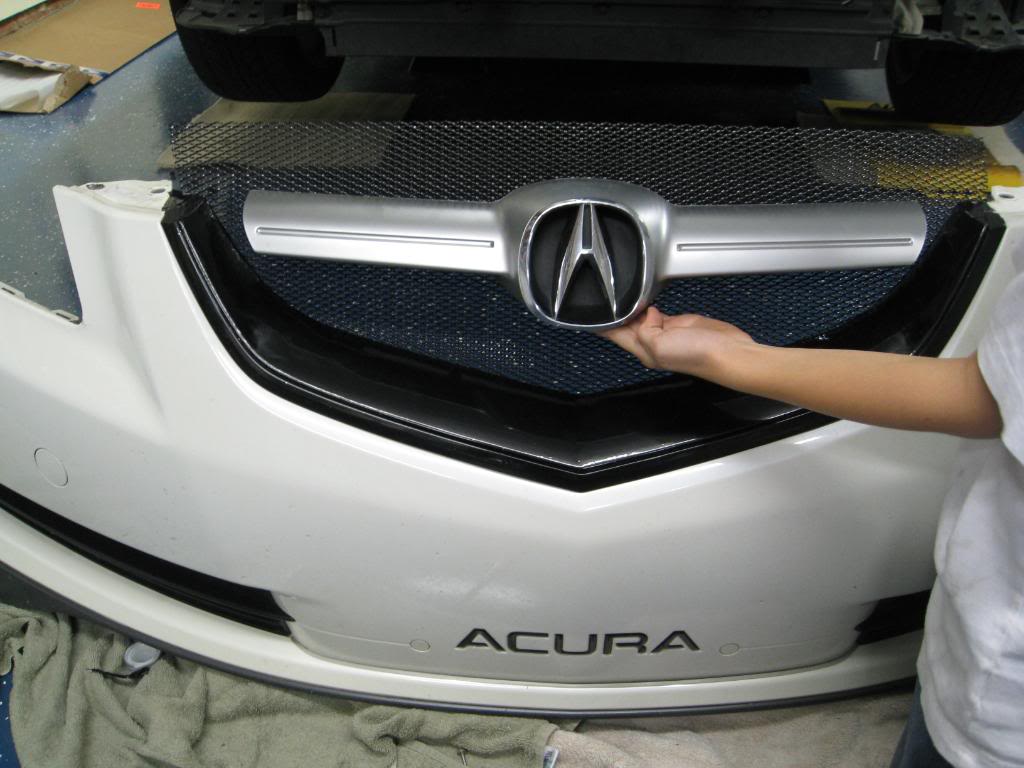
My man Alex holding up the old A molding....
Place the bumber on the car....
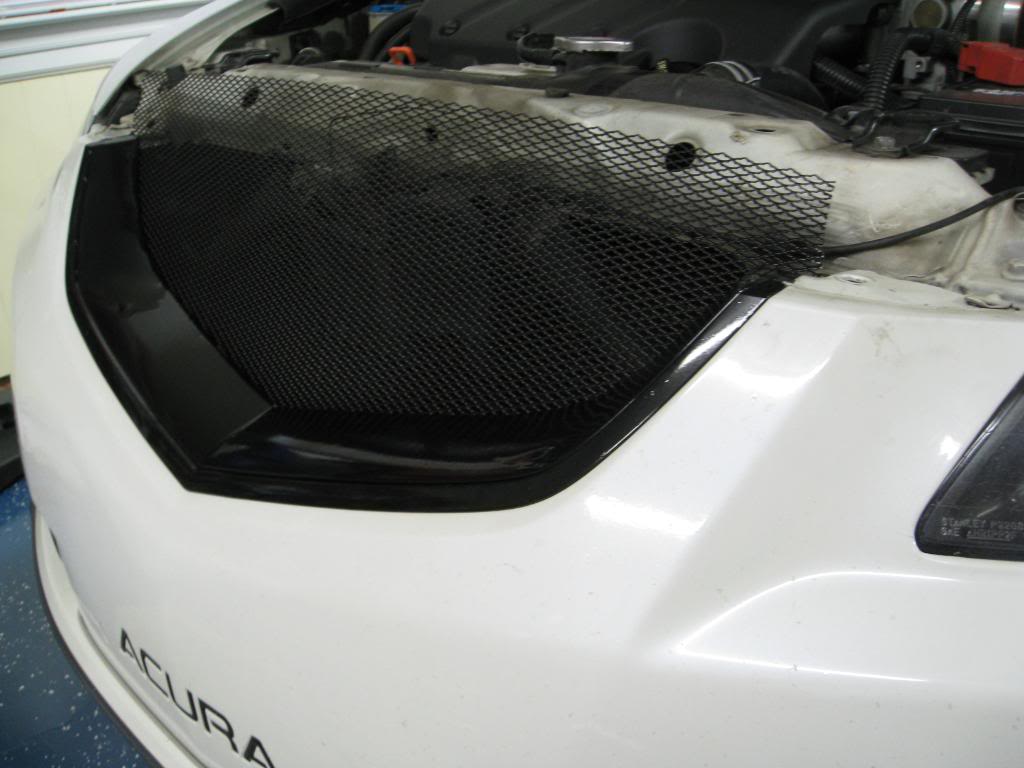
Like I said before, I had to cut the top. I put the plastic shrowd in place and the top of the mesh rests in front of that to keep it in place and tight.
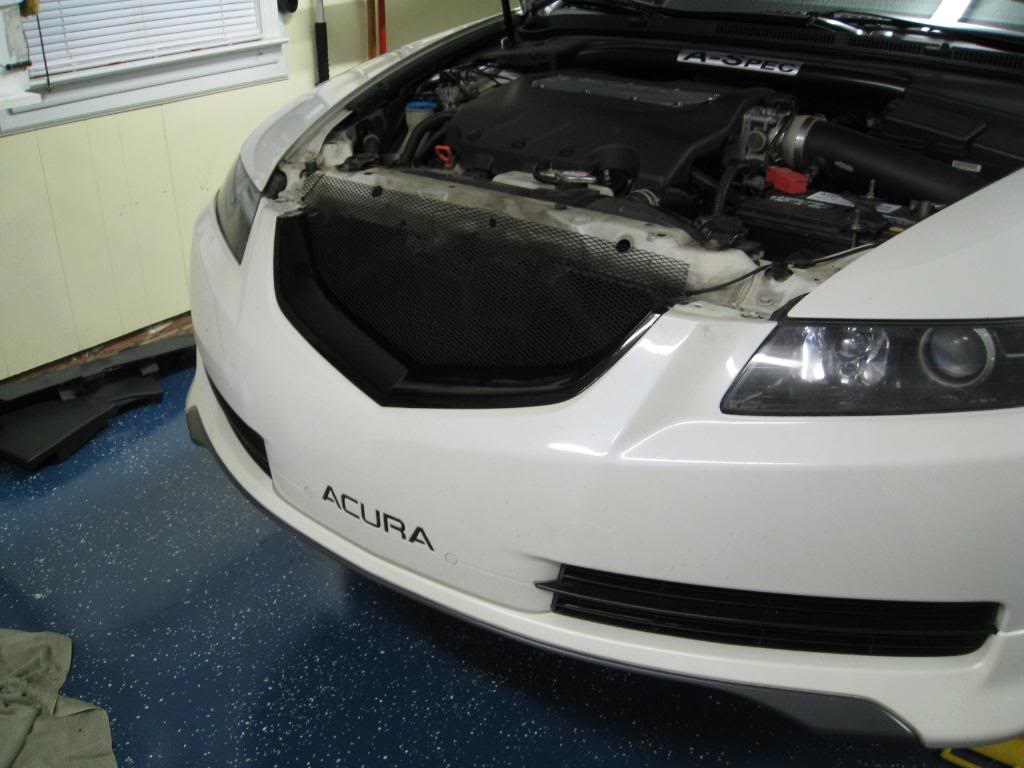
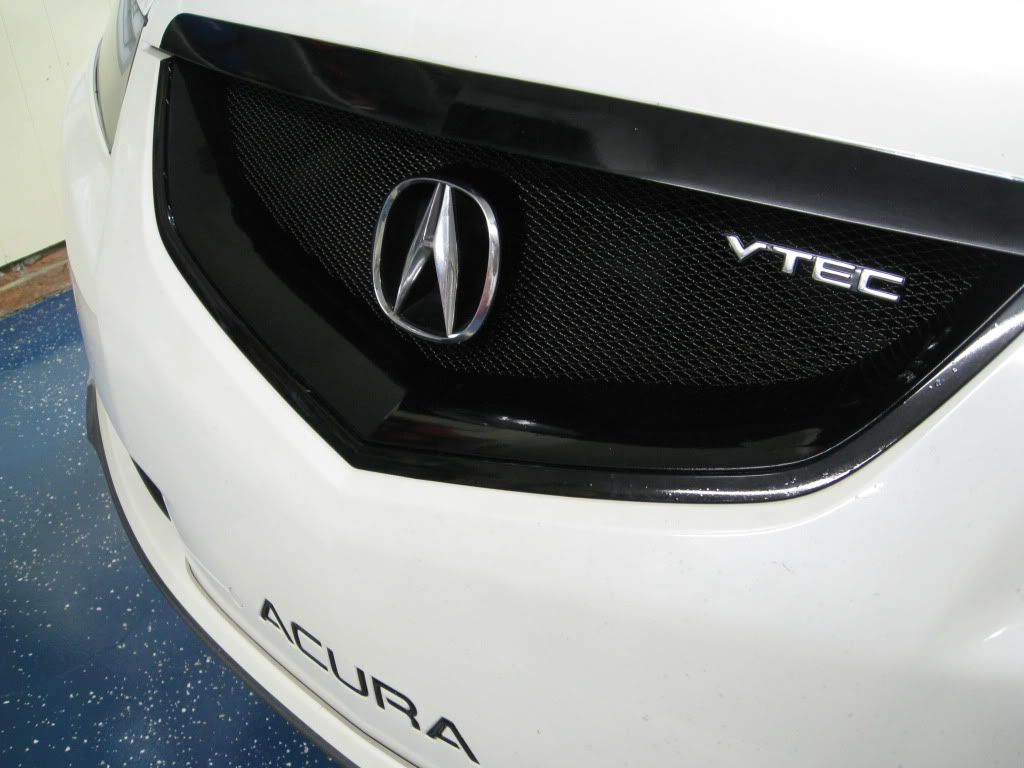
I added the V-TEC emblem to see if I like it alone and it seemed a little empty....I would like to get an aspec badge and replace the V-tec badge and will soon.
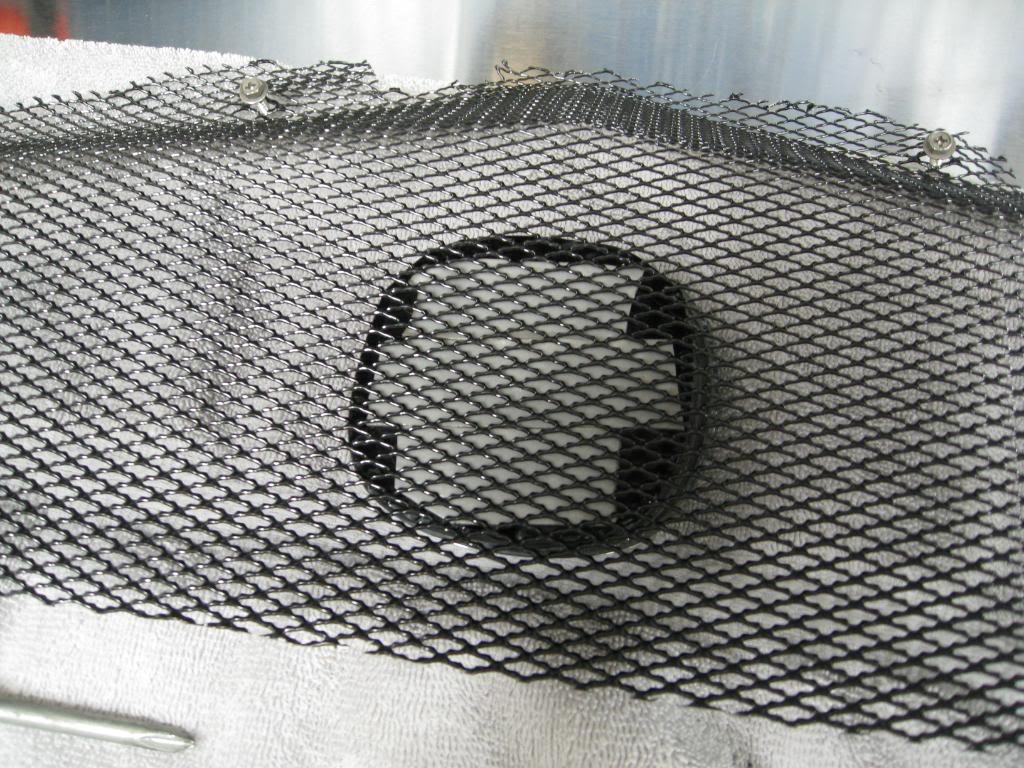
OK So....Looking at Darksom1's ride, I decided to do the same thing.....
Take the cup off and the emblem off to get the palstic circle out...
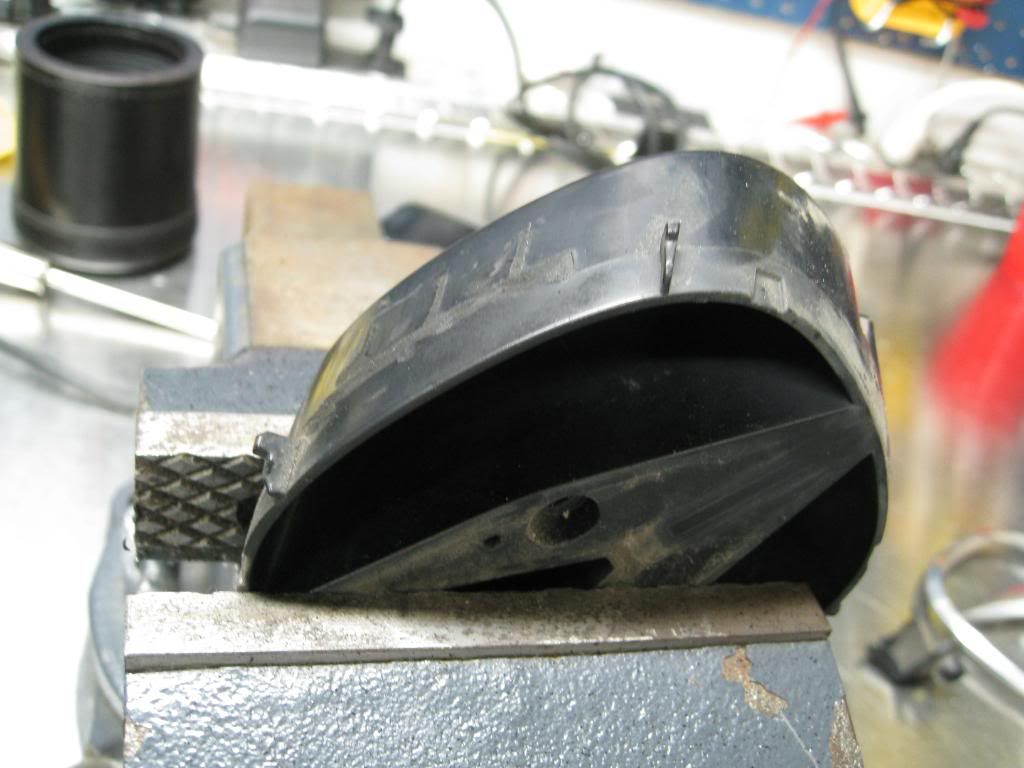
Put it in the vice and trim and sand smooth the two brackets (one on each side)
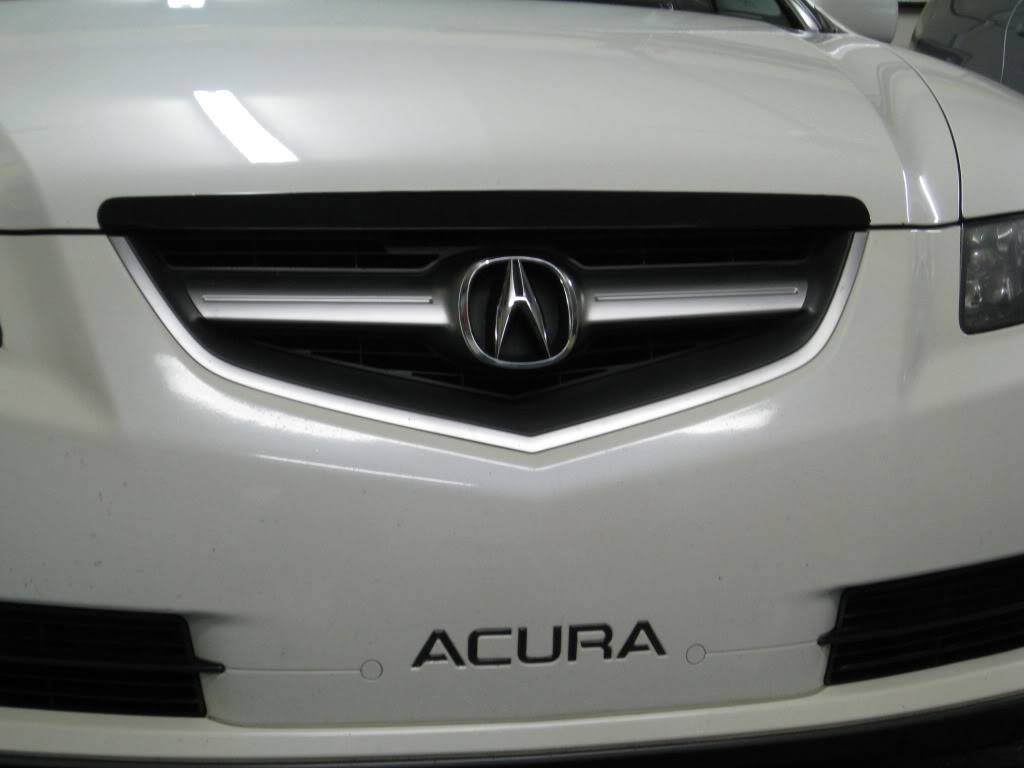
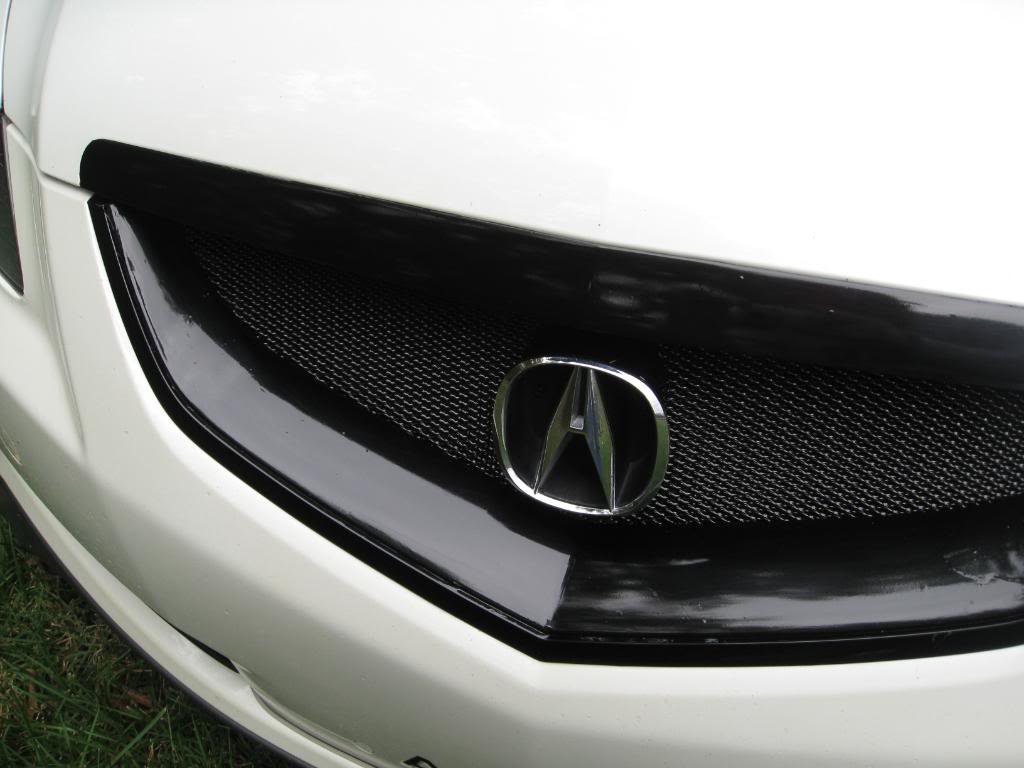
I then wrapped it in vinyl and put the emblem on I decided not t screw it in place just in case I decided I didn't want to keep it on. I didn't want to mark up the grill mesh. So I got out the 3M outdoor double sided adhesive and put it on using that. When you are all done, it should look like this....
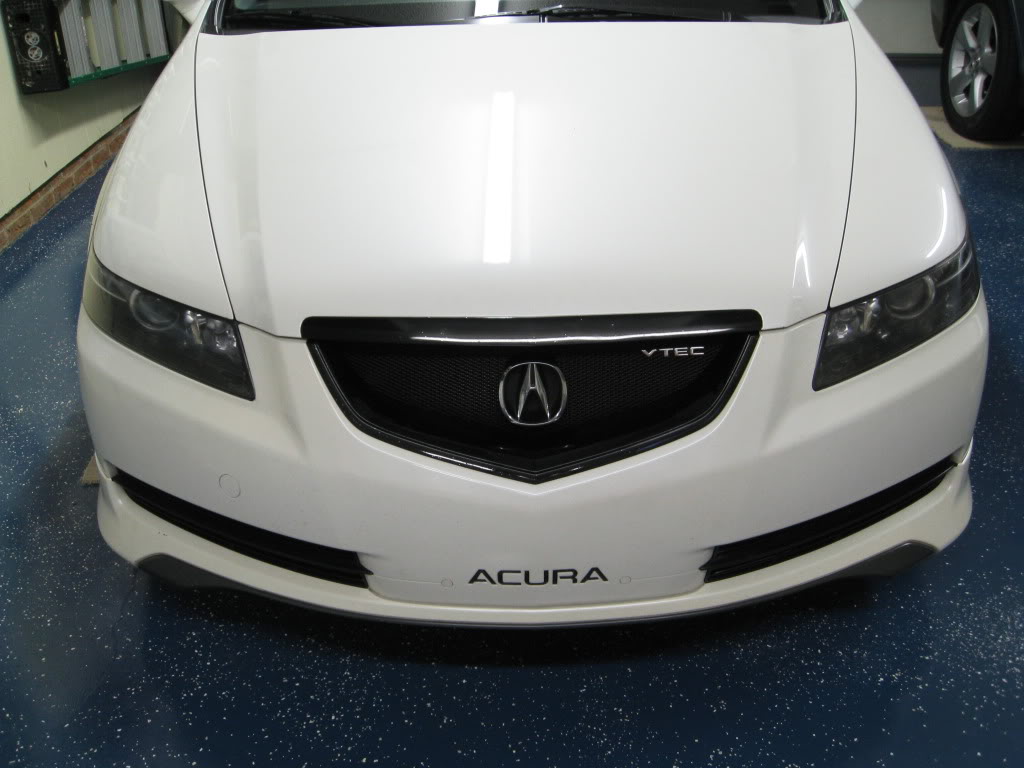
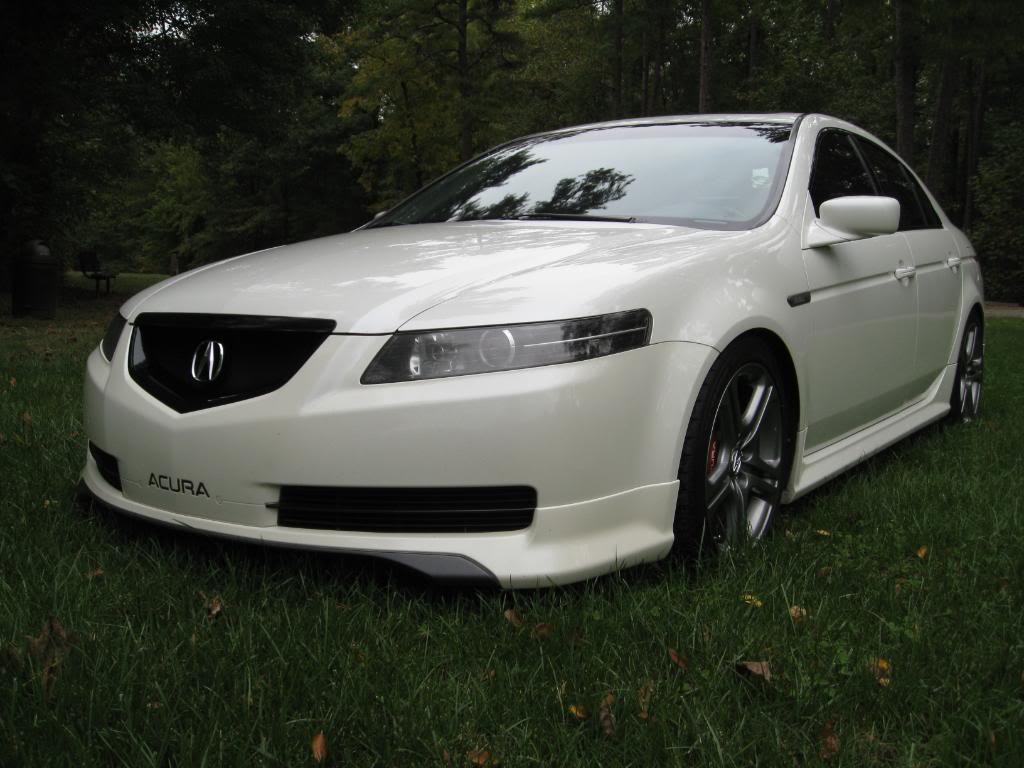
This is a mod that totally changes the front look of the car.....
My wife even said this was the best looking mod by far
I am not a pro and the vinyl does have a few bubbles that I am going to try to work with and see if I can get them out. You really need to be up on the car to see them so no big deal.
I love this site and I am glad to help out this great community that has helped me transform the Acura I have today..... Thanks everyone!!!!!
Here is a mod I wanted to do for a long time but really didn't know if I wanted to put the time and money into it to do the job right. I decided to do this considering I am keeping this car for a very long time....I know some might say it is a permant mod and you can never bring it back to stock when you sell it and they are right. With 160,000 miles on the clock and adding 5000 miles a month, the car is going to be worthless after I sell it....
On with the DIY......
First thanks to this form for letting me see what look is out there and getting some ideas as I search....
Thanks to ACCURATin for having the balls to do this mod to his brand new 04 TL back in the day.....The Original Griller!!!!!
Darksom1- Thanks for giving us the idea of the floating A
Sk8ter4life- Thanks for thinking of the idea to wrap the grill parts in vinyl
Rockyfeller- This DIY is to help the non-stop questions you have been getting about your grill mod! Keep up the great work on your ride!
OK on with this already....
If you are planning to tackel this job, you need to make sure you have these before you start anything......
Your gonna need them if you are going to be cutting your grill
Tools parts, emblems, and grill mesh......
Autozone has it all but most good auto parts will have what you need...
Bondo Hair (fiberglass) $13.99
Plastic Welder epoxy $4.99
Bondo spreader (2.99) Plastic mixing board used for the back parts of the hole (2.99) Straight cut tin snips for cutting the grill mesh (9.99)
Oracle Vinyl Black wrap (17.00 shipped)
Here is the Vinyl wrap link---->http://www.uscutterdirect.com/ORACAL...hed_p_260.html
Poweder coated grill Mesh by customgrills.com 12*48 inch sheet (60.00 shipped)
Here is the link for the grill Mesh--->http://cgi.ebay.com/ebaymotors/CCG-U...Q5fAccessories
Or go to customgrills.com to see the store.
Don't cheap out on this part because if you paint it, it will chip. Powder coating is the only way!!!
Cheap V-Tec emblem.....I will be getting an aspec badge when I find one at a good price!
I cut the I off and just used the Vtec part.
Tools.........
Dremel/80-300 grit sandpaper/
OK on with taking the car apart......
First pop the hood and remove the black plastic covers to expose the four 8mm nuts. Take all of them out...
In the middle there is a clip that must be popped out with a srewdriver and the top part will come off the hood...
Now that the part is off the car, clean it with alcohol to make sure the vinyl will stick.....
Cut a piece of vinyl to fit and wrap it up....I am horrible at this and must admit, it took me forever to get it looking ok...I am going to see how it holds up for a month or two with the road chips and if it does well, I am going to have new ones wrapped by the pros when I do my roof
Install the part back on the car and this part is done....
Here is the video link on how to remove the front bumper from the car....
https://acurazine.com/forums/showthr...bumper+removal
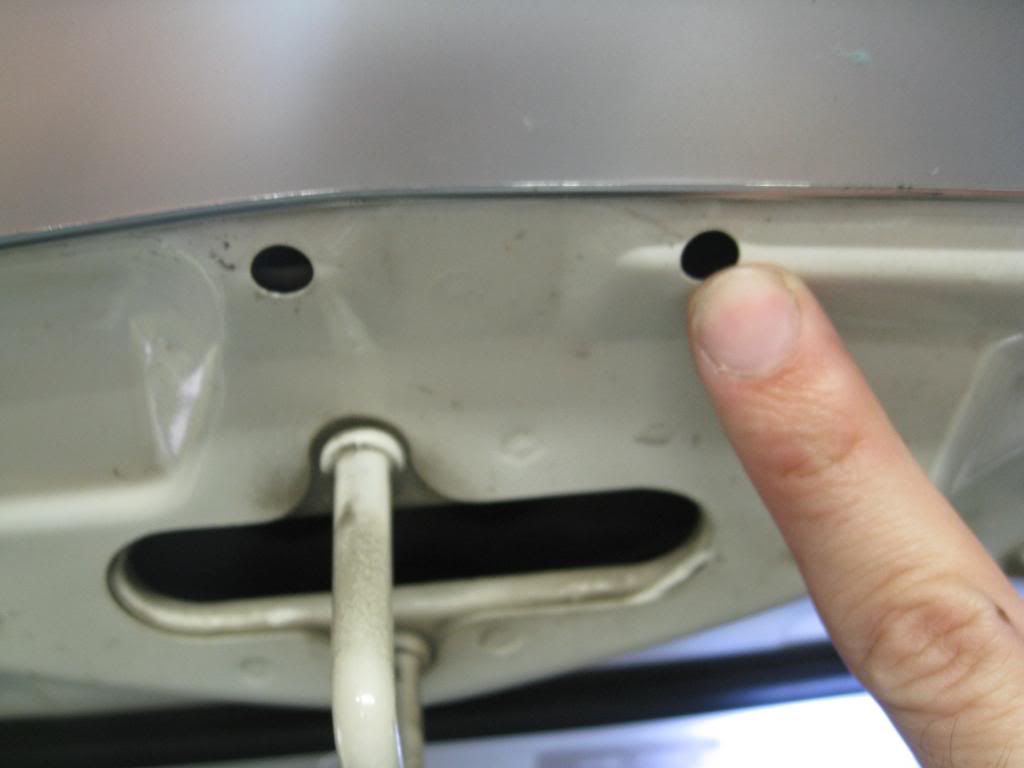
Here is the bumper off.....
Turn the bumper around and take all of the phillips head screws off and keep them to use later on....You will need those screws to attach the mesh....
All the parts are off and we are almost ready to cut.......
OK...Remember back what I said you will need first before you do anything?!?!
Reminder before you go forward....
OK break out the Dremel tool. This is the second time I used this tool on the car and it isn't so bad now that she is getting older and paid for!
Cut as close to the edge and make sure using your hands, you don't feel any raised areas....
ZING ZING................Point of No return!!!!!
AHHH The smell of plastic melting....
It should look like this....
OK now break out the bondo plastic mixing board and cut it to fill in the holes on either side.....
Should look like this...Nice and flush on the back end.
Now get your 180 grit sandpaper out and sand the area TOP AND BOTTOM OF THE AREA THAT IS GOING TO BE FILLED!!!
MAKE SURE YOU SAND THE WHITE PLASTIC SO THE BONDO AND EPOXY WILL STICK!!!!!
Break out the EPOXY and mix a small amount to put on either side to hold it in place...
Bend the plastic to shape as shown in the pictures and use a clamp or clips to make sure it stays in place......Take a break for 15 minutes to let it dry.
Nice to have a TV in the garage with the playoffs on.....
Dodgers tie it in the eight.....
OK, back to work.....
Take the clips off and it should be attached well and look lie this....
Break out the Fiberglass bondo or regular bondo and mix as described on the can...This fiberglass drys fast so be prepared to move quick.....
Spread it on like so.....
Take a break, drink a beer and watch some more Baseball.....Come on Yankees!!!!!
OK now sand the crap out of this with a file or 80 grit sandpaper... I did this outside for many reasons and I wish I didn't lay it on so thick because I had a lot of sanding to do.
Tape off the areas around to make sure you don't sand your paint off. If you are panting this, it needs to be perfect....Smooth and not one hole or bump...My vinyl covered up most of this but if you look really closely, you can see where I could have sanded more. I can always do this if I decide to paint it next summer....
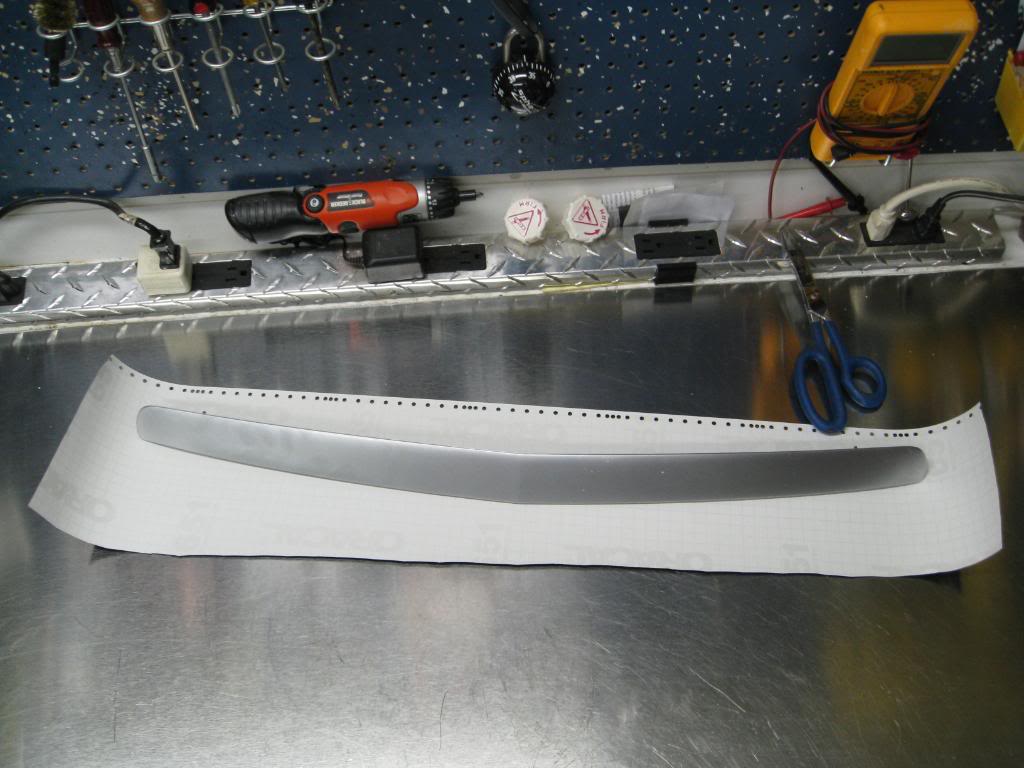
PPLAWPW's DIY thread said to use the two poles to hold the mesh in place but I decided to go a different route.
I cut the two poles off and made them flush...
Clean the area to be wrapped with alcohol so tyhe vinyl sticks well.
Wrap it up and it should look like this...
Now on with the grill mesh...
As I went on, I realized I could have saved a lot of the mesh and used a lot less but I had an idea on top that I ended up not needing any where need the amount.
I suggest to make the top grill mess level with the top part of the bumper and not have as much as I do because I eneded up cutting a lot...
Break out those phillips screws that held the old grill in and also cut the mesh so it can be bent and formed like this. I bent it enough so it had presser on the screws but not a lot...
Form the rest of the grill and use the other two screws on top (one on each side)
Bend and form the grill so it's against the bumper..
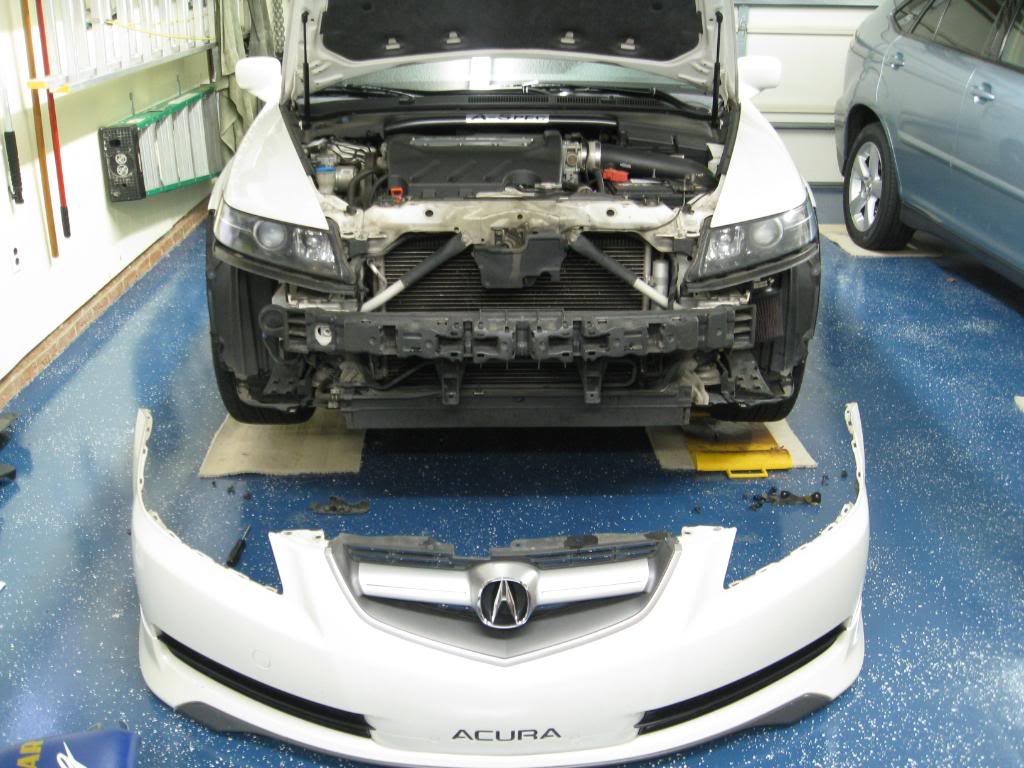
My man Alex holding up the old A molding....
Place the bumber on the car....
Like I said before, I had to cut the top. I put the plastic shrowd in place and the top of the mesh rests in front of that to keep it in place and tight.
I added the V-TEC emblem to see if I like it alone and it seemed a little empty....I would like to get an aspec badge and replace the V-tec badge and will soon.
OK So....Looking at Darksom1's ride, I decided to do the same thing.....
Take the cup off and the emblem off to get the palstic circle out...
Put it in the vice and trim and sand smooth the two brackets (one on each side)
I then wrapped it in vinyl and put the emblem on I decided not t screw it in place just in case I decided I didn't want to keep it on. I didn't want to mark up the grill mesh. So I got out the 3M outdoor double sided adhesive and put it on using that. When you are all done, it should look like this....
This is a mod that totally changes the front look of the car.....
My wife even said this was the best looking mod by far
I am not a pro and the vinyl does have a few bubbles that I am going to try to work with and see if I can get them out. You really need to be up on the car to see them so no big deal.
I love this site and I am glad to help out this great community that has helped me transform the Acura I have today..... Thanks everyone!!!!!


Trending Topics
10-17-2009, 02:41 PM
#8
Thinking about this more and being too lazy to see if this question was raised with other mods like this.
Would the use of kitty hair bondo be too rigid for a plastic bumper and end up cracking with the expansion/contraction with temperature change or flex while driving?
Would the use of kitty hair bondo be too rigid for a plastic bumper and end up cracking with the expansion/contraction with temperature change or flex while driving?
10-17-2009, 06:56 PM
#12
AZ Community Team

Join Date: May 2007
Location: N35�03'16.75", W 080�51'0.9"
Posts: 32,488
Received 7,770 Likes
on
4,341 Posts
WOW!! That is nice.
Jon, you are a genius.
Jon, you are a genius.
10-17-2009, 09:39 PM
#14
Team Owner
iTrader: (2)
Join Date: Jan 2008
Location: Kansas City, MO (Overland Park, KS)
Posts: 36,545
Received 6,470 Likes
on
5,162 Posts
Jon, that looks fantastic! What a classy look for the TL. How long did it take you....from start to finish?
Jaime-now it's your turn.
Jaime-now it's your turn.
 10-18-2009, 12:32 AM
#18
Chapter Leader (NY/NJ)
iTrader: (10)
Dude,
AWESOME!!: bigeek: :bi geek:
Great write-up and great work. Car looks great now. this is going to be my winter project since the car is gonna be in "storage".
mmade22 FTW!!!!!
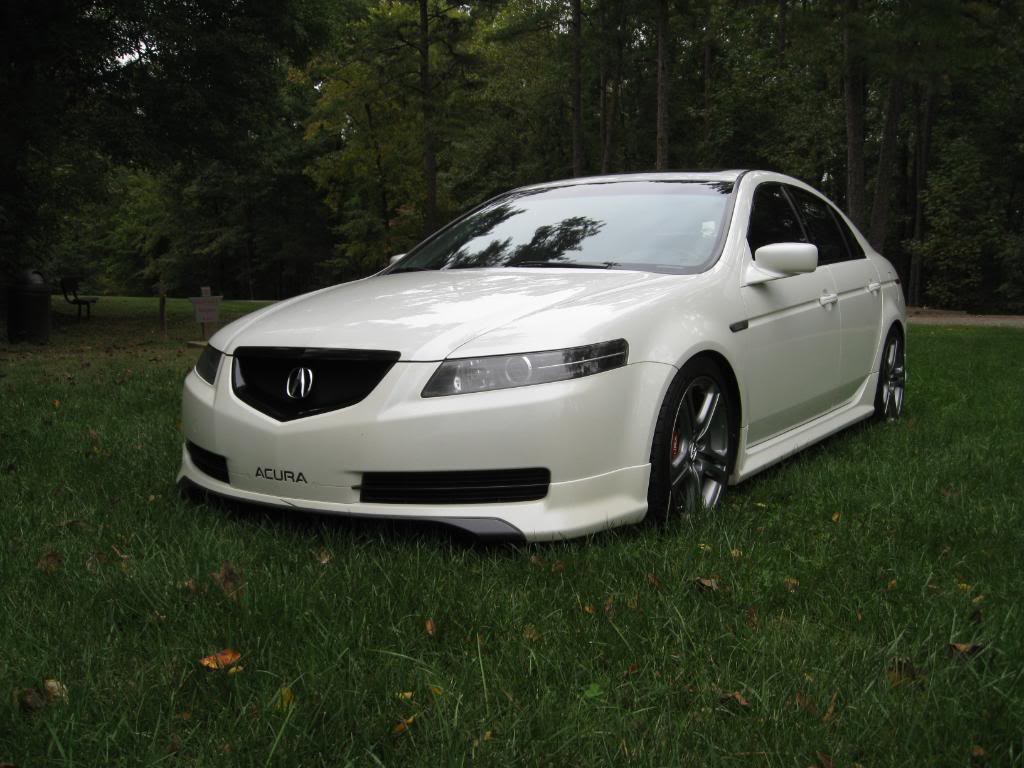
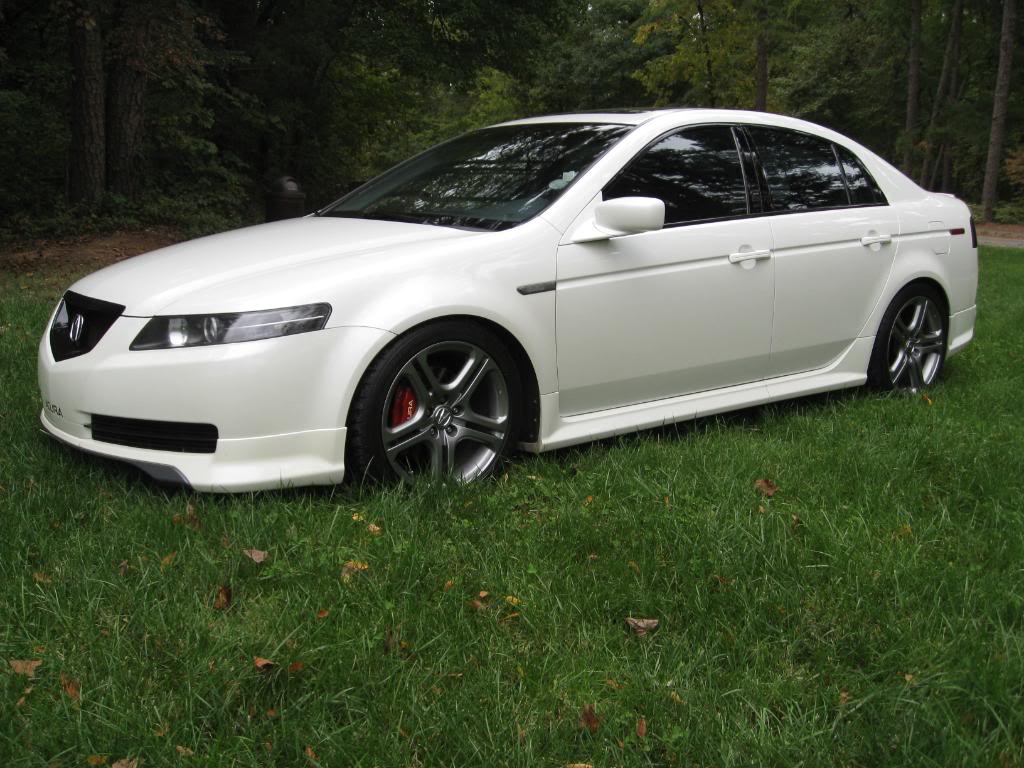
can you take a pic from afar of the front? i just sold the WDP today. got the AM ready for the full "sport" look unlike the WDP.
AWESOME!!
: bigeek::bi geek:Great write-up and great work. Car looks great now. this is going to be my winter project since the car is gonna be in "storage".
mmade22 FTW!!!!!
can you take a pic from afar of the front? i just sold the WDP today. got the AM ready for the full "sport" look unlike the WDP.
10-18-2009, 01:21 AM
#20
Chapter Leader (Southern Region)
Very clean! 
Nice write-up as well.
Nice write-up as well.


 Very nice write-up...mod looks great!
10-18-2009, 05:56 PM
Very nice write-up...mod looks great!
10-18-2009, 05:56 PM
#28
200,000 mile club
Thread Starter
Join Date: Jul 2007
Location: Charlotte, NC
Age: 48
Posts: 1,774
Likes: 0
Received 35 Likes
on
15 Posts
Dude,
Great write-up and great work. Car looks great now. this is going to be my winter project since the car is gonna be in "storage".
mmade22 FTW!!!!!
can you take a pic from afar of the front? i just sold the WDP today. got the AM ready for the full "sport" look unlike the WDP.
Great write-up and great work. Car looks great now. this is going to be my winter project since the car is gonna be in "storage".
mmade22 FTW!!!!!
can you take a pic from afar of the front? i just sold the WDP today. got the AM ready for the full "sport" look unlike the WDP.
Thanks and glad I could help...Scroll down for the outdoor pics..
Thanks to everyone else for the kind words....
Just looking to help my peeps out.
10-18-2009, 06:06 PM
#29
200,000 mile club
Thread Starter
Join Date: Jul 2007
Location: Charlotte, NC
Age: 48
Posts: 1,774
Likes: 0
Received 35 Likes
on
15 Posts
I have to say in the sunlight, I can see all the bubbles and small marks when I get close to the grill (2 feet) so I am going to see how the vinyl holds up and if all goes well, I will let Speed styles rewrap it for me and I may see what the roof will cost as well.
I looked up to see how much the center A badge was with the plastic parts and as soon as I saw it was almost 50 bucks shippped, I took my grill off.
I decided to screw it in as I have no need to spend the extra cash when I already have what I need.
Back side with the 3M tape.
Screwed in one of the two screws and put lock tight on it and made it snug!!
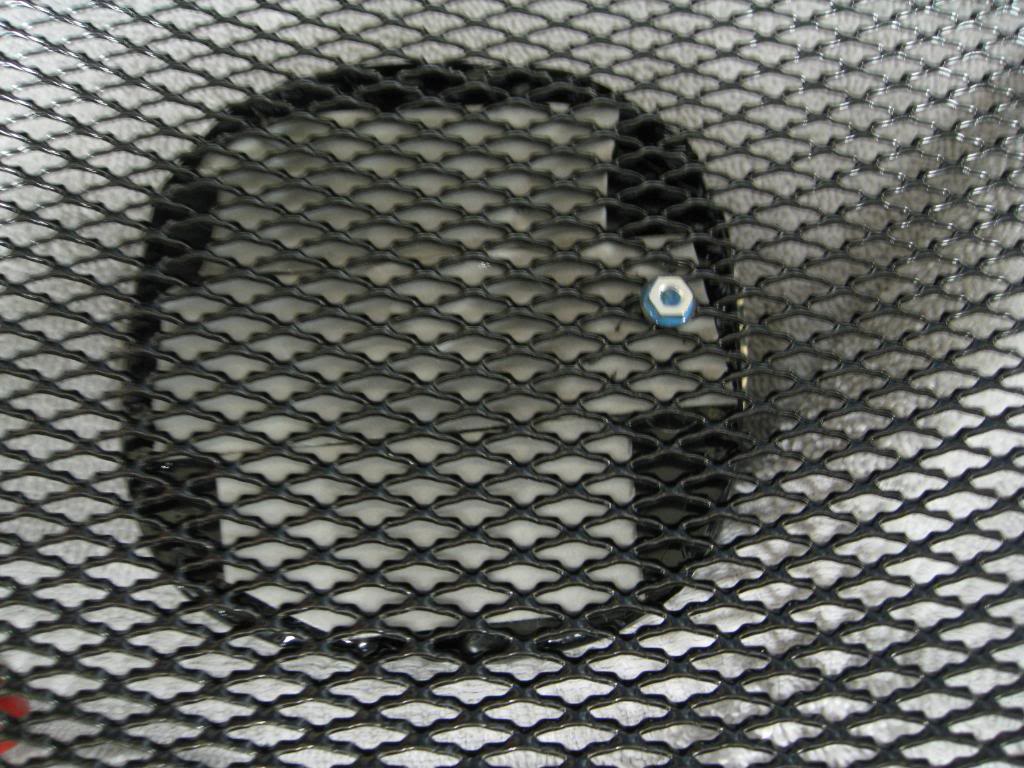
Nice 2.5 mm screws that you can hardly see...
She is now one with the grill.
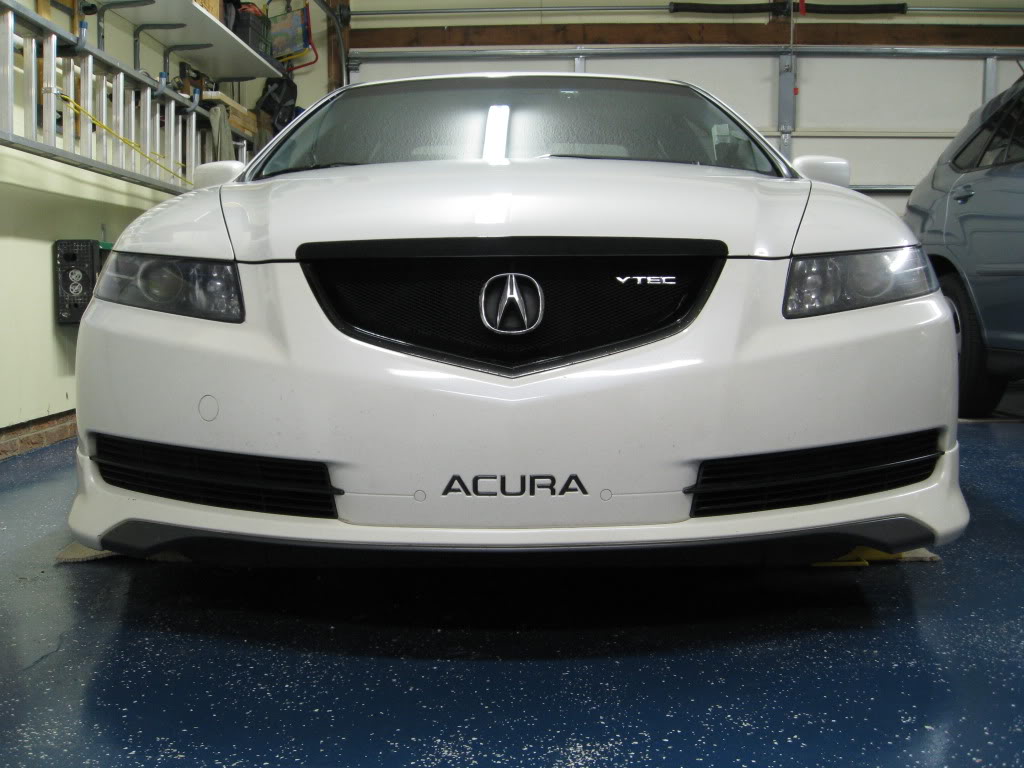
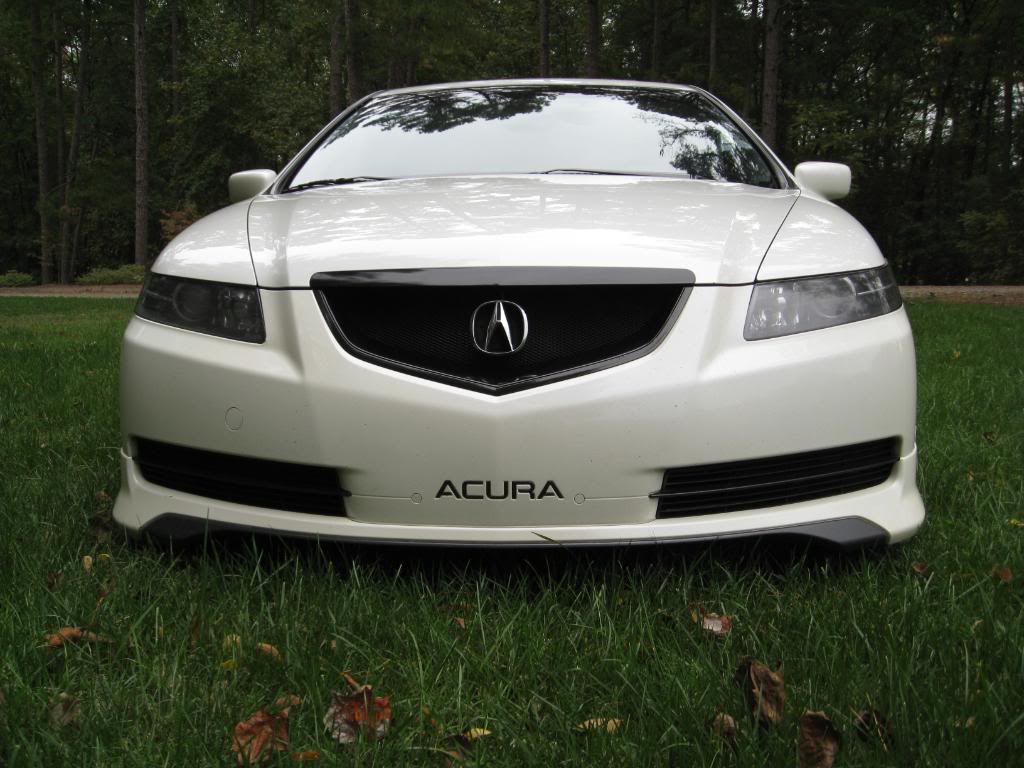
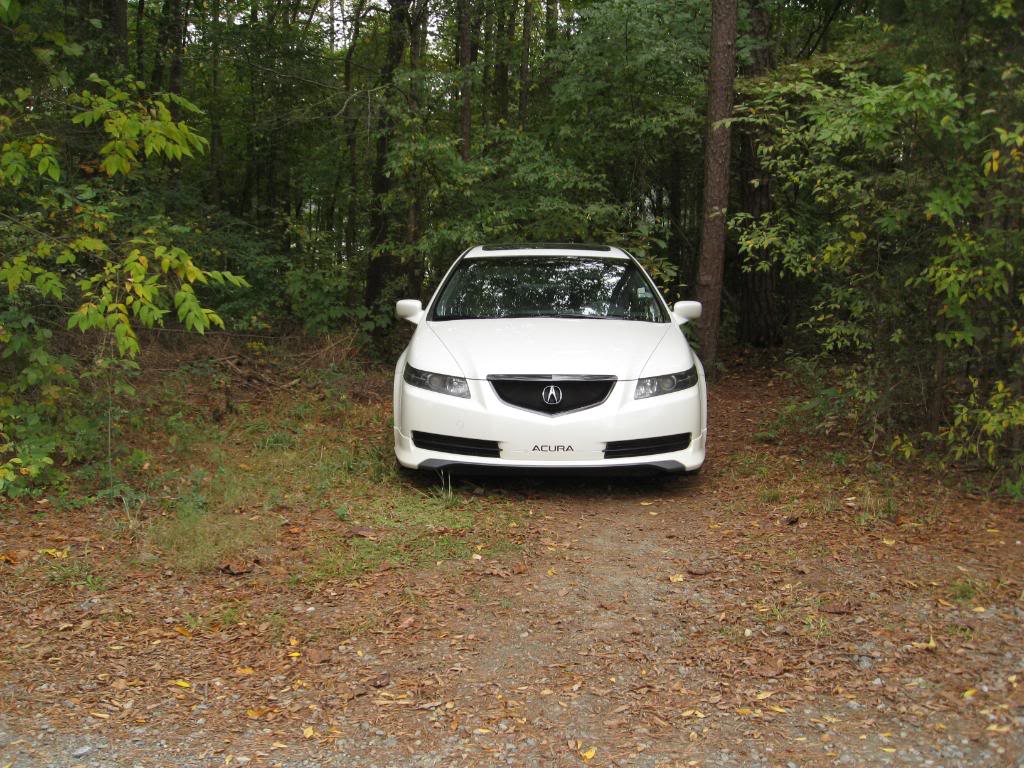
OK, so the day was cold as could be in October in sunny NC but I got some outdoor pics of the car...
BTW....The Vtec badge is gone!!
Enjoy!

Like I said, you can see a lot of bubbles in the vinyl because I suck at it so you may want to have someone wrap yours. Mine works for me for the next 6 months....
I looked up to see how much the center A badge was with the plastic parts and as soon as I saw it was almost 50 bucks shippped, I took my grill off.
I decided to screw it in as I have no need to spend the extra cash when I already have what I need.
Back side with the 3M tape.
Screwed in one of the two screws and put lock tight on it and made it snug!!
Nice 2.5 mm screws that you can hardly see...
She is now one with the grill.
OK, so the day was cold as could be in October in sunny NC but I got some outdoor pics of the car...
BTW....The Vtec badge is gone!!
Enjoy!
Like I said, you can see a lot of bubbles
in the vinyl because I suck at it so you may want to have someone wrap yours. Mine works for me for the next 6 months....
10-18-2009, 11:55 PM
#34
Chapter Leader (NY/NJ)
iTrader: (10)
looks great bro. tried hitting them bubbles with a heatgun? and for big bubbles just let the air out with a needle ( make a pin size hole) then hit it up some more with heat? my .02.
10-19-2009, 11:58 AM
#37
Burning Brakes
Join Date: Feb 2008
Location: Ottawa, Canaduh!
Age: 56
Posts: 1,107
Likes: 0
Received 3 Likes
on
3 Posts
Well done! Has an OEM stealth look....and good call on removing the VTech badge.
When did you get Aspecs? I thought you had a set of Inspyres? Looks better with the ASpecs, IMO.
When did you get Aspecs? I thought you had a set of Inspyres? Looks better with the ASpecs, IMO.
10-20-2009, 08:49 AM
#40
Team Owner
iTrader: (2)
Join Date: Jan 2008
Location: Kansas City, MO (Overland Park, KS)
Posts: 36,545
Received 6,470 Likes
on
5,162 Posts
Jon, if your car gets an hotter, you'll have to wear Nomex.