
DIY: Blacked/Cleared Headlights 3G Garage #G046
 01-31-2010, 07:24 AM
#361
 01-31-2010, 03:10 PM
#362
Ironicallly enough...I was just reliving this thread for a DIY because I bought some cleared headlights i need to repair...and it turns out I had posted on here and you guys just posted on here too.
I'm in for a picture and more info on this butyl rubber thing that nissan has. Where can this be purchased, other than a nissan dealership.
I'm in for a picture and more info on this butyl rubber thing that nissan has. Where can this be purchased, other than a nissan dealership.
01-31-2010, 03:20 PM
#363
Yeah...but you have the equipment and the concept down. I like the effect. Either way...love to have some taken...or at least talk to you about it. Looks cool IMO.
Oh...AND...I love Alehouse...maybe we could meet 11 take some pics till 1 then grab a beer and talk crap at alehouse for a bit before heading down. That could work.
Heatseeker is another local forum member with a TL...he'd probably be down if he's not working as he lives in Sunrise.
Oh...AND...I love Alehouse...maybe we could meet 11 take some pics till 1 then grab a beer and talk crap at alehouse for a bit before heading down. That could work.
Heatseeker is another local forum member with a TL...he'd probably be down if he's not working as he lives in Sunrise.
01-31-2010, 03:23 PM
#364
Drifting
iTrader: (13)
Ironicallly enough...I was just reliving this thread for a DIY because I bought some cleared headlights i need to repair...and it turns out I had posted on here and you guys just posted on here too.
I'm in for a picture and more info on this butyl rubber thing that nissan has. Where can this be purchased, other than a nissan dealership.
I'm in for a picture and more info on this butyl rubber thing that nissan has. Where can this be purchased, other than a nissan dealership.
01-31-2010, 06:11 PM
#365
Thank you^^^
What do you guys think of this? as far as sealant goes.
http://www.technologylk.com/black-pt...htm?src=nextag
What do you guys think of this? as far as sealant goes.
http://www.technologylk.com/black-pt...htm?src=nextag
01-31-2010, 07:08 PM
#366
Drifting
iTrader: (13)
In JnC's post, he says the link to the Nissan rubber no longer works. This is incorrect---the link is fine. Perhaps your product might serve better as the final seal JnC mentions in his writeup.
01-31-2010, 08:15 PM
#367
Hmmm...the link goes to the nissan website but it looks like they don't have the product as I searched for butyl.
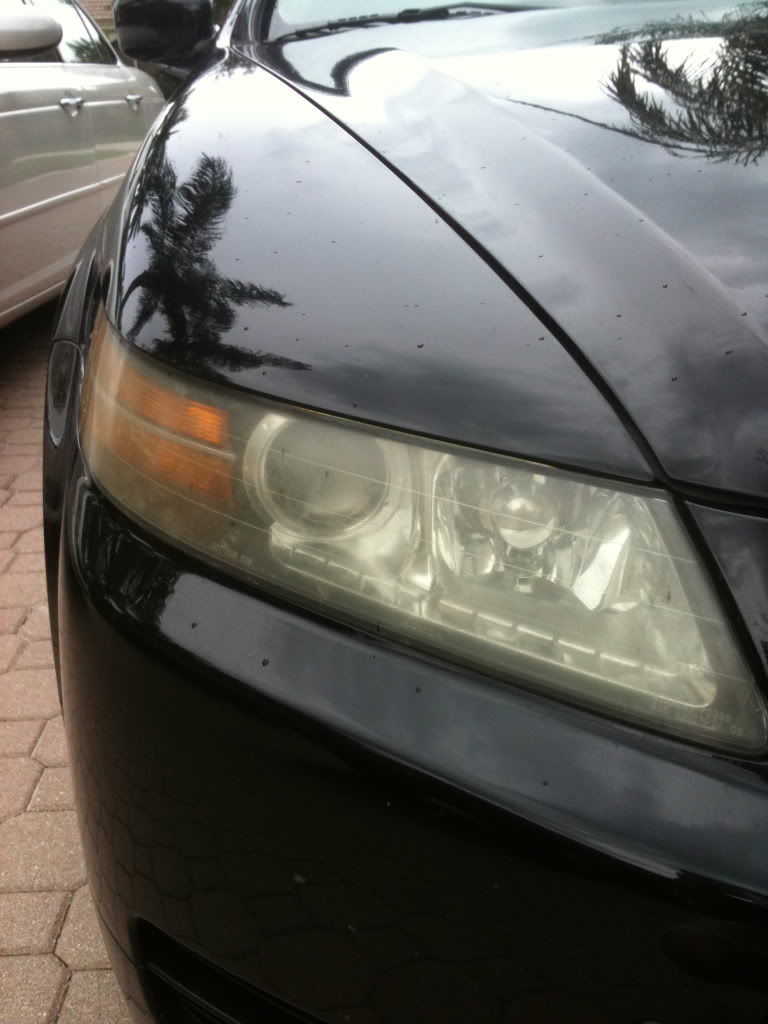
Maybe you can help me...I bought a set of clear lights from a member that were supposedly sealed with butyl and were guaranteed not to leak. But 1 of them does. Could it be humidity that was introduced in transit etc...how would someone remove excess humidity trapped inside a light? It DID come up after I washed the car and there was dew forming last night. I don't know.....it LOOKS very well sealed so I'm not sure.
Maybe you can help me...I bought a set of clear lights from a member that were supposedly sealed with butyl and were guaranteed not to leak. But 1 of them does. Could it be humidity that was introduced in transit etc...how would someone remove excess humidity trapped inside a light? It DID come up after I washed the car and there was dew forming last night. I don't know.....it LOOKS very well sealed so I'm not sure.
01-31-2010, 10:34 PM
#369
Drifting
iTrader: (13)
Hmmm...the link goes to the nissan website but it looks like they don't have the product as I searched for butyl.
Maybe you can help me...I bought a set of clear lights from a member that were supposedly sealed with butyl and were guaranteed not to leak. But 1 of them does. Could it be humidity that was introduced in transit etc...how would someone remove excess humidity trapped inside a light? It DID come up after I washed the car and there was dew forming last night. I don't know.....it LOOKS very well sealed so I'm not sure.
Maybe you can help me...I bought a set of clear lights from a member that were supposedly sealed with butyl and were guaranteed not to leak. But 1 of them does. Could it be humidity that was introduced in transit etc...how would someone remove excess humidity trapped inside a light? It DID come up after I washed the car and there was dew forming last night. I don't know.....it LOOKS very well sealed so I'm not sure.
02-01-2010, 09:19 AM
#370
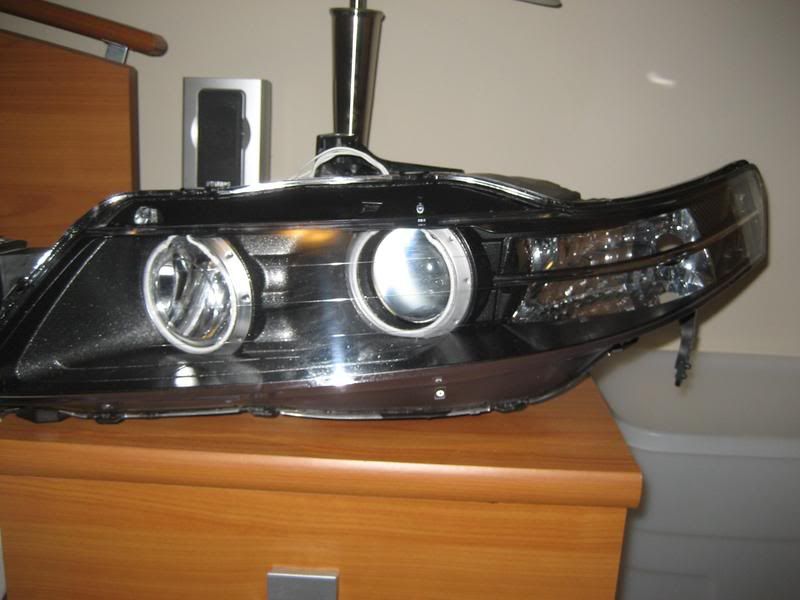
Well...both my original OEM ones had huge dessicant packs in it...and this new set I received also do.
The driver side one is fine but the passenger one has condensation...it fogged up the other night when I washed the car...finally was all clear this morning in the garage...then I drove to work and it's raining and it's foggy again.
The would be a sign that it's leaking, right? Not that it's got the condensation trapped inside cause then the driver one would be that way too!? At least it's the one with the cracked reflector inside so I could kill two birds with one stone and fix the inside and seal with the nissan butyl rubber stuff.
 02-24-2010, 09:32 AM
#376
Thanks for the tips guys...I actually bought them cleared already. I ended up getting rid of the condensation though. Using a hairdryer a shopvac fitting and a length of garden hose run into the assembly...I blew out all the humidity from the lense for like 5 minutes and I added teflon tape to my drl bulb base to make sure it was a solid fit. It seems loose before.
J.
J.
05-15-2010, 09:02 PM
#379
Safety Car
so i had a spare headlight (broken one, so it was useless other than practicing baking) that i baked this afternoon...
pulling the cover plastic wasn't taht easy, but i felt like putting them back together would be even harder...
any hints on putting back together?? someone mentioned they clean up the gooey stuff when they first open them up... and put new silicon when putting them back toghter
any suggestions??
pulling the cover plastic wasn't taht easy, but i felt like putting them back together would be even harder...
any hints on putting back together?? someone mentioned they clean up the gooey stuff when they first open them up... and put new silicon when putting them back toghter
any suggestions??
 08-27-2010, 12:54 PM
#381
Intermediate
Join Date: Aug 2010
Posts: 25
Likes: 0
Received 0 Likes
on
0 Posts
This mod is amazing but Man�I�m not brave enough to do this. I�m very picky with the TL and what if I F!@#$% up...I don�t know...but they look awesome. And DO want to do it. But ...I don�t know. What if I over bake and forgot and leave them in the oven and later on my wife founds out that I�m also doing stuff for my car �in the kitchen��mannn�she�ll cut my D!ck�...LOL....don�t know�
08-27-2010, 01:31 PM
#382
AZ Community Team

Join Date: May 2007
Location: N35�03'16.75", W 080�51'0.9"
Posts: 32,488
Received 7,770 Likes
on
4,341 Posts
This mod is amazing but Man�I�m not brave enough to do this. I�m very picky with the TL and what if I F!@#$% up...I don�t know...but they look awesome. And DO want to do it. But ...I don�t know. What if I over bake and forgot and leave them in the oven and later on my wife founds out that I�m also doing stuff for my car �in the kitchen��mannn�she�ll cut my D!ck�...LOL....don�t know�
If you're likely to "forget and leave them in the oven", I recommend NOT doing this - or any mod.

Otherwise: Just do it and follow the instructions. It SOUNDS intimidating, but it's really not.
OR, hit up user/vendor JnC and do a core swap or retrofit with his lights. There's a group buy thread around to see the details.
08-27-2010, 05:01 PM
#383
Phmbm12
This mod is amazing but Man�I�m not brave enough to do this. I�m very picky with the TL and what if I F!@#$% up...I don�t know...but they look awesome. And DO want to do it. But ...I don�t know. What if I over bake and forgot and leave them in the oven and later on my wife founds out that I�m also doing stuff for my car �in the kitchen��mannn�she�ll cut my D!ck�...LOL....don�t know�
10-03-2010, 10:58 AM
#386
Racer
i just did this last night and it took forever. it turned out well though i think and it wasnt superrr hard but i was a bit nervous. in the end it was too too difficult, just really time consuming
 05-26-2011, 09:55 PM
#390

 05-26-2011, 10:47 PM
#391
contact Ack05TL...the tail light guy...or buy ANY 3Mish carbon fiber stuff. 
when I had cleared lights before, this was the ONLY thing I hated...the chrome corners...I thought they looked cheap and if you really looked you could tell it was missing something.
when I had cleared lights before, this was the ONLY thing I hated...the chrome corners...I thought they looked cheap and if you really looked you could tell it was missing something.
 06-13-2011, 01:40 AM
#394
Mons shaver
Yet another version of Black outs thanks to this thread. This was the easiest job. Time consuming but easy. I used toothpaste to mask the chrome edges in the blinkers, it works great. I wish I hadn't sat on the fence about this for a couple of years. This can be done by your self easily. Thanks for posting excellent instructions and tips.

I'd like to take on this challenge (and it would be a very large challenge based on my skill set), but I do not know the legality of having no amber piece on the front lights. If anyone knows the Hawaii laws about this, please let me know. This uncertainty has lead me to thinking that having a small piece of amber may be my best option. I have a could of questions for those who have gone through this process.
1. Where does the "toothpaste" come into play?
2. Do you remove the entire amber reflector, then trim it and epoxy it back on? Or is there another method to removing just part of the amber piece?
06-13-2011, 09:58 AM
#395
The alternative...which you would probably like is to black out the assembly and buy a type S diffuser (if you can find one). The type s one has the corners in amber and the front cleared out.
Otherwise, I'd venture to guess it's a dremel and some tape and some epoxy to make the normal amber diffuser work. If you're really concerned with losing the amber try blacking out the headlight and put the amber back in...gives it a darker, more sinister look without losing the stock appearance. Just make sure to tape off the reflector area. I think the toothpaste is an alternative to taping that area off...but I think the tape was easy enough.
Otherwise, I'd venture to guess it's a dremel and some tape and some epoxy to make the normal amber diffuser work. If you're really concerned with losing the amber try blacking out the headlight and put the amber back in...gives it a darker, more sinister look without losing the stock appearance. Just make sure to tape off the reflector area. I think the toothpaste is an alternative to taping that area off...but I think the tape was easy enough.


 07-03-2011, 01:06 AM
#399
I'm in
Thread Starter
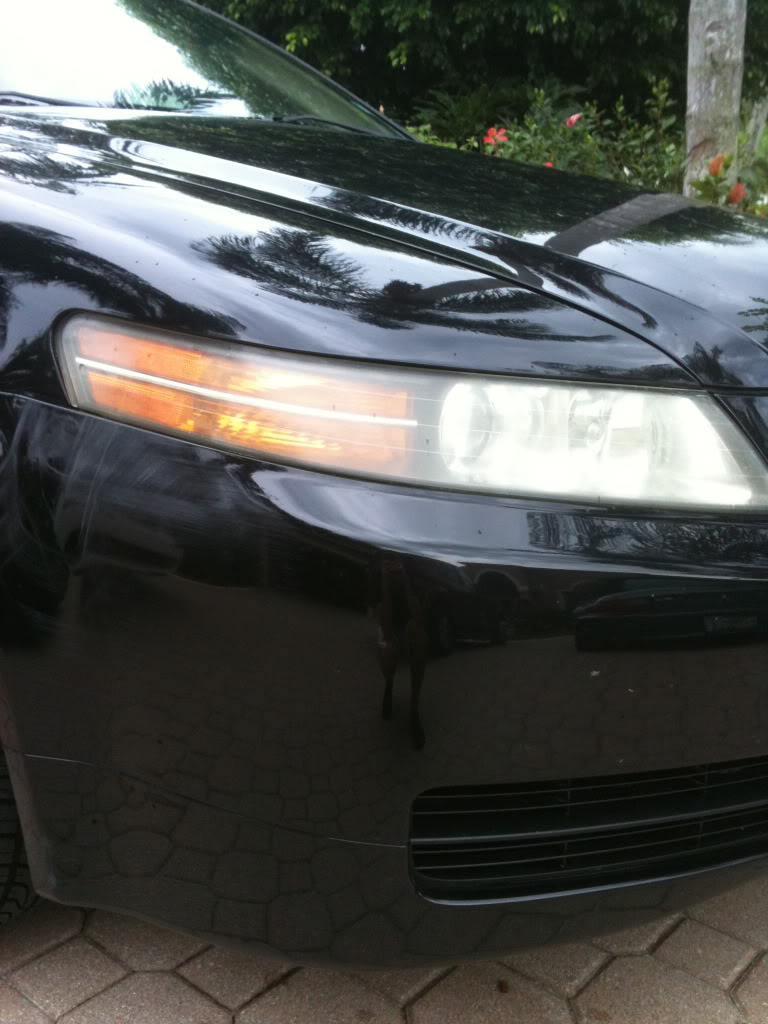
^ Condensation? You mean oxidation?
It looks oxidized in other words hazy. Baking will not solve anything here.
To remove the oxidation, you would need to wet sand, then use compound (if severe), then polish polish polish until its shiny/haziness removed.
It looks oxidized in other words hazy. Baking will not solve anything here.
To remove the oxidation, you would need to wet sand, then use compound (if severe), then polish polish polish until its shiny/haziness removed.