Erin's Grigio 4G Progress Thread, Staggard Vossen CV3's, Tein S-Tech Springs, Lip Kit


 12-27-2013, 01:17 AM
#282
Racer
Thread Starter
The following users liked this post:
Gaza TL (12-15-2014)
01-06-2014, 12:53 AM
#283
Racer
Thread Starter
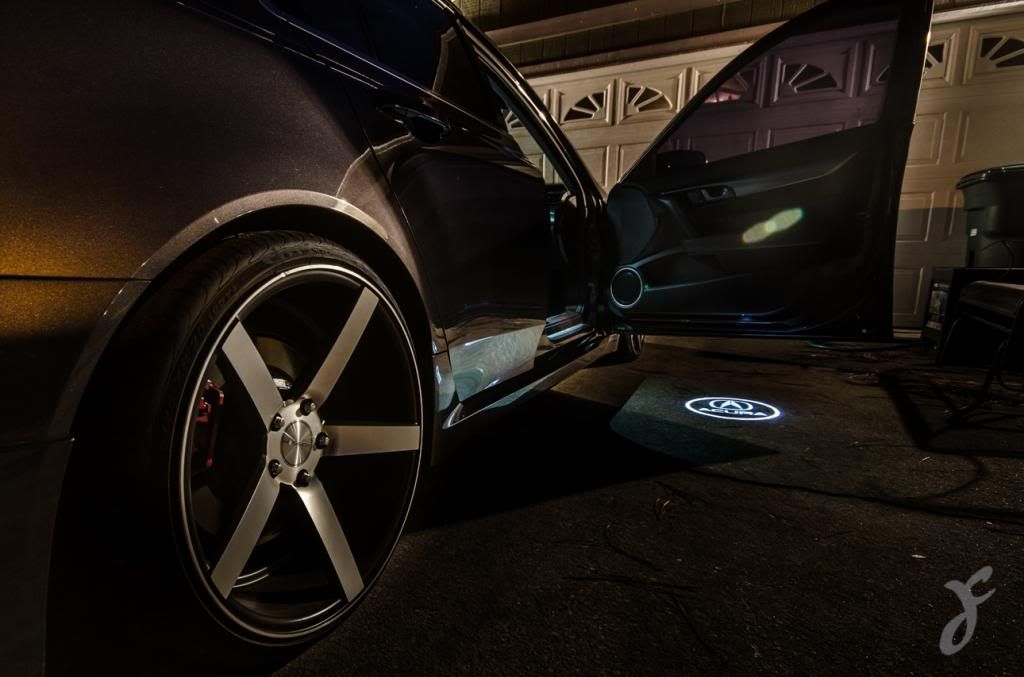
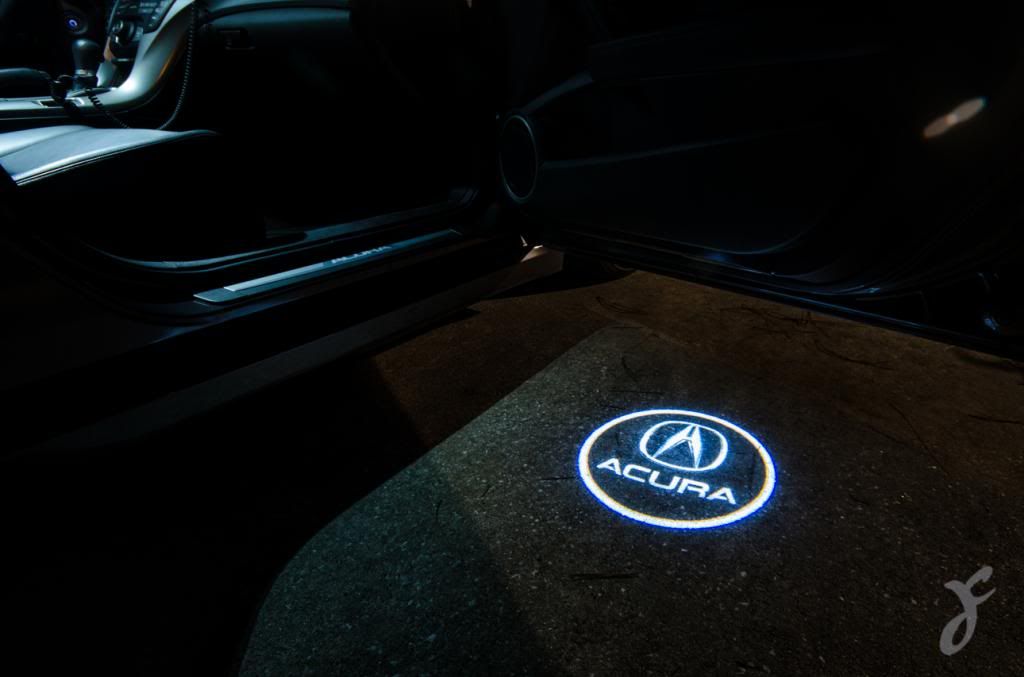
Okay here was today's project on the 4G... It was warm out here in FL, and my cold was a little better so I wanted to make the day productive... so I put these in before I took down the Christmas lights. The pics aren't the best but they get the point across...
Pretty easy to wire up... the 5th gen of these fits in the lens for the OEM puddle light so I drilled it out rather than drilling the door panel, Positive to the white wire of the puddle lamp it's constant (+), the ground wire I had to run through the door grommet and down the door sill to the OEM pin switch for the ground. Can't use the OEM switched ground in the door for the puddle lamp it comes form the MICU and doesn't have enough voltage to run the LED without screwing up the MICU... FYI Drill an 1/8 inch pilot hole from the inside of the lens before using the included bit... you do away with the bulb and back piece of the housing and drill in the center of the unused area where the bulb used to be...
Here's the link if anyone is looking for them... eBay seller: yitamotor I liked his product way better than one I got from another seller... he's about $2 more but well worth it... the LED is brighter and the resistor wiring is in molded rubber rather than just heat shrink.
http://www.ebay.com/itm/5Th-Gen-Car-Laser-Projector-Logo-Ghost-Door-Step-LED-Light-for-Acura-/251370471406?pt=Motors_Car_Truck_Parts_Accessories&hash=item3a86d8ffee
The following users liked this post:
User Error (01-07-2014)
01-06-2014, 11:22 AM
#285
Moderator
how did you get +42?
when you add a inch on a rim you do not just add it on the face of the wheel. you split that in half and add half a inch on the inner and outer.. total overall width.
and since 1 inch is 25.4mm you divide that into two as well.. and you get 12.7mm.. 12.7mm + 12mm = 24.7mm
you can correct me if im wrong..
01-06-2014, 12:39 PM
#286

... 20x9.5 +12mm = 20x10.5 +24.7mm
how did you get +42?
when you add a inch on a rim you do not just add it on the face of the wheel. you split that in half and add half a inch on the inner and outer.. total overall width.
and since 1 inch is 25.4mm you divide that into two as well.. and you get 12.7mm.. 12.7mm + 12mm = 24.7mm
you can correct me if im wrong..
01-07-2014, 01:40 PM
#287
Racer
Thread Starter
Yeah it was nice and in the 70's that day it's two days later now and a high of 38... this weather is insane... two days from now it'll be in the 70's again... I like the mod a lot it's pretty cheap just a bit labor intensive... and it gives a great look when you pull up to a valet or a car meet... When it warms up in a couple of days I've gotta pull the front bumper and change out all 6 lights on the front of the 4G, should be a fun lil project...
and Potz I said closer not exact...
01-07-2014, 07:52 PM
#289
Team Owner
iTrader: (2)
Join Date: Jan 2008
Location: Kansas City, MO (Overland Park, KS)
Posts: 36,545
Received 6,470 Likes
on
5,162 Posts
Very nice, UE. I've seen these advertised for my C7 Corvette too. I was considering them. Yours look good.
01-08-2014, 12:18 PM
#290
Racer
Thread Starter
Thanks, They are a pretty fun little mod and great conversation piece. On these lower cars they project a tight (smaller) logo but the clarity is better at this size. I've got a set for my truck as well i'll be putting on when it gets back from the body shop. It's lifted a little so the logo should be much much larger interested to see how it comes out when I do it.
 01-11-2014, 12:08 PM
#292
Racer
Thread Starter
The positive (+) side yes you can connect to the white wire at the puddle light it's constant 12 volts... and does not run thru a computer... *** the ground no you have to run to the door pin switch so you bypass the MICU or computer... they pull too much of a draw and will smoke that output on the computer...
The following users liked this post:
KarKraze (01-11-2014)
01-11-2014, 12:20 PM
#293
^^ Good info,when i did my lighted door sills,i ran a wire directly from the battery for the 12v + constant and used the ground from the door pin,the pin being a floating ground only completes the circuit when the door is opened hence the light is only active when the door is opened.No need to worry about the MICU with my set up.
01-11-2014, 05:10 PM
#294
Racer
Thread Starter
^^ Good info,when i did my lighted door sills,i ran a wire directly from the battery for the 12v + constant and used the ground from the door pin,the pin being a floating ground only completes the circuit when the door is opened hence the light is only active when the door is opened.No need to worry about the MICU with my set up.
Yeah no worries with that set up the MICU being after your tap in is what makes the ground float... if it wasn't for that they would both come on if either door was opened... It's basically the same thing... With the white wire in the door is a constant just like the one you put in... Was just easier since I was already in the door to use what was already there...
01-17-2014, 01:11 PM
#295
Racer
Thread Starter
I was asked for this on another thread, so I figured I would post it in here as well... so I know where it is if anyone else asks...
Step by Step to Install the 5th Gen Logo Lights in the Door... Purchased on eBay from seller Yitamotor his are the best quality of the several sets I ordered.
Link > http://www.ebay.com/itm/5Th-Gen-Car-Laser-Projector-Logo-Ghost-Door-Step-LED-Light-for-Acura-/251370471406?pt=Motors_Car_Truck_Parts_Accessories&hash=item3a86d8ffee
Okay here goes,
Take a screw driver and pop out the puddle lamp. One end just pops out if it's fighting you do the other end. Unplug it and remove the rear grey housing it just unsnaps then remove the bulb. Take a small drill bit like a 1/8 of an inch drill a hole in the center of the lens from the inside... centering top to bottom and from the side to the bulb contacts or mount.
The Logo lights come with a hole saw once you have your centered pilot hole take the hole saw and drill out the lens to it's size. Then just push the logo light into the hole.
Now remove the door panel, There's a screw behind the inside handle you remove the cover with a bent pick or all... there's a screw in the bottom of where you grab to shut the door under the rubber mat, and one behind the little plastic cover that's where the door panel slopes back in below where you grab to shut it. Once those are out you pull from a lower corner and it'll snap off.
Then remove the Kick panel in the floor board by just pulling on it, Remove the door sill by pulling on it and the B Piller trim remove the lower portion and push it towards the seat. The seatbelt will hold it in place...
This will allow you access to the door pin switch in the B Pillar unplug it.
Directions to remove door panel with pics from another product but great directions... Link >> http://webpages.charter.net/lewishom...structions.pdf
This is the hardest part by far, you will need to run a wire thru the rubber hose from the door to the interior. I pulled the hose off both sides and shoved one strand of stiff home electrical wire through taped my wire to it and pulled it back through. A Flimsy Metal Coat hanger would prolly work as well. Then push it thru into the interior you'll have to shove your arm far up in behind the kick panel to grab it... pull enough room to you so you can reach the door pin switch with the wire laying in the sill...
Now shove the other end coming out of the door side of the hose into the door reach in and grab a few feet you'll feel wires running inside the door near the bottom wrap it around them and follow those wires to the puddle lamp plug... leave your new wire hanging past the plug a bit
Reinstall the door panel with the plug and your new wire hanging out of the puddle lamp hole in the bottom of the panel...
Take this new wire and connect it to the black wire or ground on the Logo Light..
T tap the red power wire to the white power wire that you unplugged from the puddle lamp above the plug. You will leave this plug unplugged so the contacts inside the housing have no power. Zip tie up your wires as snug as you can get them.
Snap the puddle lamp back in, slide the plug side in first and you'll have to push the logo light to the side and bit as you're pushing in the other side.
Now go to the door sill I wrapped the new wire around the wires currently there, make your way to the B Pillar and T Tap in the new wire to the door pin switch very close to the plug, plug it back into the switch and your logo light should be on at this point if all your connections are good.
Reinstall the B Pillar trim,
Reinstall the kick panel,
Reinstall the door sill, get it in place and a few good smacks to set the clips.
Job well done!
Last edited by Steven Bell; 02-12-2014 at 10:34 PM.
The following users liked this post:
Gaza TL (12-15-2014)
01-19-2014, 05:48 PM
#296
Team Owner
iTrader: (2)
Join Date: Jan 2008
Location: Kansas City, MO (Overland Park, KS)
Posts: 36,545
Received 6,470 Likes
on
5,162 Posts
You've got me considering these.......
01-19-2014, 07:50 PM
#297
Racer
Thread Starter
01-21-2014, 03:33 PM
#299
Racer
Thread Starter
With being sick and wrecking my truck Christmas night I haven't put them on yet... Gonna do it once I get the truck back so if something goes wrong or I need to let the TL sit a day or two we'll having something else to drive... but here's a pic of Matt's I took a while back... same tips... same process..
 01-23-2014, 08:04 PM
#300
Team Owner
iTrader: (2)
Join Date: Jan 2008
Location: Kansas City, MO (Overland Park, KS)
Posts: 36,545
Received 6,470 Likes
on
5,162 Posts
There is a guy who sells this for the Corvettes too.
He really wants me to get a set for mine. I'm just not feeling it. Can you do a video of this?
He really wants me to get a set for mine. I'm just not feeling it. Can you do a video of this?
01-23-2014, 08:25 PM
#301
Racer
Thread Starter
You talking about the tips Steven? What are you wanting to see in the video? There's no change in sound it's 100% looks... it's still the stock muffler just changing the tips, they are wide open pipes just like the oem tips so no change in sound or performance...
01-25-2014, 02:52 AM
#302
Racer
Thread Starter
Steven can you add this link under the third paragraph in the logo light directions? Thanks...
Directions to remove door panel with pics from another product but great directions... Link >> http://webpages.charter.net/lewishom...structions.pdf
Directions to remove door panel with pics from another product but great directions... Link >> http://webpages.charter.net/lewishom...structions.pdf
01-25-2014, 07:18 PM
#304
The positive (+) side yes you can connect to the white wire at the puddle light it's constant 12 volts... and does not run thru a computer... *** the ground no you have to run to the door pin switch so you bypass the MICU or computer... they pull too much of a draw and will smoke that output on the computer...
01-25-2014, 08:55 PM
#305
Racer
Thread Starter
A Door pin switch is the black button your door presses to turn on and off the dome light... it's in the door jam near the latch... you access the wire from the inside of the car behind the plastic interior trim...
02-12-2014, 09:43 PM
#306
Okay here was today's project on the 4G... It was warm out here in FL, and my cold was a little better so I wanted to make the day productive... so I put these in before I took down the Christmas lights. The pics aren't the best but they get the point across...
Pretty easy to wire up... the 5th gen of these fits in the lens for the OEM puddle light so I drilled it out rather than drilling the door panel, Positive to the white wire of the puddle lamp it's constant (+), the ground wire I had to run through the door grommet and down the door sill to the OEM pin switch for the ground. Can't use the OEM switched ground in the door for the puddle lamp it comes form the MICU and doesn't have enough voltage to run the LED without screwing up the MICU... FYI Drill an 1/8 inch pilot hole from the inside of the lens before using the included bit... you do away with the bulb and back piece of the housing and drill in the center of the unused area where the bulb used to be...
Here's the link if anyone is looking for them... eBay seller: yitamotor I liked his product way better than one I got from another seller... he's about $2 more but well worth it... the LED is brighter and the resistor wiring is in molded rubber rather than just heat shrink.
5th Gen Car Laser Projector Logo Ghost Door Step LED Light for Acura | eBay
02-12-2014, 10:35 PM
#307
Team Owner
iTrader: (2)
Join Date: Jan 2008
Location: Kansas City, MO (Overland Park, KS)
Posts: 36,545
Received 6,470 Likes
on
5,162 Posts
Done!
I just wanted to see how this looks and works as you open the door.
I just wanted to see how this looks and works as you open the door.
02-21-2014, 01:51 AM
#308
Racer
Thread Starter
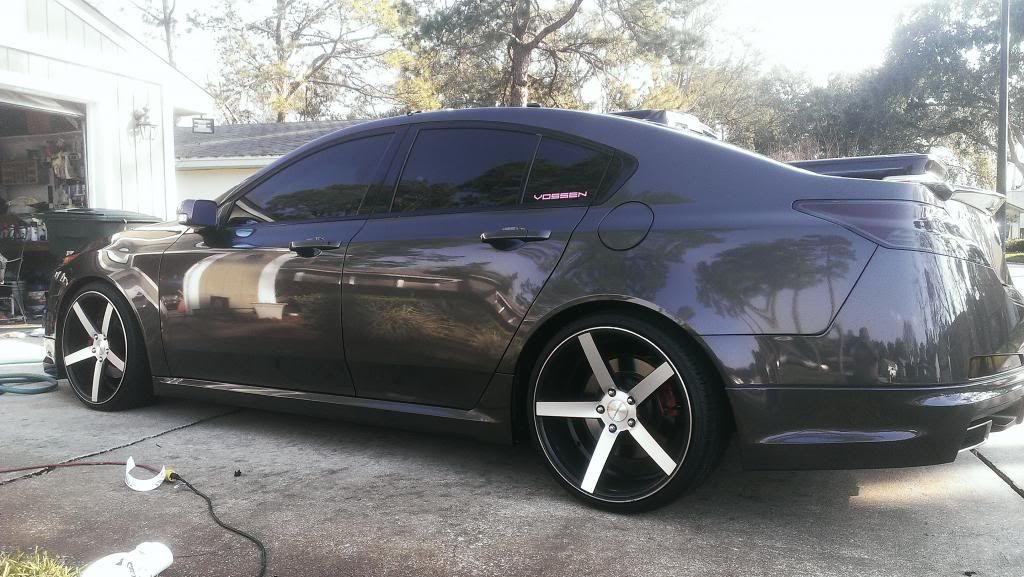
I need to still do a Vid of the logo lights for Steven... hey how do I upload a vid anyways? Photobucket or? and I need to get a few minutes to pull out the camera and do some real shots of the 4g since most of the mods from Christmas are on now... here's a quick Cell shot from yesterday when I wrapped the trim on the drivers side... gotta let her decide if it's staying and I'm doing the other side or peeling it back to stock... Latest mod's to update since Christmas, 2012 headlights with black guts, Wrapped trim gloss black, tinted tails and reflectors, wrapped parking lights to reshape like the AWD, 6k HID's and Fog's, Switchbacks, Logo lights, Shorter Rear Lugs, rolled the rear fenders, Painted Trunk Trim, the quad tips are still in the box they are coming soon... future mods painting the center of the grille, window module, taller tires...
 02-21-2014, 10:43 PM
#310
Team Owner
iTrader: (2)
Join Date: Jan 2008
Location: Kansas City, MO (Overland Park, KS)
Posts: 36,545
Received 6,470 Likes
on
5,162 Posts
Thanks UE-love the new shot!
02-25-2014, 07:02 PM
#311

nice car bro, is that the original aero kit from Acura? i went to the dealer asking how much it would cost for the full kit (front, side skirts and rear) and they said 1590 before tax installed/painted you think thats a good price?
02-25-2014, 07:10 PM
#312
https://acurazine.com/forums/sponsored-sales-group-buys-10/spec-group-buy-4th-gen-tl-905381/
02-25-2014, 07:13 PM
#313
Racer
Thread Starter
Yes thats the A-Spec OEM Kit... That's almost double what I paid... 850 to a G is about right uninstalled... it only comes prepainted and ready to install... But I did do the Install myself like everything else on the car... It's prolly a 3 Hour Job for someone that's done it before and has a lift like the dealer does... The front and sides are pretty simple... all the holes are premarked on the front and rear bumpers on the inside except two and a template comes for those... the sides just pop off and pop the new ones on... It's drilling a buncha holes for the front and the rear does take cutting out around the exhaust. If you have normal tools, a drill, and a dremel it's not real hard... 12-1300 should be doable to a dealer than wants to make a sell for the kit installed... Or pay one of the members that installs them on the side where are you located? I Do them here in North FL, Potz does them in Cali... There's several of us... that will install much cheaper than the dealer...
Last edited by User Error; 02-25-2014 at 07:16 PM.
02-25-2014, 07:25 PM
#314
The parts already come painted. Usually, you can get the kit shipped to your door for around $860. We're trying to see if there's a better deal to be had....see group buy below:
https://acurazine.com/forums/showthread.php?t=905381
https://acurazine.com/forums/showthread.php?t=905381
dude i knew joining this forum was a bad idea for my wallet... for 860 at my door ill buy it anyday thanks for the post!
Noobie question but this kit does not come with the trunk lip correct?
02-25-2014, 07:32 PM
#316
Yes thats the A-Spec OEM Kit... That's almost double what I paid... 850 to a G is about right uninstalled... it only comes prepainted and ready to install... But I did do the Install myself like everything else on the car... It's prolly a 3 Hour Job for someone that's done it before and has a lift like the dealer does... The front and sides are pretty simple... all the holes are premarked on the front and rear bumpers on the inside except two and a template comes for those... the sides just pop off and pop the new ones on... It's drilling a buncha holes for the front and the rear does take cutting out around the exhaust. If you have normal tools, a drill, and a dremel it's not real hard... 12-1300 should be doable to a dealer than wants to make a sell for the kit installed... Or pay one of the members that installs them on the side where are you located? I Do them here in North FL, Potz does them in Cali... There's several of us... that will install much cheaper than the dealer...
02-25-2014, 07:32 PM
#317
Racer
Thread Starter
Talking about the spoiler? No it's the Front Lip, Side Skirts, and Rear Lip all the low skirts, The spoiler can be bought on eBay which is where mine came from... it comes painted to match, it's aftermarket but a direct replica of the OEM... I've had two from them one for her 4G and one for her 3G both were great quality and paint match... I think they sell for 117 shipped for in stock colors and 157 shipped for custom colors... vs almost 400 from the dealer... eBay seller "thespoilerstore" Just pull your paint code from the door sticker it'll be something like NH736M... here's a link to the auction http://www.ebay.com/itm/PAINTED-SPOILER-FOR-AN-ACURA-TL-LIP-FACTORY-STYLE-SPOILER-2009-2013-/121279062225?pt=Motors_Car_Truck_Parts_Accessories&fits=Make%3AAcura%7CModel%3ATL%7CYear%3A2009&hash=item1c3ccba0d1
The following users liked this post:
Filson (03-02-2014)
02-25-2014, 07:40 PM
#318
Talking about the spoiler? No it's the Front Lip, Side Skirts, and Rear Lip all the low skirts, The spoiler can be bought on eBay which is where mine came from... it comes painted to match, it's aftermarket but a direct replica of the OEM... I've had two from them one for her 4G and one for her 3G both were great quality and paint match... I think they sell for 117 shipped for in stock colors and 157 shipped for custom colors... vs almost 400 from the dealer... eBay seller "thespoilerstore" Just pull your paint code from the door sticker it'll be something like NH736M... here's a link to the auction Painted Spoiler for An Acura TL Lip Factory Style Spoiler 2009 2013 | eBay
big thanks for the help bro!
The following users liked this post:
User Error (02-25-2014)
02-25-2014, 07:44 PM
#319
Racer
Thread Starter
No prob man enjoy it... What color is your 4g? and yeah Kid in a Candy Store kinda how the wifey felt on Xmas... her Kit, Spoiler, and a ton of other stuff was under the tree two Christmas's ago... and a ton more stuff this past year...
02-25-2014, 07:47 PM
#320


