BC Suspension- RDX Coilovers

 02-08-2012, 11:37 PM
#42
Instructor
Thread Starter
I will be installing these on Friday. I will take pictures through the install.
I see there are a couple of requests for pricing. When I asked BC they mentioned it should be around $1K.
"Most of our kits are $1000. Only exceptional cases on fab work will it be more but I don't see that being an issue here. We don't charge more for branded vehicles, where as other manufacturers will cut cost on say a honda and charge a larger fee for the Acura."
This quote was before they produced the first set, once I have some feedback to report I'll be sure to ask them again about pricing.
Wish you guys could see them live, they look great. They look and are constructed better than my H&R Coilovers for my Audi.
02-10-2012, 08:50 PM
#44
Instructor
Thread Starter
It's FRIDAY.... 
Stay posted, got it installed....ohhhhhh yeah!
I'm loading up the pictures and doing a write up on how to install.
Me LIKEEEEE.....
Stay posted, got it installed....ohhhhhh yeah!
I'm loading up the pictures and doing a write up on how to install.
Me LIKEEEEE.....
02-10-2012, 09:28 PM
#45
Instructor
Thread Starter
http://s733.photobucket.com/albums/w...cpZZ1QQtppZZ28
The pics are posted.
The got posted backwards....
It is a continuation of the original pics.
I'll do the write up late tonight. Degree of difficulty on installation 3 out of 10 if you are by yourself, and 1 out of 10 if you have a buddy to help.
The biggest pain was taking off and putting on the rear shock's top nut (tightening it down), followed by taking off the original springs (needed to use spring compressors).
Enjoy the pics for now.
She is dirted....I'll tell you all about it...I have to take a shower now and clean up...hehe.
02-10-2012, 09:52 PM
#46
questions:
Where did you get these parts ?
- Brake Lines
- Slot F/R Disc
Are your Big Spacer just to make it look aggressive ??
Before
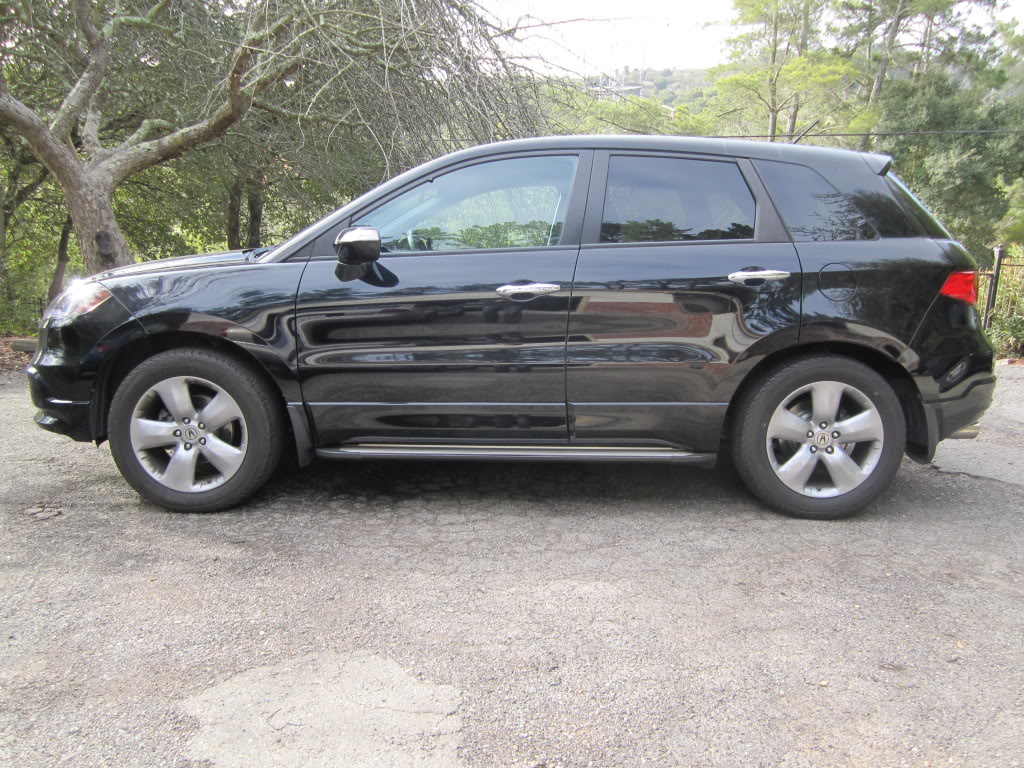
After
P.S. 993 & FD track cars ? Awesome
Where did you get these parts ?
- Brake Lines
- Slot F/R Disc
Are your Big Spacer just to make it look aggressive ??
Before
After
P.S. 993 & FD track cars ? Awesome
Last edited by BU; 02-10-2012 at 09:55 PM.
02-10-2012, 10:56 PM
#47
Instructor
Thread Starter
Answers within your post...
questions:
Where did you get these parts ?
- Brake Lines- From http://www.horsepowerfreaks.com/
- Slot F/R Disc - From ebaY
Are your Big Spacer just to make it look aggressive ?? They are 25mm each, fill the wheel wells, wider stance.
Before
After-- Only front was installed at this point.
P.S. 993 & FD track cars ? Good eye my friend...It is a 996 though...
Awesome
Where did you get these parts ?
- Brake Lines- From http://www.horsepowerfreaks.com/
- Slot F/R Disc - From ebaY
Are your Big Spacer just to make it look aggressive ?? They are 25mm each, fill the wheel wells, wider stance.
Before
After
-- Only front was installed at this point.P.S. 993 & FD track cars ? Good eye my friend...It is a 996 though...
Awesome
The following users liked this post:
BU (02-10-2012)
02-10-2012, 11:23 PM
#48
Instructor
Thread Starter
BC Suspension- Installation of front Coilovers
This is just my experience and not an official BC post.
Step 1. Jack up car/jack stands on both sides
2. Take wheels off (19mm)
3. Take sensor off (10mm), the plastic clip is a pain to take off (use small flat screw driver to pry from the sides and not from above and below)
4. Unscrew brake line connection from strut body (12mm)
5. Take off nuts from the top of shocks (leave one, but loosen it almost to the end). You will access them through the engine bay. Remove the plastic covers to expose the nuts(14mm, use deep socket)
6. Remove swaybar links completly (17mm)
7. Remove the 2 lower strut nuts/bolts (22mm/19mm) place jack under the suspension arm
8. Remove the last nut from strut hat. Lower jack, twist assymbly hub towards the back of car, fish the strut assembly out
9. Install BC strut, jack up the suspension, install all five nuts on strut hat (leave them loose)
10. Install 2 lower strut nuts/bolts
11. Install swaybar link-- BC uses 19mm nuts
12. Install brake line and sensor
13. Tighten to strut nuts
14. Install wheel
02-10-2012, 11:52 PM
#49
Instructor
Thread Starter
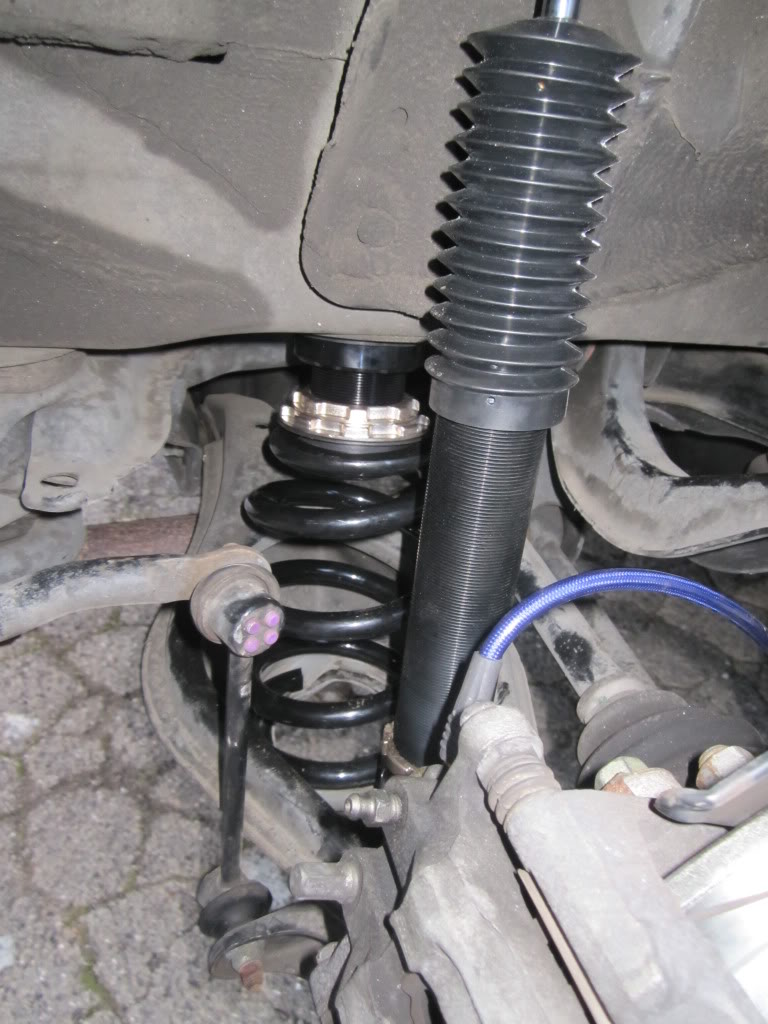
BC Suspension- Installation of rear shocks and springs
1. Remove internal covers to expose top of rear shocks-- Access is through the trunk, use flat screw drive and pry off from the side and not top or bottom
2. Remove nuts completly (Deep 14mm socket)-- If stuck use 4mm allen and 14mm wrench
3. Jack up rear of car/remove wheels
4. Remove bottom shock bolt- 17mm rachet
5. Push body of shock up, move past suspension arm, remove shock
6. Use spring compressor (one inside spring towards center of car, one outside of spring towards the outside of car, see pics), take spring out
7. Remove bump stop 12mm socket with short extension
8. Install BC upper spring perch/height adjuster- Use 1.75 inch bolts instead of stock (I'll ask BC to include in final product)
9. Insert BC spring
10. Install BC shocks, tighten bottom bolt, jack up the suspension, tighen the top nut (BC uses 19mm nut)
11. Install wheels
12. Take car off jacks.
02-11-2012, 12:14 AM
#50
Instructor
Thread Starter
Now the commentary...
I took last Tuesday off to do this install and it rained! So I looked at the weather and Friday was to be clear...as you see from the pictures as I was installing the suspension it started to rain...best laid plans....
I promised you guys Friday installation, you got Friday installation.
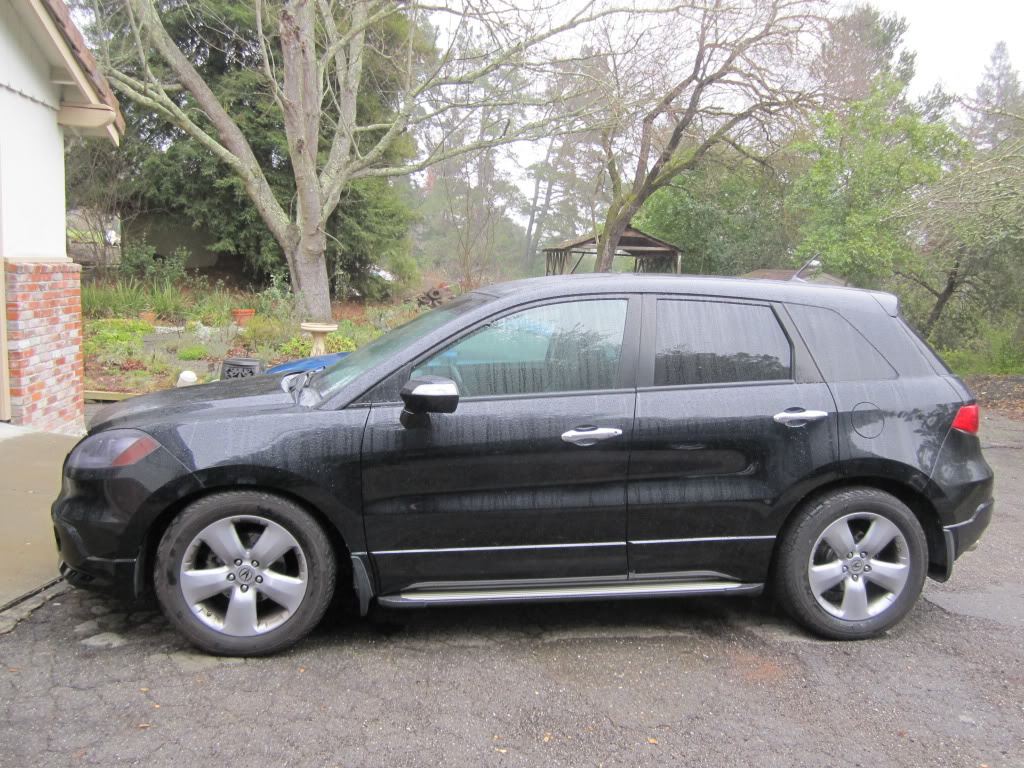
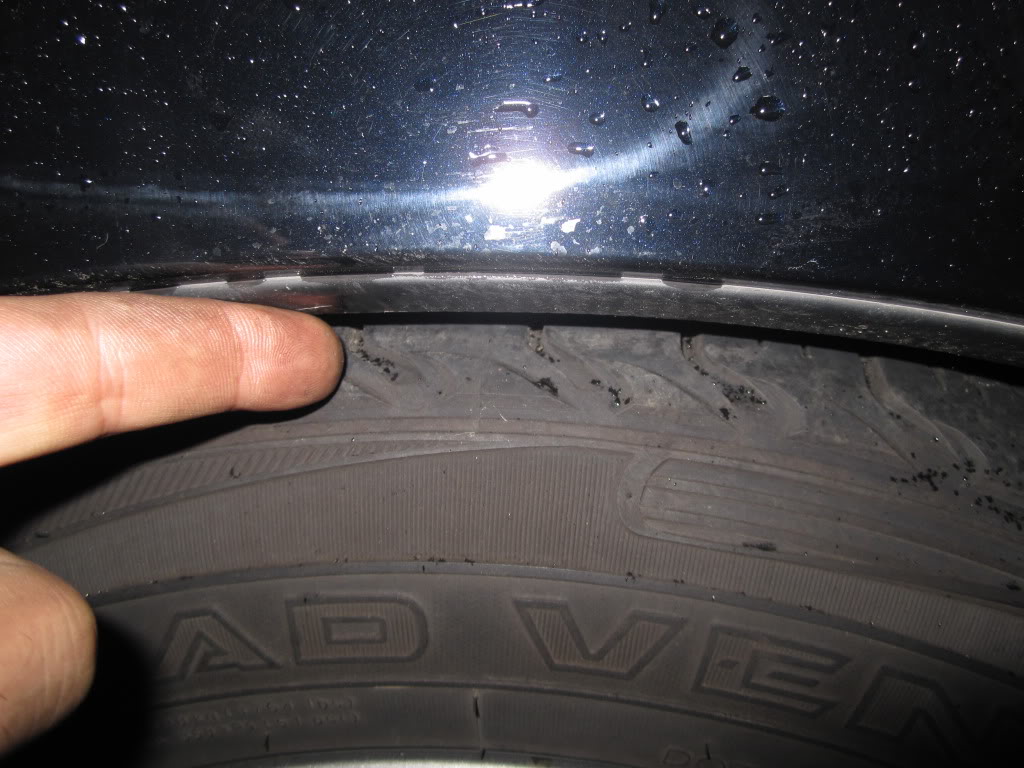
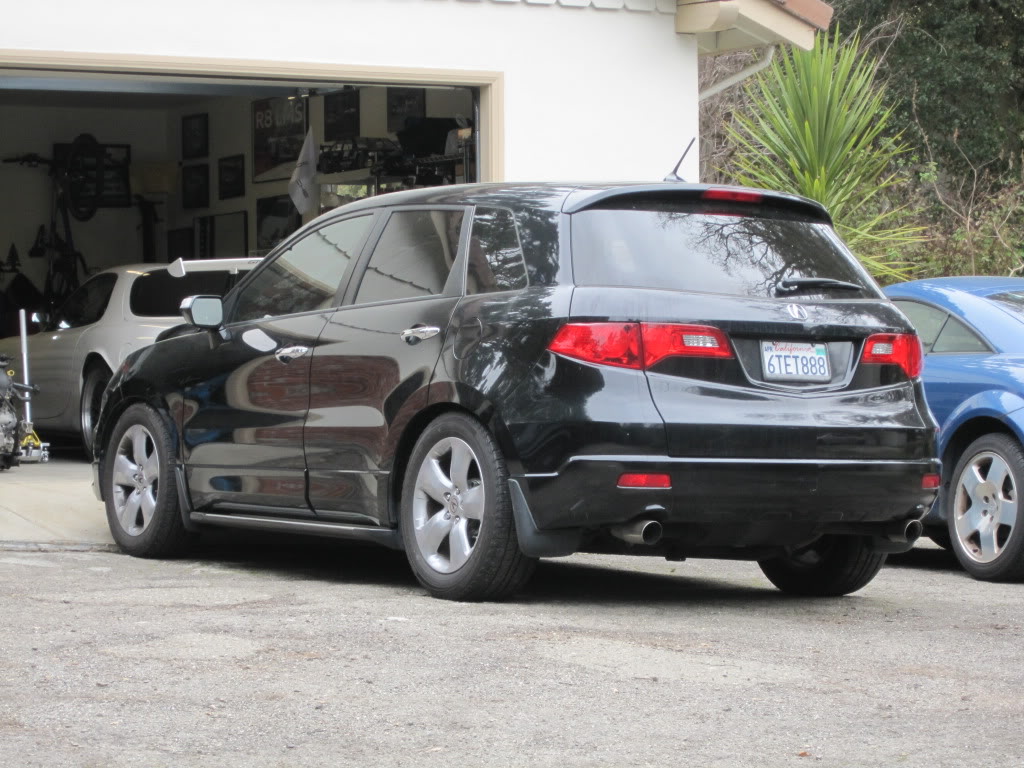
The RDX looked HOT after the front was installed (see "after" pic posted by BU). I took it for a drive, but the ground was too wet to push it hard. It would just slide, and understeer on the slower stuff. I have 25mm spacers and it rubbed a little on hard cornering, just barely.
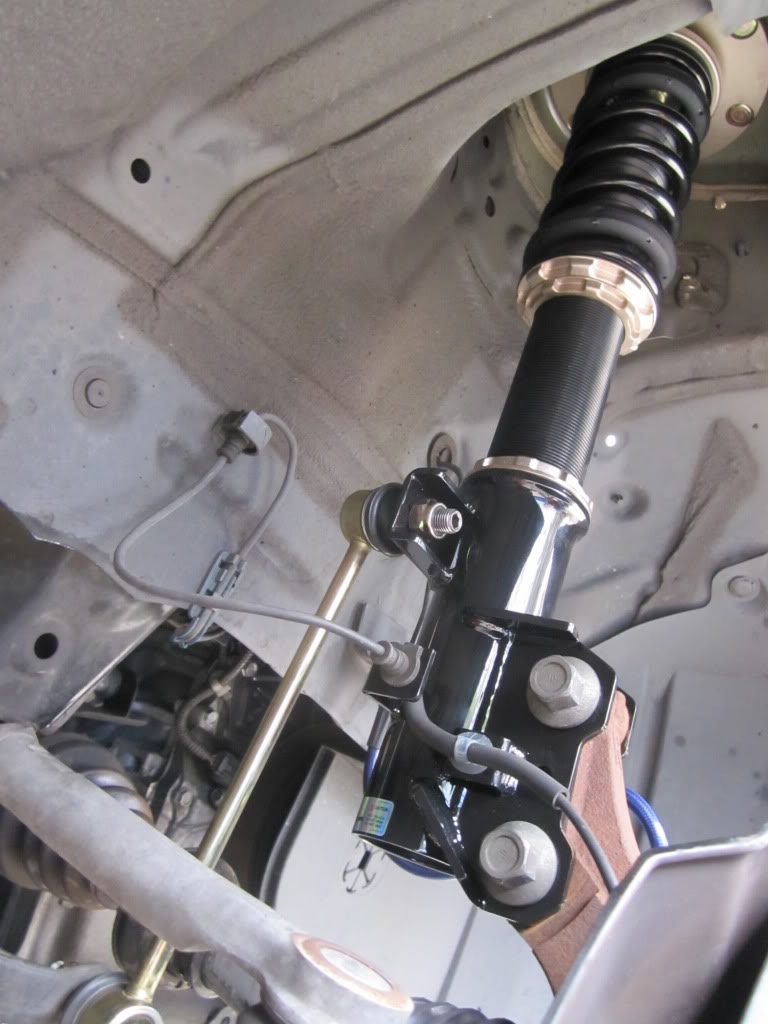
The BC struts are shorter than stock, see pic, and considerably lighter than stock. The body is aluminum the spring is smaller, and the top had is alum as well.
It came from the factory to bolt right in. The fronts worked just fine.
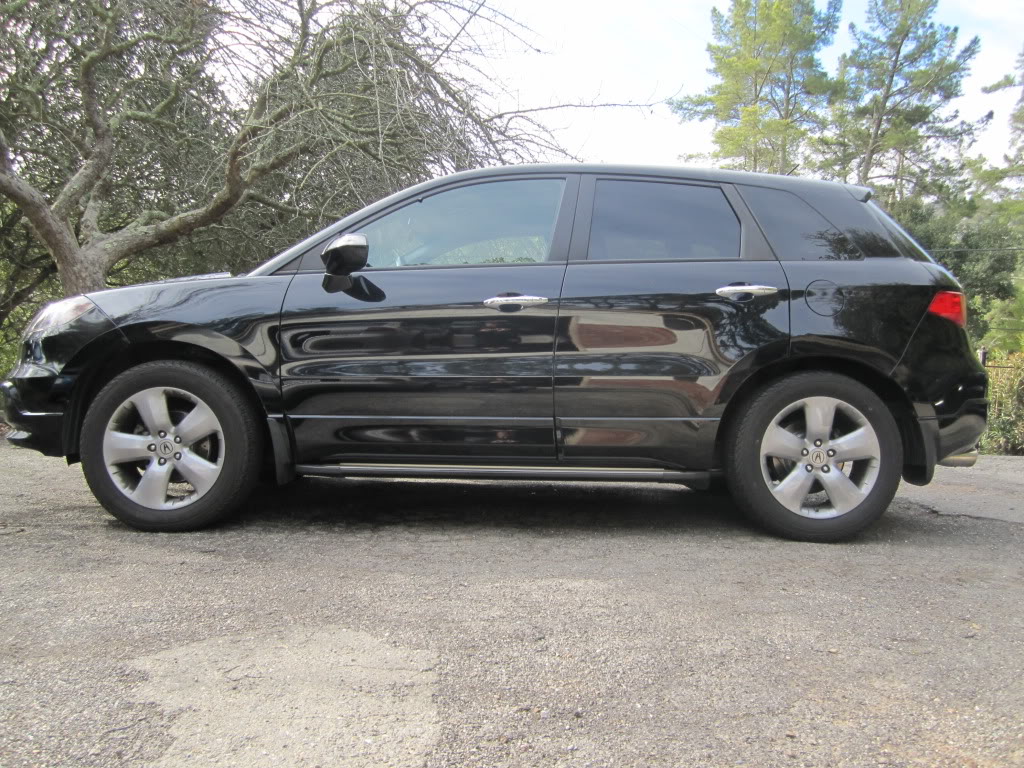
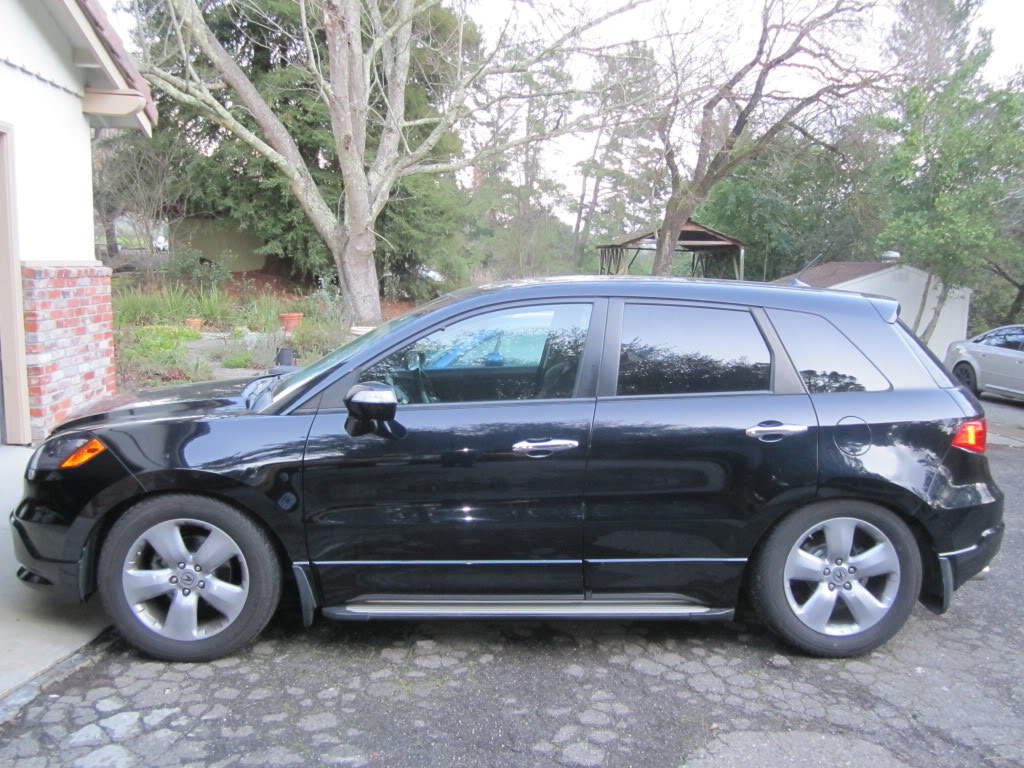
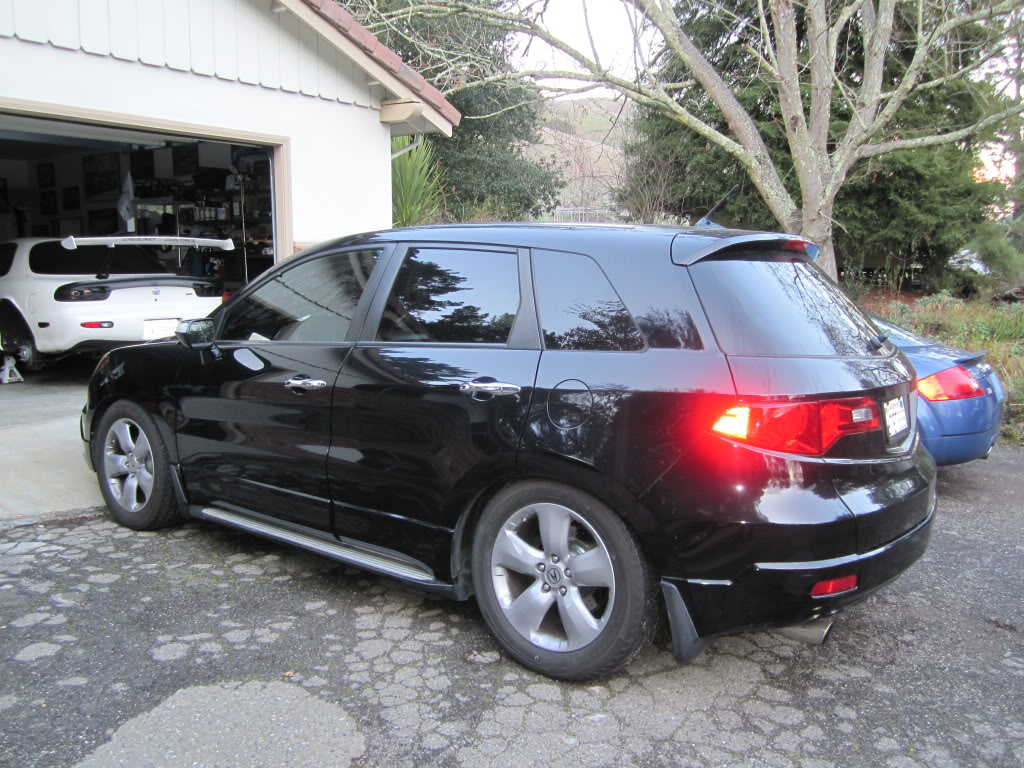
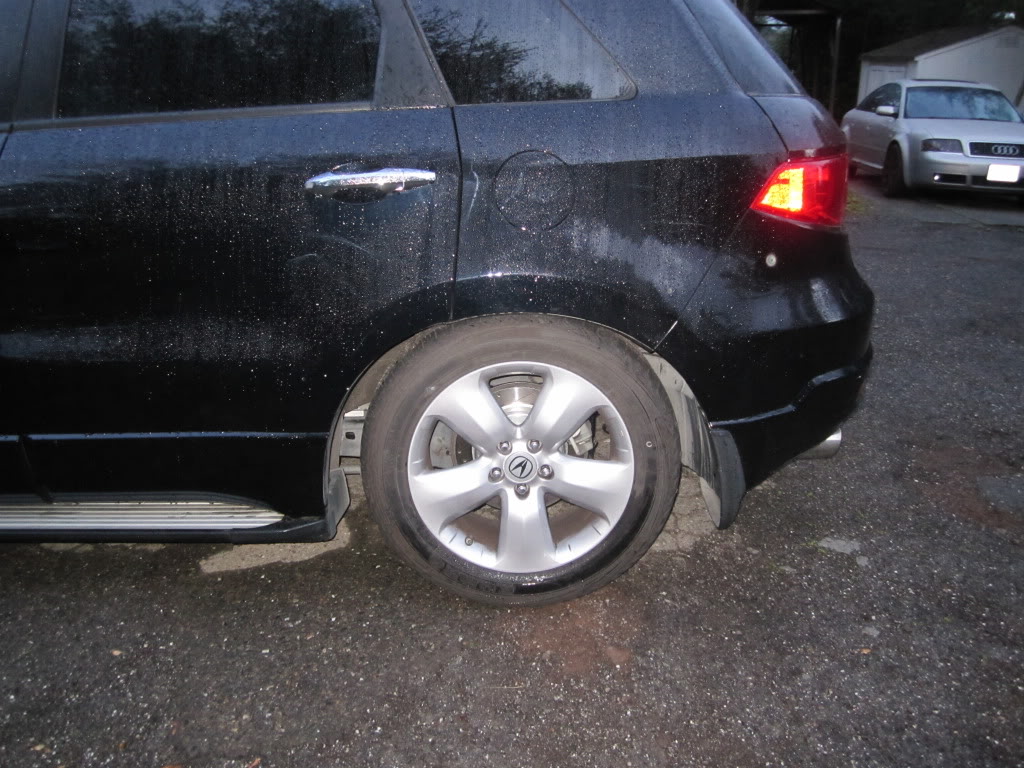
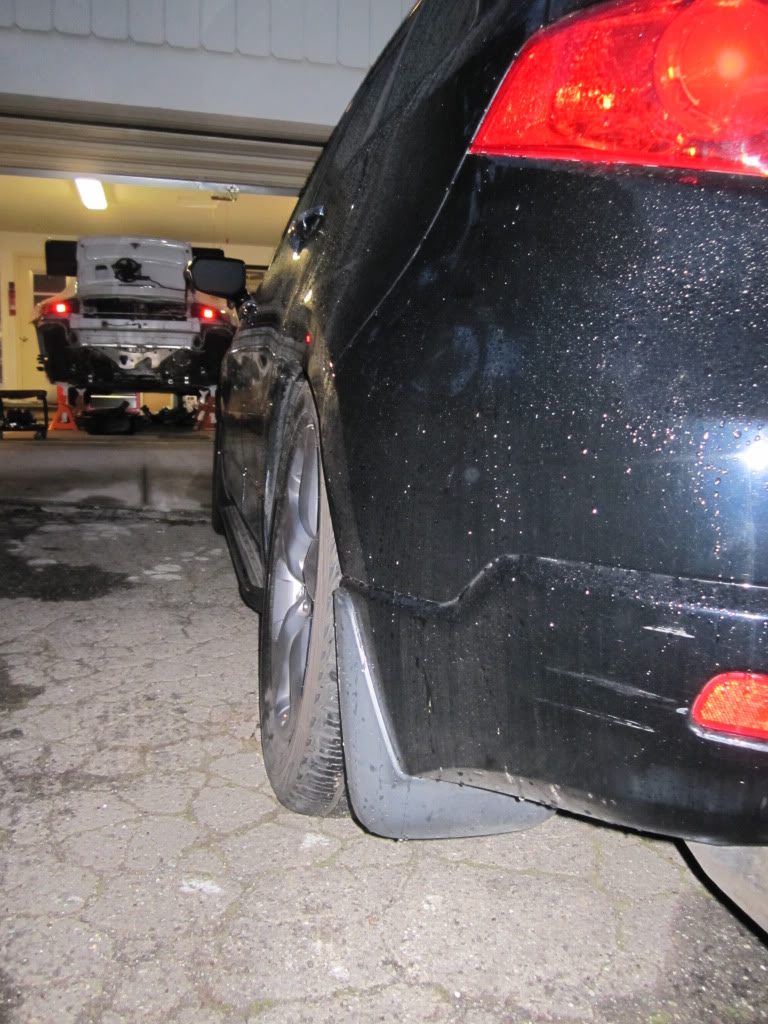
Then I installed the rears. The back end is totally dirted. The drop is the same amount all the way around. Personally I don't think she looks as good as when it had a "rake" to it. I will be raising the rear by 1/2 to 1 inch and lower the front by 1/2 inch. There is plenty of adjustment on the suspension, both front and rear, to go further up or down.
I like it that they pre-set it from the factory. Great place to start, if not on the aggresive side. I guess if you are putting in coil-overs you are after that aggresive look.
I took the car for a test drive, but the rear would rub as soon as I would do any cornering. I will need to roll the fenders in the rear.
I ran out light to do any further work. The few minutes that I drove around on city roads the ride felt just as stock with fronts only, and bit harsher once the rears were installed.
When lowered, the front camber looks the same as before (did not actually measure it), but the rear has significantly more camber than stock. I will need to completly allign the car, roll the fenders, and take out some of the rear camber.
I think BC's experience made this setup pretty spot on.
I'll keep you all posted.
I took last Tuesday off to do this install and it rained! So I looked at the weather and Friday was to be clear...as you see from the pictures as I was installing the suspension it started to rain...best laid plans....
I promised you guys Friday installation, you got Friday installation.
The RDX looked HOT after the front was installed (see "after" pic posted by BU). I took it for a drive, but the ground was too wet to push it hard. It would just slide, and understeer on the slower stuff. I have 25mm spacers and it rubbed a little on hard cornering, just barely.
The BC struts are shorter than stock, see pic, and considerably lighter than stock. The body is aluminum the spring is smaller, and the top had is alum as well.
It came from the factory to bolt right in. The fronts worked just fine.
Then I installed the rears. The back end is totally dirted. The drop is the same amount all the way around. Personally I don't think she looks as good as when it had a "rake" to it. I will be raising the rear by 1/2 to 1 inch and lower the front by 1/2 inch. There is plenty of adjustment on the suspension, both front and rear, to go further up or down.
I like it that they pre-set it from the factory. Great place to start, if not on the aggresive side. I guess if you are putting in coil-overs you are after that aggresive look.
I took the car for a test drive, but the rear would rub as soon as I would do any cornering. I will need to roll the fenders in the rear.
I ran out light to do any further work. The few minutes that I drove around on city roads the ride felt just as stock with fronts only, and bit harsher once the rears were installed.
When lowered, the front camber looks the same as before (did not actually measure it), but the rear has significantly more camber than stock. I will need to completly allign the car, roll the fenders, and take out some of the rear camber.
I think BC's experience made this setup pretty spot on.
I'll keep you all posted.
Last edited by Rotary Rocket; 02-11-2012 at 12:18 AM.

 02-11-2012, 08:37 PM
#54
Instructor
Thread Starter
I took some more shots while it was still light outside. I hope it shows better.
http://s733.photobucket.com/albums/w...otary_Rocket5/
You will be able to buy these from BC Racing (suspension), once I get done testing them. I would say they should be available in less than 30 days. Start saving...
Cheers.
http://s733.photobucket.com/albums/w...otary_Rocket5/
You will be able to buy these from BC Racing (suspension), once I get done testing them. I would say they should be available in less than 30 days. Start saving...
Cheers.
02-11-2012, 10:37 PM
#55
thanks for pictures againDid you fine tune your coilover to you like yet ?
Height/Stiffness
you mentioned that BC coilover came shorter than OEM. (as seem in pictures)
Does that mean it can't rise to stock height ?
BU

 02-12-2012, 01:08 PM
#57

Holy cow. That's too low for me. Are you serious? There is still room to come down. You could screw that down to the floor.
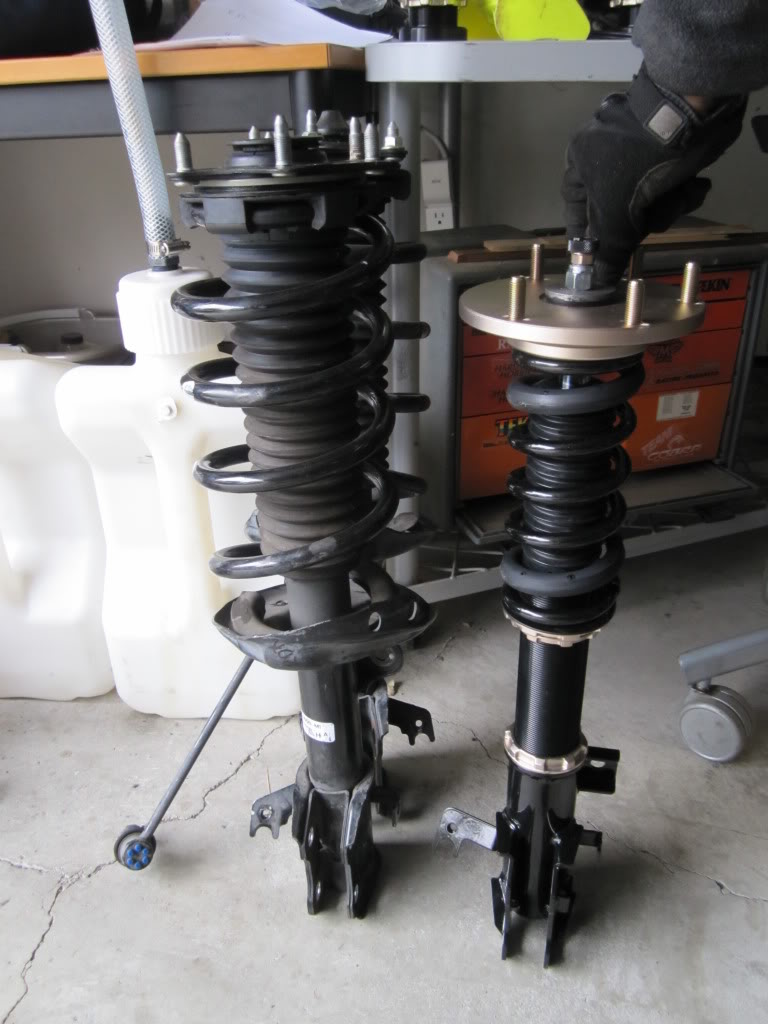
I don't know what they were thinking, but you should be able to start at stock height and twist your way down a couple inches. If these are at the top now, they are two inches too short.
Hello, Camber Kit?
I'm out on this set-up.
I don't know what they were thinking, but you should be able to start at stock height and twist your way down a couple inches. If these are at the top now, they are two inches too short.
Hello, Camber Kit?
I'm out on this set-up.
Last edited by Mr Marco; 02-12-2012 at 01:15 PM.
02-12-2012, 08:42 PM
#59
That side by side looks like a full three inches to me. Holy speed-bump scraper, Batman!
02-12-2012, 09:51 PM
#60
Instructor
Thread Starter
New pics added...
http://s733.photobucket.com/albums/w...otary_Rocket5/
So I rolled the rear fenders and the tires clear with no problem even with my 25mm spacers.
I marked the rear height adjusters and raised it by 10mm and due to their "inboard" location that translated into 1 full inch raise. The new first pictures shows how the car sits now.
Stock BC suspension setting drops the front by 2 1/4 inches and the rears by 2 3/4 inches.
I raised the rear by 1 inch, so now I have 2 1/4 front and 1 3/4 inch drop in back.
02-12-2012, 10:16 PM
#61
Instructor
Thread Starter
I will be installing the Advanti (Konig) 19 inch wheels next. It looks like they should work fine. Looking for some sticky tires for them, any suggestions?
Finally got to test drive the car properly. I did back roads/canyon roads. The suspension feels like a european sport sedan rather than a top heavy SUV. The ride is just a bit more stiff than stock, not harsh at all though.
I pushed the car pretty good, and the weak point was tires for sure. It now can really benfit further from a larger rear swaybar (next project?!!!). The handling is very predictable, it is still "nose heavy". When pushed hard it has a tendancy to understeer.
I have not had a chance to align the car, the rear has a lot of chamber so it should handle even better once aligned.
In ther rear, there was about 10mm more room left to raise the car. That should equate to another inch. To answer BU's question, the max you can raise the rear is to within 3/4 inch (lower) of stock. The front is a non issue, in fact you could probably raise it higher than stock.
You could lower the rear by another 20mm, that means you could potentially lower it by another 2 inches (lower than what was set by BC), for a total of 4 3/4 inch dorp. Don't know if the tires will clear, and will not try it either...
I am very happy with the handling/comfort/stance of this set up. It give us some flexibiliy to set up the car further to our liking (although the rear shock is NOT adjustable).
Unless you really plan on tracking this SUV ( the brakes were smoking) I would say these coilovers are ready for use. The spring rates were spot on, the dampening was just right. The car just feels so "planted", and looks great.
My feedback to BC will be to provide the 1 3/4 inch bolts for the rear height adjuster, and possibly give us dampening adjuster for the rear shocks.
I will have to take it for a long road trip to see how they feel, but they passed the handling test (my main reason for the swap) with flying colors.
THANK YOU BC, you guys ROCK.
So much for the hard to find Eibach springs...
Finally got to test drive the car properly. I did back roads/canyon roads. The suspension feels like a european sport sedan rather than a top heavy SUV. The ride is just a bit more stiff than stock, not harsh at all though.
I pushed the car pretty good, and the weak point was tires for sure. It now can really benfit further from a larger rear swaybar (next project?!!!). The handling is very predictable, it is still "nose heavy". When pushed hard it has a tendancy to understeer.
I have not had a chance to align the car, the rear has a lot of chamber so it should handle even better once aligned.
In ther rear, there was about 10mm more room left to raise the car. That should equate to another inch. To answer BU's question, the max you can raise the rear is to within 3/4 inch (lower) of stock. The front is a non issue, in fact you could probably raise it higher than stock.
You could lower the rear by another 20mm, that means you could potentially lower it by another 2 inches (lower than what was set by BC), for a total of 4 3/4 inch dorp.
Don't know if the tires will clear, and will not try it either...I am very happy with the handling/comfort/stance of this set up. It give us some flexibiliy to set up the car further to our liking (although the rear shock is NOT adjustable).
Unless you really plan on tracking this SUV (
the brakes were smoking) I would say these coilovers are ready for use. The spring rates were spot on, the dampening was just right. The car just feels so "planted", and looks great.My feedback to BC will be to provide the 1 3/4 inch bolts for the rear height adjuster, and possibly give us dampening adjuster for the rear shocks.
I will have to take it for a long road trip to see how they feel, but they passed the handling test (my main reason for the swap) with flying colors.
THANK YOU BC, you guys ROCK.
So much for the hard to find Eibach springs...
02-12-2012, 10:45 PM
#62
New pics added...
http://s733.photobucket.com/albums/w...otary_Rocket5/
The new first pictures shows how the car sits now.
http://s733.photobucket.com/albums/w...otary_Rocket5/
The new first pictures shows how the car sits now.
Thank You for your effort for contacting BC at SEMA
I love how your suspension sitting at now.
It look prefect from my POV
Let see how the rear camber go after your re-alignment.
 02-12-2012, 11:04 PM
#63
Instructor
Thread Starter
Thanks BU, I agree...I really like how she sits now.
I will be at Infinion Raceway on March 10th and 11th. If you want a ride on the track let me know and I would be more than happy to aoblige. I will have the RDX there for hot laps.
In fact if you can make it out on Saturday, lunch will be on me...it is our first race of the season. Our team is called GoGoGear.Com, we race a BMW and Hyundai...both bright YELLOW. You can't miss us.
The following users liked this post:
BU (02-18-2012)
02-13-2012, 12:25 PM
#64
02-13-2012, 03:27 PM
#65
Instructor
Join Date: Aug 2007
Location: NYC~Brooklyn
Age: 39
Posts: 246
Likes: 0
Received 0 Likes
on
0 Posts
lovely pics Rotary rocket!
you said that the ride is stiffer than stock but not harsh. I live in NYC and the RDX's suspension seems to fall on its face when the roads are completely uneven and filled with cracks and potholes.
Do you mind doing a test with the suspension on roads that have not smooth and uneven? I mean of course after you roll your rear fenders =)
keep up the updates!
02-13-2012, 10:12 PM
#67
'06 RL Tech
I can't wait, but I have to. Another dream came true recently.

It's a Nighthawk T3, and it helps protect my RDX. Newer toys are on hold for a bit.
Way to go Rotary Rocket!!!
It's a Nighthawk T3, and it helps protect my RDX. Newer toys are on hold for a bit.
Way to go Rotary Rocket!!!
02-14-2012, 01:15 PM
#68
i like the setup. think it would be better with a camber kit.. would like to see what it looks like with upgraded wheels on it too..
Marco wanna buy my springs?? my offer still stands on amount 
Marco wanna buy my springs??
my offer still stands on amount
02-14-2012, 03:31 PM
#69
02-14-2012, 10:22 PM
#70
Instructor
Thread Starter
http://s733.photobucket.com/upload/a...otary_Rocket5/
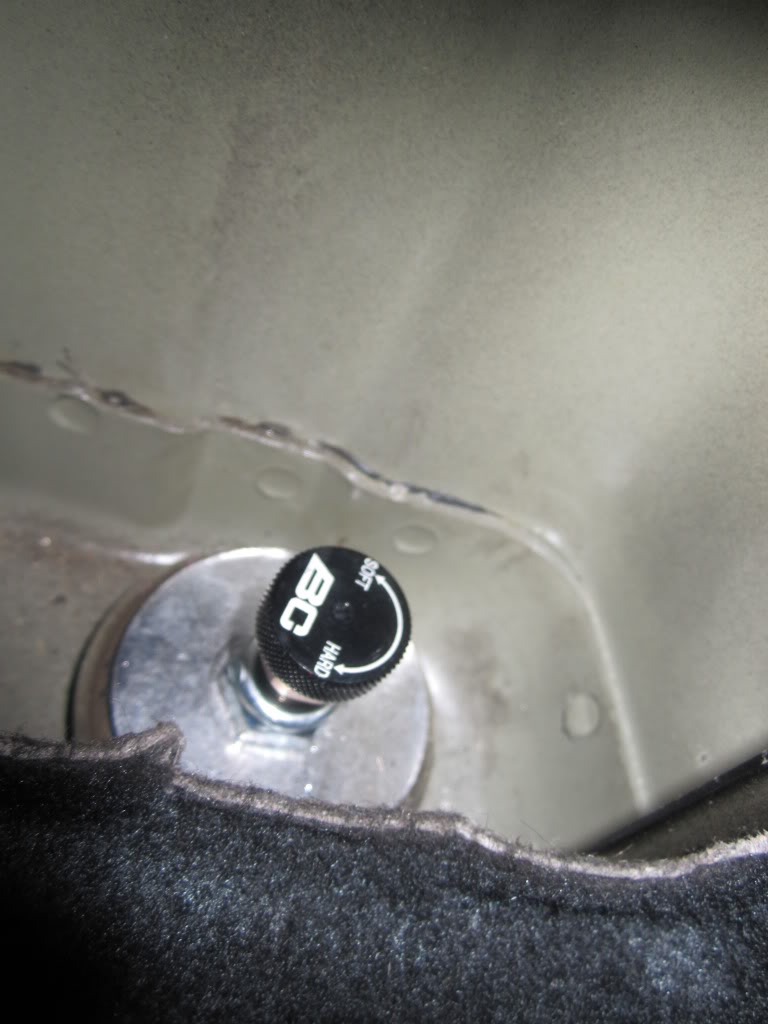
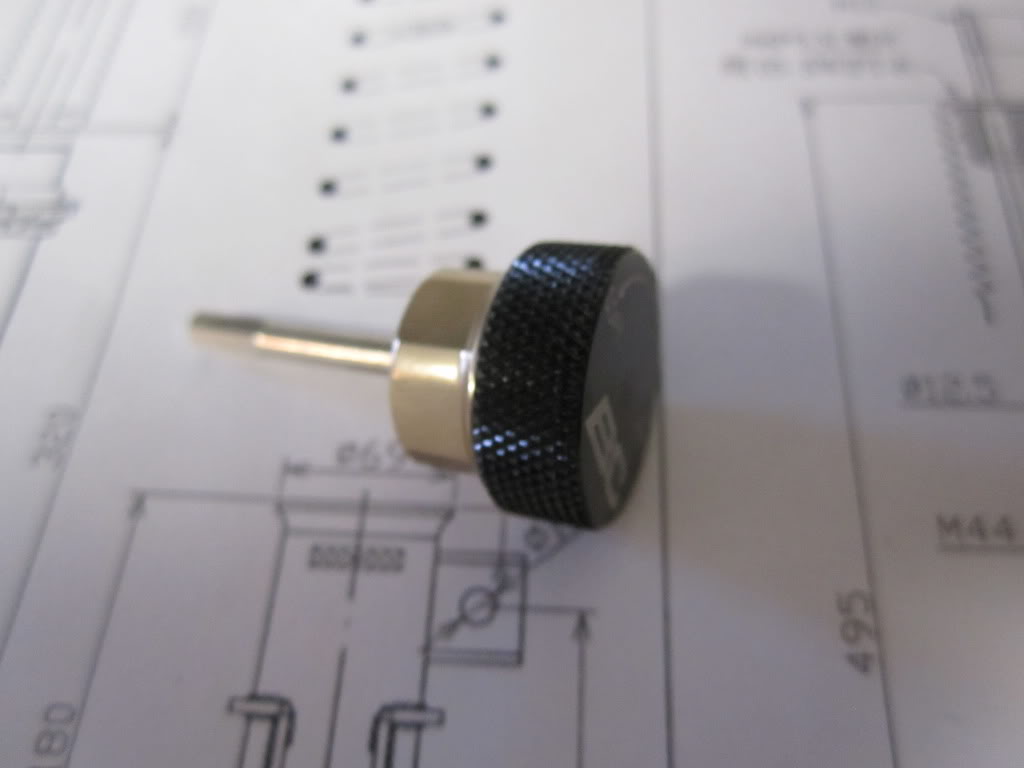
Great news...I was mistaken. The rear shocks ARE adjustable. Please see the new pictures. There are no "extra" adjuster knobs. These knobs are for the rear shocks. In applications such as the RDX, the knobs are used to adjust the shocks and then place them in the glovebox.
I soften the rears by one click. It seemed the rears where stiffer than the front.
I will be testing on some "rough roads" as requested. The stock RDX had a tendancy to skate a bit on rought roads, I wonder how it will perform now.
BC was going to do chamber plates for the front, but there is not enough room due to the top had design of the car.
JMJ3rd, congrats on you new "toy". Enjoy it in good health.
The following users liked this post:
BigHatch (02-15-2012)
02-15-2012, 09:53 AM
#72
http://s733.photobucket.com/upload/a...otary_Rocket5/
Great news...I was mistaken. The rear shocks ARE adjustable. Please see the new pictures. There are no "extra" adjuster knobs. These knobs are for the rear shocks. In applications such as the RDX, the knobs are used to adjust the shocks and then place them in the glovebox.
I soften the rears by one click. It seemed the rears where stiffer than the front.
I will be testing on some "rough roads" as requested. The stock RDX had a tendancy to skate a bit on rought roads, I wonder how it will perform now.
BC was going to do chamber plates for the front, but there is not enough room due to the top had design of the car.
JMJ3rd, congrats on you new "toy". Enjoy it in good health.
tell them to make a rear camber kit.. no one makes one for the vehicle.. eibach still makes a front camber kit. i think ive seen them go for 60 bucks

The following users liked this post:
BigHatch (02-15-2012)

 02-17-2012, 08:57 PM
#79
'06 RL Tech
Sorry, I moved the link in pb.

When I can get them, I'll be giving up the Eibachs, as well. I want to see all the kinks worked out first.
Thanks RR for the props on the "toy".
Since you are using spacers and it seems to be "ok", do you think I'd have a problem with my tire and wheel set up that is in my sig? No spacers on mine.
When I can get them, I'll be giving up the Eibachs, as well. I want to see all the kinks worked out first.
Thanks RR for the props on the "toy".
Since you are using spacers and it seems to be "ok", do you think I'd have a problem with my tire and wheel set up that is in my sig? No spacers on mine.
02-18-2012, 03:00 PM
#80
Instructor
Thread Starter
Guys,
This keeps getting better...the rear adjusters actually screw on to the top of the rear shocks (14 mm), no need to remove to put in the glove box. The come separatly so you can install the rear shocks (the hole is only enough for the shock shaft to go through).
I also forgot to mention, but the shock shafts are larger than stock. These will be stronger units than stock.
The rear suspension arms are adjustable for chamber, so that is how you should adjust the rear chamber.
I will be speaking with BC live today to provide my feedback. I proposed to them to take "Acurazine" pre-orders, I'll let you know if they go for it.
They were estimating 30-45 days for final production units to be available.
Now that I have rolled the rear fenders, there is a ton of room. If you don't use 25 mm spacers, I think you will be fine with even a 9 inch rim in the rear (of course it matters what your off-set is).
Cheers.