Yungone501's- Excessive infatuation with the J-series
 07-03-2014, 11:06 PM
#1201
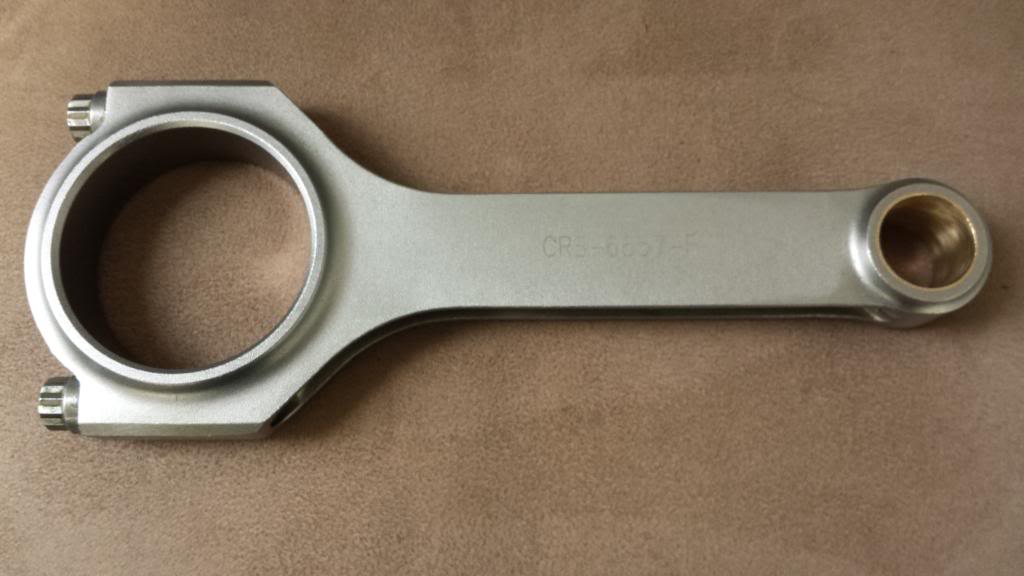
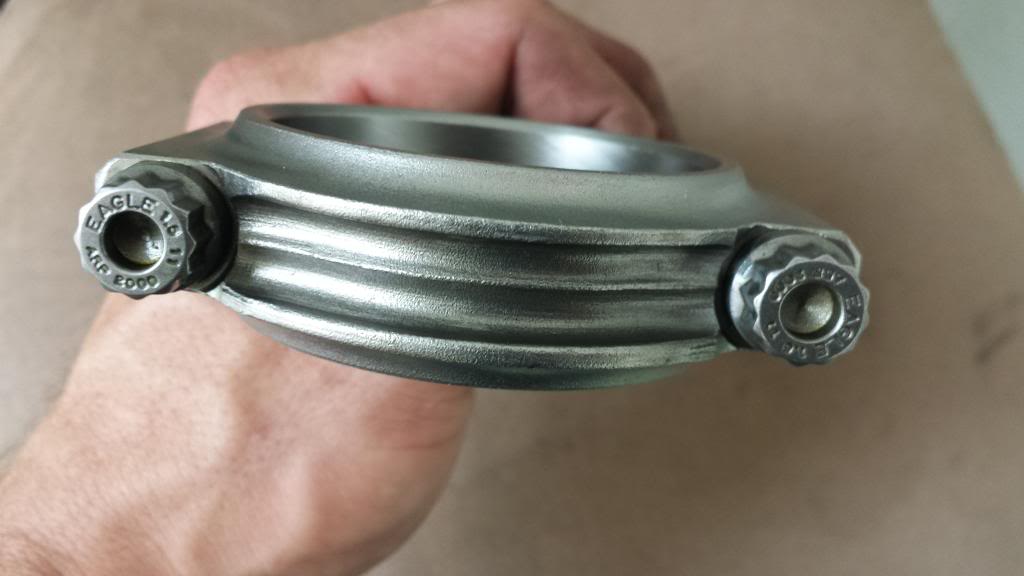
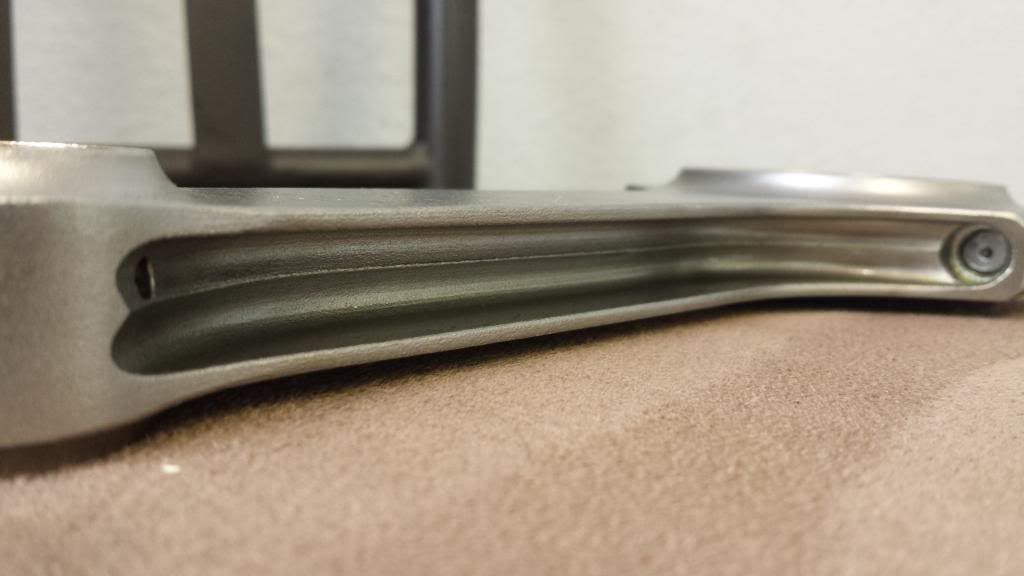
Here's a few shots of the Eagle rod that I'll be using in the short stroke build. As mentioned previously, the rods are h-beam design. Though I haven't weighed them yet, they do feel slightly heavier than the stock 2.5 rods but that's before material removal. They may very well be lighter once they are machined down in width. One thing that I neglected to mention was the rod bolt diameter which is 3/8" or 9.5mm. Stock Honda rod bolt is 8mm. In the first three pics, you can see there's nothing spectacular about them. It's also worth notating that the caps are not crack separated like OEM Honda is. At first glance, I didn't realize this as the parting line was almost unseen. If you look closely in the pics, you can vaguely see this parting line near the edge of the journal side.
Onto the good stuff. First thing I did was of course spec them and there was almost no difference in the center to center as well as the SE bore size (which was a precise match). Both of them were acceptable. The BE bore was what I had discussed so that variation was expected. You can see from the side by side top view that the width on the Eagle rod was right at the anticipated difference of 5mm.The brim accounted for 7.2mm (3.6mm per side) by itself which meant that there was plenty of material to remove from each side. Done deal!
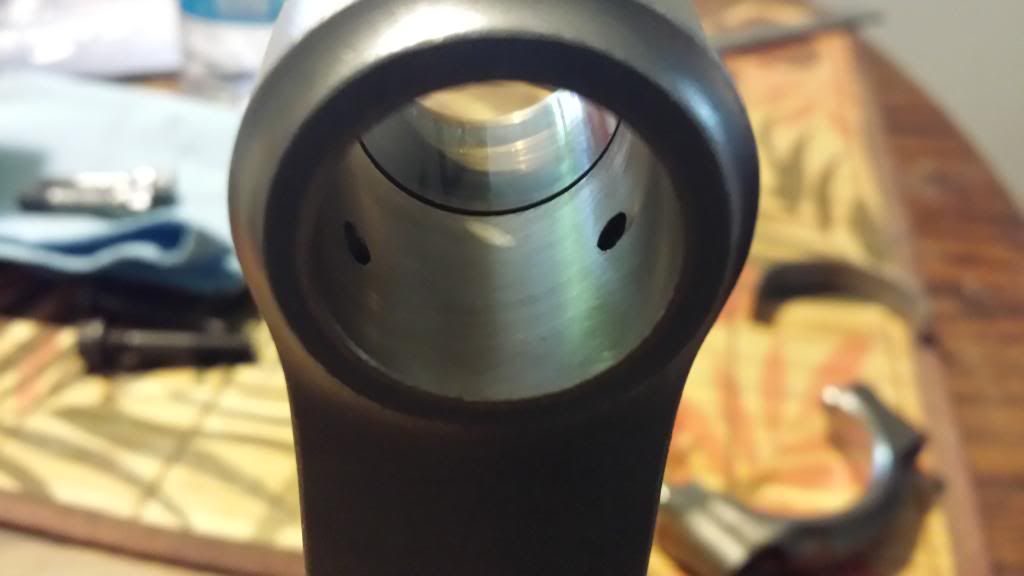
The rod journal width is much wider than the 2.5 rod and covered nearly the entire surface from brim edge to brim edge. So this means that there's a likelihood of the factory Ford bearing being MUCH wider than the Honda rod is. No big deal. Small hurdle to jump compared to the ones I've already cleared.
The next two pics are of the Eagle and stock 2.5 rod side by side. Both rods have the caps removed and are sitting on a flat surface. You can't really see from the angle shown here but there's about a strand of a human hair difference in length (.003") between the two rods.

Onto the good stuff. First thing I did was of course spec them and there was almost no difference in the center to center as well as the SE bore size (which was a precise match). Both of them were acceptable. The BE bore was what I had discussed so that variation was expected. You can see from the side by side top view that the width on the Eagle rod was right at the anticipated difference of 5mm.The brim accounted for 7.2mm (3.6mm per side) by itself which meant that there was plenty of material to remove from each side. Done deal!
The rod journal width is much wider than the 2.5 rod and covered nearly the entire surface from brim edge to brim edge. So this means that there's a likelihood of the factory Ford bearing being MUCH wider than the Honda rod is. No big deal. Small hurdle to jump compared to the ones I've already cleared.
The next two pics are of the Eagle and stock 2.5 rod side by side. Both rods have the caps removed and are sitting on a flat surface. You can't really see from the angle shown here but there's about a strand of a human hair difference in length (.003") between the two rods.


The following users liked this post:
1foxbody (08-03-2014)
07-14-2014, 11:36 AM
#1203
takin care of Business in
iTrader: (5)
Join Date: Jan 2008
Location: Kansas City, MO
Age: 40
Posts: 30,994
Received 4,732 Likes
on
4,064 Posts

Matt strikes again !!!
07-15-2014, 07:04 PM
#1204
 07-16-2014, 01:14 PM
#1205
takin care of Business in
iTrader: (5)
Join Date: Jan 2008
Location: Kansas City, MO
Age: 40
Posts: 30,994
Received 4,732 Likes
on
4,064 Posts
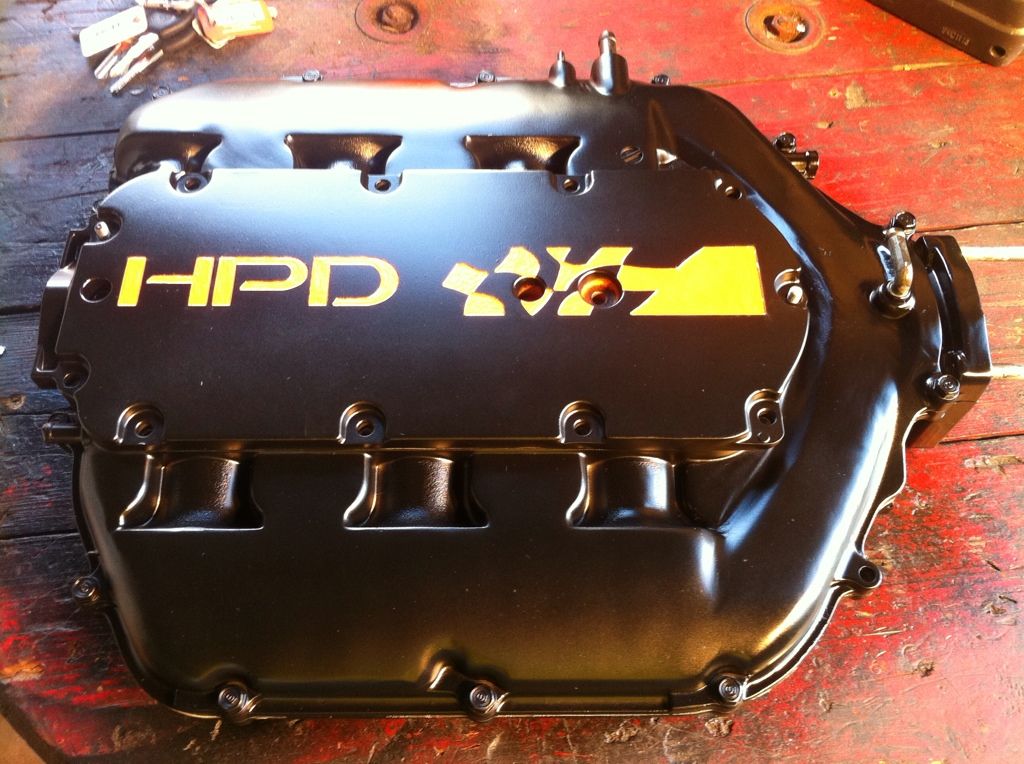
That manifold
I would love to run something like that with some nice horn inside
I would love to run something like that with some nice horn inside
07-20-2014, 02:35 PM
#1206
Too busy working on everyone else's ride. 
I have to be honest with everyone, I've been toying with 2010 MDX here lately and done a few things with it....since it is, after all, my daily driver.
I've added a dry shot .041 jetted nitrous setup to it which is making an additional 87hp at ALL wheels. Lol, remember its AWD. I've also gutted the precats and the single cat beneath the cab as well. Installed a good set of defoulers on the cat monitor O2 sensors to eliminate the MIL. And last but not least, will be throwing the manifold that Matt made for me on it for the meantime. This is really to see where the powerband is enhanced at and to gain a little knowledge from it for the use on the 2.7 here before too long.
07-28-2014, 01:36 AM
#1208
Good news is it did fit AND with nearly 12" of space from the top of the lower runners to the underside of the hood insulation, the hood closed with ease.
07-28-2014, 10:49 AM
#1210
More like $6k-7k if it all works out the way I've planned. My biggest expenses so far have been the j37a2 heads, the custom manifold, forged rods/pistons, then the cam regrinds. There are other moderate expenses that may even increase in cost but that's it for the most part. I'm still on the fence about using titanium valves or not but if I do, this will probably be the biggest expense yet at around $1650 which is decent pricing considering the are all custom made in a CNC mill.
07-28-2014, 11:47 PM
#1212
Dude, the MDX becomes a rabid animal when you shove nitrous down its throat. Imagine an already 300hp SUV putting up a helluva fight against a bone stock 5.7 liter GTO when a press of a button unleashes another 100hp. What's even better is the face of the man driving the car that just realized he was pulled by a cars length in something that comfortably seats my entire family (total of 7 people) on a daily basis. Yes, the j37a1 is monster in disguise. Sorry, no videos yet. If I can remember next time I'll try and get my coworker to shoot one for you guys.
****UPDATE****
So the Accords been sitting at my house for the past several months but now that I've been nearing the completion of the 2.7 (or at least the gathering of parts) I decided it was a good day to return the car to the shop and prep her for a righteous and more appropriately built engine. She's now sitting in the first bay of my shop 25 minutes away from me tonight....and I'm sort of sad....not really.......well maybe a little.
I also boxed up the j37a2 cams and sent them out to Bill at Gude Performance whom I've been talking to for the past year or so about grinding some gnarly profiles on the sticks. Bill seems like a pretty cool guy and I've never dealt with him but gotta say he's pretty damn knowledgable in his highly competitive industry. We've been discussing the possibility of a radical change in direction for the motor I'm building. I'll lay this one clue out and let's see if anyone can guess what may be happening: There's a chance that the cams may be reground to give them MORE EXHAUST DURATION and that's it.
Let's see who's doing their homework here on Azine...
The following users liked this post:
Marcelechka (07-29-2014)
07-29-2014, 09:04 AM
#1213
Senior Moderator
More duration huh?
As soon as im done with the body work (stretching the fenders) im going to be playing with the motor. Ive got a set of rollers for the rockers im going to install on a spare set i have laying around. I want to put it on a dyno to see the results (before and after).
Got any "other" cams laying around
07-29-2014, 10:00 AM
#1215
takin care of Business in
iTrader: (5)
Join Date: Jan 2008
Location: Kansas City, MO
Age: 40
Posts: 30,994
Received 4,732 Likes
on
4,064 Posts
 07-31-2014, 05:25 PM
#1216
More like $6k-7k if it all works out the way I've planned. My biggest expenses so far have been the j37a2 heads, the custom manifold, forged rods/pistons, then the cam regrinds. There are other moderate expenses that may even increase in cost but that's it for the most part. I'm still on the fence about using titanium valves or not but if I do, this will probably be the biggest expense yet at around $1650 which is decent pricing considering the are all custom made in a CNC mill.
For me to get a custom long tube header set and exhaust installed plus tune would run me atleast 5k.
More duration huh?
As soon as im done with the body work (stretching the fenders) im going to be playing with the motor. Ive got a set of rollers for the rockers im going to install on a spare set i have laying around. I want to put it on a dyno to see the results (before and after).
Got any "other" cams laying around
As soon as im done with the body work (stretching the fenders) im going to be playing with the motor. Ive got a set of rollers for the rockers im going to install on a spare set i have laying around. I want to put it on a dyno to see the results (before and after).
Got any "other" cams laying around
I was reading honda tuning mag today and saw an article on a twin turbo v6 nsx pikes peak build.
The car started off with hpd's twin turbocharged HR28TT engine used in ALMS. It is based off of the 3.5L j series, then destroked to 2.8 liters.
For the Pikes Peak build they bumped displacement back to 3.5 liters, resulting in 500hp and 380 lb-ft of torque. It uses CP forged pistons and Carrillo rods that lower compression to 9.5:1.
HPD's dry sump oiling system was removed in favor of the 3.7L TL's and the cable throttle was swapped to the TL's drive by wire.
They removed the dry sump system because there was no room for it, they claim. They also state that the cost to make the change was not worth the benefits that could be realized from the dry sump setup.
They removed the sequential transmission, and installed the TL's 6spd manual. Custom shifter cables were made. Tilton pedal box was used. They are running a spec clutch and flywheel, 2 BorgWarner EFR B1 turbos were used.
Here is the engine parts list:
HR28TT J35A engine
Custom Honda R&D billet aluminum engine mounts
CP 9.5:1 pistons
Carrillo connecting rods
RLX crankshaft
TL SH-AWD oil pump
ARP head studs
TL cylinder heads
TL TB
HPD HR28TT camshafts
HPD HR28TT valve springs
HPD HR28TT valve retainers
HPD Hr28TT valve keepers
Accord VCM aluminum rocker arms
BorgWarner EFR B1-frame turbochargers
Custom Honda R&D intake system
HR28TT IM
Custom Honda R&D intercooler and piping
Custom blow-off valve
Custom Honda R&D exhaust manifolds
Custom Honda R&D downpipes
Aeromotive R1000 fuel pump
Aeromotive fuel filter
Modified RDX fuel injectors
HR28TT fuel rails
Custom AN fittings and steel-braided lines
JEGS universal aluminum radiator
Silicone radiator hoses
NGK iridium spark plugs
Accord ignition coils
Custom modified ecu
TL Type-S transmission
Custom shifter cables
Spec Stage 5 clutch
Spec aluminum flywheel
Driveshaft Shop axles
I now see where you got the idea for your build from.
 07-31-2014, 09:28 PM
#1217
Senior Moderator
Long tubes will be this winter, im hoping to get the rollers tested this fall.
High reving id probably stick to the 3.2/3.5. Bump the compression, Heads that can really flow (ie ported, polished and gasket matched, and Cams would be the big thing. The other thing i would do is have your crank knife edged/lightened and the rest of the rotating assembly lightened and balanced with it. The light weight internals will make a difference.
08-03-2014, 02:06 AM
#1218
That seems really cheap. Does that include ecu, tuning, welding, piping, intercooler, upgraded axles, IM, exhaust, oil cooler, turbo, etc.
For me to get a custom long tube header set and exhaust installed plus tune would run me atleast 5k.
I now see where you got the idea for your build from.
For me to get a custom long tube header set and exhaust installed plus tune would run me atleast 5k.
I now see where you got the idea for your build from.
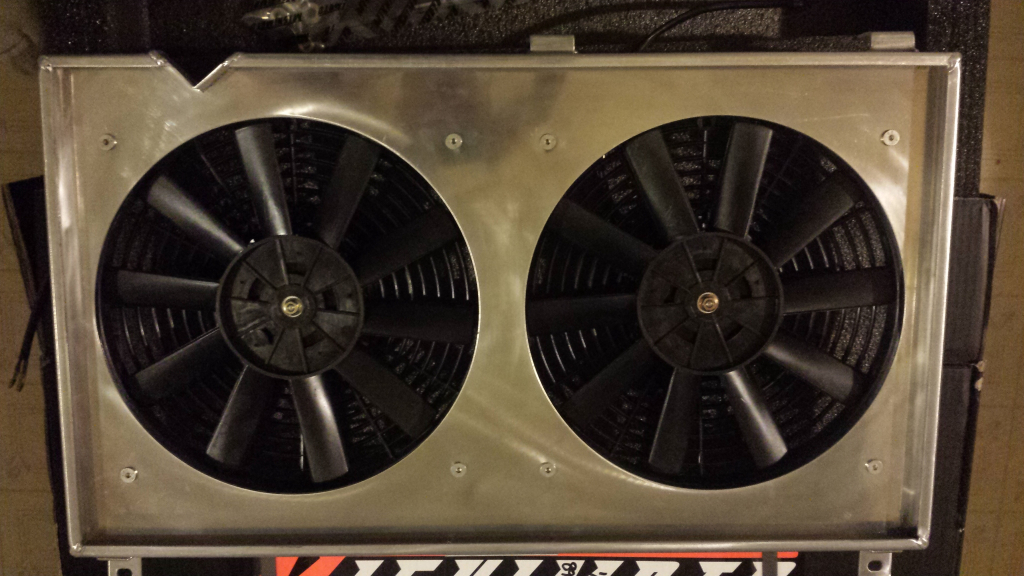
And speaking of spending money, I found a great deal tonight on Craigslist for this brand new Mishimoto fan/shroud setup. Though it's intended for use on a S2000, I can make minimal modifications to it that will allow it to work on the current aluminum radiator I've got. Cost me $150 and included two 12" pullers. Very nice quality for the money and looks great.

 08-03-2014, 06:37 PM
#1219
Looking good glad to see you're still sticking with it! I just created a fs thread a few days ago maybe you would be interested in some parts. I'm willing to do a package deal on multiple parts if you're.
https://acurazine.com/forums/showthr...1#post15105757
https://acurazine.com/forums/showthr...1#post15105757
The following users liked this post:
1foxbody (08-04-2014)
08-04-2014, 09:52 PM
#1222
08-22-2014, 12:44 PM
#1224
Originally Posted by HickamHatch
wheres the updates.... FAG

 08-26-2014, 11:50 PM
#1227
Currently waiting on my good buddy ol' pal Matt Hickam to get his and his new multi axis CNC mill's sh*t together so a few things can be done for me to get this motor built. This includes having the Ford 5.4 rods taken down to the 2.5's rod specs and once this single step has been completed....engine assembly can commence.
Ain't that right Matt? By the way, how's that new microwave doing for ya?
Ain't that right Matt? By the way, how's that new microwave doing for ya?
The following users liked this post:
gnuts (08-27-2014)
08-27-2014, 10:00 AM
#1228
Three Wheelin'
I'm about to have mine powder coated as well and have a question for you - did you separate your IM for this? I'm worried that the ~400 degree oven baking part will damage the seal or gasket, however the IM is sealed. And since I don't know how it's sealed from factory, I'm afraid to open it and not have the right sealant to close it back up if it's not a gasket...what do you recommend?
 08-27-2014, 01:09 PM
#1229
I've always powdered them fully assembled with no issues. I've had go reseal one once for a different reason (excess boost with wrong hardware went BOOM) and it honestly looks like the factory uses Hondabond (or gray Permatex RTV) to seal the two halves.
The following users liked this post:
FamilyGuy (08-27-2014)
08-27-2014, 01:13 PM
#1230
Three Wheelin'
Thank you sir
08-27-2014, 07:02 PM
#1231
Three Wheelin'
One more - on the top plate, did you remove that plastic half gear wheel, the one that connects to the butterflies? I'm guessing the plastic will melt?
08-27-2014, 10:29 PM
#1232
Quick tip on the IMRC gear assembly, be sure and make note of what order things are removed because there's several very small pieces that are easy to get confused during reassembly.
The following users liked this post:
FamilyGuy (08-27-2014)
08-28-2014, 05:56 PM
#1233
Three Wheelin'
Good tip thx, I ended up taking a couple pics as I disassembled it, lots of washers / parts. The nut didn't feel it was put on too tight from factory either, so I have to remember not to torque it down too much when I re-assemble it.
You left the butterflies in there right? I only removed the gear ass'y.
Everything is going to powder coating tomorrow. The guy said no sand blasting on IM and valve covers, due to the baffles / joints, so he's going to do a chemical wash to clean everything. I'll try to have him sand the top of the manifold smooth like yours. Don't like the factory checkered marks.
The butterflies look like they have that same black / dark grey spray-on sealant as the TB around the edges of the plates. This will probably wash off, hopefully car will run fine after? Did you re-spray yours?
Last edited by FamilyGuy; 08-28-2014 at 06:02 PM.
08-29-2014, 10:59 AM
#1234
Remove the flaps as well, yes. If you look closely on each flap, there are three tiny Phillips screws. Remove these on each one and that will enable you to slide out the rod assembly from the gear side. Make sure and use loctite when reassembling on the 6 tiny screws...you don't won't those loosening up and getting sucked into a chamber. Lol
The following users liked this post:
FamilyGuy (08-29-2014)
08-29-2014, 12:22 PM
#1235
Three Wheelin'
Crap, everything's in the car already to get dropped off after work...why do the butterflies have to come off?
Does the top part of the bracket around the butterflies come off too then? This is screwed onto the top plate itself.
There's also a bushing / bearing, gold colored, in the hole for the rod where the gear ass'y came off, looks like a press fit or something, it didn't fall out when I removed the gear ass'y and all its little washers. Did you remove this too? I think it's preventing the rod from falling out on this side of the top plate.
Red or blue loctite after? Only on the butterfly screws? Nothing on the bracket screws? Tempting to try and find some flush mount screws then?
Last edited by FamilyGuy; 08-29-2014 at 12:26 PM.
08-29-2014, 12:38 PM
#1236
Three Wheelin'

 08-29-2014, 04:57 PM
#1237
Three Wheelin'
Alright, dropped everything off at the powder coater. I took the butterflies out plus the bracket, but the rod did not come out, it's held in there by that brass bushing. The guy said as long as there's no plastic or rubber seals in there, it should be fine.
08-30-2014, 05:46 PM
#1238
Cruisin'
I have j32a type s and 6 speed close ratio manual with LSD (rare) if u need the swap
Check out the black market forum I'm selling type s engine and 6 speed manual transmission with LSD with lots of parts included
09-01-2014, 09:11 PM
#1239
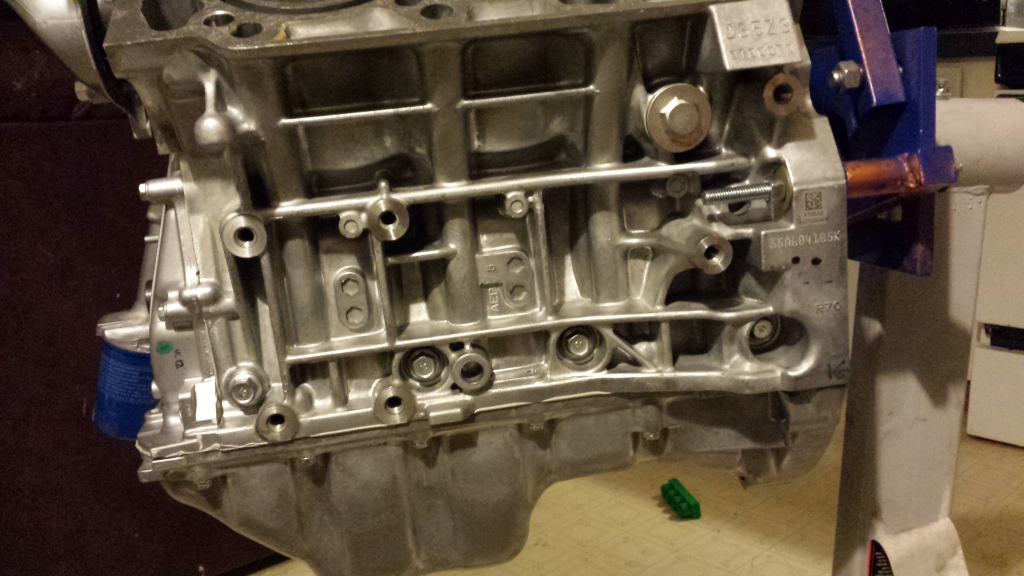
After finding a great deal on two brand new J35Z3 short blocks for $500 each, I decided on buying both of them. One of them will be used for testing/tuning on the Accord and the other one will become the new candidate for the 2.7 build. Unlike the j35a6 that was to be used, the z3 engine has piston oil squirters (great for reducing knock) and also is manufactured using a different material/process that gives the block greater strength. The block also uses a plateau honing honing technique that will make ring seating easier.
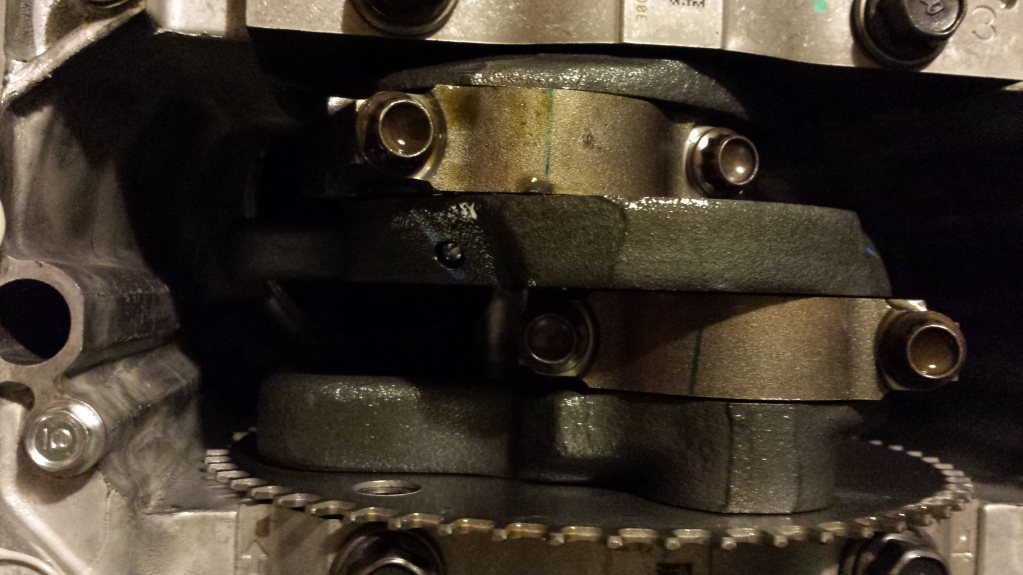
Last night, I began disassembling one of them to check a few things out. It's not too often one gets a brand new short block to check and compare factory clearances on. This will aid in future builds by guiding me in the proper range of bearing clearances as the factory specs call for a wide range between .0008 -.0017". However, given the rule of thumb of .001" per 1.00" of crankshaft journal diameter, you can see how little clearance Honda runs and where their reliability comes from. Though I didn't get to the actual checking of the clearances last night, I did manage to snap a few shots of the engine before and after disassembly.
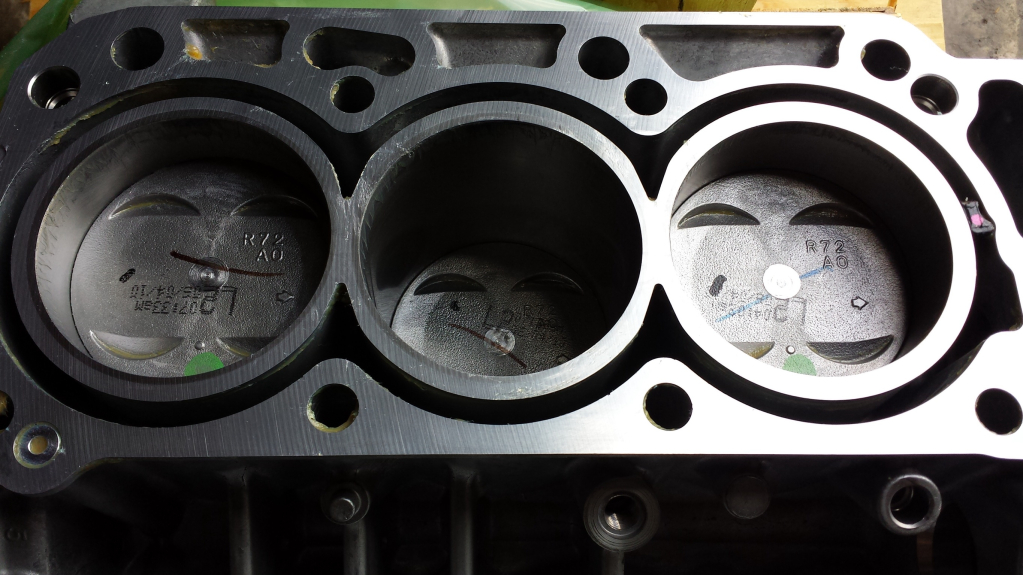
The j35z (and all later engines) have a crankshaft position sensor that's mounted on the oil pan and reads a "high resolution" trigger wheel for more precise fuel and ignition timing. Unfortunately, anyone running the j35a8 (or similar) ECM won't be compatible with this trigger wheel. Thankfully, the j35z oil pump has the mounting provisions for the j35a8 crank sensor which should make things easy to convert.
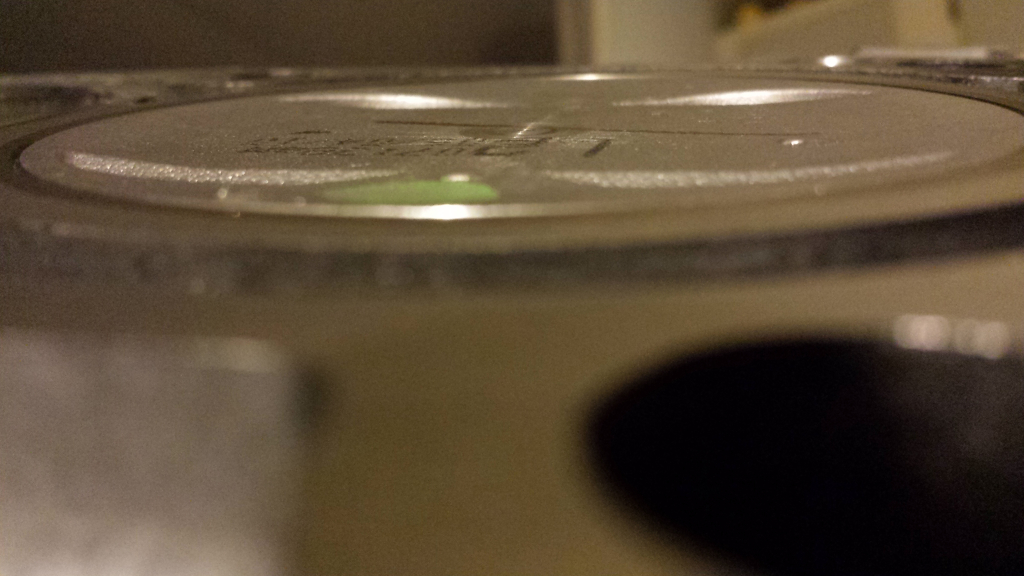
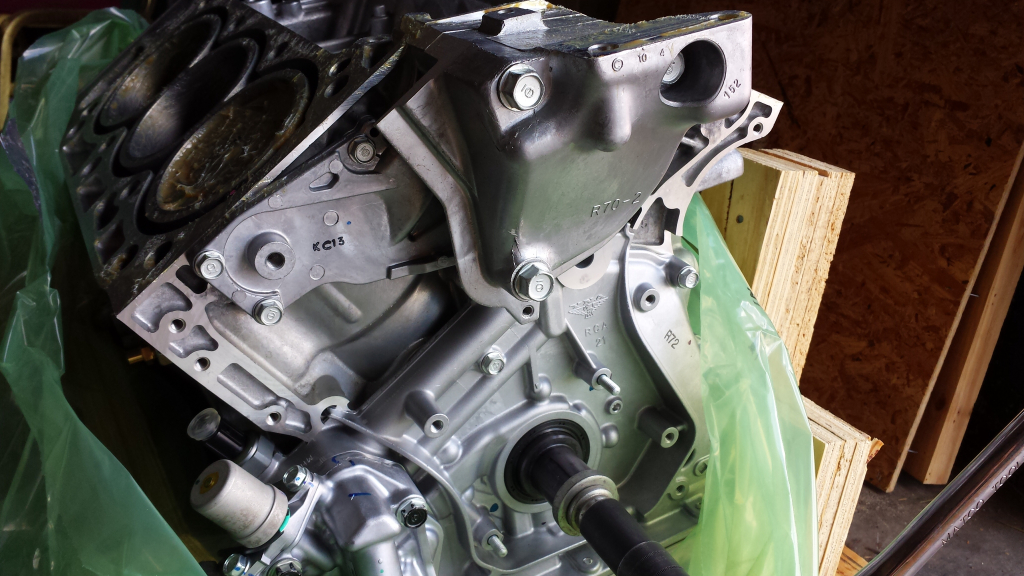
Another funny thing I noticed is you look at the face of the oil pump in the second picture down, you'll see that its an "RCA" casting but then Honda stamped an "R72" to the right of it. The RCA casting has pretty much been the same oil pump since it first appeared on the 03 Accord 3.0 and has also been used been used by 04-06/09+ TL's, 03-13 MDX's (under the RYE casting), and a few others.
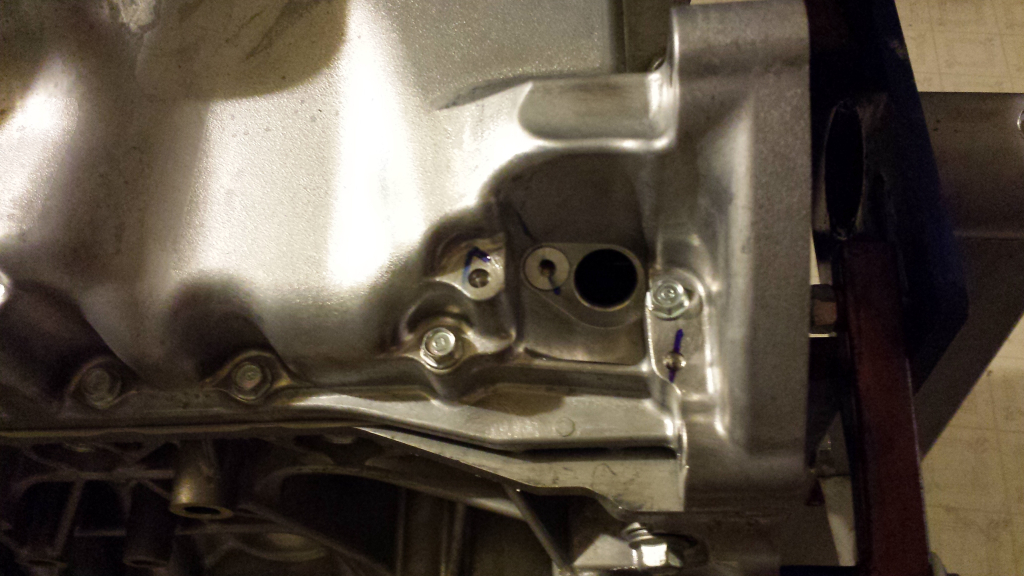
A few shots of the trigger wheel.
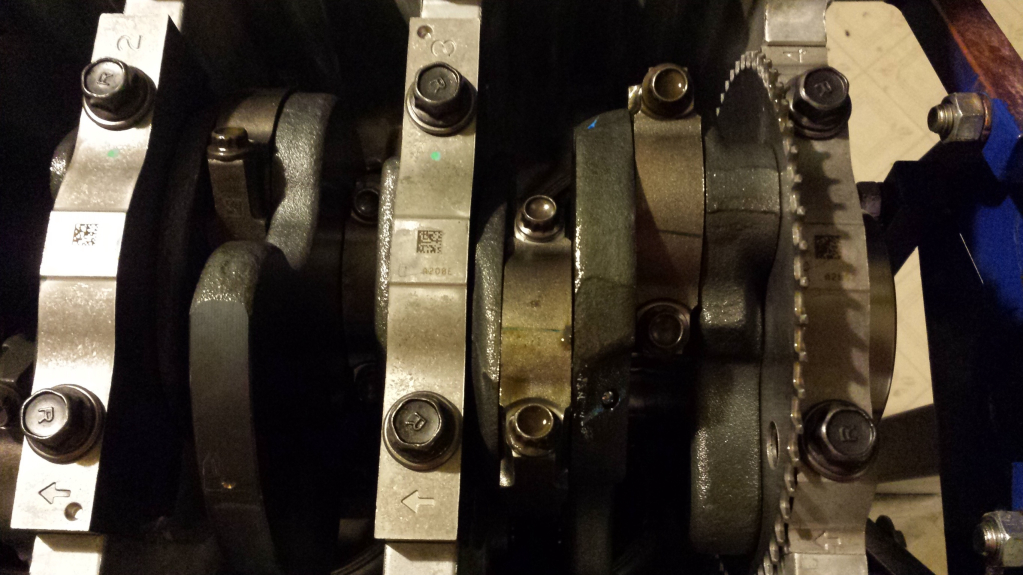
Last night, I began disassembling one of them to check a few things out. It's not too often one gets a brand new short block to check and compare factory clearances on. This will aid in future builds by guiding me in the proper range of bearing clearances as the factory specs call for a wide range between .0008 -.0017". However, given the rule of thumb of .001" per 1.00" of crankshaft journal diameter, you can see how little clearance Honda runs and where their reliability comes from. Though I didn't get to the actual checking of the clearances last night, I did manage to snap a few shots of the engine before and after disassembly.
The j35z (and all later engines) have a crankshaft position sensor that's mounted on the oil pan and reads a "high resolution" trigger wheel for more precise fuel and ignition timing. Unfortunately, anyone running the j35a8 (or similar) ECM won't be compatible with this trigger wheel. Thankfully, the j35z oil pump has the mounting provisions for the j35a8 crank sensor which should make things easy to convert.
Another funny thing I noticed is you look at the face of the oil pump in the second picture down, you'll see that its an "RCA" casting but then Honda stamped an "R72" to the right of it. The RCA casting has pretty much been the same oil pump since it first appeared on the 03 Accord 3.0 and has also been used been used by 04-06/09+ TL's, 03-13 MDX's (under the RYE casting), and a few others.
A few shots of the trigger wheel.
The following users liked this post:
Euro-R_Spec_TSX (09-01-2014)

