My transformation thread.


 01-10-2011, 12:27 PM
#85
The AEM V2 cost me $200 from a friend brand new. He got in an accident so the insurance got him a new one for his accord, the body shop said the one on his car would be okay to use so he gave me his extra one at a great price.
Should have an update on the headlights this weekend.
Does anyone know if we have a DIY for opening headlights.
Should have an update on the headlights this weekend.
Does anyone know if we have a DIY for opening headlights.
01-10-2011, 09:47 PM
#86
Team Owner
iTrader: (2)
Join Date: Jan 2008
Location: Kansas City, MO (Overland Park, KS)
Posts: 36,545
Received 6,470 Likes
on
5,162 Posts
Nate, I've done my headlights-check out My Garage. Take off the front bumper, remove the headlights. Bake them in the oven for 20 minutes at 200 degrees. Then pull apart. Do your mod to the headlights, then close and reseal the headlights up again and bake them again to activate the seal you'll put on to close up the headlights again. Install back into the TL and put the bumper back on. Then wire them in and you've got it!
01-17-2011, 05:01 PM
#88
Well I had hard time make my bracket so didn't get around to installing my angel eyes. Maybe this summer when JnC does my quad retro.
Here's the new edition though.
The hybrid projector 07 bowls, 04 step shield, authentic ZKW clear lenses, and 66240 Osram CBI 5000k bulbs. So far I love these bulbs, very white, no tinge of yellow like the 85122+, and just as bright if not brighter than the 22+.


Here's the new edition though.
The hybrid projector 07 bowls, 04 step shield, authentic ZKW clear lenses, and 66240 Osram CBI 5000k bulbs. So far I love these bulbs, very white, no tinge of yellow like the 85122+, and just as bright if not brighter than the 22+.
Last edited by nate_0022; 01-17-2011 at 05:04 PM.
01-21-2011, 12:19 AM
#91
Alright guys, I finally got my angel eyes installed late last night. This was more of a chore than I thought it was going to be. Thank to jptl04 for helping me with the brackets, now they're cleanly installed and not just thrown in onto of the clear plastic diffuser. Let me know your guys honest opinion good or bad because I know these aren't everyones cup of tea.


Last edited by nate_0022; 01-21-2011 at 12:23 AM.

 03-01-2011, 05:13 PM
#96
Instructor

those halos look sick, but i have a question. Is it just me or in those pics you have of the HIDs on the garage, is the right one slightly higher than the left? My car does the same exact thing and I spent a minute trying to adjust them but it seemed my screwdriver wasnt skinny enough.
Is this normal? I thought just my car was off but then saw these pics and made me wonder.
Is this normal? I thought just my car was off but then saw these pics and made me wonder.
03-09-2011, 08:04 AM
#97
those halos look sick, but i have a question. Is it just me or in those pics you have of the HIDs on the garage, is the right one slightly higher than the left? My car does the same exact thing and I spent a minute trying to adjust them but it seemed my screwdriver wasnt skinny enough.
Is this normal? I thought just my car was off but then saw these pics and made me wonder.
Is this normal? I thought just my car was off but then saw these pics and made me wonder.
EX) you want "C" definitely not "A"

EDIT: I think I misunderstood your question. Are you talking about the step in the projectors themselves? Our projectors have a cutoff shield with in the projector

Reasoning behind the cutoff is to allow the light to be thrown out further and higher on the right side so see further down the road while not blinding people in the oncoming lane, that's why the cutoff is lower on the left side. So the cutoff serves the purpose to have bright lights while not blinding oncoming traffic. HIDs are a no no for people without a projector, otherwise you'll be blinding oncoming traffic because you don't have the cutoff shield. Some cars do come
Equipped with headlights that have special designed reflectors to support D2R HID bulb systems.
Last edited by nate_0022; 03-09-2011 at 08:13 AM.
03-09-2011, 08:17 AM
#98
I should have updated pics soon. I'm getting the rear bumper aspec lip delivered today and will be put on today as well. Should compliment the ATLP exhaust nicely  . Also, I should be starting my taillight mod soon and have those done in time for my spring Acurazine meet on April 9th.
. Also, I should be starting my taillight mod soon and have those done in time for my spring Acurazine meet on April 9th.
03-09-2011, 05:11 PM
#99
NEW ITEM: My rear aspec lip was delivered today, took half a day off work just to get this thing installed, most of it was self explanatory only had problems figuring out those stupid brackets that go by the wheel well. Looking at it now I know I should've done the taillights first then put the aspec on. Anyways love this thing, I don't know why I didn't buy this in the very begining, the sides will be coming soon, then when I purchase a new bumper get it painted then I'll buy the front lip.
Before:
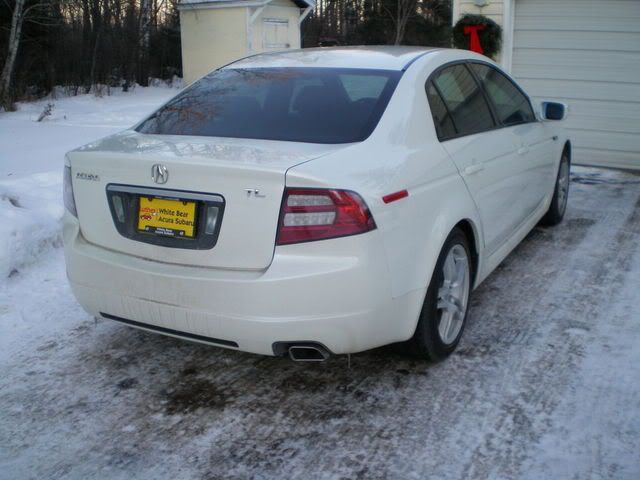
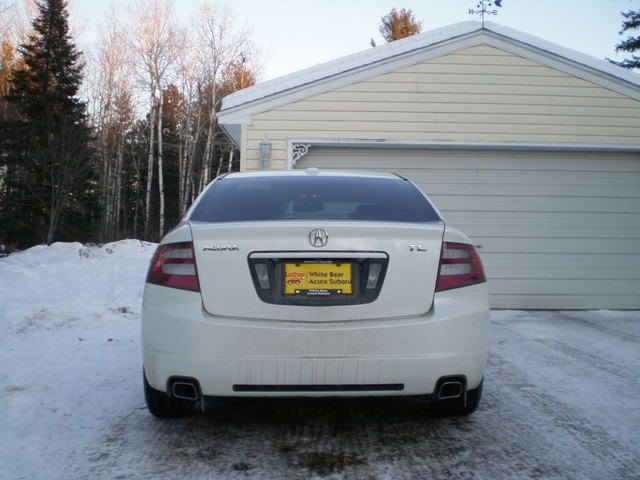
After:


Compliments the ATLP exhaust very well.

Before:
After:
Compliments the ATLP exhaust very well.
Last edited by nate_0022; 03-09-2011 at 05:22 PM.
 03-09-2011, 08:56 PM
#103
Thanks Donnie. As far as the taillights I'm just swapping the internals (tinted parts and Type S bezel) from my black set earlier inthis thread into my OEM taillights so I have guaranteed fitment, I'm tired of messing around with DEPO lights that seem to never fit. I may leave the bottom reflector red haven't made that final decision yet.
Last edited by nate_0022; 03-09-2011 at 09:01 PM.
03-10-2011, 01:57 AM
#104
Rev High; Drive Happy
iTrader: (2)
Join Date: Feb 2008
Location: Scarborough, Ontario
Age: 34
Posts: 4,074
Received 398 Likes
on
332 Posts
Thanks Donnie. As far as the taillights I'm just swapping the internals (tinted parts and Type S bezel) from my black set earlier inthis thread into my OEM taillights so I have guaranteed fitment, I'm tired of messing around with DEPO lights that seem to never fit. I may leave the bottom reflector red haven't made that final decision yet.
They are Eagle Eyes (with some OEM parts).
The fitment is terrible!
I heard the DEPO had either hit or miss fitment. Either way, I'm sure it's better than these Eagle Eyes I just messed with. The paint on my bezel is ruined and it was such a pain making the bezel fit that the outer clear lens fell and chipped.
Hope you'll have much better luck with your taillights than I am.
03-10-2011, 08:26 AM
#105
Eagle eye? I've never heard of that. well hope you get things figured out on your end lol. How are you sealing up the taillights? Are you going with the butyl route to have easy access when and if it comes to have to get to the internals again? I'm contemplating trying the butyl, but I'm just worried of it working it way apart since the lenses don't fit inside of a channel like the headlights. I was thinking of running butyl between the plastic pieces where they meet, and also around the whole outside of the taillight. I'm taking a gamble with these taillights and hoping I can get everything cut perfectly and not mess anything up cause I don't have a back up set. The only part that worries me is the lower outside corner, it seems like a really shallow cut and need to be as precise as possible to not cut the bezel.
03-10-2011, 01:55 PM
#106
Rev High; Drive Happy
iTrader: (2)
Join Date: Feb 2008
Location: Scarborough, Ontario
Age: 34
Posts: 4,074
Received 398 Likes
on
332 Posts
Eagle eye? I've never heard of that. well hope you get things figured out on your end lol. How are you sealing up the taillights? Are you going with the butyl route to have easy access when and if it comes to have to get to the internals again? I'm contemplating trying the butyl, but I'm just worried of it working it way apart since the lenses don't fit inside of a channel like the headlights. I was thinking of running butyl between the plastic pieces where they meet, and also around the whole outside of the taillight. I'm taking a gamble with these taillights and hoping I can get everything cut perfectly and not mess anything up cause I don't have a back up set. The only part that worries me is the lower outside corner, it seems like a really shallow cut and need to be as precise as possible to not cut the bezel.
I haven't thought about how I'd seal these things up yet. The butyl rubber does seem like a good idea. It's very strong stuff. The tail lights are also held together by screws.
I think I might just go with epoxy and silicone. Especially since there are some big cuts made by the previous owner of these tails.
The corner does seem like a nuisance to cut into (I didn't make the cuts on my tails). The best advice I can give you in that area is to measure where the bezel sits, then trace around the housing. This would give you a good approximate at where the bezel sits.
A good idea also would be to mark the areas where you plan to cut rather than just going at it. It'll make sure your cuts are all uniform (assuming you used a straight edge).
Just make sure your cuts are as straight as possible. It'll make things easier to take apart and put back together. Mine has a lot of curves going here and there.


 04-02-2011, 09:42 PM
#115
Race Director
iTrader: (8)
A spy a setup close to Roger555's =P
 04-03-2011, 10:43 AM
#119
You'll have to actuallly cut it to make it fit. That's what Roger did in the pic above he and I have the 07-08 bumper as well. Look through his thread here.
Acura and Audi tastefully come together
Acura and Audi tastefully come together