DIY Timing Belt
 11-10-2008, 12:32 AM
#1
Acura TLS are SLOW
Thread Starter
DIY Timing Belt
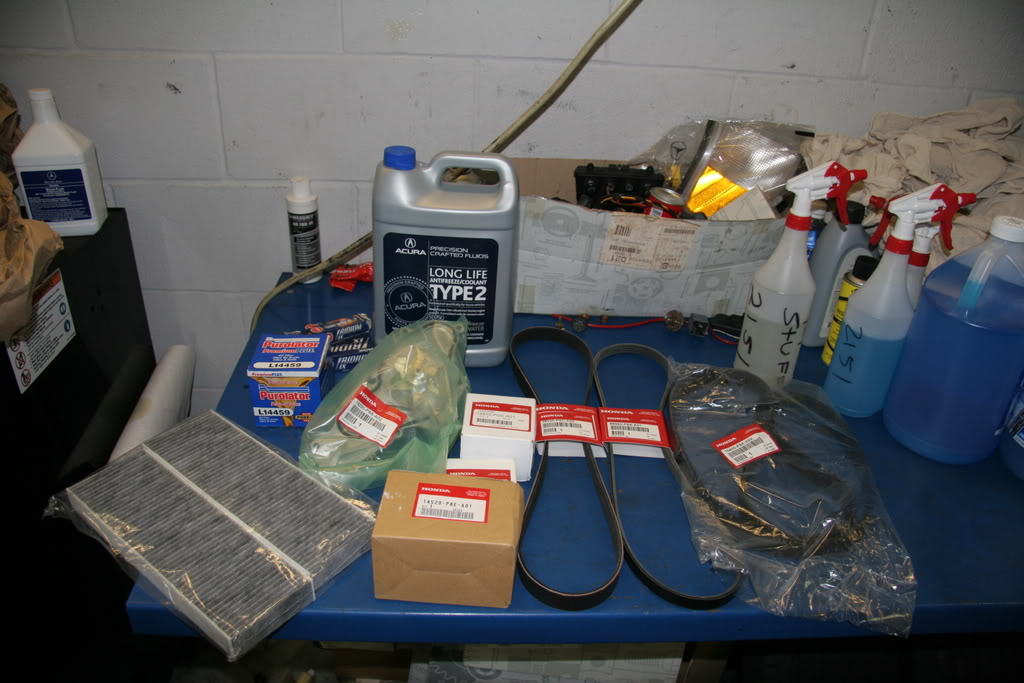
Did my timing belt after 120k. I Got the Timing belt, Ps belt, AC belt, Water Pump, Tensioner, Idler, and the adjuster pulley. This is my first time doing a timing belt on any car and it took a long time (5 hours). I could of done it faster but I was taking pictures and didnt have the battery tie down as that is a very important tool. I think I can do one now in about 2 hours. Here is a DIY. This isnt the best write up due to the pics and I did this at work after working on cars for the past 9 hours(was really beat). Overall, this was a easy job. From a scale of 1 to 10, I rate this about 3. The hardest part was removing all the bolts for the timing cover due to the limited amount of room.
List of tools you will need
-Crank Holder
-Impact Gun
-Serpentine belt tool
-Battery Tie down tool
-Lots of different sockets, swivels,extensions,wrenches, etc
-Jack+Block of wood
I AM NOT RESPONSIBLE FOR ANY DAMAGE DONE TO YOUR ENGINE. Proceed at your own will.
Removal
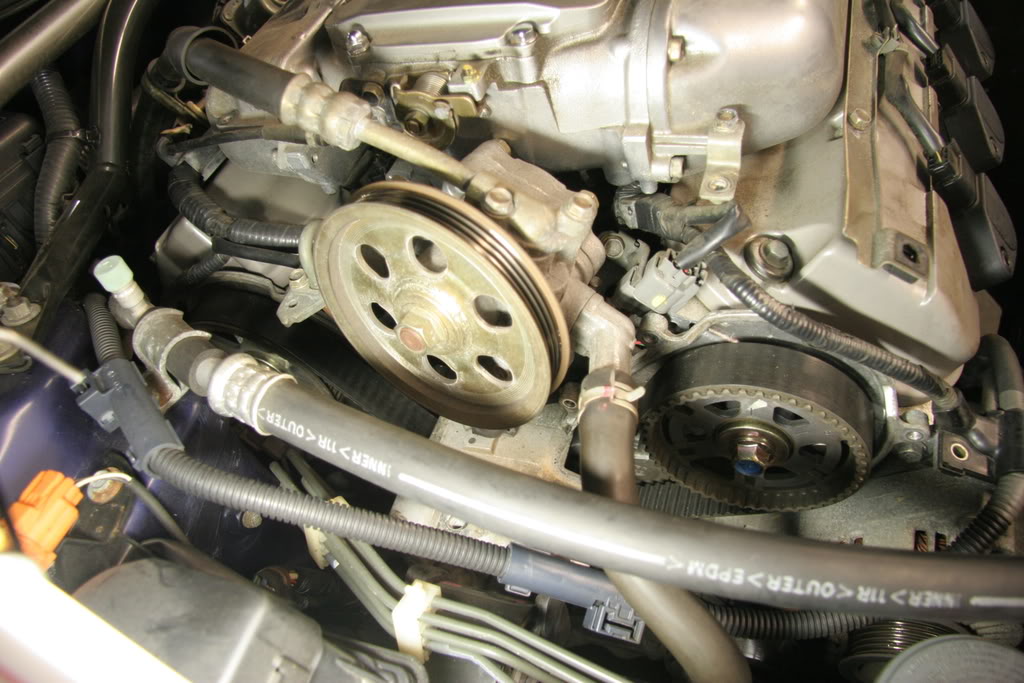
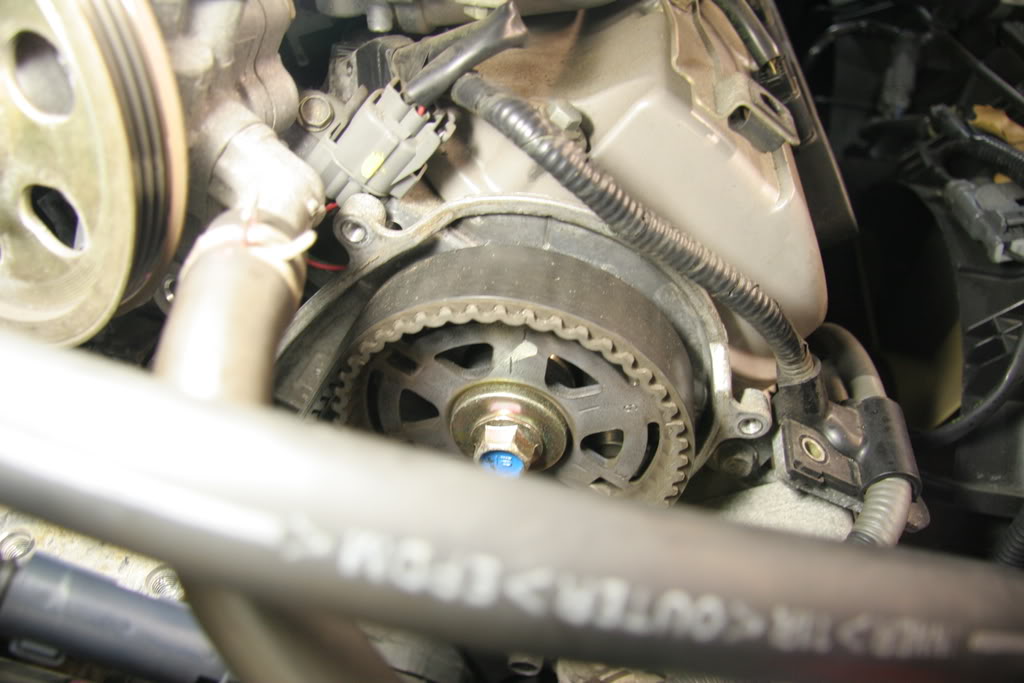
1.Turn the crank to make sure your Timing marks line up. Front Cam, Rear Cam, And Crank Mark. ( No pics for the rear cam-You need a mirror to see the timing mark.)
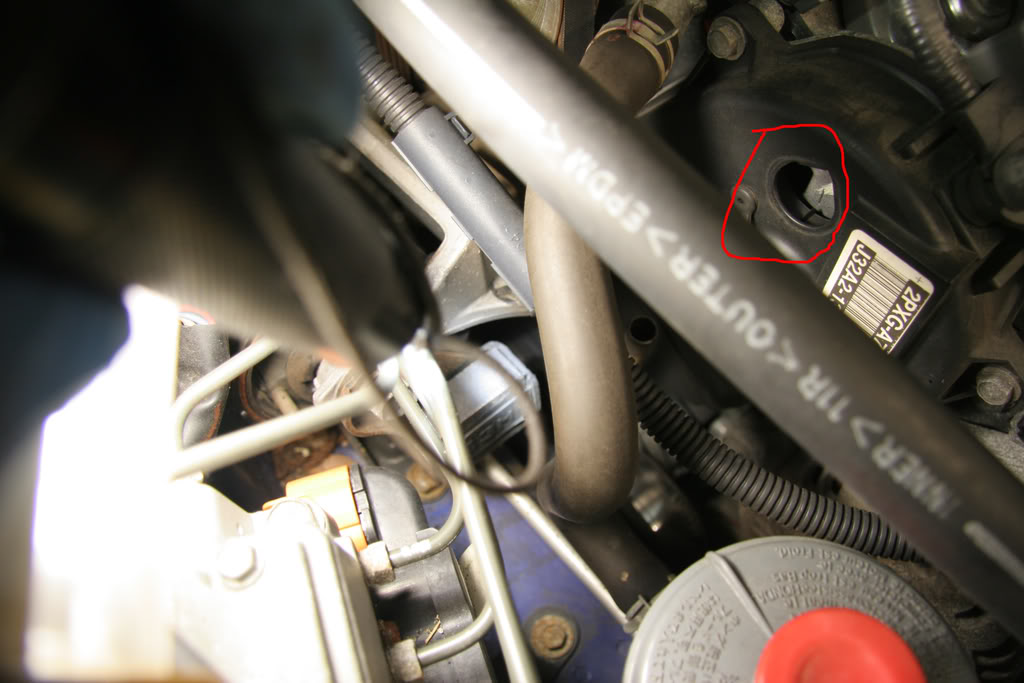

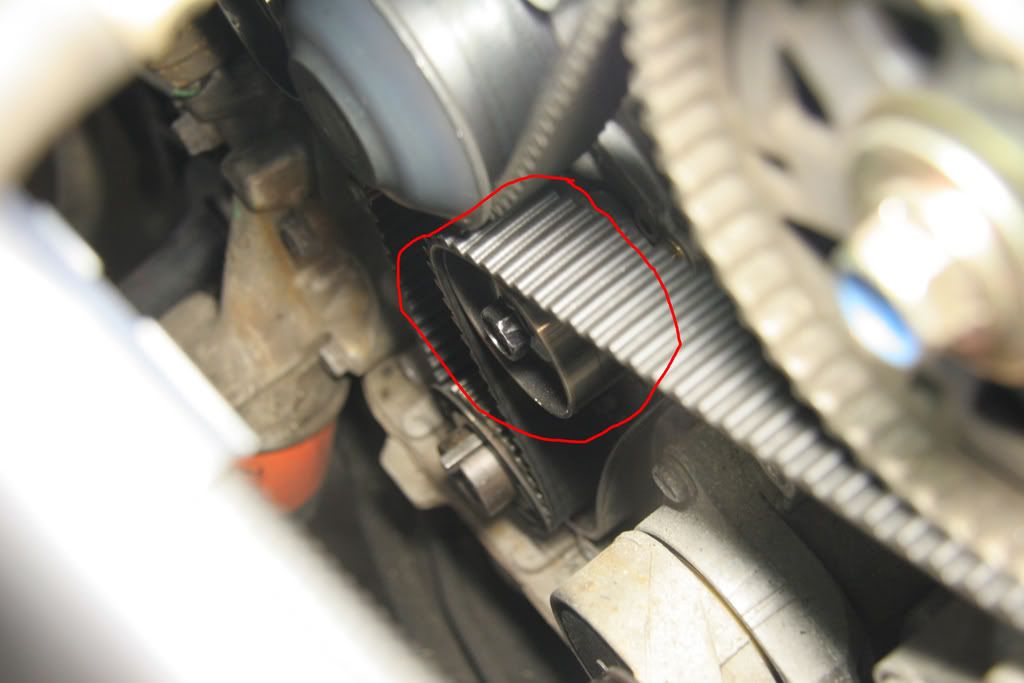
Front cam timing mark
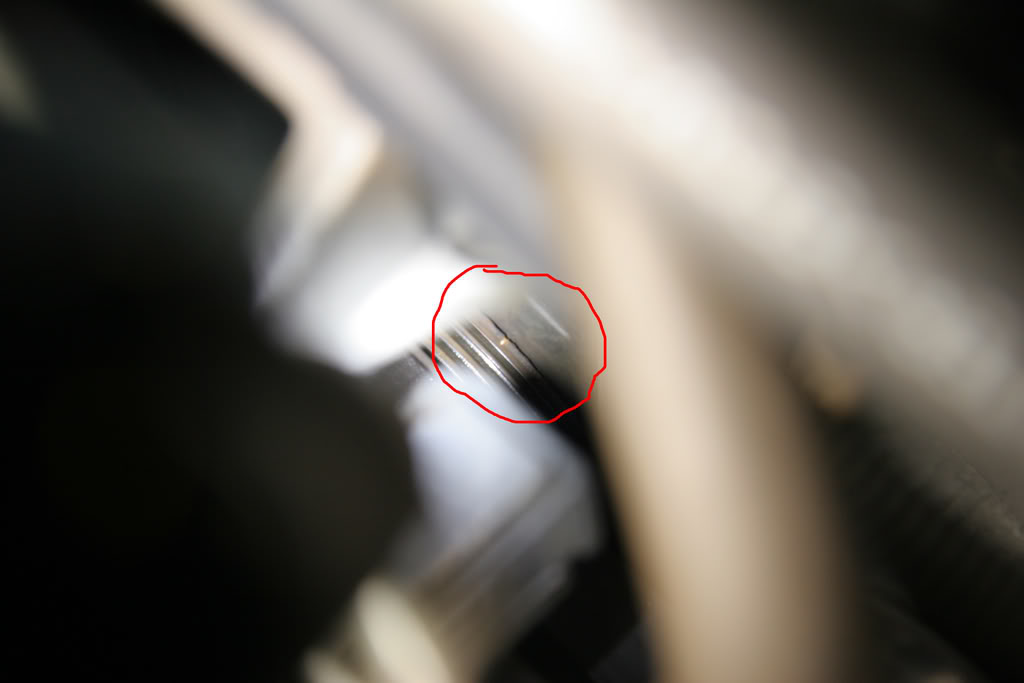
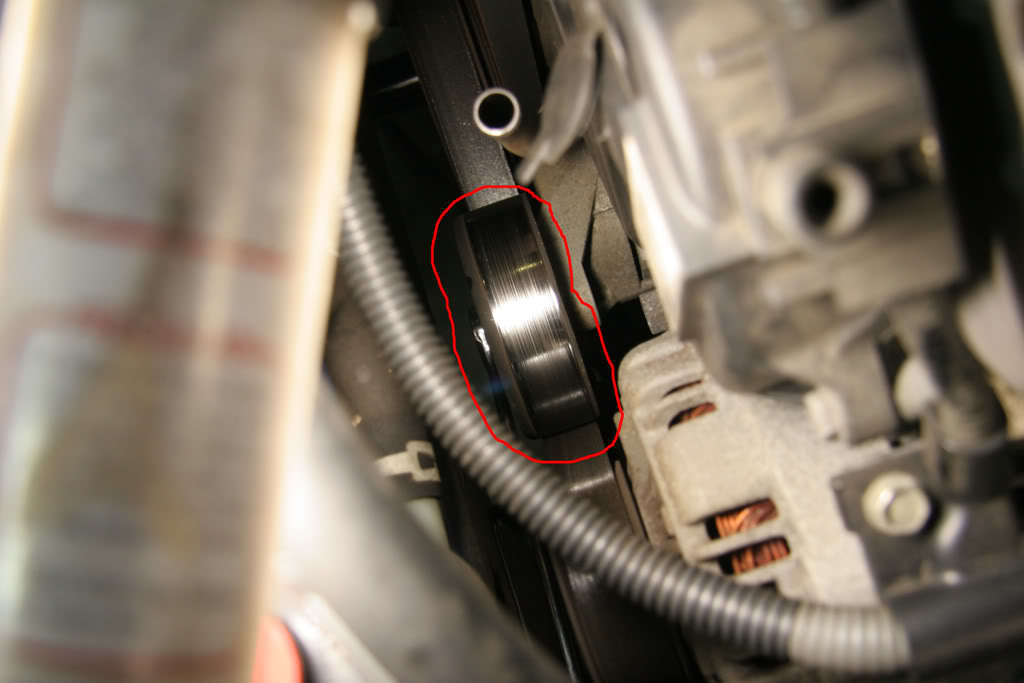
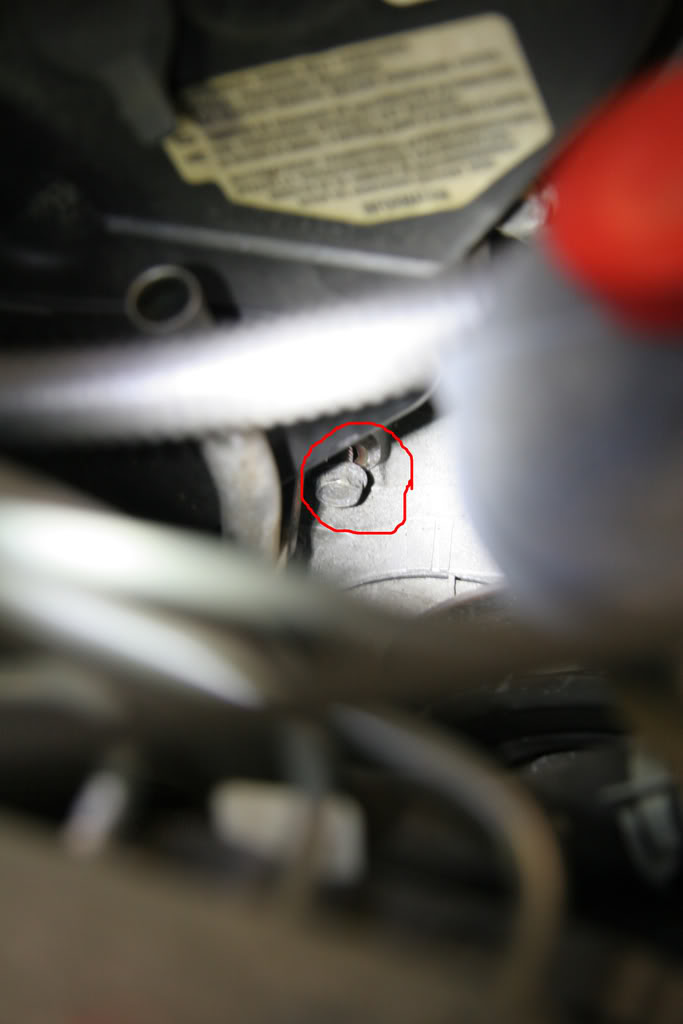
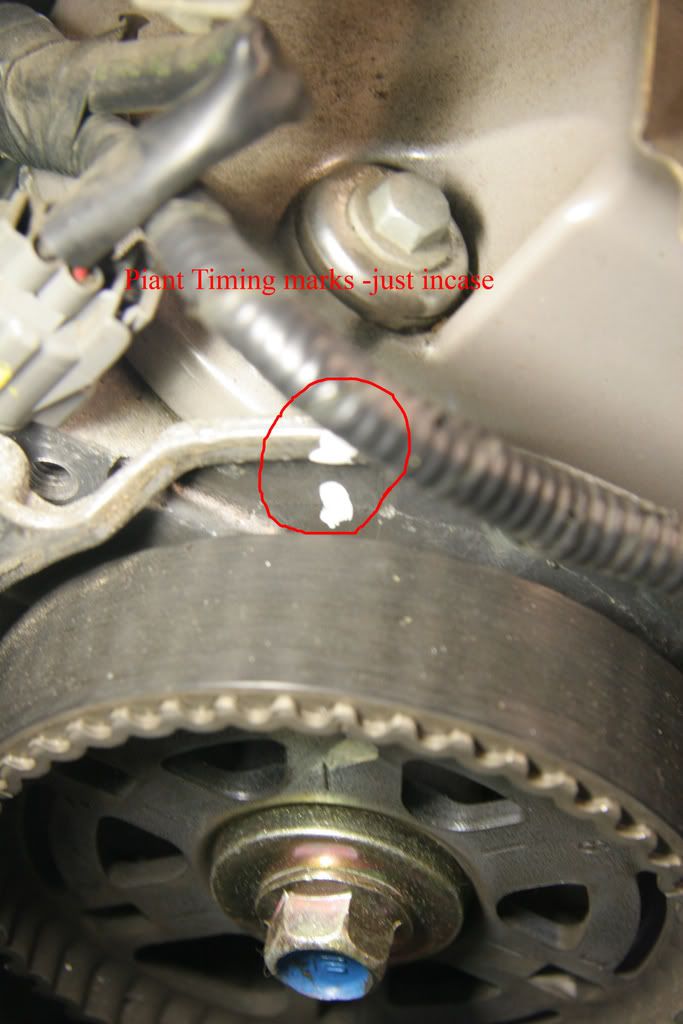
Crank Timing mark-Look for a White dot & Arrow on the timing cover. They should line up
2.Remove Right front Wheel and Under panel
3.Move Auto tensioner and remove Alternator/AC belt
Use a serpentine belt tool. If you dont have one use a 14mm wrench but be careful since there is a lot of tension on that
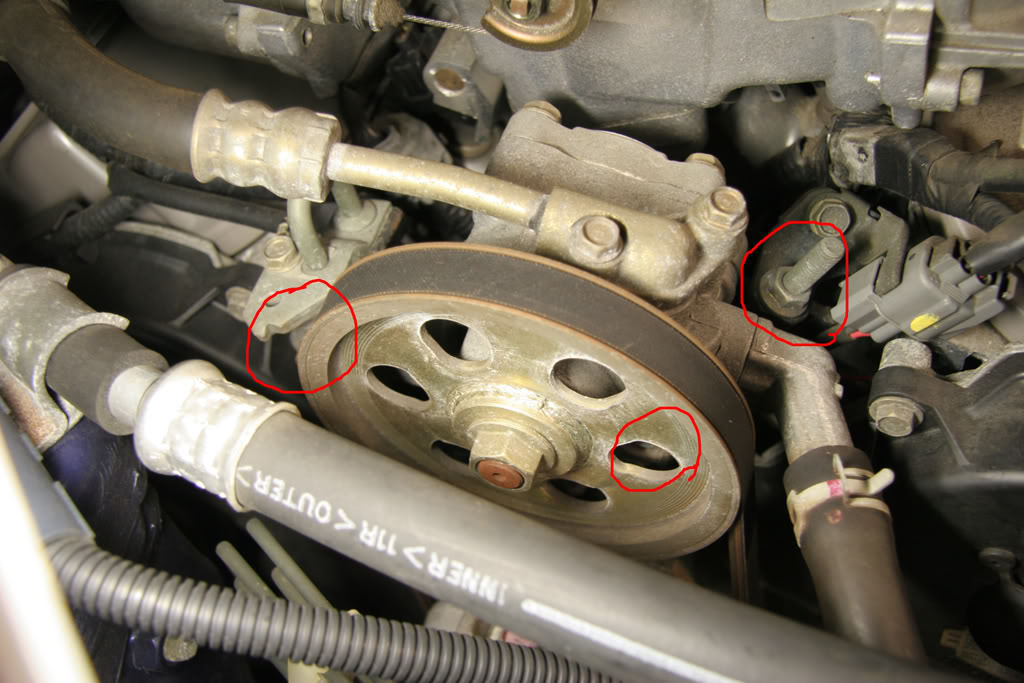
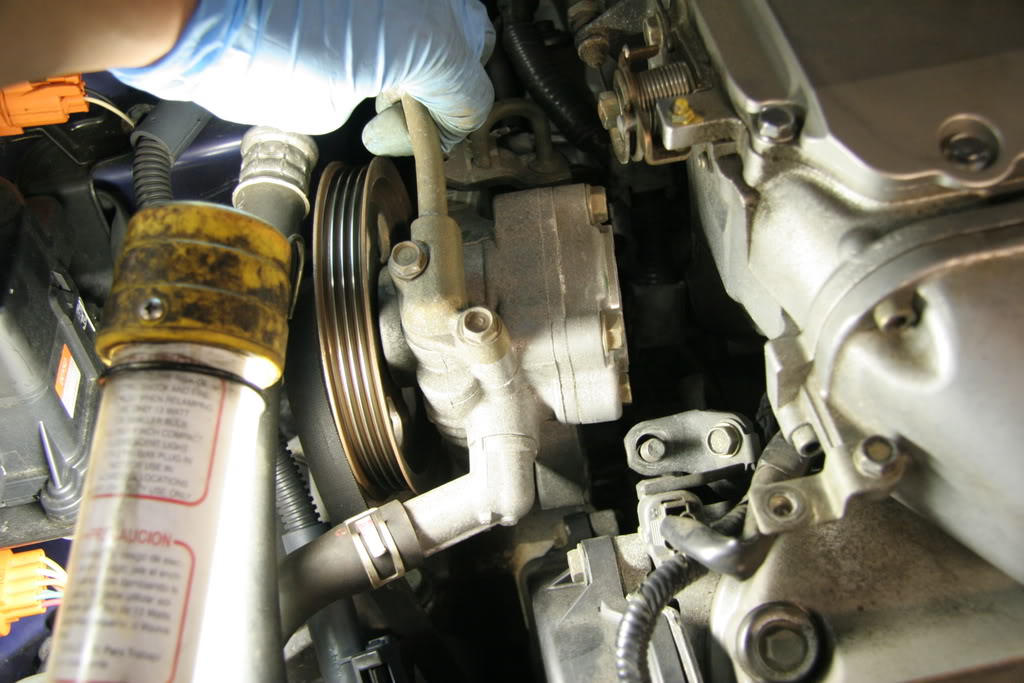
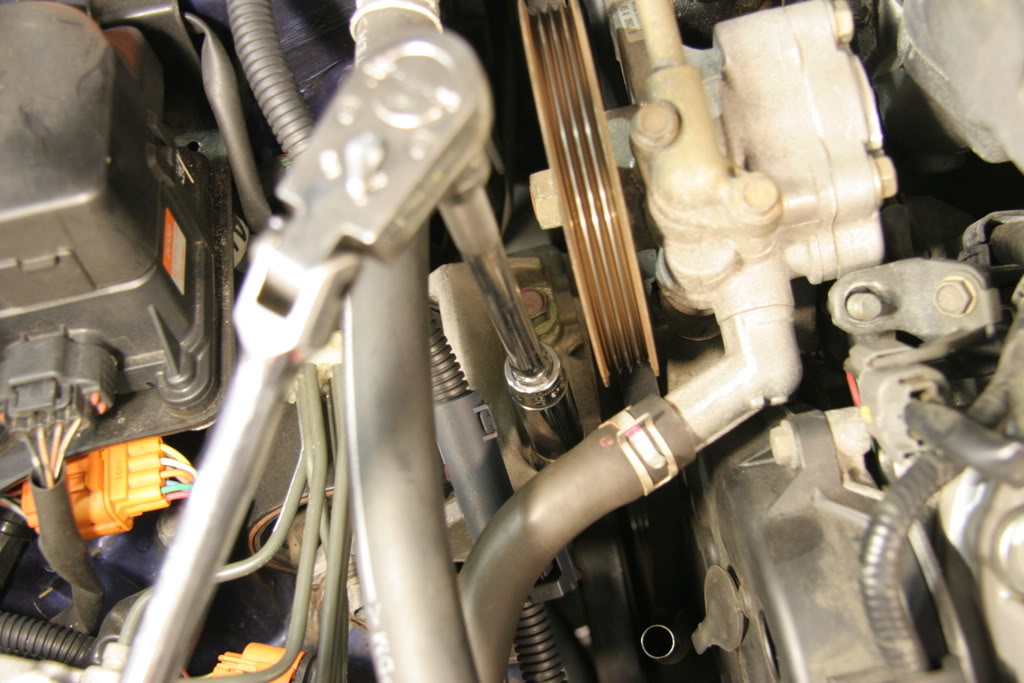
4.Loosen the PS pump nuts. One is hidden behind the pulley. There is a total of 3 nuts. Remove belt. Note-I would recommend un-doing the hose clamp and move the pump out of your way IF you have bought PS fluid.
5.Support the motor with a floor jack and block of wood under the oil pan.

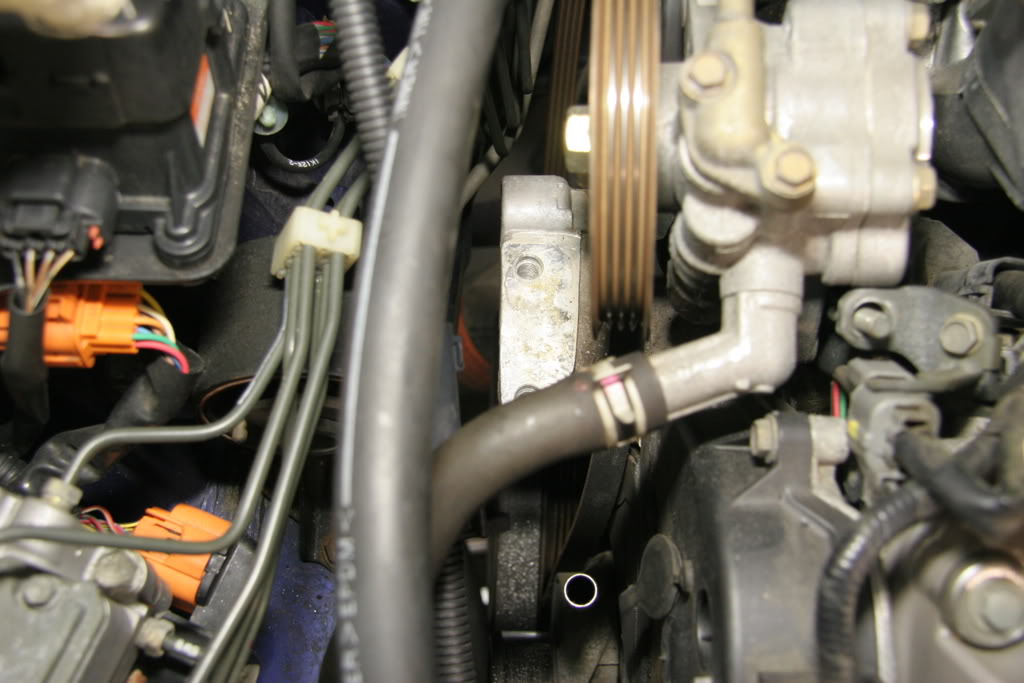
6.Remove the engine side mount.
7. Remove the oil dip stick tube by undoing the 10mm bolt. (new o-ring for dipstick tube is recommended)
8.Remove the crank bolt (19mm socket) with impact tool. Before you remove the crank, Re-check ALL your Timing Marks to make sure they are align.
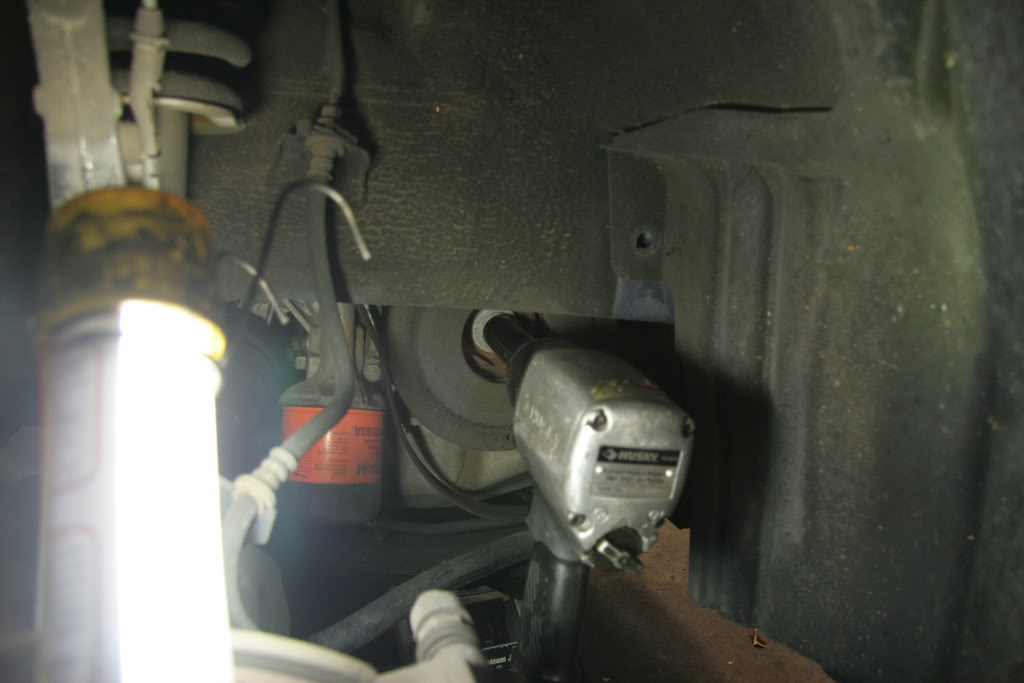
Kinda Surprise that the crappy husky gun removed the bolt.
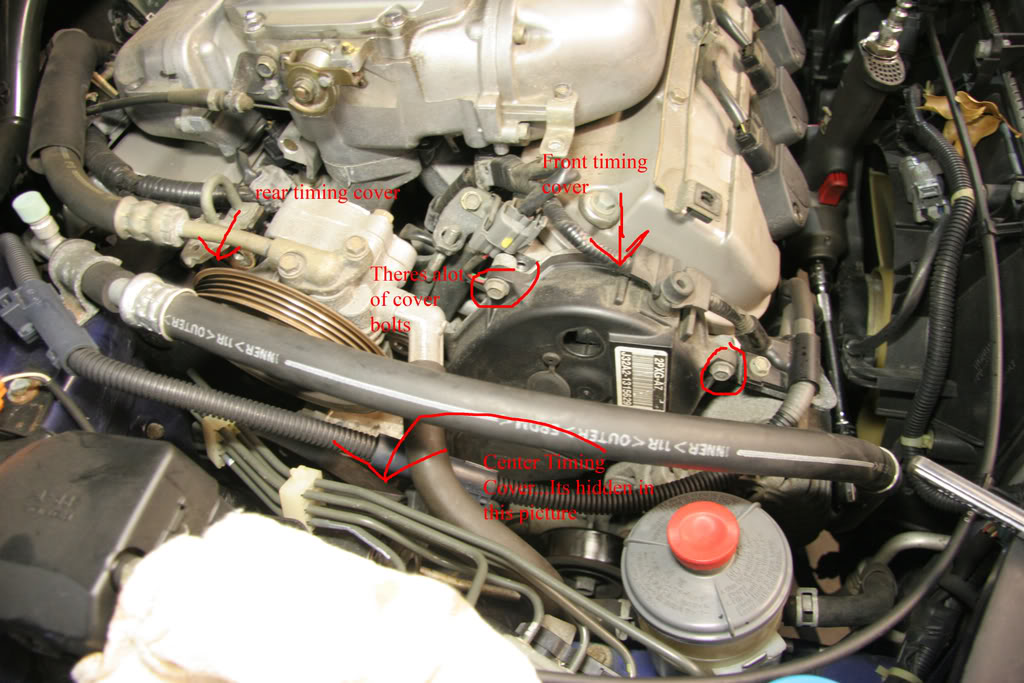
9.Remove all the Timing cover bolt, starting with the front, rear, and lower. This is the most frustrating part due to lack of room.
9a. I do this "just in case" If I screw up. Mark your Cam gears with white paint.

10. I dont have a Pic for this Due to the lack of room for me to fit my Camera (DSLR). You need to remove one of your battery tie down bar. Use the tie down bar and screw it in a bracket to push the Timing Belt Adjuster pulley in to release the tension on the timing belt. Sorry, that is the best i can explain it. If you dont have the tie down like me, Your gonna have a hell of a time to relieve the tension on that.
11.Remove the Engine Side Mount Bracket.
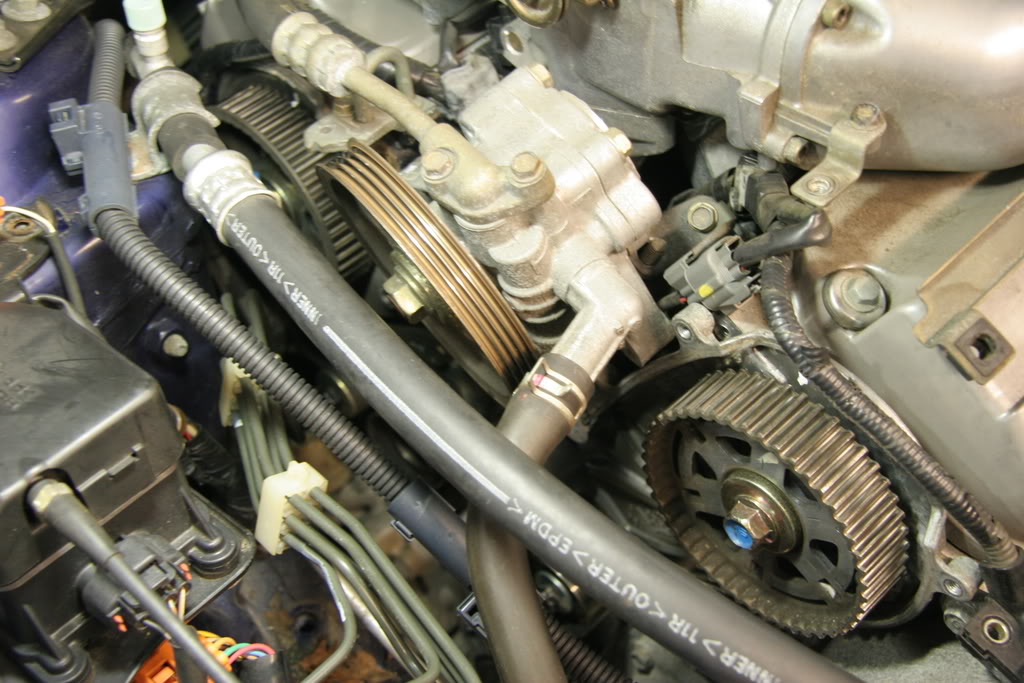
12.Loosen the Idler pulley and remove the belt.
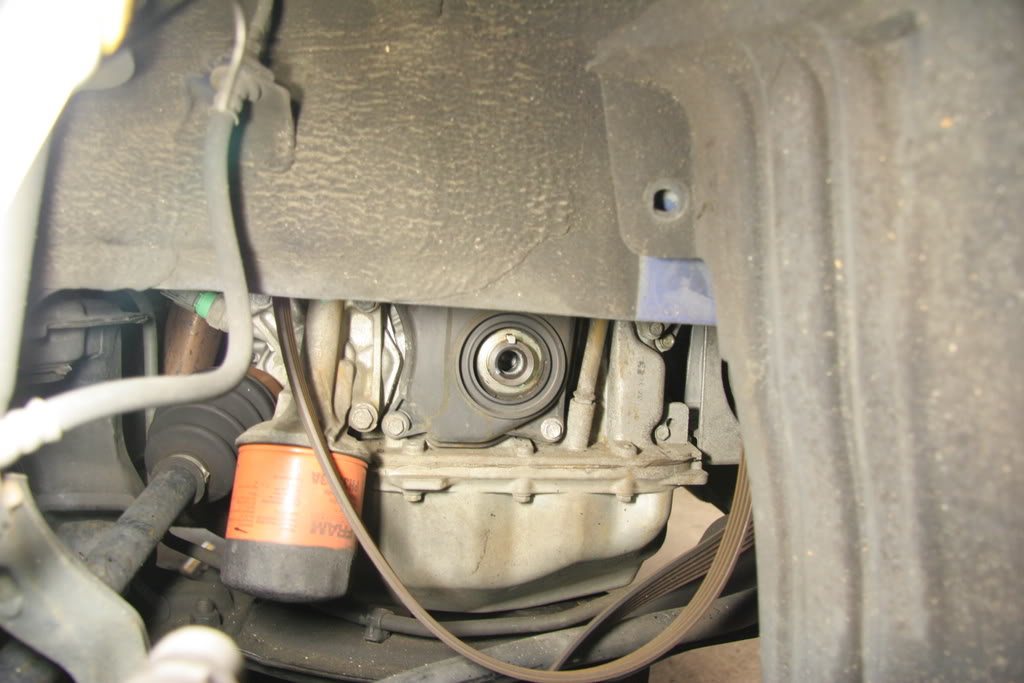
13. Remove and replace water pump.
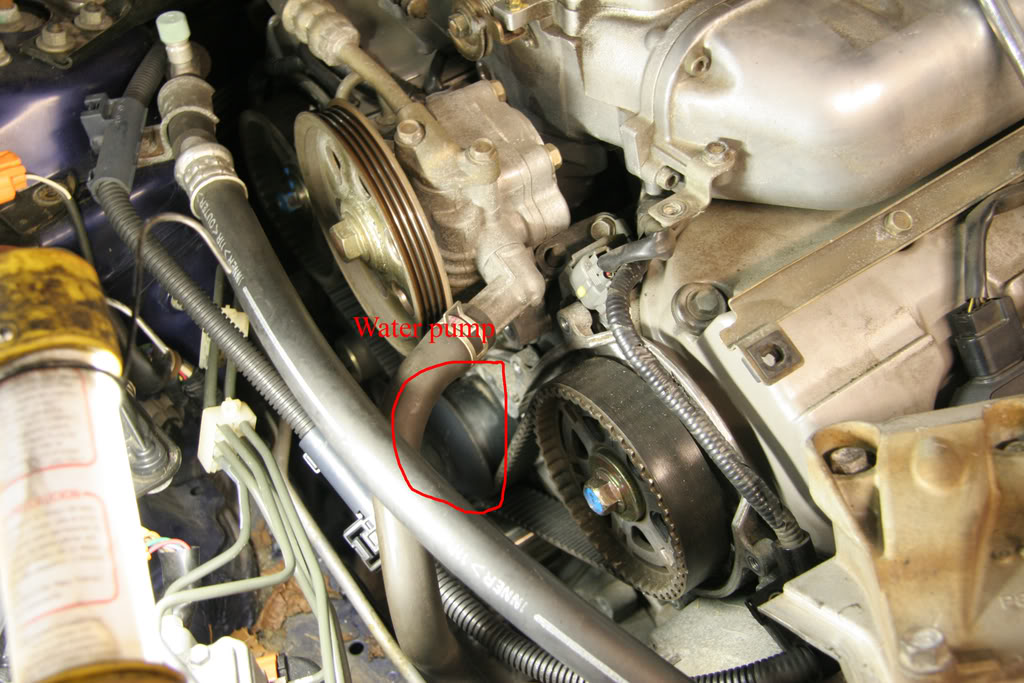
(Forgot to take a pic of the water pump so i have to re-use a pic, Notice the belt if not off of the pic when it is supposed to be)
14. Remove battery tie down and remove adjuster.
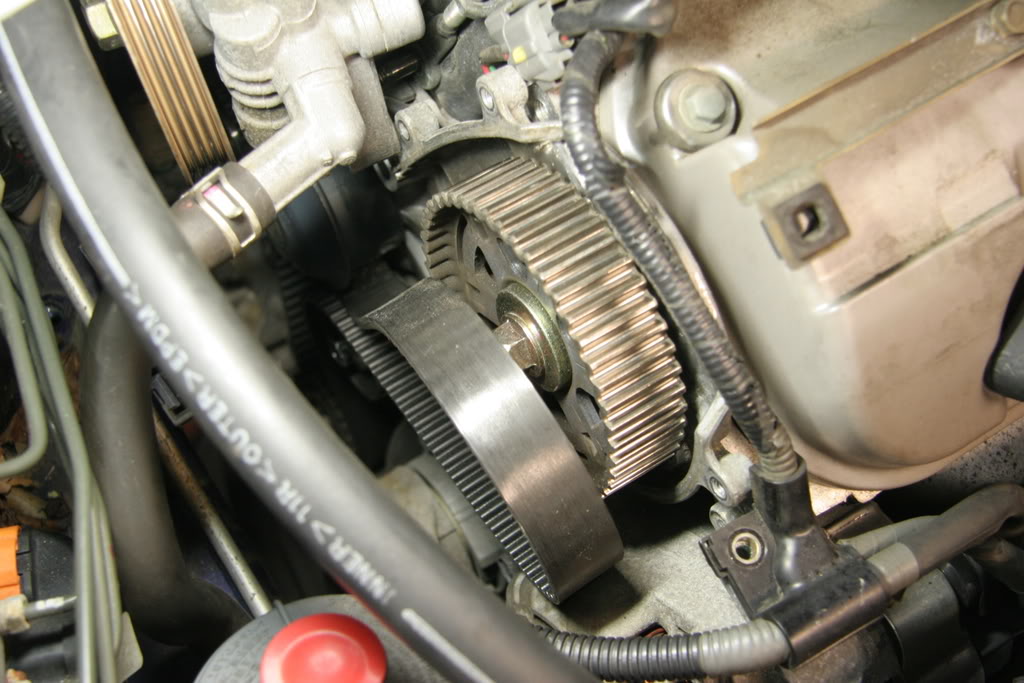
Everthing removed
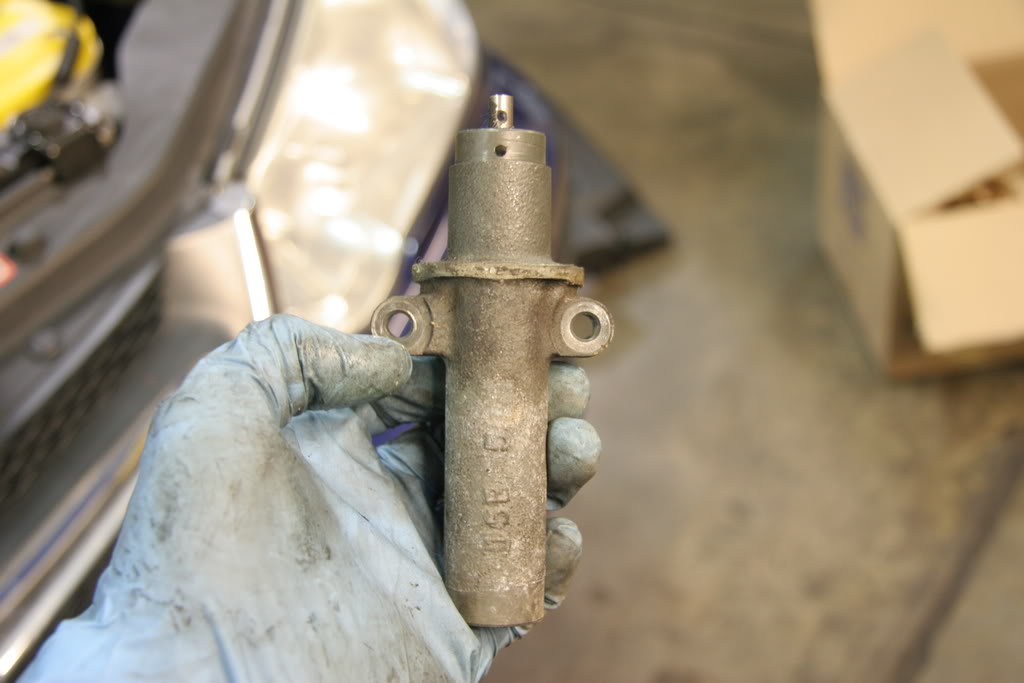
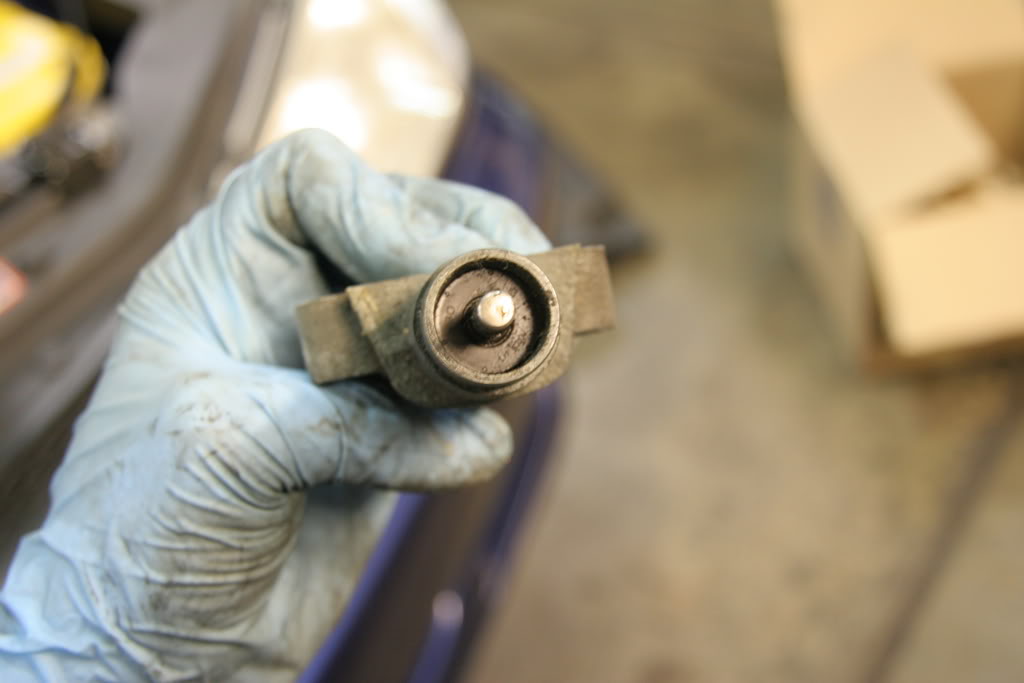
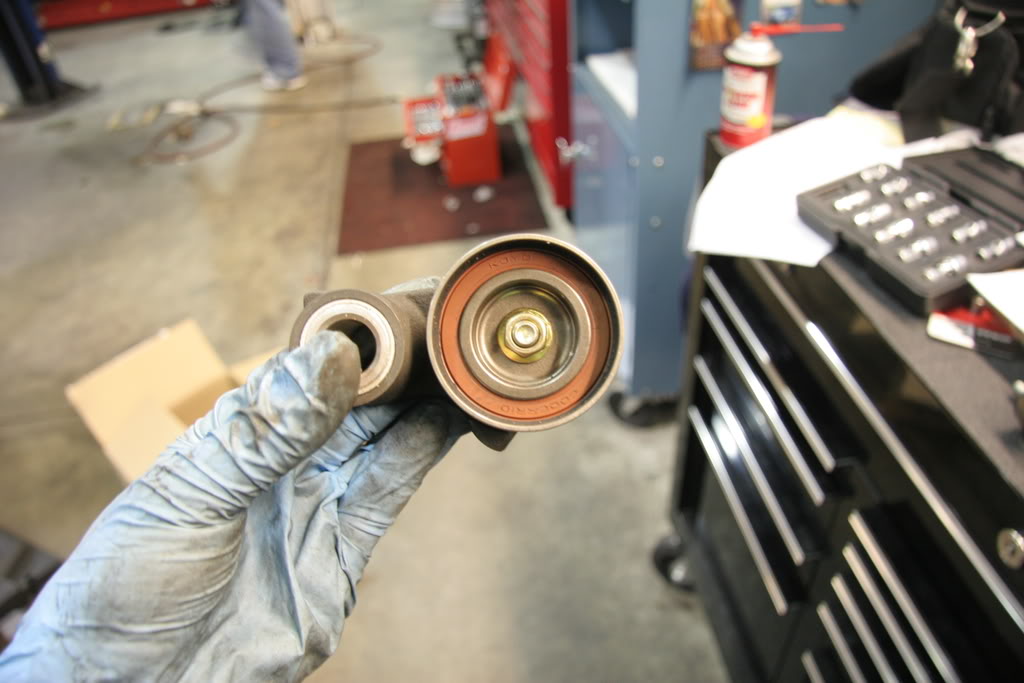
Tensioner Looks good
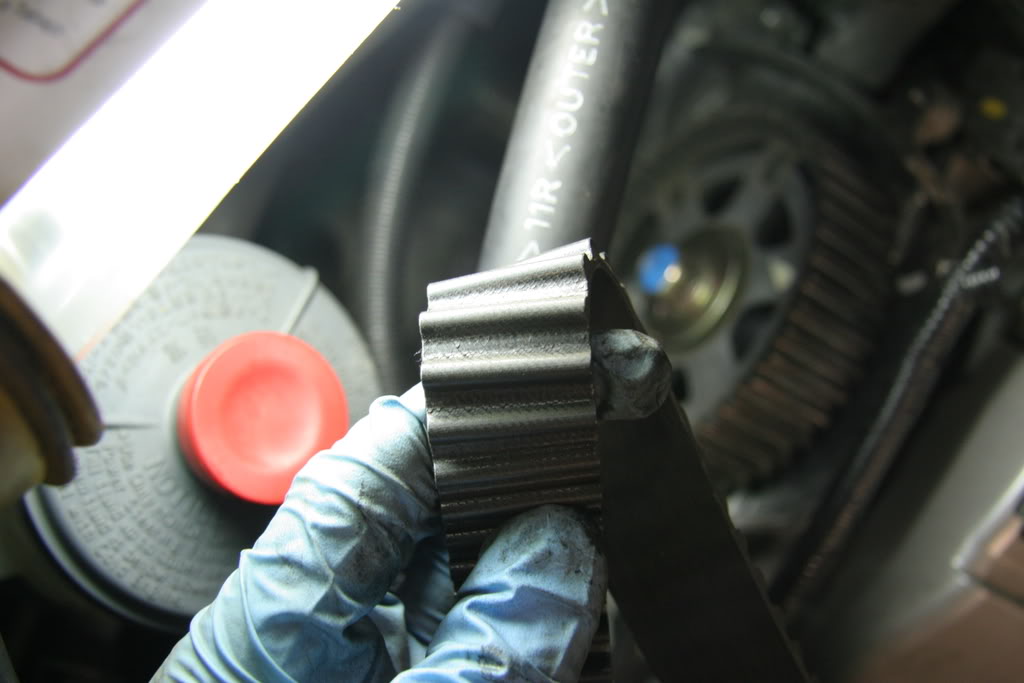
The belt could of lasted another 20k
Idler pulley looks good
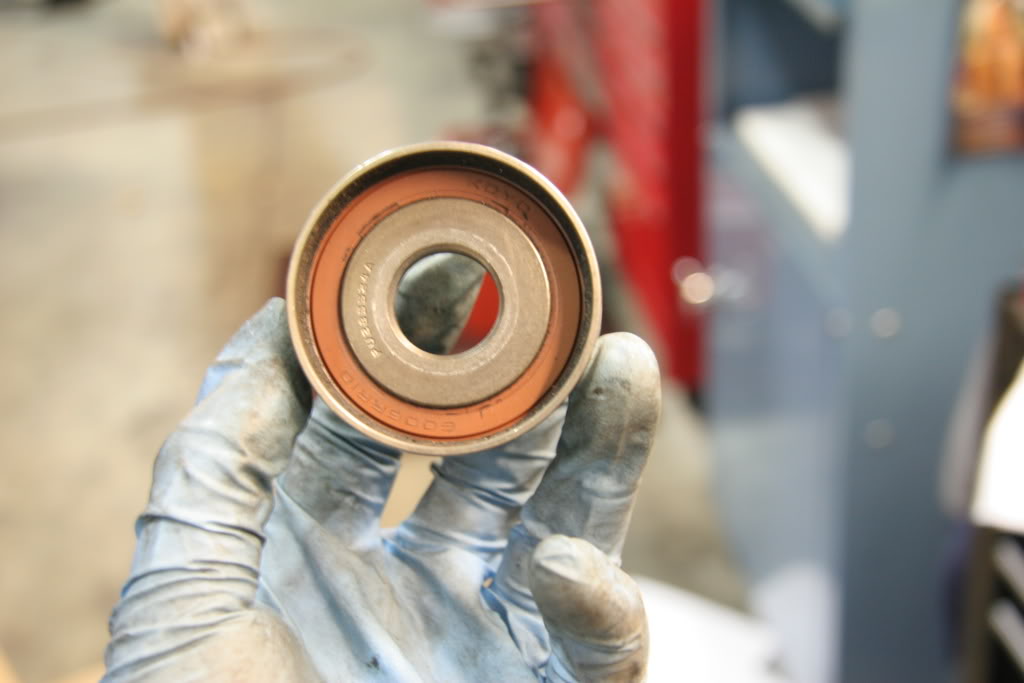
Adjuster pulley looks good
Install..........
I dont really have pics for install since its really just a reverse of everything.
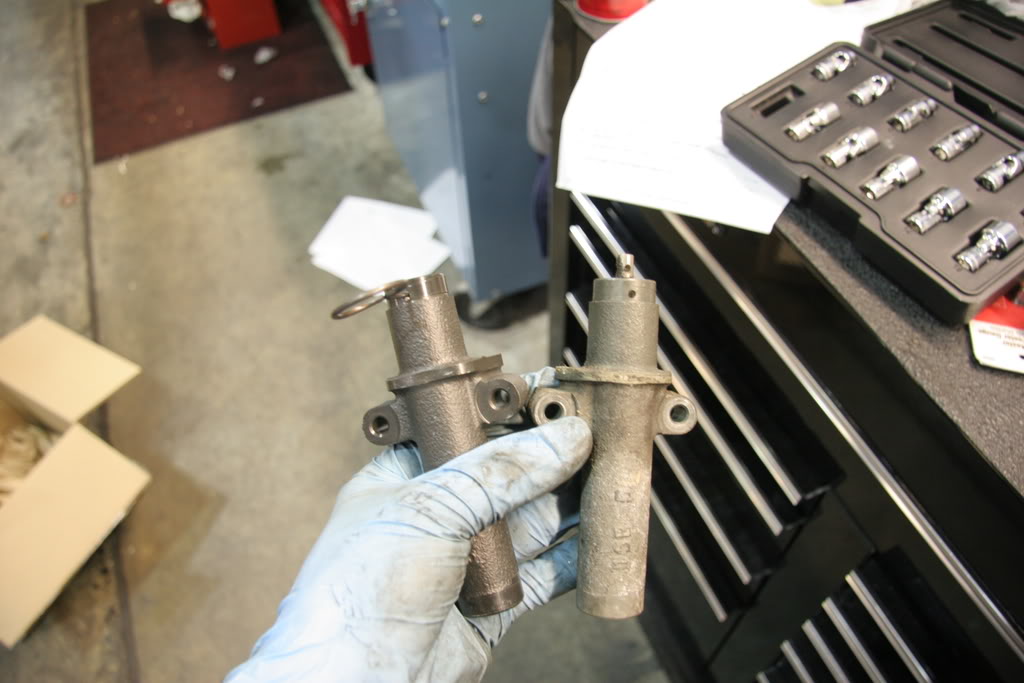
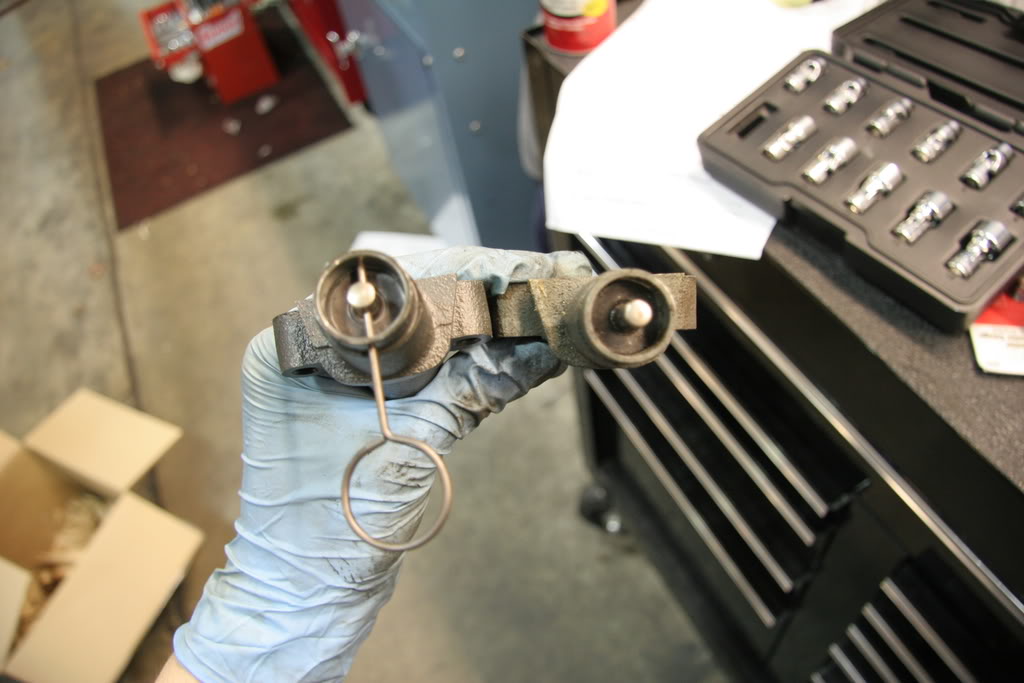
1.Install timing tensioner, but do not remove the pin. Install the battery tie down tool.(If you re-use the old tension, You need to put it in a vice and compress the tensioner.)
2. Install the timing belt COUNTER-Clockwise starting with crank gear working your way up the to front cam gear around idler pulley and into rear cam gear. AND MAKE SURE ALL THE BELT SLACKS ARE AT THE TENSIONER!!! There should be no slacks or play between the cam gears or crank and cam gear. Note-If your belt dont line up with the cam gears, Dont worry, Move the cam gear very slightly(were talking about a .1 mm NOT A TOOTH).
3. I can't stress enough on how important it is to make sure there are no belt slacks between the cam gears and crank gears. Double Check your Belt BEFORE you remove the pin to the tensioner. Pull the pin when your ready Remove battery tie down tool.
4. Check your timing mark to make sure they are correct. Install the crank and bolt(no need to tighten the crank bolt). Turn the Engine over a few times by putting a 19 mm socket+ratchet.
5. If they are, your good. Install everything in reverse order,
If not, start over from step 10 of removal process.
Remember to do your cooling system flush.
Good luck
Feel free to chime in if I forgot something
List of tools you will need
-Crank Holder
-Impact Gun
-Serpentine belt tool
-Battery Tie down tool
-Lots of different sockets, swivels,extensions,wrenches, etc
-Jack+Block of wood
I AM NOT RESPONSIBLE FOR ANY DAMAGE DONE TO YOUR ENGINE. Proceed at your own will.
Removal
1.Turn the crank to make sure your Timing marks line up. Front Cam, Rear Cam, And Crank Mark. ( No pics for the rear cam-You need a mirror to see the timing mark.)
Front cam timing mark
Crank Timing mark-Look for a White dot & Arrow on the timing cover. They should line up
2.Remove Right front Wheel and Under panel
3.Move Auto tensioner and remove Alternator/AC belt
Use a serpentine belt tool. If you dont have one use a 14mm wrench but be careful since there is a lot of tension on that
4.Loosen the PS pump nuts. One is hidden behind the pulley. There is a total of 3 nuts. Remove belt. Note-I would recommend un-doing the hose clamp and move the pump out of your way IF you have bought PS fluid.
5.Support the motor with a floor jack and block of wood under the oil pan.
6.Remove the engine side mount.
7. Remove the oil dip stick tube by undoing the 10mm bolt. (new o-ring for dipstick tube is recommended)
8.Remove the crank bolt (19mm socket) with impact tool. Before you remove the crank, Re-check ALL your Timing Marks to make sure they are align.
Kinda Surprise that the crappy husky gun removed the bolt.
9.Remove all the Timing cover bolt, starting with the front, rear, and lower. This is the most frustrating part due to lack of room.
9a. I do this "just in case" If I screw up. Mark your Cam gears with white paint.
10. I dont have a Pic for this Due to the lack of room for me to fit my Camera (DSLR). You need to remove one of your battery tie down bar. Use the tie down bar and screw it in a bracket to push the Timing Belt Adjuster pulley in to release the tension on the timing belt. Sorry, that is the best i can explain it. If you dont have the tie down like me, Your gonna have a hell of a time to relieve the tension on that.
11.Remove the Engine Side Mount Bracket.
12.Loosen the Idler pulley and remove the belt.
13. Remove and replace water pump.
(Forgot to take a pic of the water pump so i have to re-use a pic, Notice the belt if not off of the pic when it is supposed to be)
14. Remove battery tie down and remove adjuster.
Everthing removed
Tensioner Looks good
The belt could of lasted another 20k
Idler pulley looks good
Adjuster pulley looks good
Install..........
I dont really have pics for install since its really just a reverse of everything.
1.Install timing tensioner, but do not remove the pin. Install the battery tie down tool.(If you re-use the old tension, You need to put it in a vice and compress the tensioner.)
2. Install the timing belt COUNTER-Clockwise starting with crank gear working your way up the to front cam gear around idler pulley and into rear cam gear. AND MAKE SURE ALL THE BELT SLACKS ARE AT THE TENSIONER!!! There should be no slacks or play between the cam gears or crank and cam gear. Note-If your belt dont line up with the cam gears, Dont worry, Move the cam gear very slightly(were talking about a .1 mm NOT A TOOTH).
3. I can't stress enough on how important it is to make sure there are no belt slacks between the cam gears and crank gears. Double Check your Belt BEFORE you remove the pin to the tensioner. Pull the pin when your ready
Remove battery tie down tool.4. Check your timing mark to make sure they are correct. Install the crank and bolt(no need to tighten the crank bolt). Turn the Engine over a few times by putting a 19 mm socket+ratchet.
5. If they are, your good. Install everything in reverse order,
If not, start over from step 10 of removal process.
Remember to do your cooling system flush.
Good luck
Feel free to chime in if I forgot something
Last edited by MotionEffects; 11-10-2008 at 12:35 AM.

 11-10-2008, 07:30 AM
#5
Senior Moderator
Nice. 
I will add.
1. Install the belt counter clock wise starting from the crank.
2. Ive done this probably 5+ times and i still dont see the need for the battery tie down.
3. Make sure the rear cam doesn't move. It sits right on the edge of spinning forward or backward 1/4 turn. If you do forget to mark it, there is a mark on the backing plate that you can line up with the TDC line across the cam gear
And i to am surprised your air gun got that off.
The following users liked this post:
shamal (11-01-2014)

Trending Topics
 11-11-2008, 08:35 PM
#11
Acura TLS are SLOW
Thread Starter
fsttyms1-Now since you mention the rear cam sits on the edge of jumping forward or backward, I forgot to mention that happen to me. Haha
phee-


You're very Welcme
Stimpy-I paid $350 for all belts, waterpump, tensioner, adjuster and idler pulley. I didnt really need the tensioner, idler and adjuster since they all where good. No play in the bearings (idler+adj) and no leaks (tensioner)
phee-
You're very Welcme
Stimpy-I paid $350 for all belts, waterpump, tensioner, adjuster and idler pulley. I didnt really need the tensioner, idler and adjuster since they all where good. No play in the bearings (idler+adj) and no leaks (tensioner)
12-12-2008, 12:26 AM
#12
6th Gear

Join Date: Jun 2008
Age: 39
Posts: 6
Likes: 0
Received 0 Likes
on
0 Posts
thanks for the DIY!!!! i'm going to tackle this job on my accord v6 6spd next week...just one question, what did u do to correct the rear cam timing when it slipped during installation?.....i read on a different forum that you have to remove the rear valve cover and loosen the rocker arm bolts to be able to turn the cam back to TDC....
12-12-2008, 09:29 PM
#13
Advanced

Join Date: Dec 2006
Age: 54
Posts: 63
Likes: 0
Received 0 Likes
on
0 Posts
I am also curious to hear an answer that salvageland asked.
Is it OK or can I change the water pump without draining the coolant first, I mean, spill free of course? Judging by your post this seems to be the case.
In my mind it would be easier to finish off replacing the belt + pump and then drain and replace the coolant itself.
In short I am getting ready to do it myself, also, first time ever, so I would like to know which tool/tools did you use exactly to take off all those cover bolts (front, rear and lower cover of course). The space is extra tight especially for the rear cover and lower cover. Can you access any bolts from under the car?
Can you post the exact measure (length) for the wrench?
Last edited by jjar03; 12-12-2008 at 09:33 PM.
12-13-2008, 12:08 AM
#14
Instructor
Join Date: Oct 2008
Location: Wisconsin
Age: 38
Posts: 215
Likes: 0
Received 0 Likes
on
0 Posts
Is it OK or can I change the water pump without draining the coolant first, I mean, spill free of course? Judging by your post this seems to be the case.
In my mind it would be easier to finish off replacing the belt + pump and then drain and replace the coolant itself.
In short I am getting ready to do it myself, also, first time ever, so I would like to know which tool/tools did you use exactly to take off all those cover bolts (front, rear and lower cover of course). The space is extra tight especially for the rear cover and lower cover. Can you access any bolts from under the car?
Can you post the exact measure (length) for the wrench?
As for the tools, I'm not sure because I've never changed the timing belt and waterpump on the TL
01-02-2009, 02:09 AM
#15
3rd Gear

Join Date: Mar 2008
Age: 39
Posts: 3
Likes: 0
Received 0 Likes
on
0 Posts
All you need to do is slide the timing belt off of the cam gear, make sure that you don't turn the crank off of TDC when you do this, then put a wrench on the bolt for the cam gear and turn it until it lines up, then slide the timing belt back on the gear.
Can anyone confirm this, so for my peace of mind??
01-12-2009, 11:18 AM
#19
Ackniculous One
Join Date: Jun 2003
Location: ATL Shawwwwtyyyy
Age: 49
Posts: 3,100
Likes: 0
Received 8 Likes
on
7 Posts
Very Nice write up, props to you for doing this.
This is something I wouldn't feel comfortable doing myself. I just got my timing belt service with new oem water pump, valve adjustment, coolant flush, power steering flush and they threw on my UR Stock size lightweight pulley (labor for the pulley free of course) for $590 at a Acura mechanic's shop nearby. Dealer wanted $1200 w/o a valve adjustment so your DIY will certainly be helpful to those looking to save a lot of cash.
This is something I wouldn't feel comfortable doing myself. I just got my timing belt service with new oem water pump, valve adjustment, coolant flush, power steering flush and they threw on my UR Stock size lightweight pulley (labor for the pulley free of course) for $590 at a Acura mechanic's shop nearby. Dealer wanted $1200 w/o a valve adjustment so your DIY will certainly be helpful to those looking to save a lot of cash.
01-12-2009, 06:40 PM
#20
Advanced

Join Date: Jul 2007
Age: 55
Posts: 56
Likes: 0
Received 0 Likes
on
0 Posts
Hi, great write up!
OK, you have inspired me to DIY on the timing belt. Now, if you could answer a few questions please.
The water pump, does it include the gasget, and do I need to apply adhesive to the gasget/engine, or is the pump just bolt on with rubber gasget no adhesive?
I am using a new tensioner/aduster pully/idler pully. How do I use the battery tie down and on what part? Dealer only item?
Thanks for any advice
Jason
01-13-2009, 11:23 PM
#21
6th Gear
Join Date: Jun 2008
Age: 39
Posts: 6
Likes: 0
Received 0 Likes
on
0 Posts
i tried to tackle this job this week and upon taking off the timing belt covers i found that my belt was in excellent condition..(04 accord v6 6 speed with 107k miles) so i decided to drive another 20-30k on the stock belt before i change it...
i have timing belt kit that i bought from ebay comes with GMB idler and tensioner pulley with a Continental timingbelt...if anybody is interested...$105 shipped nairi91205@yahoo.com
i have timing belt kit that i bought from ebay comes with GMB idler and tensioner pulley with a Continental timingbelt...if anybody is interested...$105 shipped
nairi91205@yahoo.com
01-21-2009, 08:02 PM
#22
Three Wheelin'
iTrader: (3)
Join Date: Sep 2008
Location: Chicagoland
Age: 33
Posts: 1,648
Likes: 0
Received 0 Likes
on
0 Posts
Great write up
Im thinking about doing this myself because i dont have $1000+ that the stealership wants
I bought the car when it already more than 110k on it so i dont know if it was ever changed!
Is there a way to find out if it was or not? (dumb question i know)
Im thinking about doing this myself because i dont have $1000+ that the stealership wants
I bought the car when it already more than 110k on it so i dont know if it was ever changed!
Is there a way to find out if it was or not? (dumb question i know)
01-22-2009, 07:53 PM
#23
Advanced

Join Date: Dec 2008
Location: Chicagoland
Posts: 85
Likes: 0
Received 0 Likes
on
0 Posts
Pretty nice write up, having to do these all the time @ work I am glad that some people are able to do these. They are cake walk ! Only thing I don't understand is this battery tie down thing you are talkin about ?
I stick the tensioner into the vise and compress it back..
There is no way of telling if the timing belt has been changed. Look at the drive belts, if they are pretty crusty looking chances are its never been done. If any of you have any Qs about these belt changes, shoot me a PM.
I stick the tensioner into the vise and compress it back..
There is no way of telling if the timing belt has been changed. Look at the drive belts, if they are pretty crusty looking chances are its never been done. If any of you have any Qs about these belt changes, shoot me a PM.
01-23-2009, 06:26 PM
#24
Instructor
Nice write-up! I also did my timing belt at 120K miles however I also did the valve adjustment and replaced my worn engine mounts.
From your write-up I assume that you work on cars for a living because you wear gloves and you rated this job as a 3/10. I ended up scraping my hands doing my timing belt because I don't like the feel of gloves when I wrench. I also assume that you were using an industrial shop air compressor because you were able to break the crank bolt with your air impact gun.
From your write-up I assume that you work on cars for a living because you wear gloves and you rated this job as a 3/10. I ended up scraping my hands doing my timing belt because I don't like the feel of gloves when I wrench. I also assume that you were using an industrial shop air compressor because you were able to break the crank bolt with your air impact gun.
01-24-2009, 09:22 AM
#25
Advanced
Join Date: Dec 2008
Location: Chicagoland
Posts: 85
Likes: 0
Received 0 Likes
on
0 Posts
K, I now see how you compress the timing belt tensioner back using the battery tray bolt..... I did a belt on a 99 TL yesterday and saw that little tab. It looks like a big PITA to do it that way, just buy a vice and compress it like that.
Maybe that person with the 99 TL was from here, it had cross drilled rotors and some kinda pads that where not OEM all around ?
Fix your tie rod bud
Maybe that person with the 99 TL was from here, it had cross drilled rotors and some kinda pads that where not OEM all around ?
Fix your tie rod bud
02-01-2009, 03:16 AM
#26
3rd Gear
Join Date: Mar 2008
Age: 39
Posts: 3
Likes: 0
Received 0 Likes
on
0 Posts
02-01-2009, 10:02 AM
#27
Advanced
Join Date: Jul 2007
Age: 55
Posts: 56
Likes: 0
Received 0 Likes
on
0 Posts
My fathernlaw and myself tackled this tbelt job last week, took 7 hrs (2 hrs back and forth to the tool store, and 1 hr gettin the damn crank bolt off!) with the majority of time taking off the timing belt cover and front mount. I did not have a factory service manual (trial and error for removal sequence), but from the time I exposed the timing belt/water pump ( I replaced tbelt/water pump, tensioner (was bad) idler pully and adjuster pully (looked good), took me 30 min and was very easy. BUT, on this job I also changed upper lower rad hoses and flushed collant, replaced ac tensioner, both belts in 7 frustrating hrs. The worst part, DON'T OVER TIGHTEN YOUR PS BELT. I ruined my ps pump, and is at the dealer to repair (long story I am going to write up later when/if car is fixed).
Hope this helps,
Jason
Hope this helps,
Jason
 02-05-2009, 02:42 PM
#29
Advanced

Join Date: Mar 2004
Location: Torrance ,CA
Age: 46
Posts: 50
Likes: 0
Received 0 Likes
on
0 Posts
Also, do you have the part number for the tensioner, its not listed anywhere on the part sites...and in this image, you see it as #18, but the part and price aren't actually listed.
http://www.acuraoemparts.com/delray/...All&vinsrch=no
http://www.acuraoemparts.com/delray/...All&vinsrch=no
02-05-2009, 07:18 PM
#30
Cruisin'

Join Date: Feb 2009
Location: Central Florida
Age: 44
Posts: 23
Likes: 0
Received 0 Likes
on
0 Posts
Awesome write up. I just purchased a 2000 TL this week with 120k on it with the original timing belt and I had plans to take care of this as soon as possible.
02-06-2009, 11:13 AM
#31
Advanced
Join Date: Mar 2004
Location: Torrance ,CA
Age: 46
Posts: 50
Likes: 0
Received 0 Likes
on
0 Posts
Also, could I get away with changing out the PS belt, AC belt, timing belt, water pump, and water pump gasket. Or do I need the pulleys and tensioner.
I'm going to be picking up the parts online at a discount and bringing them to my local repair guys..thanks.
I'm going to be picking up the parts online at a discount and bringing them to my local repair guys..thanks.
02-06-2009, 11:34 AM
#32
'02 NBP TL-S

Join Date: Jul 2007
Location: Lacey, WA
Age: 44
Posts: 233
Likes: 0
Received 0 Likes
on
0 Posts
Great write-up. Looks pretty intense for me to do. It cost me a little over $500 to have a shop do it with OEM parts (belts & water pump). I think this is one task I'll have to pass on considering I only need to do every 90k-100k+.
02-08-2009, 09:43 PM
#34
AZ Community Team
Nice pictures and writeup!
One last note even if you drain the antifreeze when you remove the waterpump on a J32 or J35 there's usually enough antifreeze still in the block that will come out when the pump is removed. So be certain to plug the dipstick hole with a rag to prevent the antifreeze from going into the oil pan. I discovered this the hard way, and had to change the oil to drain the anti-freeze out of the oil sump (and I just changed it before the timing belt change!).
One last note even if you drain the antifreeze when you remove the waterpump on a J32 or J35 there's usually enough antifreeze still in the block that will come out when the pump is removed. So be certain to plug the dipstick hole with a rag to prevent the antifreeze from going into the oil pan. I discovered this the hard way, and had to change the oil to drain the anti-freeze out of the oil sump (and I just changed it before the timing belt change!).

The following users liked this post:
Larry1030 (05-23-2020)
02-08-2009, 09:45 PM
#35
AZ Community Team
Yep with the J motors it's really easy to get the old belt off and more importantly very easy to get the new belt on and aligned. I did a J35 motor on a Honda Pilot last year (virtually identical to this J32 timing belt change).
02-08-2009, 09:47 PM
#36
AZ Community Team
02-08-2009, 09:51 PM
#37
AZ Community Team
The following users liked this post:
shamal (11-01-2014)
02-08-2009, 10:03 PM
#38
Owner www.2ndgen.info

Join Date: Apr 2008
Age: 37
Posts: 102
Likes: 0
Received 0 Likes
on
0 Posts
The following users liked this post:
shamal (11-01-2014)
02-16-2009, 01:41 AM
#40
3rd Gear
Join Date: Mar 2008
Age: 39
Posts: 3
Likes: 0
Received 0 Likes
on
0 Posts
I was always curious on the seals, crank seal, cam seals? What about changing those out? Also, is it customary to replace the tensioner and idler?
Thanks!

