euro-r kit install-part I (front lip)
 10-22-2007, 09:29 AM
#1
where is my garage?!
Thread Starter
iTrader: (2)
Join Date: Oct 2006
Location: nassau county, ny
Age: 46
Posts: 1,857
Likes: 0
Received 1 Like
on
1 Post
euro-r kit install-part I (front lip)
so yesterday i spent a few hours installing only the front lip. it took a lot longer than expected, and after a while it just got too dark too fast to do the rear and sides.
aside from the icebox, this is my only other really major install. the duration of the whole process is probably a testament to that, but i'm hoping it'll go faster for the rest when i get around to it.
i followed sean's directions, which were very helpful. everything worked like a charm. these are some things i'd just note if you guys plan to install this kit--
1. when you're tapping the screws on the side of your bumper for the spring nuts and lip, make sure you tap the LOWER 2 HOLES!! there are actually three dimples for tapping points. the highest and lowest are for the US OEM kit (which is much higher than the euro-r). we made the mistake of not double checking the tapping points (our own bone-headed mistake), and tapped them for the US OEM. afterwards, i looked at the euro-r lip and was like 'oh sh*t.' no harm done though. i just have 2 small holes that you can barely see. plus the fender lining is in there so it's no big deal.
2. when tapping the aforementioned holes, the spring nuts don't exactly line up with the dimples. as such, tap the hole w/ the screw according to how the spring nut lines up. simple and totally 'duh,' but you'd be suprised. sometimes the help you have will not think that way.
3. after installing the lip, you may encounter some space between the actual fog lamps and the new housing. this could be attributable to one of the brackets underneath the kit being stuck/lodged on the bottom of the bumper, and is not sitting flush. don't panic (as i did initially). once you line everything up and bolt it down, the gap notably narrows. it's just a pain getting the lip on initially. alot of tugging, wiggling, prying, etc...
4. the double-sided tape. for the love of god, be careful when you pull on the tabs. the lip is really, really flush against the bumper. if you pull too hard, you're liable to actually rip the tab off without the rest of the strip covering the tape. this happened to us on one of the sides. i had to actually unscrew the self-tappers, pull the lip off slightly and expose the tape, then use some needle-nose pliers to pull it off. and try to remember which direction you should be pulling as well.
the only annoying issue i really encountered was when i put everything back, i had one 10mm bolt that wouldn't freaking go back in. it's the one that goes through 3 layers of vinyl on the bottom (last layer has a spring nut on it). for some reason it goes in, but never tightens. it was annoying the hell out of me. i finally gave up and will try to tighten it on another day. for now, it should be secure enough that it won't fall out. besides, i have extras since there is some other hardware left over.
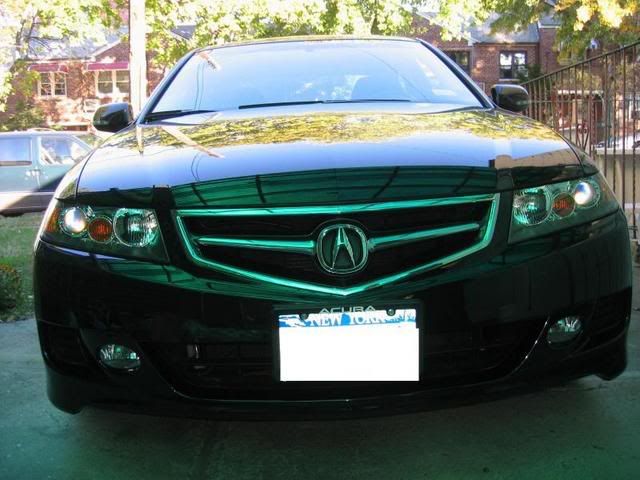
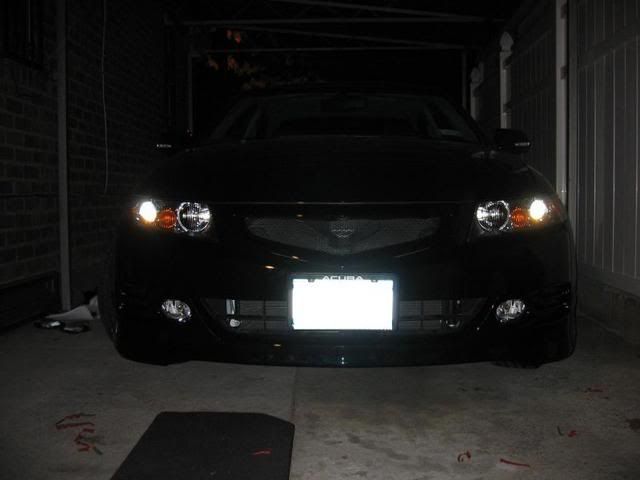
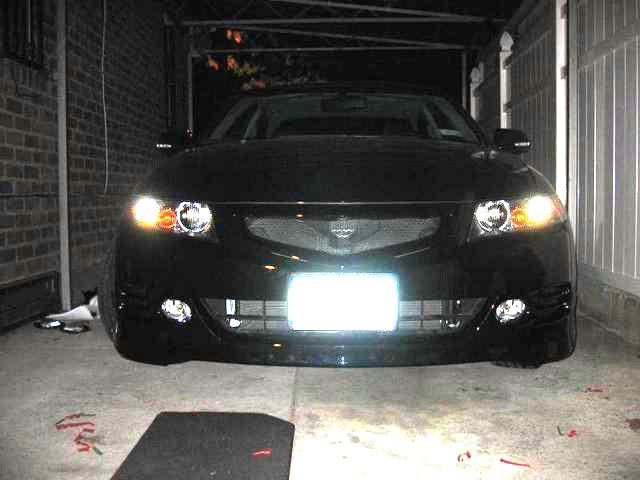
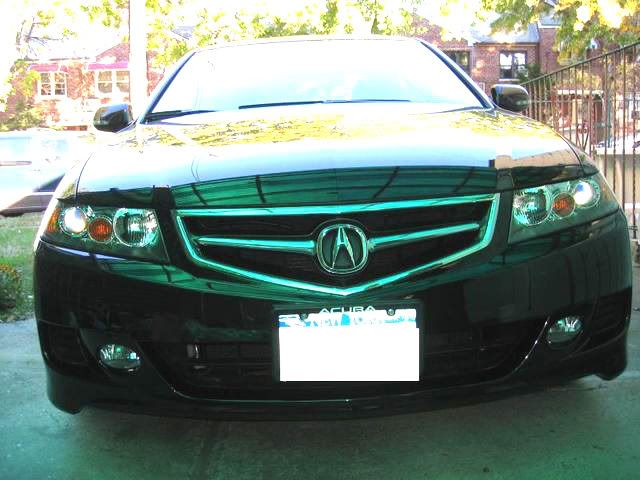
these are crappy quality before/end pics. gonna try to finish the rest this coming weekend. i also installed my mugen grille as well. in my rush to get this done, i totally forgot to swap out my fog bulbs for the hoen xenonmatches i recently purchased. doh!
before:
after (dark):
aside from the icebox, this is my only other really major install. the duration of the whole process is probably a testament to that, but i'm hoping it'll go faster for the rest when i get around to it.
i followed sean's directions, which were very helpful. everything worked like a charm. these are some things i'd just note if you guys plan to install this kit--
1. when you're tapping the screws on the side of your bumper for the spring nuts and lip, make sure you tap the LOWER 2 HOLES!! there are actually three dimples for tapping points. the highest and lowest are for the US OEM kit (which is much higher than the euro-r). we made the mistake of not double checking the tapping points (our own bone-headed mistake), and tapped them for the US OEM. afterwards, i looked at the euro-r lip and was like 'oh sh*t.' no harm done though. i just have 2 small holes that you can barely see. plus the fender lining is in there so it's no big deal.
2. when tapping the aforementioned holes, the spring nuts don't exactly line up with the dimples. as such, tap the hole w/ the screw according to how the spring nut lines up. simple and totally 'duh,' but you'd be suprised. sometimes the help you have will not think that way.
3. after installing the lip, you may encounter some space between the actual fog lamps and the new housing. this could be attributable to one of the brackets underneath the kit being stuck/lodged on the bottom of the bumper, and is not sitting flush. don't panic (as i did initially). once you line everything up and bolt it down, the gap notably narrows. it's just a pain getting the lip on initially. alot of tugging, wiggling, prying, etc...
4. the double-sided tape. for the love of god, be careful when you pull on the tabs. the lip is really, really flush against the bumper. if you pull too hard, you're liable to actually rip the tab off without the rest of the strip covering the tape. this happened to us on one of the sides. i had to actually unscrew the self-tappers, pull the lip off slightly and expose the tape, then use some needle-nose pliers to pull it off. and try to remember which direction you should be pulling as well.
the only annoying issue i really encountered was when i put everything back, i had one 10mm bolt that wouldn't freaking go back in. it's the one that goes through 3 layers of vinyl on the bottom (last layer has a spring nut on it). for some reason it goes in, but never tightens. it was annoying the hell out of me. i finally gave up and will try to tighten it on another day. for now, it should be secure enough that it won't fall out. besides, i have extras since there is some other hardware left over.
these are crappy quality before/end pics. gonna try to finish the rest this coming weekend. i also installed my mugen grille as well. in my rush to get this done, i totally forgot to swap out my fog bulbs for the hoen xenonmatches i recently purchased. doh!
before:
after (dark):
 10-22-2007, 10:04 AM
#3
where is my garage?!
Thread Starter
iTrader: (2)
Join Date: Oct 2006
Location: nassau county, ny
Age: 46
Posts: 1,857
Likes: 0
Received 1 Like
on
1 Post
Originally Posted by tom12282
can you post more picture? it's kinda hard to see the kit
when i have better pics, i'll post them. but you can kinda tell it's a little lower in the front, and you see the mugen grille. it really looks a lot nicer than that gaudy A emblem and faux chrome.
10-22-2007, 11:27 AM
#4
Moderator
Regional Coordinator (Southeast)
Regional Coordinator (Southeast)
Join Date: Dec 2003
Location: Mooresville, NC
Age: 37
Posts: 43,445
Received 3,645 Likes
on
2,486 Posts
i bet it looks good but pictures are absolutely useless no offense.
10-22-2007, 11:44 AM
#5
where is my garage?!
Thread Starter
iTrader: (2)
Join Date: Oct 2006
Location: nassau county, ny
Age: 46
Posts: 1,857
Likes: 0
Received 1 Like
on
1 Post
Originally Posted by CCColtsicehockey
i bet it looks good but pictures are absolutely useless no offense.


Trending Topics
10-28-2007, 07:40 PM
#8
where is my garage?!
Thread Starter
iTrader: (2)
Join Date: Oct 2006
Location: nassau county, ny
Age: 46
Posts: 1,857
Likes: 0
Received 1 Like
on
1 Post
verbal update
ok, so i spent a few hours installing the rear lip. no help this time, but it was managable. probably would've taken less time with an extra set of hands.
it was more or less pretty straightforward. it's a little tricky getting the bumper off the hooks, but once you do it, the lip goes on really easy.
my only screw up was that when i put the eurofied bumper back on, i noticed some stuff underneath was misaligned. first, there's the plastic cover plate that wasn't flush w/ the bumper. i tried jamming it back in only to realize one of the brackets was out, rather than in. so i had to go back and pull off the left side of the back bumper, align the bracket and cover, then re-clip and screw everything back. the one thing about the cover is you can take the whole thing off (10mm bolts) and slide it back into the bumper so all the holes align.
anyways, it got too dark too fast once again. no shots and i didn't have time to put on the sideskirts. i swear to god, after next weekend, i will have this done, put on my m3-style spoiler, changed my fog bulbs and put this thing to rest before the winter.
and yes. this thread is worthless without pics.
 10-29-2007, 10:34 AM
#12
where is my garage?!
Thread Starter
iTrader: (2)
Join Date: Oct 2006
Location: nassau county, ny
Age: 46
Posts: 1,857
Likes: 0
Received 1 Like
on
1 Post
nice w/ the photoshop!
cgtsx07: well, the scratches i couldn't fix i just covered w/ the euro-r rear lip.
the one on the edge, i actually used my paint pen to create a layer of paint and clearcoat to at least blend it. you can still kind of see the edge where the cc was taken off and the spot is, but the rear lip actually hides about 3/4 of it. i'll get a close up pic to post.
10-29-2007, 01:07 PM
#14
where is my garage?!
Thread Starter
iTrader: (2)
Join Date: Oct 2006
Location: nassau county, ny
Age: 46
Posts: 1,857
Likes: 0
Received 1 Like
on
1 Post
mostly online b/c i was lazy. another had posted a guide of what you need, so i just bought the hardware from different places. you could probably go to a bunch of auto stores (pep boys, napa, autozone) and home depot and get the same stuff.
10-29-2007, 01:13 PM
#15
Racer
Join Date: Apr 2007
Location: Driver's seat
Posts: 384
Likes: 0
Received 0 Likes
on
0 Posts
hey xjohnkdoex, I hope I'm not too late in requesting but... can you take a picture of the side of your TSX before you install the rest of the bodykit? I want to see how it looks like with just the front lip! Much appreciated if you can still do that
so far... the front looks completely stock still due to the fact that it's NBP and the pictures are dark xD
so far... the front looks completely stock still due to the fact that it's NBP and the pictures are dark xD
10-29-2007, 01:29 PM
#16
where is my garage?!
Thread Starter
iTrader: (2)
Join Date: Oct 2006
Location: nassau county, ny
Age: 46
Posts: 1,857
Likes: 0
Received 1 Like
on
1 Post
Originally Posted by Zyuan10
hey xjohnkdoex, I hope I'm not too late in requesting but... can you take a picture of the side of your TSX before you install the rest of the bodykit? I want to see how it looks like with just the front lip! Much appreciated if you can still do that
so far... the front looks completely stock still due to the fact that it's NBP and the pictures are dark xD
so far... the front looks completely stock still due to the fact that it's NBP and the pictures are dark xD
hmm...i think i had a side shot, but i'll have to check. agreed, from the front, it looks really similar to stock, but from the side, it does drop about 1/2 an inch and makes the front a little more heady. i'm afraid i might only be able to provide an after pic.
10-29-2007, 01:32 PM
#17
Racer
Join Date: Aug 2006
Location: Saint Louis, MO
Age: 42
Posts: 281
Likes: 0
Received 0 Likes
on
0 Posts
Originally Posted by xjohnkdoex
hmm...i think i had a side shot, but i'll have to check. agreed, from the front, it looks really similar to stock, but from the side, it does drop about 1/2 an inch and makes the front a little more heady. i'm afraid i might only be able to provide an after pic.
Whatever you can do would be great... we're living vicariously through you!
 10-29-2007, 01:34 PM
#18
Racer
Join Date: Aug 2006
Location: Saint Louis, MO
Age: 42
Posts: 281
Likes: 0
Received 0 Likes
on
0 Posts
Originally Posted by xjohnkdoex
mostly online b/c i was lazy. another had posted a guide of what you need, so i just bought the hardware from different places. you could probably go to a bunch of auto stores (pep boys, napa, autozone) and home depot and get the same stuff.
10-29-2007, 02:04 PM
#19
where is my garage?!
Thread Starter
iTrader: (2)
Join Date: Oct 2006
Location: nassau county, ny
Age: 46
Posts: 1,857
Likes: 0
Received 1 Like
on
1 Post
oh, through A&J racing. it was a group buy on the 'other' forum.
it was originaly $1100 USD. good deal, but after currency conversion (CAD was almost equal w/ the USD), shipping, tariff fees, etc...the savings isn't so much. better than the $1300 USD it normally is.
it was originaly $1100 USD. good deal, but after currency conversion (CAD was almost equal w/ the USD), shipping, tariff fees, etc...the savings isn't so much. better than the $1300 USD it normally is.
11-03-2007, 07:15 PM
#20
E92
Do they sell just the front lip anywhere? I'm just interested in that.
And just a tip for the fog bulbs, they're a piece of cake to install by taking off the grille and doin it thru there
And just a tip for the fog bulbs, they're a piece of cake to install by taking off the grille and doin it thru there

Thread
Thread Starter
Forum
Replies
Last Post
nuldabz
3G TL Tires, Wheels & Suspension
3
09-03-2015 05:49 PM
Pegon95
3G TL (2004-2008)
10
08-31-2015 02:18 PM

