DIY: door handle LEDs
 03-02-2007, 10:17 AM
#1
05 Acura TL: a-spec
Thread Starter

DIY: door handle LEDs
Tools/Items list:
Soldering iron
Solder
Wire(I think I used 20 gauge)
Wire cutters/strippers
Shrink tube
Lighter
Liquid electrical tape
Electrical tape
Needle nose pliers
9v battery and leads(to test your work)
LEDs
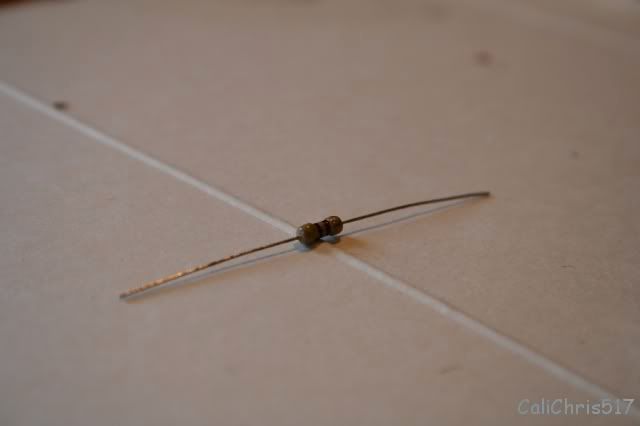
Resistors (you can use a multimeter to determine the correct resistor)
Multimeter(helpful but not required)
Philips screw driver
Dremel (or something else to flatten LEDs)
LED Prep:
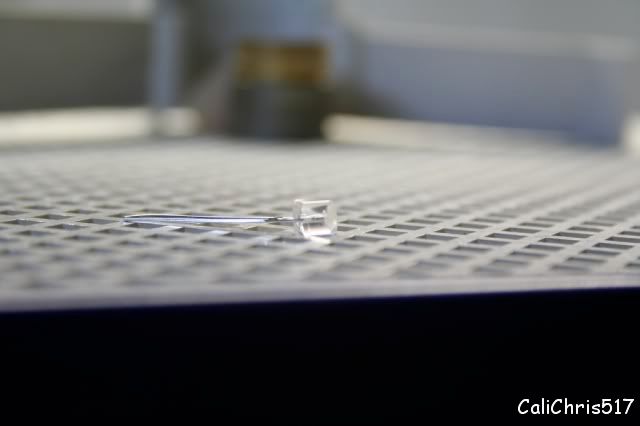
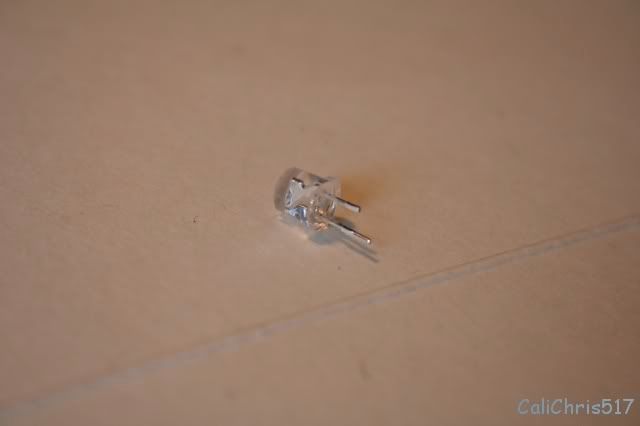
1. Flatten the tips of the LEDs. I used a glass grinder since my mom is into stained glass and it just happened to be handy, but you can use a Dremel. I recommend doing all 4 at the same time.
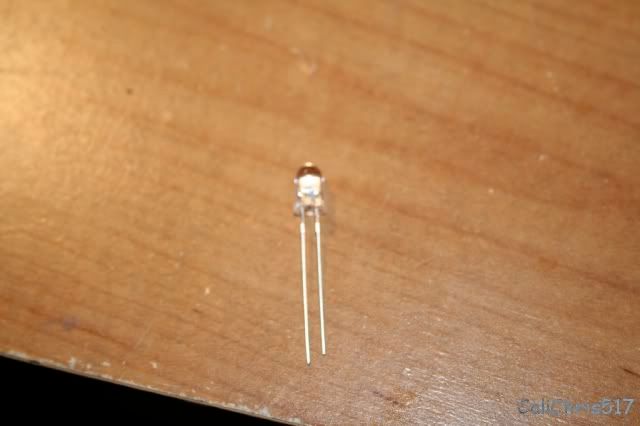

2. cut the LED down to size. Don�t forget which end is positive and which is negative. The longer is positive and the shorter is negative.
3. solder the resistor to the positive end of the LED
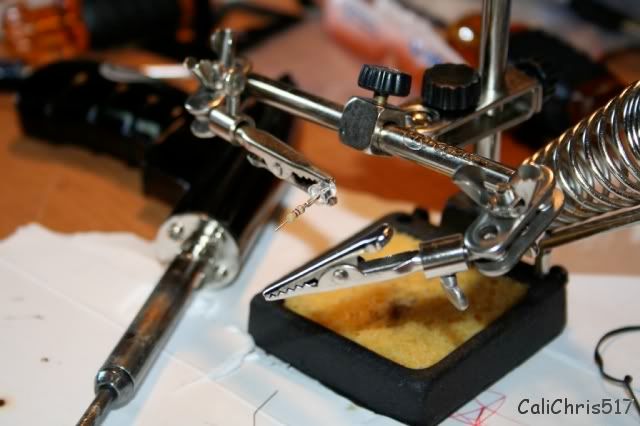
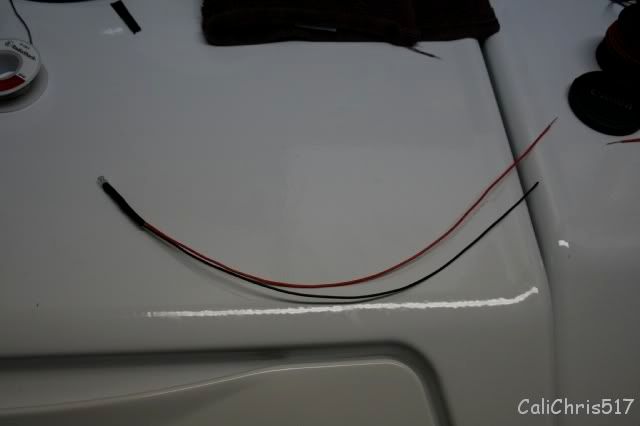
4. solder on about 8-12 inches of wire, don�t get positive(red) and negative(black) mixed up.
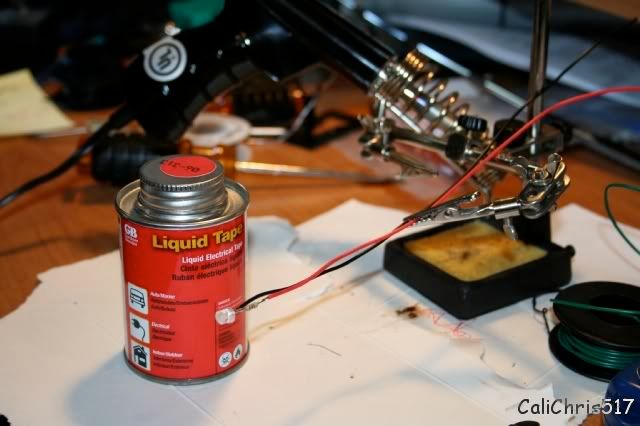
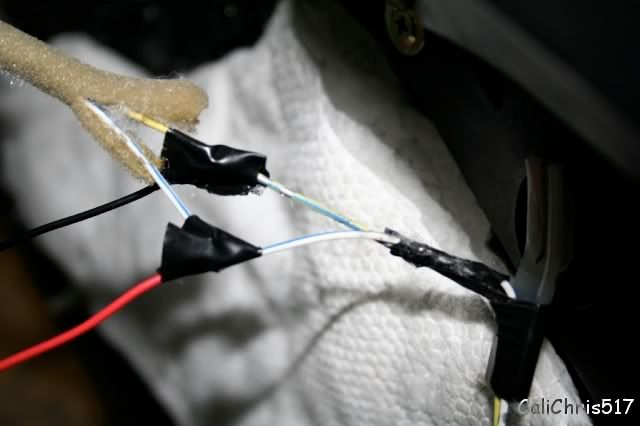
5. now you need to seal up all exposed wire, for this I used liquid electrical tape, then shrink tube. Warning liquid tape is flammable. To shrink, shrink tube, you need a flame.
I found that putting a flame to liquid tape (after it was applied to the wires) causes to to harden up quicker and create a good seal.

after you apply liquid tape, put the shrink tube on. Then shrink it.

6. I then wrapped the shrink tube in electrical tape to hold it all together.
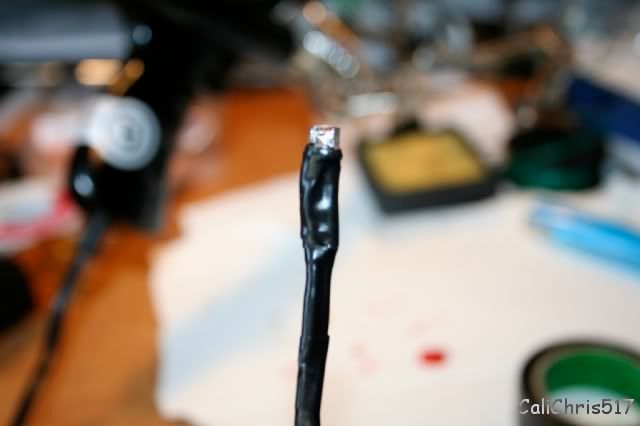
Finished product should look like this-
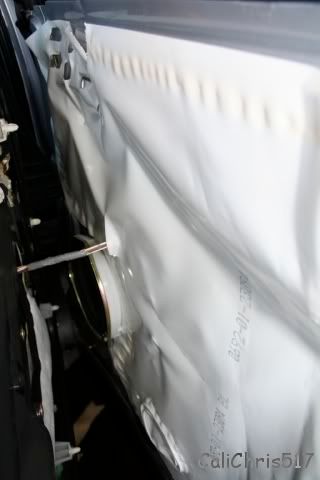
Removing a door panel (just in case you don�t know)
1. Use a Philips screw driver to remove the two screws.
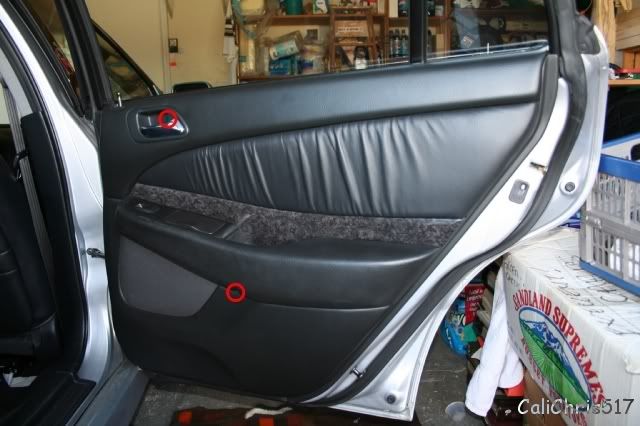
2. Pop the door handle out by pushing it to the left.
3. Disconnect the rear of the handle and the harness.
4. Pull the door panel toward yourself to pop it out, then push it up. Then, unplug the remaining window control harness.
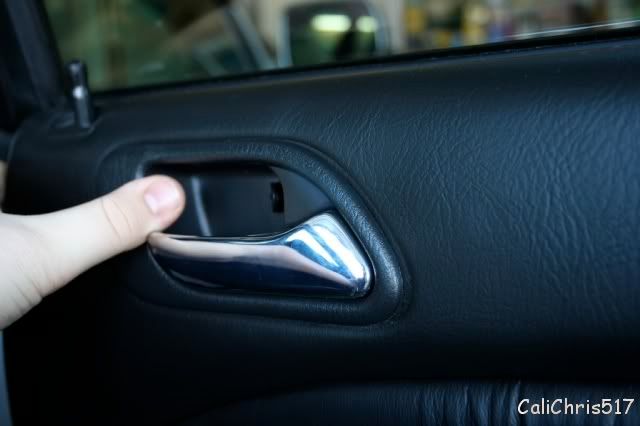
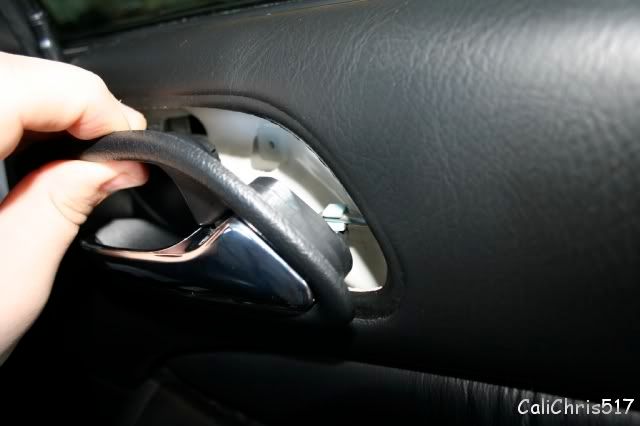
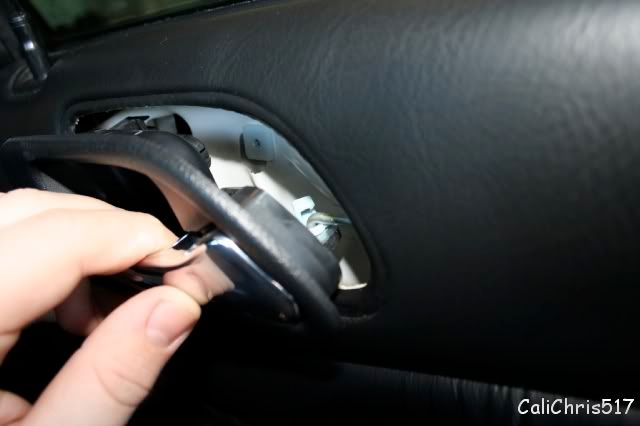
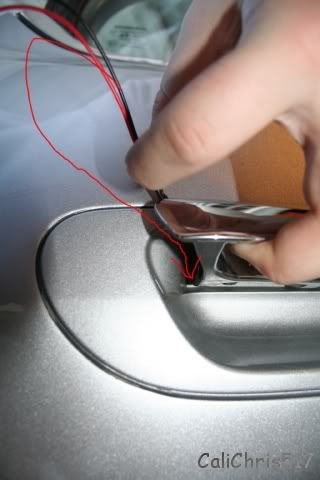
Putting the LED into the handle
Run the wires through the slot under the door handle. The LED shouldn�t be able to slide through this slot, but you can use clear silicon to secure the LED if you like later. Then run the wires inside the door (see pics).


Once the wires are somewhat inside the door, you need to reach in and pull them tight.
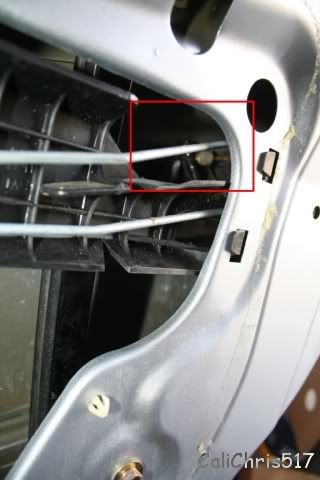
^the red box is where they should be
You will probably have to use both hands, push/jumble the wires from the outside and pull them at the same time on the inside. After they are inside and in place, make sure your door handle goes all the way down and work right, if it doesn�t just play with the wires until it works right.
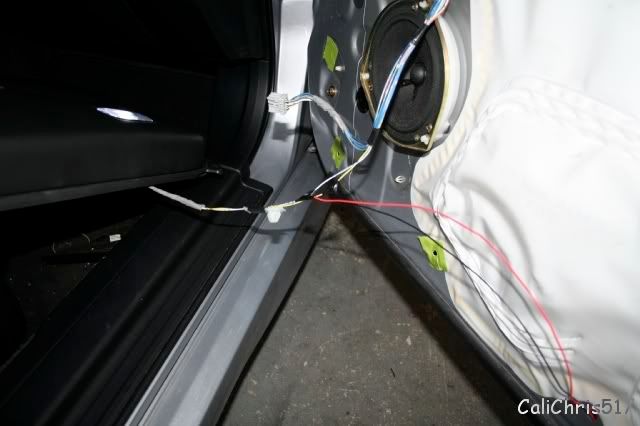
Powering the LED (passenger side front door)
I tapped into my front door light.
The two wires you are going to tap into are:
white wire with blue stripe and repeating 2 silver marks (POSITIVE / RED).
yellow wire with repeating 2 silver marks is (NEGATIVE /BLACK)

Powering the LED (driver side front door)
The two wires you are going to tap into are:
White wire w/ blue stripe and 2 repeating silver marks (POSITIVE)
Yellow wire w/ blue stripe and 2 repeating silver marks (NEGATIVE)
Powering a back door LED
Since the back doors don�t have door lights, you are going to have to run your own power wires. I wanted to run the wires in the rubber but its much harder than it looks.

After you have the wires to this point, you need to remove these 4 trim pieces. They all pop off.
I couldn�t remove trim piece 2, so I pried up the edge enough to get the wire under it.
Run the wires to the passenger side fuse box, just leave them there for now.
Sorry I don�t have many pics of this, but its pretty self explanatory.
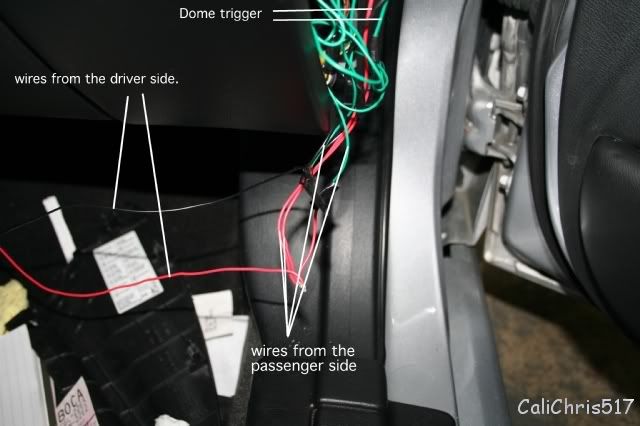
Wiring a front door to the dome trigger (front passenger side)
The reason we are tapping into the dome trigger is so that when you press the unlock button on your remote, the leds light up. They also fade in and out with the dome light.
The wires you tapped into inside the door come into the car. On the passenger side they are in this harness.
unscrew the harness
remove the connector that comes from the door
Find two wires and tap into them. Use about 7-10 inches of wire.
The wires you are looking for are:
White wire w/ blue stripe and 2 repeating silver marks
Solid yellow wire and 2 repeating silver marks.
You will be wiring these wires to the dome trigger.
Wiring a front door to the dome trigger (front driver side)
On the driver side the harness is a little different. All the harnesses plug into a panel. You may have to remove 2 harnesses to get to the one that comes from the door.
The two wires you are looking for are:
White wire w/ blue stripe and 2 repeating silver marks(Positive)
Yellow wire w/ blue stripe and 2 repeating silver marks(Negative)
Use about 7-10 inches of wire. You can connect the positive and negative to the positive and negative from the driver side rear door.
Wiring everything to the dome light
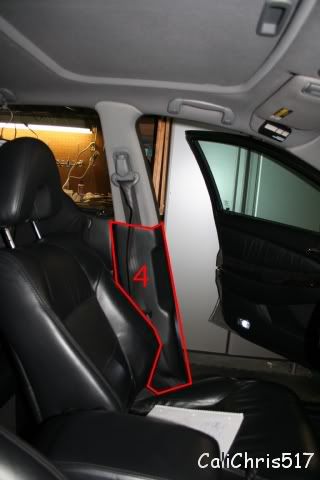
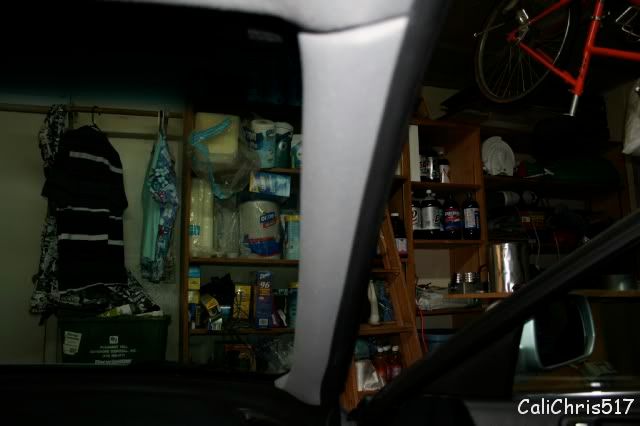
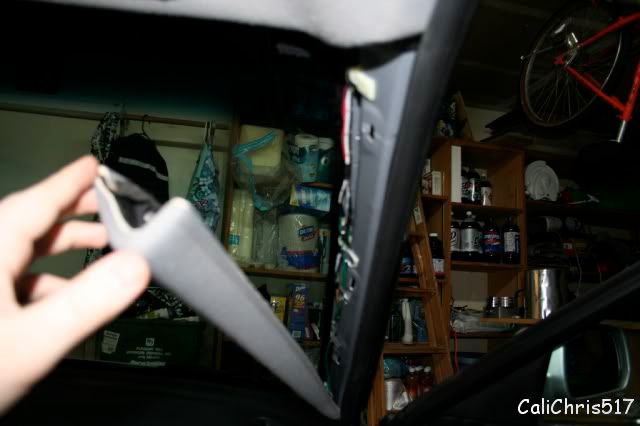
Pop the front passenger side window pillar off
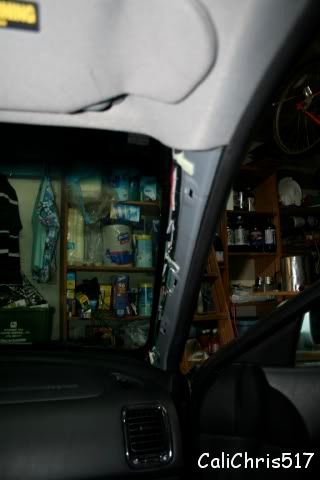
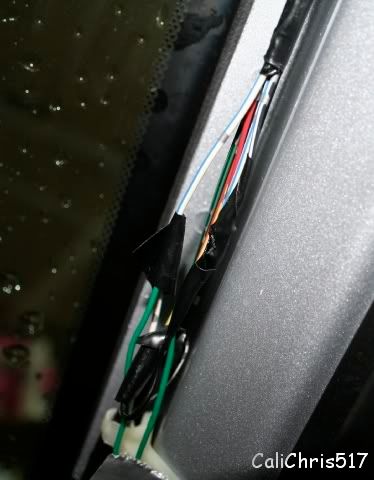
Tap into the dome trigger wires.
The two wires you are looking for are:
Black wire w/ white stripe and 2 silver repeating marks (NEGATIVE)
White wire w/ blue stripe and 2 silver repeating marks (POSITIVE)
NOTE: there are two black wires, make sure you get the right one.
Send the wire down to the passenger side fuse box area.
Hide all the wired under the dash.. zip ties or duct tape work well.
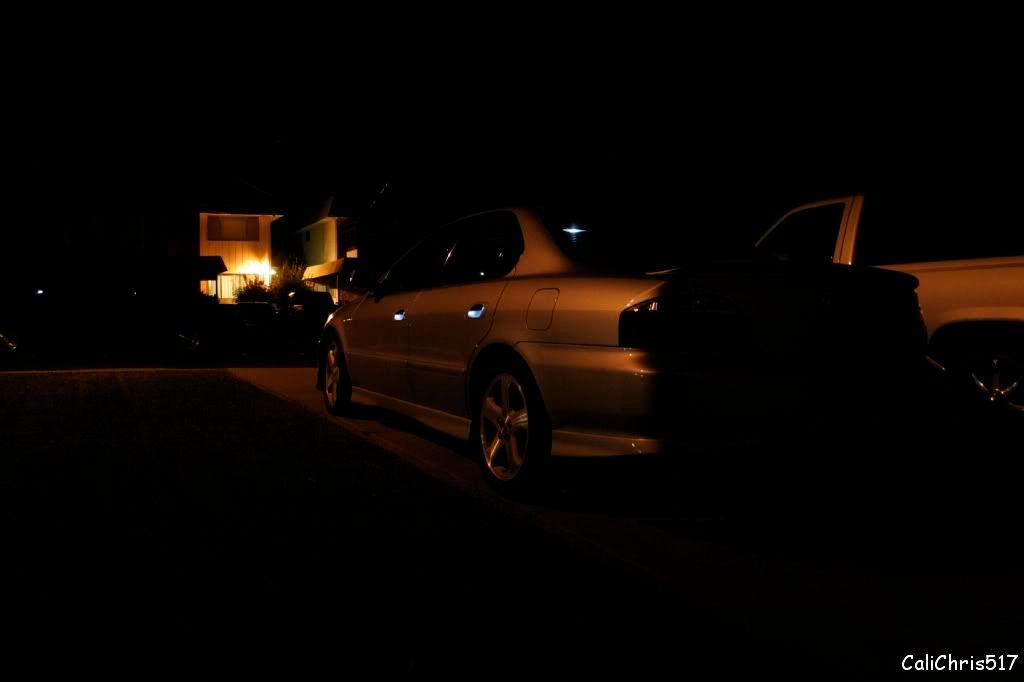
Here is the finished product-
One thing I would like to add: Along the way, my interior light fuse blew out. It was a 7.5 amp fuse. When I went to radio shack to get a new one, they only have 10 amp fuses. So I ended up getting the 10 amp fuse, everything works fine now. I am not sure if the 7.5 amp fuse couldnt handle the LEDs or if I just messed up on something.
If you need help with something, I will try to help as best I can.
Soldering iron
Solder
Wire(I think I used 20 gauge)
Wire cutters/strippers
Shrink tube
Lighter
Liquid electrical tape
Electrical tape
Needle nose pliers
9v battery and leads(to test your work)
LEDs
Resistors (you can use a multimeter to determine the correct resistor)
Multimeter(helpful but not required)
Philips screw driver
Dremel (or something else to flatten LEDs)
LED Prep:
1. Flatten the tips of the LEDs. I used a glass grinder since my mom is into stained glass and it just happened to be handy, but you can use a Dremel. I recommend doing all 4 at the same time.
2. cut the LED down to size. Don�t forget which end is positive and which is negative. The longer is positive and the shorter is negative.
3. solder the resistor to the positive end of the LED
4. solder on about 8-12 inches of wire, don�t get positive(red) and negative(black) mixed up.
5. now you need to seal up all exposed wire, for this I used liquid electrical tape, then shrink tube. Warning liquid tape is flammable. To shrink, shrink tube, you need a flame.
I found that putting a flame to liquid tape (after it was applied to the wires) causes to to harden up quicker and create a good seal.
after you apply liquid tape, put the shrink tube on. Then shrink it.
6. I then wrapped the shrink tube in electrical tape to hold it all together.
Finished product should look like this-
Removing a door panel (just in case you don�t know)
1. Use a Philips screw driver to remove the two screws.
2. Pop the door handle out by pushing it to the left.
3. Disconnect the rear of the handle and the harness.
4. Pull the door panel toward yourself to pop it out, then push it up. Then, unplug the remaining window control harness.
Putting the LED into the handle
Run the wires through the slot under the door handle. The LED shouldn�t be able to slide through this slot, but you can use clear silicon to secure the LED if you like later. Then run the wires inside the door (see pics).
Once the wires are somewhat inside the door, you need to reach in and pull them tight.
^the red box is where they should be
You will probably have to use both hands, push/jumble the wires from the outside and pull them at the same time on the inside. After they are inside and in place, make sure your door handle goes all the way down and work right, if it doesn�t just play with the wires until it works right.
Powering the LED (passenger side front door)
I tapped into my front door light.
The two wires you are going to tap into are:
white wire with blue stripe and repeating 2 silver marks (POSITIVE / RED).
yellow wire with repeating 2 silver marks is (NEGATIVE /BLACK)
Powering the LED (driver side front door)
The two wires you are going to tap into are:
White wire w/ blue stripe and 2 repeating silver marks (POSITIVE)
Yellow wire w/ blue stripe and 2 repeating silver marks (NEGATIVE)
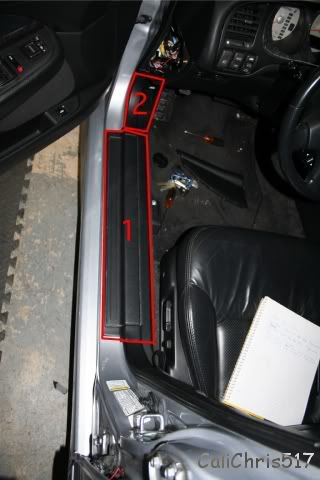
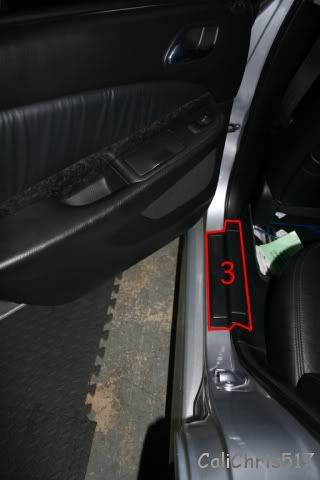
Powering a back door LED
Since the back doors don�t have door lights, you are going to have to run your own power wires. I wanted to run the wires in the rubber but its much harder than it looks.
After you have the wires to this point, you need to remove these 4 trim pieces. They all pop off.
I couldn�t remove trim piece 2, so I pried up the edge enough to get the wire under it.
Run the wires to the passenger side fuse box, just leave them there for now.
Sorry I don�t have many pics of this, but its pretty self explanatory.
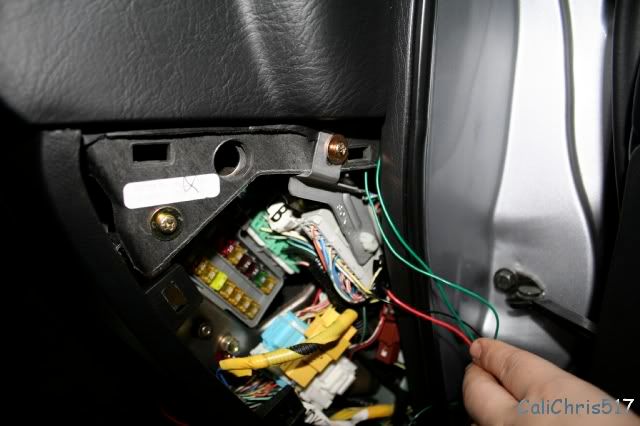
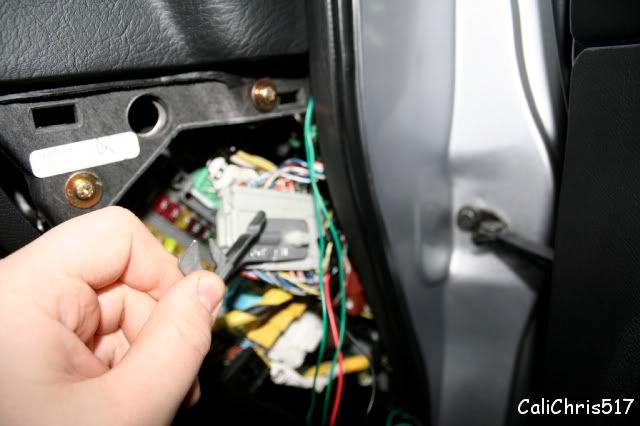
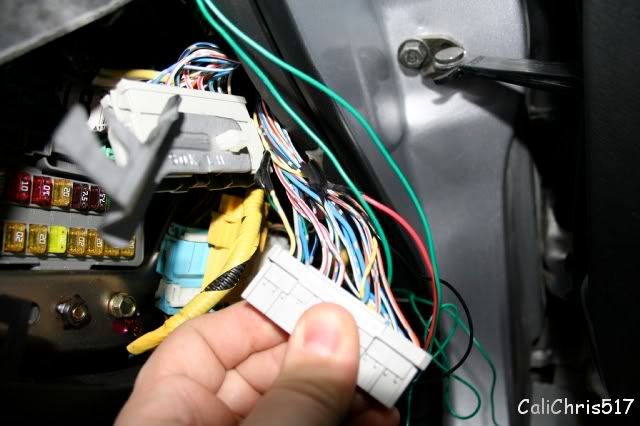
Wiring a front door to the dome trigger (front passenger side)
The reason we are tapping into the dome trigger is so that when you press the unlock button on your remote, the leds light up. They also fade in and out with the dome light.
The wires you tapped into inside the door come into the car. On the passenger side they are in this harness.
unscrew the harness
remove the connector that comes from the door
Find two wires and tap into them. Use about 7-10 inches of wire.
The wires you are looking for are:
White wire w/ blue stripe and 2 repeating silver marks
Solid yellow wire and 2 repeating silver marks.
You will be wiring these wires to the dome trigger.
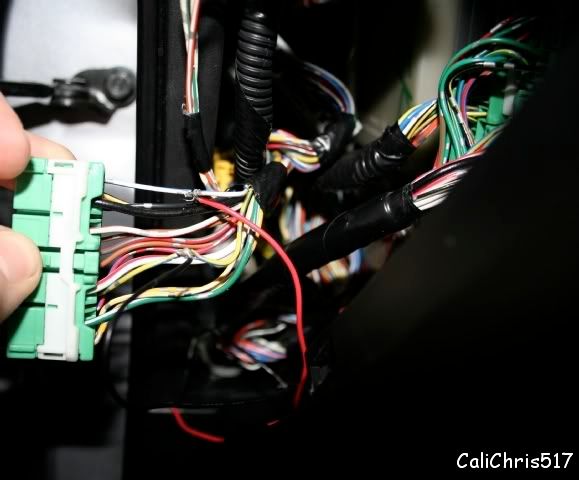
Wiring a front door to the dome trigger (front driver side)
On the driver side the harness is a little different. All the harnesses plug into a panel. You may have to remove 2 harnesses to get to the one that comes from the door.
The two wires you are looking for are:
White wire w/ blue stripe and 2 repeating silver marks(Positive)
Yellow wire w/ blue stripe and 2 repeating silver marks(Negative)
Use about 7-10 inches of wire. You can connect the positive and negative to the positive and negative from the driver side rear door.
Wiring everything to the dome light
Pop the front passenger side window pillar off
Tap into the dome trigger wires.
The two wires you are looking for are:
Black wire w/ white stripe and 2 silver repeating marks (NEGATIVE)
White wire w/ blue stripe and 2 silver repeating marks (POSITIVE)
NOTE: there are two black wires, make sure you get the right one.
Send the wire down to the passenger side fuse box area.
Hide all the wired under the dash.. zip ties or duct tape work well.
Here is the finished product-
One thing I would like to add: Along the way, my interior light fuse blew out. It was a 7.5 amp fuse. When I went to radio shack to get a new one, they only have 10 amp fuses. So I ended up getting the 10 amp fuse, everything works fine now. I am not sure if the 7.5 amp fuse couldnt handle the LEDs or if I just messed up on something.
If you need help with something, I will try to help as best I can.

The following 3 users liked this post by Topher707:
 03-02-2007, 10:41 AM
#7
05 Acura TL: a-spec
Thread Starter
You're all welcome. Im glad I can give back to the community after taking so much. haha. I never knew how hard it was to write a DIY.. took maybe half the time it took me to figure out how to do the LED project.
done
Originally Posted by ThreePointTwoTeeEl
Put it in the DIY Mod Sextion.
Trending Topics
03-02-2007, 11:09 AM
#12
05 Acura TL: a-spec
Thread Starter
Originally Posted by ThreePointTwoTeeEl
I get 30% off, HOLLA! Thanks
03-02-2007, 11:53 AM
#14
Prick of the month
Originally Posted by CaliChris517
Find two wires and tap into them. Use about 7-10 inches of wire.
The wires you are looking for are:
White wire w/ blue stripe and 2 repeating silver marks
Solid yellow wire and 2 repeating silver marks.
You will be wiring these wires to the dome trigger.
Wiring a front door to the dome trigger (front driver side)
On the driver side the harness is a little different. All the harnesses plug into a panel. You may have to remove 2 harnesses to get to the one that comes from the door.
The two wires you are looking for are:
White wire w/ blue stripe and 2 repeating silver marks
Yellow wire w/ blue stripe and 2 repeating silver marks
Use about 7-10 inches of wire. You can connect the positive and negative to the positive and negative from the driver side rear door.

Could you label them? Thanks.
03-02-2007, 12:31 PM
#16
Originally Posted by 02TLSfan
Here you don't specify which wires are positive and negative. I would assume top is positive and bottom is negative because that's the pattern so far, but you change the order in the next step.
Could you label them? Thanks.
Could you label them? Thanks.
03-02-2007, 12:49 PM
#17
Prick of the month
Originally Posted by AMGala
I'm pretty sure he's using red for positive and black for negative.
03-02-2007, 03:26 PM
#19
05 Acura TL: a-spec
Thread Starter
my bad...
The two wires you are looking for are:
White wire w/ blue stripe and 2 repeating silver marks(pos)
Yellow wire w/ blue stripe and 2 repeating silver marks(neg)
The two wires you are looking for are:
White wire w/ blue stripe and 2 repeating silver marks(pos)
Yellow wire w/ blue stripe and 2 repeating silver marks(neg)
03-02-2007, 04:23 PM
#23
2Poor 2Furious

Join Date: Sep 2003
Location: Berkeley, CA
Age: 44
Posts: 1,022
Likes: 0
Received 0 Likes
on
0 Posts
nice writeup! so for the LED mounting, did you use silicon sealant or something to hold it in place, or does it just wedge in there? That's pretty sweet that there's already holes for routing the wiring.
03-02-2007, 04:32 PM
#24
Prick of the month
Originally Posted by CaliChris517
my bad...
The two wires you are looking for are:
White wire w/ blue stripe and 2 repeating silver marks(pos)
Yellow wire w/ blue stripe and 2 repeating silver marks(neg)
The two wires you are looking for are:
White wire w/ blue stripe and 2 repeating silver marks(pos)
Yellow wire w/ blue stripe and 2 repeating silver marks(neg)
03-04-2007, 12:56 AM
#28
alright so the day he made the DIY public is the same day my LEDs and Resistors came in the mail and is the same day I started on this (Started=10 PM Ended=4:30 AM). I did The Front And Rear Right Doors and drivers door. Saturday I did the rear left door. I had to redo the front doors cause I didnt think about the windows and the cables were basically in the way of the windows when they go down so i fixed that. Then I did the wiring from the fuse boxes to the Dome light trigger. It took me an hour to figure out why it wasnt working, but its cause on the passenger fuse box, I had to tap into a solid yellow cable, but didnt see that I tapped into a Yellow wire with a white strip. It blended in but I figured it out and its working. This is the first time I take so many things apart in my car. After a while it got annoying taking the door panels off but it was well worth it. Thanks Bro amazing.!!
03-20-2007, 04:10 PM
#33
Prick of the month
Originally Posted by seanranger3
has anybody else done this mod. and do you have any other pics from different angles. maybe straight one the handle from the side.
03-20-2007, 04:20 PM
#34
Prick of the month
Originally Posted by lokee99
Oh yea what size LED did you use and what Ohm rating were the resistors. I cant really see the color band fully to see for my self.
I used 5mm, 10,000mcd white LEds, I suppose you could use 10mm, there would be no way it could come out the back of the slot in the handle but it may be a little over kill, plus you would feel it every time you opened a door. You could use brighter LEDs too but 10,000mcd works great, I can see my car from accross the parking lot. If you have a black car I would suggest brighter because black likes to absorb light.
 03-20-2007, 04:46 PM
#35
Originally Posted by 02TLSfan
You can use 470 or 560 ohm 1/4 watt resistors, I used 470, they will be a little brighter, 560 is technically the right one because the battery while the car is running is closer to 14V, 13.4 or 13.8 I think, not just 12V. 470 ohm will reduce the overall life of the LEDs but only by a few thousand hours, not bad when you consider that most have a life of 100,000 hours or more.
I used 5mm, 10,000mcd white LEds, I suppose you could use 10mm, there would be no way it could come out the back of the slot in the handle but it may be a little over kill, plus you would feel it every time you opened a door. You could use brighter LEDs too but 10,000mcd works great, I can see my car from accross the parking lot. If you have a black car I would suggest brighter because black likes to absorb light.
I used 5mm, 10,000mcd white LEds, I suppose you could use 10mm, there would be no way it could come out the back of the slot in the handle but it may be a little over kill, plus you would feel it every time you opened a door. You could use brighter LEDs too but 10,000mcd works great, I can see my car from accross the parking lot. If you have a black car I would suggest brighter because black likes to absorb light.
03-20-2007, 05:21 PM
#36
Prick of the month
Right now they are just sitting there, causing no problems at all. I intend to seal them only so they don't move, just haven't done it yet. I used liquid electrical tape where suggested, then double shrink wrapped them and sealed the ends of the shrink wrap with glue/sealant, I doubt anything is getting through that.


