Sleeper headers w/stock heat shield DIY
 08-25-2014, 01:21 AM
#1
Intermediate
Thread Starter

Applications: 2nd Gen CL/TLs (maybe more depending how creative you can be).
Time: 1hr
Here is a how-to for anyone that wants to retain the factory heat shield after installing aftermarket headers. Or maybe you want to be able to pop the hood real quick and say, "See it's stock" to lure in a friendly race.
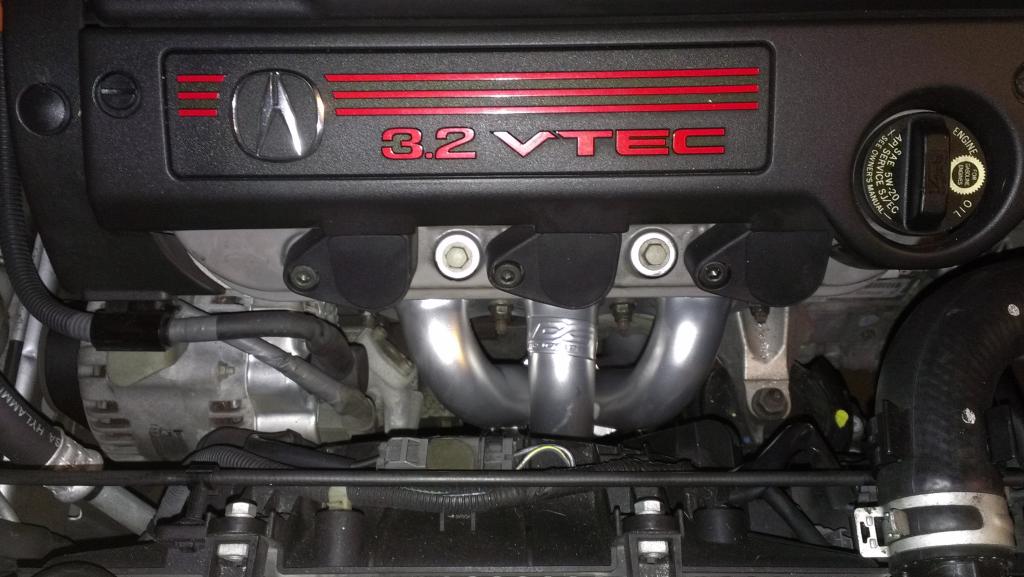
Here's the goal: Aftermarket headers installed BEFORE pic.
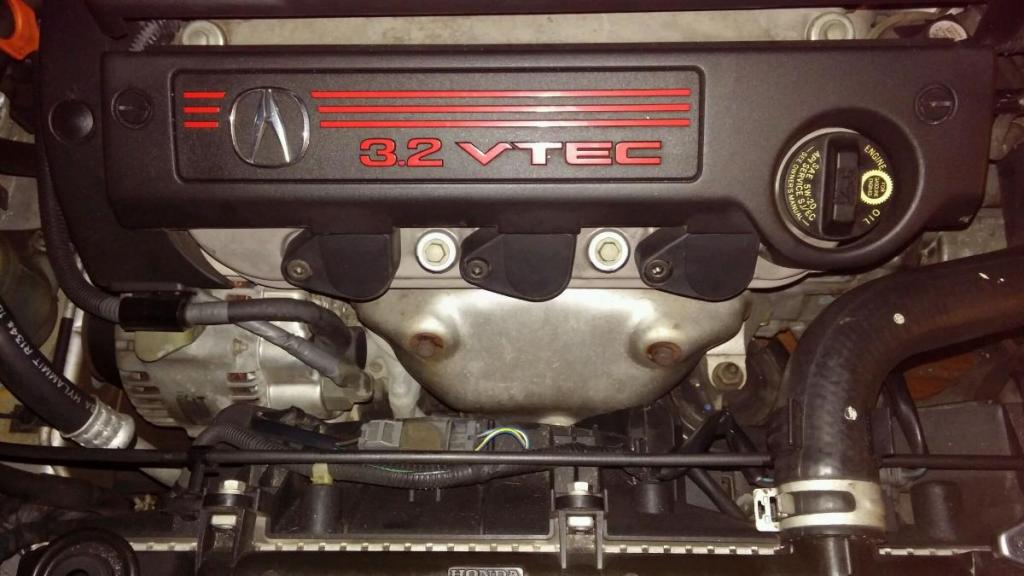
And factory heat shield hiding your headers AFTER pic.
Things you'll need:
1. Your factory heat shield
2. A drill and a 5/16 drill bit
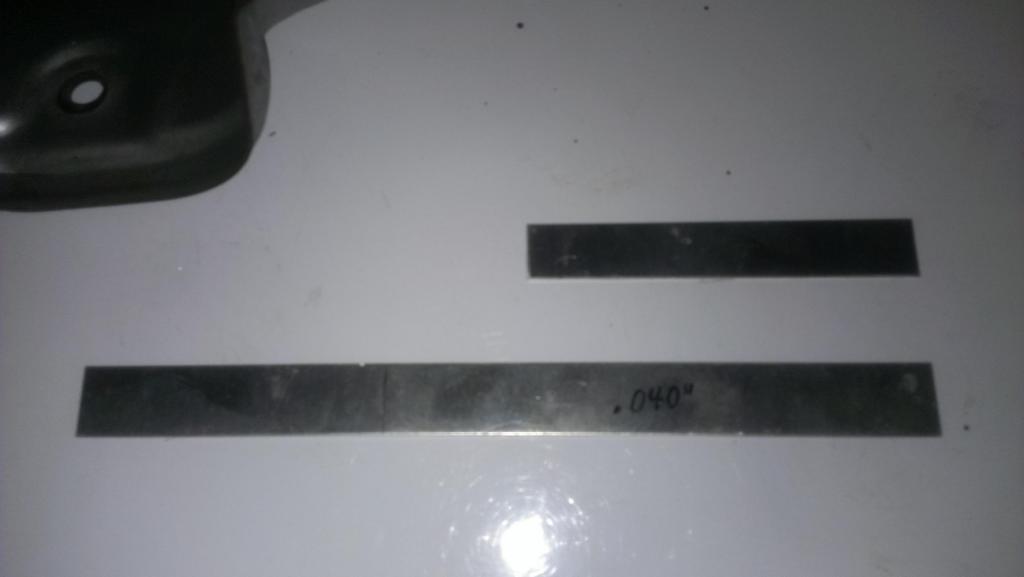
3. .040" thick piece of sheet metal 8"x 1/2" (my local recycling center had this but these can be found at Lowes, Home Depot, or a universal exhaust piece from your local auto parts store will do.)
4. Pliers
5. Tin snips/shears/or a cutting wheel
6. Three nuts to fit the factory heat shield bolts (bring your heat shield bolts to the store for thread sizing.)
7. Three factory heat shield bolts
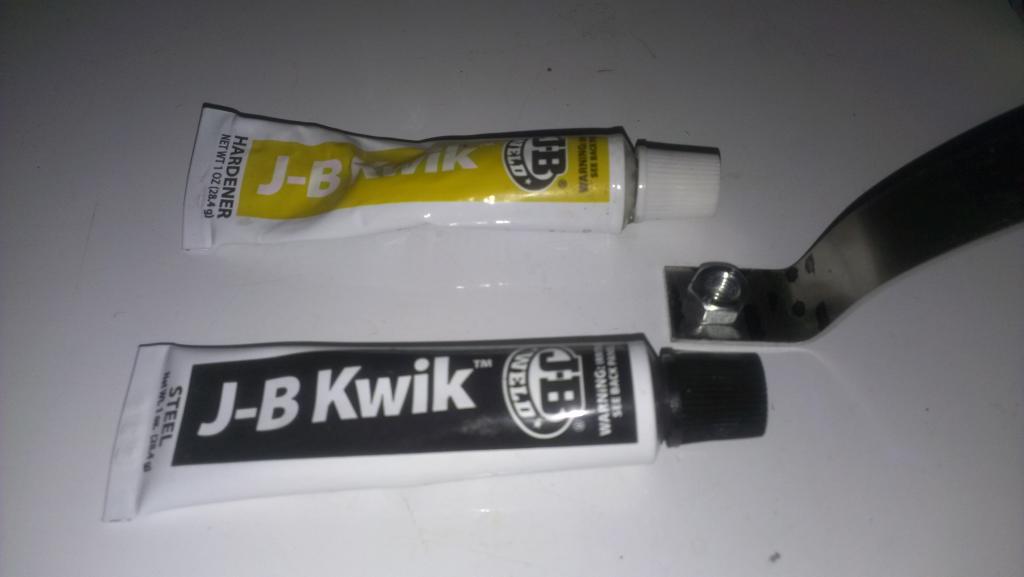
8. JB Kwik Weld (preferred) or regular JB Weld
9. PB Blaster or other lubricating penetrant
Things to know:
Your factory heat shield will not fit over your aftermarket headers. Only the bottom half -around the merged area- needs to be widened 1.5-1.75" to clear your aftermarket headers. You can do this a couple of ways: With a vise and a rubber mallet is one. But I don't have a sweet table and vise setup so I used my feet. Step on one corner then the other, then both and it flattens surprisingly nice. Test fit it under your hood by sliding at an angle from right to left in between your radiator and your headers. It will be snug but should clear your alternator and radiator fine. Expect a slight tilt at the bottom of the heat shield toward your radiator fans.
Next up is your sheet metal piece (or whatever else you found to use).
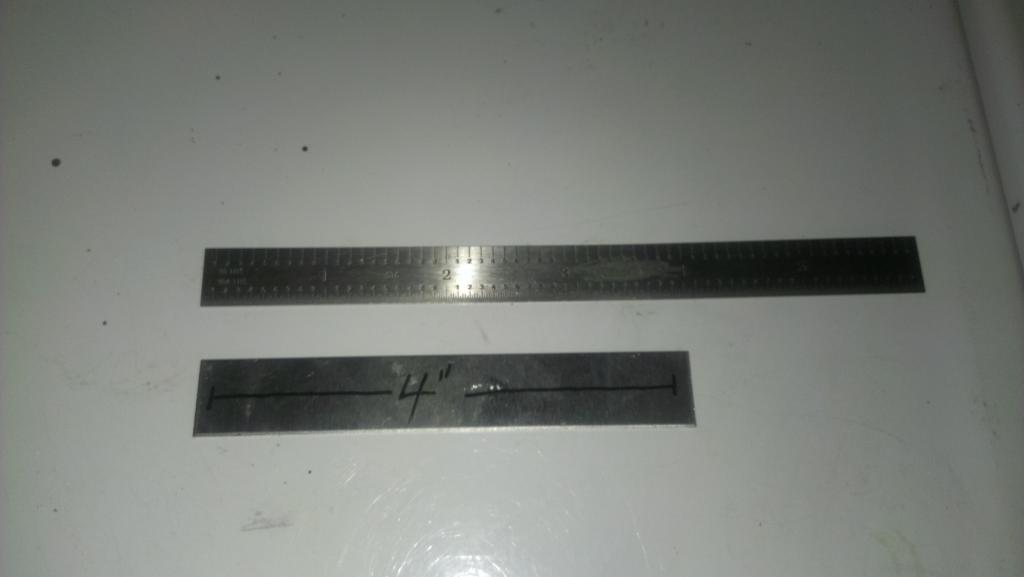
I cut mine into two 4" pieces by a half inch wide.
Next take your heat shield and lay it face down. You're going to use it as a templete to make your brackets to hold the heat shield.
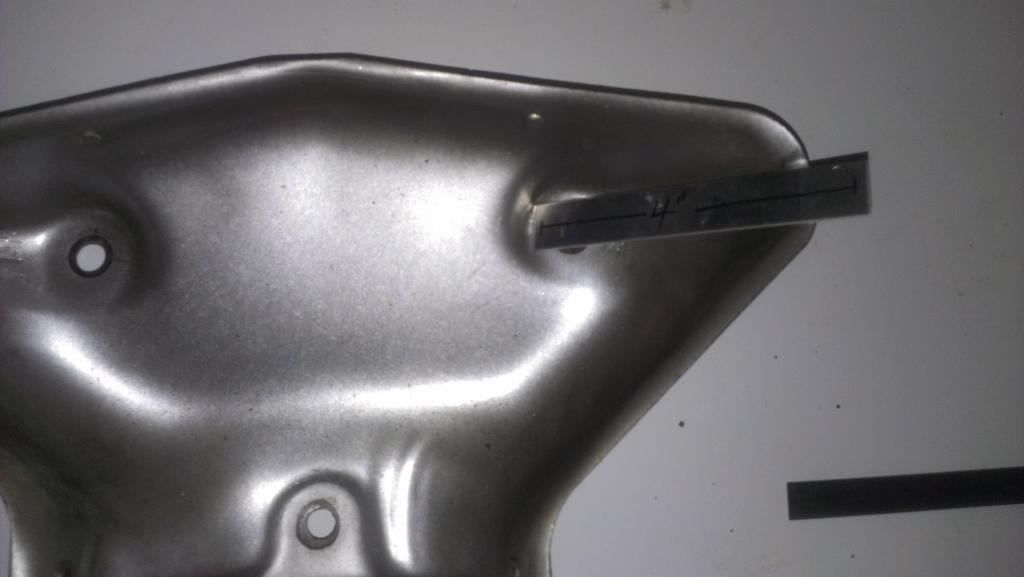
The heat shield has roughly a 45 degree bend. Grab your pliers and from the left go in about 1" and clamp down. Use your other hand to bend your angle.
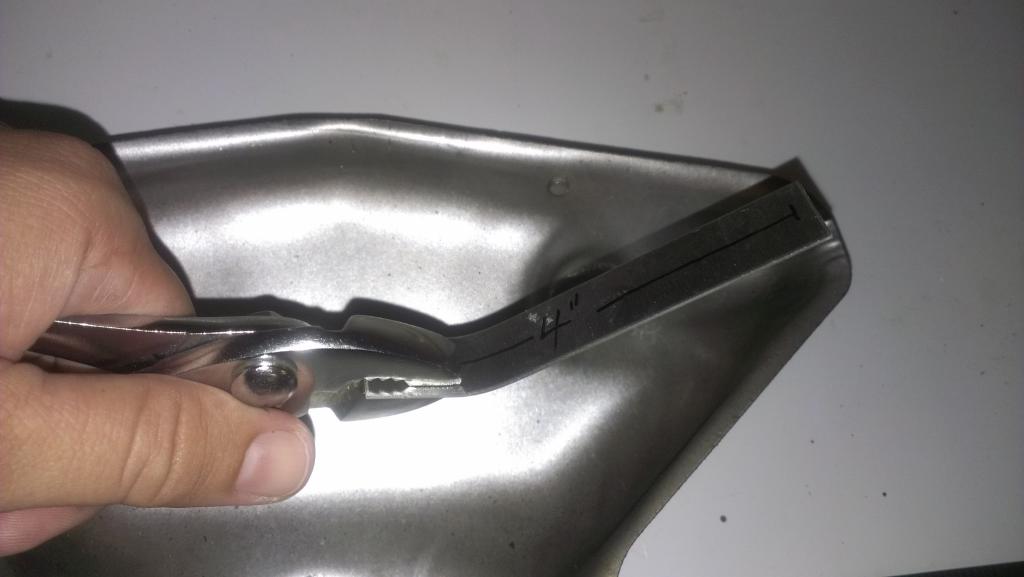
Next give the metal a slight vertical bend to begin making your flange.
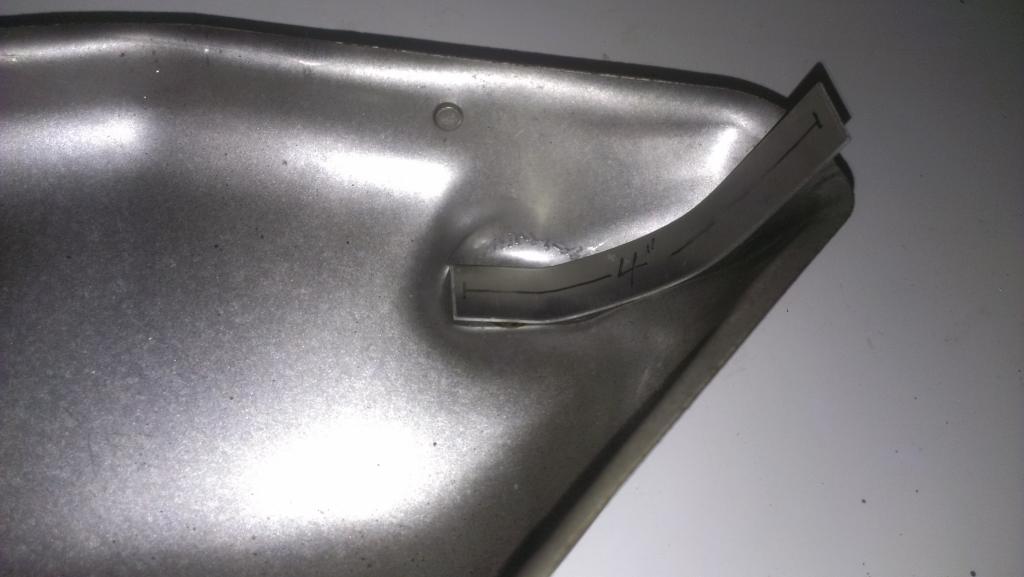
Now make your flange by bending with the pliers and mark your 5/16 bolt holes. Drill your 5/16 bolt holes. It helps to make a small pilot hole first or to use a step down drill bit.
Now is a good time to PB Blast your factory heat shield bolts or run a wire wheel over the threads to make sure they cleanly pass through the nuts.
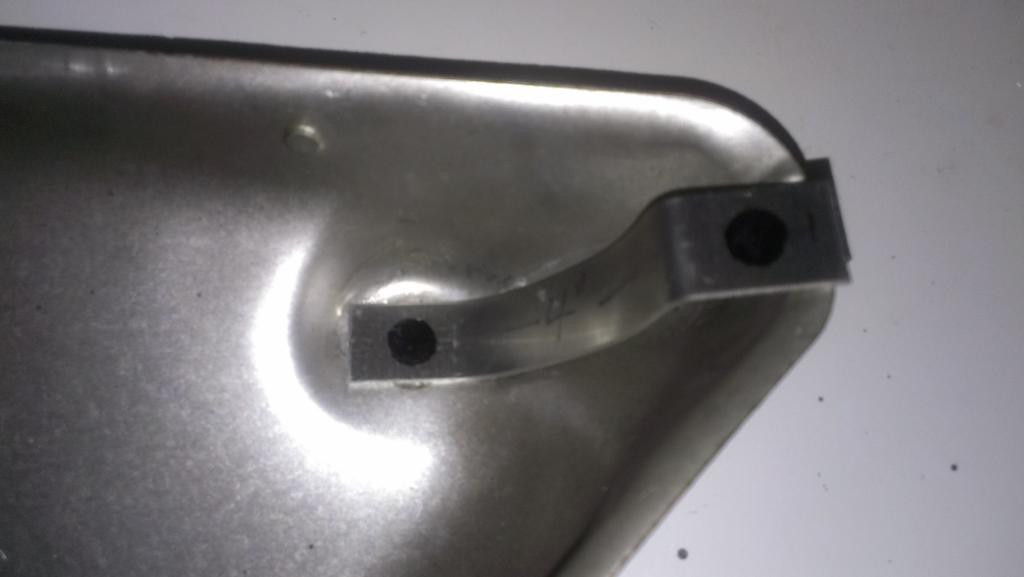
After your bolt holes are drilled, grab the JB Weld. If you have a welder -awesome! Tack weld these babies together and continue on! But if you're like me and don't, use a light coat of JB Weld on the bracket and center the nut over the hole while making sure nothing gets on the threads.
Notice the placement of the nut below. We want it to go nut>bracket>heat shield>bolt. NOT bracket>nut>heat shield>bolt.
Now the waiting begins. If you have regular JB Weld I would let it set up overnight. I waited the 4hrs to cure (5hrs acutally) and they spun off when I had them about half torqued. I went to the store and picked up the JB Kwik Weld and let it dry for 1.5-2hrs and it was good to go.
Now that bracket #1 is ready, go ahead and make bracket #2.
You'll notice a 3rd hole towards the bottom of your heat shield. We won't be attaching it to anything, it stays in place fine with two brackets. You can leave it empty or you can install the bolt with a nut behind it to keep it in place. I chose to put the factory heat shield bolt in with a nut to secure it so it looks 100% stock.
Time to attach the brackets to the car!
On the header facing the front of the car you have one nut all the way to the left by the alternator and one nut to the far right by the driver's side. Remove both of these nuts. Place your flange fairly horizontal and tighten down the nuts all the way. (You will have some wiggle room to line up the heat shield bolt holes to your bracket bolt holes.)
Place your heat shield in place. You can use a thin screw driver or a nail to center your heat shield holes with your bracket holes. Once one is lined up, loosely thread a heat shield bolt in 2-3 threads. Line up your second bolt hole and tighten. Then finish tightening your first bolt.
Now you should have something that looks like this! This pic was shot from underneath the driver's side of the car and shows how the brackets bolt into the factory location with the heat shield installed.


Time: 1hr
Here is a how-to for anyone that wants to retain the factory heat shield after installing aftermarket headers. Or maybe you want to be able to pop the hood real quick and say, "See it's stock" to lure in a friendly race.
Here's the goal: Aftermarket headers installed BEFORE pic.

And factory heat shield hiding your headers AFTER pic.

Things you'll need:
1. Your factory heat shield
2. A drill and a 5/16 drill bit
3. .040" thick piece of sheet metal 8"x 1/2" (my local recycling center had this but these can be found at Lowes, Home Depot, or a universal exhaust piece from your local auto parts store will do.)
4. Pliers
5. Tin snips/shears/or a cutting wheel
6. Three nuts to fit the factory heat shield bolts (bring your heat shield bolts to the store for thread sizing.)
7. Three factory heat shield bolts
8. JB Kwik Weld (preferred) or regular JB Weld
9. PB Blaster or other lubricating penetrant
Things to know:
Your factory heat shield will not fit over your aftermarket headers. Only the bottom half -around the merged area- needs to be widened 1.5-1.75" to clear your aftermarket headers. You can do this a couple of ways: With a vise and a rubber mallet is one. But I don't have a sweet table and vise setup so I used my feet. Step on one corner then the other, then both and it flattens surprisingly nice. Test fit it under your hood by sliding at an angle from right to left in between your radiator and your headers. It will be snug but should clear your alternator and radiator fine. Expect a slight tilt at the bottom of the heat shield toward your radiator fans.
Next up is your sheet metal piece (or whatever else you found to use).
I cut mine into two 4" pieces by a half inch wide.


Next take your heat shield and lay it face down. You're going to use it as a templete to make your brackets to hold the heat shield.

The heat shield has roughly a 45 degree bend. Grab your pliers and from the left go in about 1" and clamp down. Use your other hand to bend your angle.

Next give the metal a slight vertical bend to begin making your flange.

Now make your flange by bending with the pliers and mark your 5/16 bolt holes. Drill your 5/16 bolt holes. It helps to make a small pilot hole first or to use a step down drill bit.

Now is a good time to PB Blast your factory heat shield bolts or run a wire wheel over the threads to make sure they cleanly pass through the nuts.
After your bolt holes are drilled, grab the JB Weld. If you have a welder -awesome! Tack weld these babies together and continue on! But if you're like me and don't, use a light coat of JB Weld on the bracket and center the nut over the hole while making sure nothing gets on the threads.
Notice the placement of the nut below. We want it to go nut>bracket>heat shield>bolt. NOT bracket>nut>heat shield>bolt.
Now the waiting begins. If you have regular JB Weld I would let it set up overnight. I waited the 4hrs to cure (5hrs acutally) and they spun off when I had them about half torqued. I went to the store and picked up the JB Kwik Weld and let it dry for 1.5-2hrs and it was good to go.

Now that bracket #1 is ready, go ahead and make bracket #2.
You'll notice a 3rd hole towards the bottom of your heat shield. We won't be attaching it to anything, it stays in place fine with two brackets. You can leave it empty or you can install the bolt with a nut behind it to keep it in place. I chose to put the factory heat shield bolt in with a nut to secure it so it looks 100% stock.
Time to attach the brackets to the car!
On the header facing the front of the car you have one nut all the way to the left by the alternator and one nut to the far right by the driver's side. Remove both of these nuts. Place your flange fairly horizontal and tighten down the nuts all the way. (You will have some wiggle room to line up the heat shield bolt holes to your bracket bolt holes.)
Place your heat shield in place. You can use a thin screw driver or a nail to center your heat shield holes with your bracket holes. Once one is lined up, loosely thread a heat shield bolt in 2-3 threads. Line up your second bolt hole and tighten. Then finish tightening your first bolt.
Now you should have something that looks like this! This pic was shot from underneath the driver's side of the car and shows how the brackets bolt into the factory location with the heat shield installed.


Last edited by KR3J//; 08-25-2014 at 01:34 AM.

 08-25-2014, 10:35 AM
#4
Intermediate
Thread Starter
There's two approaches to performance mods:
Guy #1) Hides nothing and pops his hood. You can see probably 90% of his mods without much effort and there's most likely polished/chrome parts and colored wire looms snaked throughout the engine bay. After a meet or two everyone knows what kind of parts he has and he probably unknowingly scares off a race or two by doing it.
Guy #2) Likes going fast too. He looks stock and probably sounds stock. He surprises other cars he races and they often ask what is done to the car. Put on your poker face and say "it's stock with 1XX,XXX miles." No more running through your mods list at the next stop light thumbs' up/convo. You'll love the surprised/baffled look on someone's face when you pop your hood and they stand there scratching their head wondering how they lost. And best of all you won't scare off any would be racers that have had a look at your engine.
Most of the cars I've built have been like Guy #1 (well, minus the colored wire looms).
What I like about my CL-S is that it's a car that most people forgot about and it's quick enough to beat more cars than you'd think. It's low-key and in my opinion a fun sleeper car. This is just taking that idea up a notch.
Last edited by KR3J//; 08-25-2014 at 10:50 AM.

Thread
Thread Starter
Forum
Replies
Last Post
rp_guy
Member Cars for Sale
9
07-16-2017 07:33 AM