When you click on links to various merchants on this site and make a purchase, this can result in this site earning a commission. Affiliate programs and affiliations include, but are not limited to, the eBay Partner Network.
I thought I would make a new build thread since I am getting a lot of work done atm by King Motorsports.
My goal is to make the car as fast around a track and autocross course as possible while still retaining street drivability. This will mean I have to make compromises.
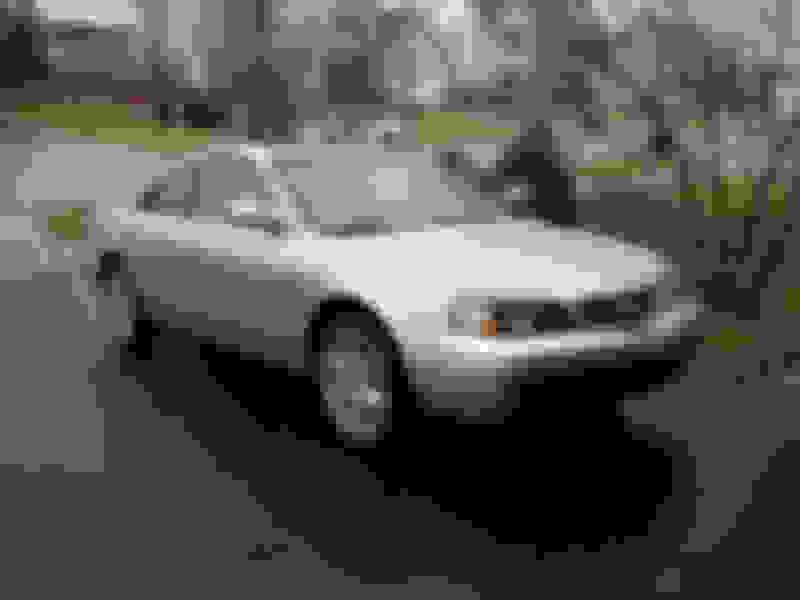
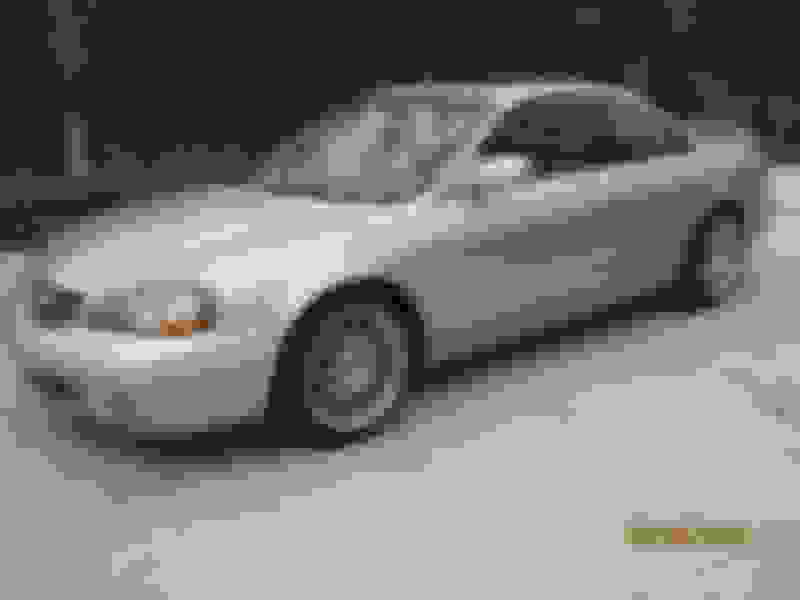
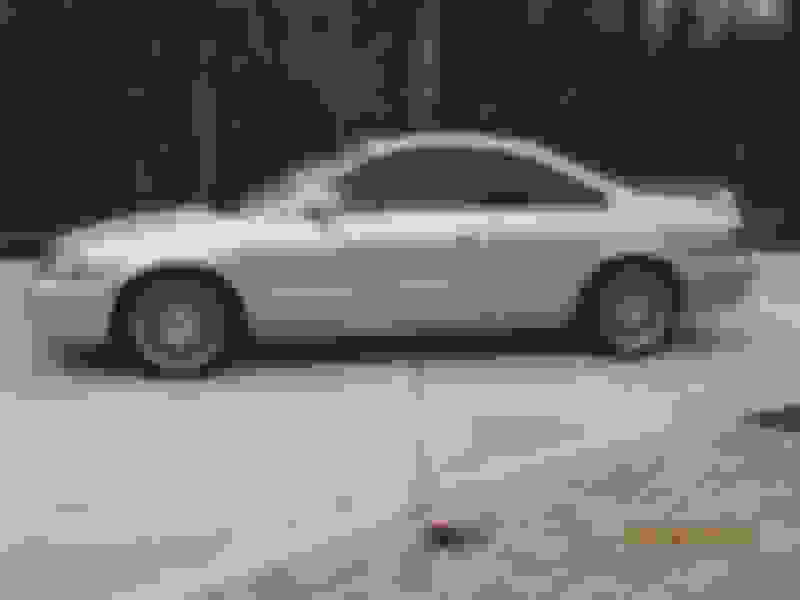
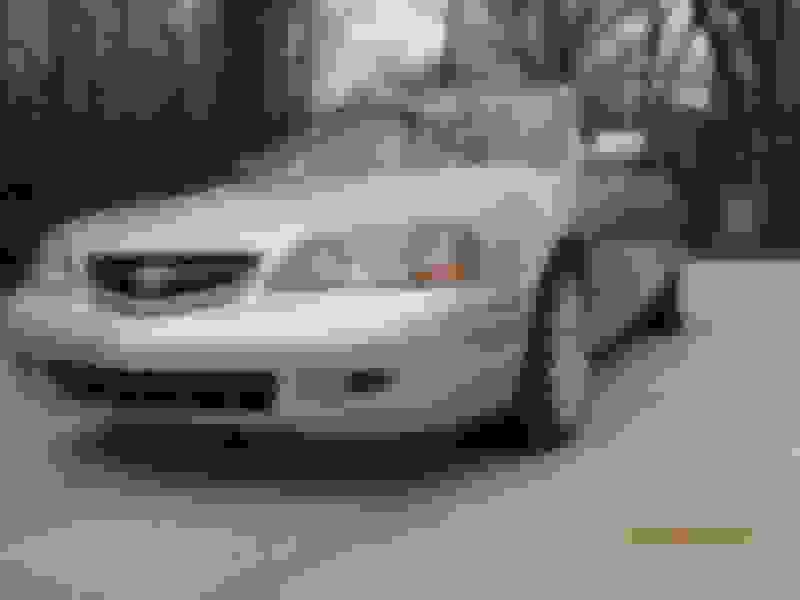
I picked up my CLS6 SSM without Navi NEW on 11/15/02.
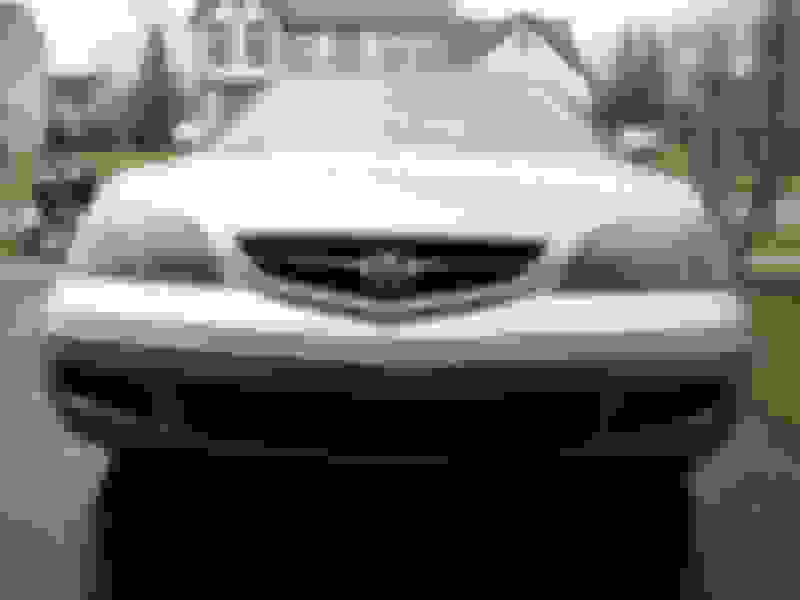
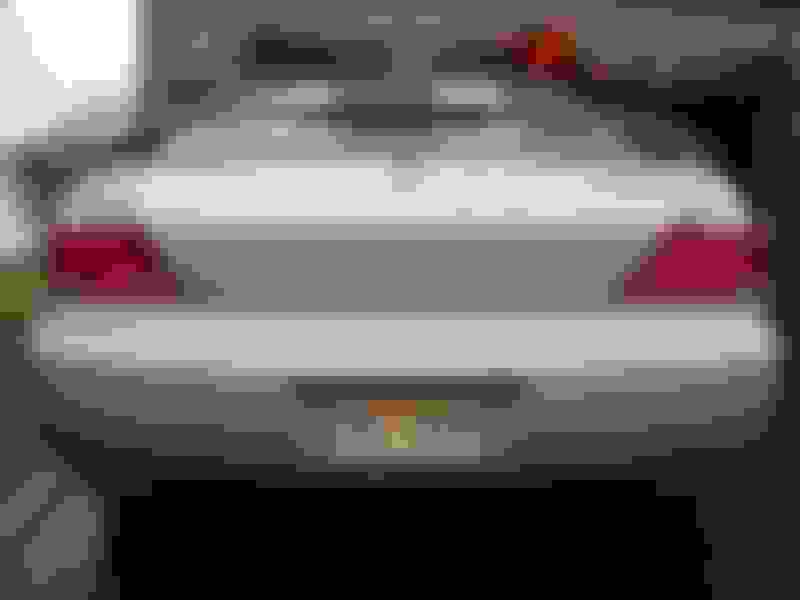
Here are a few pics when new.
I did some minor modding the first 2 years of ownership. Installed Koni/Neuspeed SP3 shocks, Neuspeed sport springs, and SPC camber front/rear.
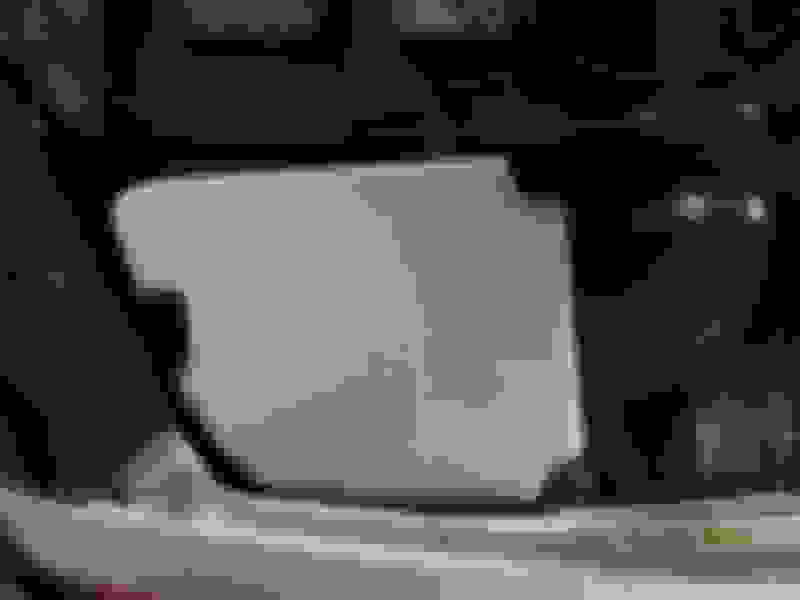
Installed Comptech Icebox. Just recently had my shop paint it though.
Installed Sun Automobile hyper ground kit.
Installed Neuspeed SS Adapter.
I installed the Autovation Pedals from the groupbuy we had in 03 or 04.
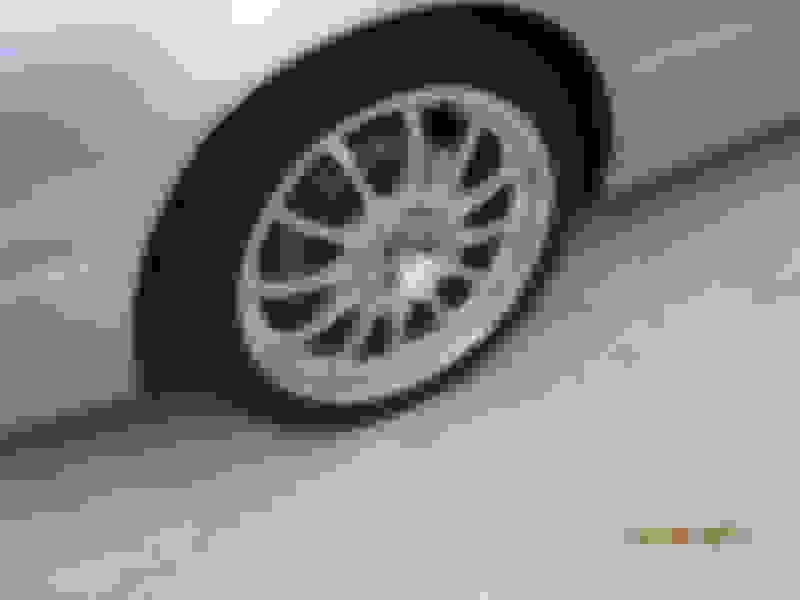
11/09 - I had the lower ball joints and upper control arms for both sides replaced. I bought a set of SSR 18x8.5 Type F wheels from Tirerack on clearance for 46% off at $290 a wheel( i was looking recently for a replacement and the cheapest i could find new still is over $500 each). I also bought a set of the Hankook Ventus RS-2's on clearance for $350 for the set shipped.
11-3-09 Installed Option under-drive pulley and belts.
I decided it was time to get the car fixed/painted. At first i was just gonna try to do as little as possible but that ended up going more and more extreme till the whole car was repainted besides the spoiler, side skirts, and mirrors.
Dropped car off 12-7-09 and got it back sometime in January.
I had them paint that strip above the doors where the sticker is flat black on both sides. I had them paint the wing in the front grill, and the emblem is from the NSX with graphite background. I removed OEM fog covers, cut the back off, painted them body color, then added mesh backing. I bought the mesh from mcmasters and cut it and bent it around the back so it cups the vent to stay on better and glued it. I also had them paint my icebox cover.
Some pics after painting.
After I got the car back from the shop i noticed that the quarter panel windows were all scratched up with deep scratches and the chrome was scratched bad. 2-24-10 I had both quarter panel windows replaced with new ones.
2-27-10 Installed Progress rear sway bar and Moog end-links.
3-21-10 Installed Comptech headers.
3-26-10 I had a shop install a 3m paint protection kit and re-tint my windows. For the paint protection kit they covered the whole front bumper, the grill trim, a big section of the hood, mirrors, and a section behind the rear wheels. It came out to 25 square feet of that expensive stuff. For the windows I had them remove the rear window tint that was 20% and redo the whole car in 35% since that is what is legal now. I also got rid of that awful third brake light hole.
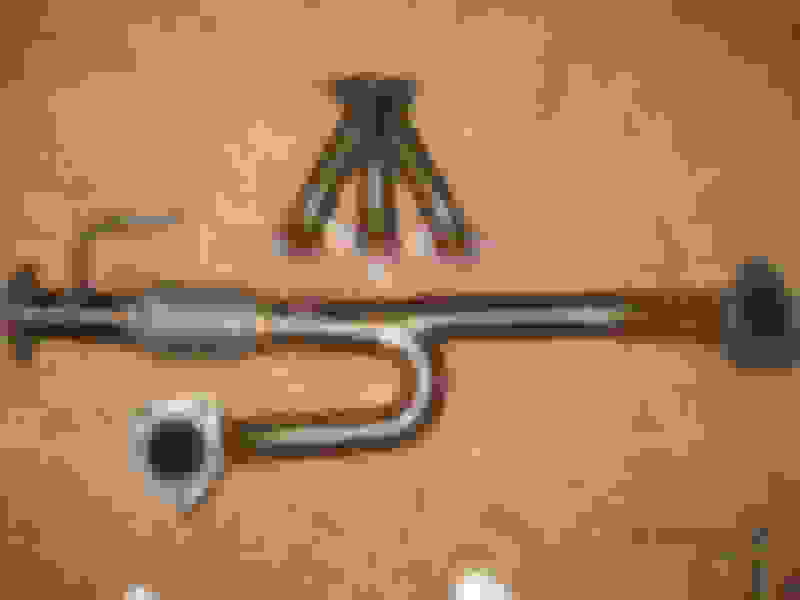
4-7-10 Installed RT cat. Used a universal 2.5" 3 bolt gasket for rear and just used sealant in front for now.
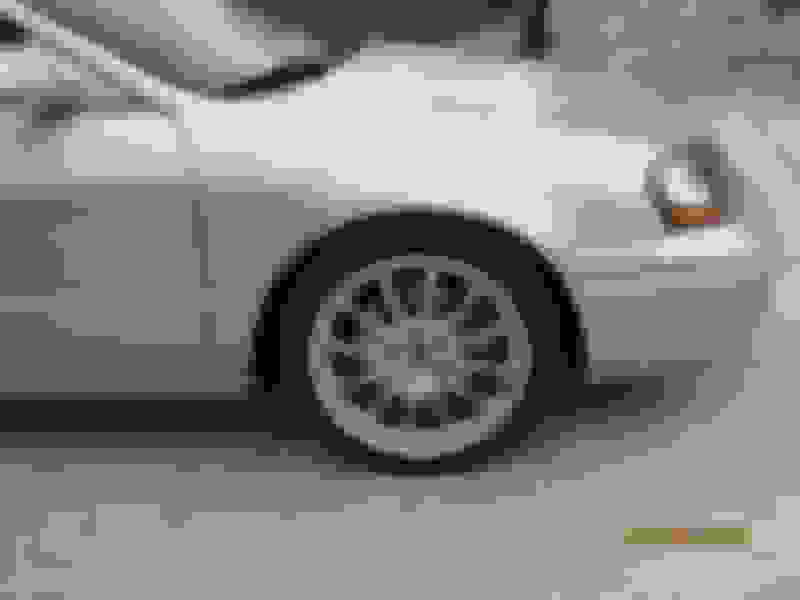
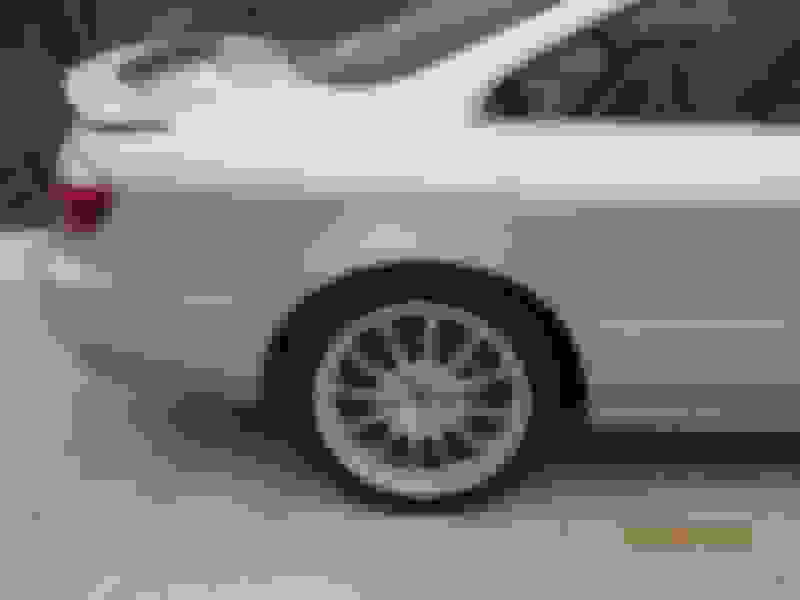
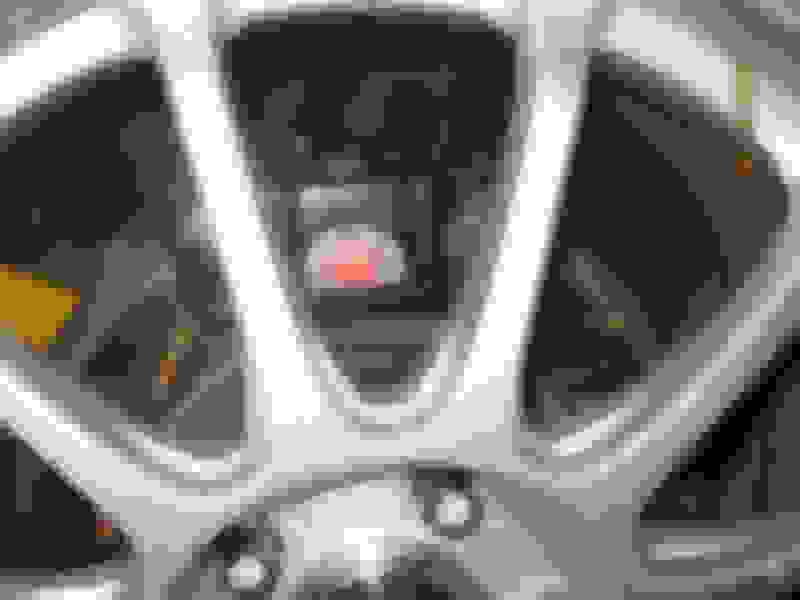
4-8-10 Installed my SSR Type F 18x8.5 Wheels, SSR center caps, Project Kics R26 neo-chrome lugs, Hankook Ventus RS-2 tires and got an alignment.
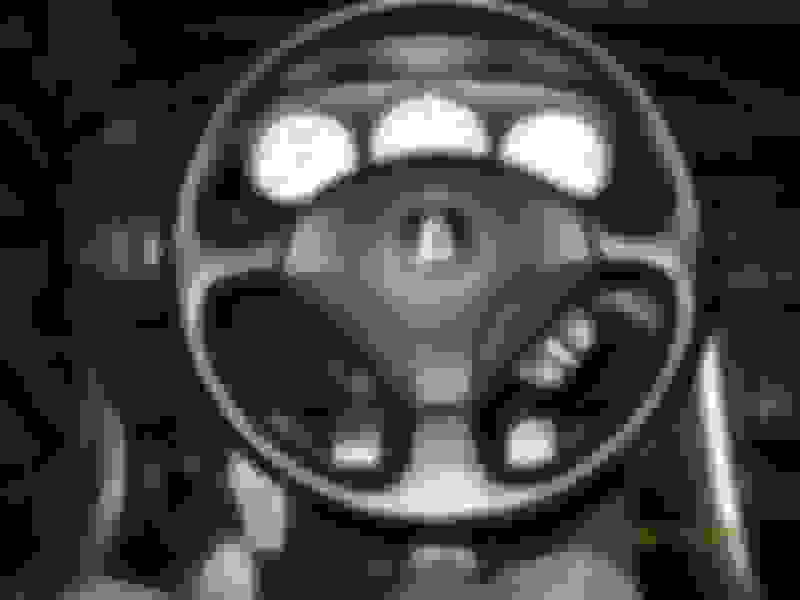
4-12-10 Installed DC5 Momo steering wheel and RSX airbag.
5-5-10 Installed CT mufflers.
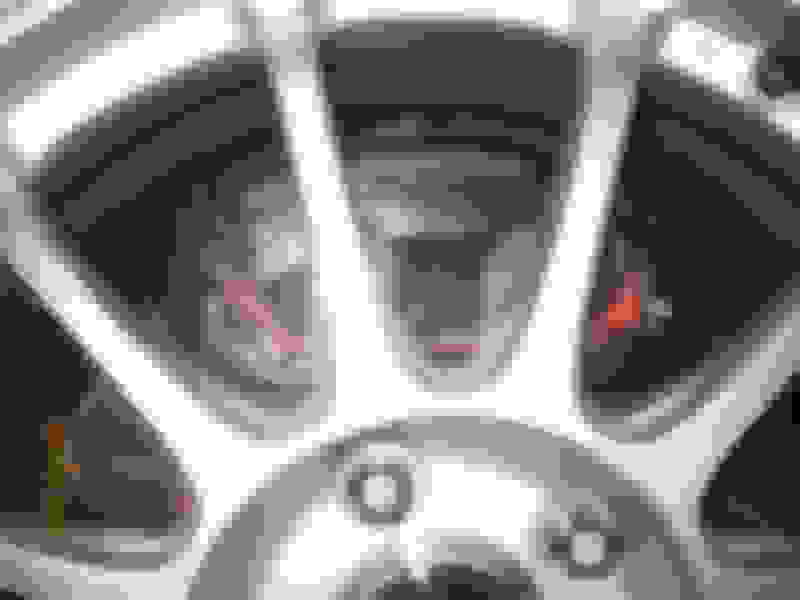
5-27-10 Had Legend calipers, stock rear calipers and the 4 brackets powder-coated satin black and installed.
Installed Comptech Titanium strut bar.
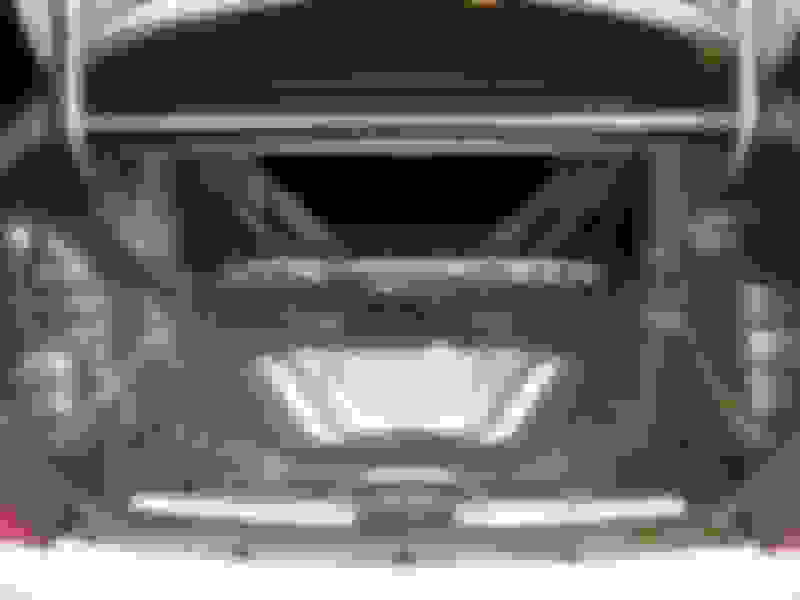
Here is how my trunk/back seat looks now gutted.
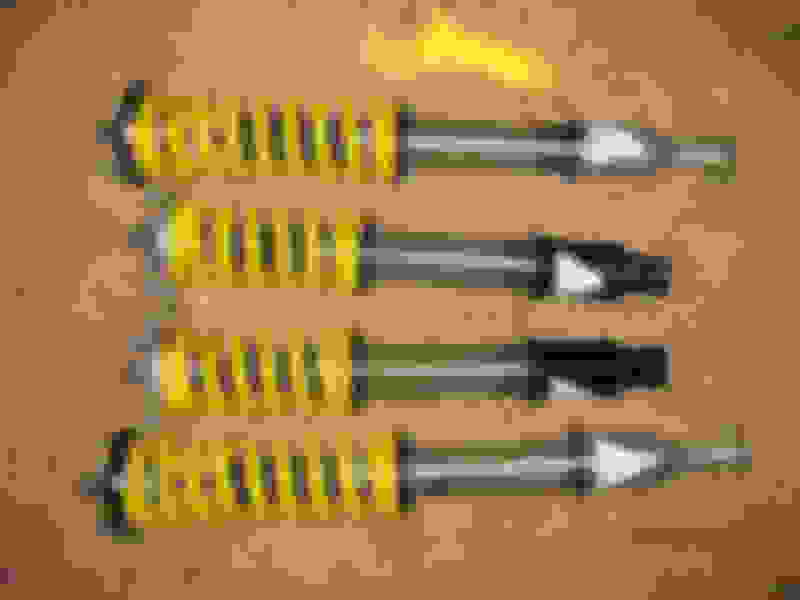
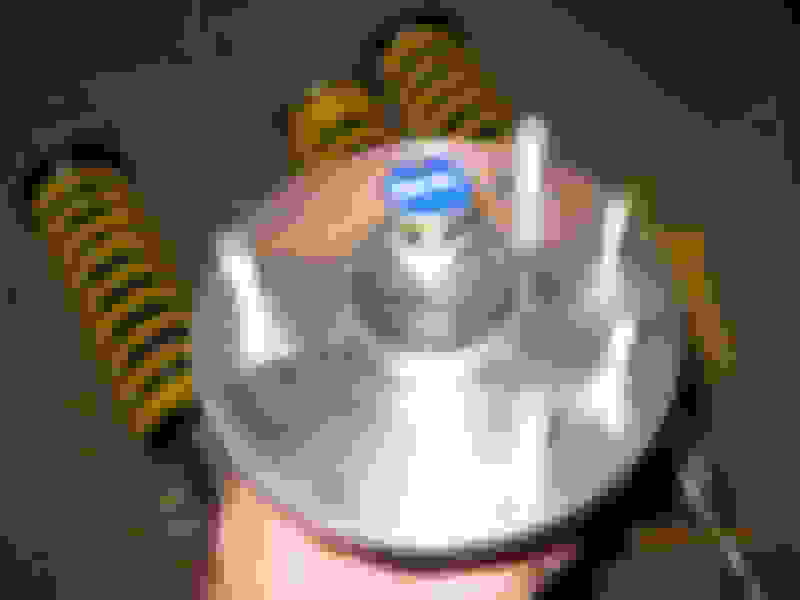
7-3-10 Installed custom valved Zeal Function-T coil-overs and rolled fenders.
7-8-10 Installed Ingalls rear camber kit.
I have also been doing weight savings stuff. I removed the damper on the front bumper beam, 17 lb wheels, lighter strut bar, removed hood and trunk lining, removed plastics under hood, rear seat and console, gutted trunk-spare, tools, jack, amp removed, removed rear seat belts and hardware, lighter lug nuts, etc. Still a work in progress.
8-23-10 Passed 100,000 miles still on original clutch and flywheel.
8-26-10 Replaced my headlight bulbs with Phillips D2R 5000K bulbs.
I bought a set of P2R Plenums for a good price. I sanded them smooth then polished them.
Before sanding and polishing.
After polishing.
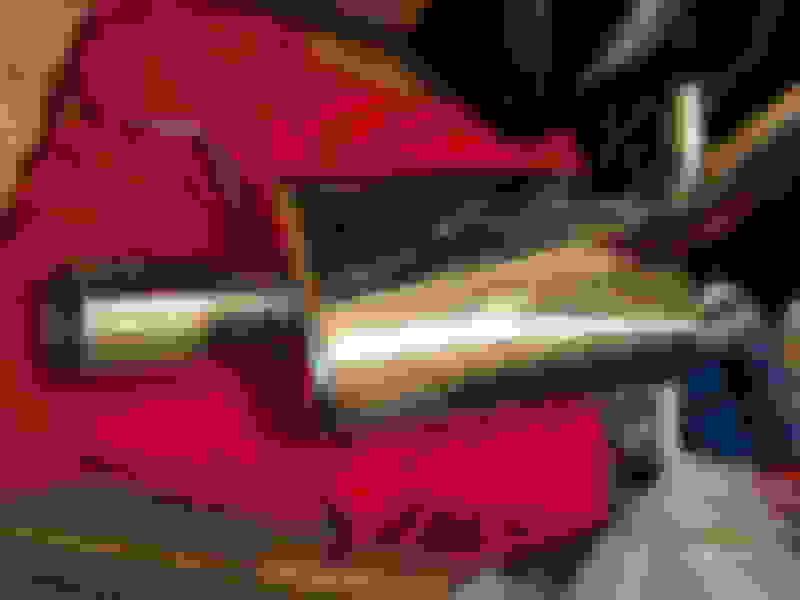
I bought a TB bored by Maxbore from a forum member for $150. I decided to polish it.
12-13-10 I finally bought the service manual.
1-23-11 Purchased OEM JDM Honda oil cap found on Civic Type R.
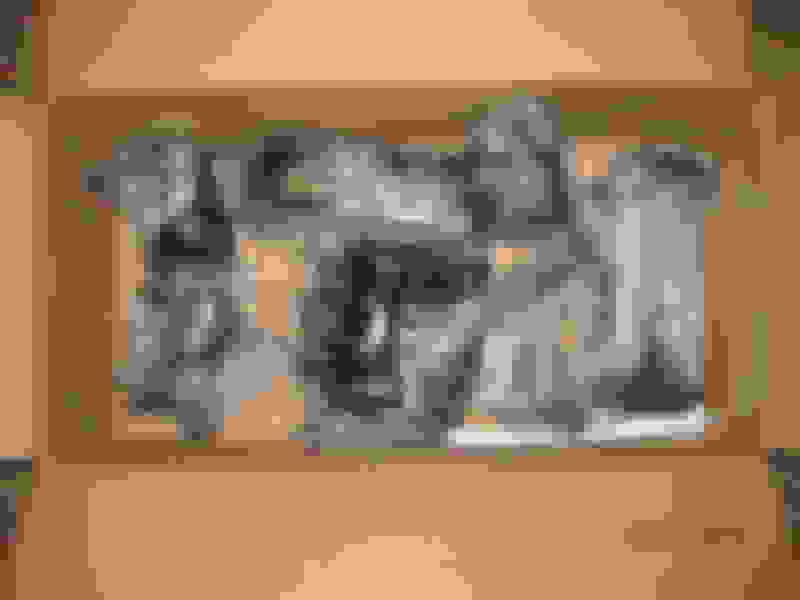
Here is a pic of my bored tb, P2R TB spacer, P2R thermal gaskets, ported & polished IM and runners from P2R race accord, and P2R plenums.
2-1-11 Received my Braille 15 lb battery. Here is the size difference.
2-9-11 Installed the Braille battery with the Braille horizontal mount. The Acura battery weighed 38.5 lbs, so this saved me 23.5 lbs and that weight is lower and more centered.
2-10-11 2 teaser pics. Items courtesy of brianlin87, thnx
Bolted up 01 MDX intake horns to IM.
IMRC welded up.
Purchased Takata harness and shoulder pads.
4-13-11 Installed Hybrid Racing shifter cable bushings.
hmmmm, What are the benefits of deleting the butterfly?
In for more progress
A little less weight, one less thing that can break, better flow through the IM for slight gains at high rpm. You might lose some torque below 2500 rpm but I am not concerned about that.
4-29-11 Installed my hub, quick release and steering wheel today. The stock wheel plus airbag is pretty heavy at 8.5 lbs.
4-30-11 Removed the cruise control items from the engine bay. They weighed a whopping 2.5 lbs.
I took out my front bumper vents to remove the grill backing so i can send that along with some other parts to get powder coated. These pics show how I mounted them.
5-6-11 Had Timing Belt Service done at shop I use Project X Customs.
5-9-11 Installed Eibach front sway bar, Moog endlinks, Cusco tie-bar, and the UR 4point brace today. It went fairly smooth. The UR brace(made for accord) does need some slight modifying to fit on the cl. On the driver side of the car, there is an extra rail that is not on the passenger side. This rail has edges that stick down/out more. This gets in the way of the UR bar. I had to grind off some metal from one end, then I also ground down the lip on the rail where it was in the way of the bar.
5-26-11 Installed Mugen thermostat, fan switch, and radiator cap.
radiator cap 19045-XGER-0000
thermostat 19301-XGMR-0000
fan switch 37760-XK5-00N0
6-16-11 Bought a EGR spacer from Paul and also a Go-Pro.
6-29-11 Installed a braided stainless steel clutch line, removed the clutch dampening device, and installed modded slave cylinder with check valve deleted. The car shifts better/smoother now, especially the 2-3 and 3-4 gear changes at high RPM's. You can feel it engaging quicker.
7-10-11 Installed the Pspec short shifter and went for a short drive. Throws seem shorter than with Neuspeed adapter and a little more crisp/smooth plus a little less play. Only issue I noticed is that with it in lower positions your hand hits the hand brake when you shift into 5th, 6th, or reverse.
8-05-11 Started removing more of the interior. Carpet removal in progress. The carpet weighs 23 lbs.
8-6-11 I started removing the sound deadening.
8-7-11 Removed driver side front seat belt. It weighs 4.5 lbs.
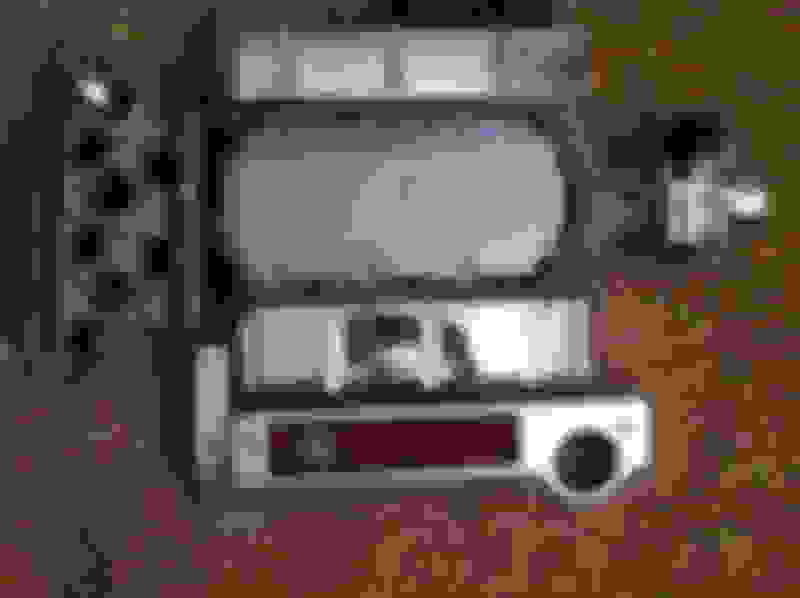
Removed the audio system and navi.
Test fit driver seat.
9-2-11 More work removing sound deadening. Using a heat gun to heat deadening helps with removal. Then I used a plastic chisel and rubber mallet. I cut out the rear seat a/c ducting. 34 lbs removed.
I removed all of the tar residue and some of the yellow sealant that was used to hold the sound deadening down. I used Turtle wax label and sticker remover. The only things I really notice when driving after removing it is that you can hear road debris more and the exhaust sounds louder in the cabin(I actually like it this way).
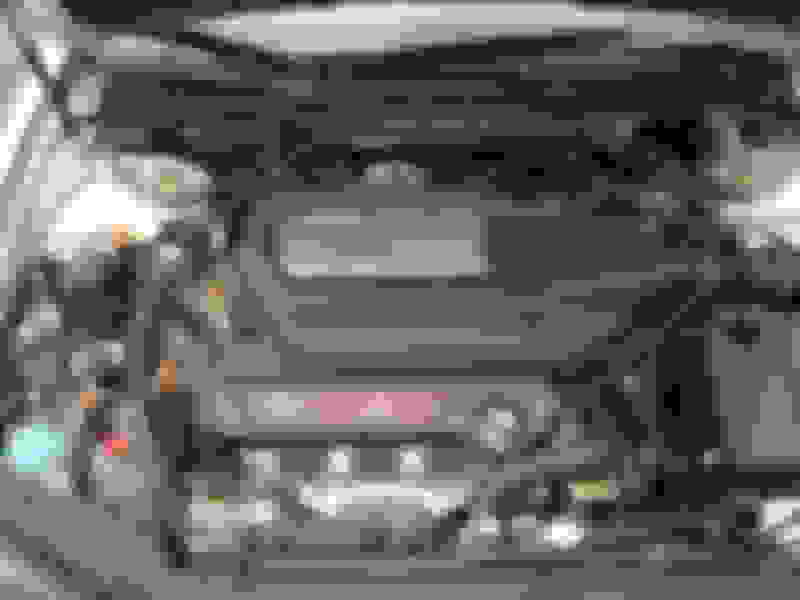
10-3-11 I steam cleaned the engine bay and scrubbed/went over all the rubber/plastic with engine bay dressing.
I have been working on removing rust from the engine bay and underneath the car also. To remove rust from the engine bay I used a dremel, wire brushes, and Griot's rust remover gel. The parts that were rusted where it was painted I cleaned up and painted with touch up paint.
The manual gearshift lever was caked in rust and was easily noticeable every time I opened the hood with my smaller size battery so I decided to clean that up and also scrubbed the transmission clean.
Here is the gearshift lever after over a week of soaking in the rust remover gel and scrubbing clean. It is ready for primer.
Primed.
Painted
I removed and replaced some of the brackets and bolts in the engine bay. I replaced the bolts and washers with stainless hardware. The bolts are socket head type.
Some of the removed brackets and bolts.
These pics show some of the replaced brackets and hardware.
10-23-11 The engine work is basically finished. Only thing left to do is install the Stiffy mount but I need to powder coat brackets first.
Here is list of what was done.
- Valve Adjustment
- 08 TL-S exhaust valve springs installed(over-rev protection)
- ported runners installed
- ported IM installed
- bored TB installed
- MDX horns installed
- TB spacer installed
- thermal gaskets installed
- P2R Plenums installed
- IMRC and Air Assist delete
- New valve covers installed
- New top plate installed
- EGR spacer installed(prevents exhaust gas from being recirculated into engine)
- XLR8 engine mounts installed
- NRG torque dampers installed
The engine mounts needed some finessing but went in relatively easily. The ct strut bar just barely clears the plenum by a few mm's but once I put the stiffy spacer on there will be more room.
The car does vibrate at idle, its like a free massaging seat.
I took car for a short drive. The vibration at idle from motor mounts would probably bother most people, but not something I care about considering the benefits. I passed someone on a 2 lane road and floored it in 3rd gear from 4k to redline. It feels like a beast on the top end. I also tried a few launches from a stop, which before would just result in wheel hop. I got no wheel hop just tire spin now. The engine just feels much more planted, shifting feels more solid and whole car just feels more connected.
Here are some of the items removed when the engine work was done. I should have weighed the runners, IM, and TB to see how much metal was shaved away.
- IMRC runner & bracket -738g=1.63 lbs
- IMRC control module - 124g=.27 lbs
- Plastic piece under accelerator pedal - 62g=.14 lbs
- Engine mount solenoid control unit - 140g=.31 lbs
- P/S hose bracket - 42g=.075 lbs
Last edited by brian6speed; 10-21-2014 at 07:36 PM.
11-19-11 I removed passenger door panel. I removed the speaker mount holder, some wiring, Dynomax, white plastic, and yellow glue and other residue.
Cleaned up.
What was removed.
I wanted to point out that without the window switch from the passenger door panel armrest you cannot open/control the passenger window even from driver side. I used cable ties and attached it in-between the door wires. I also used 2 3/8" locking cable clips to keep the wires from moving and clanking against the door metal.
11-30-11 I removed the driver door panel, removed left over speaker stuff, sound deadening, and the white plastic and glue. I removed the door light wiring from the harness, and wrapped some parts in duct tape. I wrapped the wires where I mounted the controls to help stiffen the wires up to hold better. I used 2 1/2" cable locking clips to keep cables in place. I basically forced the control unit between the 2 wires then cable tied it up. I used foam tape and foam/felt tabs behind it to stop any movement or noise. I mounted the mirror and trunk latch above the main control and used double sided tape to attach it.
I removed 22 lbs from both doors.
Here is the engine bracket that holds up clutch fluid reservoir etc. after I removed it. I removed all the rust(was alot), primed and painted it. Don't have a pic of it after paint though.
So basically as mufflers go CT are lightest, then OEM, then Tanabe.
Full stock setup would be ~65 lbs. My setup is ~52 lbs. It is also better that the weight of mine is more in the rear also.
Here is a size comparison of the normal and XL Recaro buckets. The back and shoulder area seems the same, the difference is in the butt/leg area and in the height of the top.
3-20-12 Moroso Air/Oil Separator installed.
3-28-12 New brake fluid arrived.
I used velcro for where the seats mount to try and keep from scratching the paint when I remove and put in seats.
Removed the piece of tar sound deadening by driver footwell. It weighs .14 lbs.
Here is the hood insulation and 15 clips. Removed it from storage to throw away. It weighs 1.5 lbs and the clips are 1 gram each.
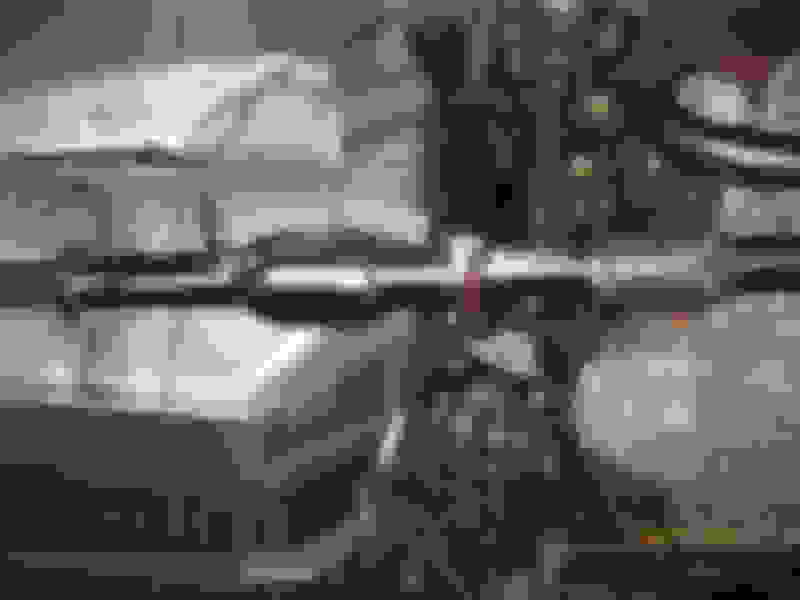
2 more exhaust pics.
I weighed a few OEM items also. OEM front sway and end-links weigh 9.5lbs. Oem strut bar weighs 4 lbs.
4-7-12 Test fit passenger seat with the aluminum recaro side mounts.
4-29-12 Removed the plastic covers from behind the rear seat panels. I found out that there is padding taped onto the inside of the quarter panel behind the plastic. I was sick of them flapping in the wind with windows down. Removed the foam seat belt protectors also.
Weight is pretty miniscule.
White Plastic Covers .29 lbs
Seat Belt Protectors .08 lbs
White Padding .68 lbs
Total 1.05 lbs
4-30-12 Working on making a carbon fiber panel to hold APR universal mirrors.
Driver mirror removed.
Sheet of carbon fiber masking it getting ready for the cutting wheel.
Masked up with paper templates made.
Here is the panel after some sanding. Final sanding still needed to make it fit perfectly.
I decided to reuse the OEM rubber weatherstripping piece that goes behind the mirror panel. I fit the panel to fit perfectly in the groove. Took a lot of fine sanding and refitting to make sure.
Here you can see I am using a exact-o knife to remove the rubber sections that stick up to get it flat for the cf panel.
Next I marked off the mounting holes and drilled them out, then installed it.
Side Mirror Weight
OEM driver mirror 3.33 lbs
APR mirror .68 lbs
-2.65 lbs
5-2-12 Replaced the front brake pads, fluid, front retainers and front shims. Went with EBC Yellowstuff pads, Prospeed RS683 fluid, retainers are ones from autozone when I bought legend calipers and shims are OEM for CL, except for the shim that goes against the pistons I used the OEM Legend one. It seems my brake noise issue is gone.
Adjusted the parking brake from inside cockpit and also from the rear rotors.
Installed rear tie-bar.
Drilled a hole thru the floor/tunnel for my seat belt harness eye-bolt mounting point. Put a washer on the inside and step down washers on the outside. Still need to do the one for passenger side.
5-8-12 Ordered a set of 255/35/18 Dunlop Star Spec tires from Tirerack.
5-9-12 Cleaned up some rust on the floor, primed it, then applied sealant.
Same spot from under car.
Masked up and ready for undercoating.
Repeated procedure on driver side also.
5-10-12 I removed the plastic horn cover. Didn't bother weighing it yet since it isn't much.
Tires arrived today. 255/35/18 Dunlop Z1SS.
Dropped off a few items to get powder-coated. Had them do a single layer satin black. They are the Ingalls Stiffy mount brackets, fog cover vents, and 2 smaller brackets.
5-24-12 Replaced some suspension parts. Don't have any pics though, sorry.
Replaced Parts
-Radius rod bushings with Energy Suspension
-Front lower control arms with OEM
-Inner and Outer tie rods with OEM
-Rear leading arms with OEM
-Rear upper arms with OEM
-Rear Koni shocks with new rubber
-Rear H&R race springs
5-27-12 Ingall's Stiffy mount installed. I bought an extra bracket and cut the end off to use on driver side to even STB out.
Removed that last piece of tar sound deadening under the dash. It weighed .66 lbs.
I drained my Moroso can after approximately 500 miles. Not that much oil came out.
I noticed when I removed the door panels, that I was missing the door handle protectors. The body shop must have not reinstalled or misplaced them when they painted the car. They seem to be fine without them. They weigh .47 lbs.
I have done some work fabricating a switch panel.
Here is paper template and the first test panel I made from aluminum.
The aluminum was too flimsy so I made a new panel from steel.
I want to be able to use my phone for music/navigation without draining its battery. I decided to remove the 12V socket from my OEM console. I cut a hole in my killswitch panel for it. I bought a Duracell 175W pocket power inverter and velcro'ed it down. It has a 12-volt wall socket and a USB. I also painted the panel flat black.
Thought I would post a pic of my TB coolant bypass and also the air assist bypass.
5-28-12 On the P2R TB spacer I sanded the powdercoat off the top section and polished it so the lettering stands out.
Cleaned up the battery wiring slightly.
6-1-12 Ended up removing the J-Pipe section of the Comptech headers to replace the gaskets. For the part that connects to the cat, I bought the gasket from Advance Auto for the generic exhaust for our car. It is not a o-ring compression gasket like the OEM or Comptech gaskets.
I noticed on the Comptech headers, the side that connects to the cat, there is a metal lip that sticks out inside the piping that holds the o-ring gasket in place. The gasket I have is wider than that part, so I decided to grind that lip off. It opened the pipe up some.
6-2-12 Removed the C-pillar bar and moved it to B-pillar. Angle of B-pillar is steeper than C-pillar so I had to grind down the back of the bracket some to fit it better. I also mounted my Gopro camera to the harness bar.
Installed both seats and harnesses. Installed Recaro side protector on the driver seat.
6-3-12 Wrapped Comptech Icebox with gold heat reflective tape and put in a new filter.
6-4-12 Installed the 255/35/18 Star Spec tires.
Pics from 2012 National Acura Meet. It is always a great time.
6-26-12 Purchased a RonJon Lip Kit.
7-26-12 Since removing the carpet, my foot position has been too low on the pedal to properly heel-toe. I installed a PCI race spec aluminum floor plate. The position is perfect now. It raised the floor approximately 1 inch.
Applied the sticker I received at the national meet.
7-29-12 Ordered a Pyrotech Helmet and Ingall's full arms for front.
I made a short video of my drive today. Nothing too special just me taking turns and some 2nd gear pulls. Gives you an idea of the sound inside the cockpit. I didn't want to go crazy since it is Sunday with a lot of cars, some bikes and cops out on the roads.
8-12-12 I did my first autocross yesterday at Alexian Field in Schaumburg with the Windy City Miata Club. It was a lot of fun. The first session I was over driving the car. I messed up recording the video for the first session, but got video of some of my 2nd session runs.
Ordered 2 new OEM axles and a new intermediate half shaft.
9-13-12 Both axles, intermediate half shaft, Ingall's full arms installed. I ran a bead of sealant along the edges of the vibration damper on the axles to avoid corrosion underneath.
-Glovebox - 4.21 lbs
-Front Passenger Airbag - 8.92 lbs
-SRS Unit - 1.42 lbs
-Passenger Dash Side Panel - .26 lbs
-Metal Bracket SRS connectors attached to - .47 lbs
-Steering column plastic toe stop - .14 lbs
-Driver side firewall rubber/foam insulation - 2.61 lbs
-Cruise Control Button - .095 lbs
-Memory Seat Position Switch - .093 lbs
-Door Handle Plastic - .018 lbs
-Side Mirror Control Switch - .077 lbs
-Trunk Light - .044 lbs
-Hood Front Seal - .075 lbs
Removed passenger airbag. The airbag lid is held onto the airbag by metal clips and can be removed. I popped the lid back in the dash as seen in 2nd pic.
Since I removed the Memory seat position switch, I decided to trim up the driver door handle.
9-17-12 Removed the front bumper so I could get at the washer fluid reservoir.
Removed washer fluid reservoir full of fluid it weighs 7.26 lbs.
Spot where the washer reservoir was.
Removed headlights and cleaned everything up.
9-19-12 I decided to remove the front bumper beam, cut off excess metal, Swiss Cheese it with hole-saw bits, and drill holes with drill bits. It is a real pain and I do not recommend doing it. The front bumper beam weighs 19 lbs.
Beginning of the process.
9-27-12 More progress.
Rear
Front
Top
Bottom
Metal scraps
10-1-12 I finished up the bumper beam finally. Glad to be done with this project. I drilled some more holes, but not enough to really matter weight wise. It ended up between 5 and 5.5 lbs.
Here are all the bits I bought and went through during this project. Drill bits were anywhere from $2.50 up to $6. Hole-saw bits were $8-10 a piece. The arbors were about $10 each. New drill $60. New dremel $60. Dremel metal cutting discs $10.
After I finished drilling, grinding, cleaning up, and sanding I sprayed it with rust remover and let that sit over night. Then I washed it with degreaser and dried it with blower. Next up, I primed it then painted it flat black.
10-3-12 High horn removed. Weight is a whopping .78 lbs. I also removed the fluid lines.(.21 lbs.) Gonna keep just in case I need to put back on. I left the spray nozzles attached to the hood.
Where the horn was.
Purchased new headlights.
Decided to open them up and clear them. I used the oven, cut the glue while opening with screw driver or credit card. Reused the stock sealant. Heated in oven then clamped.
The removed headlight amber diffusers weighed .11 lbs.
10-10-12 New cleared headlights mounted. Just working on finishing touches before I put bumper back on.
Removed the engine bay firewall insulation. It weighs .4 lbs. It is pretty easy to remove. Remove the black clips by unscrewing them. Then cut the insulation with scissors in a few select areas to ease it around components. Finally just rip it out, it tears easily.
I want to keep my footrest and my pedal on it, but that steel plate weighs nearly 2 lbs. I cut out the excess metal and Swiss Cheesed it. This removed .55 lbs.
10-11-12 I decided to start sorting through the wiring so I can remove some of the excess I don't need. I started with the harness that runs under the passenger door sill. I removed all the electric tape, that plastic tubing, and some clips. I removed the SRS harness and the audio wires, left the rest intact. Also removed a little more of the sound deadening behind dash.
Here are the wires cleaned up. I used minimal electric tape and some of the clips.
10-13-12 Finished going through the driver side wire harness that goes under the door sill. Not as much removed from this side since passenger side had the heavy amp wire on that side. The driver side also holds all the taillight wires, and gas cap opener wire.
10-28-12 Since I was working on the bumper beam and wiring, I had not started my car in 1-2 weeks. I went to start it yesterday and it would crank but not start. I had this same issue a few months ago when I didn't start it for 1-2 weeks. I also noticed my trunk button wasn't working. I was worried that I had opened a can of worms sorting through the wiring.
I knew the battery and starter were fine. When it happened a few months ago I tried a few things and eventually got it started and it has been fine since till yesterday, but I was not sure exactly what the problem was. Temperature wasn't the reason because it is in a heated garage.
I took out the main relay and all the solder points looked fine to me. I tried using a heat gun on the solder joints like I did on my ps3 to fix that. That did not fix it. I called a local acura dealer and he found a dealer that had a main relay I could go pick up. The relay has a different part number and is much larger than my original one. I plugged it in and the car started right up. The part number is 39400-S84-003. I think I will keep the metal bracket removed and just tie it up. Here is the size difference.
For the trunk button I was thinking what it could be because I didn't think it could have been from me sorting through the wires. I thought wait there is that switch in the glove box. I hooked that back up and the button works. Need to keep that switch connected to use door trunk button. Could remove the switch and door trunk button and just use the remote, but I removed it from the glove box backing and clipped it up.
I removed the switch and wiring and attached it with a clip.
The trunk release mechanism/bracket had some corrosion/rust on it so I decided to remove it to clean and paint. I removed a little excess metal, still need to paint. The removed metal is .03 lbs.
Weight Reduction Progress 03 Acura CL-S 6
Stock curb weight: 3446 lbs EXTERIOR
SSR wheels -32 lbs
Project Kics Lugs -1.05 lbs
Exhaust -13 lbs
OEM mirrors replaced with APR -5.39 lbs
Front license plate and holder -1 lbs
Rear emblems -.05 lbs
Amber headlight reflectors -.11 lbs
Horn & horn cover -.91 lbs
Front bumper beam swiss cheesed -5.5 lbs Zeal coilovers (not sure) TRUNK
Trunk wire removal -.86 lbs
Trunk light -.04 lbs
Spare tire -29.5 lbs
Jack -3.63 lbs
Trunk tools -1.61 lbs
Trunk carpet floor -8 lbs
Trunk side carpet (2 pieces) -6 lbs
Trunk plastic -3.06 lbs Trunk lid cover/fabric (not sure)
Stock amp -1.75 lbs REAR SEATS
C Pillars(x2) -1.81 lbs
Rear deck lid -3 lbs
Third brake light -.72 lbs
Rear speakers -3.58 lbs
Rear seat belts -4.4 lbs
Seat belt protectors -.08 lbs
Rear seat back -26 lbs
Rear seat bottom cushions(x2) -11 lbs
Rear seat console -7 lbs
Rear seat side panels(x2) -11 lbs
Sound deadening/rear seat a/c ducting -39.27 lbs
White plastic covers -.29 lbs
White padding -.68 lbs FRONT SEATS
Headliner -4.5 lbs
Metra dash kit and card holder -1.21 lbs
Metal support radio/dash -1.07 lbs
Passenger visor -1.76 lbs
Dome light -.16 lbs
Roof console -.96 lbs
Roof handle -.23 lbs
Roof hanger -.06 lbs
Quarter window weather-stripping -1.22 lbs
A-Pillars -1.44 lbs
Radio antenna -.41 lbs
Engine mount solenoid control unit -.31 lbs
Plastic piece under accelerator pedal -.14 lbs
Door Panels -22 lbs
Driver seat swapped for recaro -40.8 lbs
Passenger seat swapped for recaro -24.5 lbs
B Pillars(x2) -.93 lbs
Kick panels(x2) -.68 lbs
Center console -13.69 lbs
Carpet -23 lbs
Stock radio -6.07 lbs
Front seatbelts -9.76 lbs
SRS side airbag sensors -1.72 lbs
Steering column plastic -1.83 lbs
Front speakers -4.1 lbs
Mugen/ works bell steering wheel(stock delete) -5 lbs
Gas cap release bracket metal -.03 lbs
Dash wire removal -.99 lbs
Driver wire removal -.77 lbs
Passenger wire removal -1.48 lbs
Footrest metal removal -.6 lbs
Glovebox -4.21 lbs
Front passenger airbag -8.92 lbs
SRS unit -1.42 lbs
SRS connectors metal bracket -.47 lbs
Passenger dash side panel -.26 lbs
Plastic toe stop -.14 lbs
Cruise control button -.1 lbs
Memory seat position switch -.09 lbs
Side mirror control switch -.08 lbs
Driver door handle plastic removed -.02 lbs
Door handle protectors -.5 lbs ENGINE BAY
P/S hose bracket -.075 lbs
IMRC runner, bracket, & control module -2 lbs
Braille battery(15 lb) -23.5 lbs
Cruise control -2.81 lbs
Front bumper damper -7 lbs Engine cover (not sure)
Small engine cover -.92 lbs
Plastic over radiator -1 lbs
Hood insulation -1.5 lbs Comptech strut bar (not sure) Comptech headers (not sure)
Option pulley -7 lbs
Firewall insulation -.4 lbs
Washer fluid reservoir ,fluid, & lines -7.47 lbs
Subracted weight I am sure of -443.58 lbs
ADDED WEIGHT Stock spoiler (not sure)
Harness bar +7 lbs
Harnesses +7 lbs UR 4-point bar (not sure) Cusco front tie bar (not sure) Rear tie bar (not sure) Oil catch can (not sure) Ingall’s stiffy mount (not sure)
Last edited by brian6speed; 10-22-2014 at 03:26 PM.
11-2-12 I decided to reuse the main relay bracket instead of just tying it up because other connectors use it also. I thought I might as well remove some excess metal and paint it.
Metal removed .06 lbs.
Main relay and gas door opener brackets painted flat black.
11-16-12 Gas cap opener reinstalled.
Main relay location/reinstalled.
Removed some of the extra sealant from the trunk area and a small amount from back seat area.
.4 lbs removed. Plateful of sealant. This is just what I was able to vacuum up.
12-3-12 Bought a custom gauge pod that goes over the steering wheel from a forum member. I also bought 2 stack gauges. I went with the professional stepper-motor analogue gauges(st3308 and st3316). http://www.stackltd.com/instruments.html#Stepper
Went with the water temp and voltage gauges.
Pic of custom steering wheel mounted gauge pod. This gives you an idea of the clearance while sitting in the racing seat. It only really blocks the rpm's past the redline(not needed) and the lower part of the fuel reading.
1-14-13 Replaced more engine bay fasteners and also painted a few brackets and the square nuts used on the fan mounts.
1-15-13 Removed the trunk springs. They weigh approximately 1.5 lbs.
1-23-13 Bought new fender washers from - Bolt Boys!. They are the version 3 aluminum ones. Gonna use them on rear license plate also.
Engine fastener kit.
Installed a trunk prop rod.
Cut a hole and applied touch up paint. Bought the right sized rubber grommet from Home Depot. Insert in hole.
Rod installed.
Drilled another hole in the only spot possible to put the clip. I found the clip in my box of Honda parts. I used touch up paint and put a foam washer under clip to prevent vibration noise.
1-30-13 New set of pedals from Autovation arrived. They are the light weight race version. I got the accelerator and dead pedal smooth. The clutch and brake are grid pattern. I got them with the extra thru holes. They are anodized black with aluminum accents.
License plate bolts installed.
2-17-13 Made some progress on the passenger mirror.
I drilled new mounting holes. I also ground down that metal lip that sticks out and is in the way of the panel sitting flush.
Cut holes in rubber and foam.
I drove with the mirror in the position of my previous post and my vision was still blocked. I decided to drill another hole even lower and mount mirror even lower on the cf panel and that finally did the trick.
Here is the final position with good visibility.
New panel cut with 3 main mounting points drilled.
Ordered the LUK clutch and flywheel. Decided to just stay stock for this one. Ordered the flywheel from carolinaclutch for $250 shipped. It arrived today and damn is that thing heavy. I ordered the clutch from partsgeek for $164 shipped.
3-2-13 Finished dead pedal backing plate. It now weighs .8 lbs
Removed more metal.
Primed.
Painted and baking.
Replaced hardware with stainless. OEM hardware weighs 43g and new hardware weighs 21g.
Installed with dead pedal.
3-8-13 The cross member gussets weigh 12 lbs each. I removed the passenger one and got to work cleaning it up and removing weight.
Here it is on the scale after some cutting, grinding, drilling, and sanding. Weight is 8.5 lbs, a savings of 3.5 lbs.
Metal that was cut off.
Pics of it cleaned up.
Primed
3-13-13 Passenger cross member installed.
Driver gusset ready for primer.
Pedals installed.
Passenger mirror installed on new panel.
3-18-13 Removed the dash.
Instrument panel and cluster removed.
After ripping up a part of the rubber and foam, I noticed there is even more tar sound deadening.
Had a local sign shop make 2 vinyl magnet signs with my autocross number on them. The silver vinyl is metallic silver to match my paint.
3-19-13 Spent a few hours going thru the dash wires.
3-21-13 Here is what it looks like under the black rubber/yellow foam. That tar deadener is gonna be a pain to remove since it has been compressed down and the position is close to the glass.
Picked up supplies from Home Depot to re-wrap the wires. I got a shrink tube kit, professional grade electrical tape, vinyl bundling tape, and friction tape. I didn't use any friction tape yet.
Dash wiring re-wrapped.
Removed the metal dash support brackets for the radio. The top parts bolt onto that tube and it holds the dash in place so I decided to cut off the tops to reuse. Gonna clean up and paint still. This removed 1.37 lbs.
Removed all the black rubber/yellow foam I could without removing the evap, blower, or heater. There is still a piece behind those that probably weighs 2-4 lbs. What I removed weighs 6.5 lbs.
Removed some of this mat material from the back of the dash cover. It weighs .4 lbs.
Removed the remaining audio, srs, accessory power, and cruise control wires. They came out to 1.27 lbs removed.
Tape removed.
3-28-13 Taped up the dash to keep tar pieces from getting all over. Here is one piece removed. Taped up those holes in the dash to keep tar pieces from falling down them.
Both pieces removed.
What was removed. It weighs 1.5 lbs.
Removed another .13 lbs from the dash side metal. I primed, painted and baked the pieces flat black.
Removed the dash lower metal and chopped it up. That removed .63 lbs. The right side piece will be reused, the rest is scrap.
Cleaned up another bracket. Removed 10 grams of weight.
3-31-13 Tar residue removed. Think I should probably re-cover those holes with tape or something to keep outside air from getting in.
Reinstalled this metal piece. I also used lighter hardware that saved 20g of weight.
Ordered a front tow hook from Race Car Tow Hooks. It is a NASA spec tow hook and made of steel.
To get the front tow hook to fit where I wanted, decided to make a spacer out of aluminum.
Cut a section out of the bumper.
Tow hook mounted up.
4-2-13 Covered those holes in the dash with gorilla tape. Bought some foam tape used for window and door seals to use under the dash to hopefully prevent rattles. It did add 60g in weight.
Foam tape applied.
Dash back in.
Small bracket removed. It weighs 28g.
Here are the plastic clips removed from the dash wiring. They weighs 30g, and were replaced with roughly 10g worth of zip ties. Savings of 20g.
Dash fully back in. The total weight removed from the dash was 11.83 lbs. This does not include the previously removed items.
Removed the moonroof assembly. Still need to remove the wiring, but that should be under 1 lb. Here is my list of weights.
The total weight removed not including wiring is 34.18 lbs.
Decided to make the plug out of lexan. Went with a scratch resistant solar gray color race car quality lexan. Ordered a 1/8"x48x24 sheet. It is pricey at $110, but it is MR10 lexan.
4-9-13 Removed the driver side moonroof wires. They weigh in at .84 lbs.
Last edited by brian6speed; 10-22-2014 at 10:52 PM.
Glad your getting out that funk you had and your posting your updates again.
Attending a Ford Racing driving school made me want to get serious about making the CL a track car and my car being at King Motorsports has given me the motivation to start a new thread, plus I get to remove all the clutter I added in the original thread. Recopying the thread is taking longer than I hoped using this crappy net-book.
Last edited by brian6speed; 10-23-2014 at 10:39 AM.
Bought a 1/8" x 2' x 4' sheet of hardboard from Menards. I cut it out smaller than my template. Gonna adjust till I get it just right.
Installed all the rear brackets but 1. Only options really are self-tapping screws or welding brackets on. I would prefer welded on, but I don't have a welder. I used same method and brackets as RP did. Brackets are from Lowes.
4-23-13 For the front and side brackets I used M5 button cap screws and self locking nuts. Bought the brackets from Home Depot. Cut part of the brackets off so they line up with the bottom of the lip. Next up, drilled holes in the roof lip.
Need to fill the gap between the 2 layers of sheet metal with spacers. The sheet metal edges have a slight lip so the spacers need to be slightly larger than the opening and jammed in there. Make sure that there is no flex in the panel when you tighten each bracket down again. Check the roof for any signs of waviness.
All brackets installed.
Hardboard cutout with mounting holes drilled and primed.
4-25-13 Painted the panel and test fit it.
The bottom of the edge trim sits on the top of the metal brackets. Then you fill in the space to the board/panel with spacers. I used a combination of nylon and fiber washers with a rubber washer on top to fill the gaps.
Needed to figure out a mounting solution since I don't have a roll cage. After holding the mirror up inside the car for a bit, I noticed these empty screw holes might work.
Bought some 3" corner brackets from Home Depot.
Drilled holes and mounted brackets.
5-31-13 Bought OEM Honda clear brake light for the Goldwing 1800. They are hard to find since you can't just buy the light from honda without buying the whole spoiler.
6-17-13 Acurazine National Meet Pics.
7-19-13 Installed ARP studs.
7-22-13 Had a blast at the Tirerack autocross events. They used one course setup for Saturday and switched it up for the Sunday event.
My times weren't anything to really brag about. Kind of in the middle of the pack. I was faster than a stock FRS on Sunday though(comment is just for you civic). He was on stock rubber otherwise he would have been faster. The cl can improve a lot, sadly I am the limiting factor. I would love to see what a talented driver could do with it.
There were some pretty impressive drivers there. If you just watch the cars running from standing next to the track or in videos that just does not do it justice. You really need to ride in a car to see how crazy it is.
Tirerack facility picture from the infield of test track.
My car in the parking lot before the event. I forgot to pack my number magnets so I just used tape instead.
The car that impressed me the most was this Ford Focus ST. All he had done to the car was tires. I did not expect it to be that good and I have more respect for that car now. The driver was very cool and let me go for a ride along and gave me some pointers for fwd cars. He is a really good driver and damn did it seem fast and crazy from the passenger seat. I could tell I have a lot of improvement to do.
What a coincidence I bought a Ford Focus ST NEW on 8-21-14 to use as my daily driver and 2nd autocross car.
Spun my car once at the event. Here are the marks from it.
Forgot to charge Gopro and memory card was almost full, so I was only able to record one run and it was not one of my faster runs. The only place I noticed torque steer was that U-turn finish part right before the end. You can kind of see it from the steering wheel.
Brian: Good to see the majority of your pics and the story back up. Haven't been on here much lately. Been busy with the wagon, work and getting ready for a much needed vacation. Taking Cindis TL on a roady to South Carolina next week. Keep up the good postings.
how did you remove the sound deadening and made it so clean???
Have you thought about completely removing the rear bumper and replace it with a big wang?
Have fun on the vacation. I still think I posted too many pics. I can't even load the thread on my phone without internet crashing.
<<<@!2!@>>>
The best way I found was to heat it up with a heat gun, then use a plastic chisel tool and a rubber mallet if necessary. Used tar remover for the residue. The way I did it probably took me over 20 hours and it is a pain.
By wang did you mean wing because I am not putting a big penis on the back of my car.
I have not begun aero work yet unless you count the mirrors.
I could mount a wing to the bumper beam and rear sheet metal. Then just make cutouts in the bumper for it.
I want to keep trunk access. Another option could be cutting holes in quarter panels and having it come up from there. Could mount it to trunk floor and make it easily detachable maybe. Last option would be to trunk mount it and reinforce underneath.
I do like these wings. Could start out with the static and upgrade later to dynamic. Products - aeromotions
Wow - great project. Have you pulled your A/C components out yet? That would shave quite a bit. Also, not sure how functional the rear spoiler is and that thing isn't light either.
Wow - great project. Have you pulled your A/C components out yet? That would shave quite a bit. Also, not sure how functional the rear spoiler is and that thing isn't light either.
As of now I am not going to remove the a/c components since it is still used as a street car. If I ever turn it into track only car I might. Hopefully my long tube headers will clear the a/c components. I will know for sure in the next few weeks.
If you are referring to the OEM spoiler it is not very functional. It isn't that heavy but I keep it for looks and because there are holes in the trunk lid. I don't like the look of the cl rear without at least a lip spoiler. I have thought about using other spoilers, but more important things to do atm.
8-11-13 Went to the autocross on Saturday in Schaumburg. Ended up 4th in my class out of 12 drivers. I was in 2nd place up until the last session of the day when 2 cars passed me at the end. I was only 1 second off the first place car(a BMW Z4 M coupe with hoosier slicks).
Here is the Gopro video with it attached to the bottom of the front bumper. I think this location gives the best sense of speed.
9-8-13 Did another autocross in Schaumburg and placed 4th out of 8th. Here is the video of my last and fastest run. I thought my little fist pump at the end was rather funny. I was just excited that I dropped almost .9 seconds on that last run. I was running the wrong tire pressures most of the day and was just beginning to dial it in.
9-24-13 Removed the rear bumper to remove weight from bumper beam and clean up some rust.
Had to remove the taillights to get at a screw underneath that holds bumper onto the frame. It did not mention this in the service manual.
Bumper and taillights removed.
Some corrosion/rust I will clean up.
The rear bumper beam is attached slightly different then the front was. There are studs that are welded to the body of the car and the beam is held on by nuts to those studs.
Sprayed them with lubricant and waited 30 minutes. Tried to remove 1 nut from each side, but the studs both snapped off from rust.
9-28-13 Remove the bumper beam without ripping off the last 2 studs. Bought and used a propane torch to help loosen them up. Wish I would have done that for the first 2 but too late now. The bumper beam weighs 17 lbs.
10-14-13 Pretty much done with the drilling and grinding on the rear bumper beam. Still have a little clean up then time to paint. The beam started at 17 lbs and it now weighs 11 lbs, so a reduction of 6 lbs. I don't think I can think of any harder way to remove 6 lbs than this.
Front
Back
Top
Bottom
10-17-13 I am thinking of grinding down the broken studs and drilling a hole(outlined in red).
Then either enlarge this existing hole on the bottom or create a new hole that I can fit a wrench in.
Received the custom long-tube headers in the mail from 1foxbody.
Just need to grind down the pipe lip where they meet the flange.
Received some of new intake parts. 4" UBI tube kit, blox 4" velocity stack, K&N filter. I am still waiting on silicone reducer and silicone couplers.
10-21-13 After researching ceramic coatings, I think I will go with swain tech's white lightning exhaust coating.
If you need 4" silicone couplers I would recommend these.
http://www.ebay.com/itm/Silicone-Straight-Hose-Coupler-102mm-4-inch-Turbo-Silicon-Black-/120774546881?pt=Motors_Car_Truck_Parts_Accessories&hash=item1c1eb955c1&vxp=mtr
Bumper beam progress.
Masked off the broken stud to grind it down then drill it out.
Hole drilled to fit a 7/16" bolt.
Enlarged the hole on the bottom to fit my deep seat socket onto the bolt head so I can tighten down the nut on other side.
Used this magnet wand to remove the metal shaving and also to put the bolt through the hole. Will vacuum the remaining shavings.
Holding the 7/16" bolt in place for reference.
Held the bumper beam with the foam pieces on it up to the rear bumper to mark where to cut a slit for the tow hook through the bumper.
10-22-13 Did a little work on the 4" intake today.
The hole that the intake tube goes thru was not big enough so I had to open it up.
Before
After
Main tube section I will use.
Test fitting
10-23-13 More intake progress.
This pic shows the velocity stack attached to the 4" tubing.
The tubing is thicker than the velocity stack so it leaves that hard edge sticking out. Beveled the inside edge on both ends of the tubing. You can somewhat see it in this pic.
Sanded down those ridges on the pipe and also the mold seam, then hand sanded the whole pipe except for the very ends to smooth it all out perfectly.
Rubbed the intake tubing with spray adhesive then wrapped it in Mishimoto gold heat reflective tape. The spray adhesive will help bond the tape to the plastic.
10-24-13 Finished up the intake. Was able to install the intake without removing the bumper or jacking the car up. I just peeled back the fender-well trim and attached the velocity stack and filter from below.
Changed up one of the crankcase filters to make it look cleaner. I wasn't happy with how it looked before. I ended up using a K&N #62-1015 on the valve cover. I replaced the filter on the egr spacer with a K&N #62-2480.
Cleaning up the headers with my dremel and extension.
11-6-13 Here is the tow hook attached to the bumper beam.
The method I decided on was to drill 2 pilot holes at the ends then use this plastic cutting wheel on this smaller sized dremel. Had to use this shorter dremel to cut through the back of the bumper because of space and angle issues.
Masked off the area to cut, then drilled the 2 holes.
Flipped it on its back to cut it out.
Slot roughly cut out.
Taped off the other side and hand sanded.
Tape removed.
11-11-13 Masked for primer.
Primer applied.
Painted
Bumper beam installed.
When test fitting the bumper I noticed the tow hook was about an inch lower then the hole I cut out. I guess holding bumper beam up to the bumper while off the car is not the right way to do it. Oh well.
Needed to come up with a solution that didn't involve buying a new bumper.
Decided to cut a slot out and mount it inside the beam instead of under the beam like I planned. Made a spacer out of aluminum to raise it to the desired height necessary.
Cut a section out of the foam support with a box cutter.
Installed these self-tapping screws in the bumper and the metal below. This tightens up that gap below the taillights for better fitment.
Brian6speed,
Looking at what you've done to lighten the front and rear bumper beams it appears to me that you could consider simply leaving both of these off entirely as they are no longer suited to their main intended purpose. They are doing little if anything structurally and don't provide any meaningful collision protection so you might as well save the additional 16-17lbs you've measured. Just a thought.
Pretty sure he kept it on due to it being the main support for the bumpper.
Brian6speed,
Looking at what you've done to lighten the front and rear bumper beams it appears to me that you could consider simply leaving both of these off entirely as they are no longer suited to their main intended purpose. They are doing little if anything structurally and don't provide any meaningful collision protection so you might as well save the additional 16-17lbs you've measured. Just a thought.
First off, I am not recommending anyone do any of the mods I post in this thread. Please keep your car entirely stock.
I would have to disagree about them being useless now. The CL bumper beams are heavy thick steel. They are the beefiest I have seen on any car. Most newer and more expensive cars just use much lighter aluminum that isn't nearly as strong or thick. Those beams are just for low speed impacts. If anything the way I Swiss Cheesed it might help it absorb energy better and disperse it more to avoid frame damage.
I am not really concerned about it or low speed incidents. It is the high speed off track or on street accidents I would worry about.
I do not want this thread to turn into a discussion about safety like every other diet thread on here turns into. Another thread can be started just on safety if you want to start it.
Originally Posted by HairyMonkey019
Pretty sure he kept it on due to it being the main support for the bumpper.
Originally Posted by b52bgz
^
Pretty sure the bumper beams don't attach to or support the bumper covers at all.
The beam and foam does support the bumper. You can run without them but they will distort/flex at speed. If you remove the front bumper beam, a splitter solidly mounted can help support bumper also.
It supports my tow hooks also which I do not recommend anyone install.
1-20-14 DIY: Acura TL audio knobs used as climate knobs
The first thing you need is 2 audio knobs from a 05-08 Acura TL. The part number is 39103-SEP-A11ZA. Buy 2 of them.
I am not sure how the cars with navigation are setup or if this works for you since I don't have navi. It will work for 2nd gen cl and tl, and the 6th gen accord. Not sure about any other honda/acura.
To remove the stock knobs you just pull it off and it looks like this. If you break or damage anything don't blame me.
The tl audio knobs won't work without modification, but it is fairly simple work.
Here are the knobs from behind. The one on the left is the TL knob unmodified. The middle is CL knob and the left is the modded TL knob.
If you notice the tab/clip area on the stock knob sticks out a lot more than the TL audio knob. The fix I found is to grind down the TL knob a lot until that rod can fit in the clip and have it snug without wiggling. Make sure not to grind down the white clip area when grinding down the outer section. You need all the length of that white section. I also had to grind down those ridges that go out from the middle to the edge on the back of the TL knob so it would turn properly.
This shows how much I ground down the TL knob.
Pics of the knob installed. The TL knobs are plastic also but they are painted SSM and have a machined aluminum pattern and look to them.
Before you start grinding, mask the knob with tape so you don't ding or scratch it. The tape line is also used to know where to grind up to.
I used an angle grinder with a sandpaper adapter and sandpaper. Do the grinding at an angle to avoid hitting the white rear section. Once you get it down close to the line, use 180 grit sand paper on a sanding block. Put tape over the white rear section to make sure you don't sand it down. You want the white section to stick out slightly farther than the part you grind down. Then use the fine grit sanding block to finish sanding. Use the Dremel for grinding the splines on the back of the knob.
Ended up buying different length and strength struts to test out what would work best. Used 2(40 lb) strength gas struts. I bought the ones with the ball joint fittings already on them. Part number is 4138T58.
The trunk does not go up on its own when you hit the button. It needs help to go the first 6 inches or so then goes up on its own and stays up. I am happy with it.
Pic of the gas strut.
Tools used for this project. I also used a set of files but they are not in the pic.
Bought touch up primer and paint at Menards. They carry Honda colors like my SSM.
Prop open the trunk with a board.
Remove these clips from the holes on the hinges.
Drilled 1/4" holes in the trunk hinges for an extra mounting point.
Cut a bracket out of 1/8" aluminum using a Dremel. Drilled the gas strut mounting hole and one of the 1/4" holes for mounting to the trunk hinge. Cleaned up the bracket with 180 grit sand paper on sanding block.
Mount the bracket to the hinge with the top 1/4" bolt. Hold the bracket in position and use a marking tool thru the hinge to mark where to drill other mounting hole.
2nd bracket
Drill the lower mounting point for the gas struts. I tried 3 different mounting points on driver side. The lower mounting point works best. For these holes I made sure I drilled thru atleast 2 layers of sheet metal.
Hardware used. For the hinges I used 1/4" bolts, washers, and locking nuts. Used grade 8 hardware, but it is not necessary.
Mount the brackets on the hinges. Then mount the gas struts to the brackets and to the lower mounting points. Remove the board and you are done.
3-17-14 Cut rear bumper. I wanted to remove the 2 exhaust cutouts since I will be switching to a single exit exhaust. It also reduces the drag on the rear bumper and gives a unique look.
Cutting plastic sucks. The little chunks stick to everything and are hard to clean up. My clothes, face, hair, etc is covered in it. The ones in my hair were soft/melted when they attached, then they hardened up and stuck to my hair.
Here is what ventilator looked like after cutting.
Used dremel with a plastic cutting wheel and a sanding disc. I still need to do the final sanding before removing tape. 1 lb removed.
I am going to keep the metal brackets that the bottom of the bumper used to attach to. Might use them to hold the rear diffuser.
After sanding, tape removal, and cleanup.
Taped off section to be cut. It gets battered by rocks and kind of blocks airflow. Kept the lip edge for structural support.
Used 2 aluminum spacers between the bumper support and bumper. Used cable ties to hold the bumper down for better support. Drilled the holes for the cable ties behind license plate.
After pic
Bought a Genuine OEM NSX shift boot and attached it to shifter trim.
4-22-14Hardrace Suspension Parts
I noticed Hardrace makes suspension parts listed for the 99-03 TL and 98-02 Accord.
This UK site shows parts listed for the 98-02 Accord. They will fit 01-03 CL or 99-03 TL. Honda
5-2-14 Ordered the Pillowball Rear Toe Arms(4 arms), Rear Pillowball camber kit, Steering Bushing, and Pillowball Bushings for the front UCA.
5-17-14 Received my Hardrace parts.
Pillowball Toe Arms next to Ingall's arms.
Pillowball Camber Arms
UCA Pillowball Bearings
Steering Bushing
5-25-14 Replaced my moonroof panel with tinted scratch proof race quality lexan. I will post pics after I reinstall the panel when I get it back from shop.
Purchased the Atomic Metal Conditioner with 1 Stage Revitalizant, Revitalizant EX120 for Fuel and ran them through the engine. It seems to run smoother and quieter since then. I have not monitored gas mileage. I noticed a few times since I had the car running, standing outside it, and I thought it was turned off for a second it was so quiet.
I also purchased the Revitalizant EX120 for power steering but have not used it yet.
Ordered new OEM Rear Trailing Arms and OEM hardware.
Ordered the Hardrace lower control arms, rear knuckle bushings, and roll center adjusters. The LCA is an OEM arm powdercoated blue with Hardrace's hardened rubber bushings. The knuckle bushings are also hardened rubber.
BTW you can contact them through email. Their email address is sales@buyhardrace.com.
7-2-14 Hardrace Parts Arrived.
7-17-14 Everything is installed besides the steering bushing and the 2 rear upper knuckle bushings. The upper knuckle bushing replacement would require me to at least remove the coilover and brake caliper. We ran out of lift time so I will do those 2 later. Besides for those all my suspension bushings are basically new besides subframe bushings.
My initial impressions are that the car feels amazing. It is more responsive feeling. It actually makes less noise now, but it did feel more bouncy from the pillowball bushings. Turn-in is improved.
Rear Arm Install
UCA Pillowball Bushings installed in Ingall's arms.
Front LCA's being installed.
Switched up my alignment specs. Went with -2.3 camber in front with 1/8 inch toe out. For the rear went with -1.2 camber and 0 toe.
I have been running the wrong tire pressures the whole time I have autocrossed. My front pressures have been fine. For the fronts I go with 37-38 cold pressure. For the rear I was running the pressure way too low which did not allow me to rotate the rear end like you need for autocross. I was running them at 36 on Saturday and 40 on Sunday at Tirerack. I think I need to up it a little more. One of the fastest drivers/cars is a Honda CRX. He runs his pressures at 37-39 front and 45 rear. That seems like the right setup for my car also.
8-21-14 Bought a new DD/Autocross car, a 2014 Focus ST with the ST3 package. I know it sucks I am stuck with 2 fwd cars.
Bought 2 of these OEM Switch Hole Lids. Part number is 77625-S0K-A00ZA. Used them to fill the Moonroof and Cruise Control Buttons.
Removed the cross-members prior to taking car in for roll bar.
10-20-14 King Motorsports Work Begins - Time for the fun stuff!
Dropped the car off at their shop.
To do List:
- Before/After Dynos
- Long Tube Header Install
- 3" Exhaust Build
- Build Roll Bar
- Remove Transmission, Open Up, Rebuild if Needed
- Install New OEM Clutch, Flywheel, & Master Cylinder
- Replace Trans Mounts with new OEM
- Check XLR8 Motor Mounts
- Gauge Install - Water Temp & Voltmeter
- Killswitch Install
- Oil Change
- Few other items
10-28-14 Called Scott at King Motorsports to mention a few things I forgot when dropping the car off and asked for updates.
They did the before dyno. The numbers are basically what I expected. I was guessing it would be around 270whp and 240wtq.
My numbers ended up being 265.26WHP & 237.37WTQ.
I am hoping my exhaust is the limiting HP factor. Both the Comptech Headers and the Tanabe Catback which has only 2.38 inch piping.
Engine Mods List Again:
- 4" Custom Intake
- P2R TB Spacer
- P2R Thermal Gaskets
- TB Bored by Maxbore
- IM Ported by P2R
- Runners Ported by P2R
- Option Under-drive Pulley
- 08 TL-S Exhaust Valve Springs
- IMRC & Air Assist Delete
- Coolant Bypass
- Comptech Headers
- XLR8 Straight Pipe
- Tanabe Cat-back
King Motorsports is hoping to have the car done by Thanksgiving, so after dyno to come shortly.
Scott was nice enough to send me teaser pic of the Roll Bar progress.
Last edited by brian6speed; 10-29-2014 at 01:17 AM.
this thread nearly makes my computer explode with all the pics! (love it though)
Those are healthy hp/tq numbers. Any reason you're not throwing in a light flywheel while it's open?
After numbers prediction? 280/240
Hahaha, I can't even open the thread on my phone because the internet crashes. I think I overdid it with the pics and can't believe thread is still on page 1. I even left out some pics from other thread.
I already purchased a new OEM Clutch and Flywheel last year so might as well use it. I am not 100% convinced on aftermarket options yet and King Motorsports seems to prefer installing OEM. They will have the transmission back together before a Clutchmaster kit would show up anyway. Maybe next time, plus I am spending enough already.
Your numbers are pretty much what I am expecting. I will be disappointed with anything under 280. Looking over P2r's tuned dyno really makes me want to tune it, just wish it was simpler.
I thought about installing that TB Motorworx Final drive gear also but don't think it is worth the price, plus I would be hitting rev limiter more in 2nd gear autocrossing.
this thread was very inspiring. beautiful CL and the focus ST looks awesome i bet your loving it.
Thanks
The Focus ST is really nice and very fun even for being stock. It has the best turn-in of any stock car I have ever driven and might even be as good or slightly better than my CL is modded. The CL has a somewhat slow rack, whereas the Focus has a very fast rack. You need to make sharper and faster hand movements in the cl and turn the wheel more to get the same effect you do from Focus. I wish the CL was somewhere between the 2. The focus brakes have better initial bite than the CL. I must say my CL is way more fun to drive than the Focus, which is really saying something considering all the focus reviews raved about how fun it is. It will be a struggle to not mod the Focus so I can spend it on the CL instead.
The Focus rear end is very lively and likes to come loose, which is good for autocross, but it does it too much where time is lost. I noticed for the OEM rear sway on the Focus the bushings and bar are almost square instead of round on all the aftermarket products. I think the sway bar is binding up and that is why the rear is so tail happy. Ford might have done this on purpose. I did order a new rear sway to help eliminate this some.
The torque vectoring works rather well, but it could use a real mechanical LSD like the CL has. The Focus likes to spin its tires coming out of corners and loses time for it. The CL is better at the sweeping corners and the Focus is better for tighter stuff.
I did do an autocross in the Focus 2 weeks after I bought it. It was a lot of fun, especially the smokey burnouts I did. It took some time getting used to the steering difference of the 2 cars. It was also awkward trying to use the CL clutch after getting used to the Focus. I would have been atleast 3 seconds faster in the CL.
Ford offers a Octane Academy Driving Experience for FREE to anyone who buys a new Fiesta or Focus ST. This is a great thing that Ford does. I attended the School on October 12-13 2014. It was a blast. I did have to pay for plane ticket to Salt Lake City, Utah and for hotel.
The first day we met at Ken Block's office in Park City, Utah. The next day is the event. They teach you how to do a reverse 180, hand brake turning, and hand brake parking. Then they let you use those skills on an Urban Autocross course. Then you do a session driving a Focus ST or Fiesta ST on the track following an instructor. Then you go out with an instructor in passenger seat for a few laps. Next up, my favorite part by far, was a 20 minute session without passenger or follow car. The 20 minutes seemed like 5 minutes. I had to pull into pits to get a gap because I was faster than other drivers.
We then got to do 2 laps as a passenger with an instructor driving to see what was capable. I was the last one out and we lost brakes. The instructor, who is a race driver I recognized from TV racing series, was using the hand brake to brake and power sliding all of the corners. That was fun. The day finished up with a Go-Kart session. We also got a lot of goodies and there was a museum with 100 Million worth of old Ford GT's etc. I got to walk through.
The scenery there is amazing. I spent some time driving through the canyons and had a blast in a Camaro RS.
Driving the Focus ST on the track really motivated me to take my car to King Motorports and start to focus more on track events than autocross. I love autocross, but track driving is where it is really at. I am addicted.
Is that a golf mark VI I spy in your avatar?
Last edited by brian6speed; 10-30-2014 at 07:34 PM.
 10-21-2014, 05:05 PM


 I guess holding bumper beam up to the bumper while off the car is not the right way to do it. Oh well.


 It's good to see some people are still taking these cars to their true potential.