When you click on links to various merchants on this site and make a purchase, this can result in this site earning a commission. Affiliate programs and affiliations include, but are not limited to, the eBay Partner Network.
Replacing drivers side actuator for broken power door lock
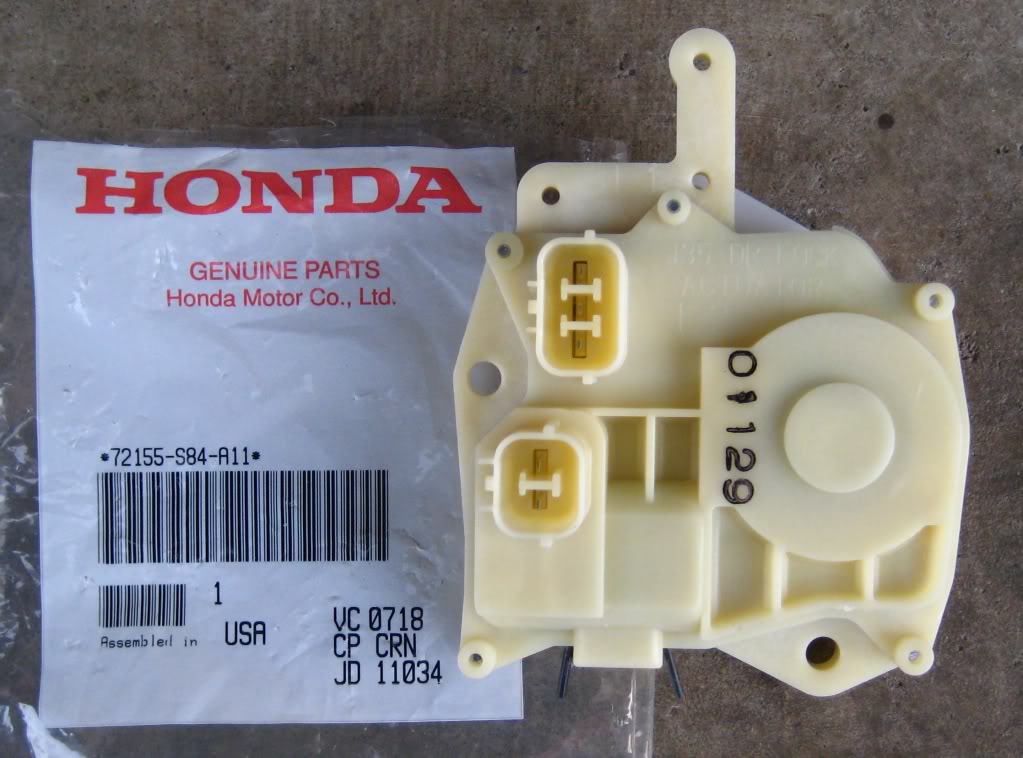
I decided to change my actuator on the driver’s side because my door lock was not working with the Key Fob or the lock switch inside the car. You will need to purchase PN 72155-S84-A11. About $35 to $49 from a Honda/Acura dealership. The actuator breaking is a common problem with Honda’s and Acura’s. This is any easy and simple way to fix it and should not take more than 2 hours if you are handy.
Pull fuse 11 out so that the interior lights are off and the battery does not get drained while you work
Peel off white weather film partially until you can see the inside of the door opening (1/4 of the door is sufficient for working area)
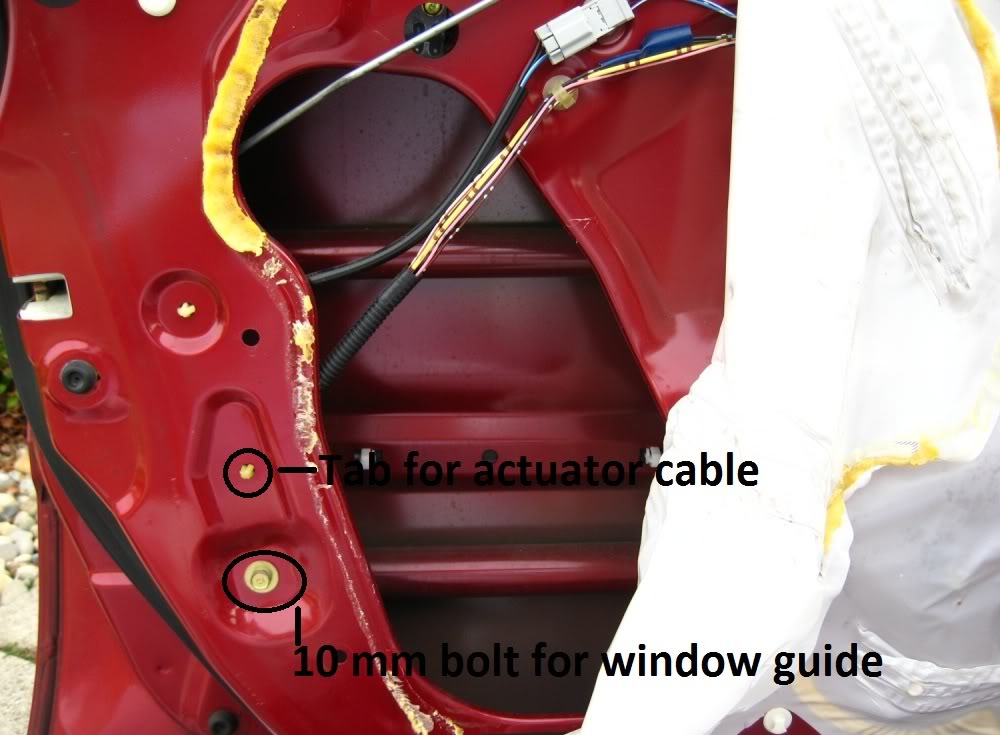
When you look inside the door you will see that the window guide is blocking actuator so this has to be removed by unscrewing the 10 mm bolt. Once the bolt is off, you will have to pull out the black rubber and the window guide down and out.
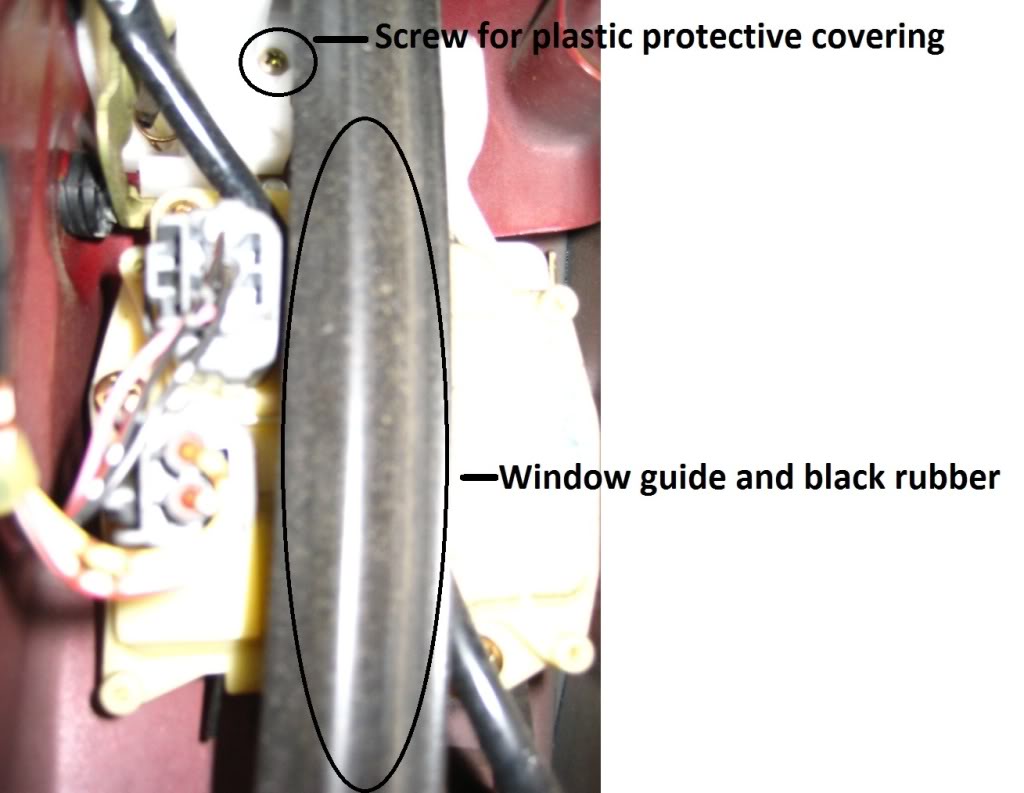
Once the window guide is removed you will see the actuator with 2 plugs and a white plastic protective cover. Remove the 2 plugs on the actuator and remove one small screw that holds the white plastic cover. Tip: it is easier to remove the plugs if you remove the tab on the door that holds the cable housing, you will have more room to pull and store the cable in your work area.
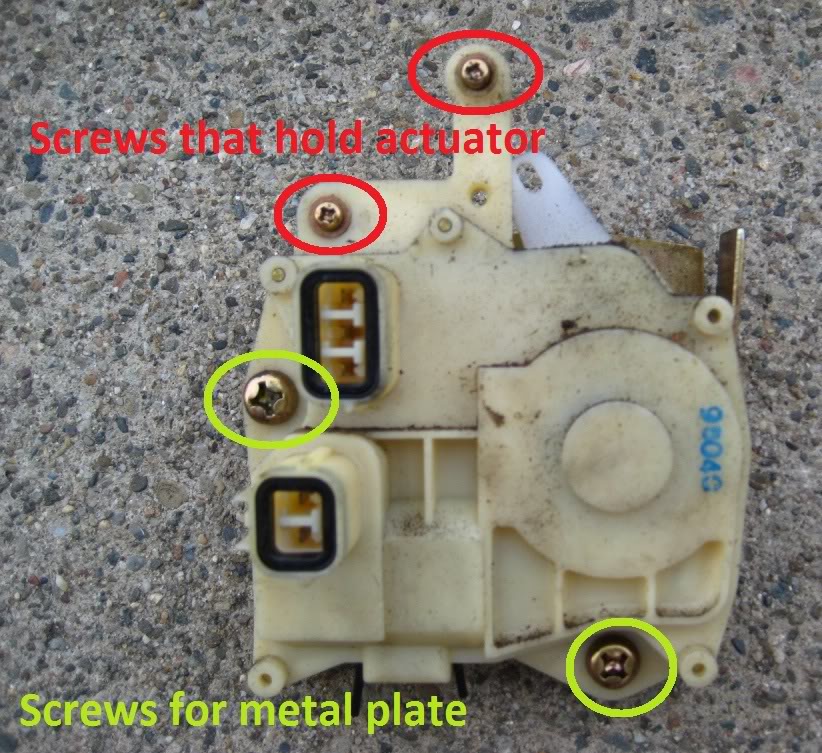
The actuator is held on with 2 small screws (one on the top and one on the left) take those out. Once the screws are out the actuator can be taken out by pulling it forward and down.
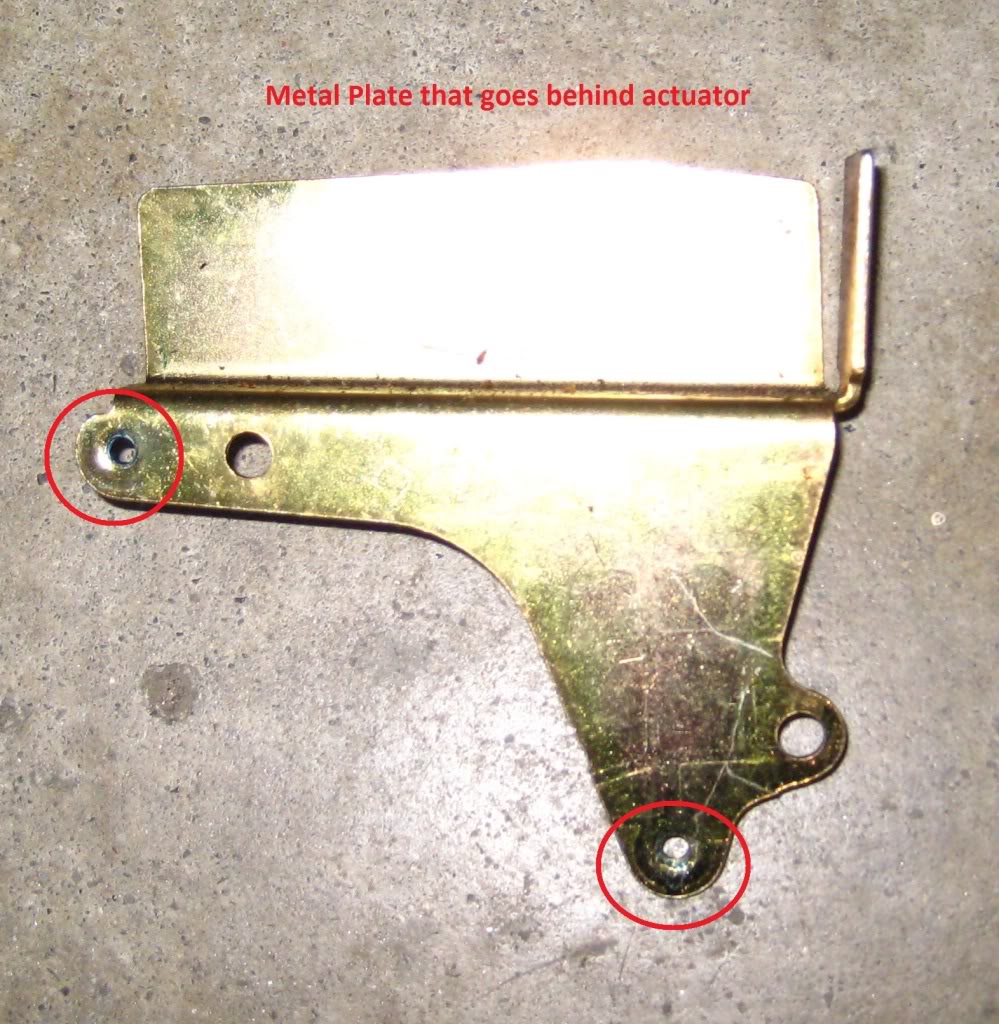
If you look at the old actuator you will notice that there is a metal plate behind it. Remove the 2 screws that hold the plate to the actuator (Big screws on the left hand side the bottom) and put it on your new actuator. My old actuator also had 2 white plastic housings and 2 black rubber gaskets for the plugs so that has to also be removed and placed on the new actuator ( use needle nose pliers)
To install actuator, place the white moving arm of the actuator on the notch of the lock mechanism and then install the 2 screws with a dab of locktite.
Next install white plastics protective cover with 1 small screw. (you will need a small mirror for this and you can start the screw by inserting into the plastic so that is does not drop in the door.
Install the 2 plugs to the actuator
Install the window guide and the black rubber and tighten the 10 mm bolt
Seal white protective covering
Before installing the door panel back in place, re-install all plugs and put back fuse 11 and test all the windows, mirrors and your key FOB. If everything is OK, push door panel back into place and you’re done.
I hope this helps people out because I was always upset when I returned to my car and noticed that the door was unlock because by habit, I would just lock my car with the remote and walk away but did not notice that my automatic door lock was broken.
damn, every acura i have owned i had to replace this. the rsx then tsx and potentially my TL. this sucks. at least its a cheap part. my sisters lexus is going to cost $200+ for the same part...
"When you look inside the door you will see that the window guide is blocking actuator so this has to be removed by unscrewing the 10 mm bolt. Once the bolt is off, you will have to pull out the black rubber and the window guide down and out."
Can you expand on this point ? I got it all apart and could not find a way to get the window guide out, even with the bottom screw removed, it would not budge.
Great DIY BTW.....thank you for the putting this together.
Pull the black rubber piece foward and then grab the metal window rail and wiggle it back and forth while pulling downwards. Taking out the window rail and reinstalling it was the hardest part of the procedure.
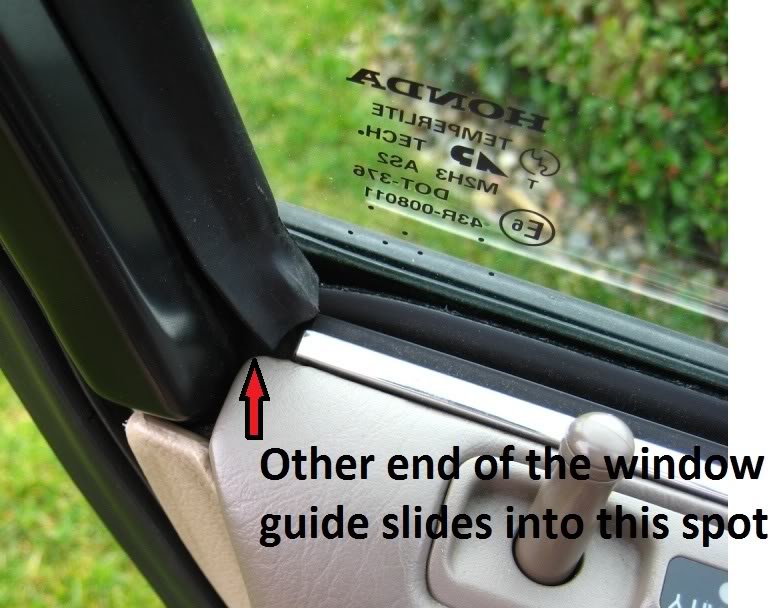
the window guide connects to this point and you can just wiggle the metal guide until it is free. Wiggle back and forth and pull unitl it is off but do not bend the metal rail. Good luck!
Originally Posted by smartypants
"When you look inside the door you will see that the window guide is blocking actuator so this has to be removed by unscrewing the 10 mm bolt. Once the bolt is off, you will have to pull out the black rubber and the window guide down and out."
Can you expand on this point ? I got it all apart and could not find a way to get the window guide out, even with the bottom screw removed, it would not budge.
Great DIY BTW.....thank you for the putting this together.
OK....that's not what stopped me. I was able to get all the way to the door actuator being loose from the door frame, but I could not negotiate it around the window track.
Do you split the actuator and the lock so it makes it comes out in two smaller pieces ? I had the mechanical lock and the actuator together and it never occurred to me to look for a way to split them until a few days later.
Is this the secret ?
smarty.
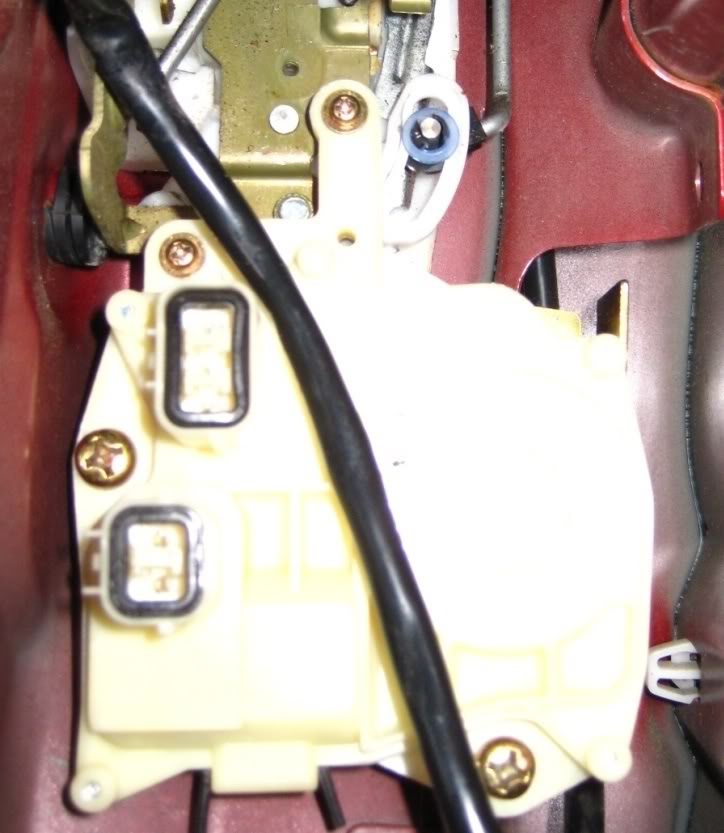
I took out the window track so it was not in the way and the actuator just came out from inside the door. With the rail in the door, I don't think it is possible to remove the actuator because it is too thick with the metal backing. I have enclose the pic of the new actuator installed before reinstalling the plugs and the window guide and you can see how much room is inside the door for the work area. The unit just slides right in and its easy to tighten all the screws needed for installation.
I just got my 99 TL and I am having this same problem with the driver side door. I was not sure if I had to reprogram my remote, but it makes perfect sense that I need to replace the actuator. Great write up - I hope to get this done over the weekend. Wish me luck!
damn, every acura i have owned i had to replace this. the rsx then tsx and potentially my TL. this sucks. at least its a cheap part. my sisters lexus is going to cost $200+ for the same part...
I have a 2005 acura RL and the dealer quoted me $550 for parts and labor. Part alone was $254. Its crazy? is it easy for DYI? Do they have after market for these? If so, where can I buy them?
Can't get the movable arm to set on the nipple of the lock mechanism. My 2001 cl is a little different. No metal plate behind the actuator. Also took out the 3 screws holding the lock mechanism to door jamb so I could get it to swing up a little. It's still connected to the rods so I cant take the assembly all the way out. Very frustrating.
 03-05-2011, 01:31 AM