DIY: Flaccid Armrest Cushion Replacement


 08-18-2012, 10:28 PM
#42
AZ Community Team

Join Date: May 2007
Location: N35�03'16.75", W 080�51'0.9"
Posts: 32,488
Received 7,770 Likes
on
4,341 Posts
Did mine today. Not too hard, but you do need to be careful about thicker padding. You can go 1", but I doubt anything thicker than that (at least for a typical DIY'er).
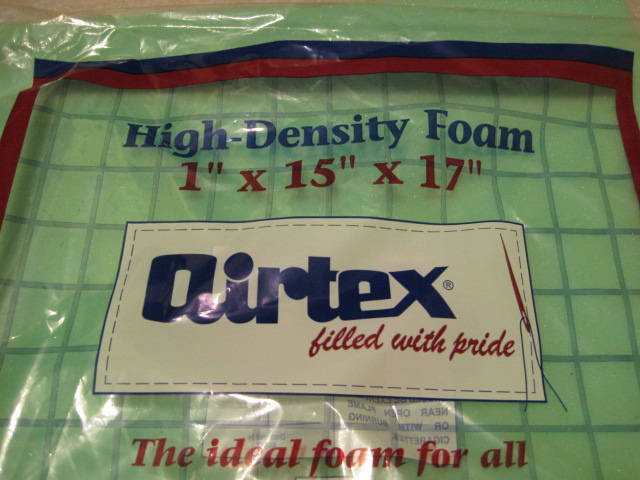
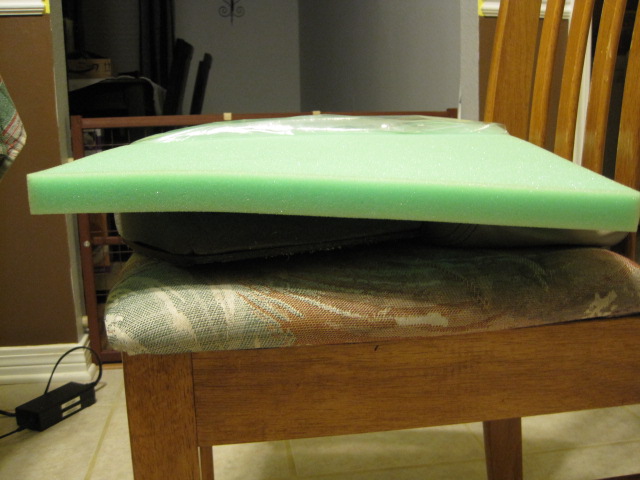
I got two types of padding. A 1" thick batting-like 'Foam Replacement' material and an 1/2" thick foam. The original idea was to use the 'Foam Replacement' as the base and the 1/2" foam only on top.
That would be far too thick though - the leather cover won't fit. Ended up with just the 1" white 'Foam Replacement' material.

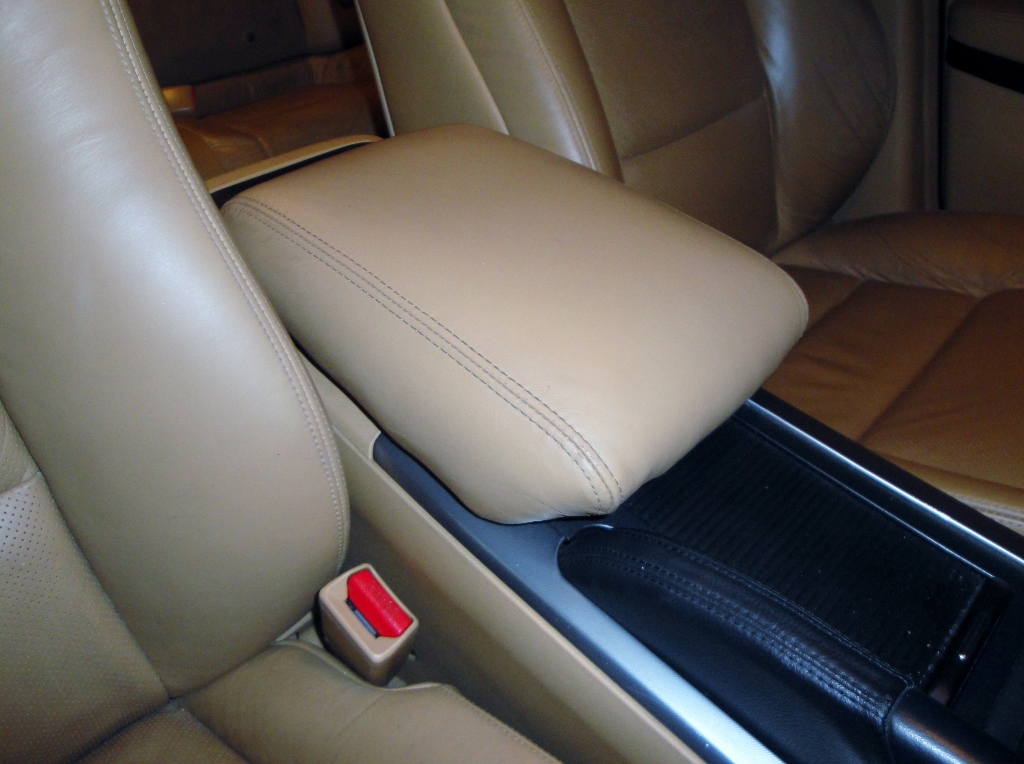
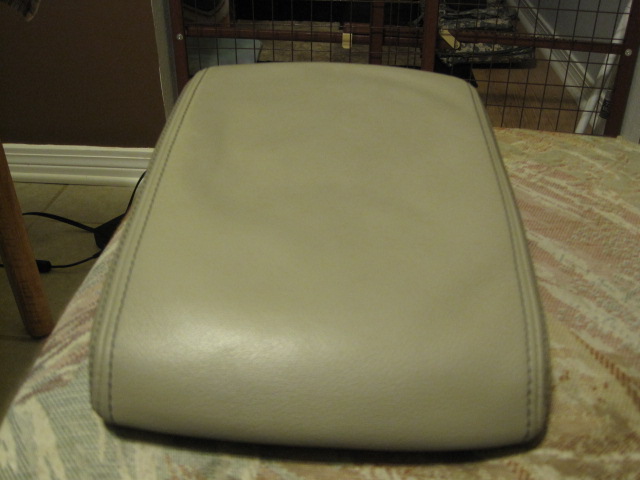
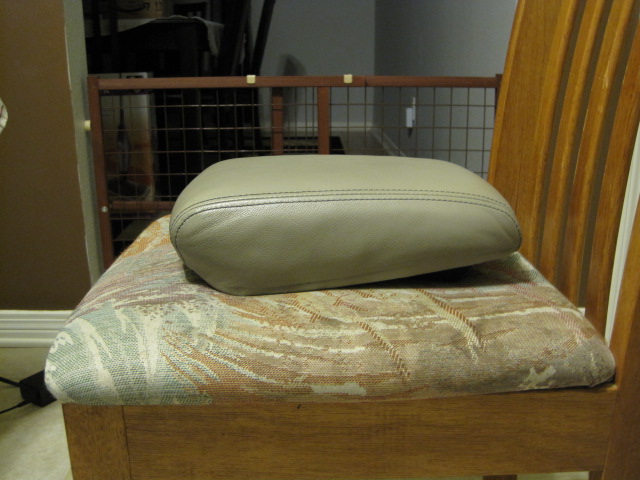
Before:

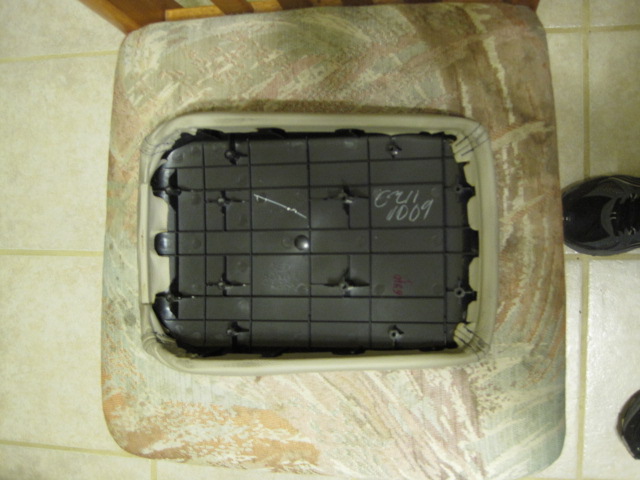
During:

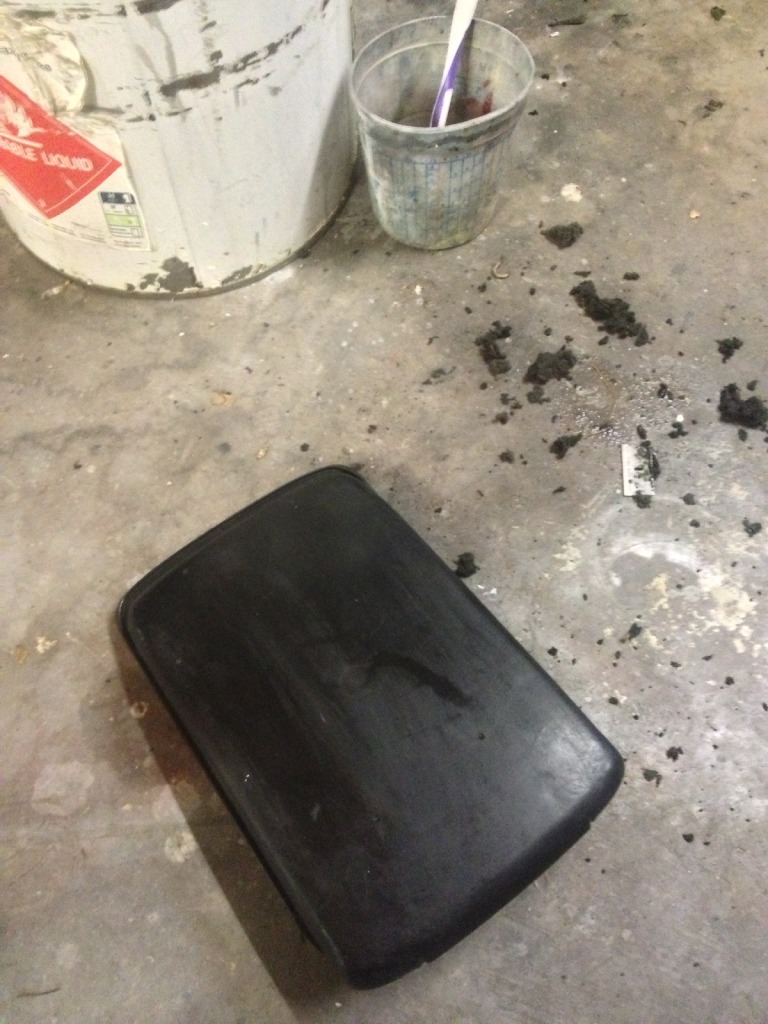
I marked the under-tray with a red sharpie for reference.

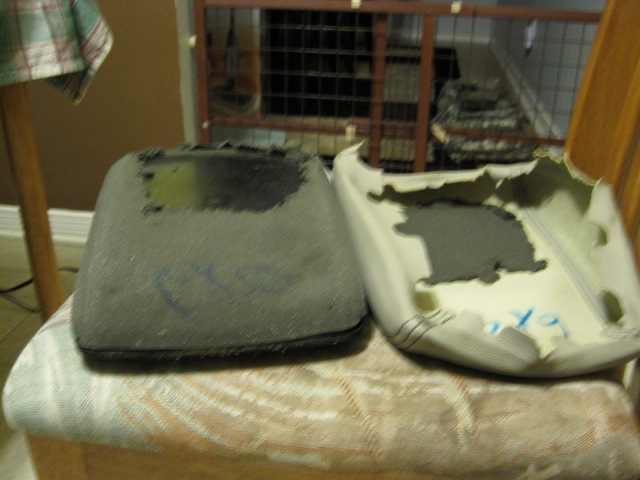
 - the original 'foam' was destroyed. Cleaned the residue as best I could with a degreaser (Simple Green) and a Magic Eraser. Wish I would've had some Goo-Gone.

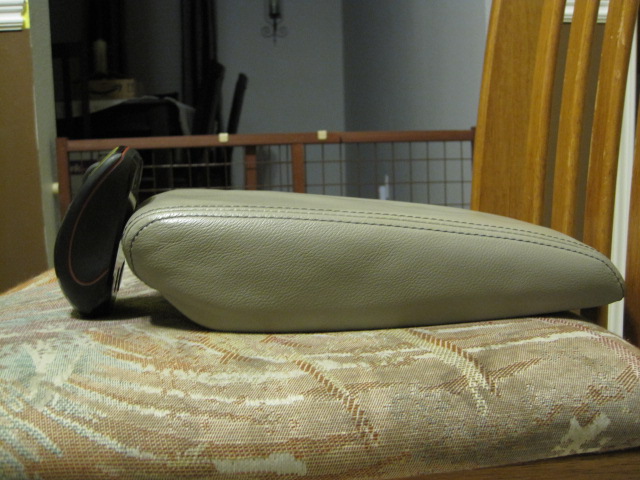
After:


Used Hot Melt to adhere the mateials to the under-tray. Seemed to work OK.
Not perfect; even at 1" the padding was a bit too thick and this lead to a few wrinkles at the corners or wrapping under the tray.
I got two types of padding. A 1" thick batting-like 'Foam Replacement' material and an 1/2" thick foam. The original idea was to use the 'Foam Replacement' as the base and the 1/2" foam only on top.
That would be far too thick though - the leather cover won't fit. Ended up with just the 1" white 'Foam Replacement' material.
Before:
During:
I marked the under-tray with a red sharpie for reference.
- the original 'foam' was destroyed. Cleaned the residue as best I could with a degreaser (Simple Green) and a Magic Eraser. Wish I would've had some Goo-Gone.After:
Used Hot Melt to adhere the mateials to the under-tray. Seemed to work OK.
Not perfect; even at 1" the padding was a bit too thick and this lead to a few wrinkles at the corners or wrapping under the tray.
The following users liked this post:
Bearcat94 (08-19-2012)
08-26-2012, 04:54 PM
#46
AZ Community Team
Join Date: May 2007
Location: N35�03'16.75", W 080�51'0.9"
Posts: 32,488
Received 7,770 Likes
on
4,341 Posts
Well done.

Post a pic ....
 .
.I stopped by Tandy Leather today to pick up a piece of pebbled black leather to do the arm rest on the rug rats Mustang .... no dice, they were closed.
 08-27-2012, 01:14 PM
#47
I just repadded my armrest yesterday as well. I actually started Saturday evening, spending the most time cleaning the old padding material off of the plastic and leather. That stuff is/was downright nasty.  I used a putty knife and lots of Goof-Off and a final cleaning with soap and water on the plastic armrest. I very carefully used the putty knife on the leather, then wiped it down with leather cleaner as best I could.
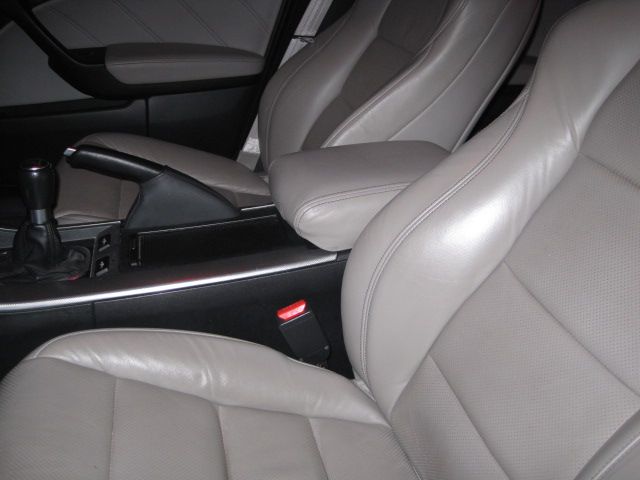
I used 1" padding on mine, but had to cut down the sides to about 1/2" to get the leather to wrap around the console. I am very happy with the way it looks now (flaccid is a great adjective to descibe how these things look with that factory crap). And it feels so nice on my forearm.
Here's a picture...

Thanks SRT-11 for the write-up; it gave me the inspiration to finally fix one of the things I never liked about my interior (the other being the crappy leather on the seats - some day I'll do something about them ).
I used a putty knife and lots of Goof-Off and a final cleaning with soap and water on the plastic armrest. I very carefully used the putty knife on the leather, then wiped it down with leather cleaner as best I could.I used 1" padding on mine, but had to cut down the sides to about 1/2" to get the leather to wrap around the console. I am very happy with the way it looks now (flaccid is a great adjective to descibe how these things look with that factory crap). And it feels so nice on my forearm.
Here's a picture...
Thanks SRT-11 for the write-up
; it gave me the inspiration to finally fix one of the things I never liked about my interior (the other being the crappy leather on the seats - some day I'll do something about them ).
The following users liked this post:
Bearcat94 (08-28-2012)
08-27-2012, 02:19 PM
#48
I did this DIY today and am extremely happy with the results. The foam the OEM used on that armrest is a disgrace. How could Honda/Acura allow for this. My armrest has been "flaccid" since I bought the car with 30,000 miles. I thought that's just the way Acura designed it, thinking all along how cheap it felt. I used half a yard of 1/2" high density foam purchased from Joann Fabrics for $5.50 and $8.98 for the 3M Super 77 at Menards. Cheap fixes are the best.
08-31-2012, 12:28 PM
#50
Advanced

Just wanted to thank SRT for this write up. I just finished mine and reinstalled it. Man what a difference. Saved over $100 in the process at least. Not a difficult install but like everyone else has said that black gunk/dry rotted foam is a bitch to deal with. I let that sucker soak over night in some degreaser/water and used a hard plastic brush the next morning.
09-22-2012, 10:08 PM
#51

Ok I also did this tonight and got good results with the replacement foam...BUT....before the install my armrest NEVER (since I owned it) would move forward like everyone else's. I just figured it was "stuck" and didnt worry about it. during removal i found the "sliding" metal bracket thing and it moved freely so i figured I had unstuck it in the process!!
Now during the reinstall of the arm rest it came to the point where I put the bracket back on I ran into some confusion on which screws went where...my partner in crime who removed most of them during the uninstall had to bail and left me with a pile of screws to work with....I went ahead and got the bracket mount to the arm rest and slid the plastic cover over and was left with 8 screws some large and some small I tried to figure out which went where but when putting the larger ones into the hole to hold the plastic trim to the metal bracket underneath. The arm rest wouldnt slide...so process of elimination told me I had them wrong and "swapped" them putting the little ones in the platic to hold it to arm rest and put big ones into hold arm rest "complete to the bracket that lifts it off console.
After installing everything I try to slide the arm rest forward it moves!! BUT not smoothly and I hear a lot of grinding from inside I slide it back quickly, again more grinding/breaking sounds and disassemble...suddenly little bits of plastic fall out and the large rectangle plastic piece which would stop the arm rest at certain points in the sliding process falls out...
I look for someway to repair it but cannot find any way to reattach so I just take it out...Never slid before so I'm not going to sweat it not sliding now and risk further problems. I try switching the screws back and put it all back the way it was before but now when I screw everything in and its "solid" and not moving like it was before when I go to close it, it kinda "pops" when its about 3 quaters the way shut and then shuts and pops again when coming open about 1 quater way up. I find it doent "pop" when the middle consoe compartment above the large storage area is open with it...the normal way to access the bottom console. but when the top is opened by itself the "pop" happens everytime...as if its being pushed into the console as it closes...
I decided to "adjust the screws holding the armrest from moving forward and by inching it forward just a hair or so, and screwing it back down so it wont move...it no longer pops and is just the same as it was before except now it sits slightly foward making accessing the buttons to open it hard and putting any drink into back cupholder causes it to rub the arm rest.
What can I do hear guys? everything seemed to be going so smoothly and then this has totally made me regret starting the project it looks so much nicer but the usefullness of the vehicles feathures has been deminished with the protruding armrest.
09-25-2012, 11:13 AM
#52
Ok well after spending another 20 min with my brother who bailed on me we seem to have got it worked it I still broke some little nipple like thing off the slider but we got it all working never the less and it slides and stops like it supposed to, which it never even slid before so I'm happy about that! No need to go looking to the junk yards! lol
10-08-2012, 09:19 PM
#54
Thanks for the Write up SRT-11! Didnt feel like working today and took a sick day and did this DIY. Used the 1 inch high density form was tuff to get the leather around but i'm satisfy at the end.
10-09-2012, 01:56 PM
#56
:what:
Just finished!!
It took me 35 min start to finish. After getting it opened up and seeing how nasty the old foam was, I decided to go a little different of a route. I used a razor blade to scrape as much of the shit off as possible and then used a rag and laquer thinner to clean the residue off. This is much quicker than most of the other processes I have seen posted. Be liberal with the thinner. It will do most of the work for you.
**WARNING** The thinner WILL soften the surface of the plastic and will make it a little sticky to the touch.. work in small areas and don't let the thinner soak into the plastic too much. DO NOT GET THINNER ON THE SURFACE OF THE LEATHER!!!
After letting the plastic piece sit in the sun for a min or two to dry off (doesn't take long for the thinner to flash off), I turned the leather inside out and put it back on the cleaned plastic to use the plastic as support for cleaning off the back of the leather. I used a dull gasket scraper ( a small putty knife will work fine) to clean the shit off of the back of the leather then did a once over on it with a rag dampened with the thinner. I glued the 1" foam (from hancock fabrics) on with Super 77 spray adhesive, then re-covered. Very simple upgrade compared to what I have had to go through in the past with other vehicles.
Last edited by Wacker; 10-09-2012 at 01:59 PM.
The following users liked this post:
Pitinzki (08-25-2013)

 11-01-2012, 11:58 PM
#59
Burning Brakes
I'm tempted to buy a new arm rest all together. Mine is getting flat but the leather paint is beginning to peel off and an annoying rattle that doesnt seem to go away no matter how much felt I insert between the side tracks for it. It vibrates up and down ever so slightly. Driving me mad.
 But I guess I shall try this and deal with it for a bit longer, plan to get a new bottom leather cushion for for both passenger and driver seat. My friend told me he will try to get me a discount
But I guess I shall try this and deal with it for a bit longer, plan to get a new bottom leather cushion for for both passenger and driver seat. My friend told me he will try to get me a discount
11-06-2012, 06:00 PM
#60
9th Gear
Join Date: Dec 2010
Location: davie FL
Posts: 9
Likes: 0
Received 0 Likes
on
0 Posts
Great write up. Thank you! I definitely will be doing this soon. The problem with mine is my leather has been cleaned so many times (previous owner) that it is faded bad. Does anyone know if someone sells a slip on leather cover that is stitched? Rather than just getting a plain piece of leather to cover. Thanks
11-07-2012, 10:23 AM
#62
Engineer in Training
Just finished!!
It took me 35 min start to finish. After getting it opened up and seeing how nasty the old foam was, I decided to go a little different of a route. I used a razor blade to scrape as much of the shit off as possible and then used a rag and laquer thinner to clean the residue off. This is much quicker than most of the other processes I have seen posted. Be liberal with the thinner. It will do most of the work for you.
**WARNING** The thinner WILL soften the surface of the plastic and will make it a little sticky to the touch.. work in small areas and don't let the thinner soak into the plastic too much. DO NOT GET THINNER ON THE SURFACE OF THE LEATHER!!!
After letting the plastic piece sit in the sun for a min or two to dry off (doesn't take long for the thinner to flash off), I turned the leather inside out and put it back on the cleaned plastic to use the plastic as support for cleaning off the back of the leather. I used a dull gasket scraper ( a small putty knife will work fine) to clean the shit off of the back of the leather then did a once over on it with a rag dampened with the thinner. I glued the 1" foam (from hancock fabrics) on with Super 77 spray adhesive, then re-covered. Very simple upgrade compared to what I have had to go through in the past with other vehicles.
I'm getting a 'custom' shift boot made and might have the company sell me some extra leather or have them make me an armrest to match. I'm going to get a boot (and possibly armrest) made with perforated leather that matches the door's leather insterts
11-11-2012, 06:12 PM
#63
Great thread and great write up. I fixed my flaccidness over the weekend. I used 1/2" foam and it worked great. I want to emphasize using a Sharpie or something to mark where there the leather was originally glued to the lid so you can get it back exactly where it was. I also threw my cover in the dryer before I tried to stretch it over the new foam to make it easier to install.

 11-25-2012, 11:53 PM
#67

Thanks for the great post the instructions were clear and easy to follow. I had done something similar for my 85 supra a long time ago. My leather was shot so I went to a tailor and had him make a new leather piece which worked out great.
11-28-2012, 12:04 PM
#68
Desert Life Sucks!!
iTrader: (2)
Join Date: May 2011
Location: Land of Entrapment
Age: 45
Posts: 3,455
Received 673 Likes
on
500 Posts
I went to Hobby Lobby yesterday and the only high dense foam they had was 2" thick. They had batting material but no thanks.
Any one know where some other places to get foam would be? I have no local craft shops to check and my only other option is walmart.
Amazon didn't have anything either. Gonna have to investigate.
Any one know where some other places to get foam would be? I have no local craft shops to check and my only other option is walmart.
Amazon didn't have anything either. Gonna have to investigate.
11-28-2012, 02:55 PM
#71
Desert Life Sucks!!
iTrader: (2)
Join Date: May 2011
Location: Land of Entrapment
Age: 45
Posts: 3,455
Received 673 Likes
on
500 Posts
http://www.foamforyou.com/Open_Cell_Foam.htm
Luxury firm high dense or tough luxury foam high dense as options.
Have to buy a pretty big piece for 1/2 thick. 8 or 14 dollars plus 10+ dollar shipping. But it looks pretty good?
Luxury firm high dense or tough luxury foam high dense as options.
Have to buy a pretty big piece for 1/2 thick. 8 or 14 dollars plus 10+ dollar shipping. But it looks pretty good?
11-28-2012, 03:05 PM
#72
:what:
Me thinks I paid $9 for a 24x24x1 inch square. I'm very happy with the 1" foam. Super cushy. They had memory foam too but I wasn't brave enough to try it. Any local fabric store will have it. Just find a blue hair and ask.


The following users liked this post:
Pitinzki (08-25-2013)
12-18-2012, 06:48 PM
#76
Desert Life Sucks!!
iTrader: (2)
Join Date: May 2011
Location: Land of Entrapment
Age: 45
Posts: 3,455
Received 673 Likes
on
500 Posts
Joanns fabric used a 50% discount so paid 4.99 or so.
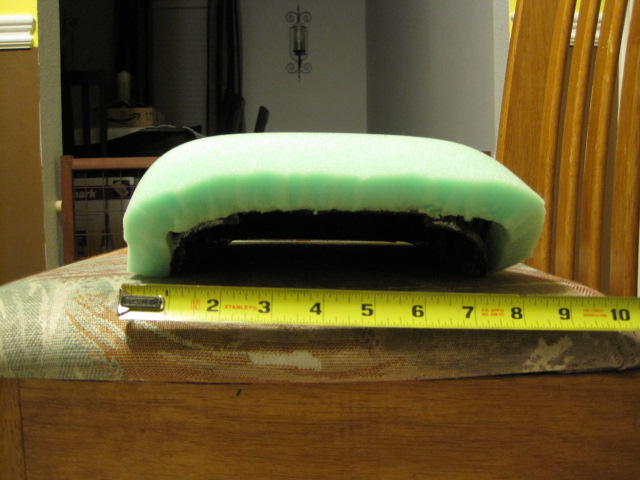
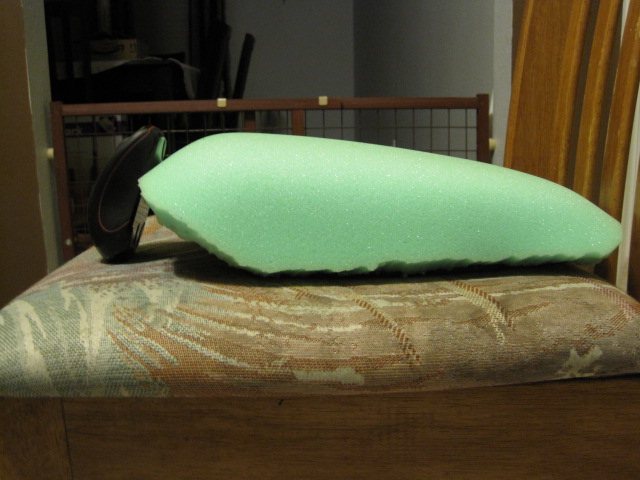
Before:
I didn't think this was too bad. Came right out of my leather and what didn't on my armrest I just used tuff stuff and a green scotch pad.
This stuff was thick.
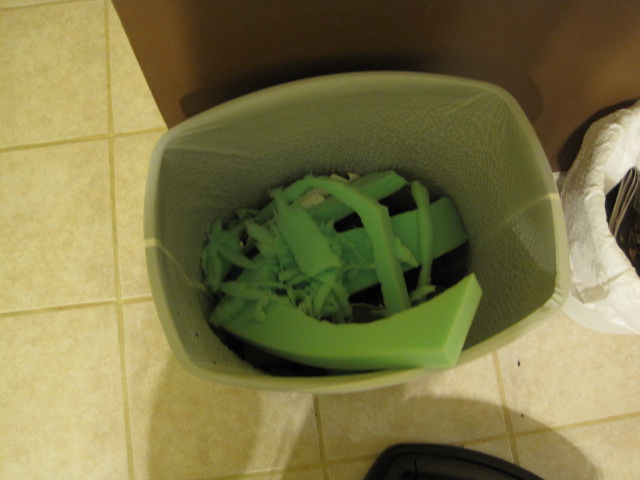
The trimmings afterwards:
Finished:
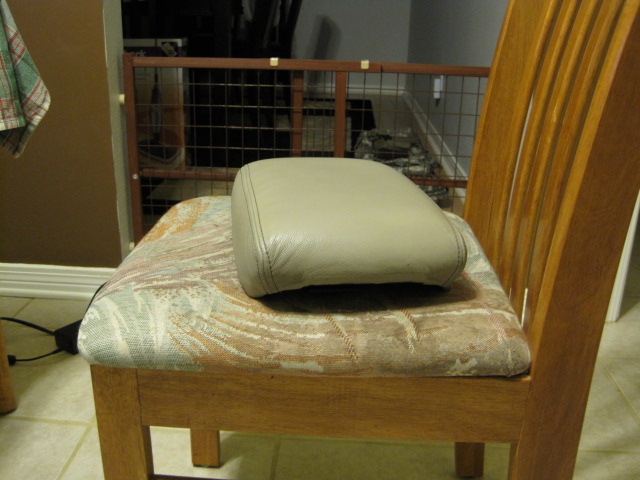

If I had to do it again I would have used 1/2 thick but I do like the high density foam and just used a little extra 1/2 on the very top. The sides were bulgy and didn't get the leather wrapped like stock.
You would never tell it was rewrapped but I can tell and that upsets me.
But I do love this. I could tell an immediate difference the first time I drove this car.
Awesome mod!!!!!!!
Before:
I didn't think this was too bad. Came right out of my leather and what didn't on my armrest I just used tuff stuff and a green scotch pad.
This stuff was thick.
The trimmings afterwards:
Finished:
If I had to do it again I would have used 1/2 thick but I do like the high density foam and just used a little extra 1/2 on the very top. The sides were bulgy and didn't get the leather wrapped like stock.
You would never tell it was rewrapped but I can tell and that upsets me.
But I do love this. I could tell an immediate difference the first time I drove this car.
Awesome mod!!!!!!!
The following users liked this post:
Pitinzki (08-25-2013)
12-18-2012, 09:18 PM
#78
Moderator
iTrader: (7)
If I had to do it again I would have used 1/2 thick but I do like the high density foam and just used a little extra 1/2 on the very top. The sides were bulgy and didn't get the leather wrapped like stock.
You would never tell it was rewrapped but I can tell and that upsets me.
But I do love this. I could tell an immediate difference the first time I drove this car.
Awesome mod!!!!!!!
It looks like you didnt pull the leather on tight enough? Did you mark the outline where it used to stick to, and made sure it went back to the same place? it takes time to get the leather to stretch back to the same spot but it will get there
12-18-2012, 11:17 PM
#79
Desert Life Sucks!!
iTrader: (2)
Join Date: May 2011
Location: Land of Entrapment
Age: 45
Posts: 3,455
Received 673 Likes
on
500 Posts
Haha, I tried and tried and trimmed and trimmed. It did not go exactly to same place. Close in most areas. The 77 wasn't tacking very well for me.
This was outside of my comfort of a mod. I like outcome. Its actually hard to tell. Padding was thick all the way around.
Aesthetics may be off but comfort is spot on!
This was outside of my comfort of a mod. I like outcome. Its actually hard to tell. Padding was thick all the way around.
Aesthetics may be off but comfort is spot on!
12-19-2012, 05:29 AM
#80
:what:
I've found in past projects that the best way to use the 77 is like a contact adhesive. Thoroughly wet both surfaces and allow both to slightly dry a bit and then be ready for a battle if you want them to come apart again. It's really good stuff.

