silvrbreez's '08 WDP TL-S Progress Thread


 01-08-2014, 11:59 AM
#82
Racer
Thread Starter
Not planning on it. I may change my mind down the line but I'd like to keep them as a spare set.
01-08-2014, 06:08 PM
#83
Team Owner
iTrader: (2)
Join Date: Jan 2008
Location: Kansas City, MO (Overland Park, KS)
Posts: 36,545
Received 6,470 Likes
on
5,162 Posts
I like 'em-can't wait to see them on.
01-08-2014, 09:17 PM
#84
Nice to see that you are taking your wheels apart and making everything new. The best way to get the wheels to separate is spray some pb blaster around the nuts and let it sit for a few minutes. It would be a lot easier if you could find a friend to help you remove the bolts and nuts if not it is a PITA because the rusted bolts are torqued around 30-40lbs and its not going to be easy. Good luck with the rebuild.
01-08-2014, 09:25 PM
#85
Racer
Thread Starter
Thanks guys. Yeah I'm anxious to get into these. I'm visiting the wheel repair shop tomorrow to address the small bend and from then it'll be to dig into to the disassembly.
I'll be keeping everyone updated as things develop.
Just wanted to say that I will be HIGHLY recommending this seller "infield_solutions" to anyone looking to source hard to find and rare JDM parts. Although I ran into a few snags with the condition of the wheels, this seller was prompt to respond and honored my request for a reimbursement to address the minor damages. Check him out on eBay and don't let the fact that he's in Malaysia scare you.
Last edited by Steven Bell; 01-09-2014 at 09:12 PM. Reason: Merged Posts
01-10-2014, 07:07 AM
#86
Racer
Thread Starter
UPDATE: The minor bend in one wheel was repaired yesterday. Quick and a good price. Started sanded on the lip of that wheel last night to remove the imperfections in the clear coat and the minor curb rash.
http://www.flickr.com/photos/bmb-photography/11870260014/http://www.flickr.com/photos/bmb-photography/11870260014/ by http://www.flickr.com/people/bmb-photography/, on Flickr
http://www.flickr.com/photos/bmb-photography/11870262294/http://www.flickr.com/photos/bmb-photography/11870262294/ by http://www.flickr.com/people/bmb-photography/, on Flickr
http://www.flickr.com/photos/bmb-photography/11869830965/http://www.flickr.com/photos/bmb-photography/11869830965/ by http://www.flickr.com/people/bmb-photography/, on Flickr
01-12-2014, 01:46 PM
#87
Racer
Thread Starter
UPDATE: Test fit the wheels last night before disassembling and refurbishing them. Fronts need a minimal spacer just to clear the calipers (say 5mm) and more to get flush with the fender (approx. 12mm or 1/2" at this ride height). Rears are in the pics below and the same spacer size would get them flush with the fender.
(sorry for the crappy quality phone pics)
http://www.flickr.com/photos/bmb-photography/11900468246/http://www.flickr.com/photos/bmb-photography/11900468246/ by http://www.flickr.com/people/bmb-photography/, on Flickr
http://www.flickr.com/photos/bmb-photography/11899879563/http://www.flickr.com/photos/bmb-photography/11899879563/ by http://www.flickr.com/people/bmb-photography/, on Flickr
http://www.flickr.com/photos/bmb-photography/11900019964/http://www.flickr.com/photos/bmb-photography/11900019964/ by http://www.flickr.com/people/bmb-photography/, on Flickr
http://www.flickr.com/photos/bmb-photography/11900015474/http://www.flickr.com/photos/bmb-photography/11900015474/ by http://www.flickr.com/people/bmb-photography/, on Flickr
I'm contemplating just running minimal spacers and going with meaty tires that are within spec for the car (OD, load rating, etc) or spacing them out and running stretched tires. I just don't care for the stretched tire look if I'm not planning to lower much more than I am now.
I'm currently 25" GTF and from what I've seen the stretched/flush look seems better to pull off if you're at least 24" GTF or lower. I just don't think that'd be a great height for me day-to-day and hauling the family kids around from time to time. I'm just not that hardcore I guess.
I'm thinking I'll just go meaty and have more of a luxury/track aesthetic than a street/stance aesthetic.
01-12-2014, 10:04 PM
#88
Team Owner
iTrader: (2)
Join Date: Jan 2008
Location: Kansas City, MO (Overland Park, KS)
Posts: 36,545
Received 6,470 Likes
on
5,162 Posts
Got any tires for those bad boys?
01-12-2014, 10:33 PM
#89
Racer
Thread Starter
I've got a few options in mind, but I likely won't be buying any until the restoration of the wheels is complete. Based on some of the setups run by D R E W, and since these are +45 offsets staggered 8.5 & 9.5, I'm considering 12mm F & 5mm R or 12mm F & R with 235/40 & 265/35 tires. When I look at my commute, how I use my car, I've had a tough time getting comfortable with running a stretched tire and lowering too much more than it is now. Those tire sizes would give me some meat, stay within the specs recommended by Acura, and still be slightly narrower and smaller OD than what D R E W was running with his TE37 setup (click here) or the EXE Convex setup (click here) he had. I know those were 19's, but it's the best point of reference I could find with someone who provided all the specs I needed to consider.
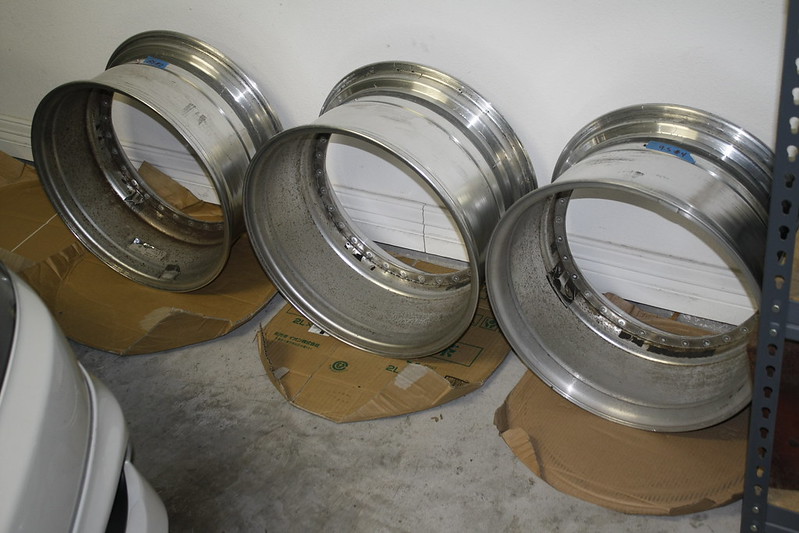
Still have quite a bit to do with the restoration, but tonight I was able to get the 18x8.5 faces removed and those lips/barrels are ready to be stripped of the clearcoat and sanded to remove oxidation & blemishes & prep for polishing.
http://www.flickr.com/photos/bmb-photography/11922556036/http://www.flickr.com/photos/bmb-photography/11922556036/ by http://www.flickr.com/people/bmb-photography/, on Flickr
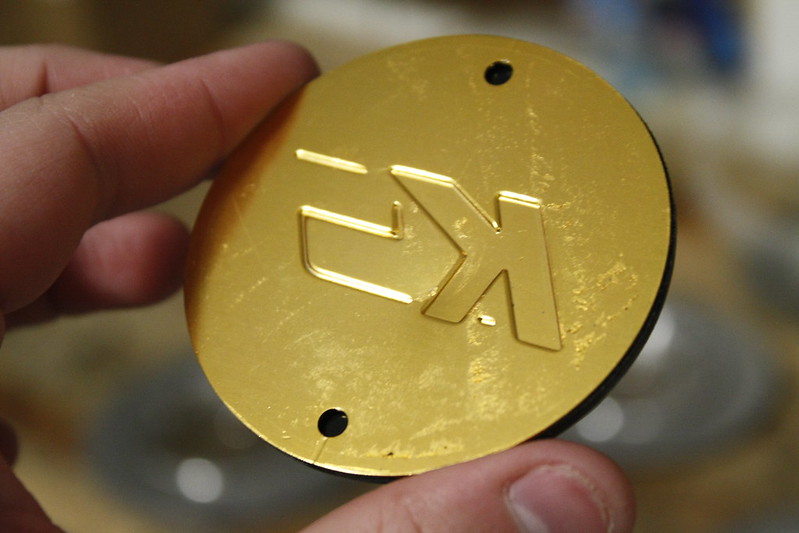
Also need to digitize this logo and get some more cut for the decals for whenever the faces get redone...
http://www.flickr.com/photos/bmb-photography/11922151514/http://www.flickr.com/photos/bmb-photography/11922151514/ by http://www.flickr.com/people/bmb-photography/, on Flickr
Still have quite a bit to do with the restoration, but tonight I was able to get the 18x8.5 faces removed and those lips/barrels are ready to be stripped of the clearcoat and sanded to remove oxidation & blemishes & prep for polishing.
http://www.flickr.com/photos/bmb-photography/11922556036/http://www.flickr.com/photos/bmb-photography/11922556036/ by http://www.flickr.com/people/bmb-photography/, on Flickr
Also need to digitize this logo and get some more cut for the decals for whenever the faces get redone...
http://www.flickr.com/photos/bmb-photography/11922151514/http://www.flickr.com/photos/bmb-photography/11922151514/ by http://www.flickr.com/people/bmb-photography/, on Flickr
Last edited by silvrbreez; 01-12-2014 at 10:37 PM.
01-15-2014, 01:22 PM
#90
Racer
Thread Starter
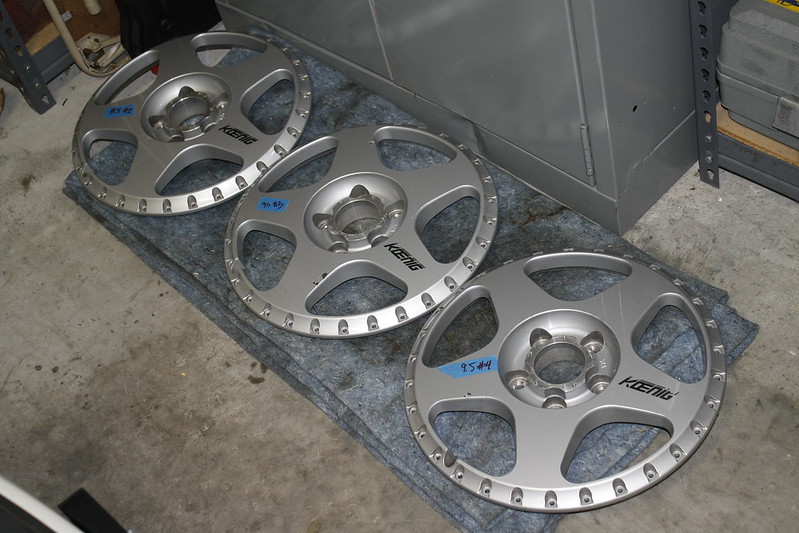
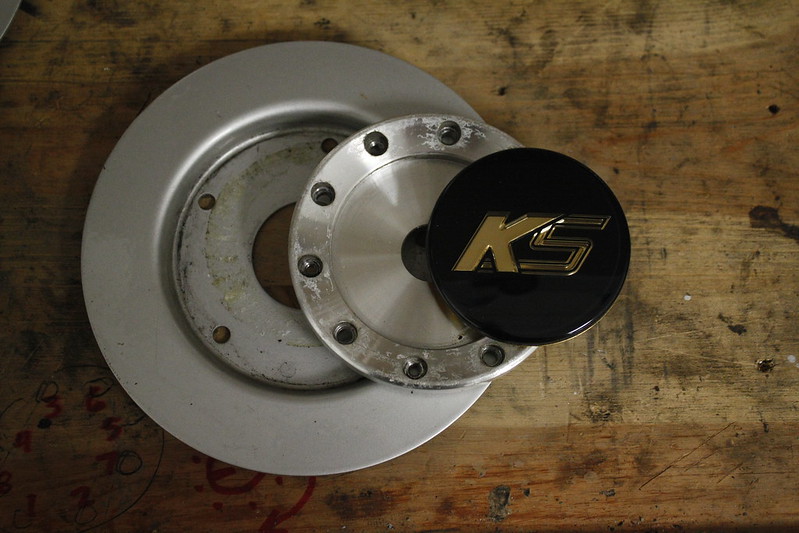
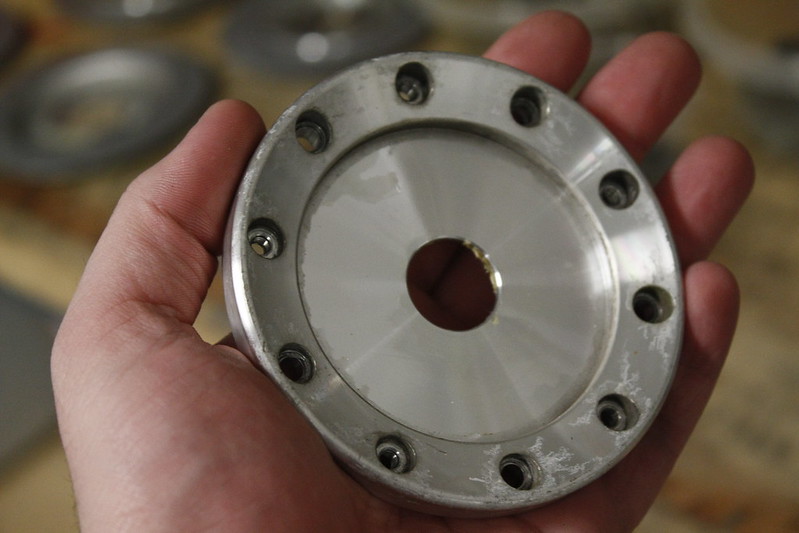
UPDATE: I disassembled the remaining wheels last night. I also carefully took apart the center caps using a heat gun to free up the adhesive holding the three pieces together.
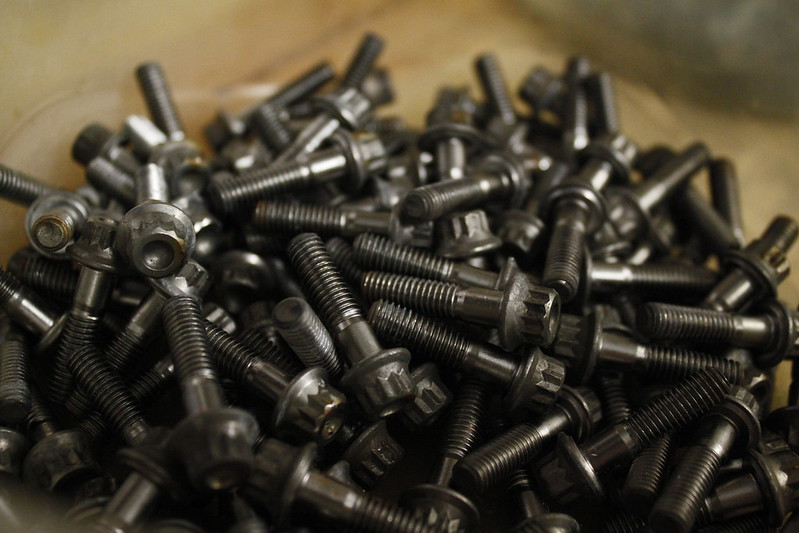
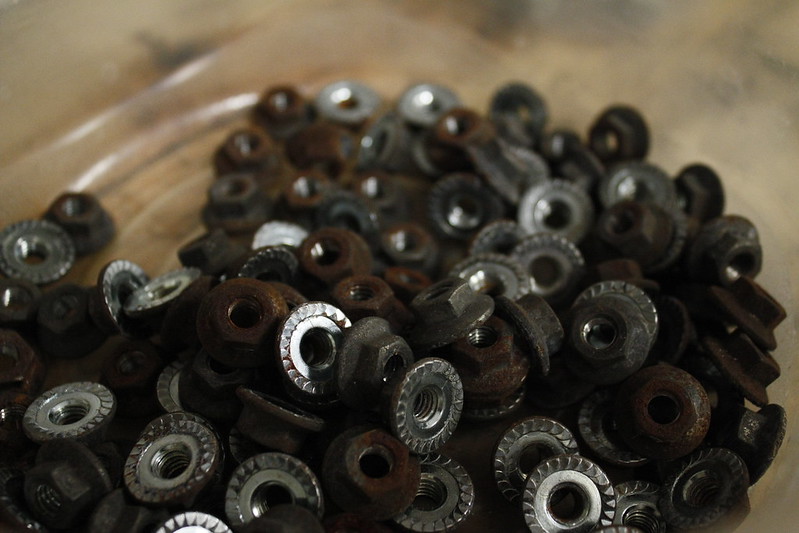
My thoughts so far is that the hardware is overall in pretty good shape, especially the bolts, but I'll be buying new stainless assembly nuts and center cap cap screws to match the 12-pt bolts.
I think I've decided how I'd like to refinish the wheels so now it's just getting them all prepped for that.
3 out of 4 faces (the 4th is being taken to get some refinishing quotes)
3 out of 4 hoops
Exploded Center Cap
Back of the Center Cap Decal
Beefy milled aluminum center cap insert
Stock stainless assembly bolts
Stock rusted assembly nuts
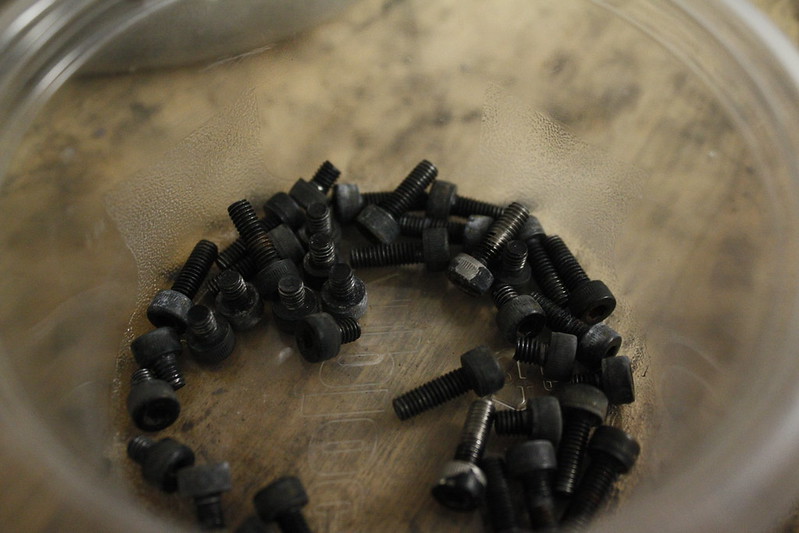
Stock center cap hardware
New TPMS adapters
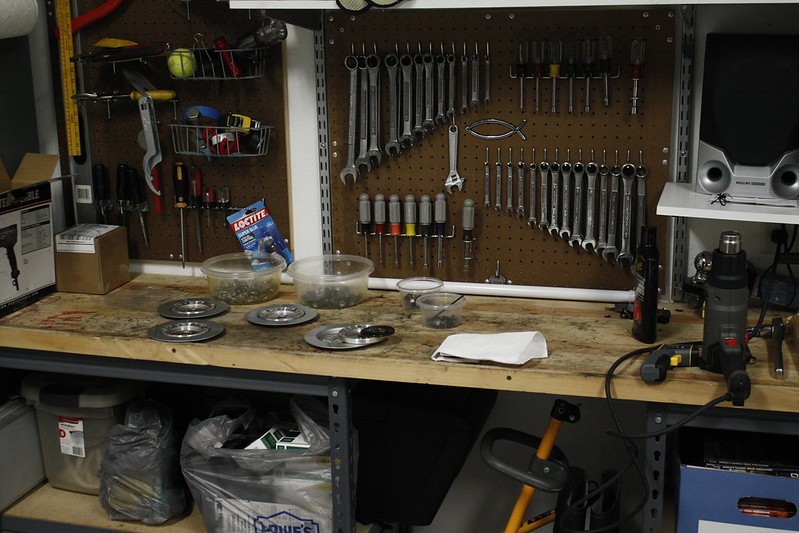
My workspace
My thoughts so far is that the hardware is overall in pretty good shape, especially the bolts, but I'll be buying new stainless assembly nuts and center cap cap screws to match the 12-pt bolts.
I think I've decided how I'd like to refinish the wheels so now it's just getting them all prepped for that.
3 out of 4 faces (the 4th is being taken to get some refinishing quotes)
3 out of 4 hoops
Exploded Center Cap
Back of the Center Cap Decal
Beefy milled aluminum center cap insert
Stock stainless assembly bolts
Stock rusted assembly nuts
Stock center cap hardware
New TPMS adapters
My workspace
 01-15-2014, 03:18 PM
#93
Moderator
iTrader: (3)
Multi-piece wheels 
01-15-2014, 09:36 PM
#94
Team Owner
iTrader: (2)
Join Date: Jan 2008
Location: Kansas City, MO (Overland Park, KS)
Posts: 36,545
Received 6,470 Likes
on
5,162 Posts
The wheels look good!
01-15-2014, 10:11 PM
#95
Suzuka Master
iTrader: (1)
 Lego rims
01-16-2014, 07:50 AM
Lego rims
01-16-2014, 07:50 AM
#96
Racer
Thread Starter
Thanks guys!
Overall they were in pretty good shape for 20+ year old wheels and I couldn't gotten away with mounting them as is, but after these are refinished over the next couple of weeks they should be mint.
Leaving for Disney World with the fam tomorrow and I'll be away from this project for a week but hitting hard when I return.
01-16-2014, 08:40 AM
#98
Racer
Thread Starter
You're pretty much right on with the name. "silvrbreez" was a name I've always used on forums since all my cars have been some sort of silver. It felt a little weird going with the same thing on this car.
01-16-2014, 08:46 AM
#99
Honestly, I love my silver S...and my black TL, but there's something so right about white. The red of the tails contrasting with the white is just absolutely fkn awesome.

Enjoy Disney, friend! If you have time, do a day at Islands of Adventure too.
Enjoy Disney, friend! If you have time, do a day at Islands of Adventure too.
01-16-2014, 01:29 PM
#100
Racer
Thread Starter
Thread Post #100
Figured I'd share this here. Let me know if there's another thread you think these links would be useful.
I've done a lot of research on this forum and across the website trying to decide on wheels, suspension, and overall fitment for this car. All of those pics have now been arranged on my flickr account for anyone to use. The titles of the photos indicate why the picture was cataloged. Some of you will probably even seen your cars in these albums.
Acura TL UA6/UA7 Suspensions
Acura TL UA6/UA7 Wheels
Acura TL UA6/UA7 Fitments
Last edited by silvrbreez; 01-16-2014 at 01:33 PM.
The following 2 users liked this post by silvrbreez:
KJ TL-S (01-16-2014),
zoostation (01-18-2014)
01-16-2014, 01:35 PM
#101
01-16-2014, 01:37 PM
#102
Racer
Thread Starter
Thanks.
Wish I had more suspension options saved. All I mostly cataloged on those was spring/shock kit options. Not long after those were researched did I just decide to go all in with the ISC N1 coils. No need to reference those as the height can be whatever you want it to be. As a matter of fact, I'll just rename that album to show that clearly.
Wish I had more suspension options saved. All I mostly cataloged on those was spring/shock kit options. Not long after those were researched did I just decide to go all in with the ISC N1 coils. No need to reference those as the height can be whatever you want it to be. As a matter of fact, I'll just rename that album to show that clearly.
01-16-2014, 02:39 PM
#103
I'd make a separate thread and get that stickied, even though there are similar threads, there aren't 2 alike and there's no shortage of new people coming in daily and asking the same exact questions.
I doubt I made the cut...
Great job though!
J.
hmmm...Bergeron, you say. French? French Canadian?
Work Equips...after my heart
I doubt I made the cut...
Great job though!
J.
hmmm...Bergeron, you say. French? French Canadian?
Work Equips...after my heart
Last edited by Steven Bell; 01-16-2014 at 06:19 PM. Reason: Merged Posts
01-16-2014, 03:08 PM
#104
Racer
Thread Starter
More like South Louisiana-ian, Cajun, Coonass. Dad's from Terrebone Parish on 'da bayou!
And sadly enough, I actually look a little bit like this...

I've created the new thread. Now how to get a mod to sticky it?
MR. BELL...................are you there?
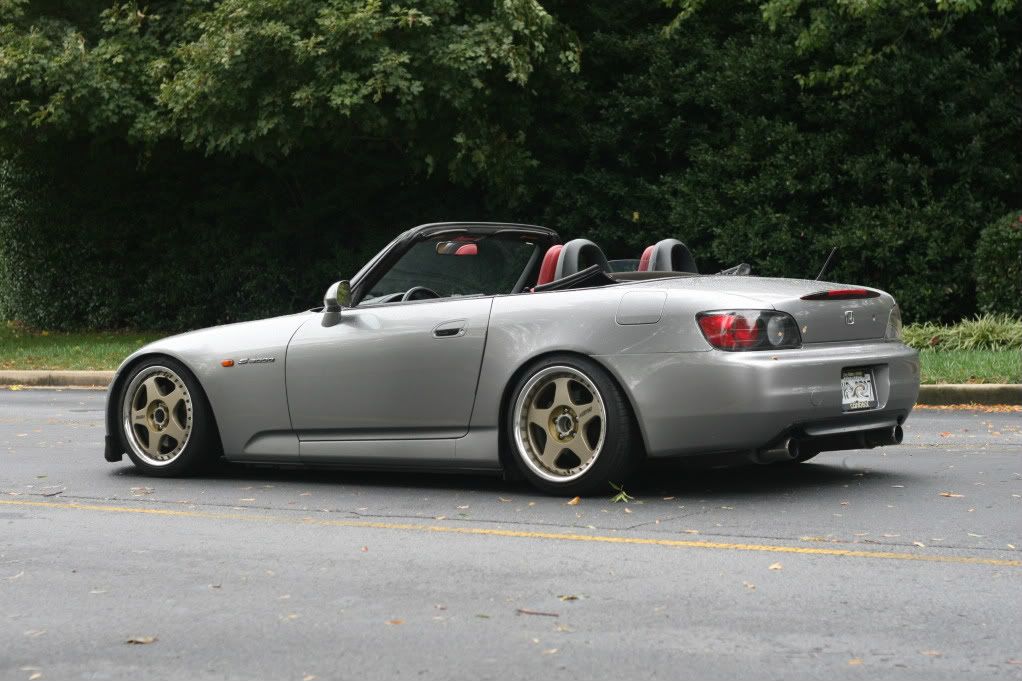
Here's the sister version of these (Koenig KG-WRV) on an S2000. These have smoothed lips where mine (KG-IMP) have stepped lips.
And sadly enough, I actually look a little bit like this...
MR. BELL...................are you there?
Last edited by Steven Bell; 01-16-2014 at 06:20 PM. Reason: Merged Posts
 01-16-2014, 04:28 PM
#106
Racer
Thread Starter
Used to think alligators were ornery because of an abnormally large medulla oblongata, but my mama says its cause they got all them teeth and no toothbrush.
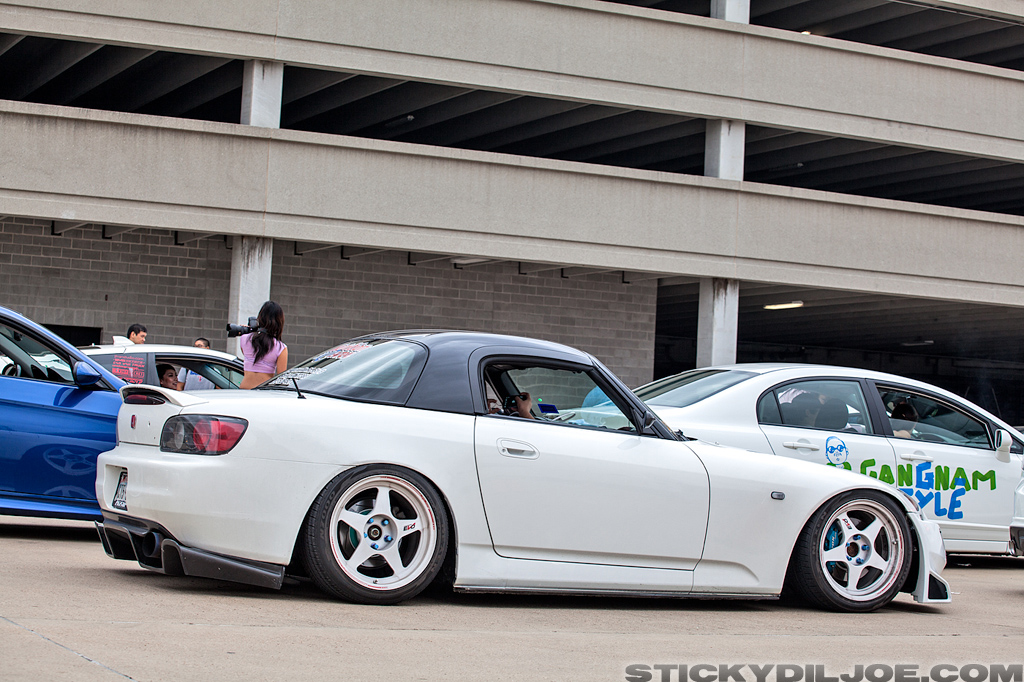
Those in your pic are the Desmond Regamaster Evo's. Thought about trying to pickup a set of those too, but wanted the contrasting lip instead.
BTW - look at that artist tape job on the Civic in the background. Props to that guy for having way to much time prepping for a car show.
Those in your pic are the Desmond Regamaster Evo's. Thought about trying to pickup a set of those too, but wanted the contrasting lip instead.
BTW - look at that artist tape job on the Civic in the background. Props to that guy for having way to much time prepping for a car show.
Last edited by silvrbreez; 01-16-2014 at 04:32 PM.
The following users liked this post:
rockstar143 (01-16-2014)

 01-16-2014, 06:21 PM
#109
Team Owner
iTrader: (2)
Join Date: Jan 2008
Location: Kansas City, MO (Overland Park, KS)
Posts: 36,545
Received 6,470 Likes
on
5,162 Posts
I'm here.......sticky what?
The following users liked this post:
silvrbreez (02-15-2014)
01-16-2014, 06:25 PM
#111
Team Owner
iTrader: (2)
Join Date: Jan 2008
Location: Kansas City, MO (Overland Park, KS)
Posts: 36,545
Received 6,470 Likes
on
5,162 Posts
Found it, got it, done!
The following users liked this post:
silvrbreez (02-15-2014)
01-16-2014, 06:26 PM
#112
This
Thread Post #100
Figured I'd share this here. Let me know if there's another thread you think these links would be useful.
I've done a lot of research on this forum and across the website trying to decide on wheels, suspension, and overall fitment for this car. All of those pics have now been arranged on my flickr account for anyone to use. The titles of the photos indicate why the picture was cataloged. Some of you will probably even seen your cars in these albums.
Acura TL UA6/UA7 Suspensions
Acura TL UA6/UA7 Wheels
Acura TL UA6/UA7 Fitments
Figured I'd share this here. Let me know if there's another thread you think these links would be useful.
I've done a lot of research on this forum and across the website trying to decide on wheels, suspension, and overall fitment for this car. All of those pics have now been arranged on my flickr account for anyone to use. The titles of the photos indicate why the picture was cataloged. Some of you will probably even seen your cars in these albums.
Acura TL UA6/UA7 Suspensions
Acura TL UA6/UA7 Wheels
Acura TL UA6/UA7 Fitments
01-19-2014, 02:44 PM
#113
Racer
Thread Starter
Not a TL update, but our Odyssey travelled great on the 10 hours between New Orleans and Orlando. Gotta love these Hondas. Recovering today from yesterday's drive, hanging with my aunt in Groveland, and watching some foosball. Momma says it's the devil though.
01-28-2014, 01:12 PM
#114
Racer
Thread Starter
Got back from Disney World Sunday. Need to get back on the wheel restoration, but I'm thinking I'll need to let it warm up a bit before I start messing with the paint stripper to remove the clear coat from the lips.
Here's my icy grill...
http://www.flickr.com/photos/bmb-photography/12193671724/
Guess this as much of a winter mode as I'll ever see down here in Southeast Texas.
Here's my icy grill...
http://www.flickr.com/photos/bmb-photography/12193671724/
Guess this as much of a winter mode as I'll ever see down here in Southeast Texas.
The following users liked this post:
rockstar143 (02-20-2014)
01-28-2014, 10:27 PM
#115
Team Owner
iTrader: (2)
Join Date: Jan 2008
Location: Kansas City, MO (Overland Park, KS)
Posts: 36,545
Received 6,470 Likes
on
5,162 Posts
Wow, even in Texas.....
01-29-2014, 01:11 AM
#116
takin care of Business in
iTrader: (5)
Join Date: Jan 2008
Location: Kansas City, MO
Age: 40
Posts: 30,994
Received 4,732 Likes
on
4,064 Posts
subd for more
01-29-2014, 03:48 PM
#117
Racer
Thread Starter
Think I've got my color scheme for the refinishing of the wheels figured out. I'm veering off my original plans to simulate a brushed finish on the lips. I'm convinced I won't be happy unless I take them to a machine shop and get them lathed and I don't want to shave any material off of these. I've considered polishing, but I've had chrome/polished/blingy lips on all my past cars and I'm wanting something different.
Aiming to get everything smoothed out and dropped to the powdercoater this week.
Aiming to get everything smoothed out and dropped to the powdercoater this week.
01-30-2014, 04:03 PM
#118
Racer
Thread Starter
Wheels have been dropped off to the powdercoater.
New OEM TPMS sensors are on the way.
New 0.045" 3M VHB adhesive foam is on the way to reassemble the cetner caps.
New lock nuts for wheel assembly, decorative center cap bolts, and hubcentric rings are being sourced tomorrow.
Now I need quotes on tires/mount/balance.
New OEM TPMS sensors are on the way.
New 0.045" 3M VHB adhesive foam is on the way to reassemble the cetner caps.
New lock nuts for wheel assembly, decorative center cap bolts, and hubcentric rings are being sourced tomorrow.
Now I need quotes on tires/mount/balance.
01-30-2014, 09:56 PM
#119
Team Owner
iTrader: (2)
Join Date: Jan 2008
Location: Kansas City, MO (Overland Park, KS)
Posts: 36,545
Received 6,470 Likes
on
5,162 Posts
Excellent....anxious to see pics.
02-15-2014, 01:59 PM
#120
Racer
Thread Starter
So the wheel restoration/refinishing is complete and just waiting for new rubber to be mounted and balanced. Here's some shots from the last couple of weeks worth of work.
An direct replacement for this hardware has proven to be impossible short of having fresh one's machined. I wanted to keep the dimpled heads like the classic BBS assembly hardware, but I wanted them stainless. It just proved easier to salvage the original hardware. One of these old bolts sheared in the reassembly process and another was so marred up in the threads that it couldn't be rethreaded with a die. Saving 118 out of 120 is still something I'm proud of. The other two are being replaced with zinc coated classic BBS bolts to try and get me as close to original as possible. One bolt on each of the rear wheels will have this and my hope is only I'll be able to point it out and otherwise no one will have a clue. :fingerscrossed: Maybe in time I'll go back and replace everything with ARP M6 12-pt stainless hardware with the flat (non-dimpled) face.
http://www.flickr.com/photos/bmb-photography/12433185705/http://www.flickr.com/photos/bmb-photography/12433185705/ by http://www.flickr.com/people/bmb-photography/, on Flickr
I needed to get a little creative with restoring the billet machined surround of the center cap. I'm very happy with how this turned out.
http://www.flickr.com/photos/bmb-photography/12546041493/http://www.flickr.com/photos/bmb-photography/12546041493/ by http://www.flickr.com/people/bmb-photography/, on Flickr
http://www.flickr.com/photos/bmb-photography/12546036963/http://www.flickr.com/photos/bmb-photography/12546036963/ by http://www.flickr.com/people/bmb-photography/, on Flickr
I decided to go with an aesthetic similar to the stock Type S wheels but with some flare to emphasize the 3-piece assembly of these classic and rare wheels. I'm very happy with the outcome and it really fits my style. I like to bring the old into the new and I think I got what I wanted out of this refinishing scheme.
http://www.flickr.com/photos/bmb-photography/12344339093/http://www.flickr.com/photos/bmb-photography/12344339093/ by http://www.flickr.com/people/bmb-photography/, on Flickr
http://www.flickr.com/photos/bmb-photography/12545978095/http://www.flickr.com/photos/bmb-photography/12545978095/ by http://www.flickr.com/people/bmb-photography/, on Flickr
http://www.flickr.com/photos/bmb-photography/12546119203/http://www.flickr.com/photos/bmb-photography/12546119203/ by http://www.flickr.com/people/bmb-photography/, on Flickr
http://www.flickr.com/photos/bmb-photography/12545968035/http://www.flickr.com/photos/bmb-photography/12545968035/ by http://www.flickr.com/people/bmb-photography/, on Flickr
http://www.flickr.com/photos/bmb-photography/12546470124/http://www.flickr.com/photos/bmb-photography/12546470124/ by http://www.flickr.com/people/bmb-photography/, on Flickr
http://www.flickr.com/photos/bmb-photography/12545956235/http://www.flickr.com/photos/bmb-photography/12545956235/ by http://www.flickr.com/people/bmb-photography/, on Flickr
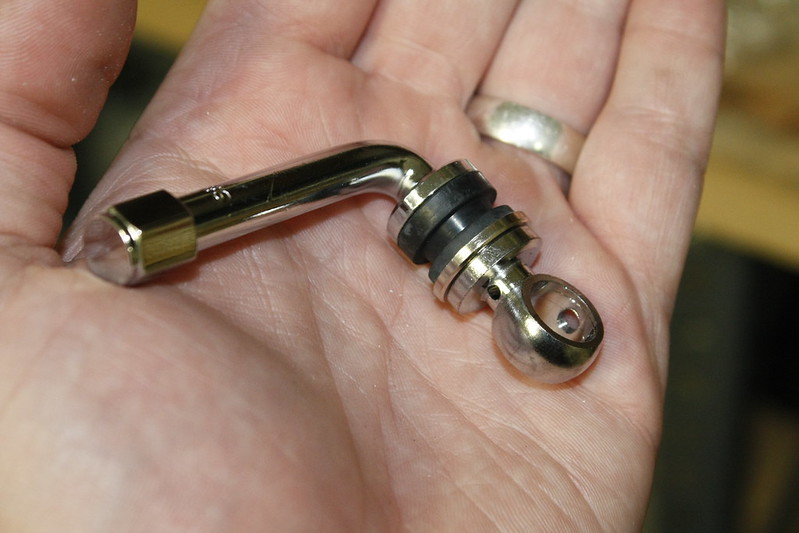
These valve stems are really trick and worked great with a fresh set of OEM sensors. They are listed on Varrestoen eBay page and are made to go on Marcato forged wheels. I'd highly recommend these to anyone doing a restoration where you need 90deg valve stems.
http://www.flickr.com/photos/bmb-photography/12546458134/http://www.flickr.com/photos/bmb-photography/12546458134/ by http://www.flickr.com/people/bmb-photography/, on Flickr
http://www.flickr.com/photos/bmb-photography/12546442314/http://www.flickr.com/photos/bmb-photography/12546442314/ by http://www.flickr.com/people/bmb-photography/, on Flickr
http://www.flickr.com/photos/bmb-photography/12545948195/http://www.flickr.com/photos/bmb-photography/12545948195/ by http://www.flickr.com/people/bmb-photography/, on Flickr
http://www.flickr.com/photos/bmb-photography/12546091513/http://www.flickr.com/photos/bmb-photography/12546091513/ by http://www.flickr.com/people/bmb-photography/, on Flickr
http://www.flickr.com/photos/bmb-photography/12546446414/http://www.flickr.com/photos/bmb-photography/12546446414/ by http://www.flickr.com/people/bmb-photography/, on Flickr
http://www.flickr.com/photos/bmb-photography/12546439754/http://www.flickr.com/photos/bmb-photography/12546439754/ by http://www.flickr.com/people/bmb-photography/, on Flickr
http://www.flickr.com/photos/bmb-photography/12546057793/http://www.flickr.com/photos/bmb-photography/12546057793/ by http://www.flickr.com/people/bmb-photography/, on Flickr
http://www.flickr.com/photos/bmb-photography/12545906295/http://www.flickr.com/photos/bmb-photography/12545906295/ by http://www.flickr.com/people/bmb-photography/, on Flickr
http://www.flickr.com/photos/bmb-photography/12545923265/http://www.flickr.com/photos/bmb-photography/12545923265/ by http://www.flickr.com/people/bmb-photography/, on Flickr
http://www.flickr.com/photos/bmb-photography/12545918175/http://www.flickr.com/photos/bmb-photography/12545918175/ by http://www.flickr.com/people/bmb-photography/, on Flickr
http://www.flickr.com/photos/bmb-photography/12546061453/http://www.flickr.com/photos/bmb-photography/12546061453/ by http://www.flickr.com/people/bmb-photography/, on Flickr
An direct replacement for this hardware has proven to be impossible short of having fresh one's machined. I wanted to keep the dimpled heads like the classic BBS assembly hardware, but I wanted them stainless. It just proved easier to salvage the original hardware. One of these old bolts sheared in the reassembly process and another was so marred up in the threads that it couldn't be rethreaded with a die. Saving 118 out of 120 is still something I'm proud of. The other two are being replaced with zinc coated classic BBS bolts to try and get me as close to original as possible. One bolt on each of the rear wheels will have this and my hope is only I'll be able to point it out and otherwise no one will have a clue. :fingerscrossed: Maybe in time I'll go back and replace everything with ARP M6 12-pt stainless hardware with the flat (non-dimpled) face.
http://www.flickr.com/photos/bmb-photography/12433185705/http://www.flickr.com/photos/bmb-photography/12433185705/ by http://www.flickr.com/people/bmb-photography/, on Flickr
I needed to get a little creative with restoring the billet machined surround of the center cap. I'm very happy with how this turned out.
http://www.flickr.com/photos/bmb-photography/12546041493/http://www.flickr.com/photos/bmb-photography/12546041493/ by http://www.flickr.com/people/bmb-photography/, on Flickr
http://www.flickr.com/photos/bmb-photography/12546036963/http://www.flickr.com/photos/bmb-photography/12546036963/ by http://www.flickr.com/people/bmb-photography/, on Flickr
I decided to go with an aesthetic similar to the stock Type S wheels but with some flare to emphasize the 3-piece assembly of these classic and rare wheels. I'm very happy with the outcome and it really fits my style. I like to bring the old into the new and I think I got what I wanted out of this refinishing scheme.
http://www.flickr.com/photos/bmb-photography/12344339093/http://www.flickr.com/photos/bmb-photography/12344339093/ by http://www.flickr.com/people/bmb-photography/, on Flickr
http://www.flickr.com/photos/bmb-photography/12545978095/http://www.flickr.com/photos/bmb-photography/12545978095/ by http://www.flickr.com/people/bmb-photography/, on Flickr
http://www.flickr.com/photos/bmb-photography/12546119203/http://www.flickr.com/photos/bmb-photography/12546119203/ by http://www.flickr.com/people/bmb-photography/, on Flickr
http://www.flickr.com/photos/bmb-photography/12545968035/http://www.flickr.com/photos/bmb-photography/12545968035/ by http://www.flickr.com/people/bmb-photography/, on Flickr
http://www.flickr.com/photos/bmb-photography/12546470124/http://www.flickr.com/photos/bmb-photography/12546470124/ by http://www.flickr.com/people/bmb-photography/, on Flickr
http://www.flickr.com/photos/bmb-photography/12545956235/http://www.flickr.com/photos/bmb-photography/12545956235/ by http://www.flickr.com/people/bmb-photography/, on Flickr
These valve stems are really trick and worked great with a fresh set of OEM sensors. They are listed on Varrestoen eBay page and are made to go on Marcato forged wheels. I'd highly recommend these to anyone doing a restoration where you need 90deg valve stems.
http://www.flickr.com/photos/bmb-photography/12546458134/http://www.flickr.com/photos/bmb-photography/12546458134/ by http://www.flickr.com/people/bmb-photography/, on Flickr
http://www.flickr.com/photos/bmb-photography/12546442314/http://www.flickr.com/photos/bmb-photography/12546442314/ by http://www.flickr.com/people/bmb-photography/, on Flickr
http://www.flickr.com/photos/bmb-photography/12545948195/http://www.flickr.com/photos/bmb-photography/12545948195/ by http://www.flickr.com/people/bmb-photography/, on Flickr
http://www.flickr.com/photos/bmb-photography/12546091513/http://www.flickr.com/photos/bmb-photography/12546091513/ by http://www.flickr.com/people/bmb-photography/, on Flickr
http://www.flickr.com/photos/bmb-photography/12546446414/http://www.flickr.com/photos/bmb-photography/12546446414/ by http://www.flickr.com/people/bmb-photography/, on Flickr
http://www.flickr.com/photos/bmb-photography/12546439754/http://www.flickr.com/photos/bmb-photography/12546439754/ by http://www.flickr.com/people/bmb-photography/, on Flickr
http://www.flickr.com/photos/bmb-photography/12546057793/http://www.flickr.com/photos/bmb-photography/12546057793/ by http://www.flickr.com/people/bmb-photography/, on Flickr
http://www.flickr.com/photos/bmb-photography/12545906295/http://www.flickr.com/photos/bmb-photography/12545906295/ by http://www.flickr.com/people/bmb-photography/, on Flickr
http://www.flickr.com/photos/bmb-photography/12545923265/http://www.flickr.com/photos/bmb-photography/12545923265/ by http://www.flickr.com/people/bmb-photography/, on Flickr
http://www.flickr.com/photos/bmb-photography/12545918175/http://www.flickr.com/photos/bmb-photography/12545918175/ by http://www.flickr.com/people/bmb-photography/, on Flickr
http://www.flickr.com/photos/bmb-photography/12546061453/http://www.flickr.com/photos/bmb-photography/12546061453/ by http://www.flickr.com/people/bmb-photography/, on Flickr
Last edited by silvrbreez; 02-15-2014 at 02:07 PM.