'07 TL, Ground Zero Plutonium 3 way active Line, Mosconi Amplifiers, Custom!
 05-27-2015, 07:15 AM
#1
Racer
Thread Starter

'07 TL, Ground Zero Plutonium 3 way active Line, Mosconi Amplifiers, Custom!
I'm building a new system in my 07 TL, its being build from ground up, Lots of mind changing in the process,.... Here is a link to DIyMA!!
Full Active 3 way setup from Ground Zero Plutonium line
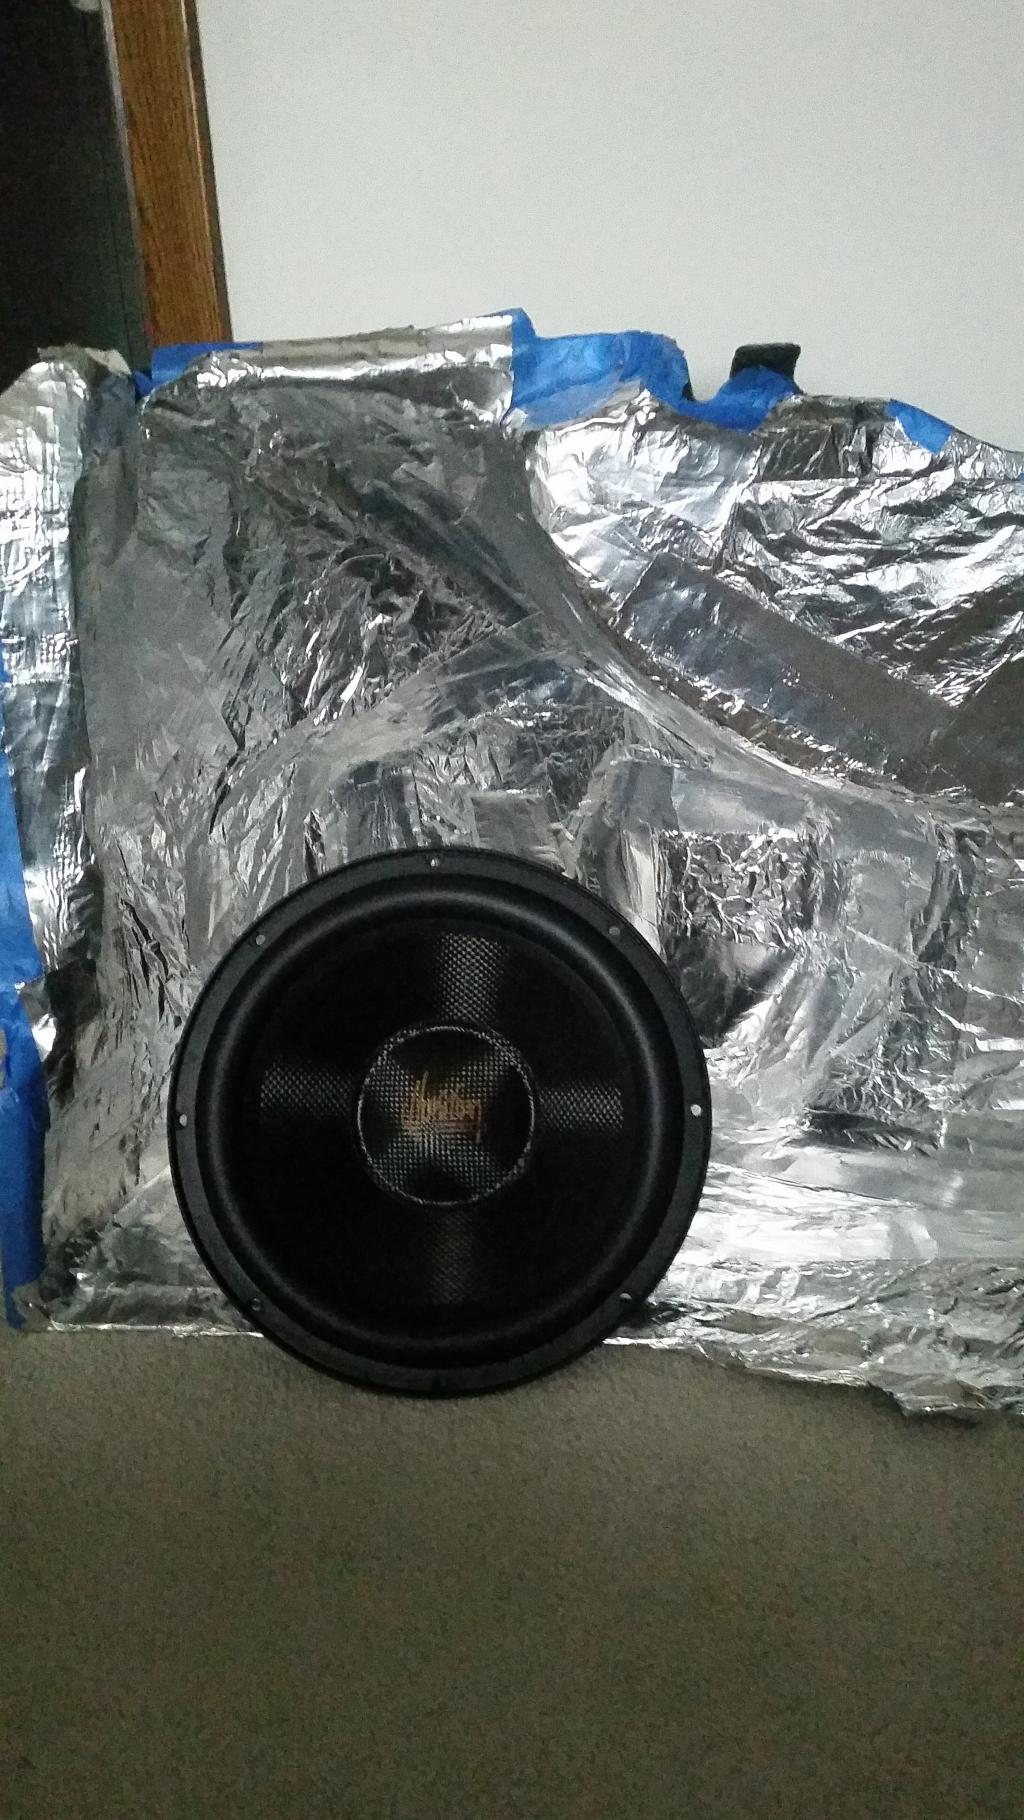
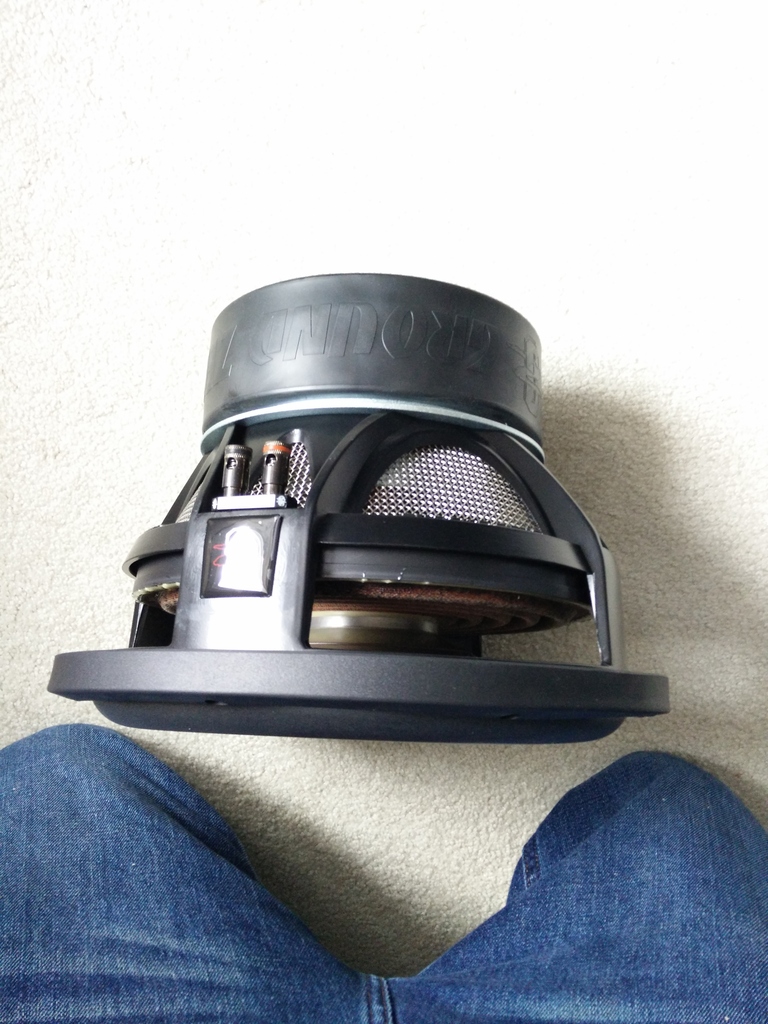
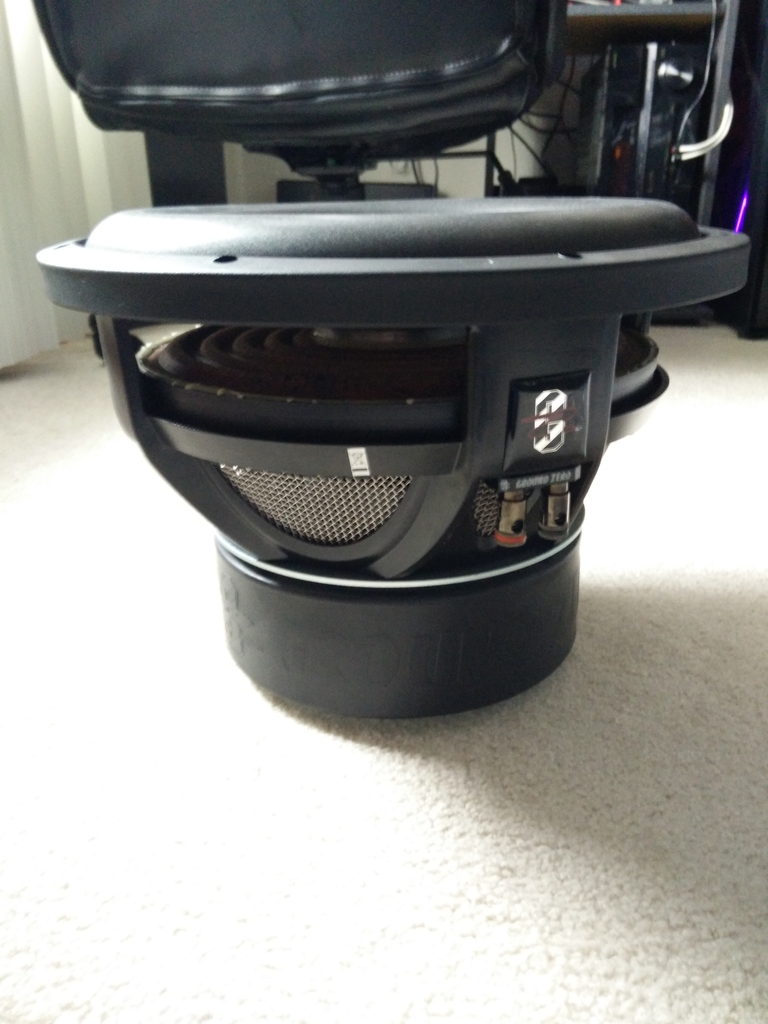
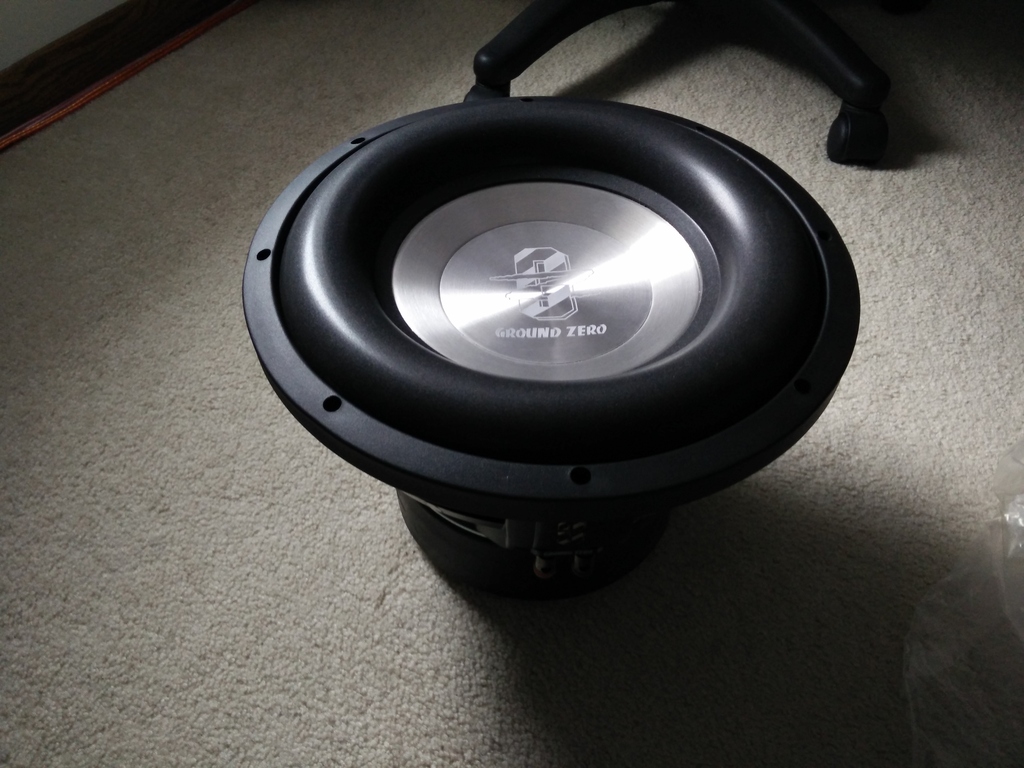
Ground Zero Plutonium 12X sub
Car Pc
Alpine H800 sound processor plus Controller
Custom Sub box
NorthStar Battery
big 3
All 12G wire for 3 way setup and more...
Build Log My New 07 Acura TL - Car Audio | DiyMobileAudio.com | Car Stereo Forum
I don't need anyone bashing or say stupid comments, this for you guys to view and share your thoughts... stupid comments will be ignored...
Enjoy!
Full Active 3 way setup from Ground Zero Plutonium line
Ground Zero Plutonium 12X sub
Car Pc
Alpine H800 sound processor plus Controller
Custom Sub box
NorthStar Battery
big 3
All 12G wire for 3 way setup and more...
Build Log My New 07 Acura TL - Car Audio | DiyMobileAudio.com | Car Stereo Forum
I don't need anyone bashing or say stupid comments, this for you guys to view and share your thoughts... stupid comments will be ignored...
Enjoy!


 06-09-2015, 01:38 AM
#4
Racer
Thread Starter
More updates Pillars are in , speaker cable has been ran, power, ground, amp rack is on its way, new amp came in last week. box build is in a progress.
If you have questions, please ask
, speaker cable has been ran, power, ground, amp rack is on its way, new amp came in last week. box build is in a progress. If you have questions, please ask
06-16-2015, 06:48 AM
#5
Racer
Thread Starter
More updates has been posted in the link,
I needed to make custom rings for my mid drivers. if you think you going to swap out speakers in TL's well good luck, you will need custom adapters for the speakers to fit, and for the door panel to go on it,
I needed to make custom rings for my mid drivers. if you think you going to swap out speakers in TL's well good luck, you will need custom adapters for the speakers to fit, and for the door panel to go on it,
07-11-2015, 07:49 PM
#7
Racer
Thread Starter
So here it is, I will make a little write up on my TL build, Here it is!
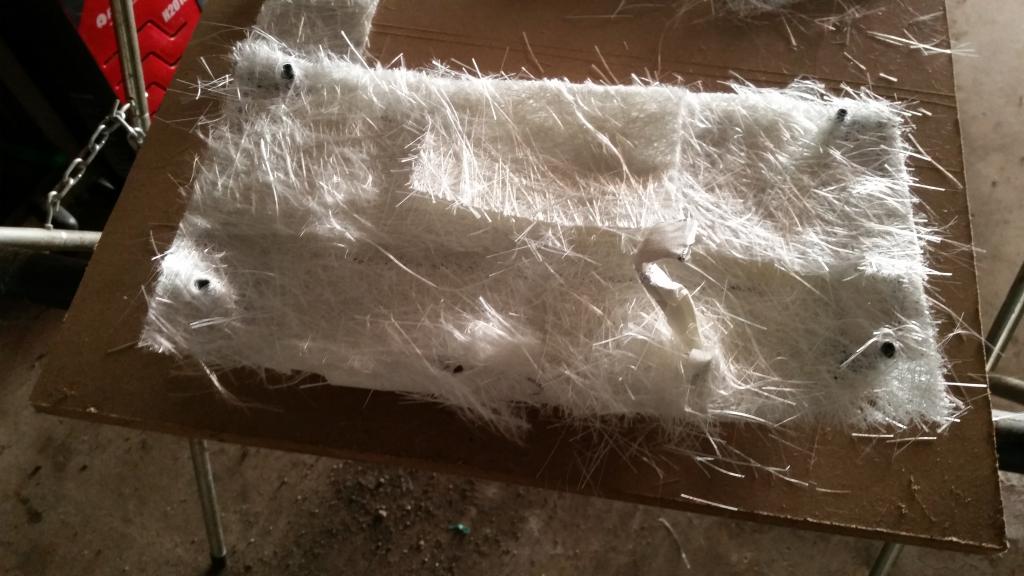
I started making box since I had extra panel for the car,
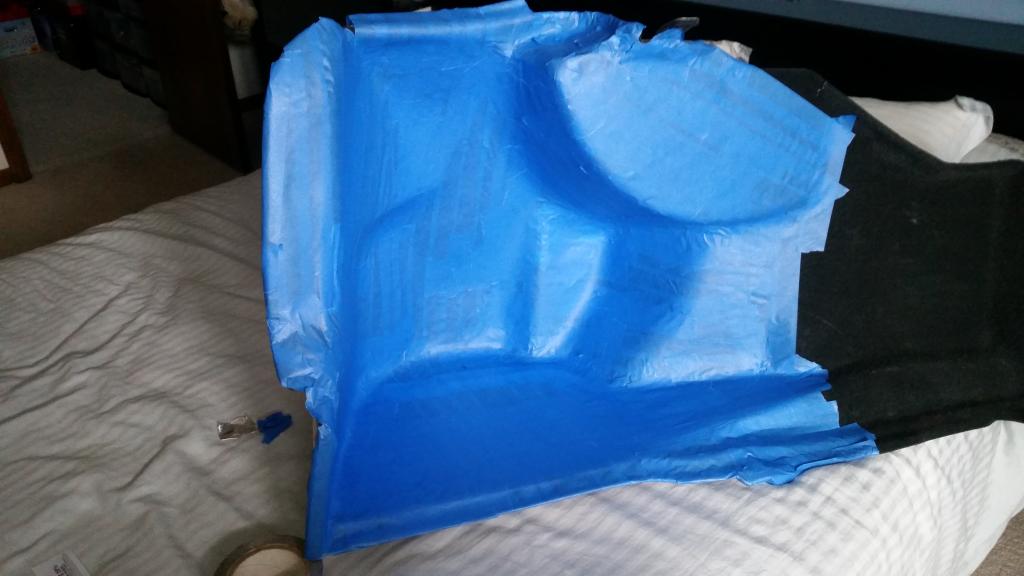
put masking tape all over it and than I have applied aluminium foil to get glassing started.
My plans were to use Illusion Audio C12XL sub but I have changed my mind down the road and went with Ground Zero
I started making box since I had extra panel for the car,

put masking tape all over it and than I have applied aluminium foil to get glassing started.

My plans were to use Illusion Audio C12XL sub but I have changed my mind down the road and went with Ground Zero

Trending Topics
07-11-2015, 07:51 PM
#8
Racer
Thread Starter
I was Also thinking of going with Tablet Idea of Windows 8 Samsung full computer, but that didn't work out to well, so I also changed my plans and decided to build a full car computer.
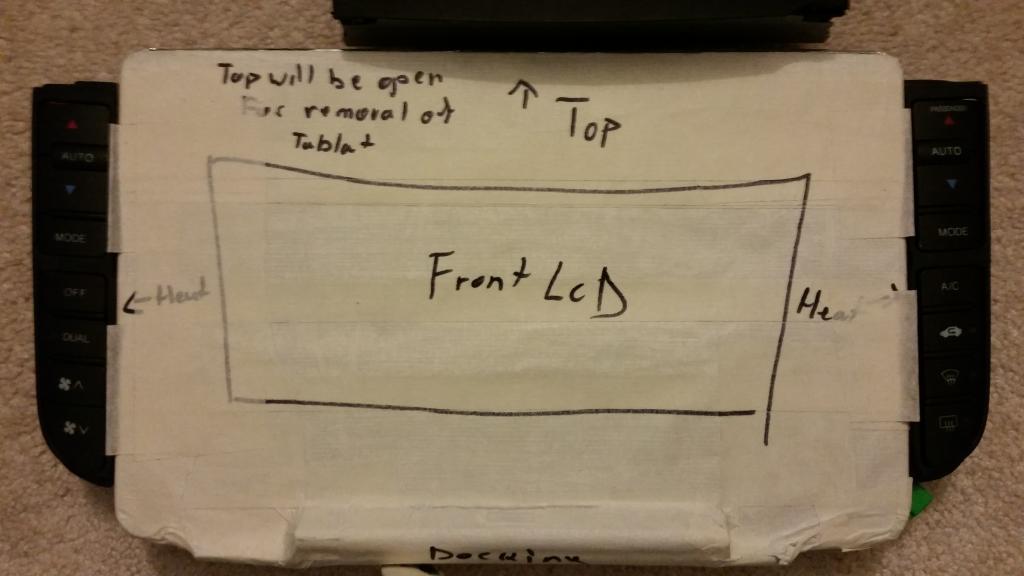
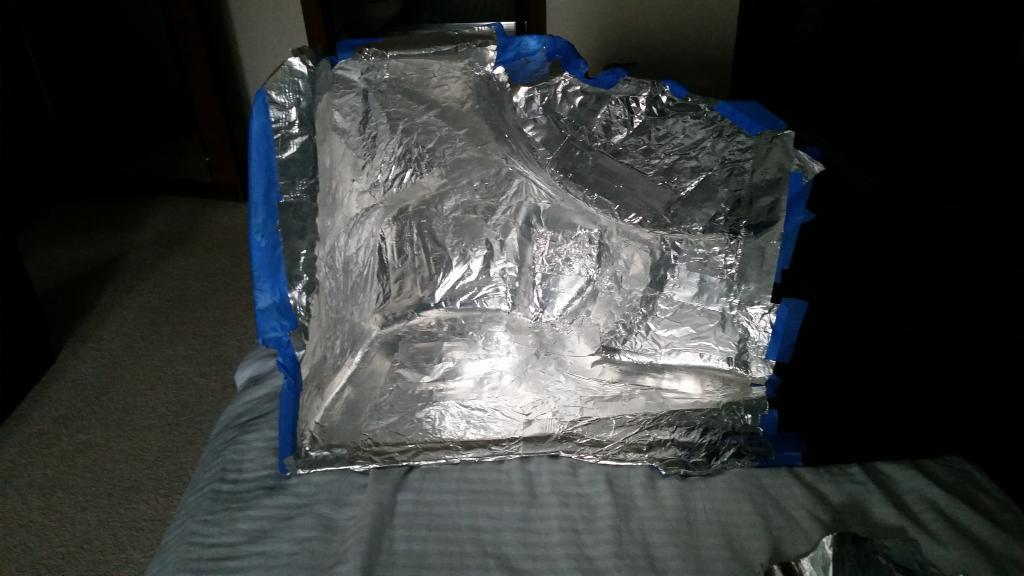
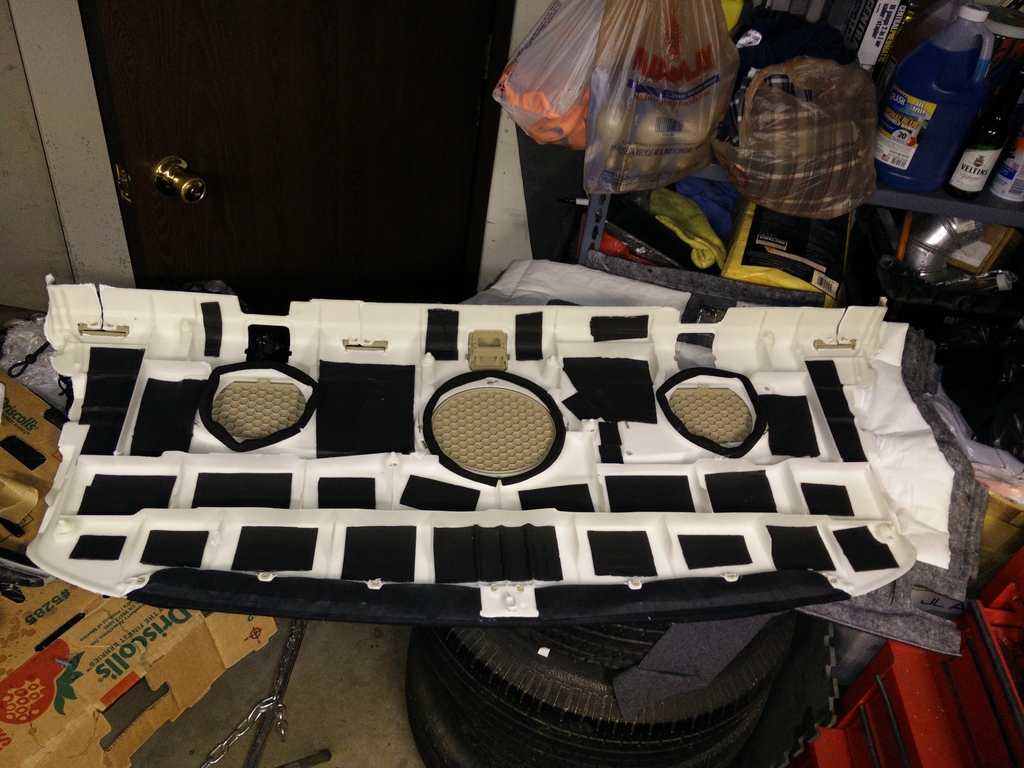
Fiberglassing back panel


Fiberglassing back panel


 07-12-2015, 02:39 AM
#12
Racer
Thread Starter
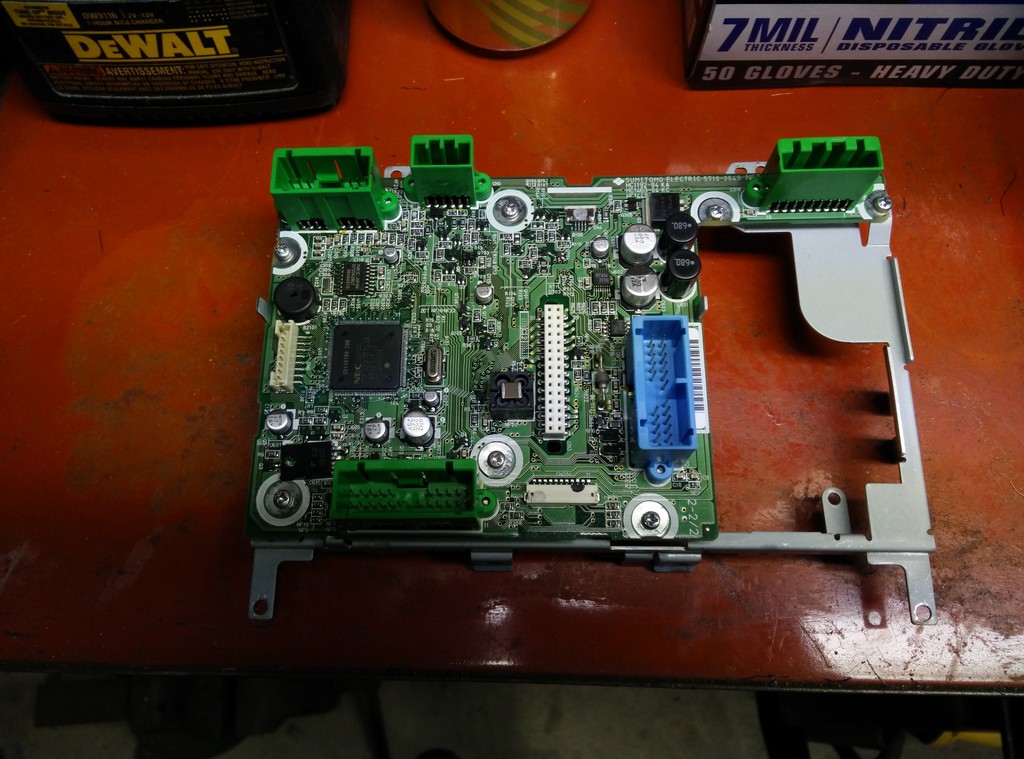
I started to get parts for car pc and testing things out, how its going to work and to some stress test for heat issues that my come around.
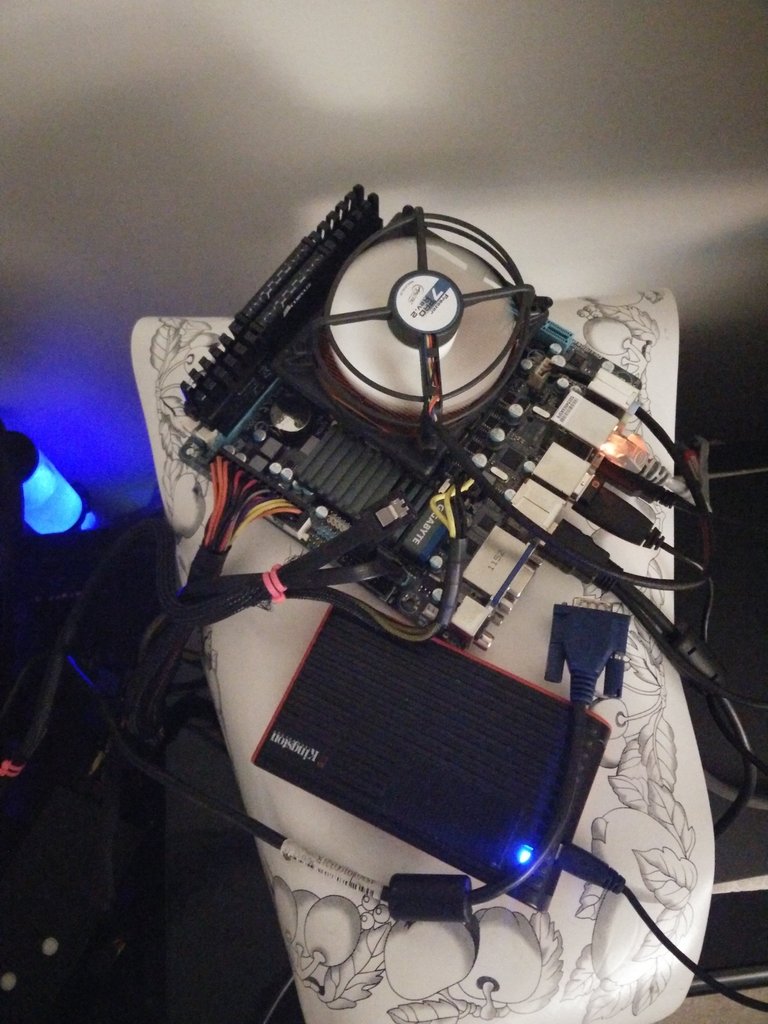
I got 10.2" IPS touch screen Liliput Monitor that will be going in to its dash place,
car PSU to feed the power to everything and ignition turn on and off.


I got 10.2" IPS touch screen Liliput Monitor that will be going in to its dash place,
car PSU to feed the power to everything and ignition turn on and off.
 07-12-2015, 02:42 AM
#13
Racer
Thread Starter
My project was put on hold, i lost a job and was let go, I have bought few little toys so I started replacing it at my free time.
Started covering trunk with Second Skin sound damping.

Started covering trunk with Second Skin sound damping.
 07-12-2015, 02:46 AM
#14
Racer
Thread Starter
I dont have a picture of full build of the trunk and being covered up, but i'm sure you get the idea.
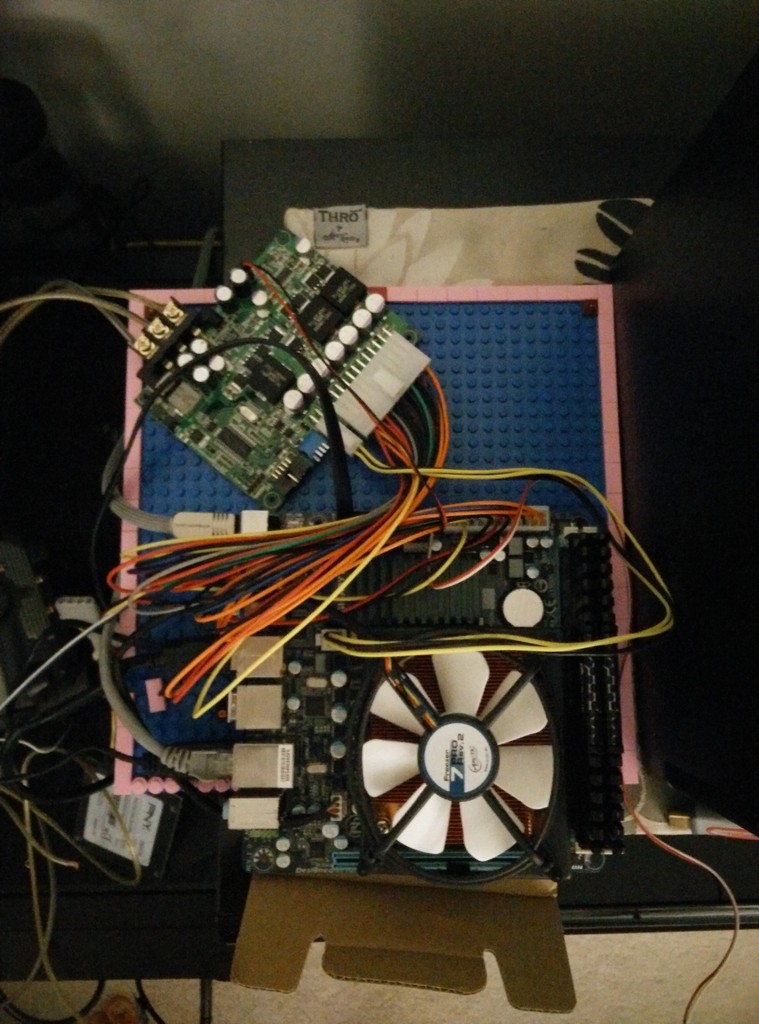
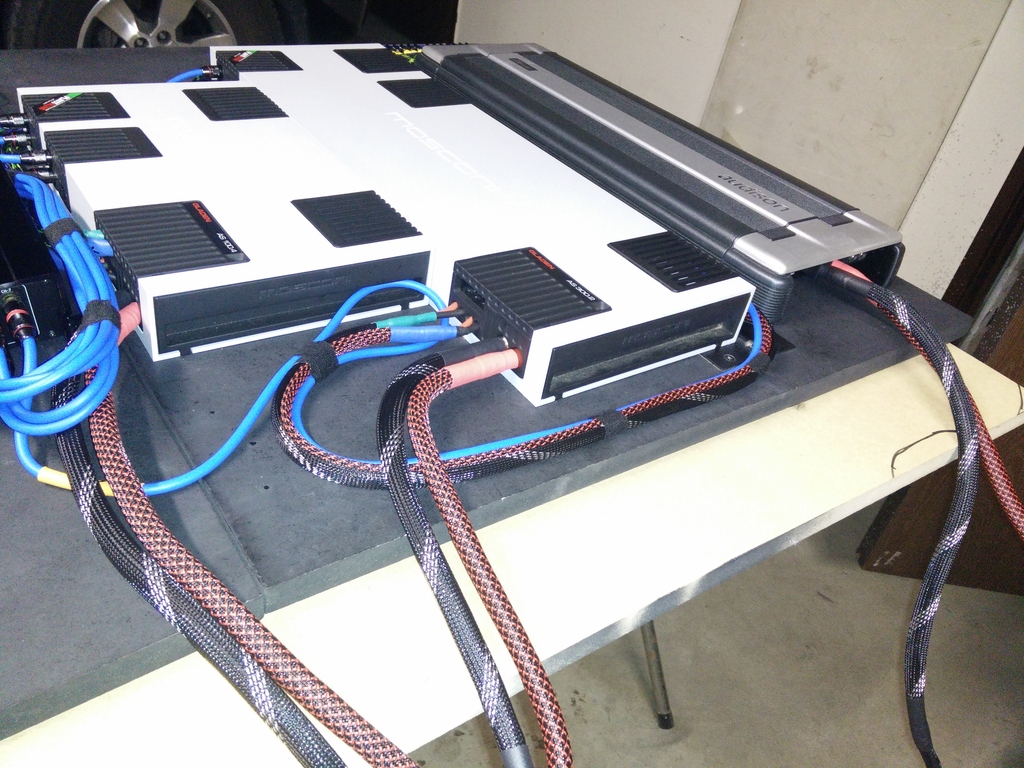
This was suppose to be my layout of false floor with Mosconi amplifiers and Alpine H800 sound processor.
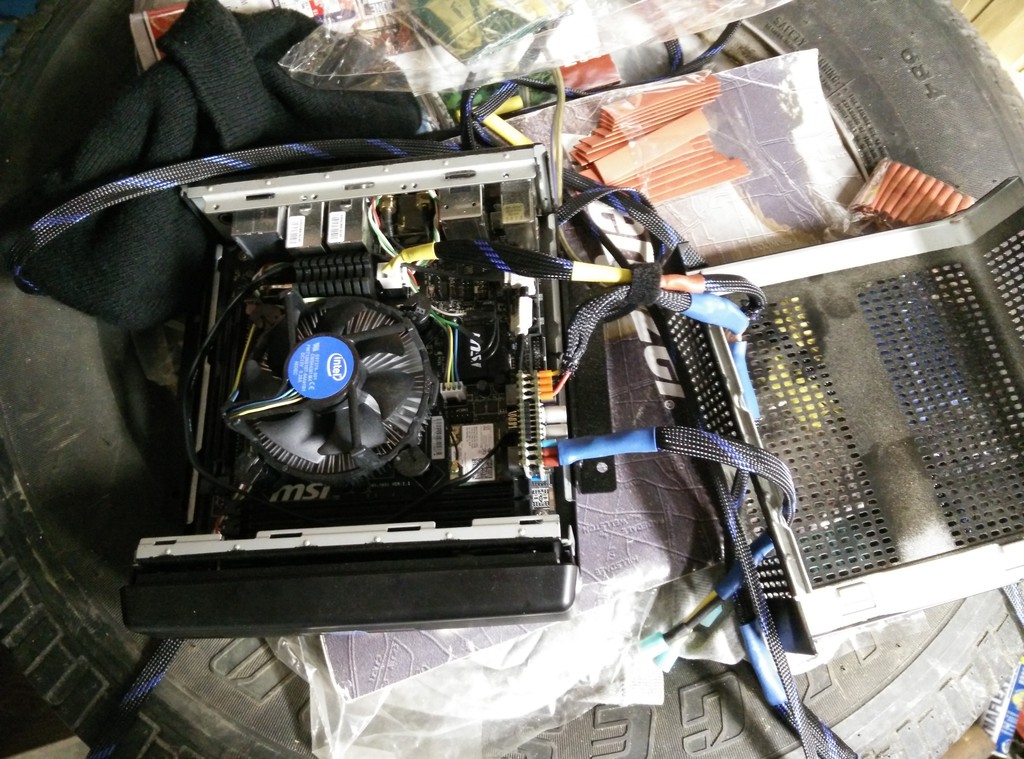
After working on the Car Pc, that power supply didn't work to well, and it didn't want to turn on my pc well, I read that M3 power supply is way much better so i gaved it a shoot and it worked right out of a box.
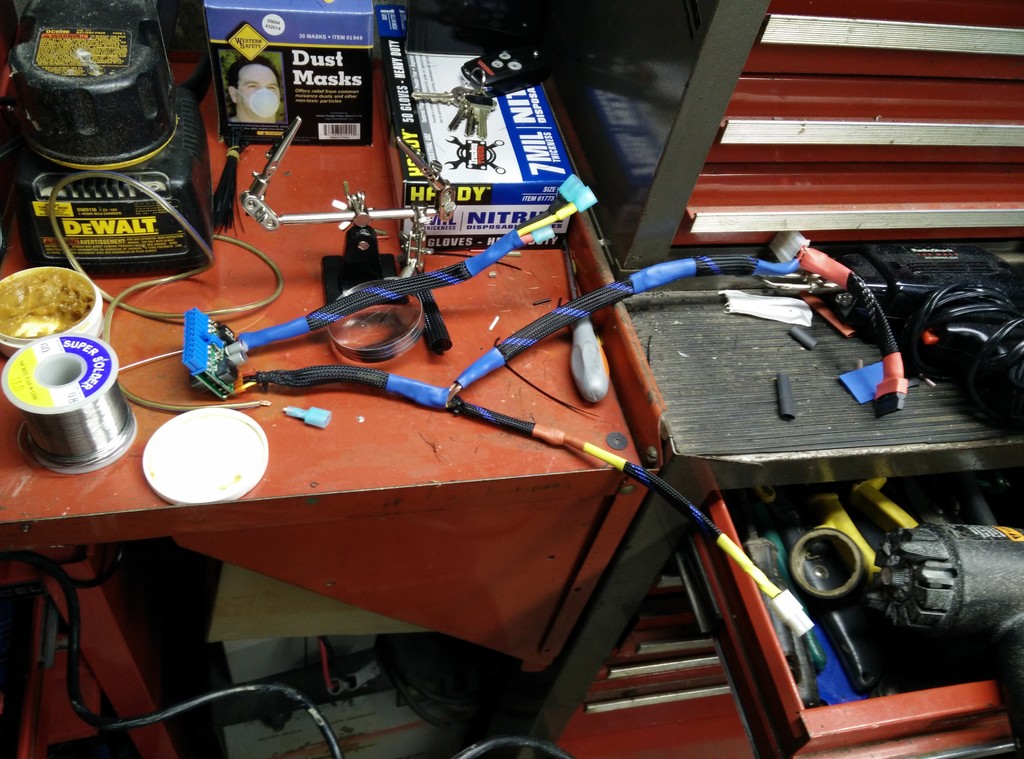
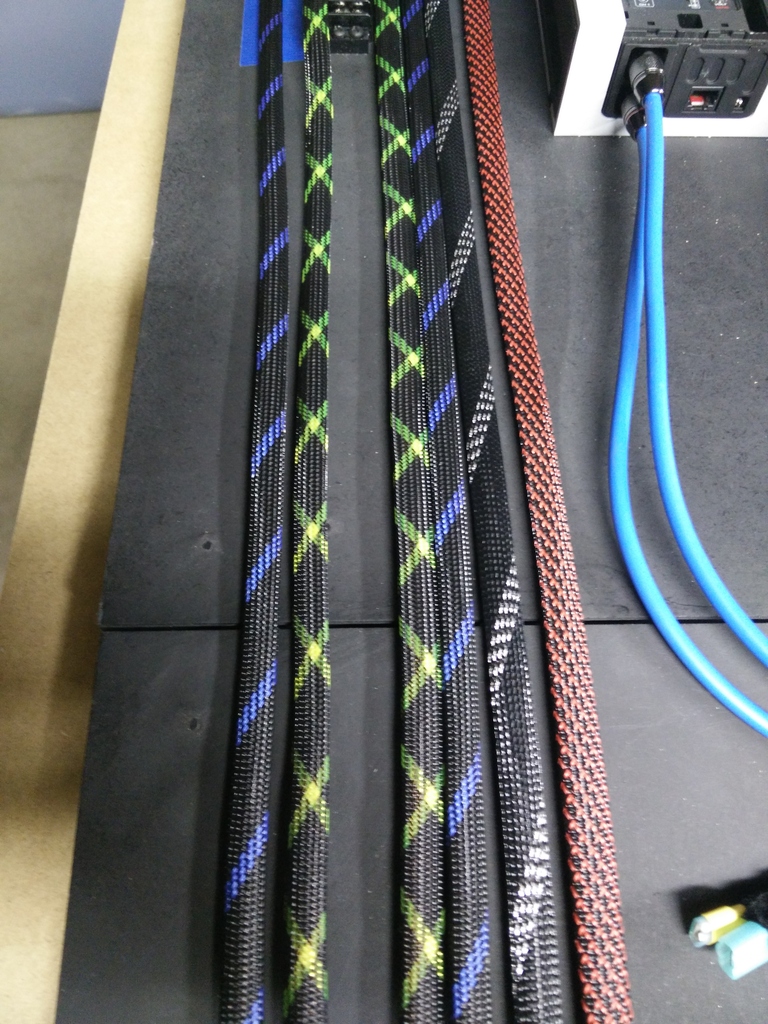
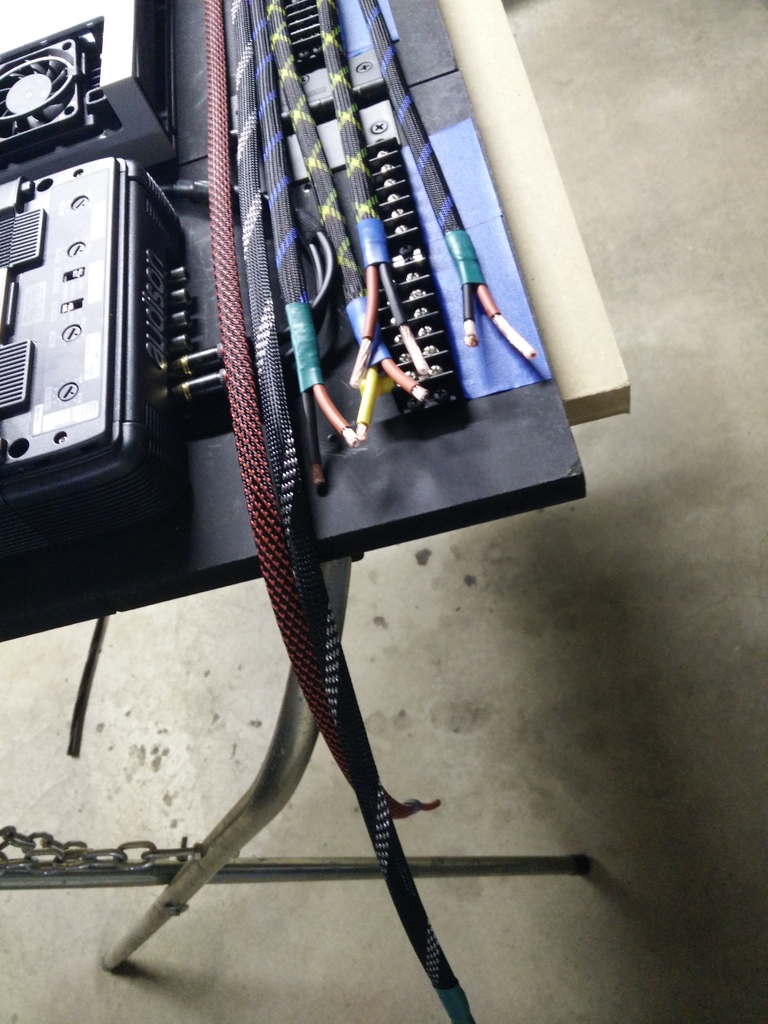
i started doing wire srink for better air flow and wire management.
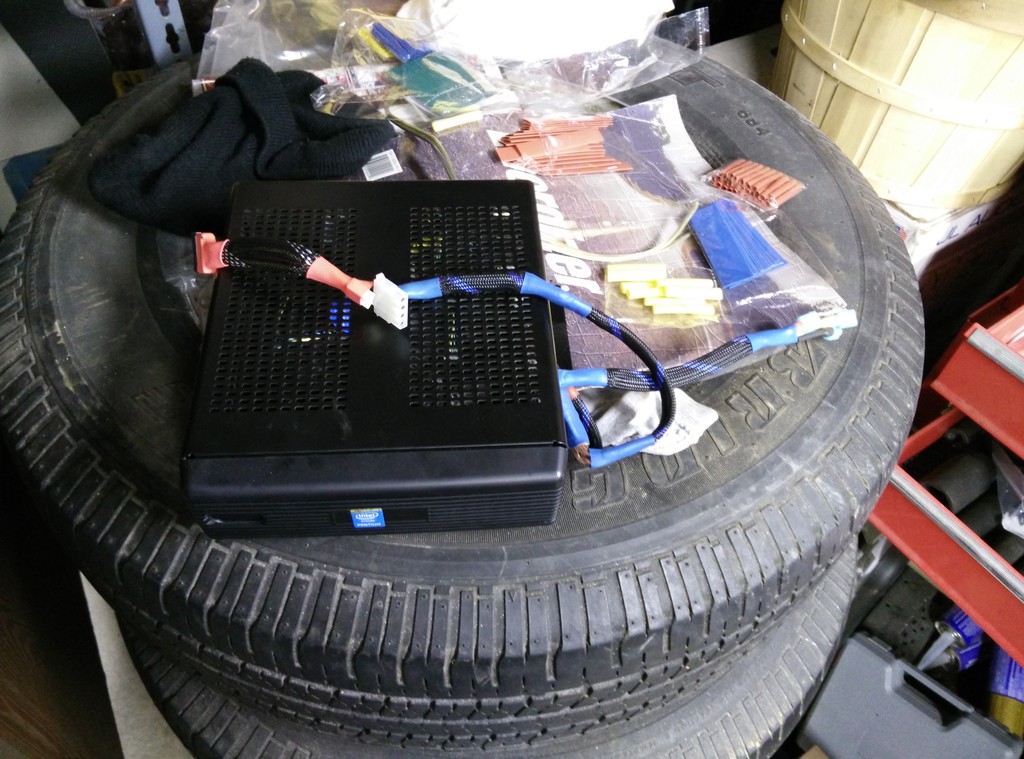
Also got a car pc case for my car puter,
Done:
I'm using 250GB SSD drive with 8 GB of ram, I3 cpu and 1TB external drive USB 3.0

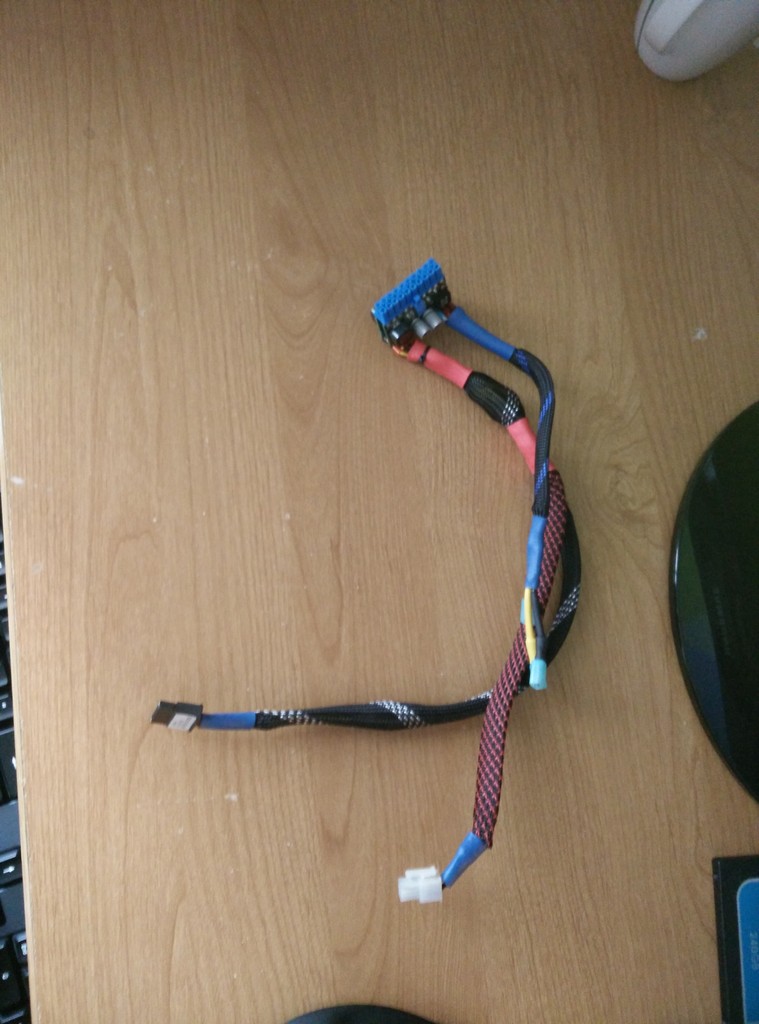
Another pic of the cable that I did.
This was suppose to be my layout of false floor with Mosconi amplifiers and Alpine H800 sound processor.

After working on the Car Pc, that power supply didn't work to well, and it didn't want to turn on my pc well, I read that M3 power supply is way much better so i gaved it a shoot and it worked right out of a box.

i started doing wire srink for better air flow and wire management.
Also got a car pc case for my car puter,

Done:


I'm using 250GB SSD drive with 8 GB of ram, I3 cpu and 1TB external drive USB 3.0

Another pic of the cable that I did.
 07-12-2015, 02:48 AM
#15
Racer
Thread Starter
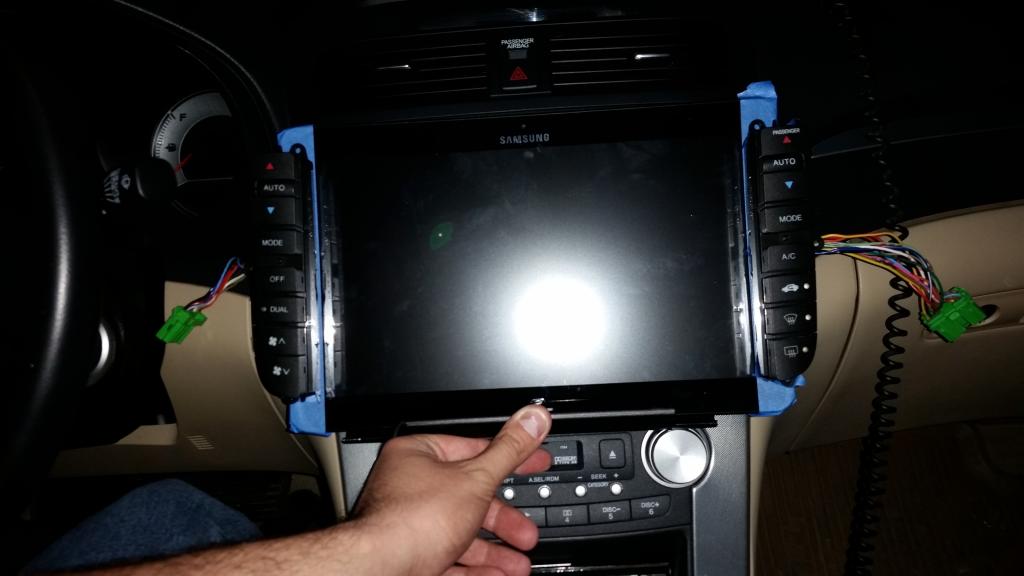
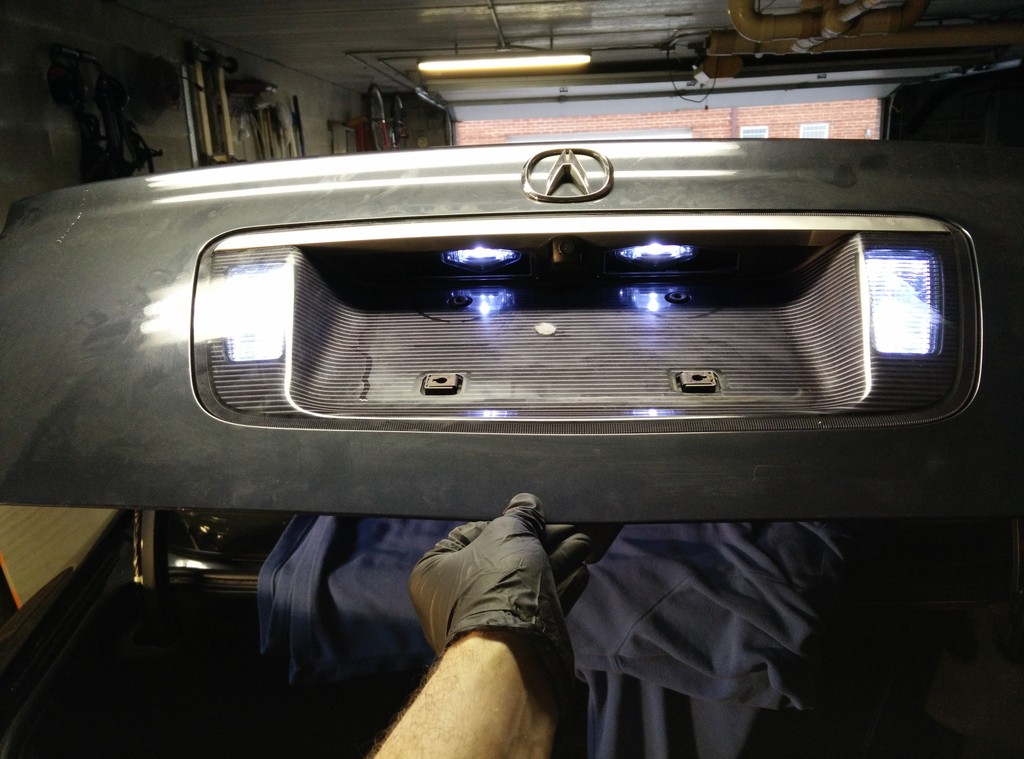
Took the dash apart to pre fit monitor,
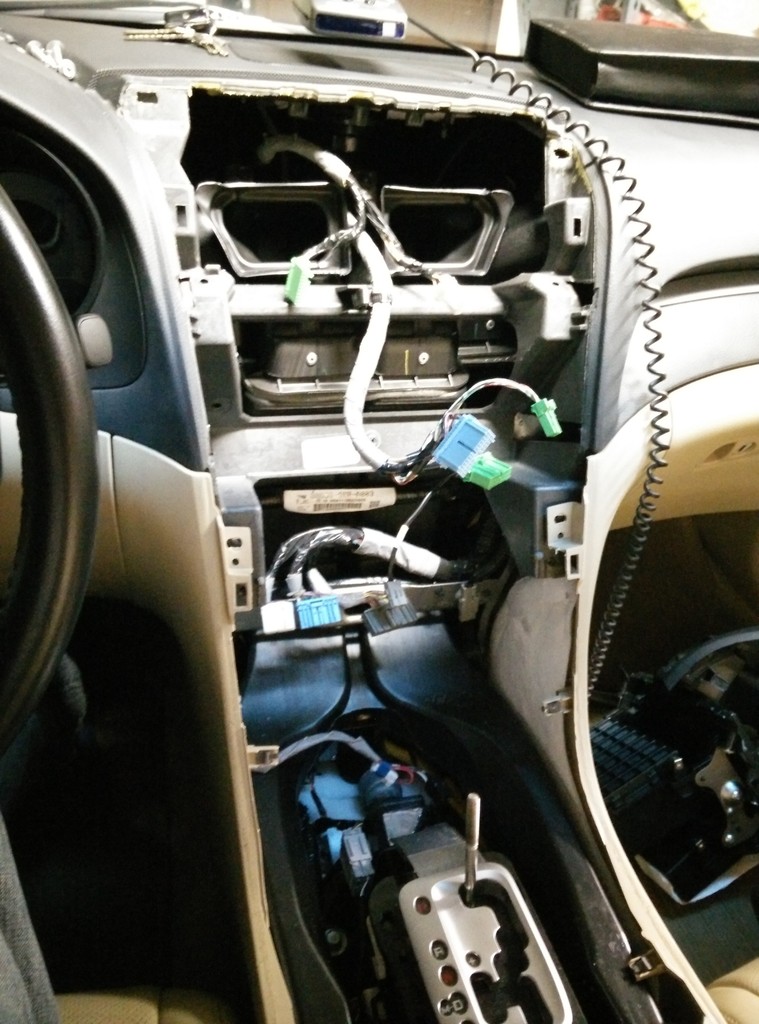
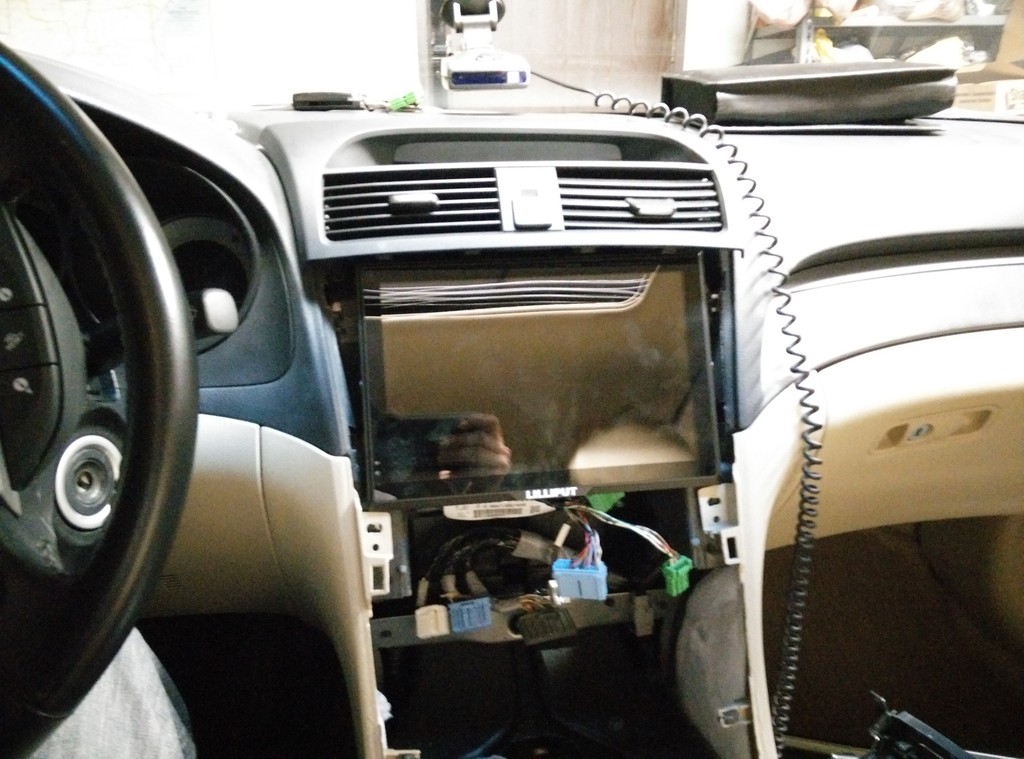
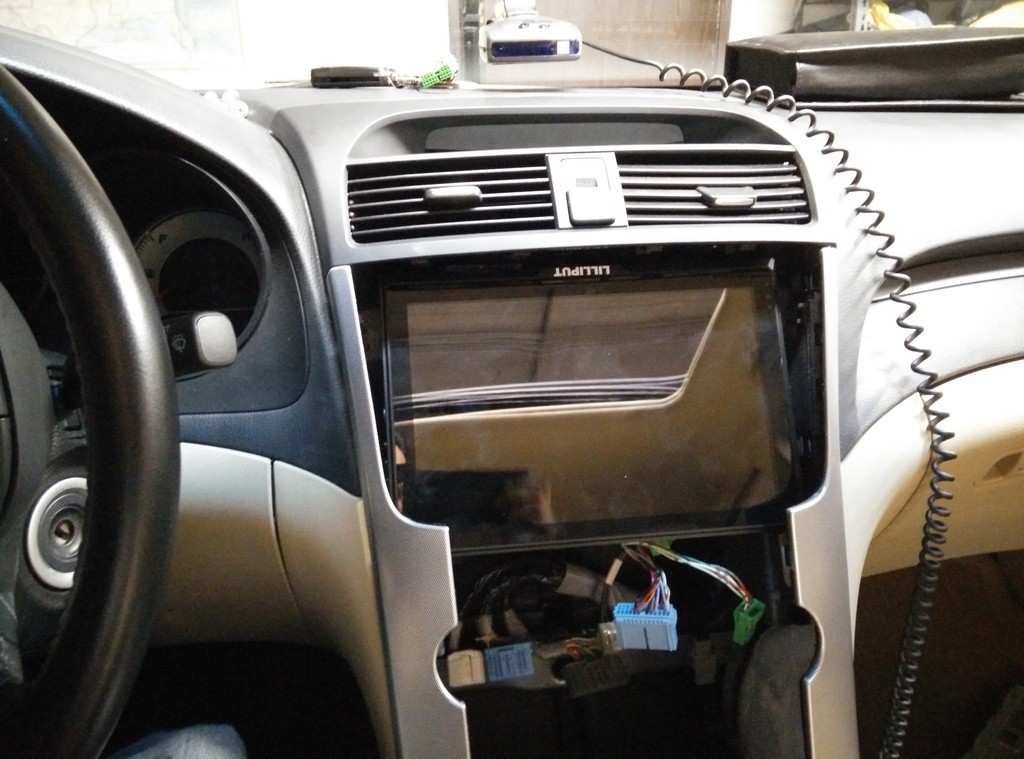
There will be a lot of work to get it in there and get it to work. But its duable if you put your mind and some skill in to it.


There will be a lot of work to get it in there and get it to work. But its duable if you put your mind and some skill in to it.
07-12-2015, 02:51 AM
#16
Racer
Thread Starter
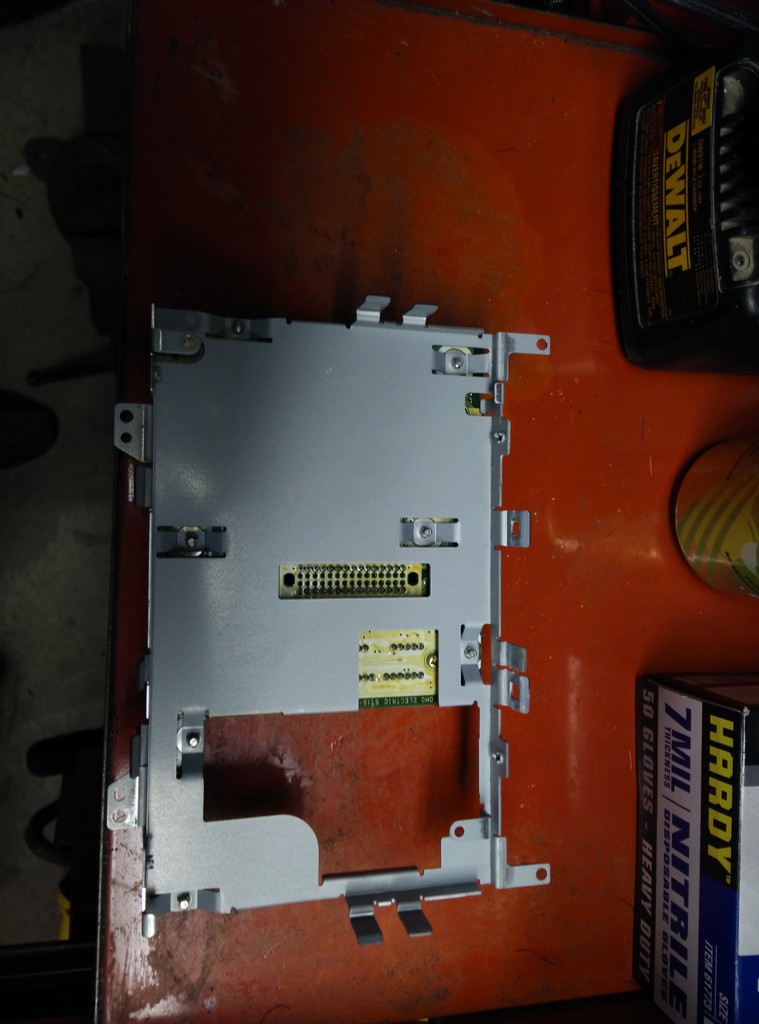
My biggest issue was, I didn't want to take apart my oem navi screen or brake it in any way. i have decided to buy another navi screen, I only needed a logic board from the back for heat and cooling controls, which it worked out perfect, not only I will be able to mount the monitor but also my heat controls will work.
I also bought T3 LED to replace the eom colors and match the dash a little.
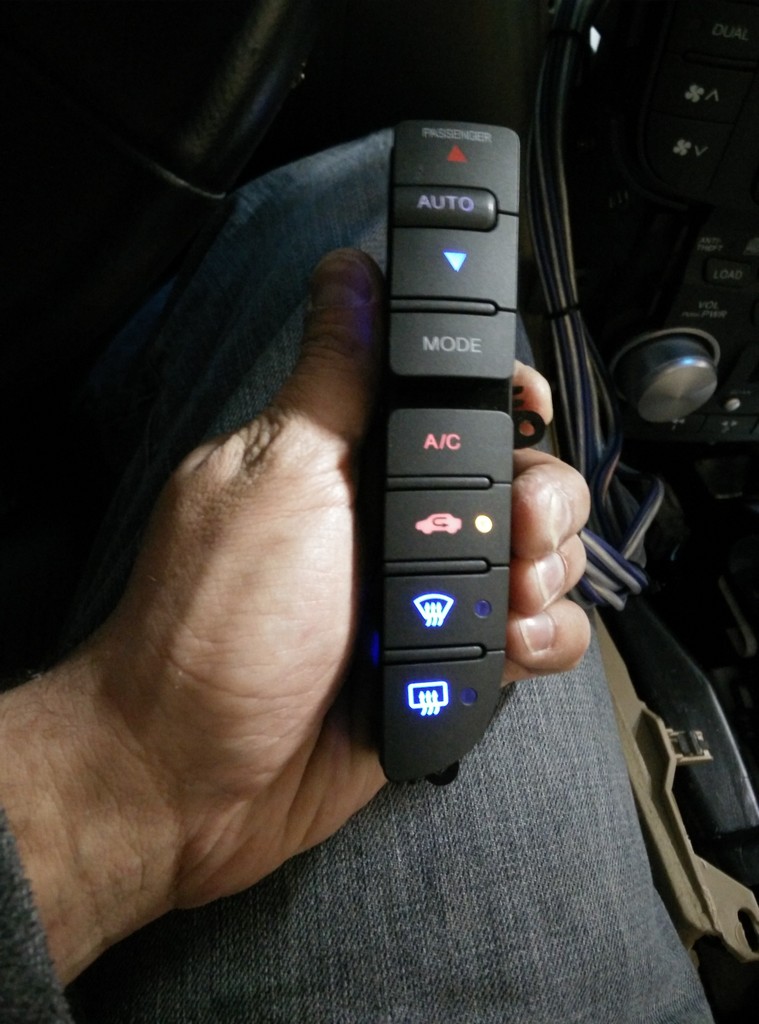
I have also replace heated seat switch led


I also bought T3 LED to replace the eom colors and match the dash a little.

I have also replace heated seat switch led


 07-12-2015, 02:55 AM
#17
Racer
Thread Starter
Let the fun begin
Ground Zero Plutonium 3 way active setup!
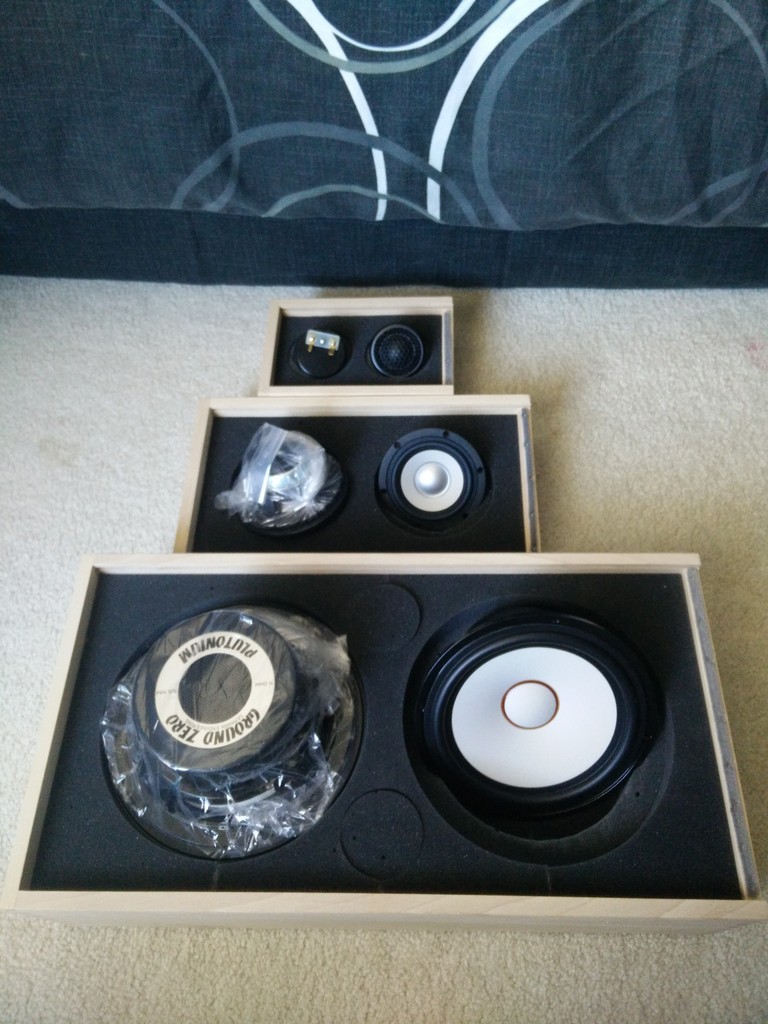
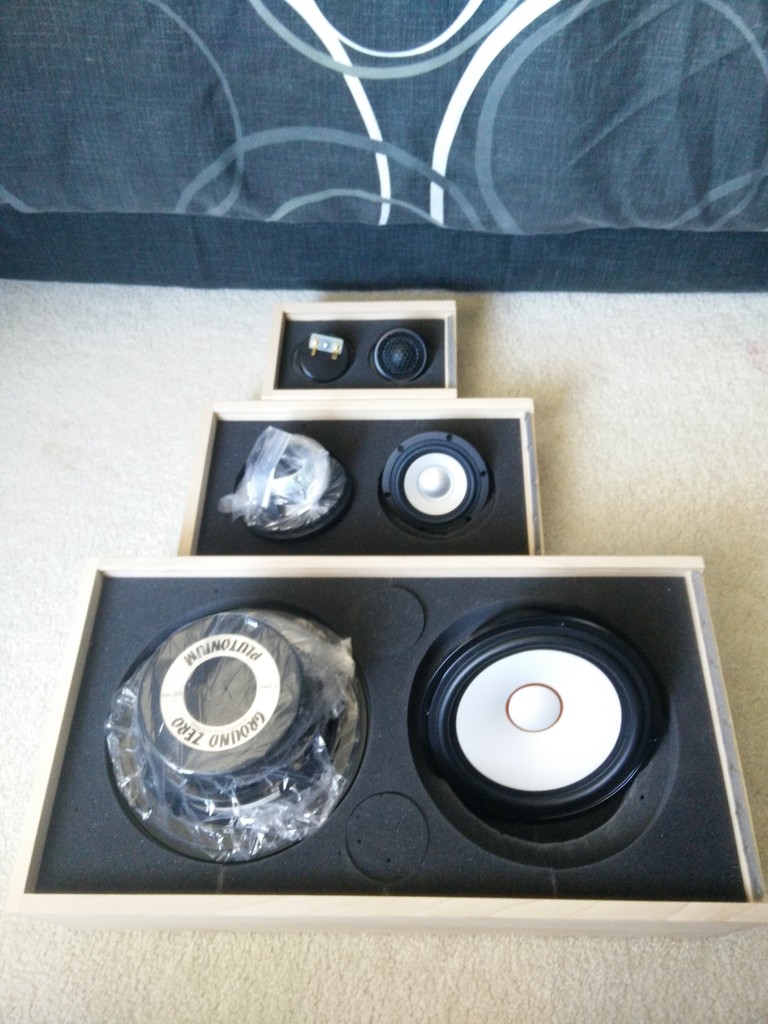
Mid-Range driver


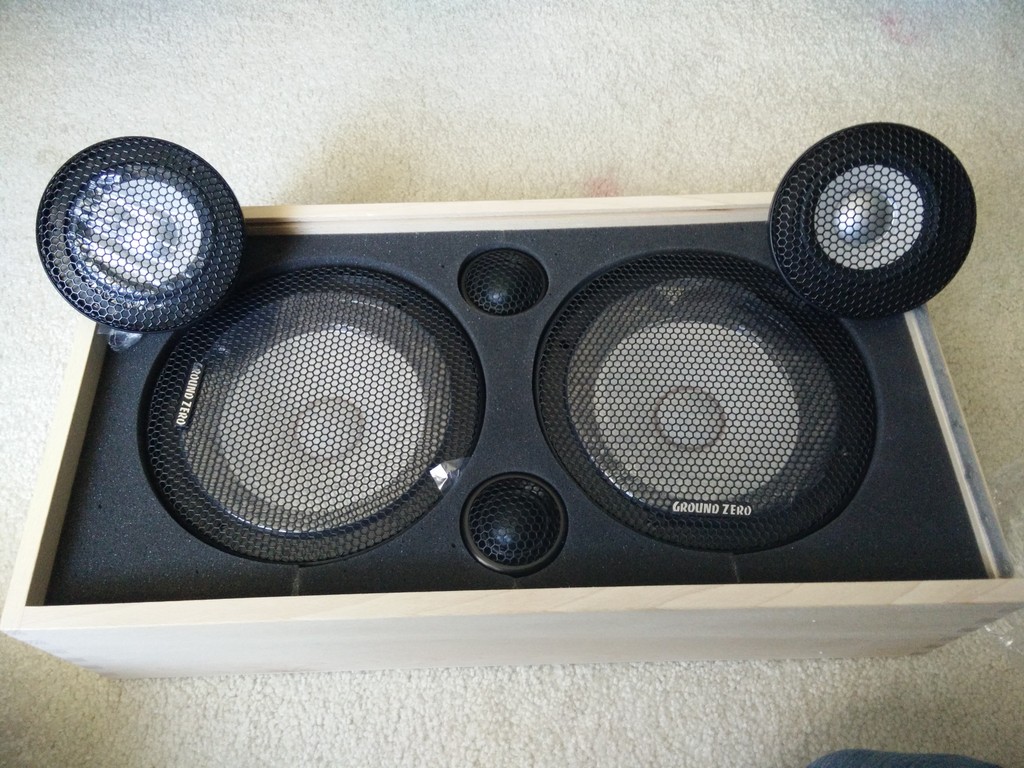
I have not wasted any time and started to make MDF rings for it.
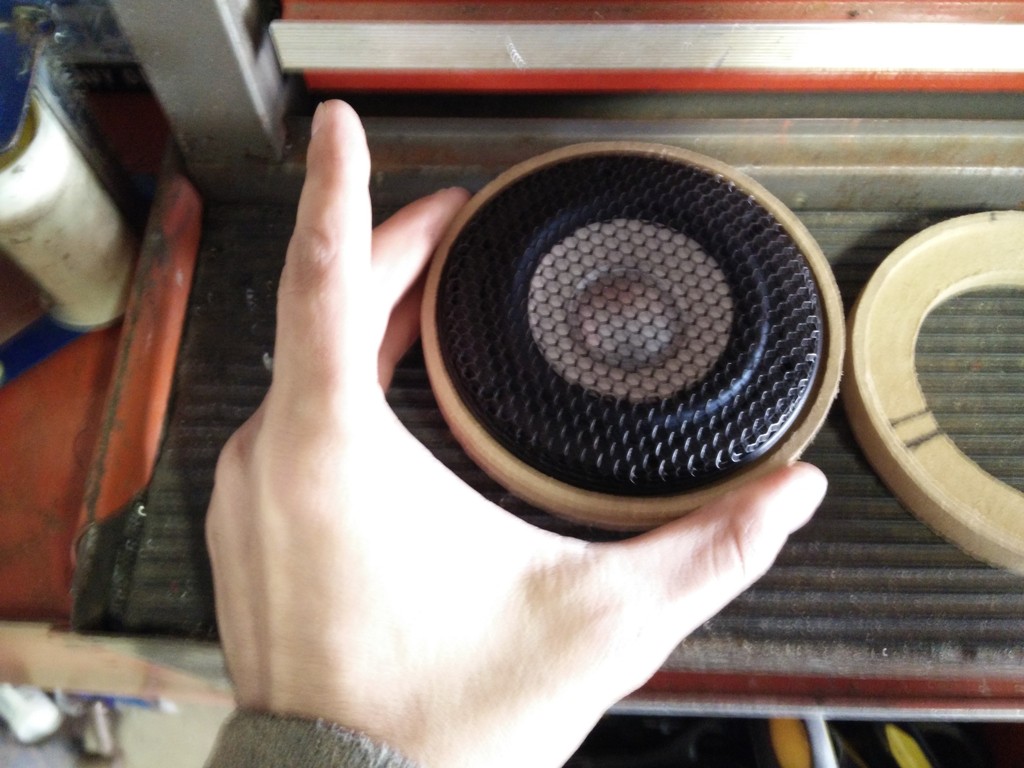
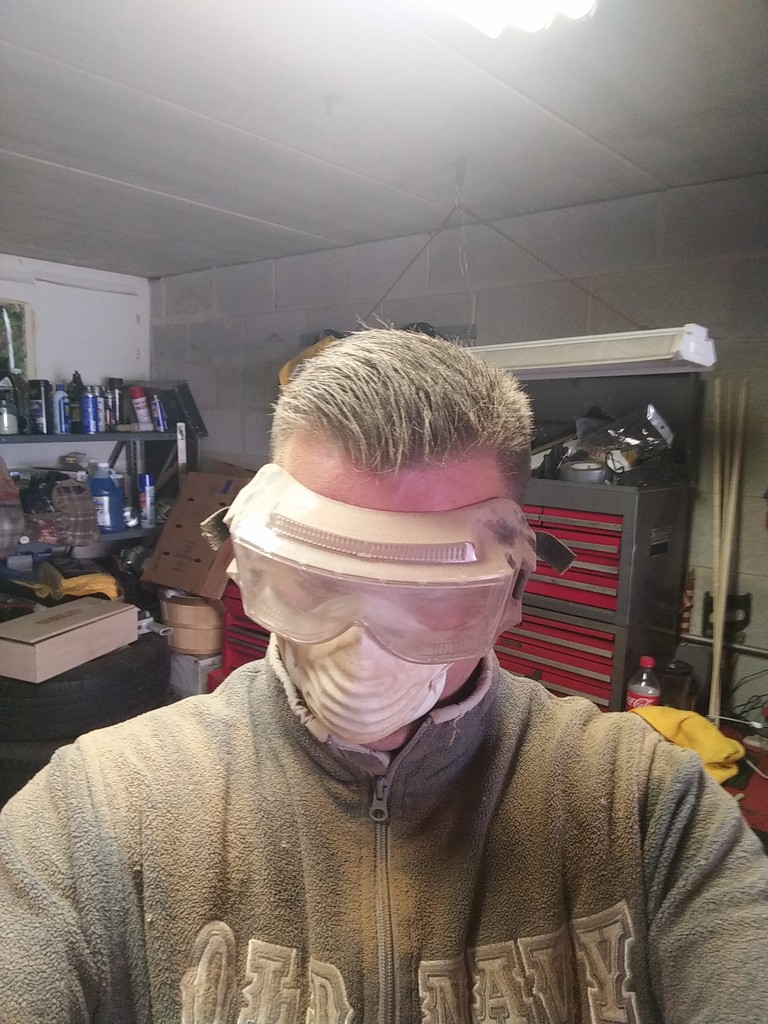
I was covered in dust from the router
After getting that done, at the same my toy has shown up:
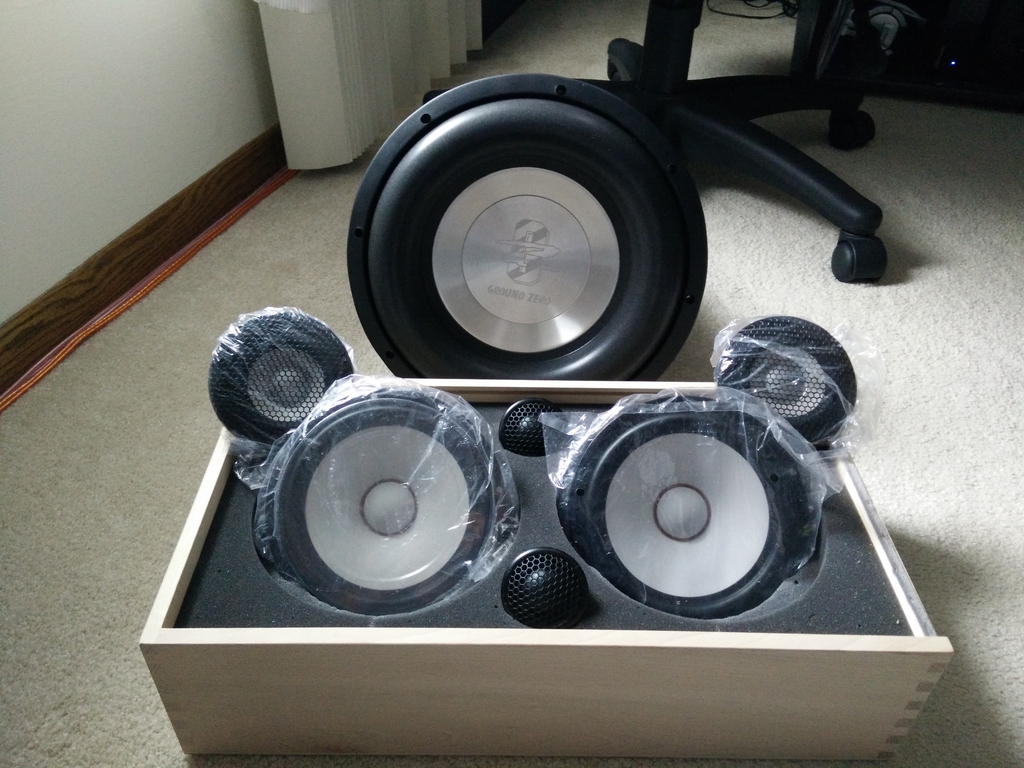
Ground Zero Plutonium 3 way active setup!


Mid-Range driver


I have not wasted any time and started to make MDF rings for it.

I was covered in dust from the router

After getting that done, at the same my toy has shown up:


 07-12-2015, 02:59 AM
#18
Racer
Thread Starter
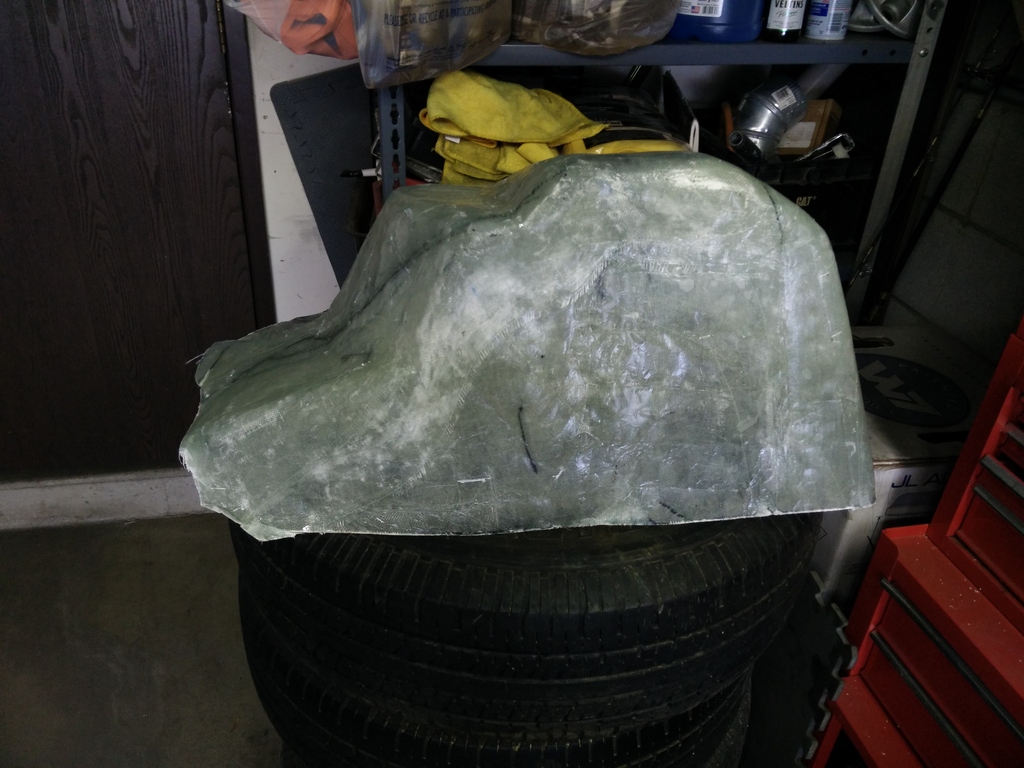
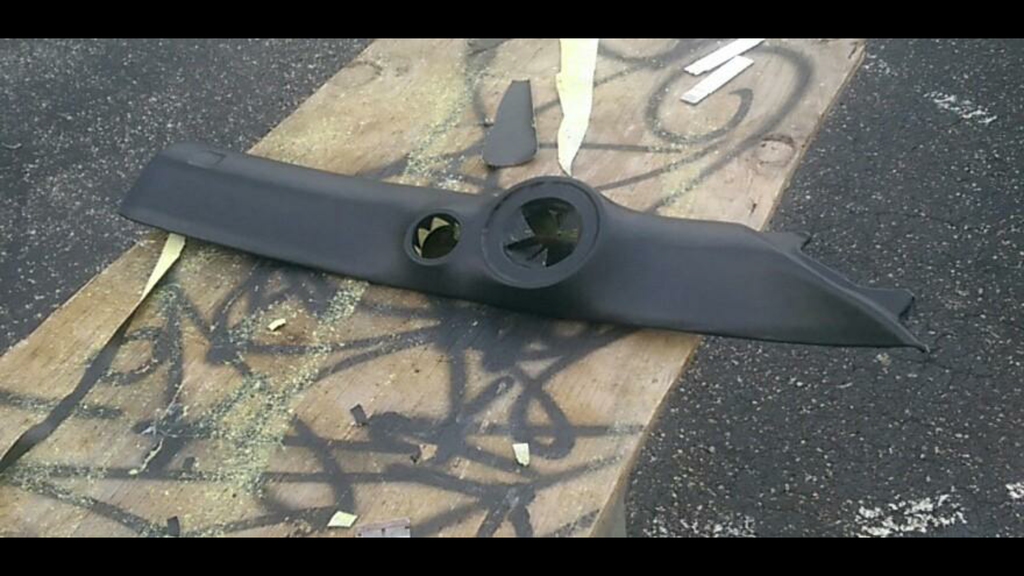
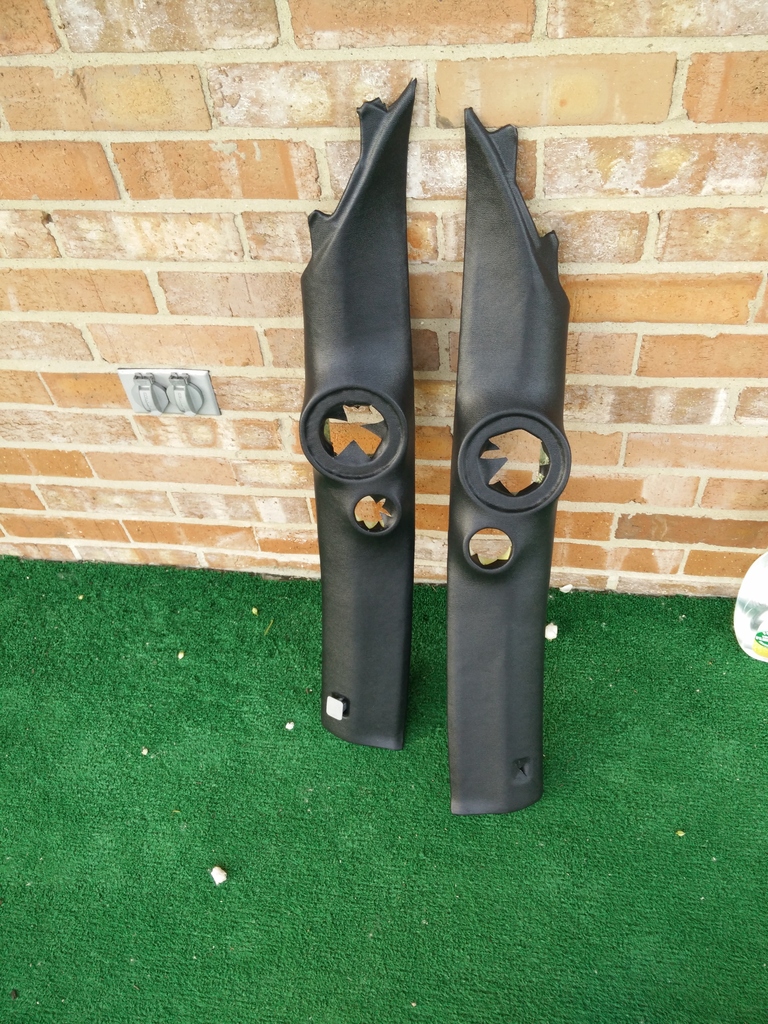
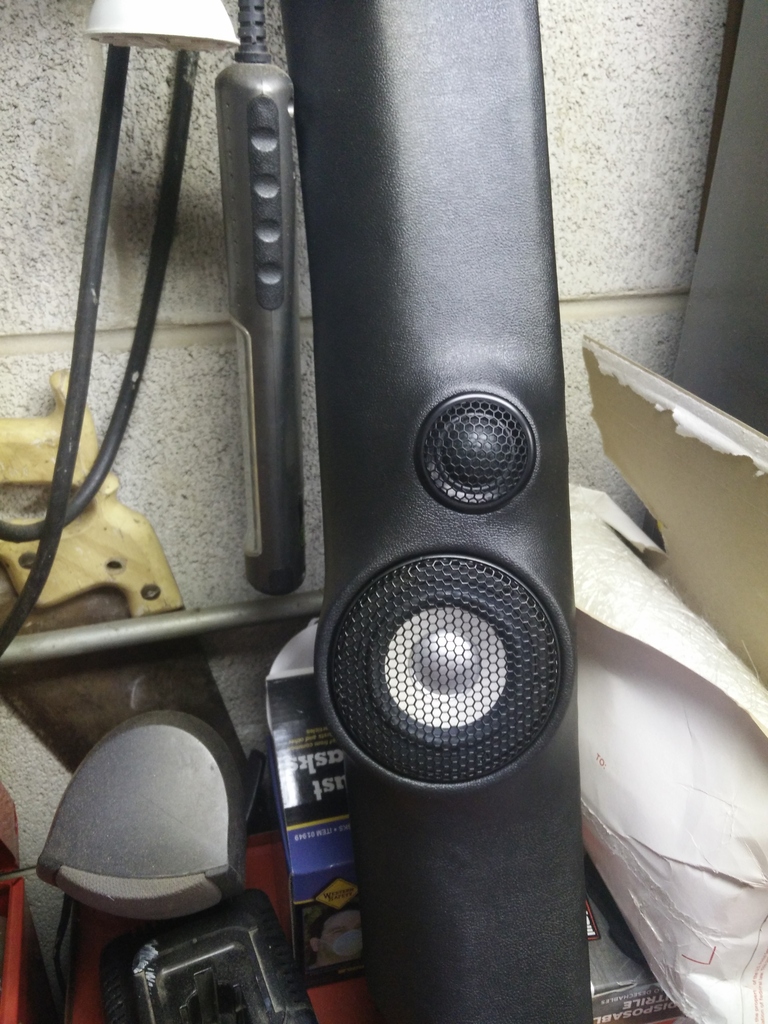
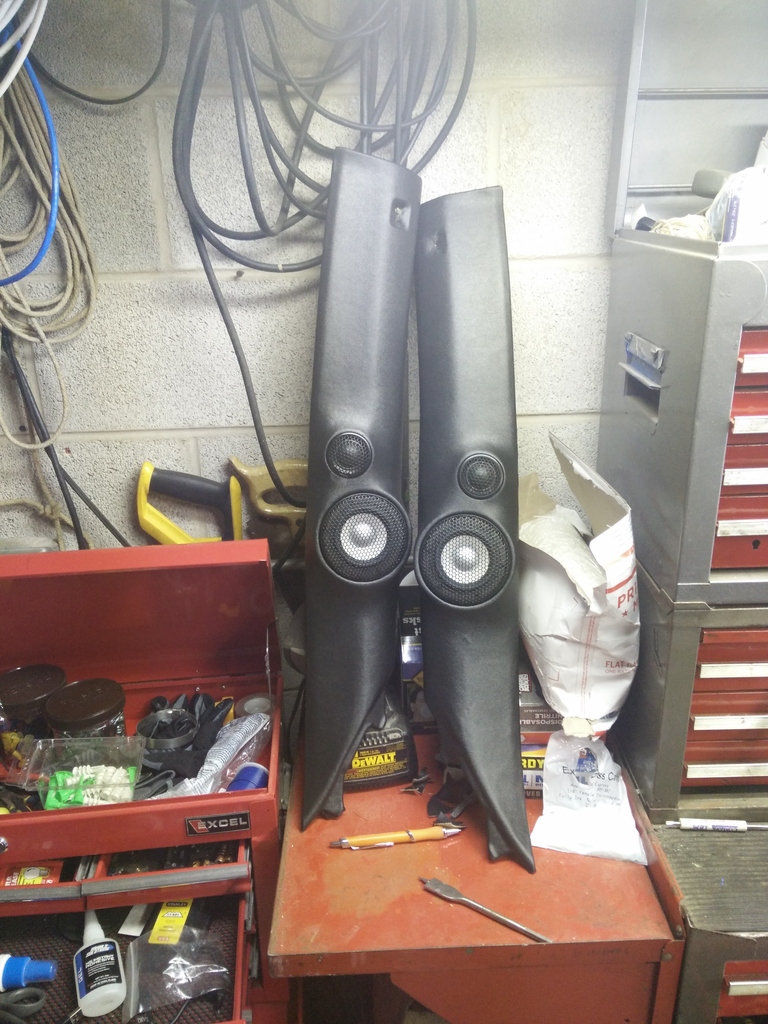
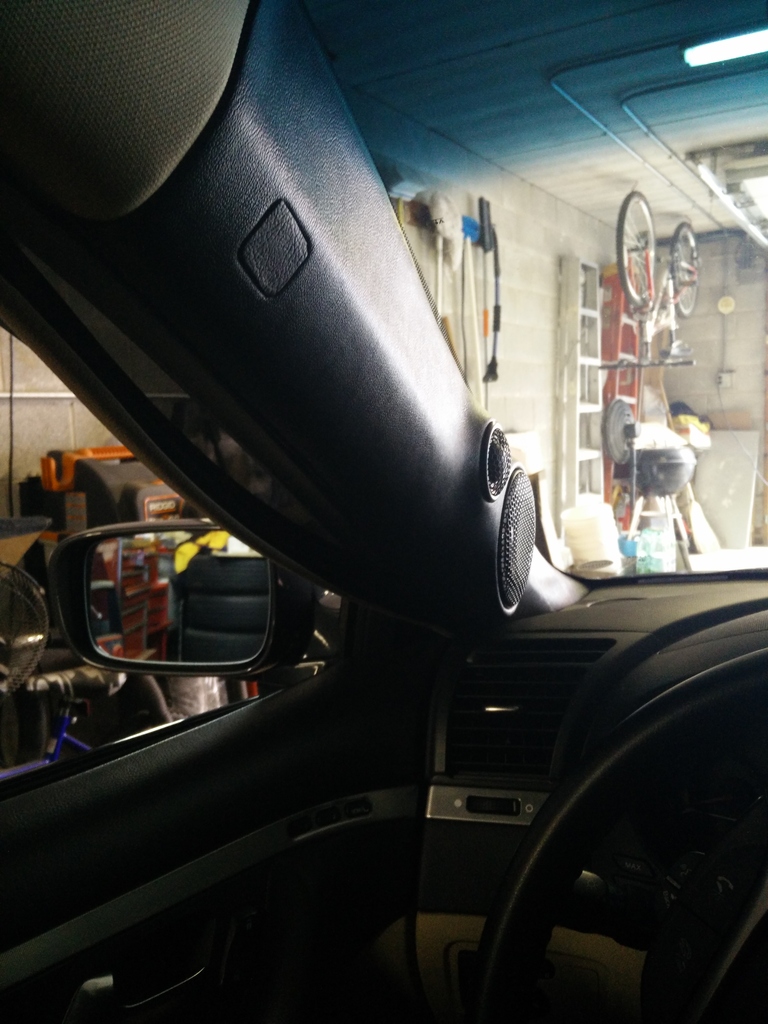
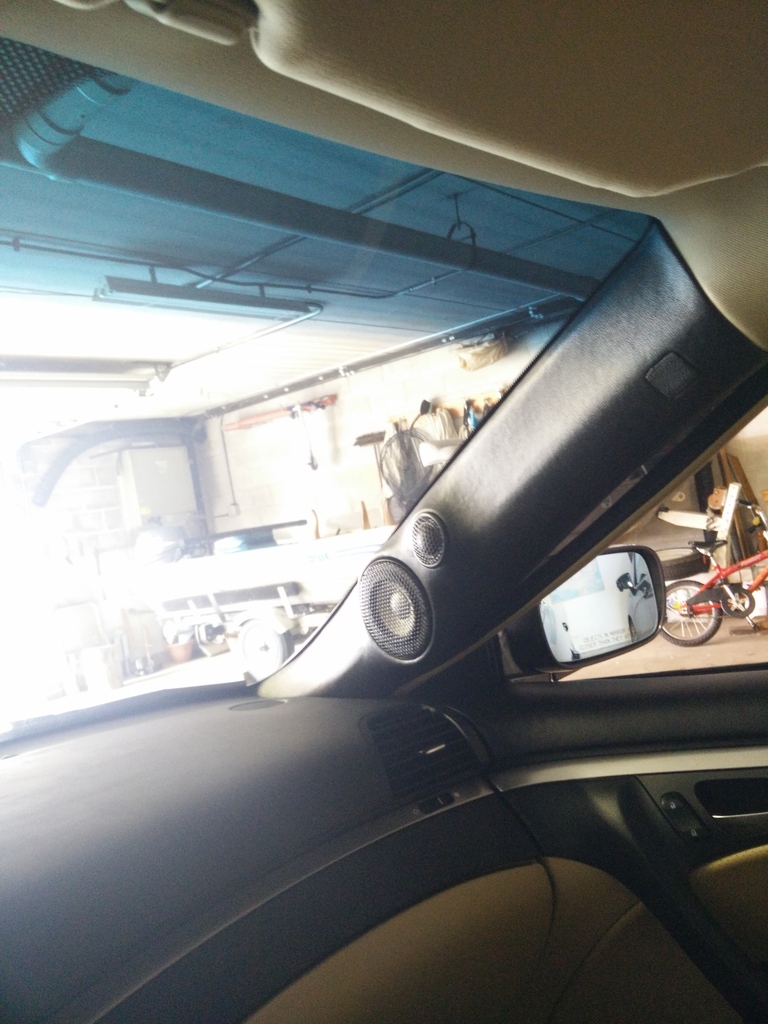
I have decided to work on my pillars that I bought from a member on here as a second set so I wont damage my oem ones.
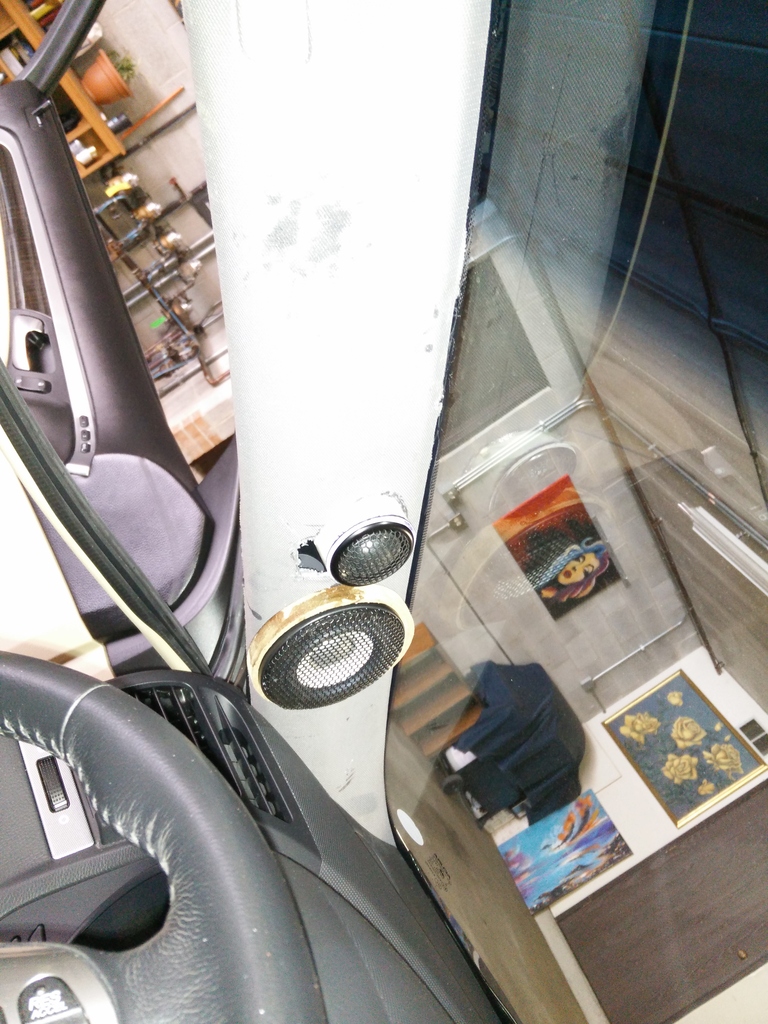
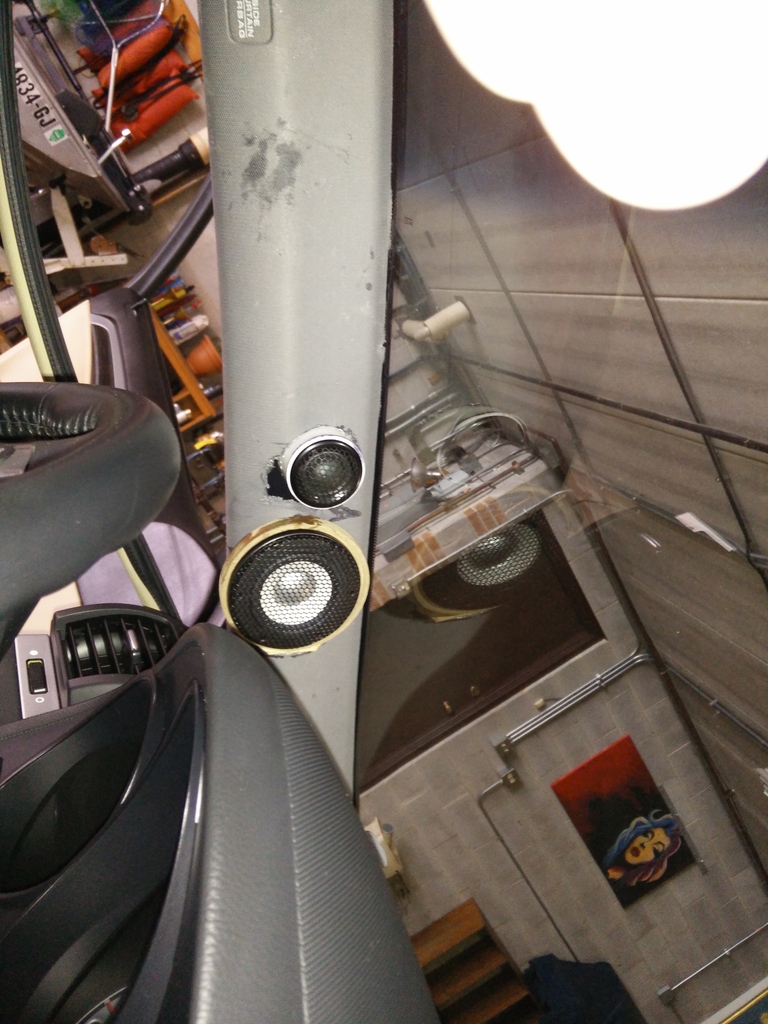
Passenger Side.
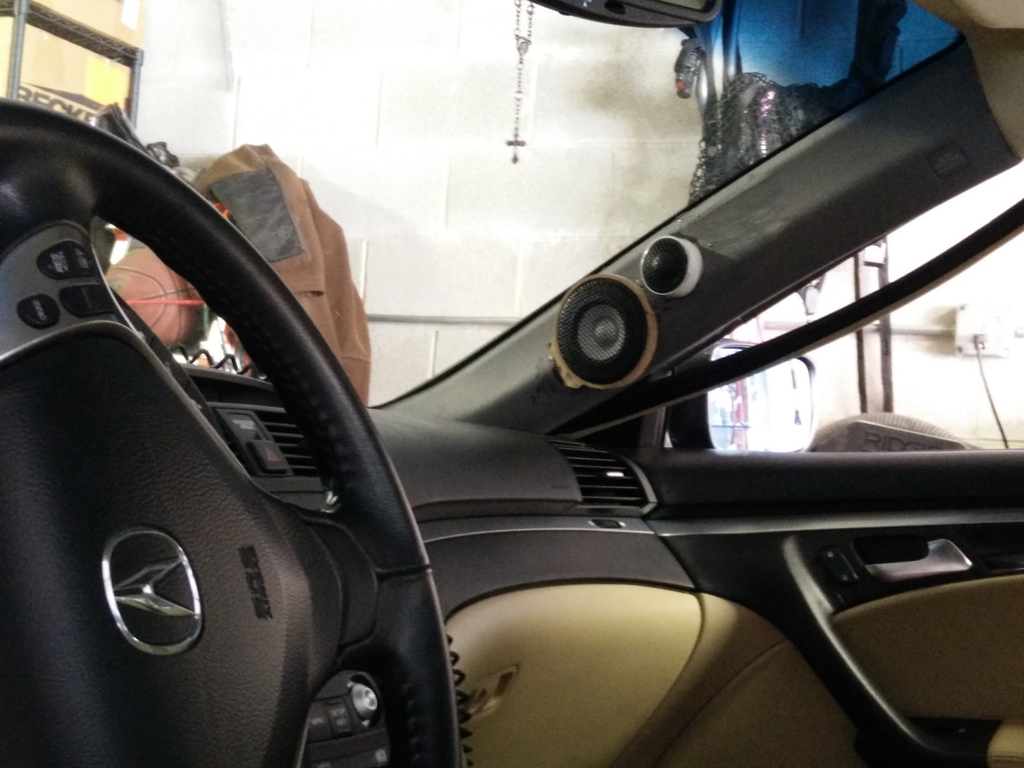
They were wrapped right away and resin was applied
Passenger Side
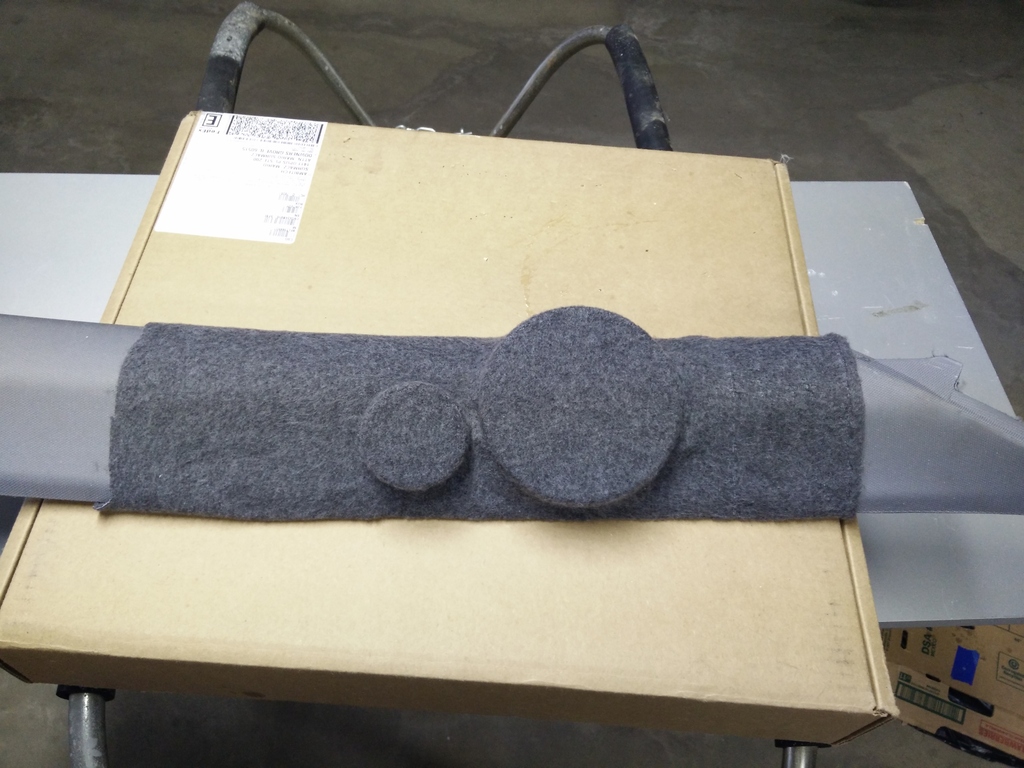


Passenger Side.

They were wrapped right away and resin was applied


Passenger Side
 07-12-2015, 03:02 AM
#19
Racer
Thread Starter
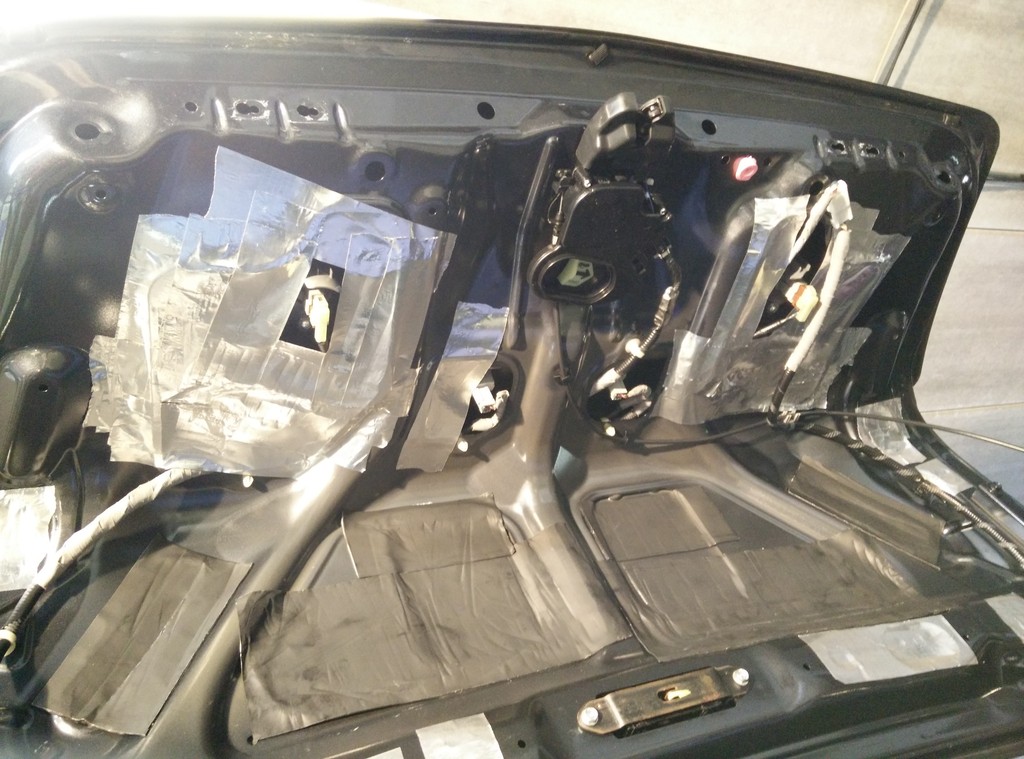
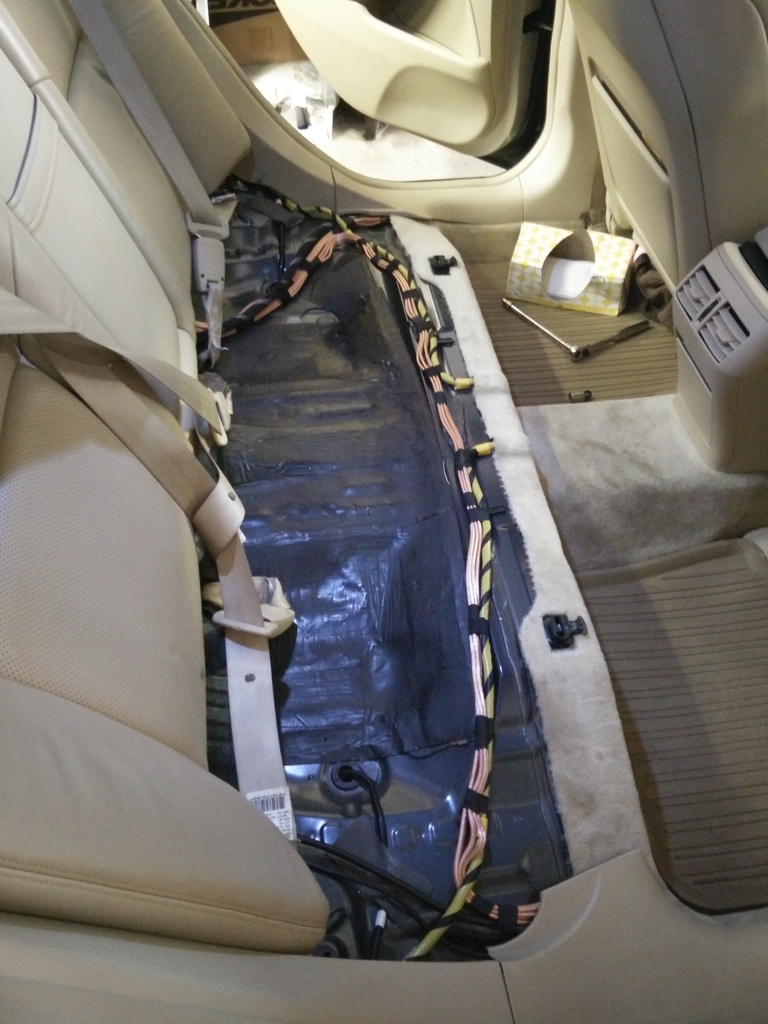
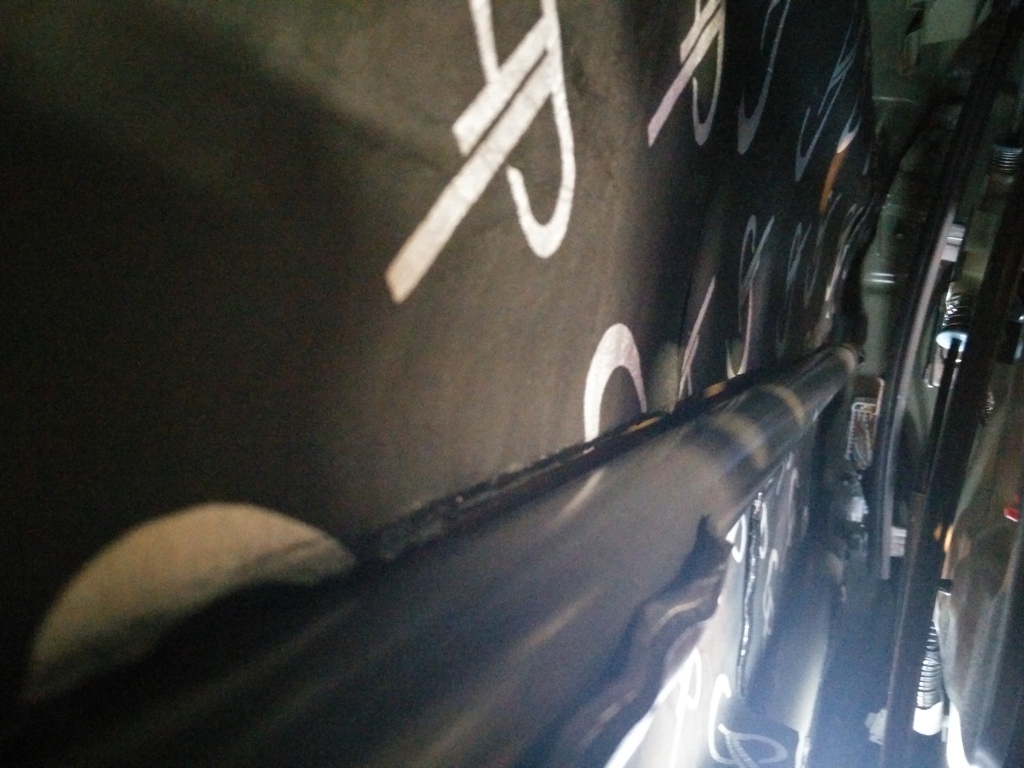
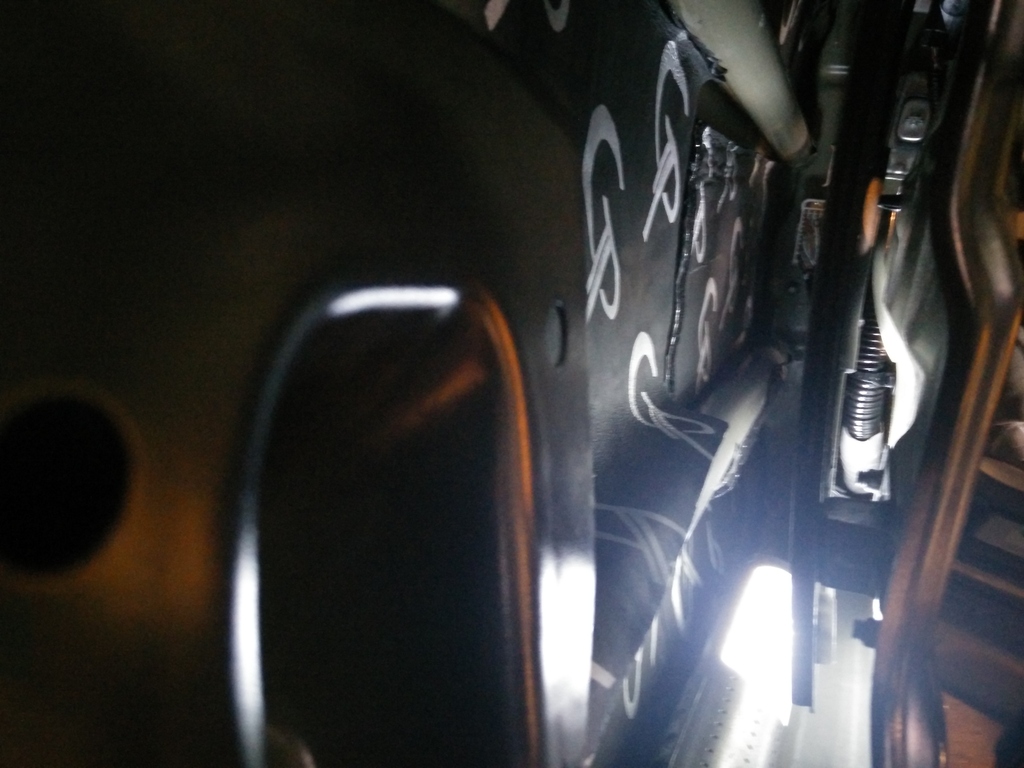
While Pillars were drying in the sun, I have removed the back seat and apply sound damping on the bottom floor and rear deck.
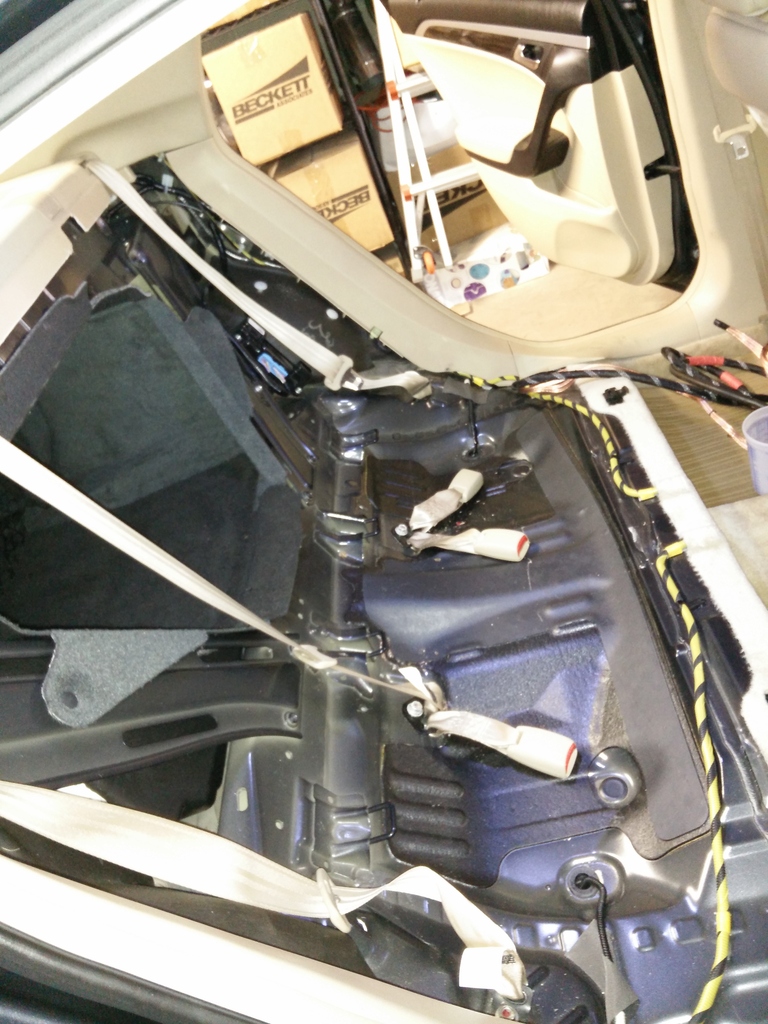
Rear speakers were removed.
Rear deck
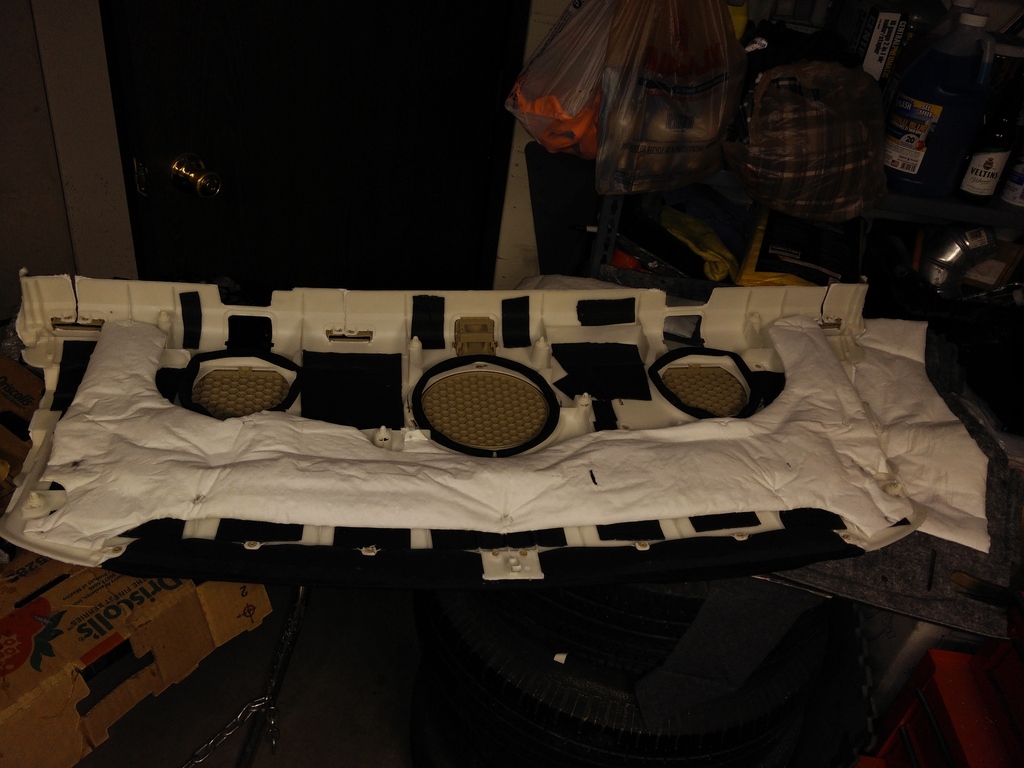
Ground cable location, everything was sanded and applied

Rear speakers were removed.

Rear deck


Ground cable location, everything was sanded and applied

 07-12-2015, 03:07 AM
#20
Racer
Thread Starter
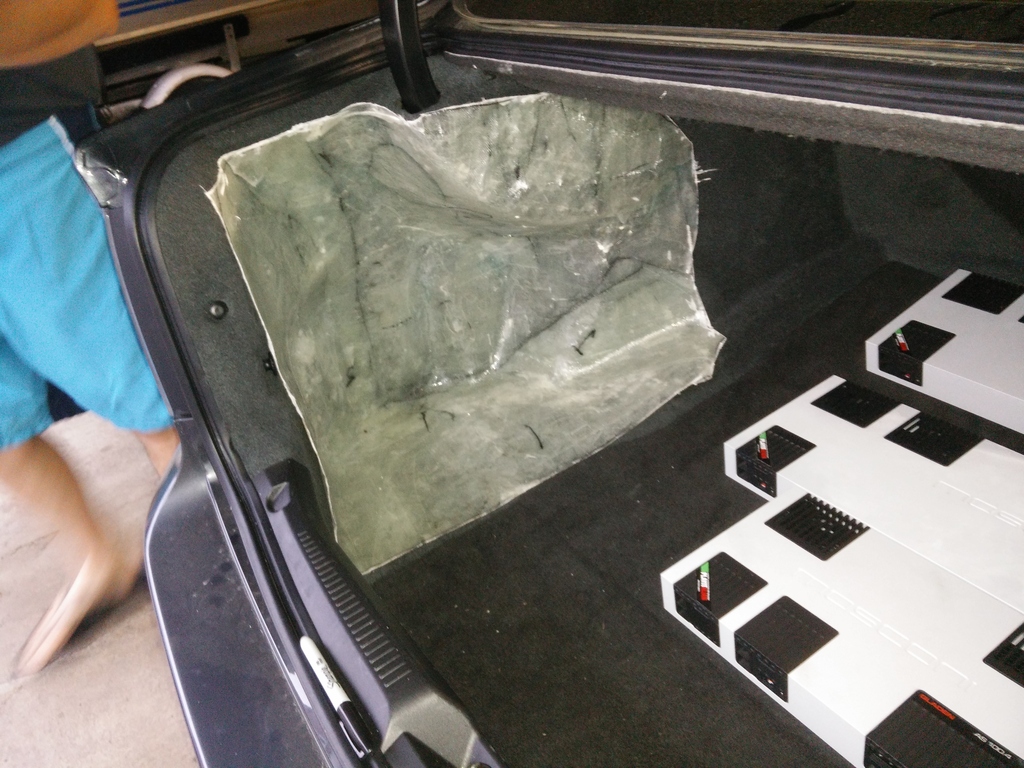
In a mean while i have started on the box, it was a nice day and thought i need to start on this some day, so I made a back mold of the box
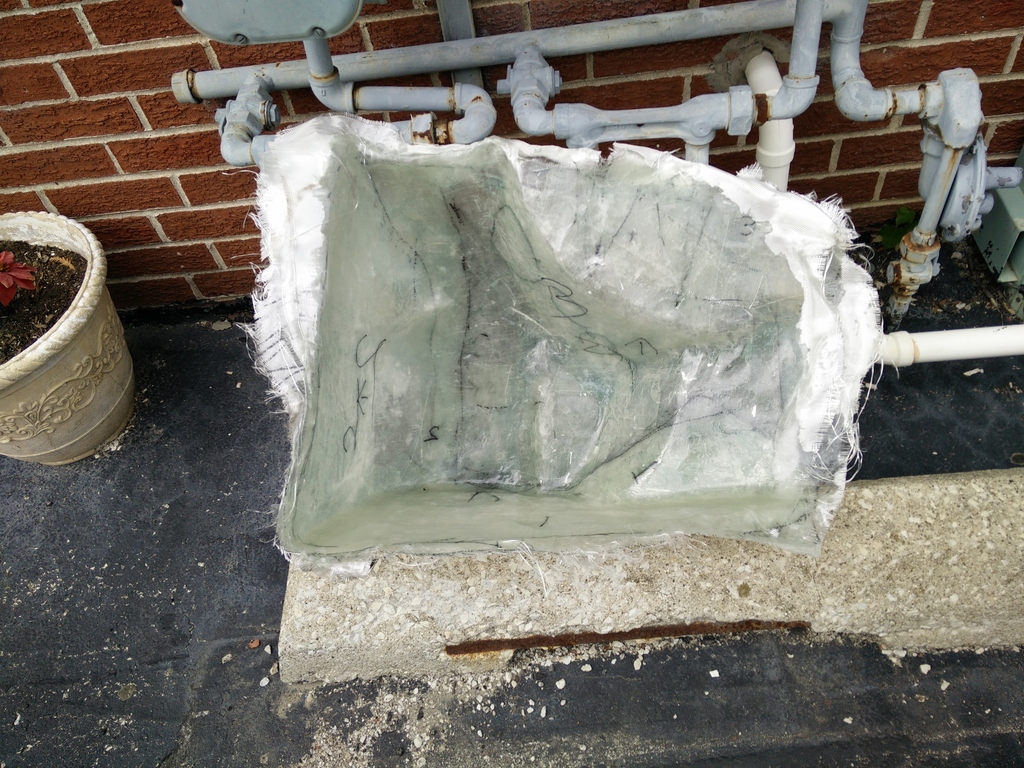
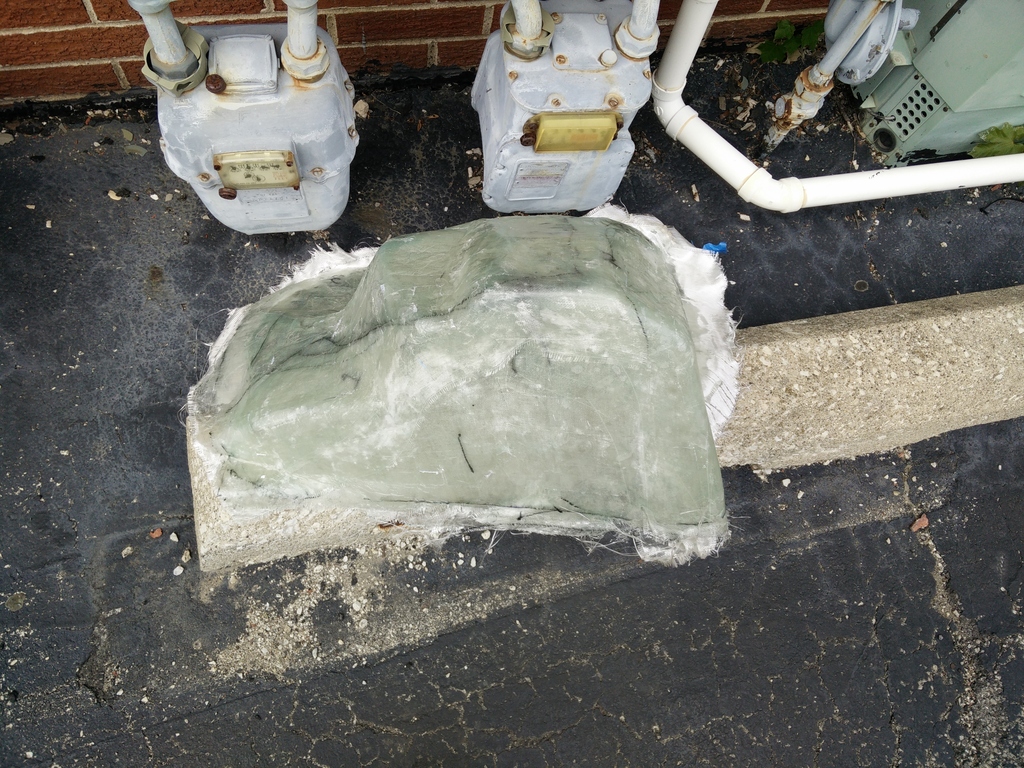
I have cut stuff around to make it look cleaner for the next batch of glass
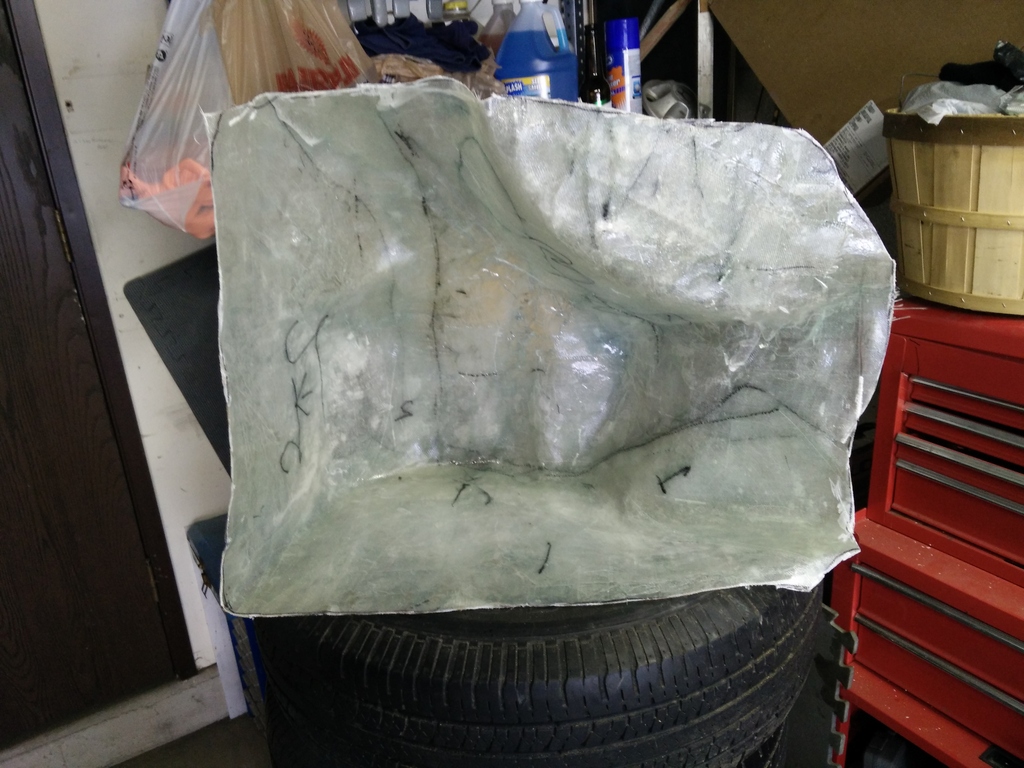
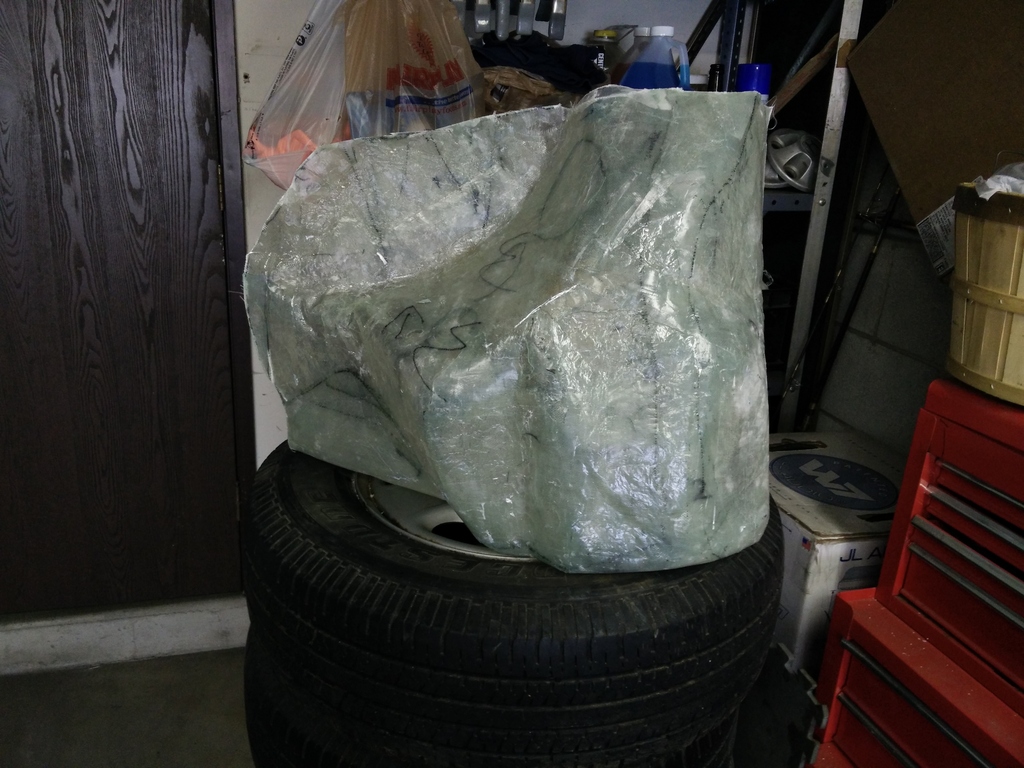
Test fit.
Back to Pillars,
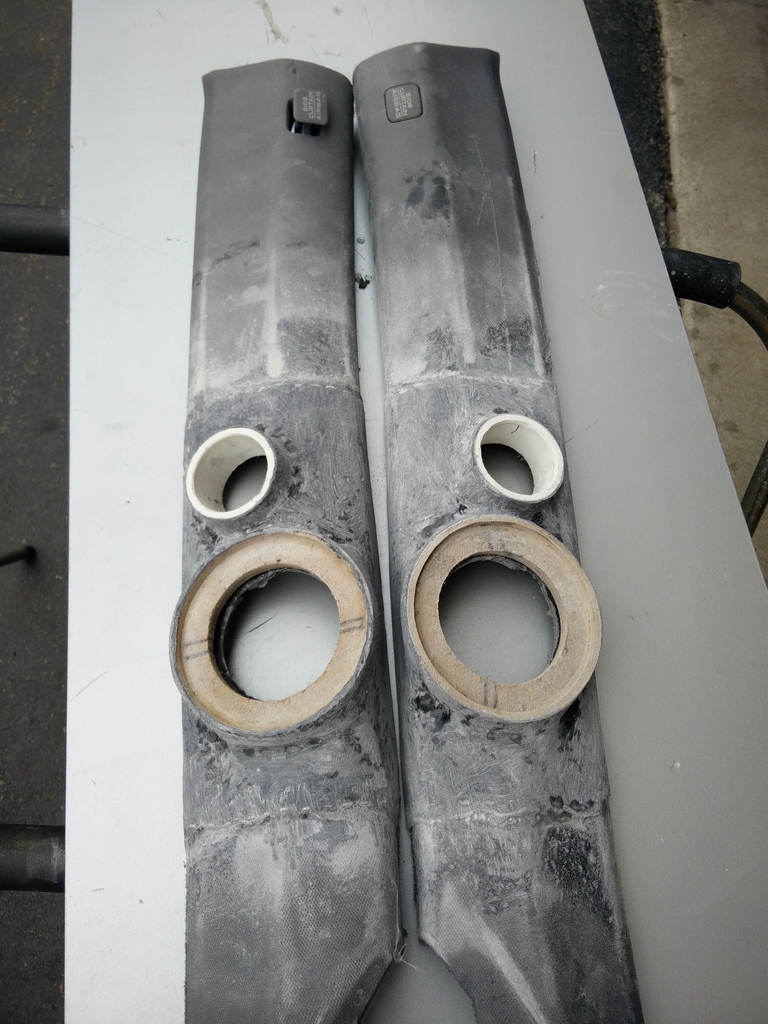
Started making some shape and sanding. OH God that wasn't fun!

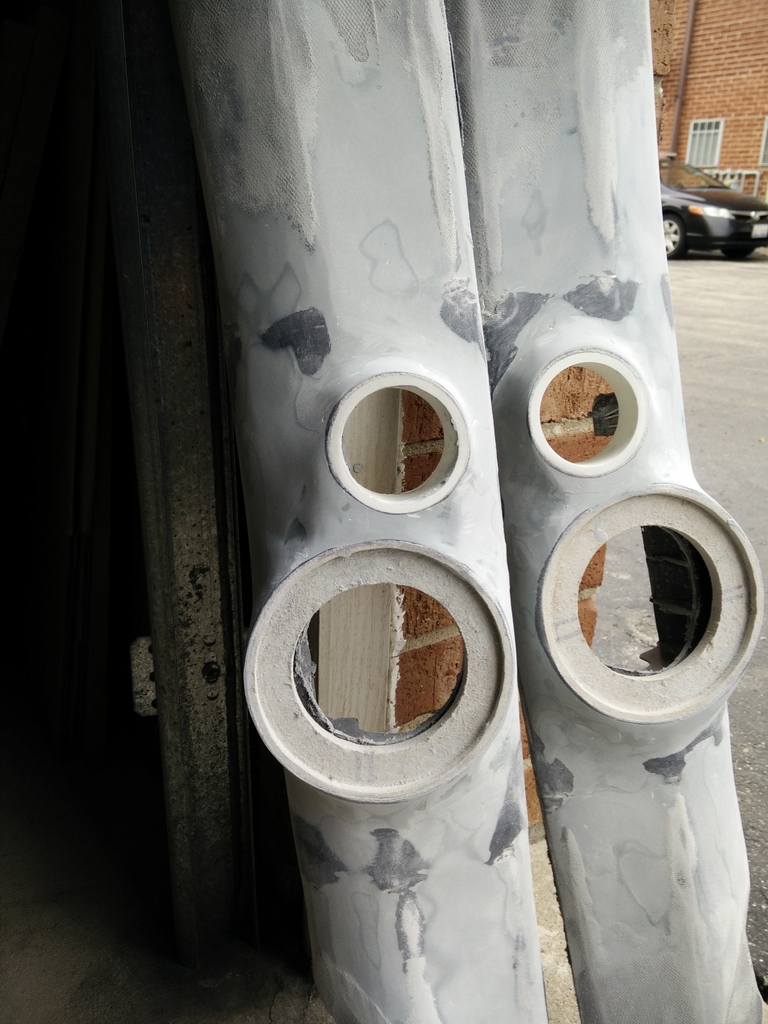
And here they are, done


I have cut stuff around to make it look cleaner for the next batch of glass


Test fit.

Back to Pillars,

Started making some shape and sanding. OH God that wasn't fun!


And here they are, done


 07-12-2015, 03:11 AM
#22
Racer
Thread Starter
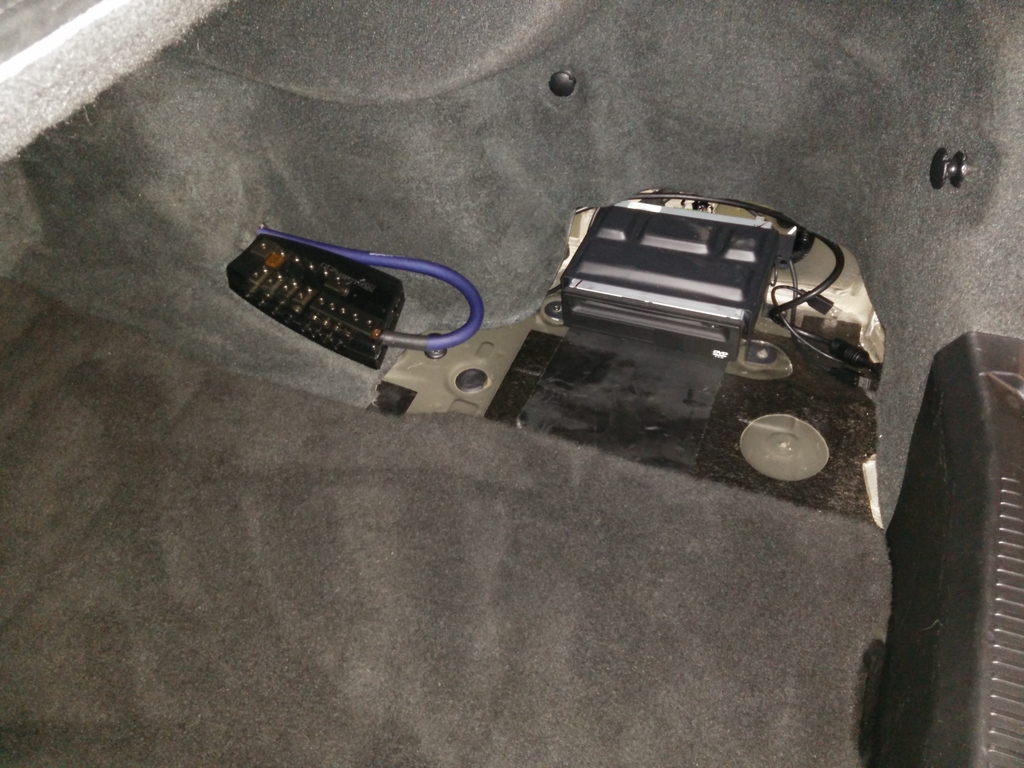
I also knew I will need extra power for my amps, since I'm gonna run 3 amps and so many other things, more power was needed.
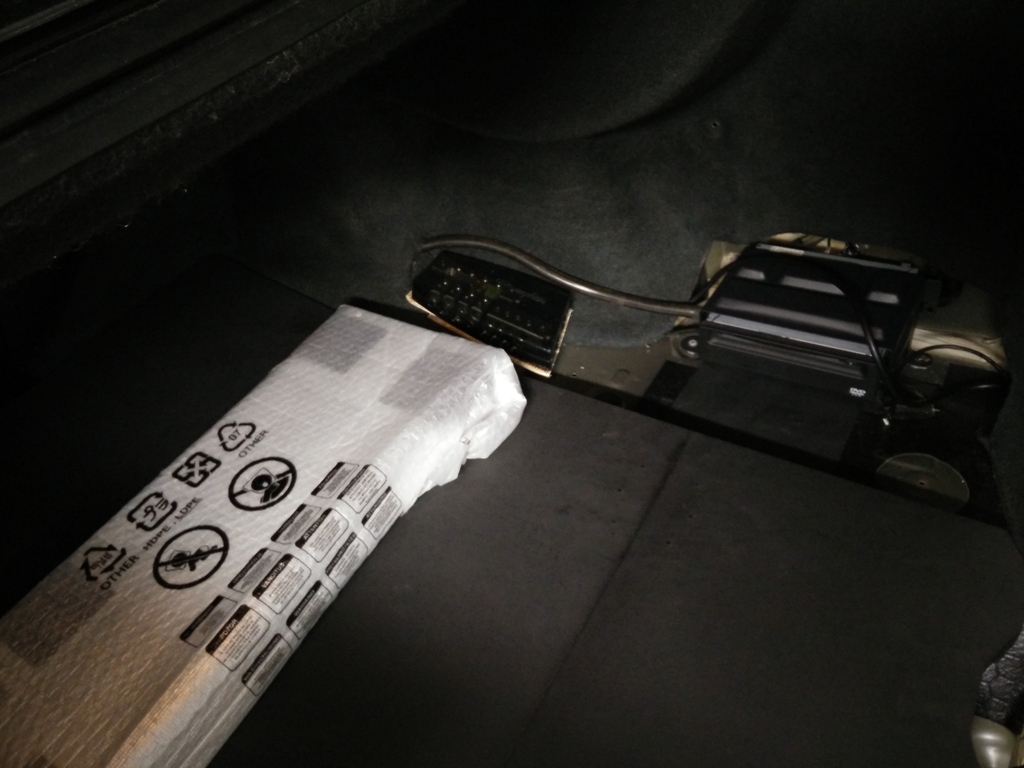
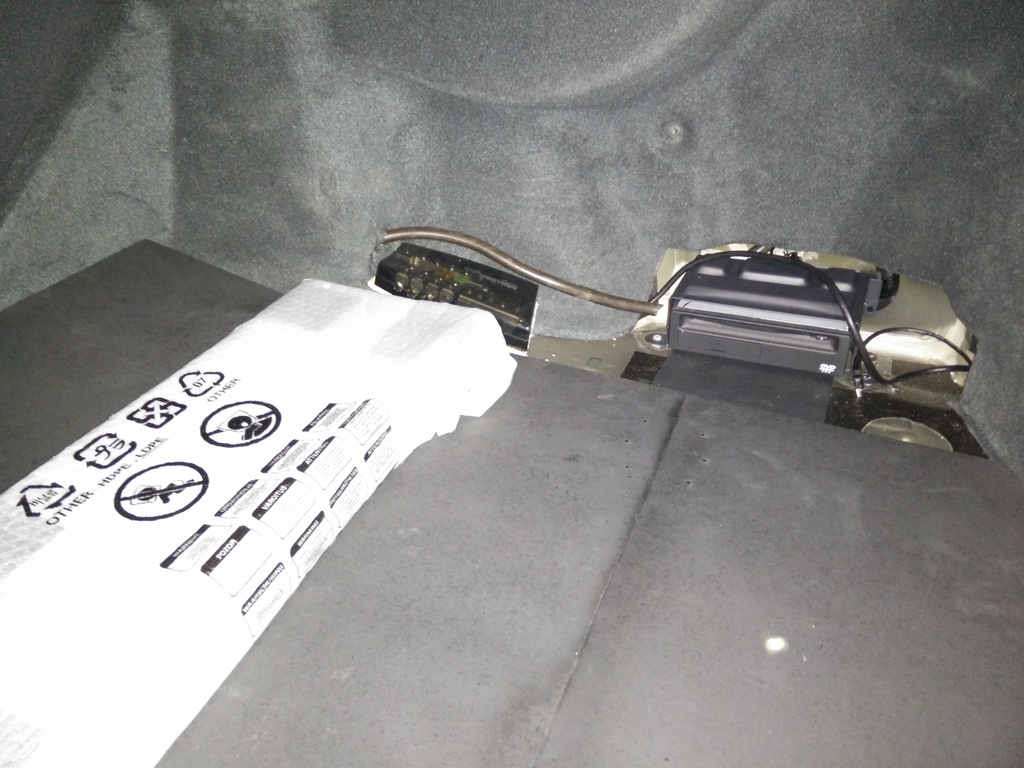
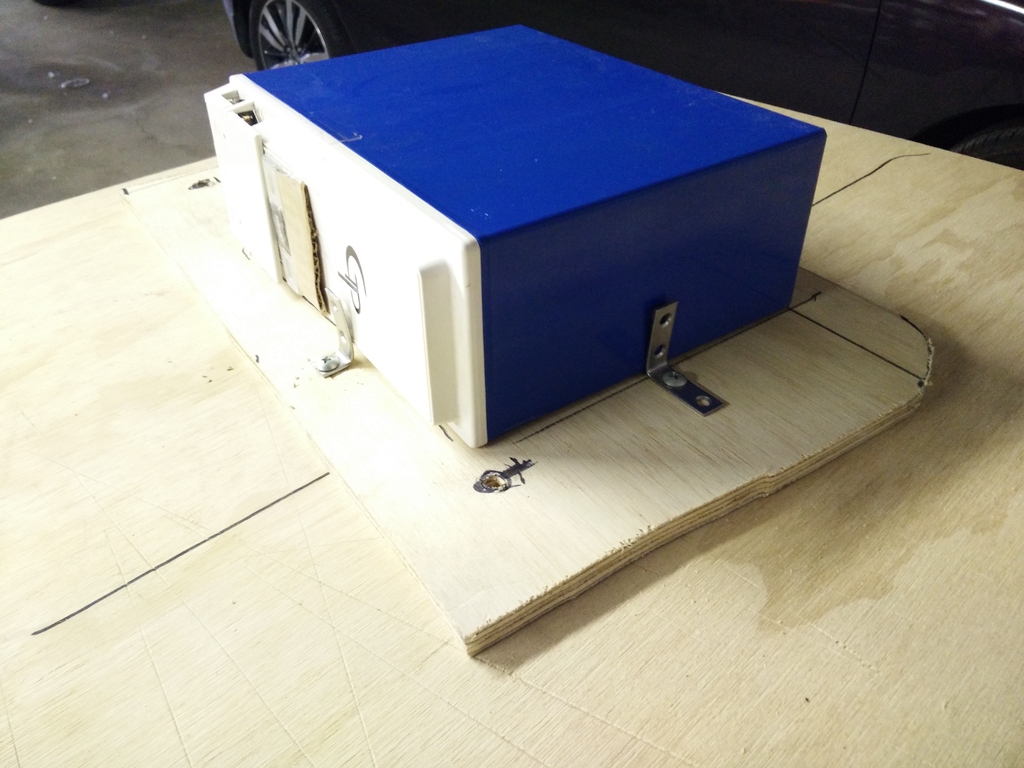
I also got custom RCA from GP Audio and Nortstar Battery for the trunk, Battery is so small it will be placed with Navi DVD is located.
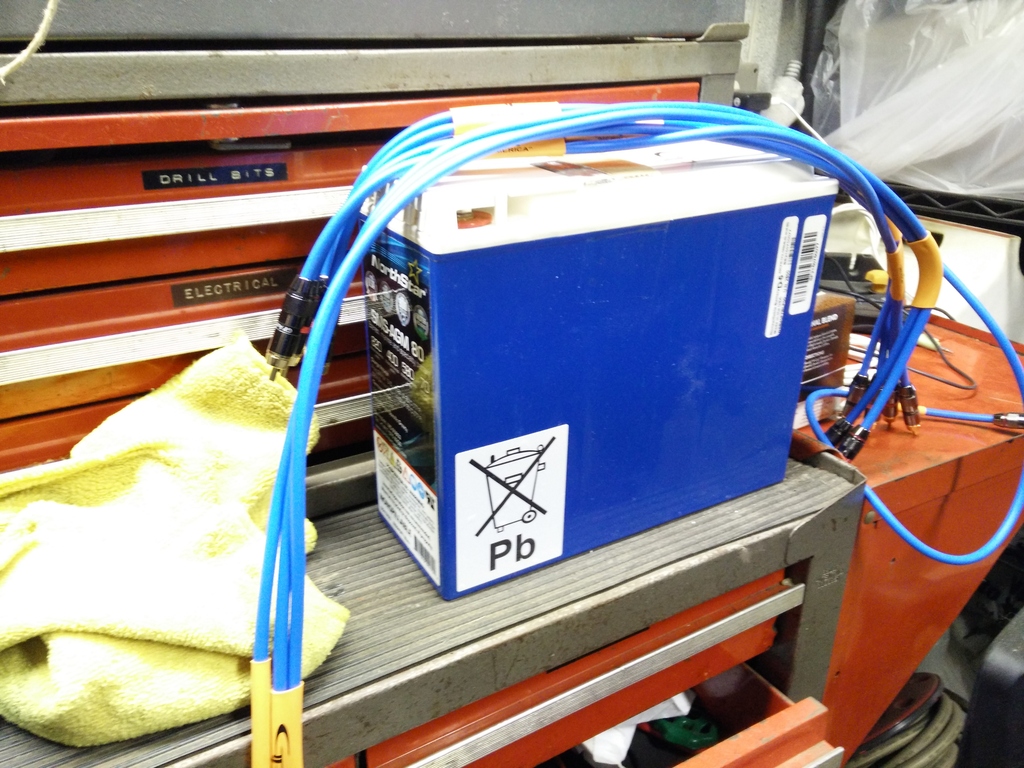
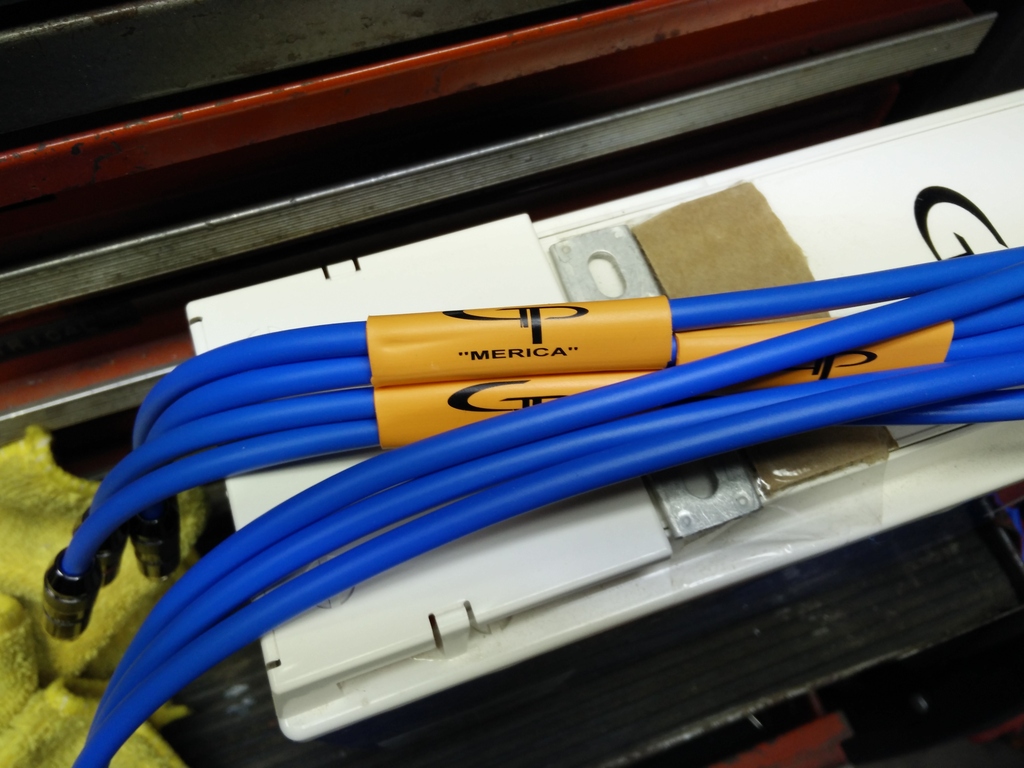
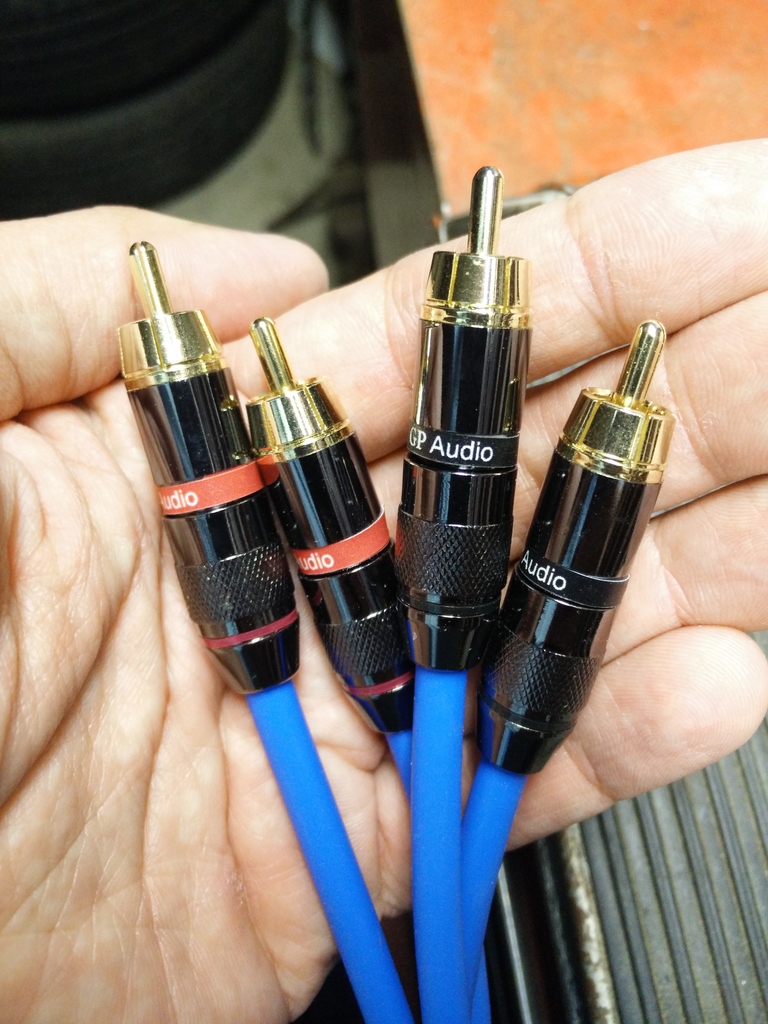
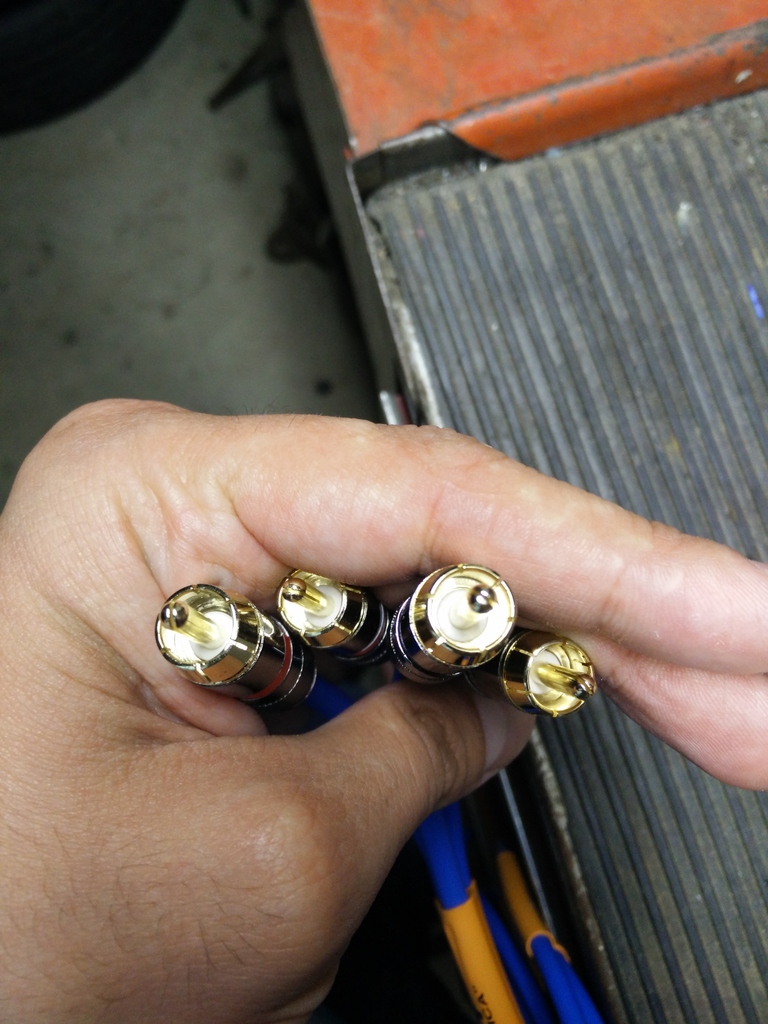
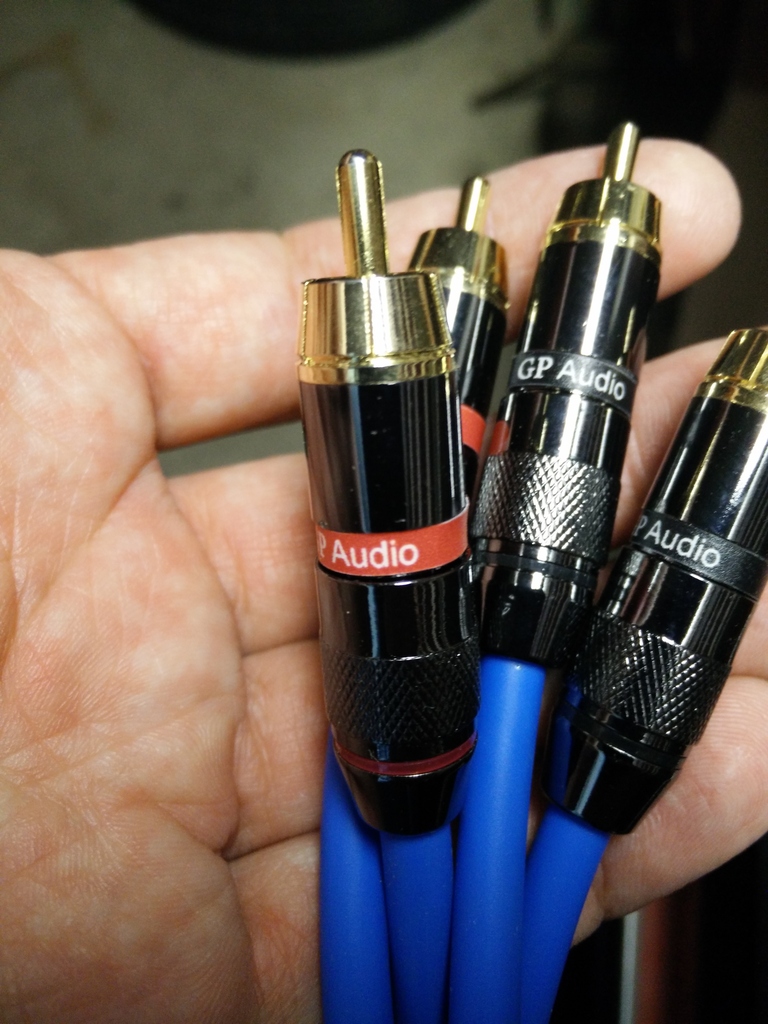
I also got custom RCA from GP Audio and Nortstar Battery for the trunk, Battery is so small it will be placed with Navi DVD is located.


 07-12-2015, 03:14 AM
#23
Racer
Thread Starter
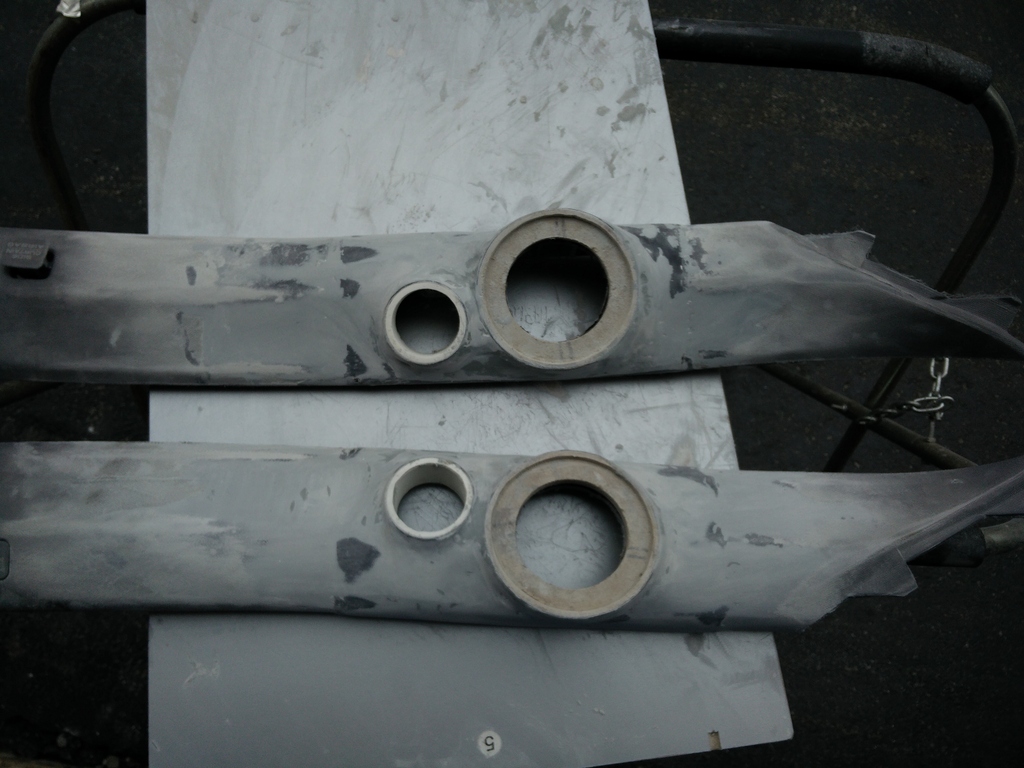
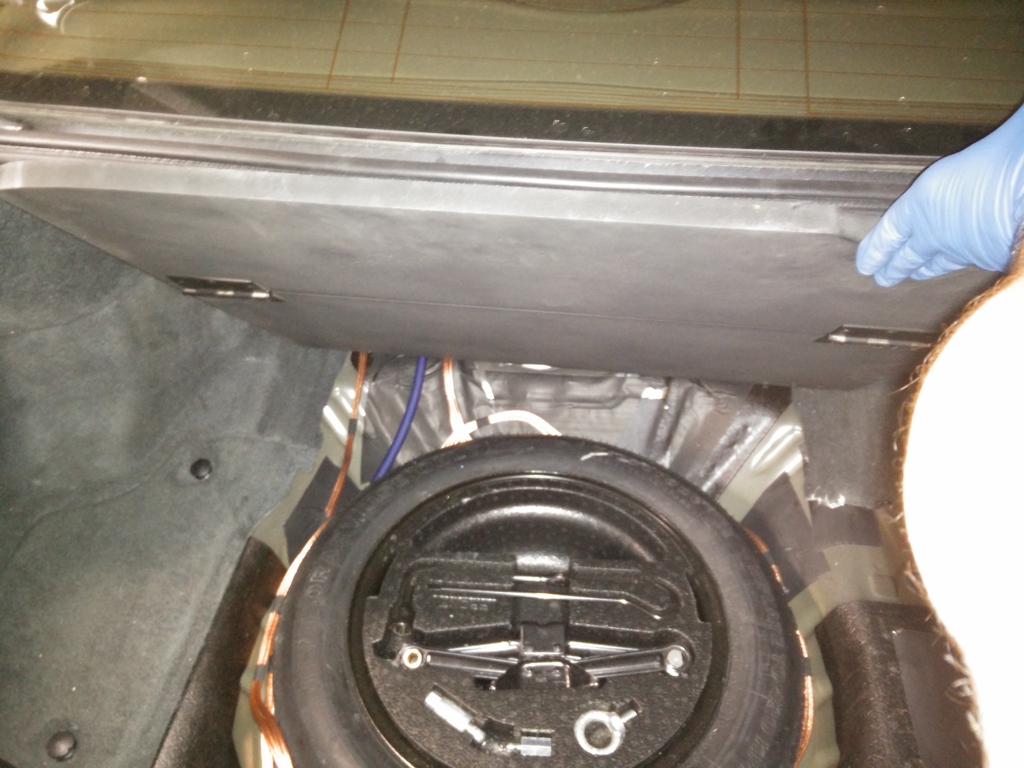
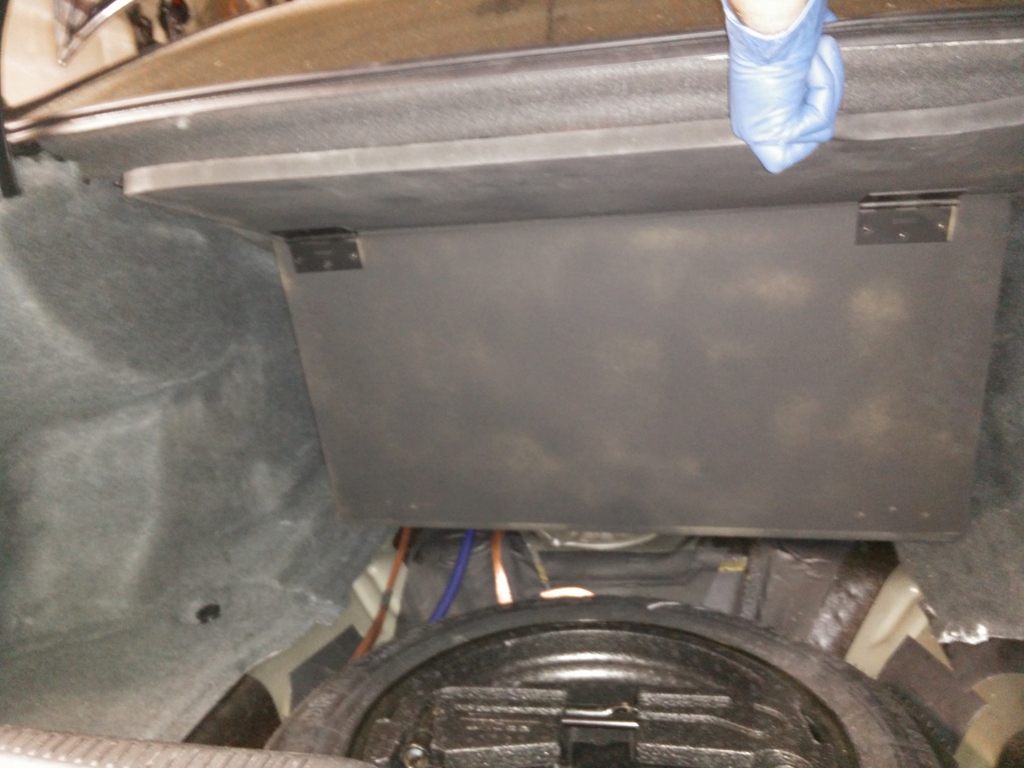
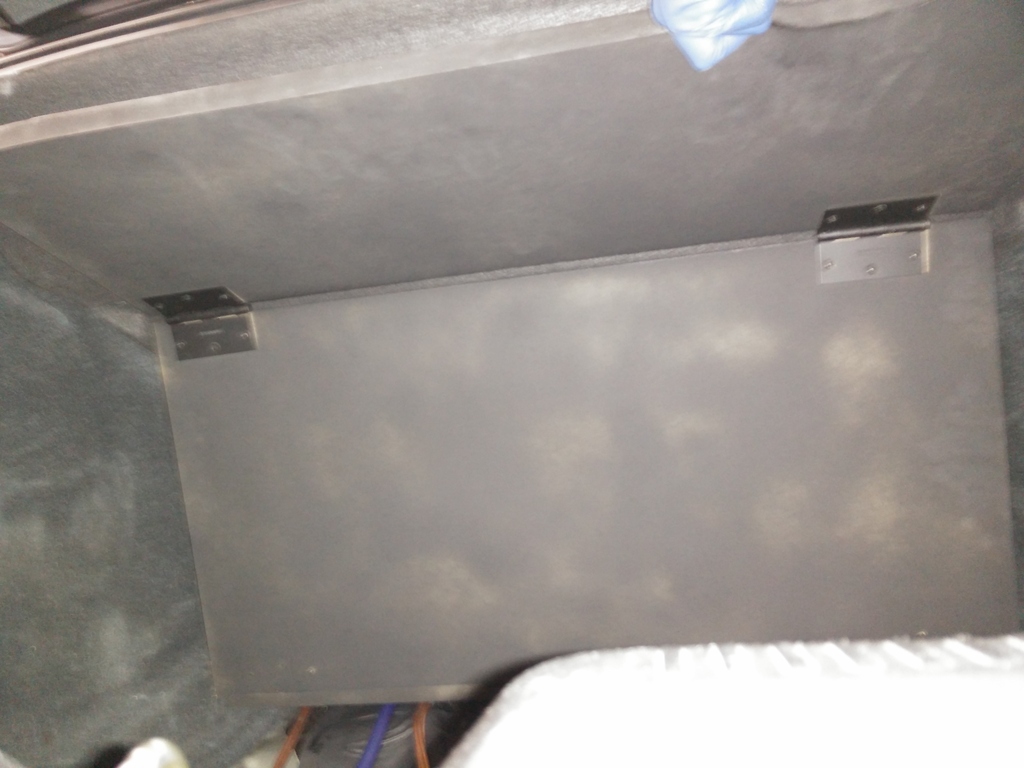
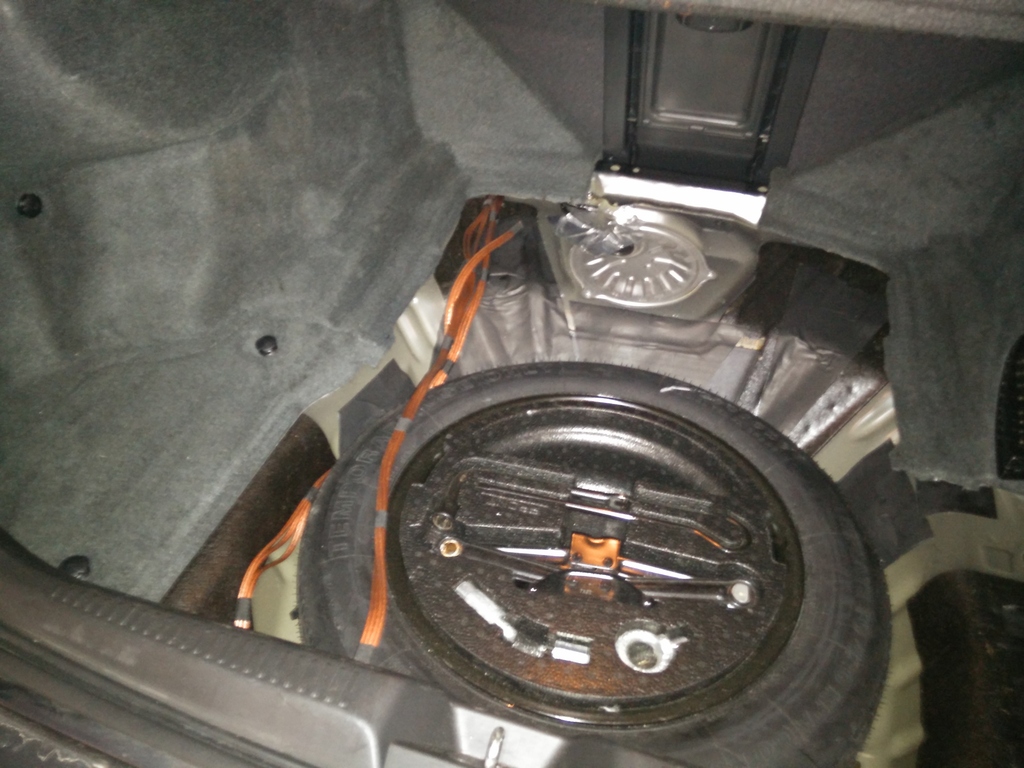
I have made measurements for the board so i could get in to my spare tire in case of anything.
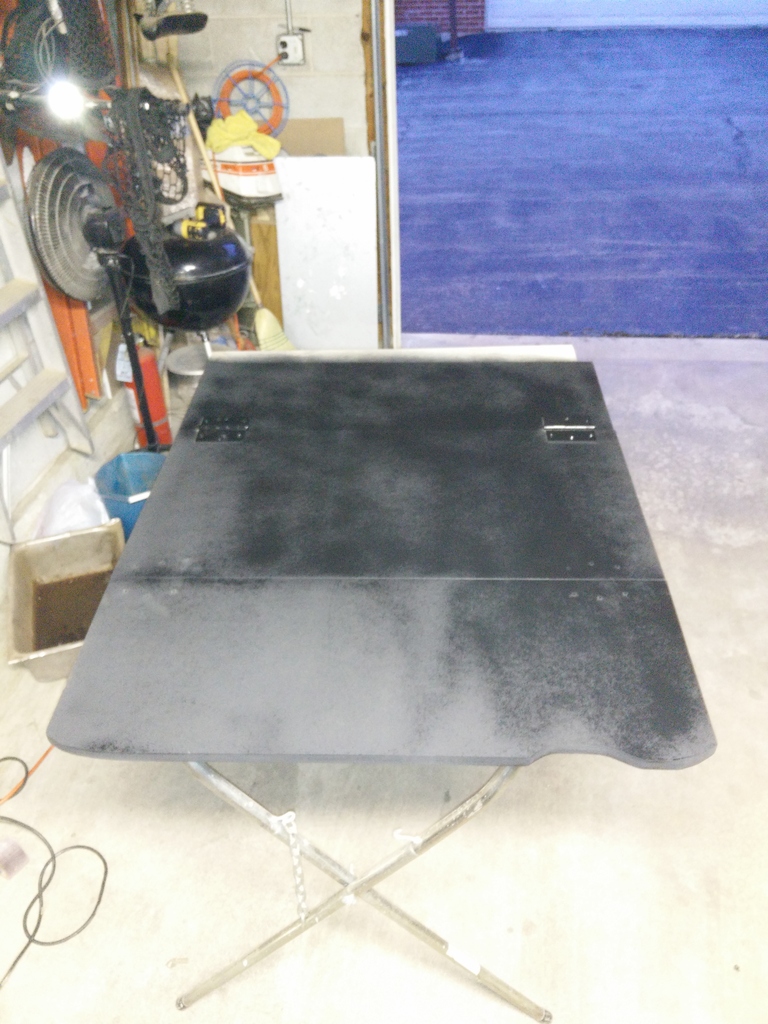
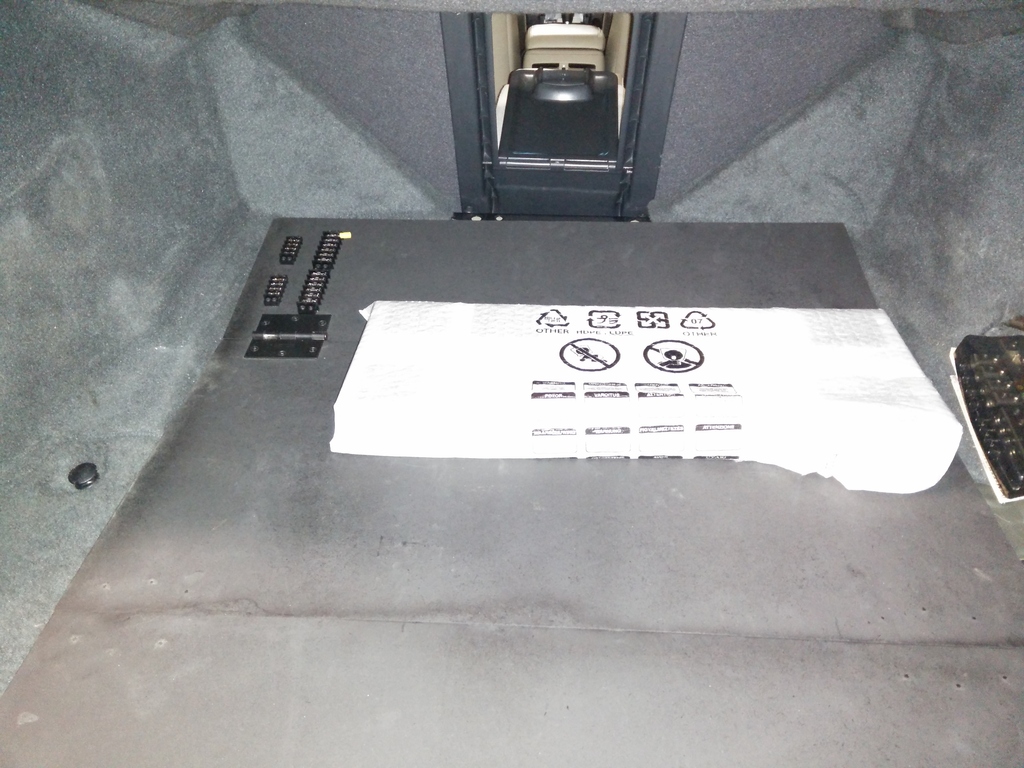
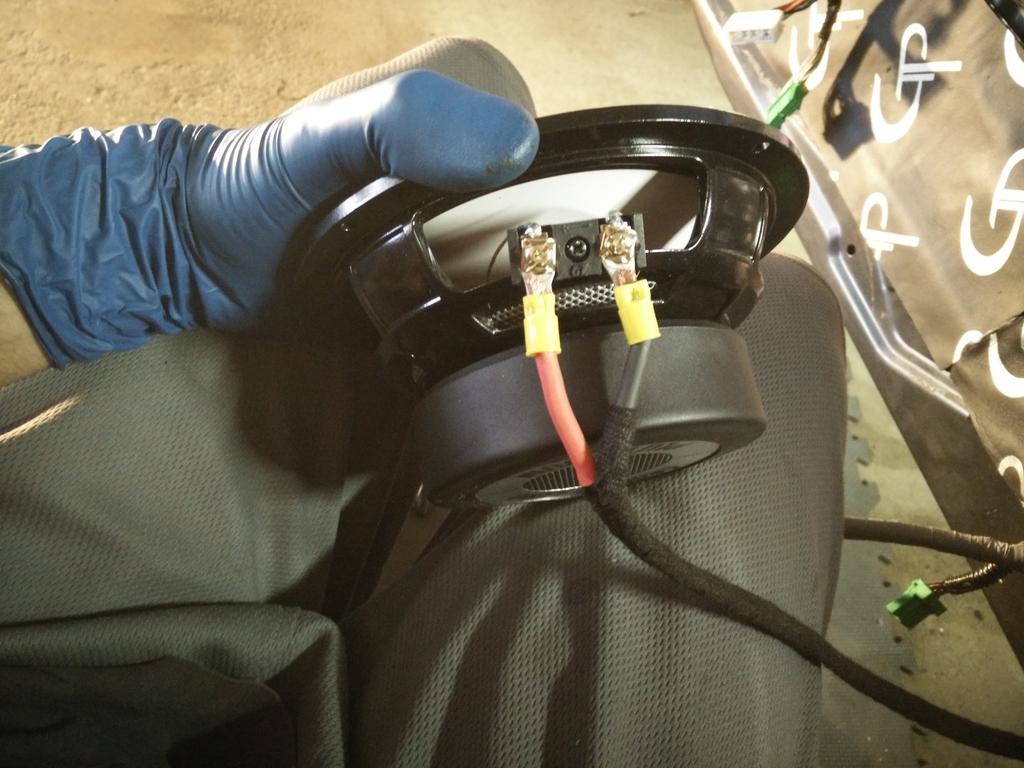
Speaker Connections
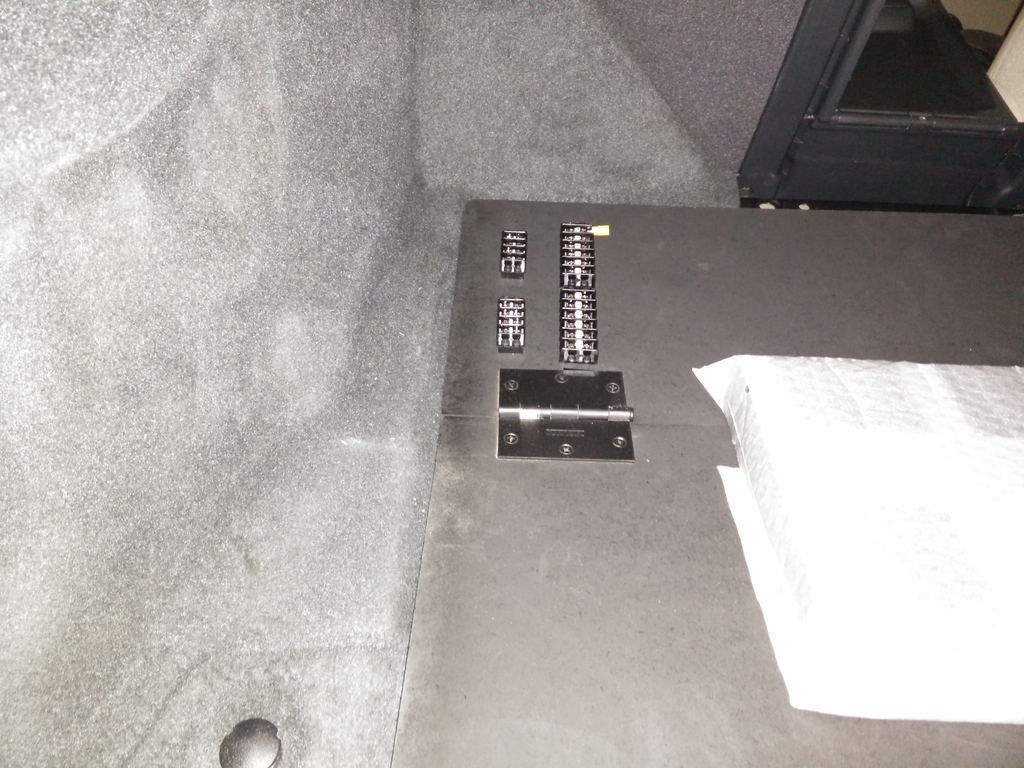
That's how it folds
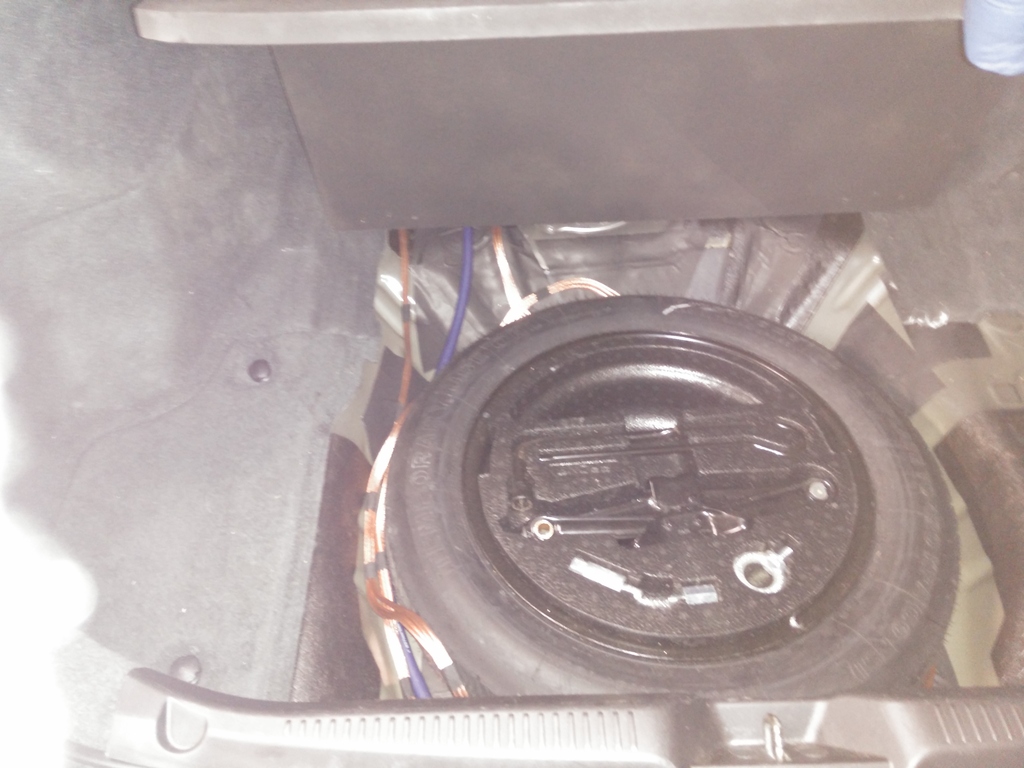
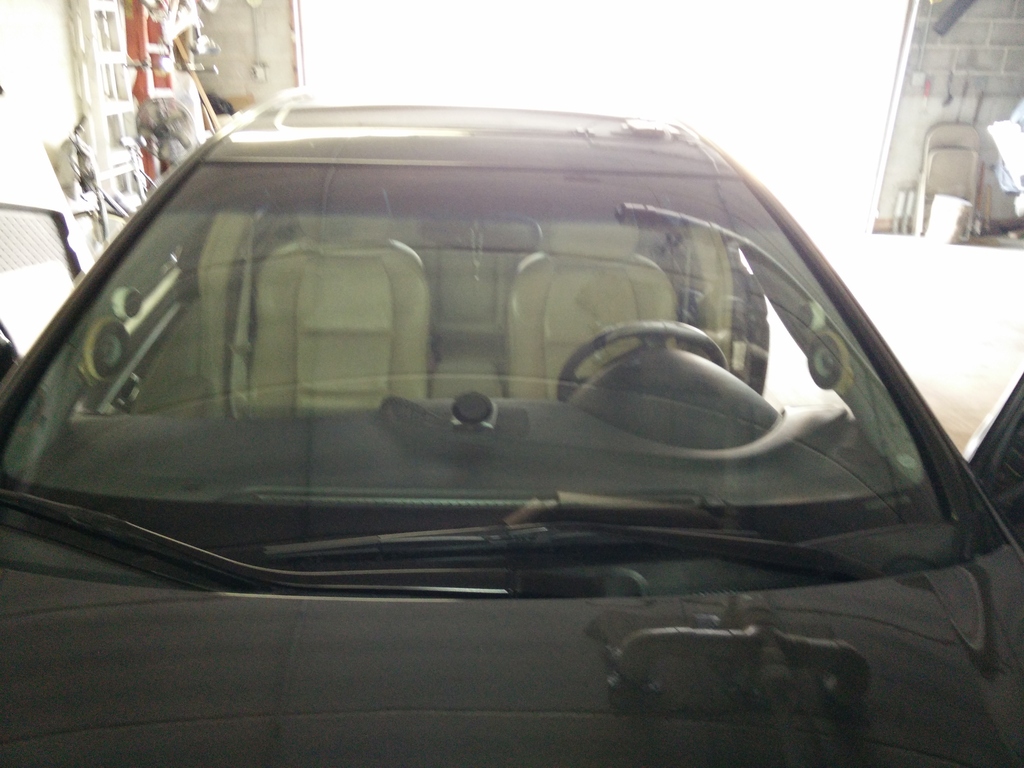
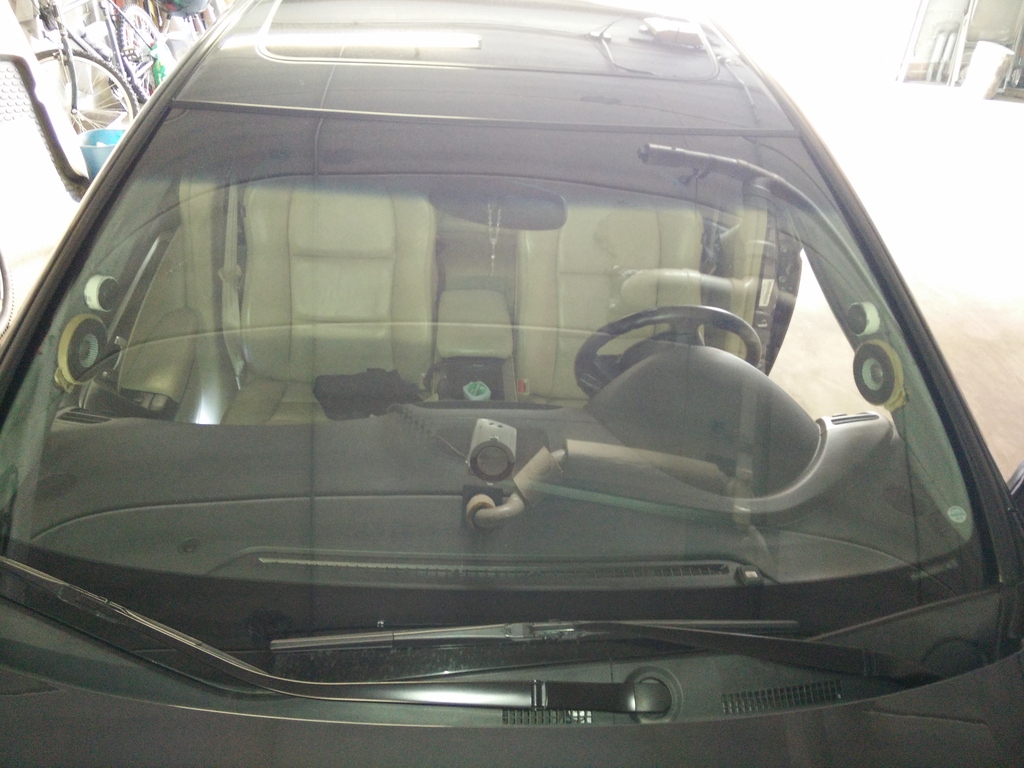
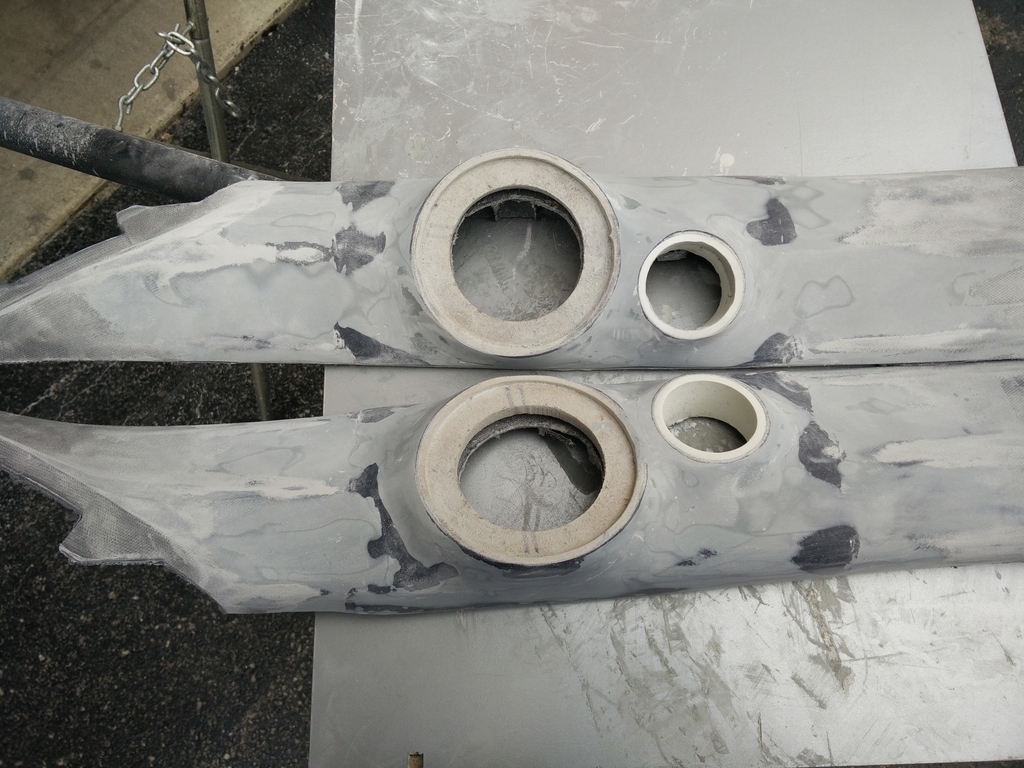
both pillars are finished and wrapped

Test Fit


Speaker Connections


That's how it folds


both pillars are finished and wrapped


Test Fit


 07-12-2015, 03:18 AM
#24
Racer
Thread Starter
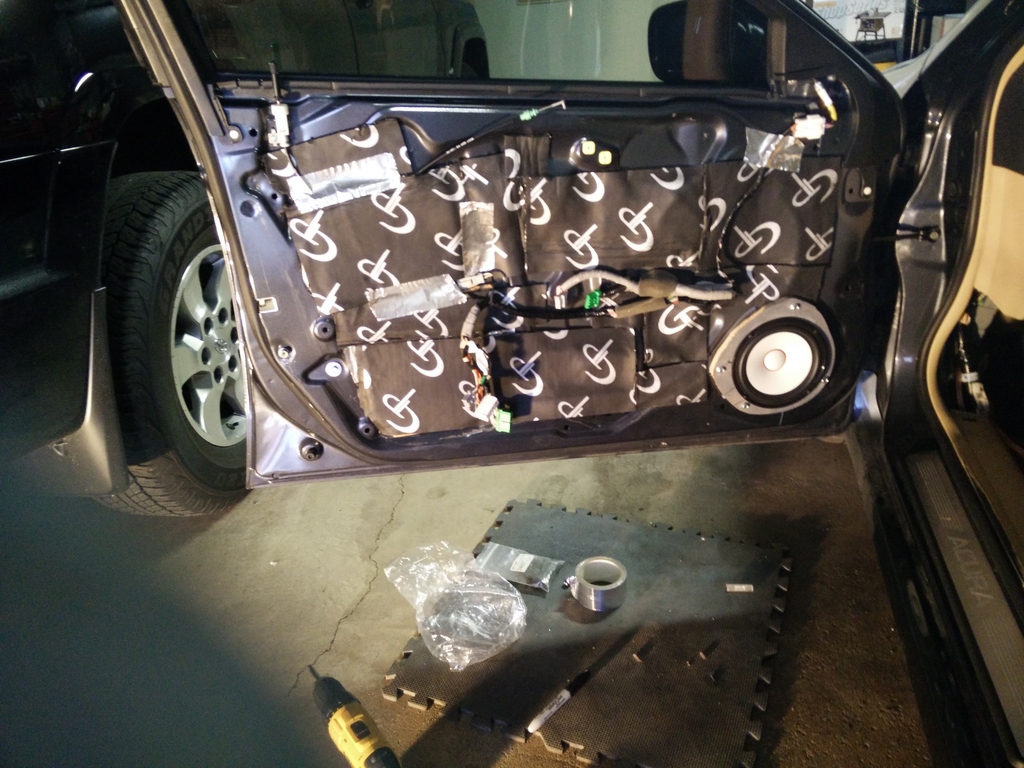
Since I had alot more of sound damping material from second skin, I have ordered GP Audio V2 for the doors only.
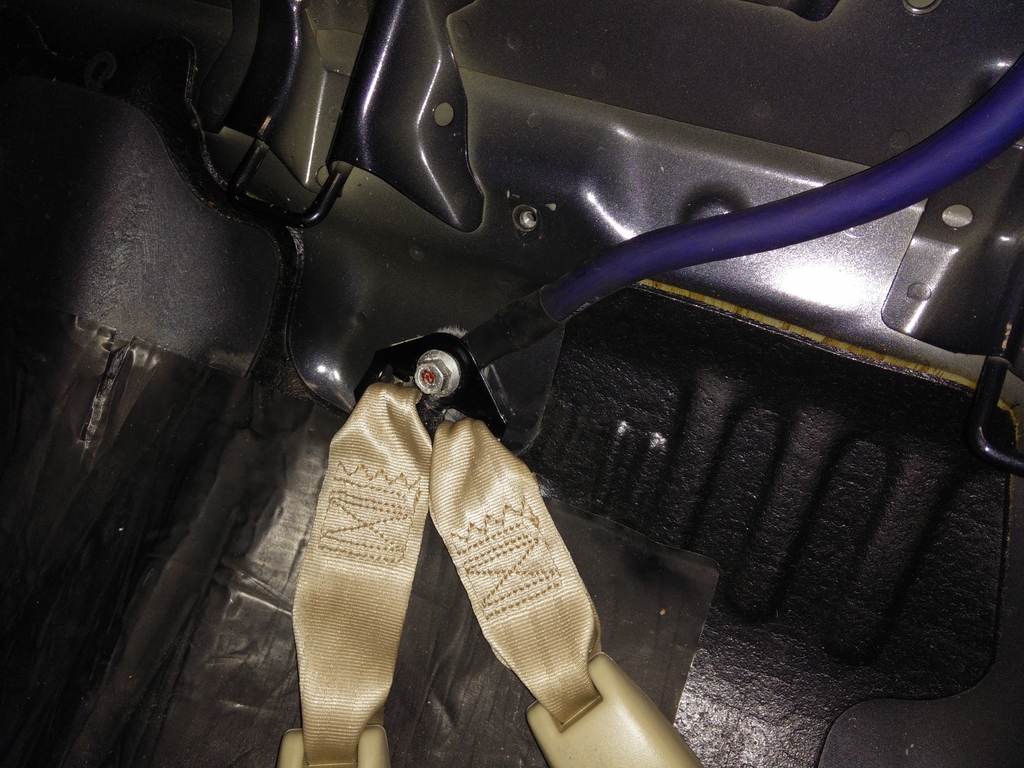
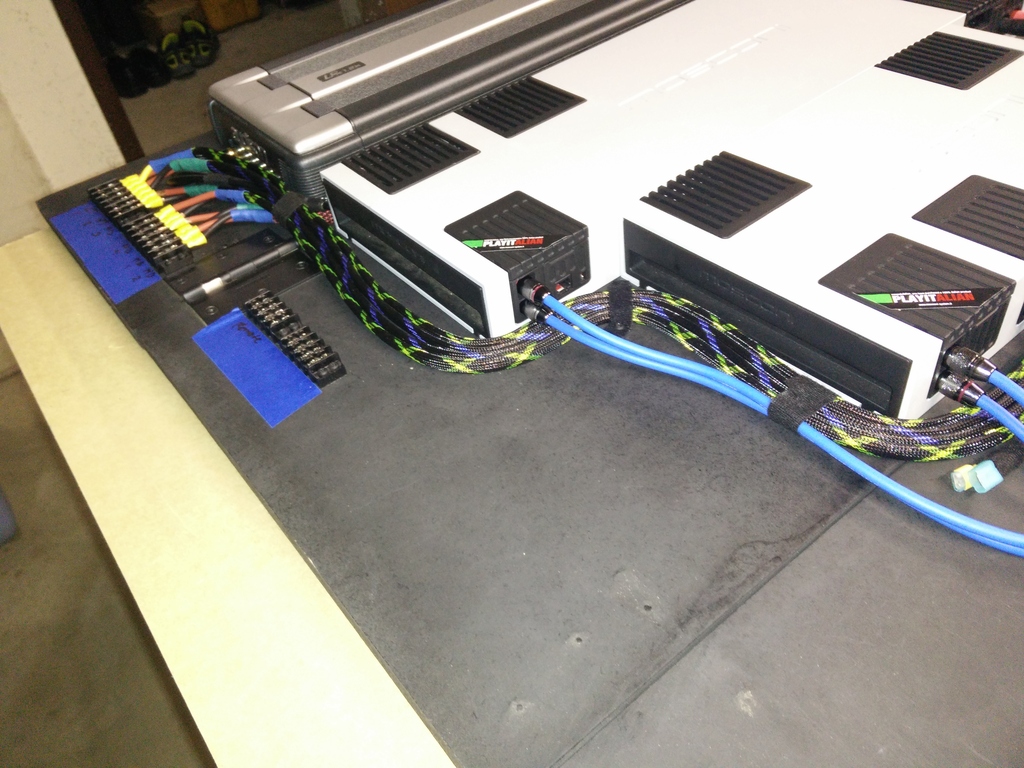
Also had to relocate some of my 3 way wires and they are all 12G wires for all my speakers in the car,
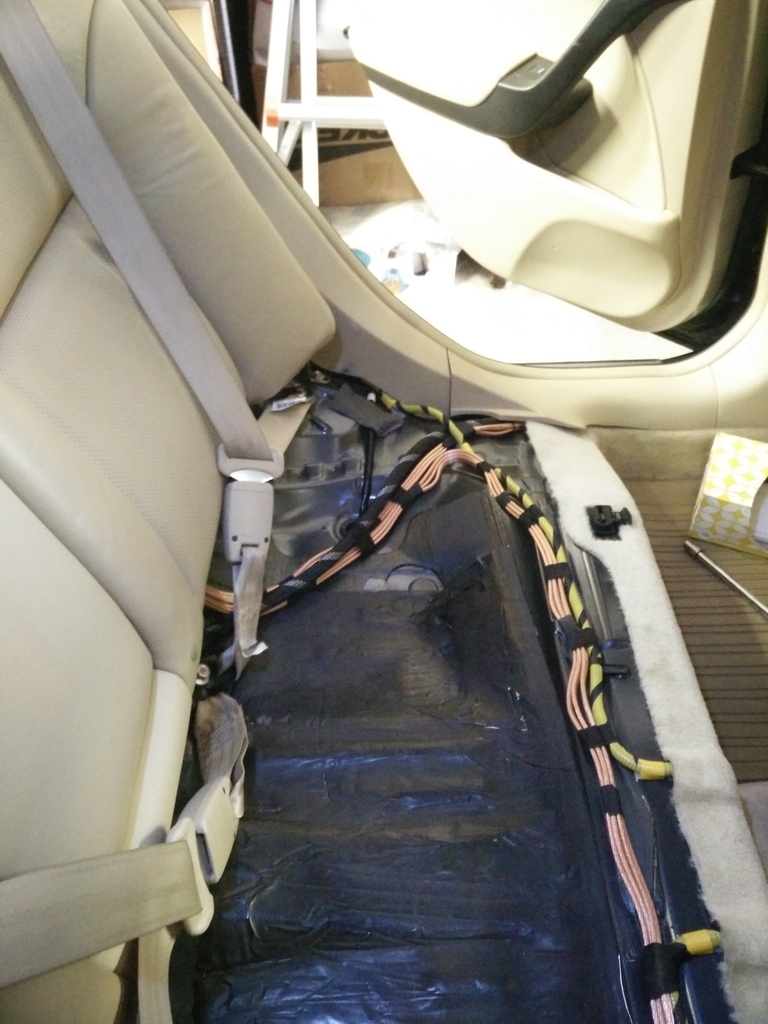
Distro block was mounted and power and ground wire were connected
All speaker wires were ran on one side to easier install.
Battery platform was made, also needed to secure it.

Also had to relocate some of my 3 way wires and they are all 12G wires for all my speakers in the car,

Distro block was mounted and power and ground wire were connected

All speaker wires were ran on one side to easier install.

Battery platform was made, also needed to secure it.
 07-12-2015, 03:27 AM
#25
Racer
Thread Starter
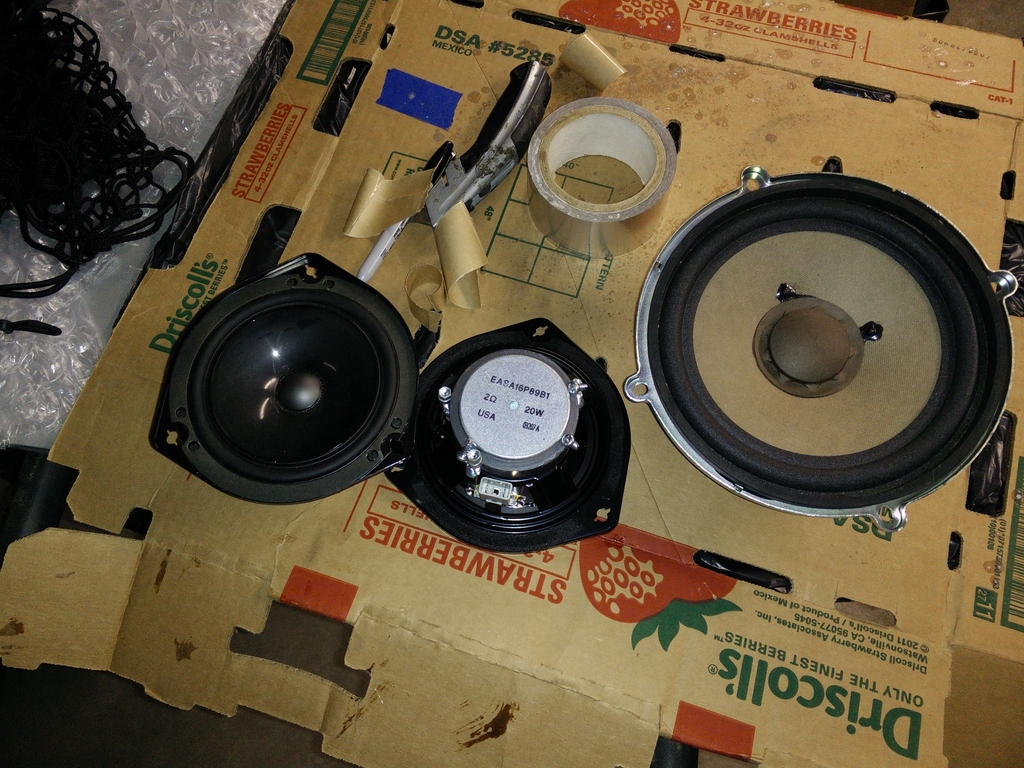
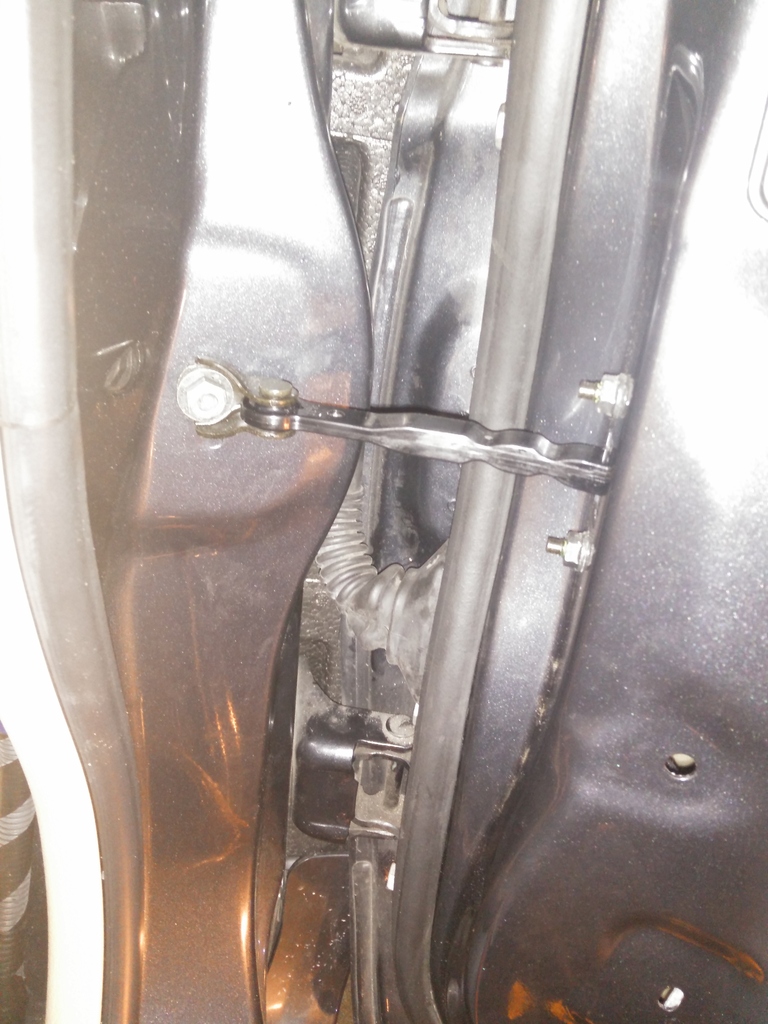
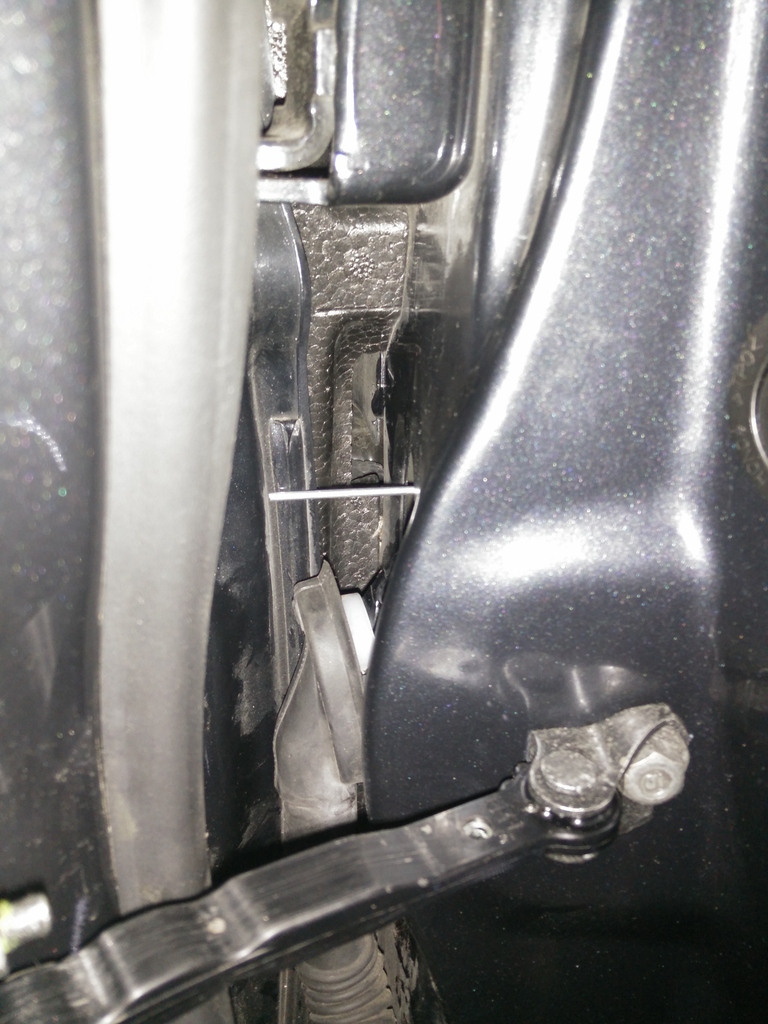
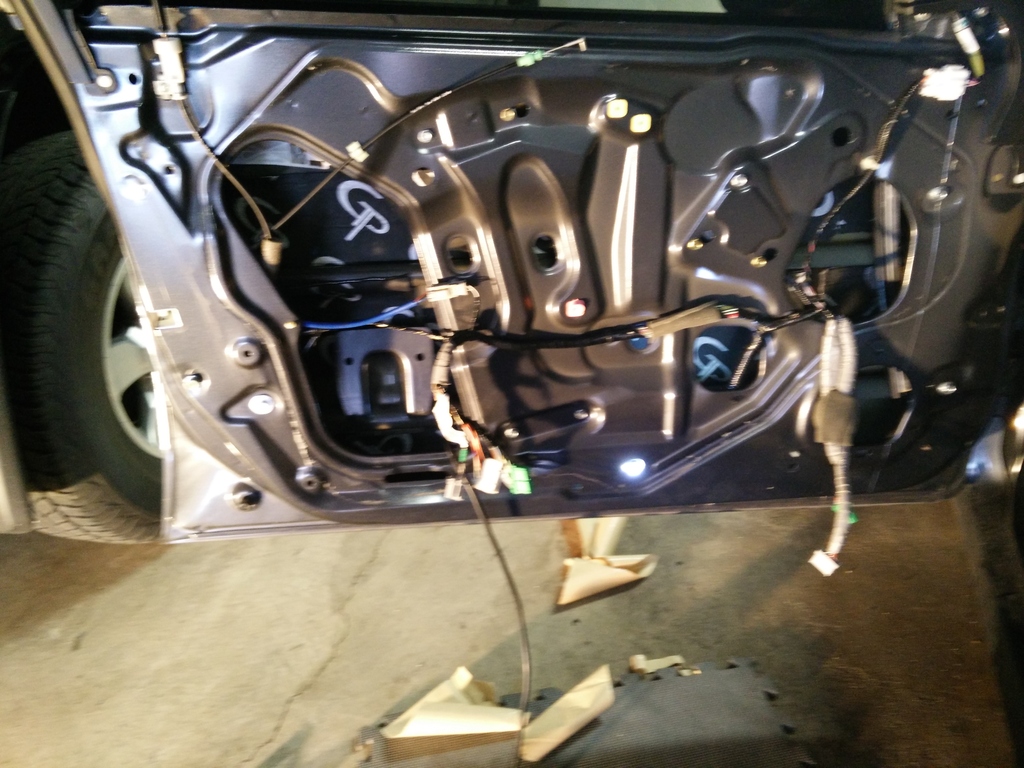
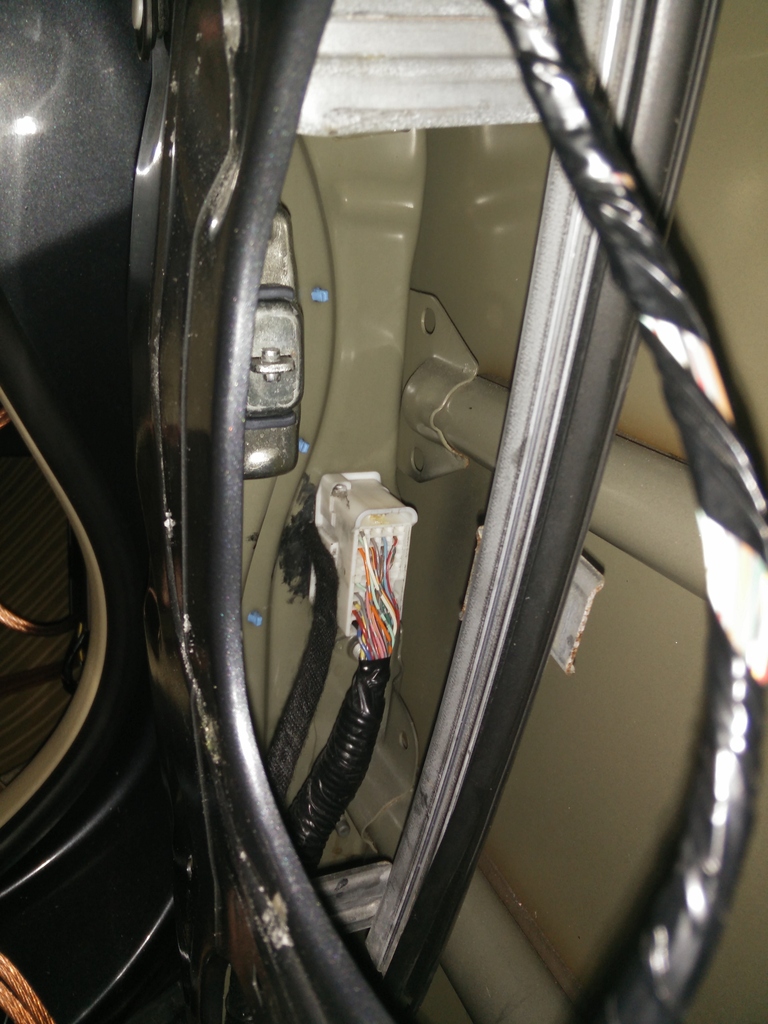
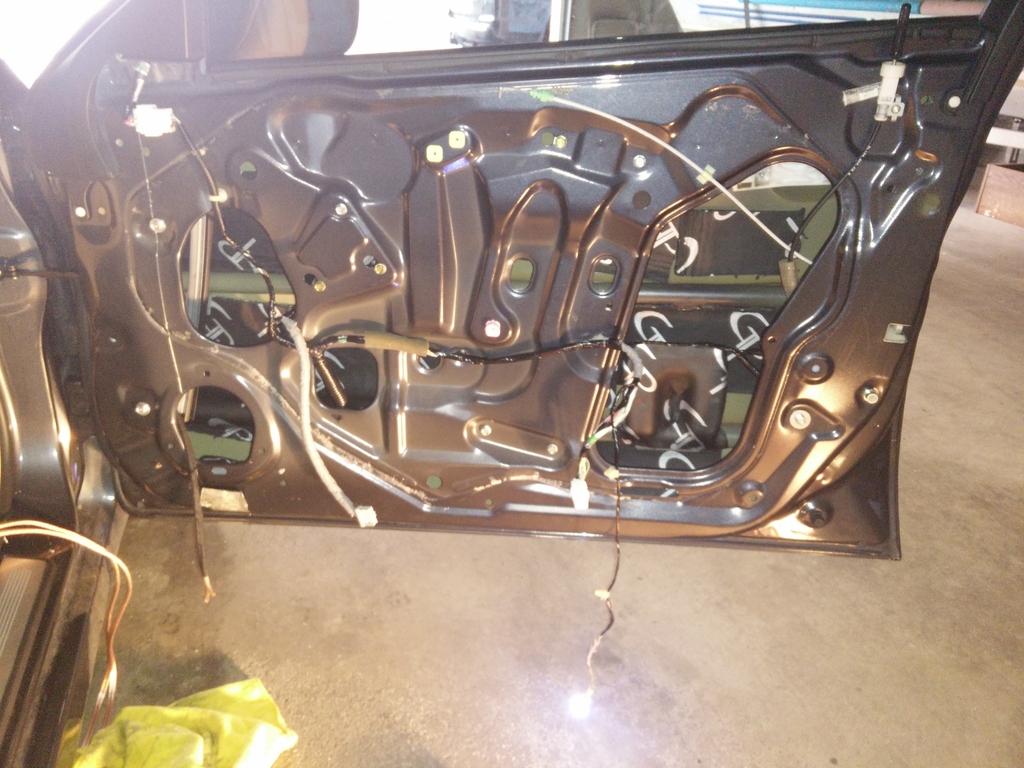
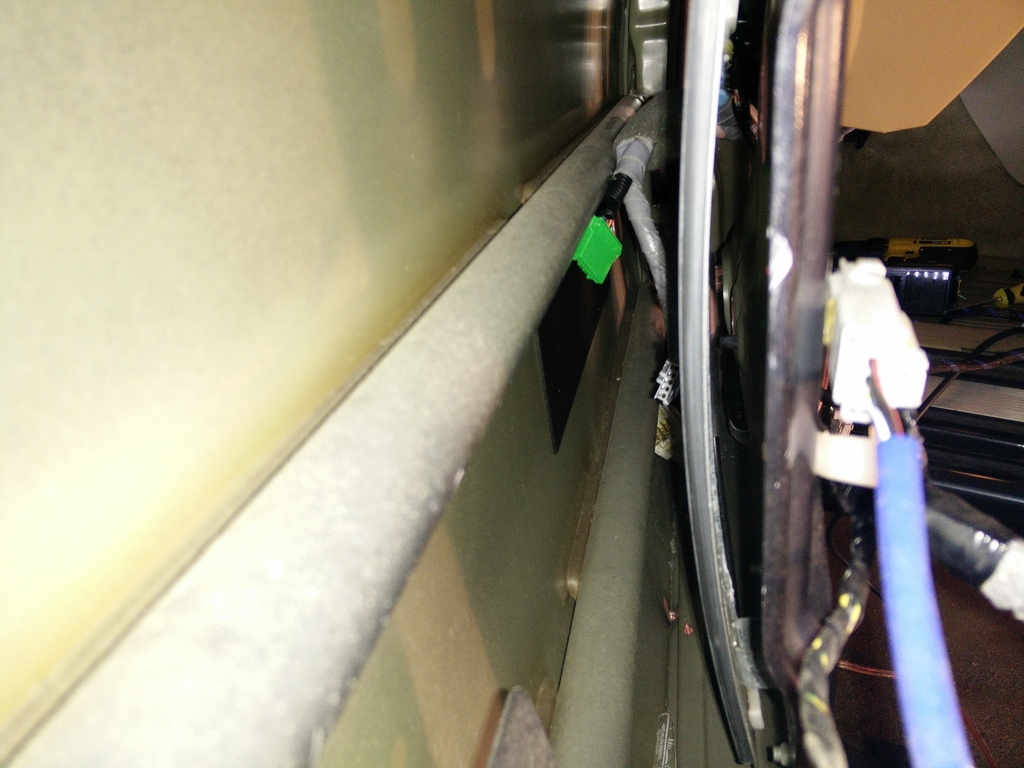
Doors OMG, they were pain in the ass to run new cable, and since it was a big cable 12G wire for mid drivers, I had lots of trouble getting the cable though molex connection.
Since I had a small dromal, i have cut in or i should say i shaved some of the metal on the side where molex connector was located and made sure nothing gets cut, no water gets in, and everything fits like a glove.

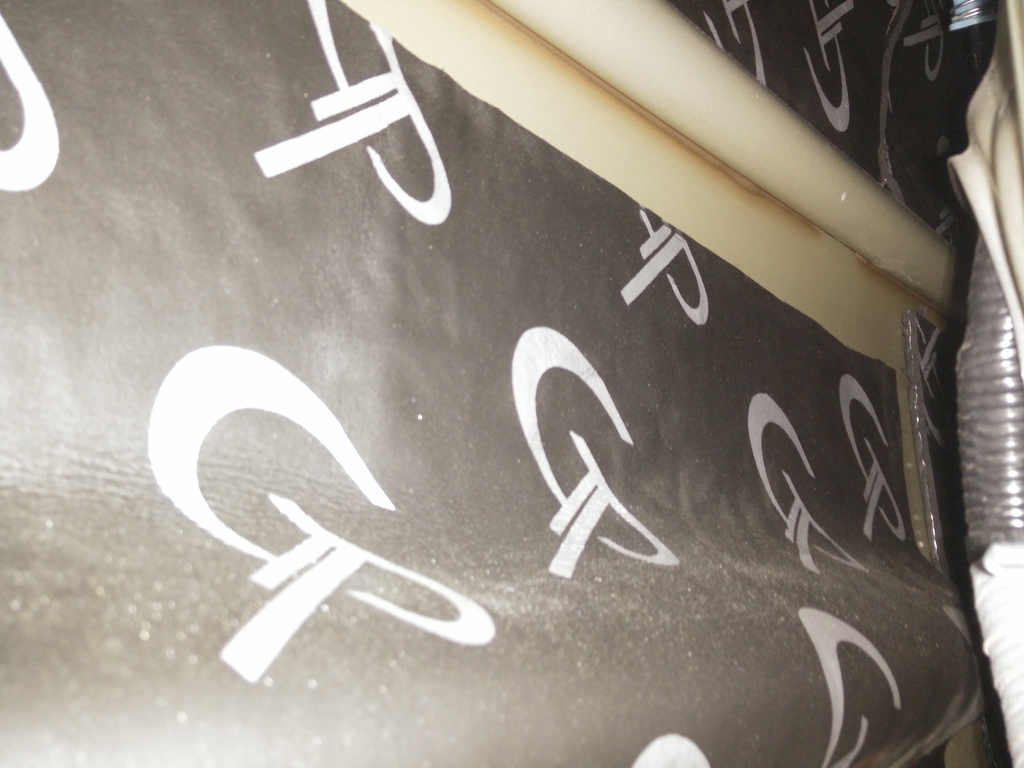
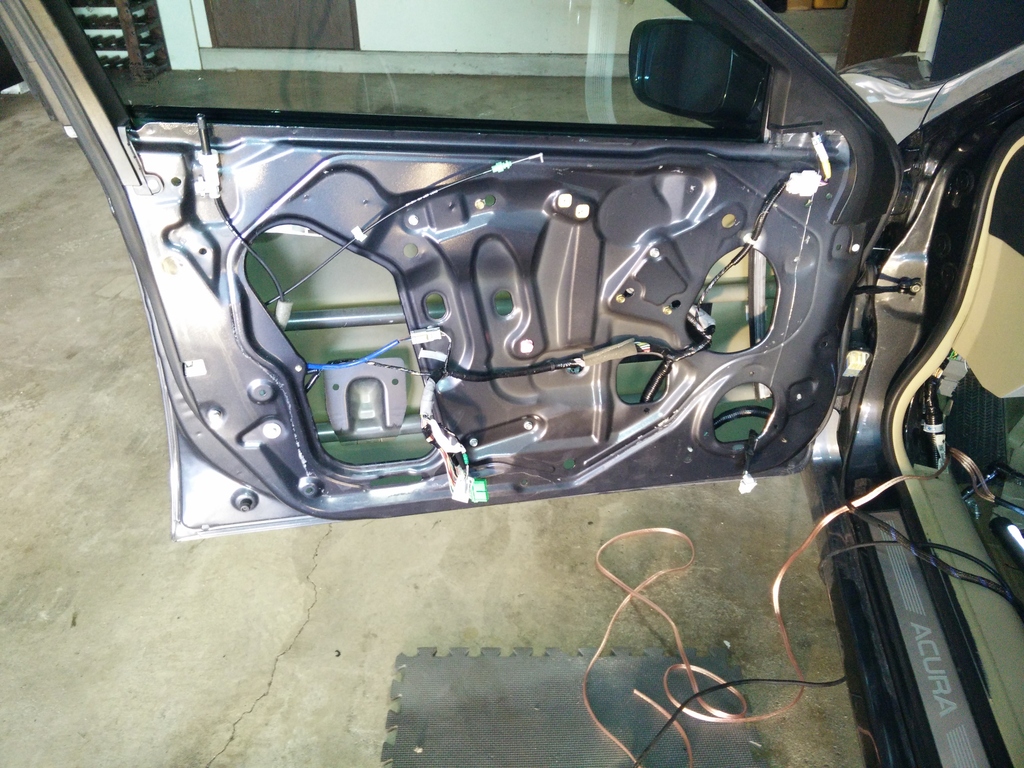
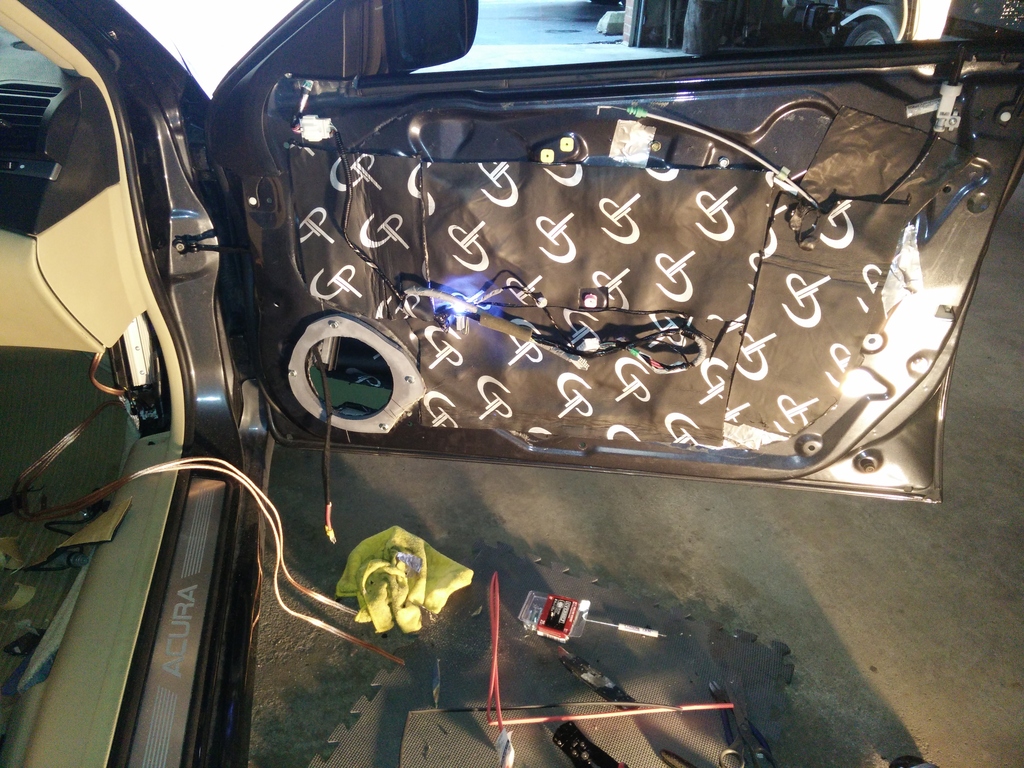
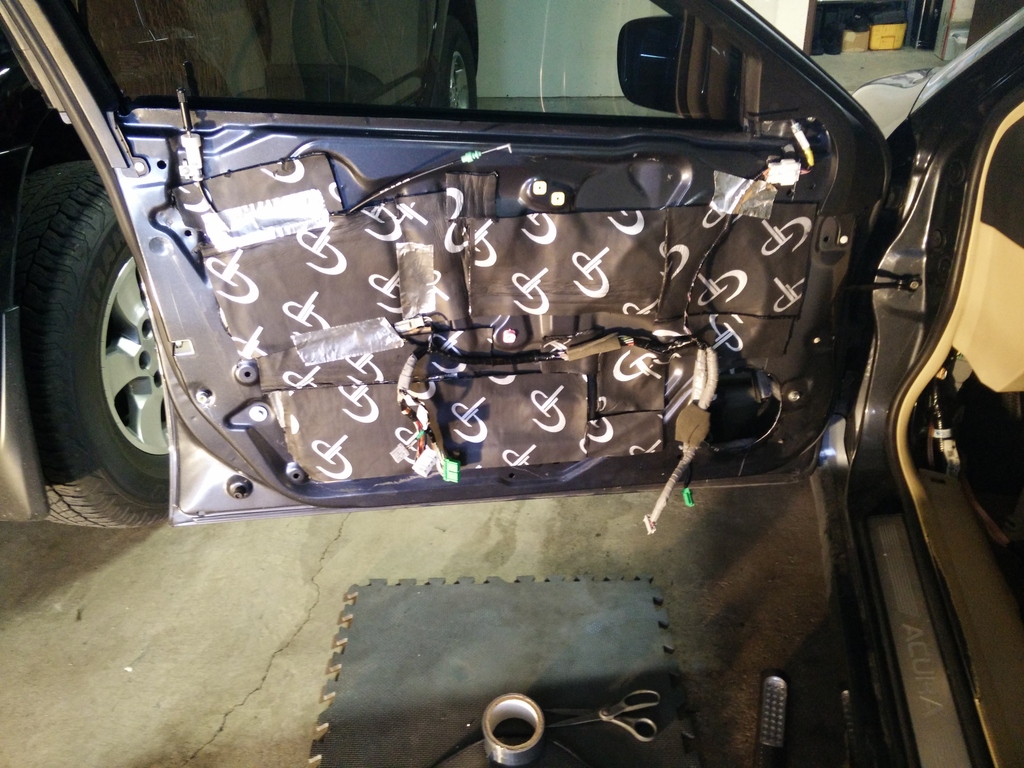
Started on doors and sound damping from GP Audio V2, I so recommend it, its not cheap but it works great, and its very easy to apply.

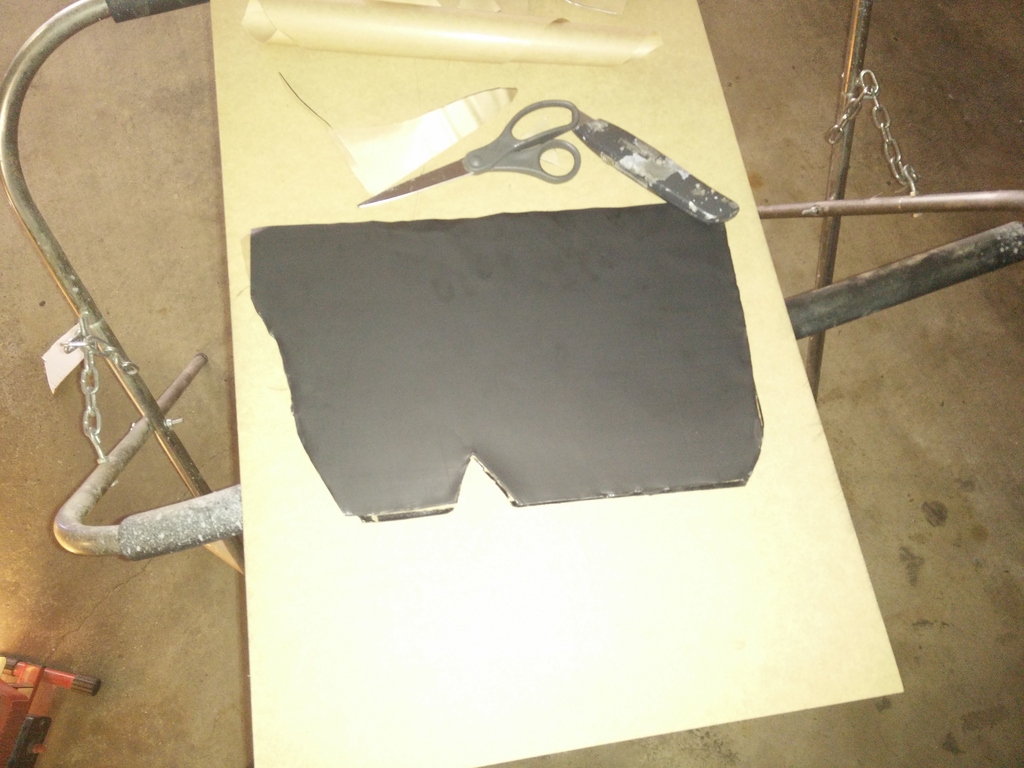
Made a panel for the big hole that you see,


everything was done, well not quiet well, the ring was to big and was hitting the door panel. so I had to remake my the speaker ring. PTA
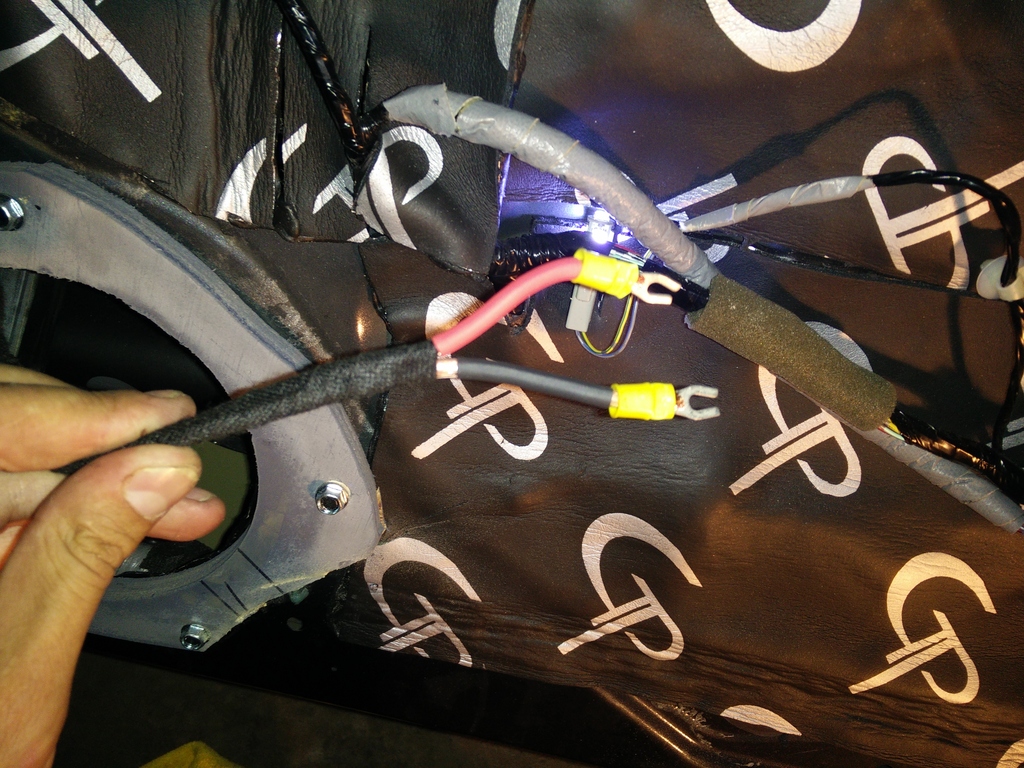
Connection
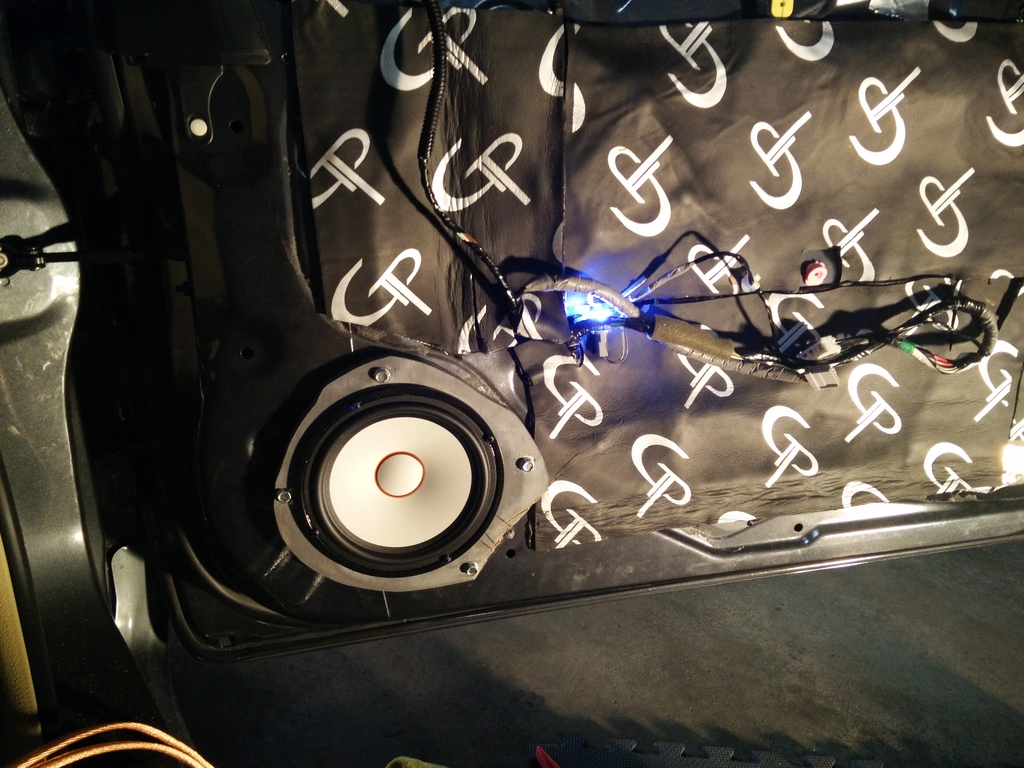
Inside damping
Oh I needed to cut out a bigger hole, for the mid base to be put in place.
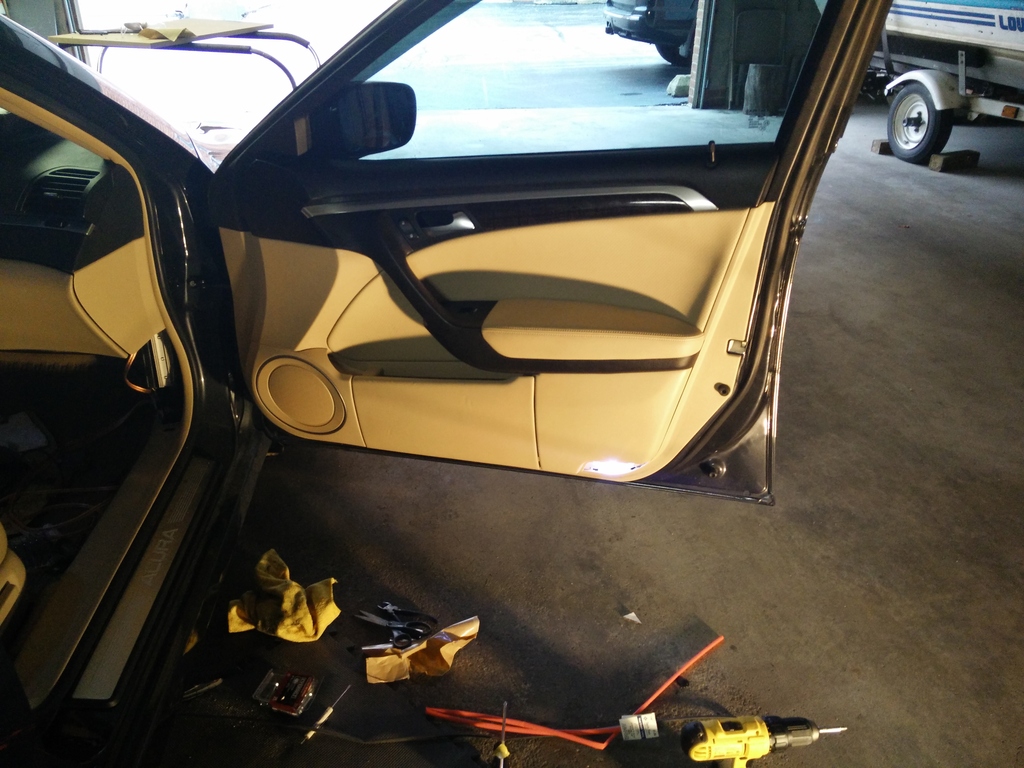
Door was put together

The next day round 2 for the driver side
Had hard time getting the wire through behind the computer/fuse box.

Got that accomplished

Apply GP damping on the inside
I forgot to take a picture of the passenger side door, but this is what I did as well, both panels are covered.
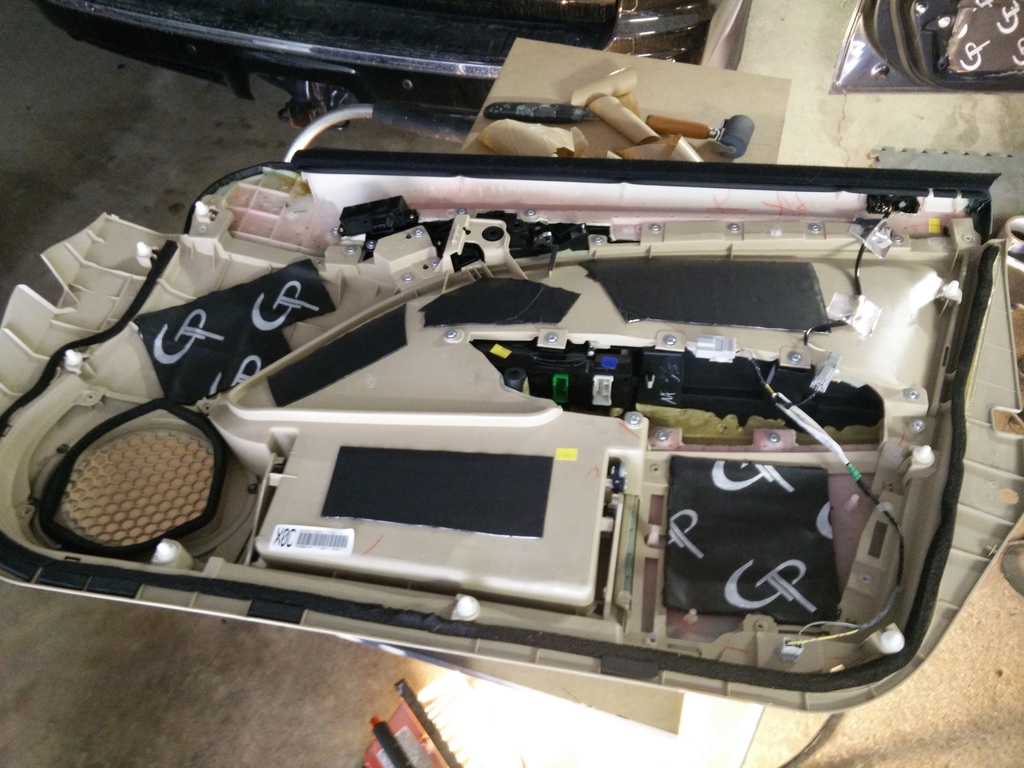

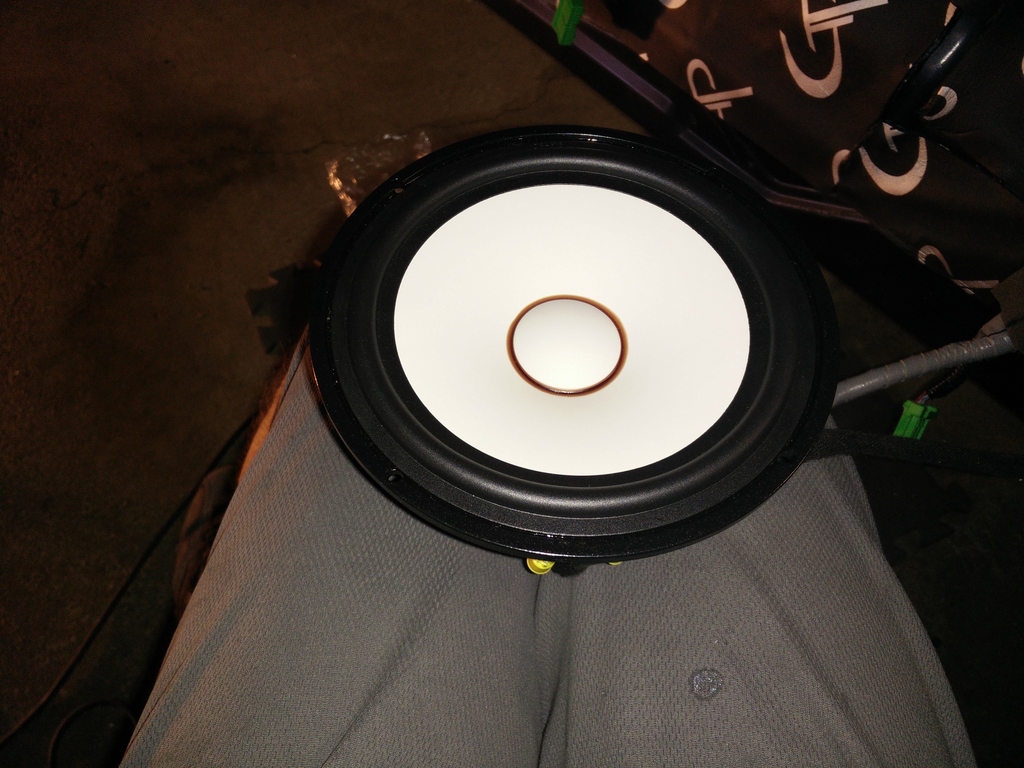
Installing Mid and had to make a new speaker ring as well,


Since I had a small dromal, i have cut in or i should say i shaved some of the metal on the side where molex connector was located and made sure nothing gets cut, no water gets in, and everything fits like a glove.


Started on doors and sound damping from GP Audio V2, I so recommend it, its not cheap but it works great, and its very easy to apply.

Made a panel for the big hole that you see,


everything was done, well not quiet well, the ring was to big and was hitting the door panel. so I had to remake my the speaker ring. PTA
Connection

Inside damping


Oh I needed to cut out a bigger hole, for the mid base to be put in place.
Door was put together

The next day round 2 for the driver side
Had hard time getting the wire through behind the computer/fuse box.


Got that accomplished


Apply GP damping on the inside


I forgot to take a picture of the passenger side door, but this is what I did as well, both panels are covered.


Installing Mid and had to make a new speaker ring as well,


 07-12-2015, 03:27 AM
#26
Racer
Thread Starter
Doors OMG, they were pain in the ass to run new cable, and since it was a big cable 12G wire for mid drivers, I had lots of trouble getting the cable though molex connection.
Since I had a small dromal, i have cut in or i should say i shaved some of the metal on the side where molex connector was located and made sure nothing gets cut, no water gets in, and everything fits like a glove.

Started on doors and sound damping from GP Audio V2, I so recommend it, its not cheap but it works great, and its very easy to apply.
Made a panel for the big hole that you see,
everything was done, well not quiet well, the ring was to big and was hitting the door panel. so I had to remake my the speaker ring. PTA
Connection

Inside damping


Oh I needed to cut out a bigger hole, for the mid base to be put in place.
Door was put together
The next day round 2 for the driver side
Had hard time getting the wire through behind the computer/fuse box.
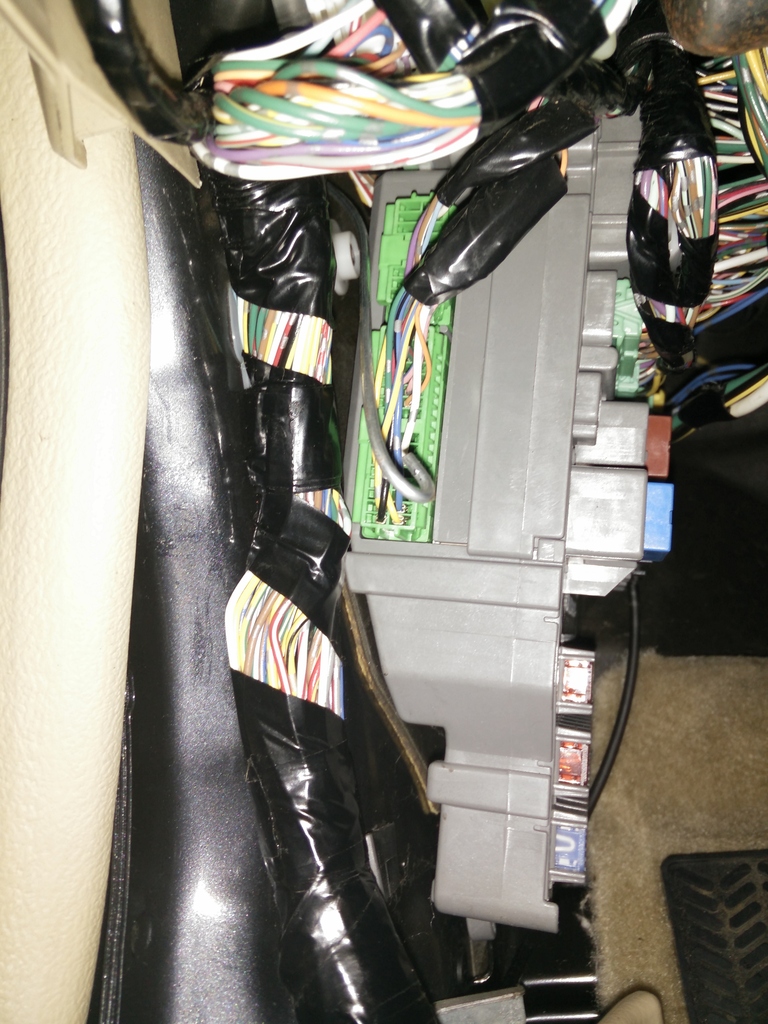

Got that accomplished

Apply GP damping on the inside


I forgot to take a picture of the passenger side door, but this is what I did as well, both panels are covered.

Installing Mid and had to make a new speaker ring as well,


Since I had a small dromal, i have cut in or i should say i shaved some of the metal on the side where molex connector was located and made sure nothing gets cut, no water gets in, and everything fits like a glove.
Started on doors and sound damping from GP Audio V2, I so recommend it, its not cheap but it works great, and its very easy to apply.
Made a panel for the big hole that you see,
everything was done, well not quiet well, the ring was to big and was hitting the door panel. so I had to remake my the speaker ring. PTA
Connection
Inside damping
Oh I needed to cut out a bigger hole, for the mid base to be put in place.
Door was put together
The next day round 2 for the driver side
Had hard time getting the wire through behind the computer/fuse box.
Got that accomplished
Apply GP damping on the inside
I forgot to take a picture of the passenger side door, but this is what I did as well, both panels are covered.
Installing Mid and had to make a new speaker ring as well,

 07-12-2015, 03:39 AM
#28
Racer
Thread Starter
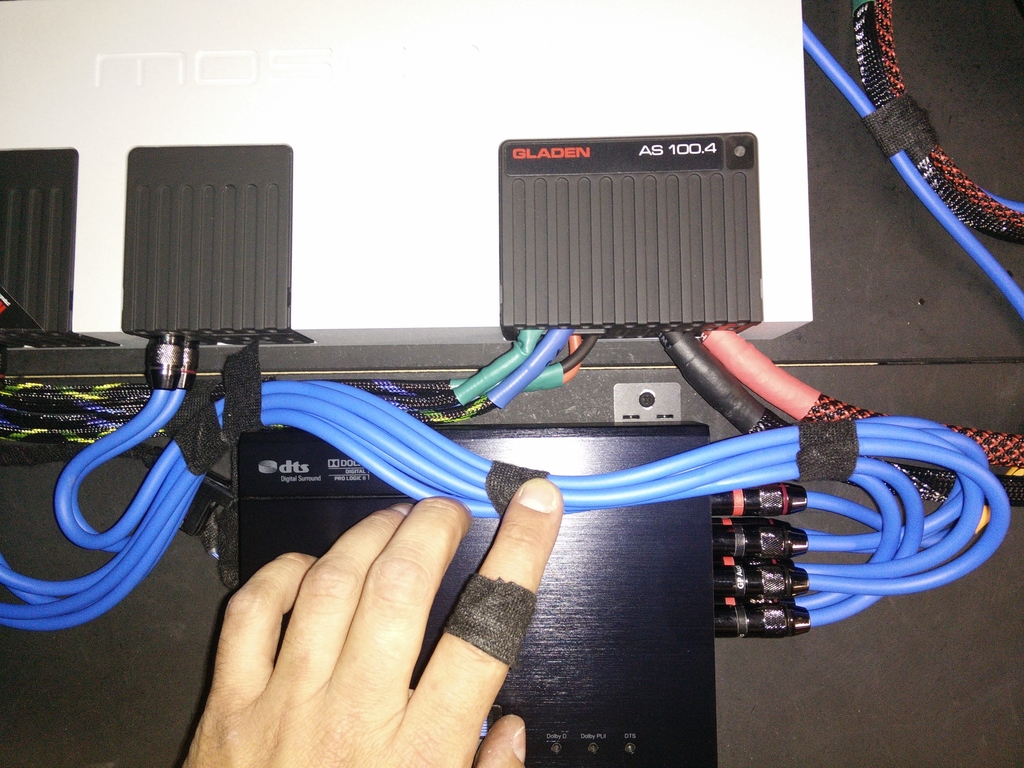
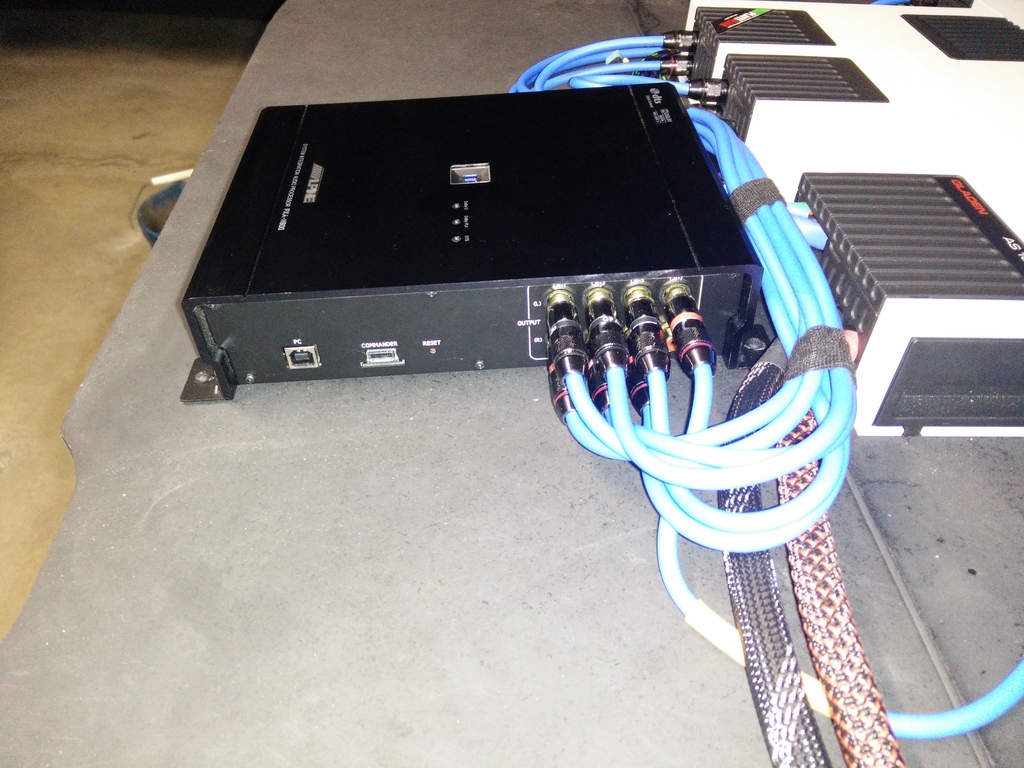
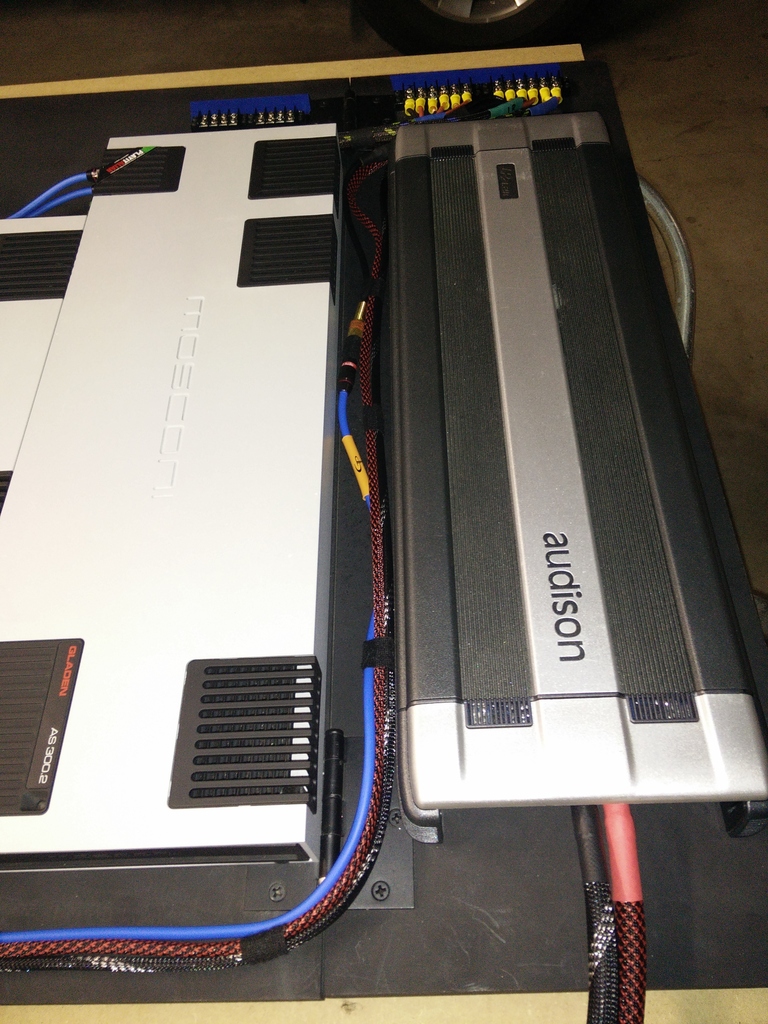
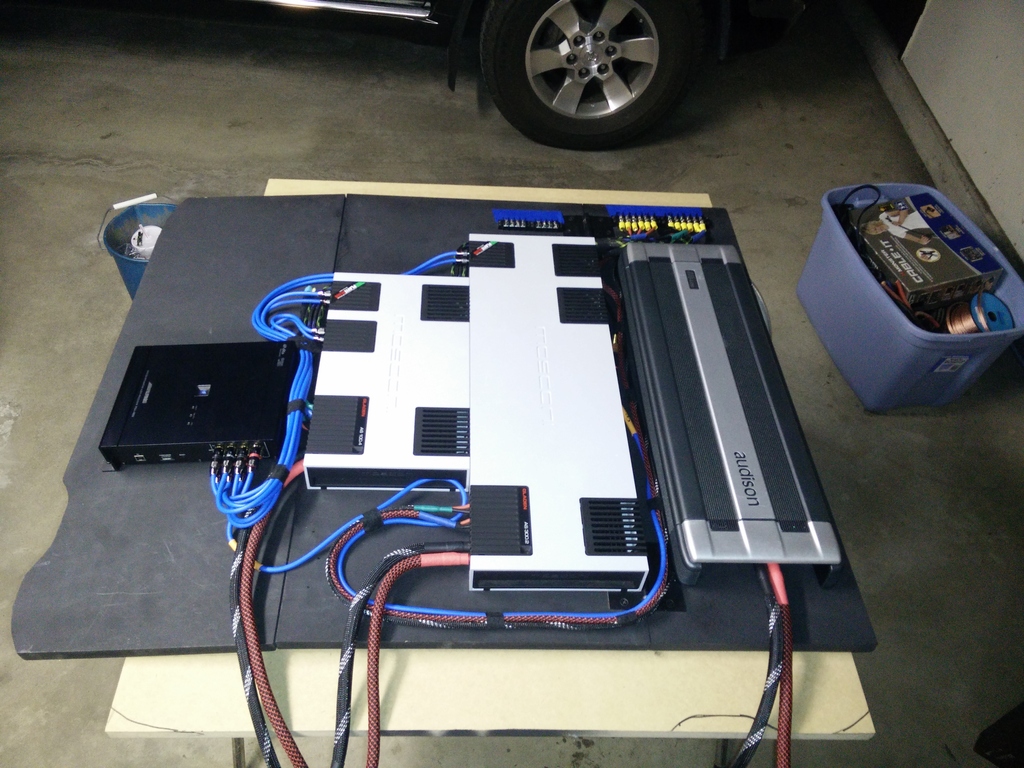
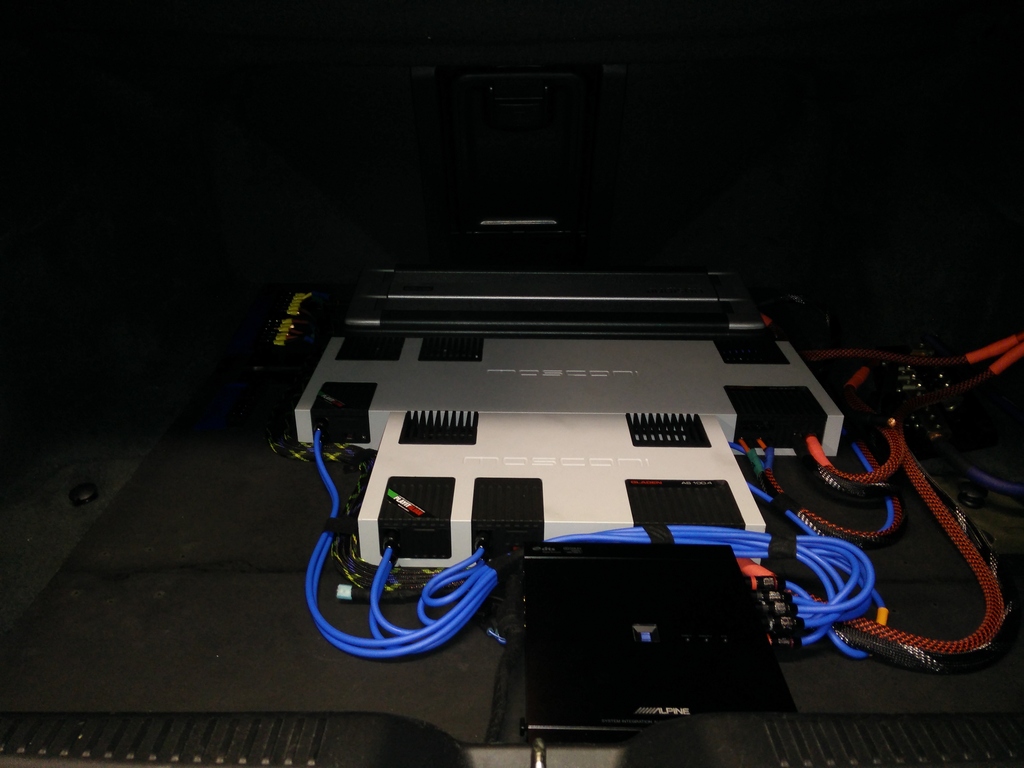
I have started to work on my amp rack, all wires were heat shrink, and cover tech flax, also I have replaced one of my amps, I needed more power for the sub, its a very hungry sub that could handle ton of power.
I went with Audison LRKx 1.2 I think thats the correct model,
It does
1000@4 ohm
2000@2 ohm
3200@1 ohm
My goal is at least 2500 w rms for the sub.
So let more fun began, it took me over 6 hours to do this.
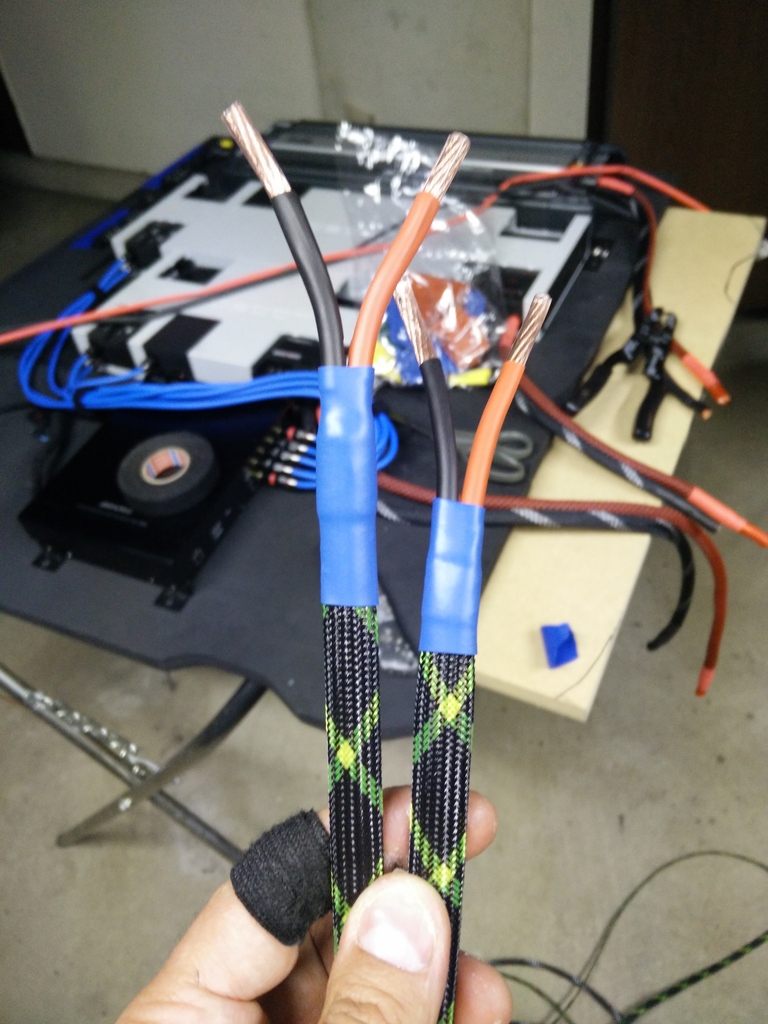

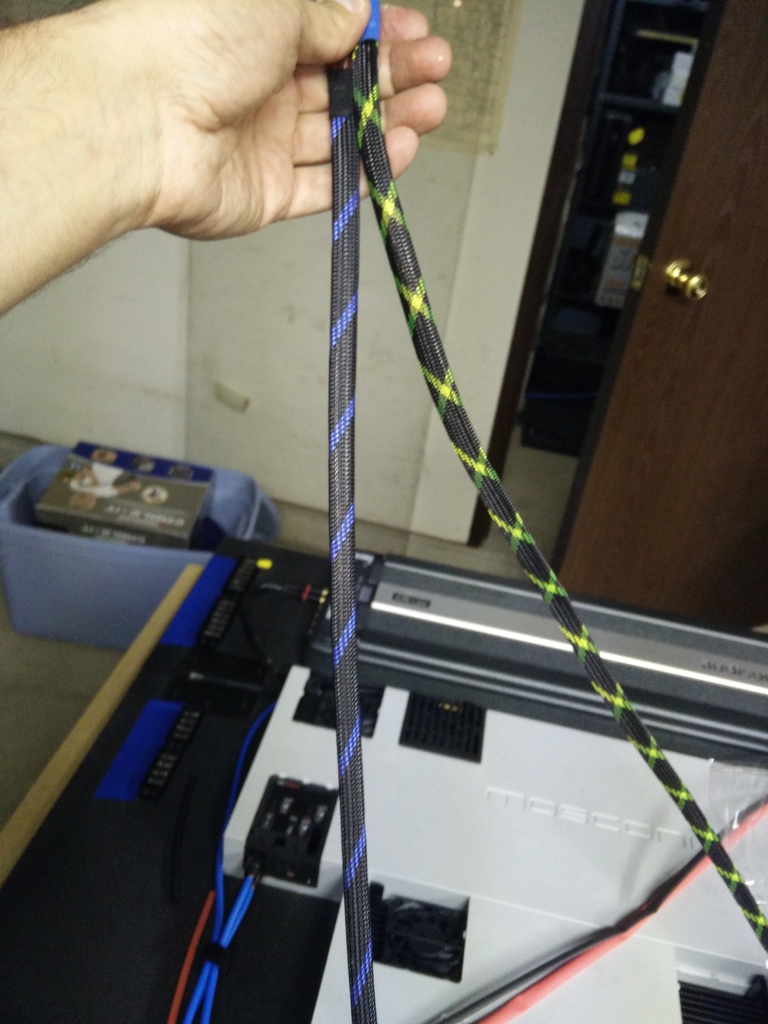
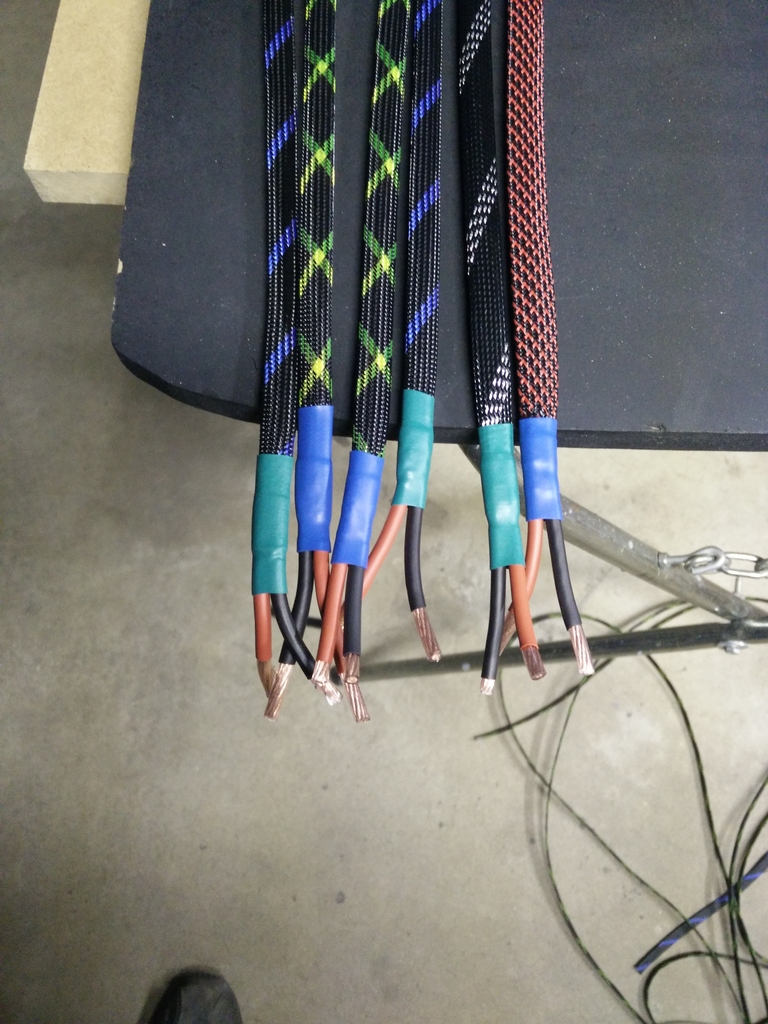
Connection has been made
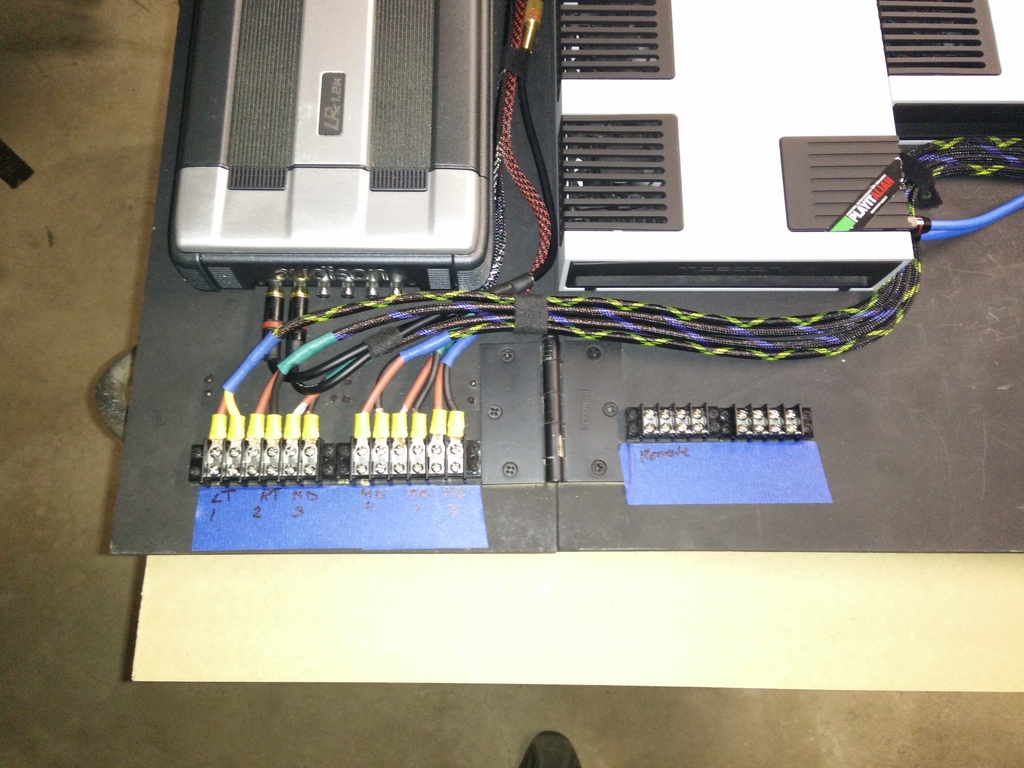
RCA and speaker connection,
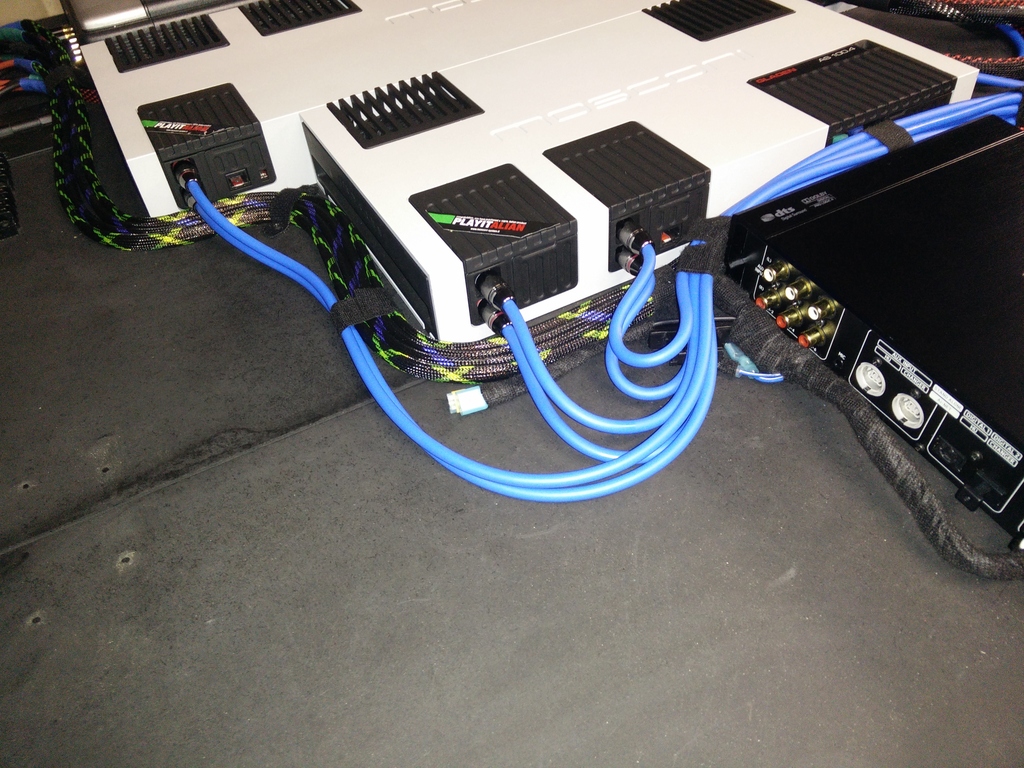
Power cables have the same setup

I went with Audison LRKx 1.2 I think thats the correct model,
It does
1000@4 ohm
2000@2 ohm
3200@1 ohm
My goal is at least 2500 w rms for the sub.
So let more fun began, it took me over 6 hours to do this.


Connection has been made


RCA and speaker connection,

Power cables have the same setup


 07-12-2015, 03:45 AM
#30
Racer
Thread Starter
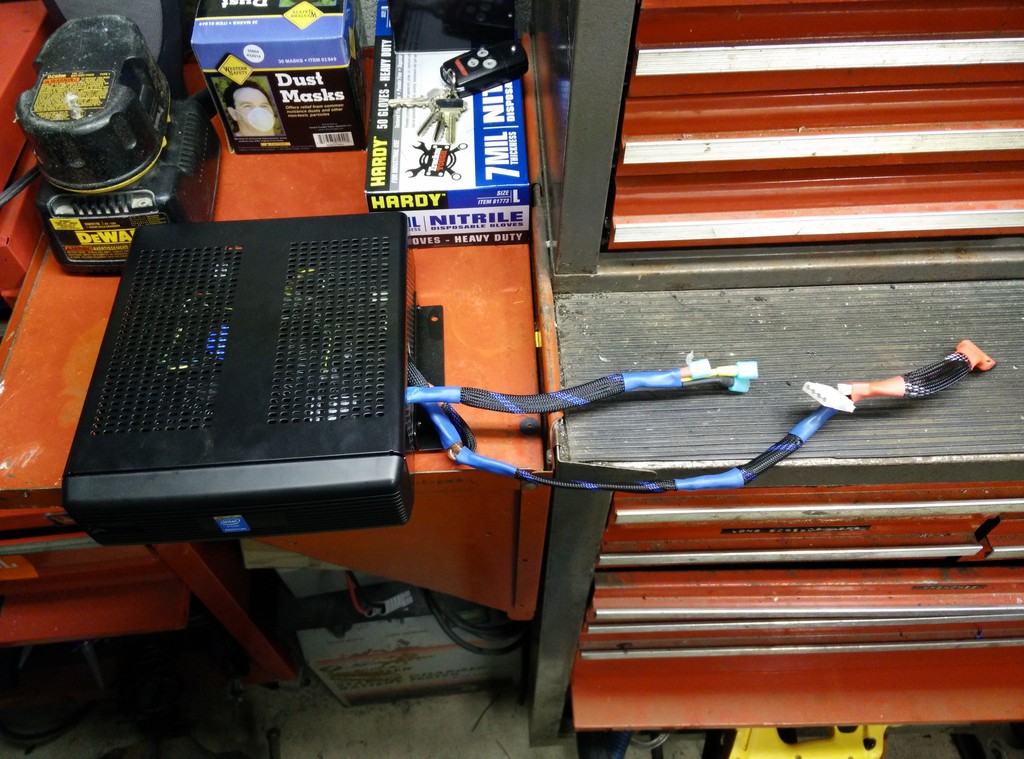
For the time being, car pc is not installed, will be shortly with additional battery,
monitor I will have to work on that, and also finish up my sub box,
Currently i play my music through a phone, its connected through Bluetooth, to optical converter, in to the processor... for the time being, im suing Alpine sub with a ported box, its does very good,
how does it sound over all, i love it, 3 way setup is must. i rally love how these midranges shine and tweeters. Midbase is very strong, and accurate, fast, very responsive.
over all i'm very happy with it, i just cant wait to finish everything, and get it tuned properly... Stay tuned!


 08-07-2015, 07:41 AM
#35
Racer
Thread Starter
 08-07-2015, 07:41 AM
#36
Racer
Thread Starter
08-12-2015, 07:20 AM
#37
Racer
Thread Starter
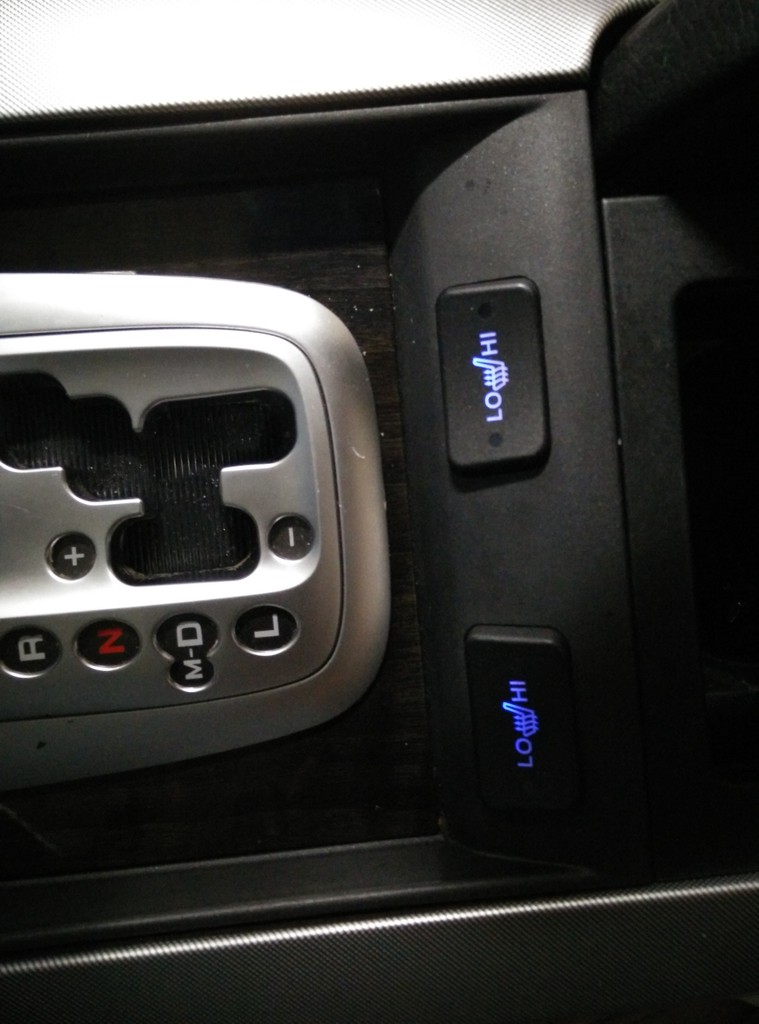
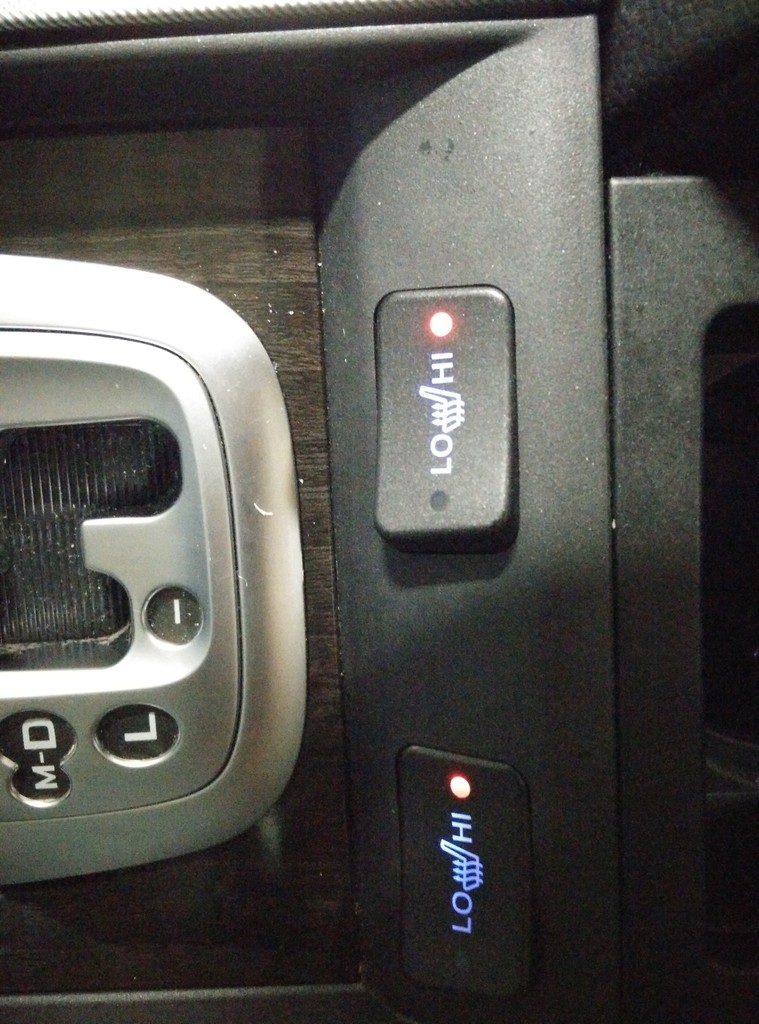
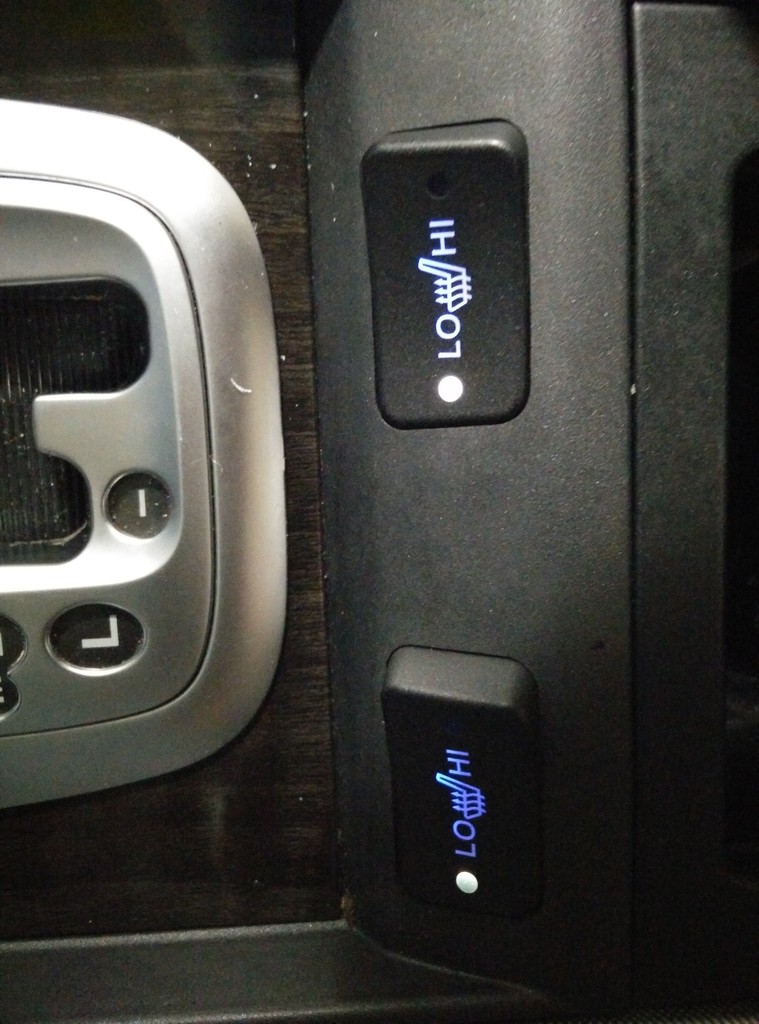
Center Consul and controller install, it's not done yet, but it will be installed today and hope to get it flushed with the top lifer cover. There will be some cutting involved, but its gonna work....
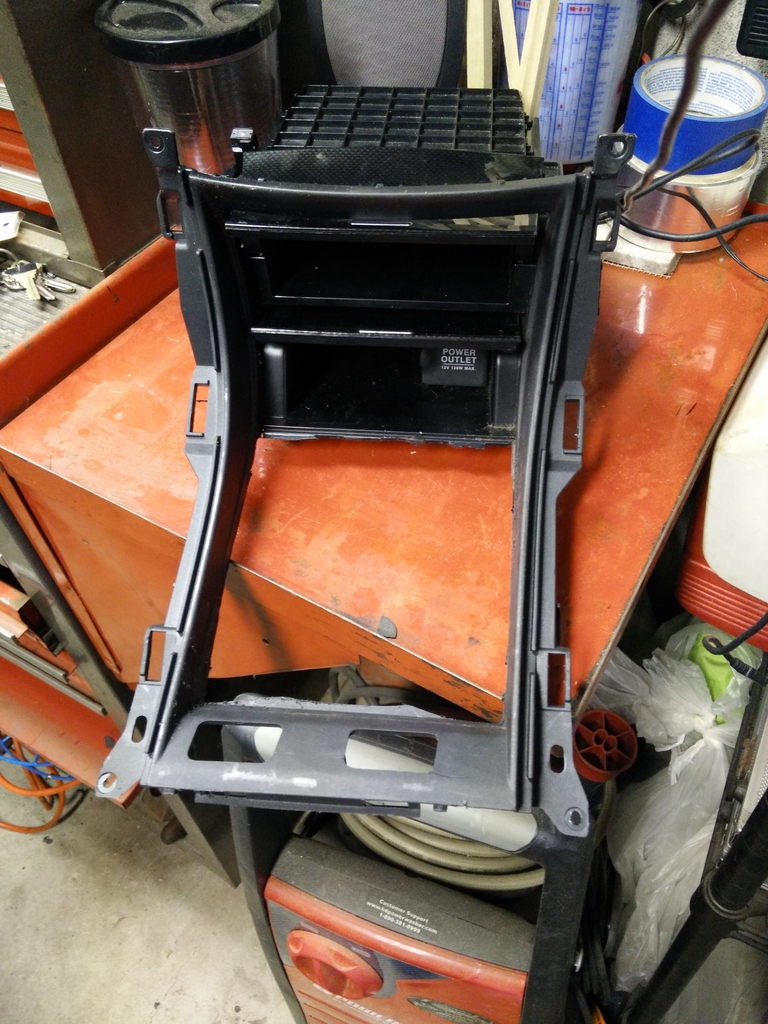
More update tonight. !


More update tonight. !
Last edited by QuickTL07; 08-12-2015 at 07:25 AM.
08-13-2015, 07:25 AM
#39
Racer
Thread Starter
Last night I didn't do much progress, I just got some strong plastic glue to glue the housing of the controllers in place. Tomorrow is a fresh start after work and the weekend. I need to finish this project with in 2-3 weeks max.. we will see how it goes... winter is coming, and I don't plan on freezing my ass outside
08-13-2015, 11:45 PM
#40
Racer
Thread Starter
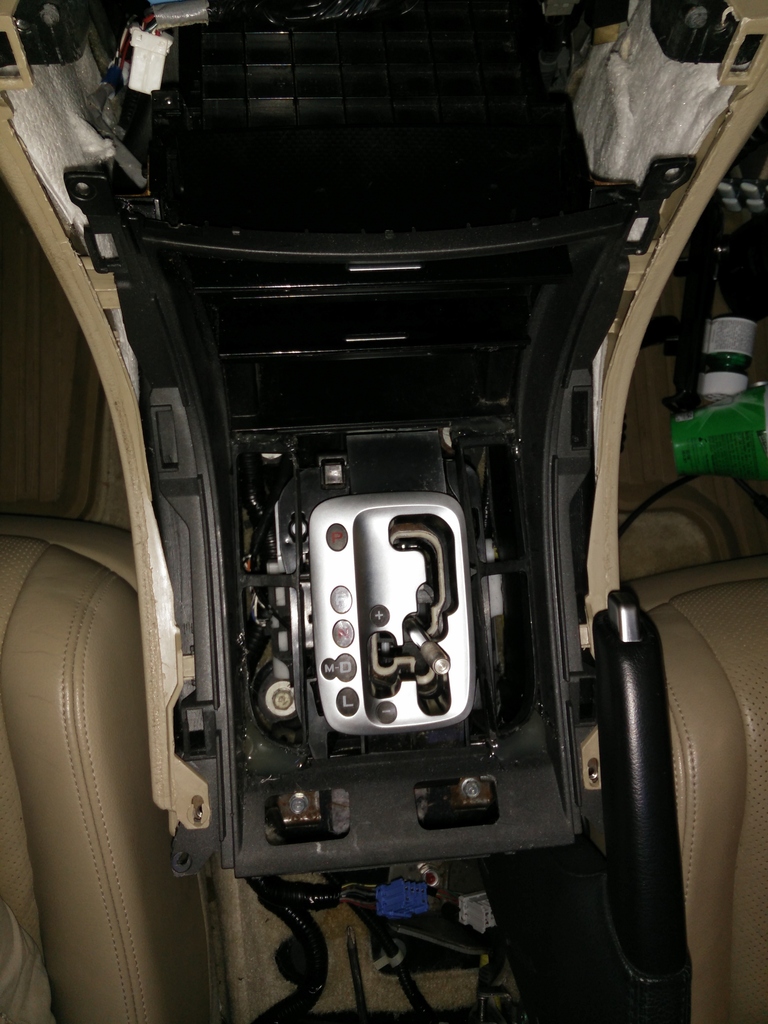
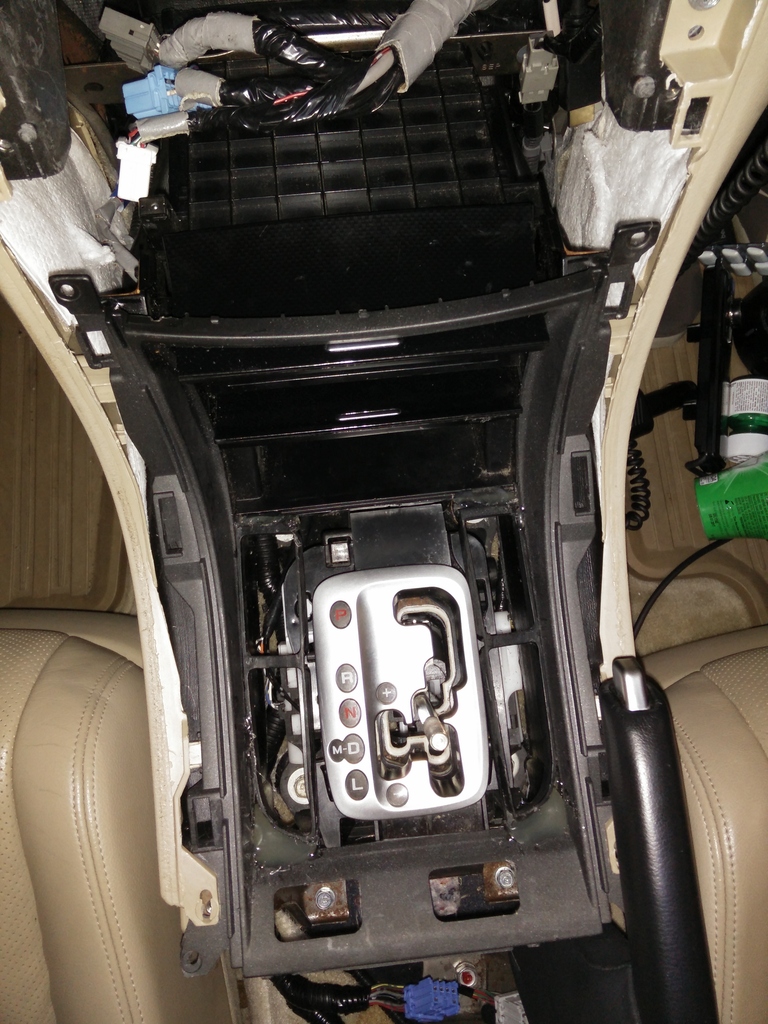
Progress!!
So as I always needed to do something with the controls, today I made it happen, got home from work, hot as hell, but that didn't stop me, I was in the car working my ass off!
So here it is, as you all know this project is taking me a very long time, and there are many reason to it and most of them are personal, I'm not no pro installer, this is my hubby so any chance I get I get my hands on it and work my magic to best of my ability.
Today i have installed and relocated my controllers !!
I had to remove the docking tubing so i could cut in some small plastic where the sifter is. If this car would have been a stick shift would be a lot easier

I had to pre-fit everything, measure 10 times, cut once
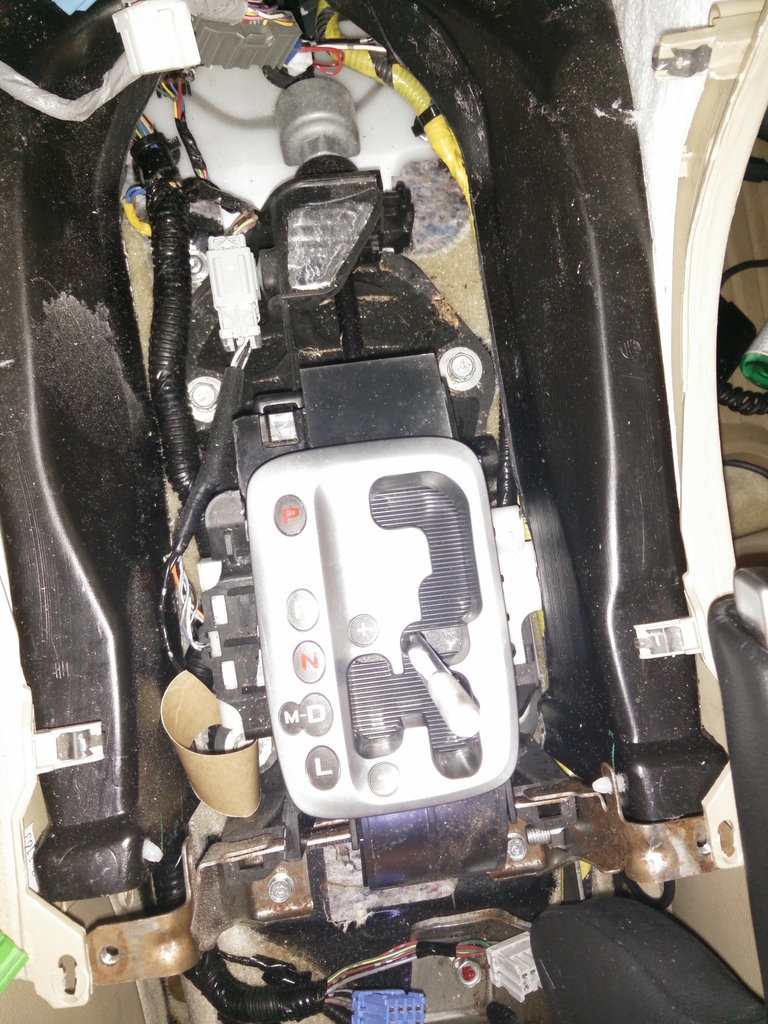
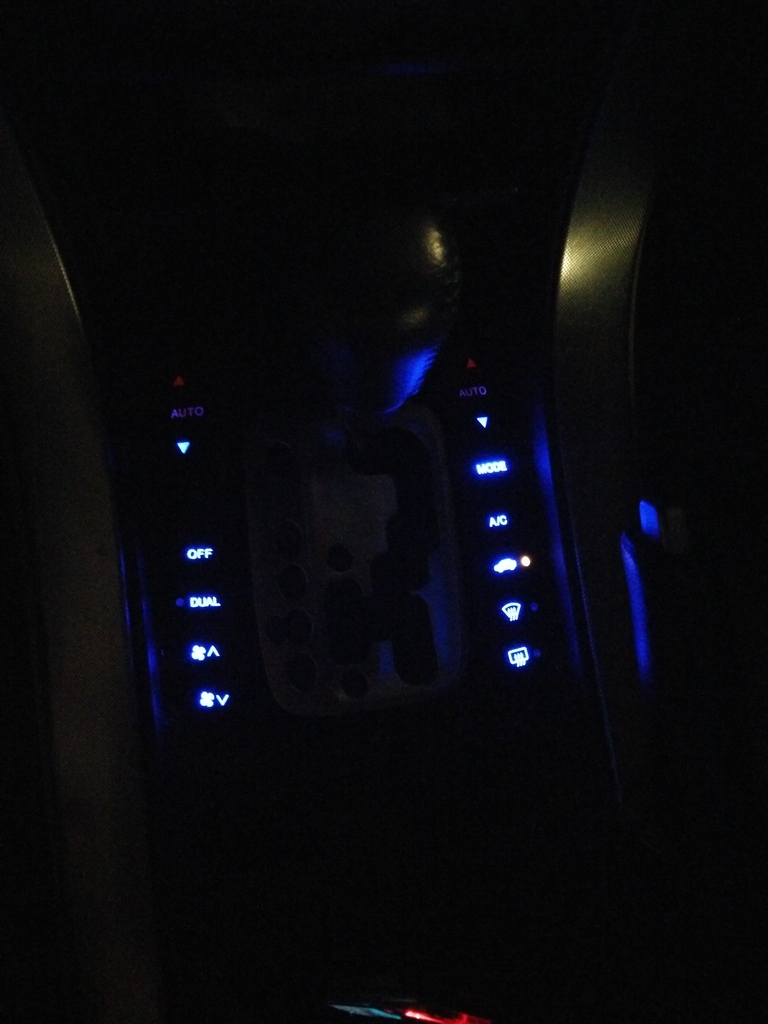
Got the controls in, also changed out LED's to blue, one of them lost a connection so I have to get it out either way... its on mode, which is not light up... but you get the idea
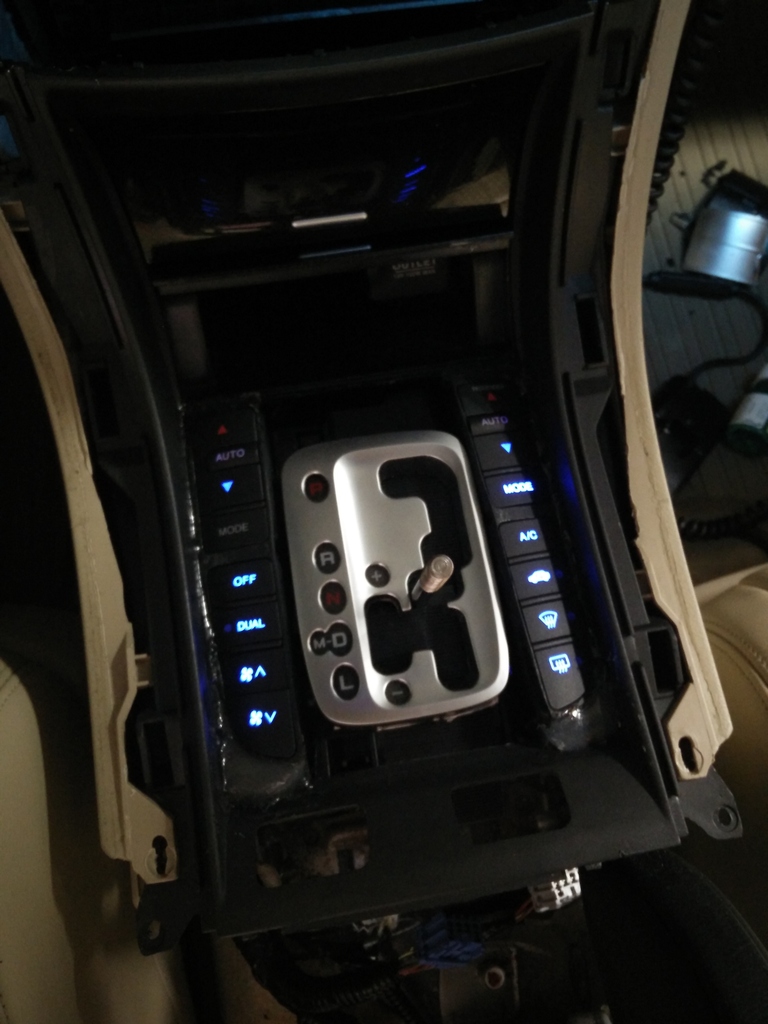
Prefit everything, and cut some more stuff so everything plays out nice.
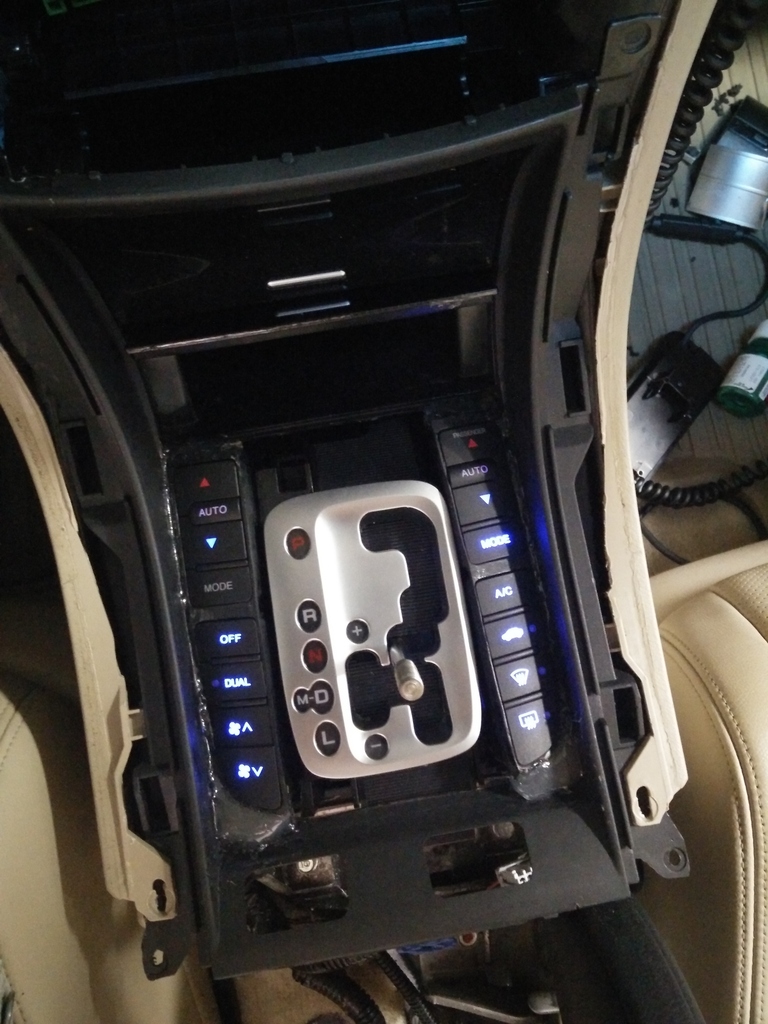
Since it only takes few minutes to take the center consul apart, total of 6 screws lol,
I put everything together and made sure everything is working after is connected.
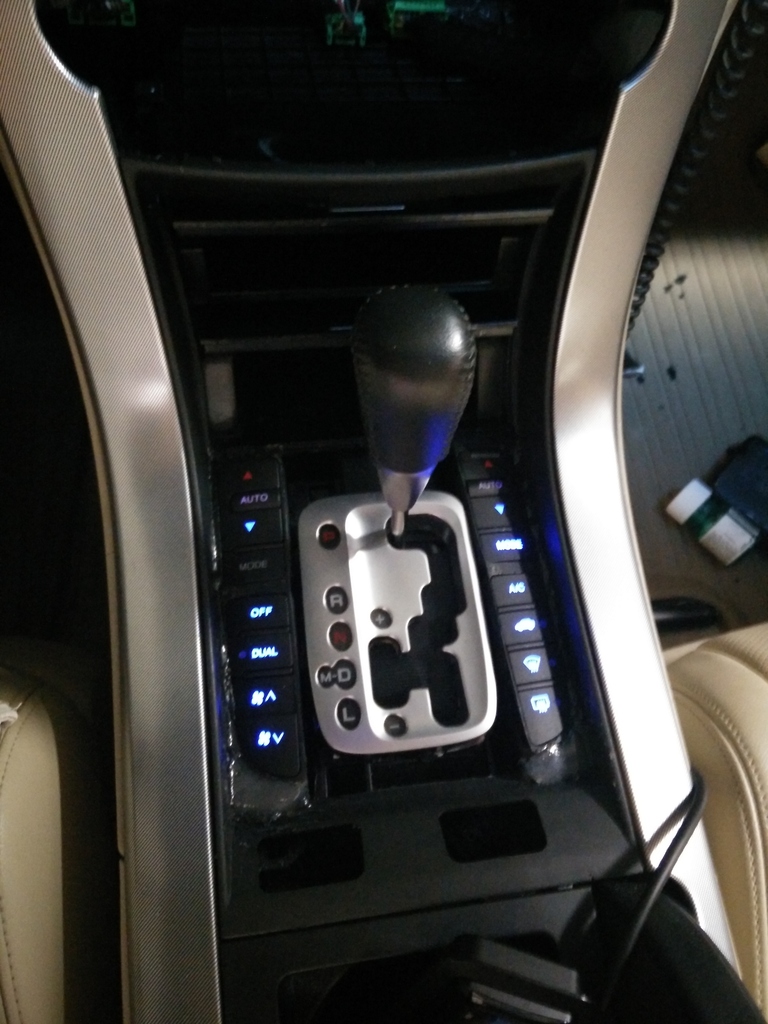
And this is how it looks now.
Tomorrow I will tape things out, remove controllers and do body filling in some spots,, than hope to sand it and either paint it, or put some 3M carbon fiber sticker over it .... don't... First I need to see the outcome.
Stay tuned till tomorrow..
So as I always needed to do something with the controls, today I made it happen, got home from work, hot as hell, but that didn't stop me, I was in the car working my ass off!
So here it is, as you all know this project is taking me a very long time, and there are many reason to it and most of them are personal, I'm not no pro installer, this is my hubby so any chance I get I get my hands on it and work my magic to best of my ability.
Today i have installed and relocated my controllers !!
I had to remove the docking tubing so i could cut in some small plastic where the sifter is. If this car would have been a stick shift would be a lot easier

I had to pre-fit everything, measure 10 times, cut once

Got the controls in, also changed out LED's to blue, one of them lost a connection so I have to get it out either way... its on mode, which is not light up... but you get the idea

Prefit everything, and cut some more stuff so everything plays out nice.

Since it only takes few minutes to take the center consul apart, total of 6 screws lol,
I put everything together and made sure everything is working after is connected.

And this is how it looks now.

Tomorrow I will tape things out, remove controllers and do body filling in some spots,, than hope to sand it and either paint it, or put some 3M carbon fiber sticker over it .... don't... First I need to see the outcome.
Stay tuned till tomorrow..