When you click on links to various merchants on this site and make a purchase, this can result in this site earning a commission. Affiliate programs and affiliations include, but are not limited to, the eBay Partner Network.
I'd searched a bit and found some helpful threads to get my double din installed from looking at the JDM Hazard Button installs. But I did this, and everything went fairly well so I thought I'd post my photos.
Notes;
CLEAR YOUR BLUETOOTH SYSTEM BEFORE REMOVING YOUR OEM RADIO. I had to re hook mine up to do this because it kept flashing "pairing" which is where all these photos came from
The finish of the Metra bezel looks OEM but feels very cheap in comparison
Bluetooth will now be controlled by the head unit and not the Acura HFL
Steering wheel controls are retained through the adapter
Pretty straight forward
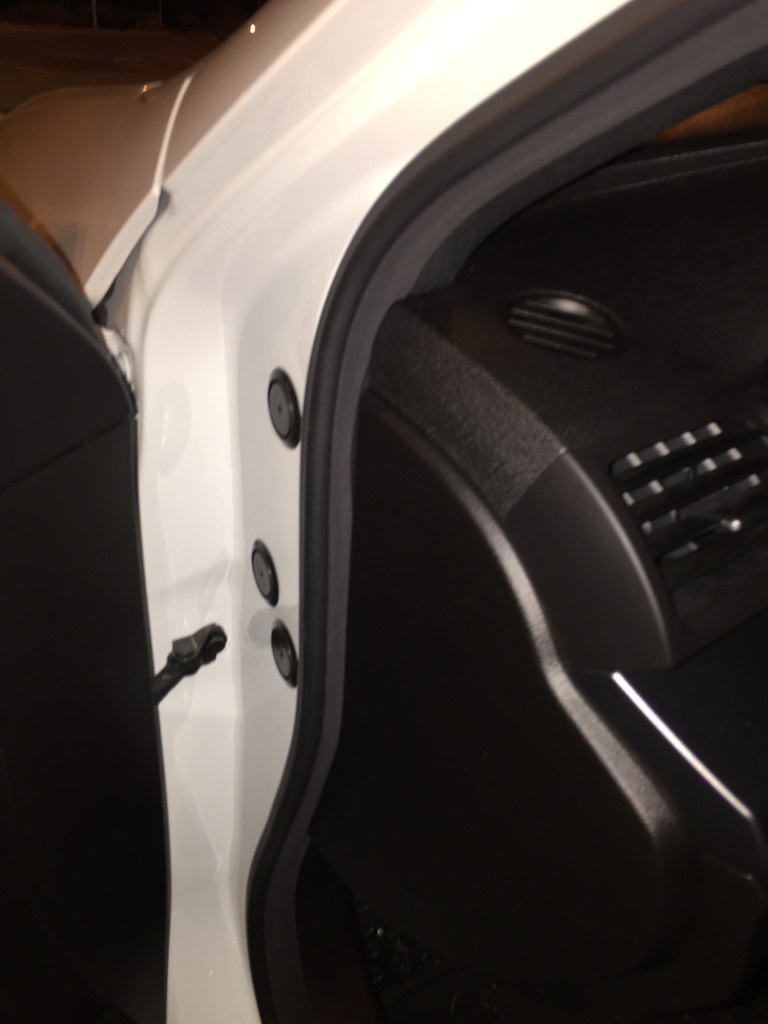
I ran my GPS and Microphone wires up the drivers side door jam and A pillar.
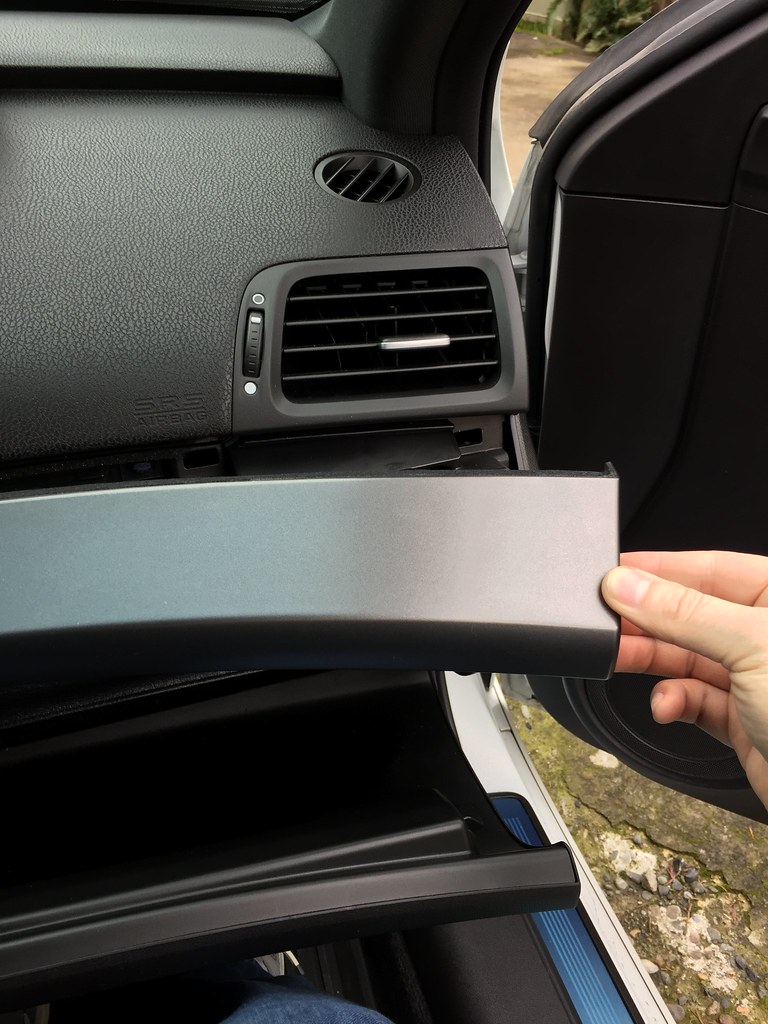
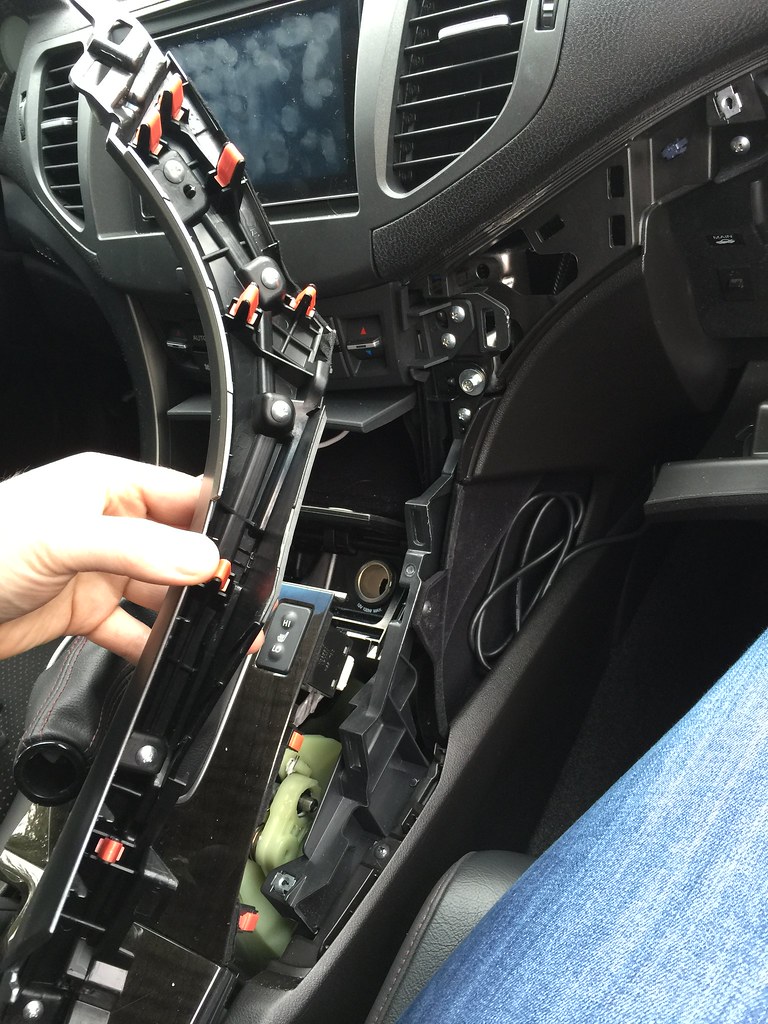
1) Start by pulling the silver dash trip above the glove box straight toward you. Start by pulling the outer most edge and slowly work the other clips out.
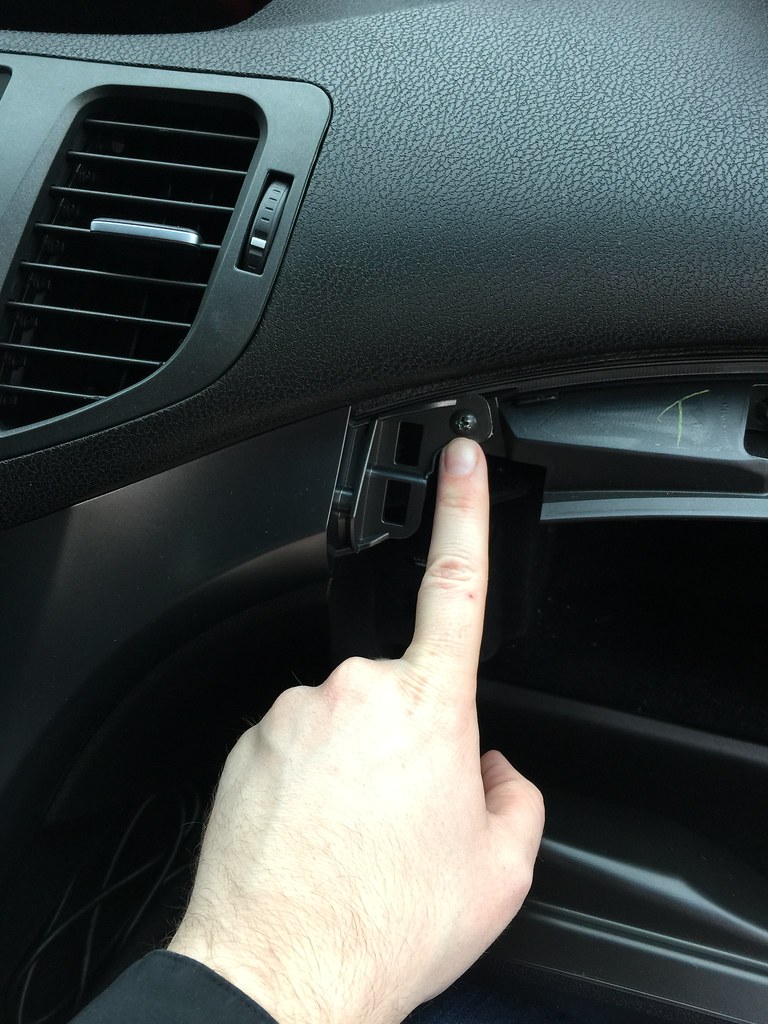
2) Remove the screw on the upper right side of the console trim on the passenger side;
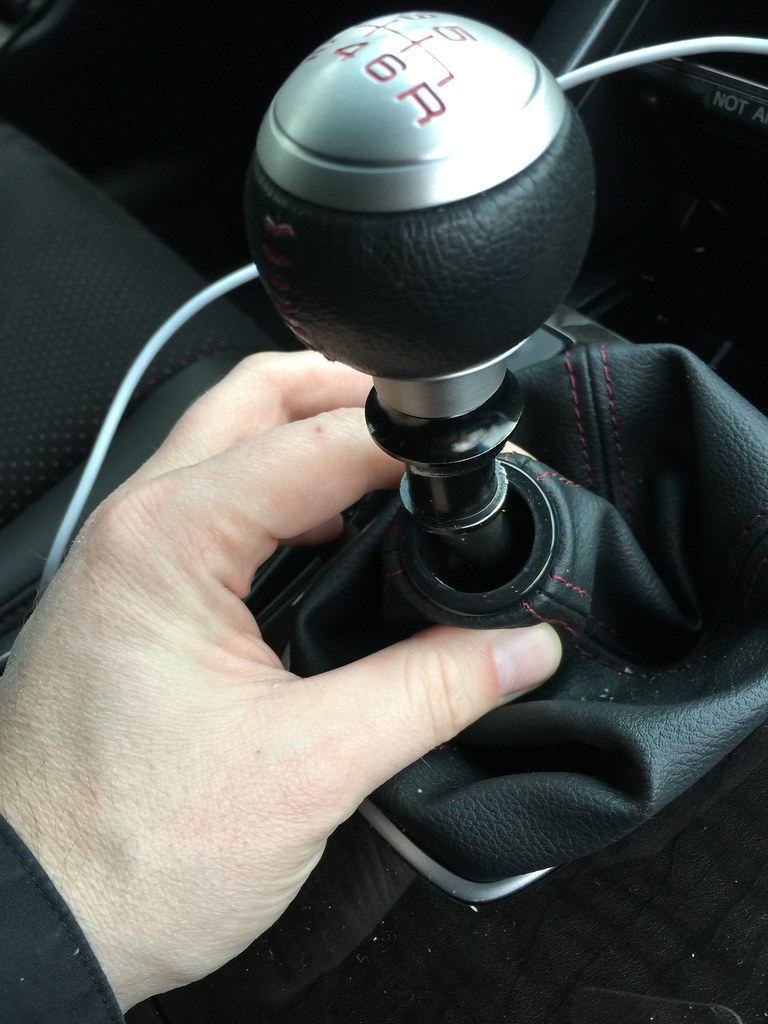
3) Depending on auto/manual, remove the shift knob. On a manual, press down on the shift boot and using a 17mm wrench, remove the shift collar;
4) Next you want to pry up on the center console just in front of the seat warmer buttons. Slowly pry back and forth from the front all the way back through the cup holder. The entire center console will NOT need to be removed. Once pry'd up, un-hook the seat warmer seat connections.
5) On either side of the center console is a screw that holds in the base of the console/dash trim. Unscrew each side;
6) Once both screws are out, pull the dash trim straight back toward the rear of the car. I found it helped to grab the middle of the piece (Where it is thickest) and jerked back. Once those clips came, the bottom and top removed easily;
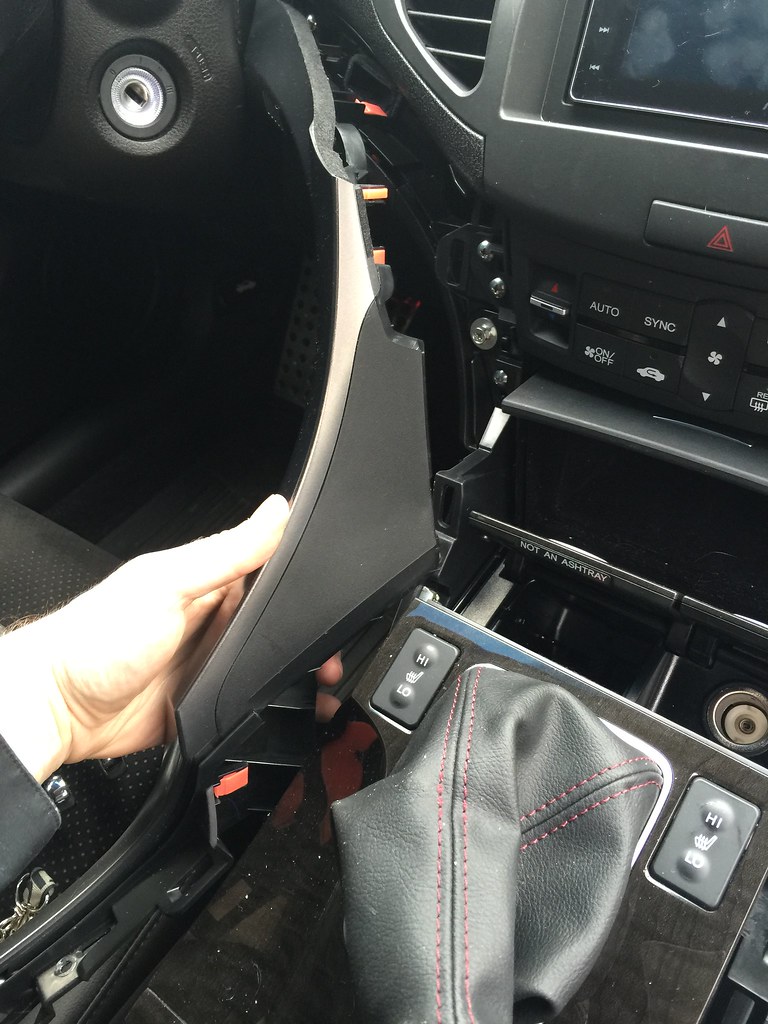
7) Next do the drivers side;
8) Open your non ash-tray ash-tray and wedge your fingers on the felt sides and pull up. That felt coin piece has one clip holding it in place. Once that is out... you'll see a little screw holding in that piece. Unscrew it;
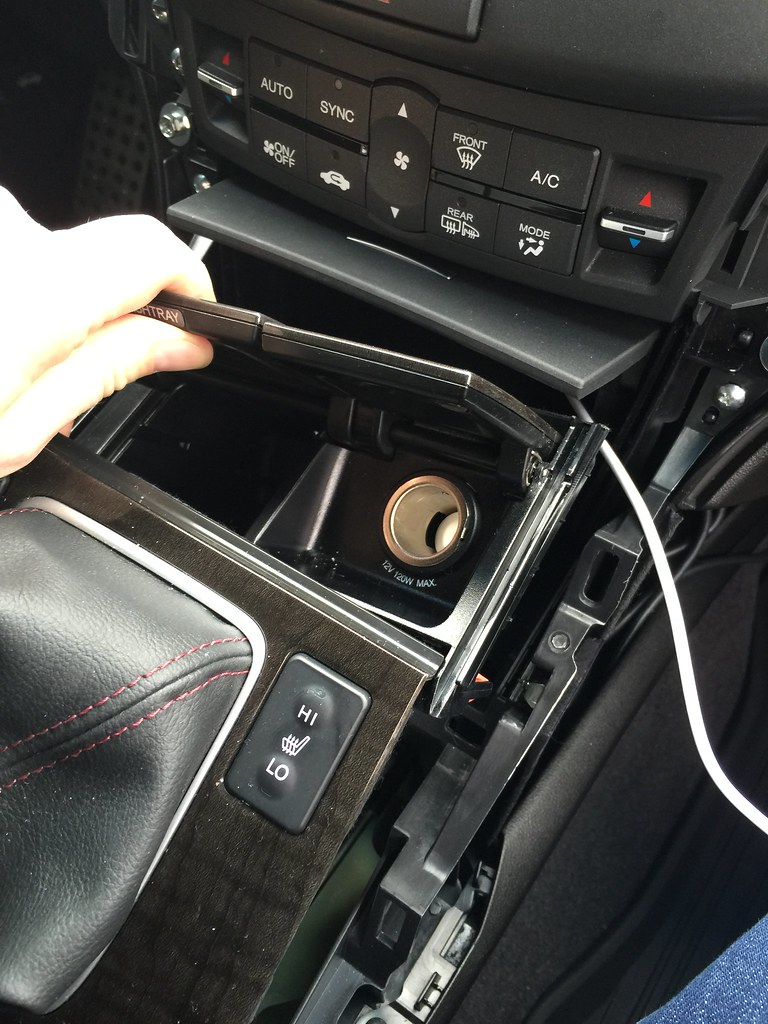
9) Once the screw is out, pull straight out the accessory socket and coin holder. There are a lot of clips, so you have to give it some elbow grease.
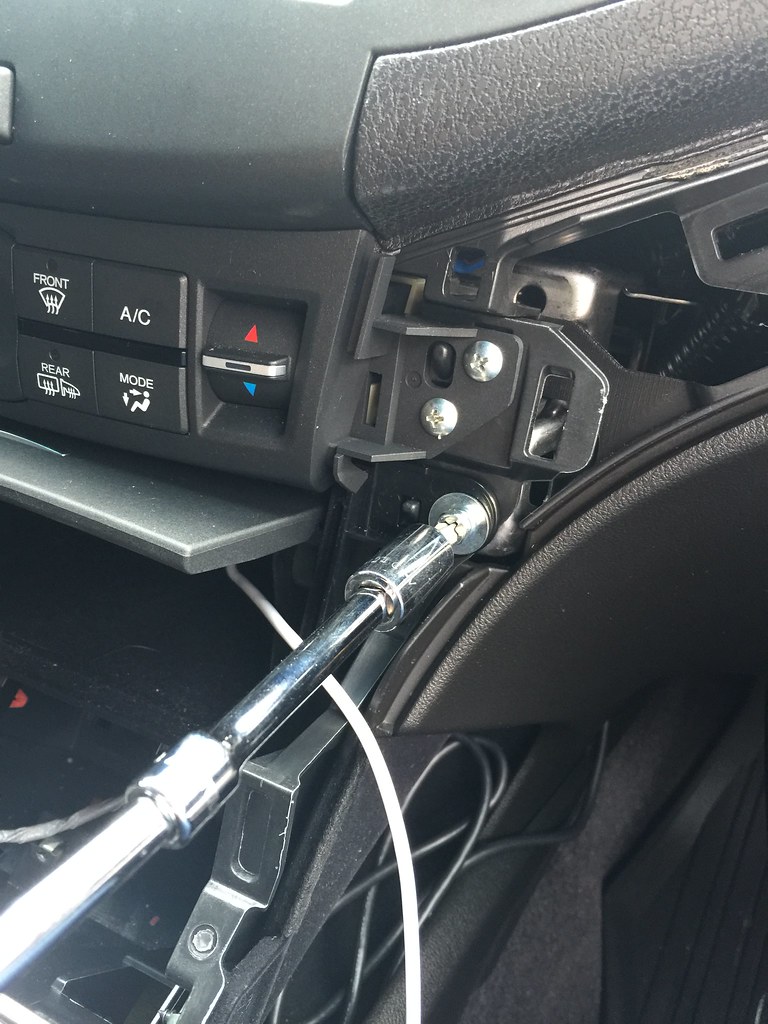
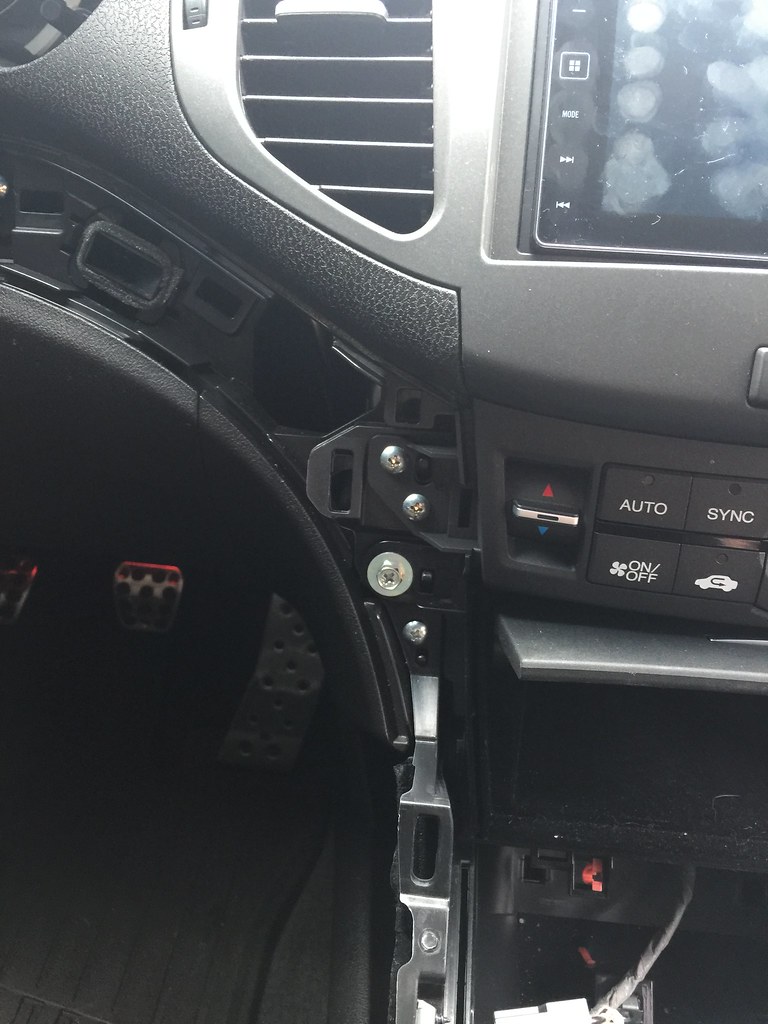
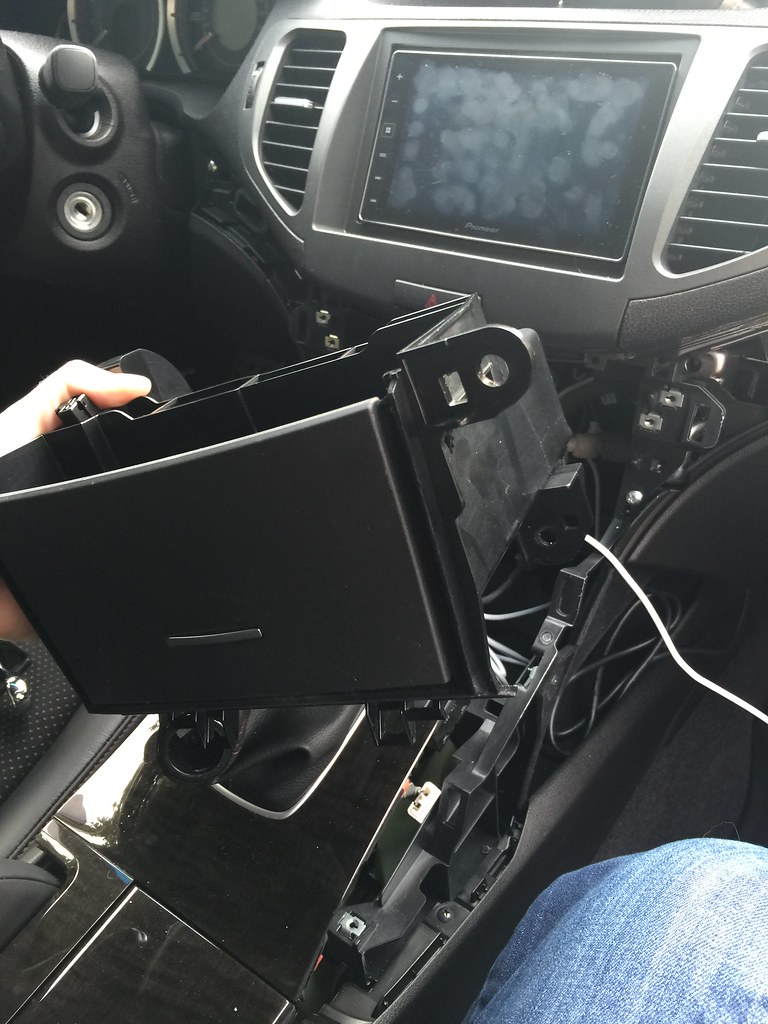
10) You will see 2 screws holding in the HVAC controls and one large screw/bolt holding in the storage compartment, remove all three screws on both sides;
11) Unclip and remove HVAC;
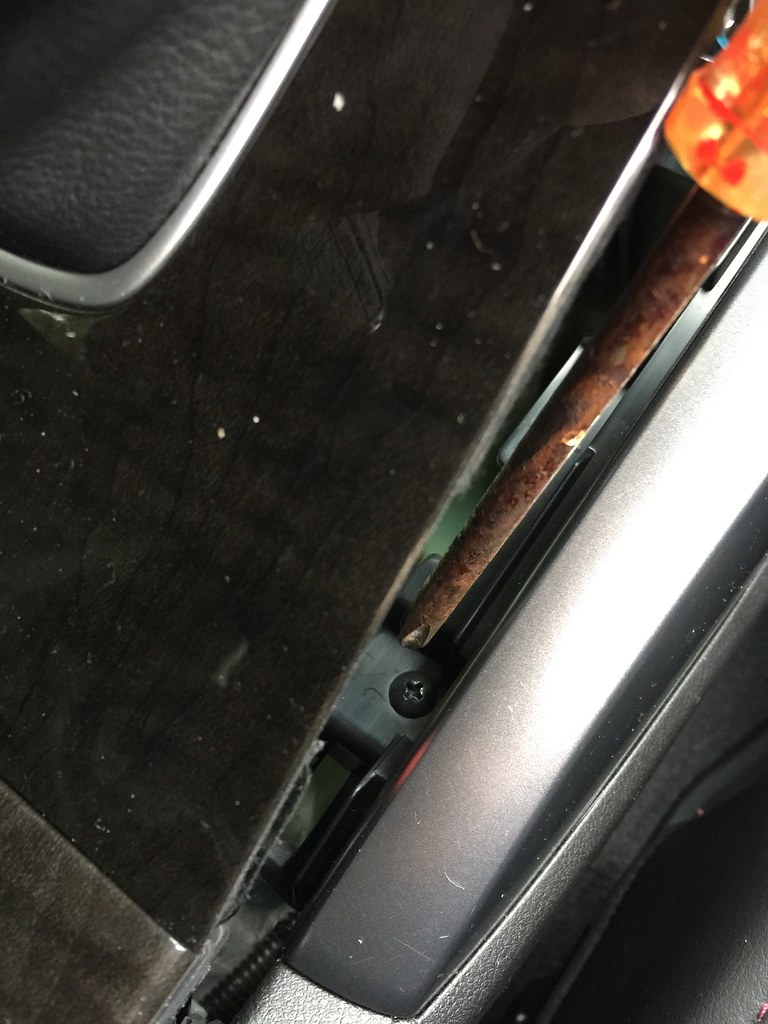
12) I know it's hard to see, but there are 2 more screws holding in the large storage compartment, they are located UNDER the compartment that are now accessible because you removed the coin tray/accessory socket;
and with the screw out;
13) SUCCESS;
14) 2 screws hold in the OEM radio from under the unit, remove them;
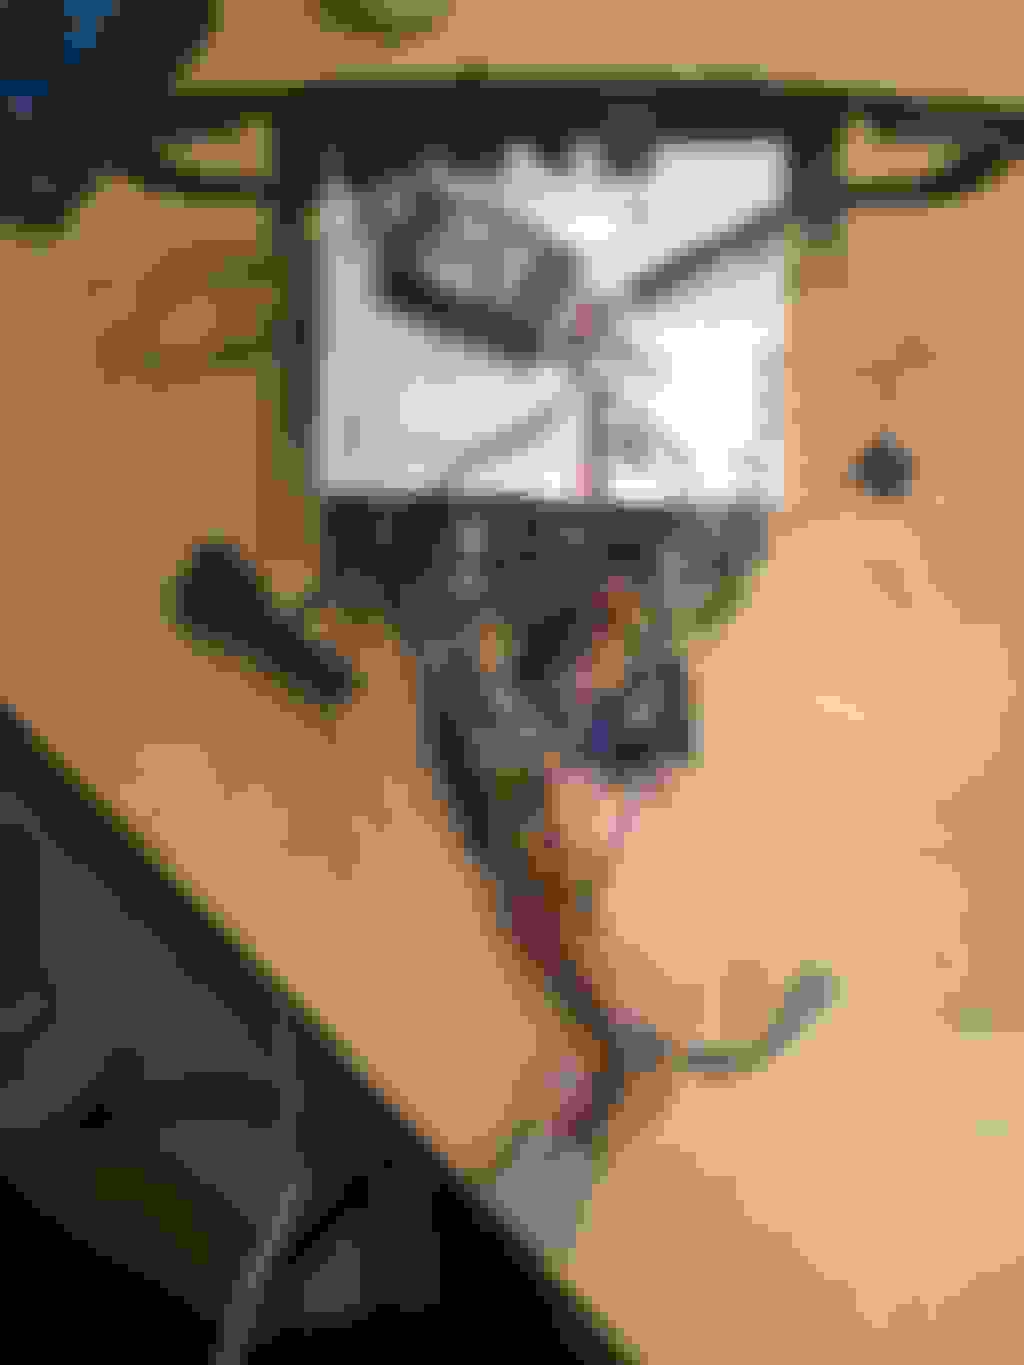
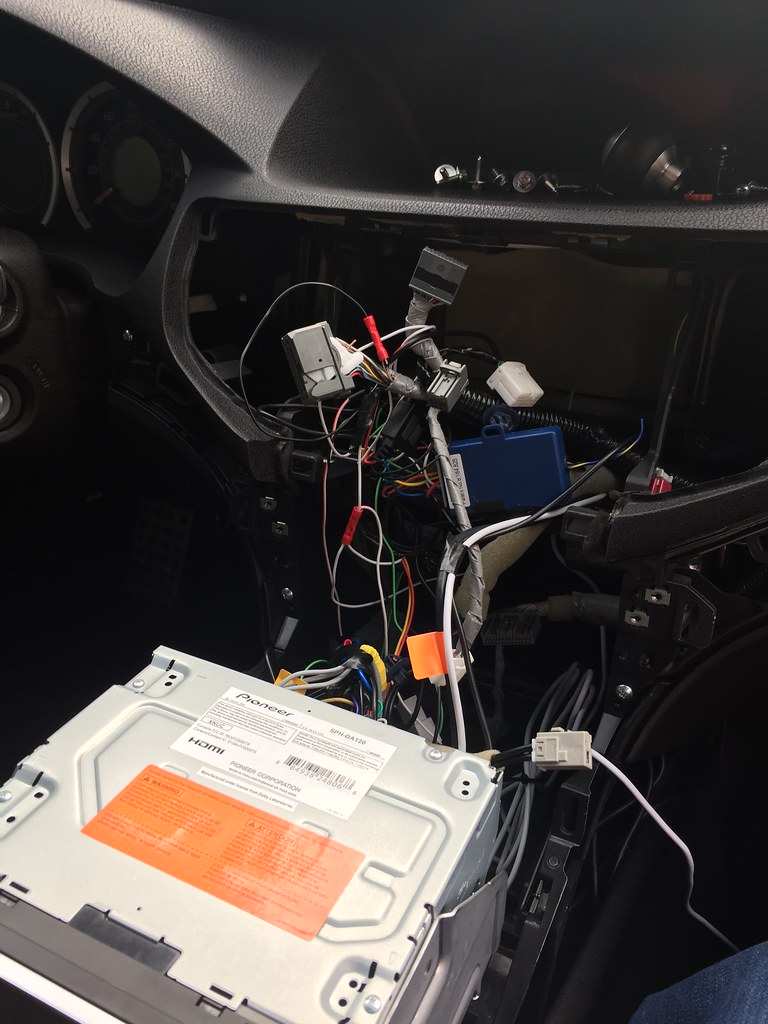
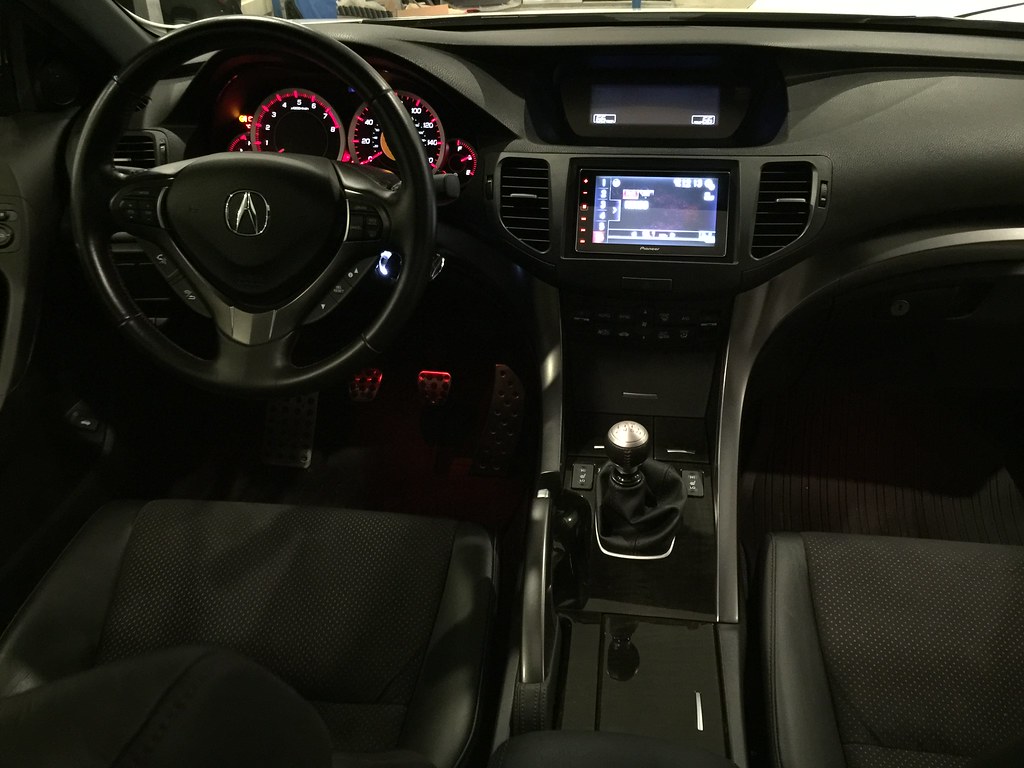
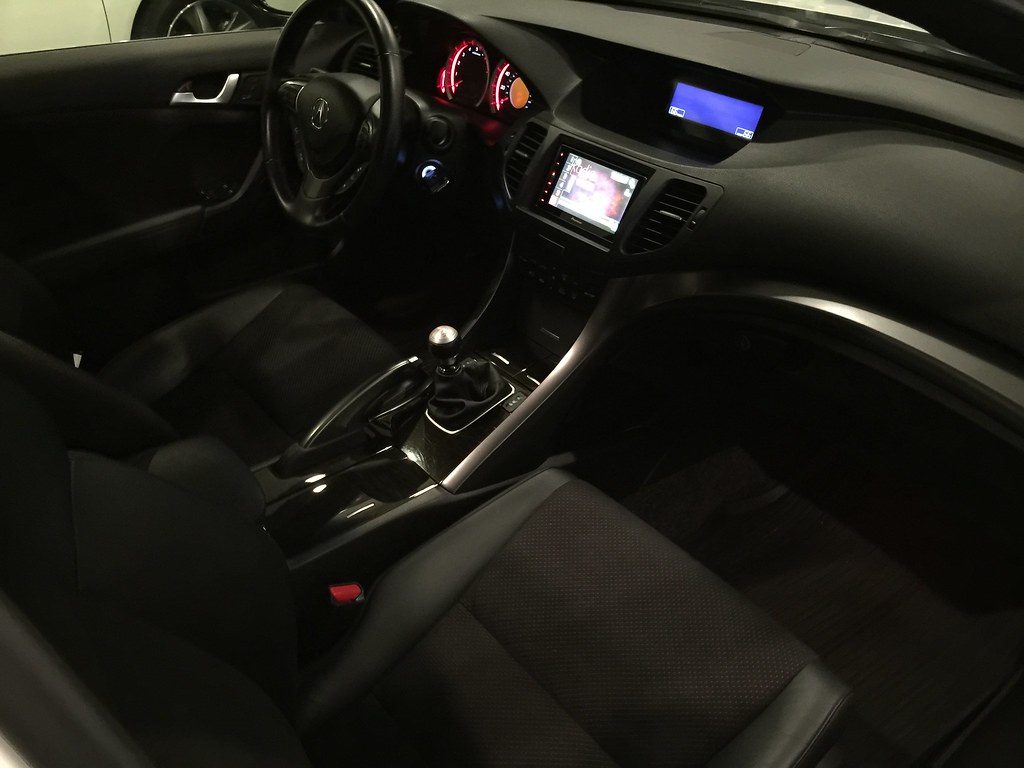
15) Now you can pull the stock head unit out, unhook the wires.
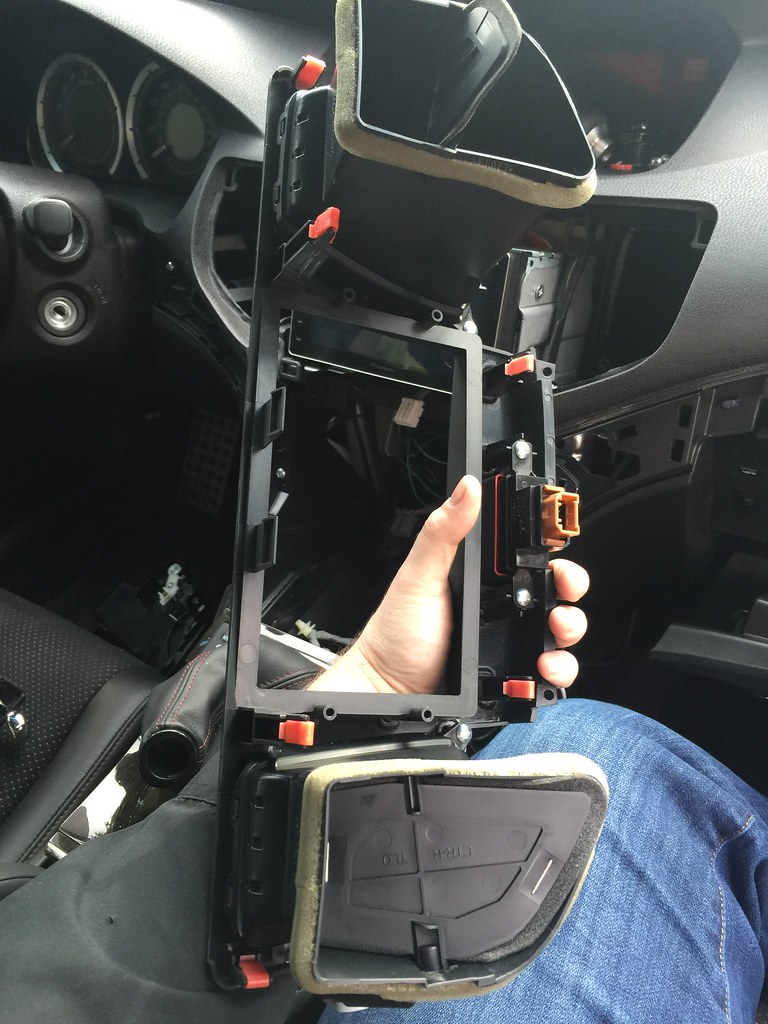
16) You will need to re use the red clips for the Metra bezel;
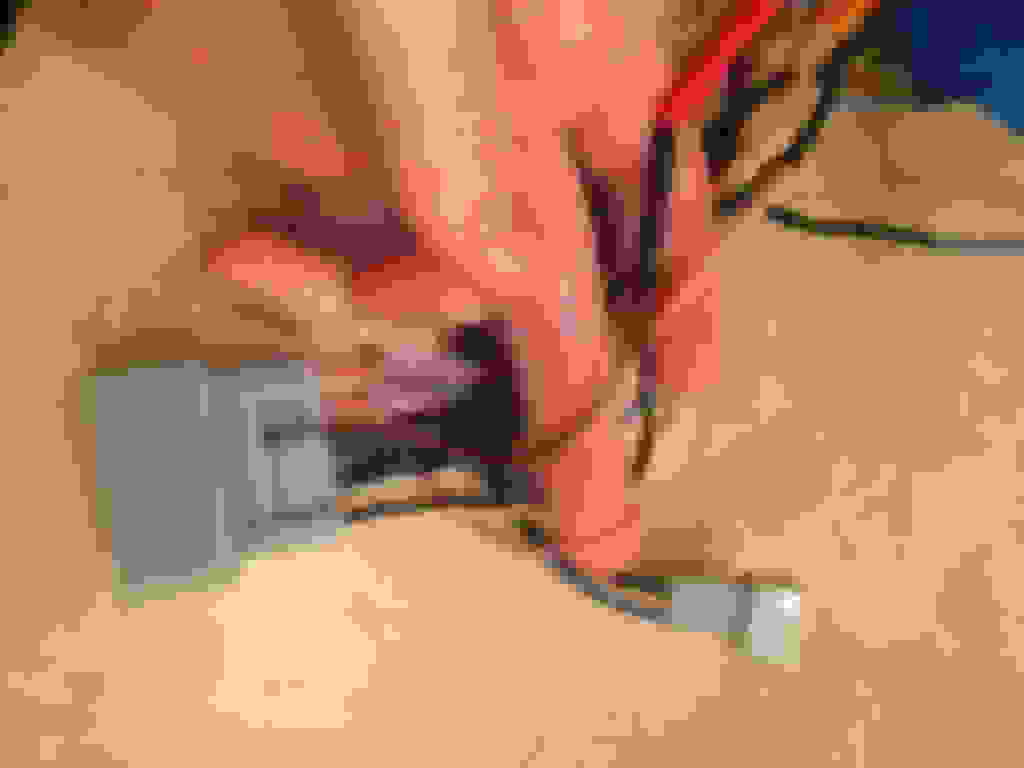
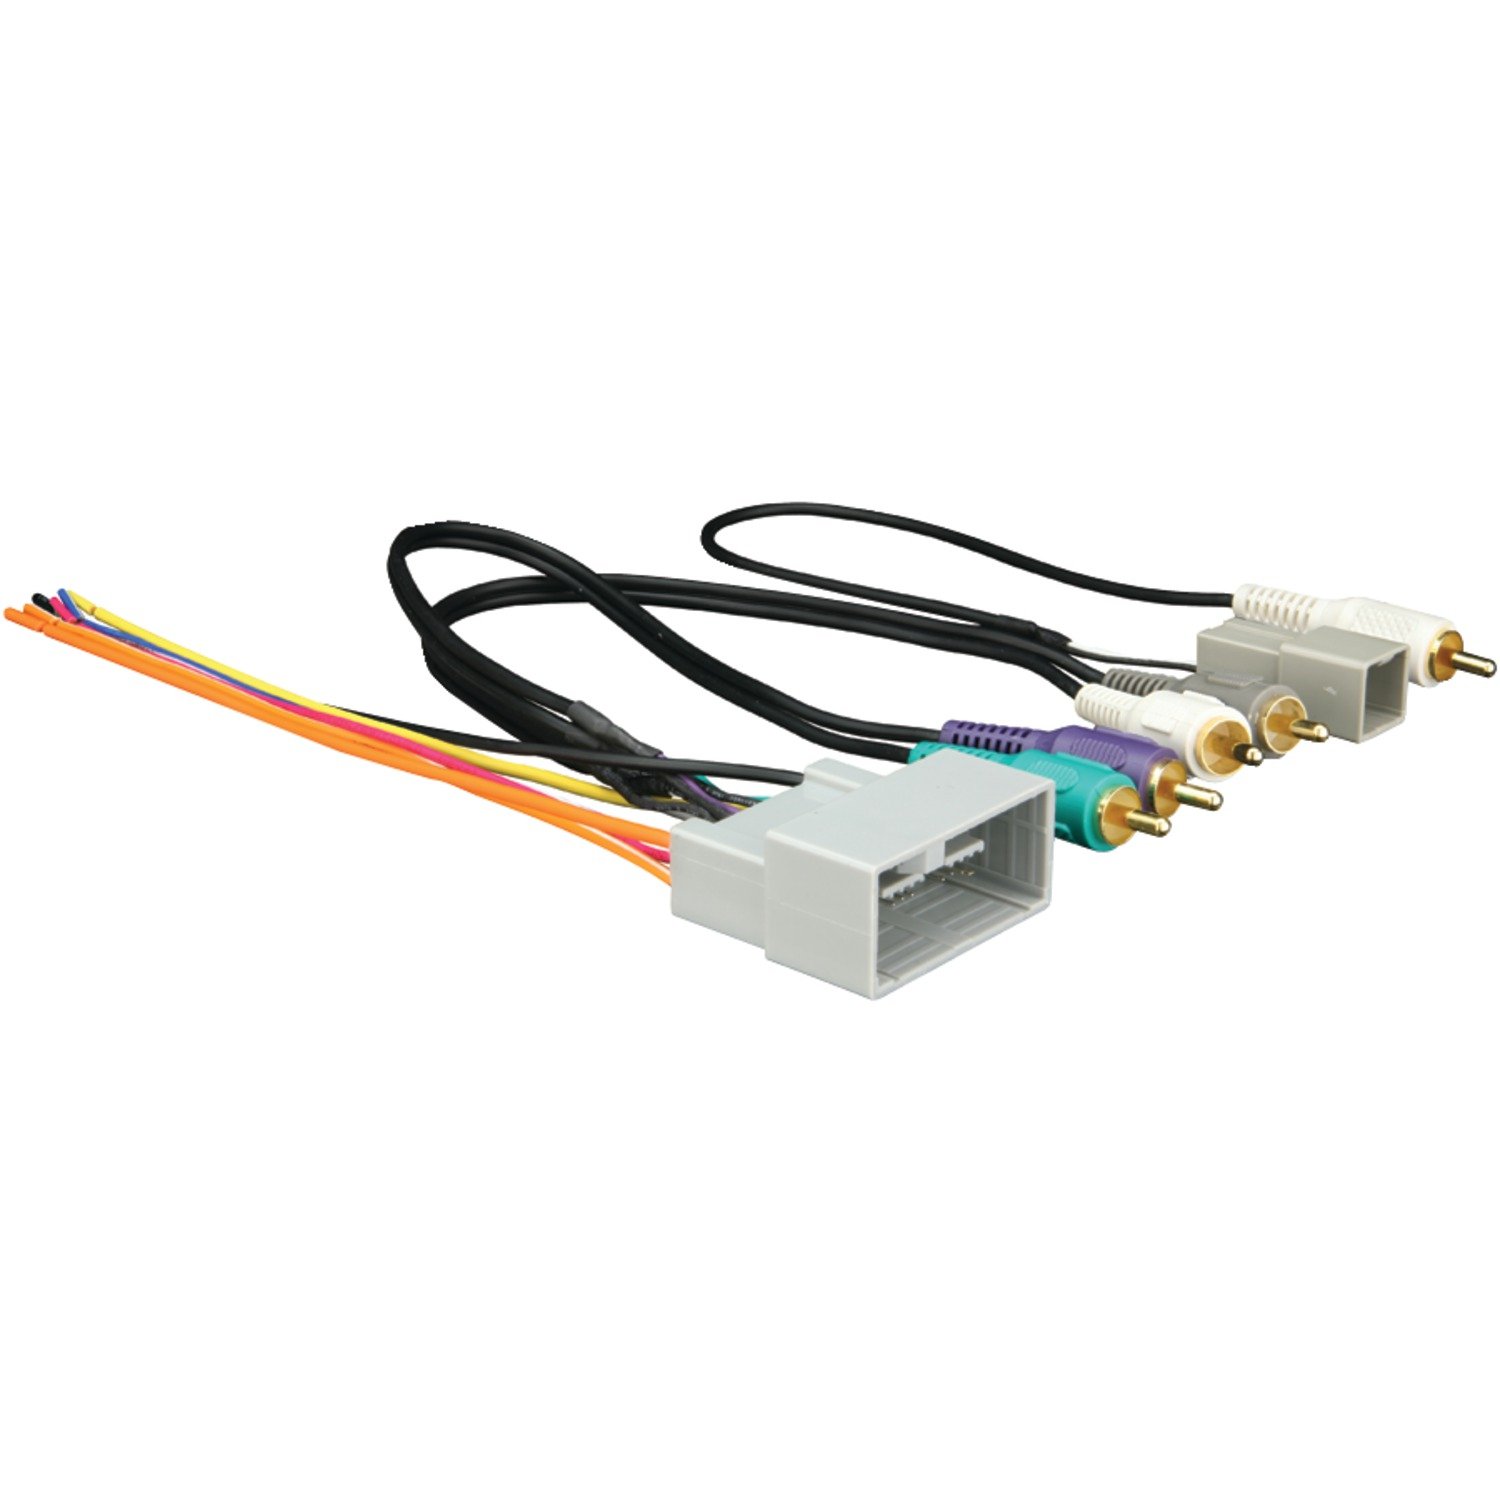
17) Connect your new radio with your radio harness adapter. RCA's will plug into the back of the radio (4 channel) since our cars have amplified radio's, the only wires from the adapter that you need to crimp will be the Power (red) Ignition (yellow) Illumination (orange) ground (black) and blue is the amplifier remote wire. (I cleaned this all up after the photo)
18) Connect your antenna adapter now and connect the blue wire to the blue wire from the harness. Both of these blue wires will now connect to the blue wire from the head unit.
19) Re-use the side brackets from your OEM Radio! These are metal and much higher quality than the cheap ones provided by metra. Also... TEST FIT the unit with the bezel on top. I had to try 3 different bracket placements before one fit with the bezel on top.
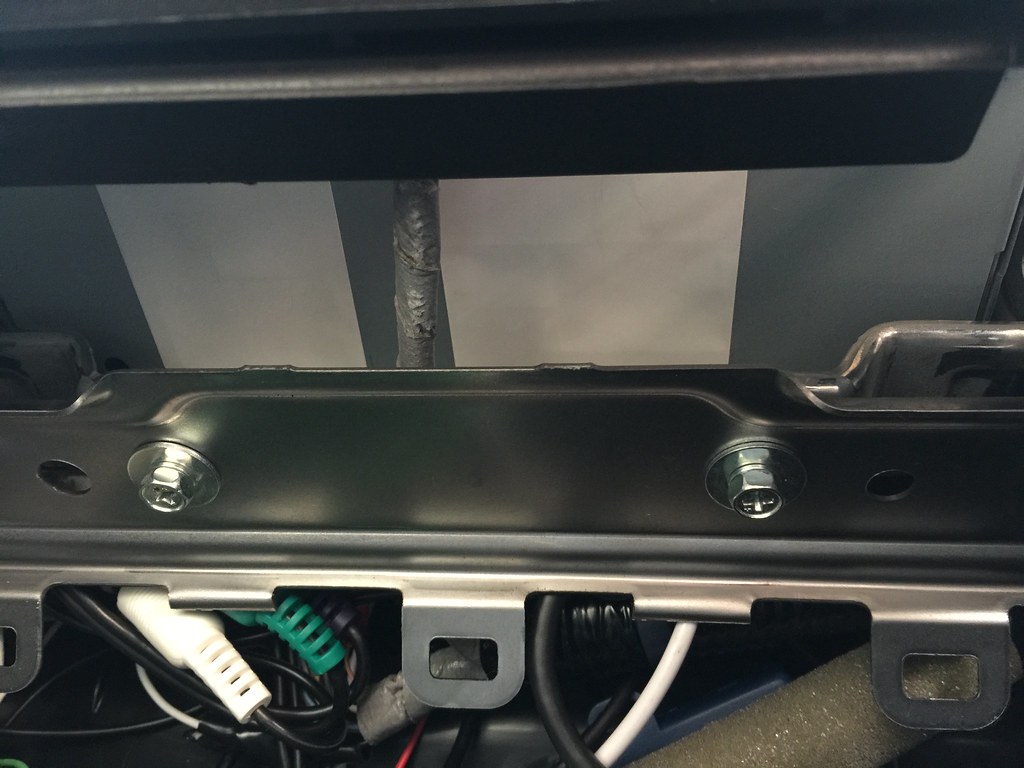
21) Don't forget to re connect your Hazard lights button;
22) Now fit everything back in slowly. Connect your screws under the radio to the bracket which will set the radio back into place. Put the bezel over the top and start re connecting everything.
Great DIY! This was very detailed and I believe this will be extremely helpful to many.
Too bad I have a TECH. I'm guessing it won't be as straightforward with the ELS system in place . Plus the climate control temps would be missing in a TECH TSX if the little screen is completely deleted.
Great DIY! This was very detailed and I believe this will be extremely helpful to many.
Too bad I have a TECH. I'm guessing it won't be as straightforward with the ELS system in place . Plus the climate control temps would be missing in a TECH TSX if the little screen is completely deleted.
Thank you, and agreed, the tech version would scare me. Not only that, but I assume the Navigation brain is also somehow integrated to the stock head unit which could be all other kinds of headaches!n
1. Is it required to connect the blue AMP remote wire?
2. Is it required to connect the blue AM/FM adapter Antenna wire?
3. When you disconnect the battery do the PAC steering wheel controls need to be re-programmed?
4. Don't the metra double den brackets also attach the radio to the den? If you use OEM radio brackets there is no way to attach the aftermarket radio to the metra double den correct? You would only be clipping into place, and not centering on the aftermarket radio screen?
5. Did you run your external USB to your center console? Can you show me pictures?
6. Can you show me how you routed your MIC to use bluetooth audio?
7. Did you just zip-tie all the wires in the back after the install? Pics?
7a. Do you notice any type of rattling?
1. Is it required to connect the blue AMP remote wire?
Yes unless you don't use the RCA's to attach the speakers but not sure why you wouldn't do that.
2. Is it required to connect the blue AM/FM adapter Antenna wire?
I guess not but why wouldn't you want your antenna amplified?
3. When you disconnect the battery do the PAC steering wheel controls need to be re-programmed?
The PAC does not need to be reprogrammed if the battery is disconnected.
4. Don't the metra double den brackets also attach the radio to the den? If you use OEM radio brackets there is no way to attach the aftermarket radio to the metradouble den correct? You would only be clipping into place, and not centering on the aftermarket radio screen?
The metra brackets do not connect to the bezel so either way you mount the unit then clip in the bezel.
5. Did you run your external USB to your center console? Can you show me pictures?
Not yet, I have it coming through the cubby under the AC controls. The top of that already has a hole for a small LED so I just ran the Lightning cable through it. I didn't want to drill into the center console to bring the cable though it.
6. Can you show me how you routed your MIC to use bluetooth audio?
Not sure what a pic will show much on this, I just ran the mic cord up the a pillar and attached it where it meets the head liner.
7. Did you just zip-tie all the wires in the back after the install? Pics?
No pics of zip tied wires. But yes I wrapped them and zip tied them.
7a. Do you notice any type of rattling?
No, although I did line the under of the unit with black foam.
How is carplay on TSX? Does siri understand while the car is in motion with wind noise?
Very good. So far I'm really impressed more so with the nav than anything else but it's all pretty fluid. The capacitive screen makes things so much easier than the old units of the past.
And yes Siri has had no problems yet, and callers have been able to hear me much better than the oem system, even at 80mph speeds. I'm very happy so far.
My only complaint is I wish CarPlay could be done through Bluetooth.
For the Mic, where did you come out of the dash?
-through the center speaker?
-through an AC vent?
Did you mount behind the rear view mirror?
Did you mount by the driver side A-pillar?
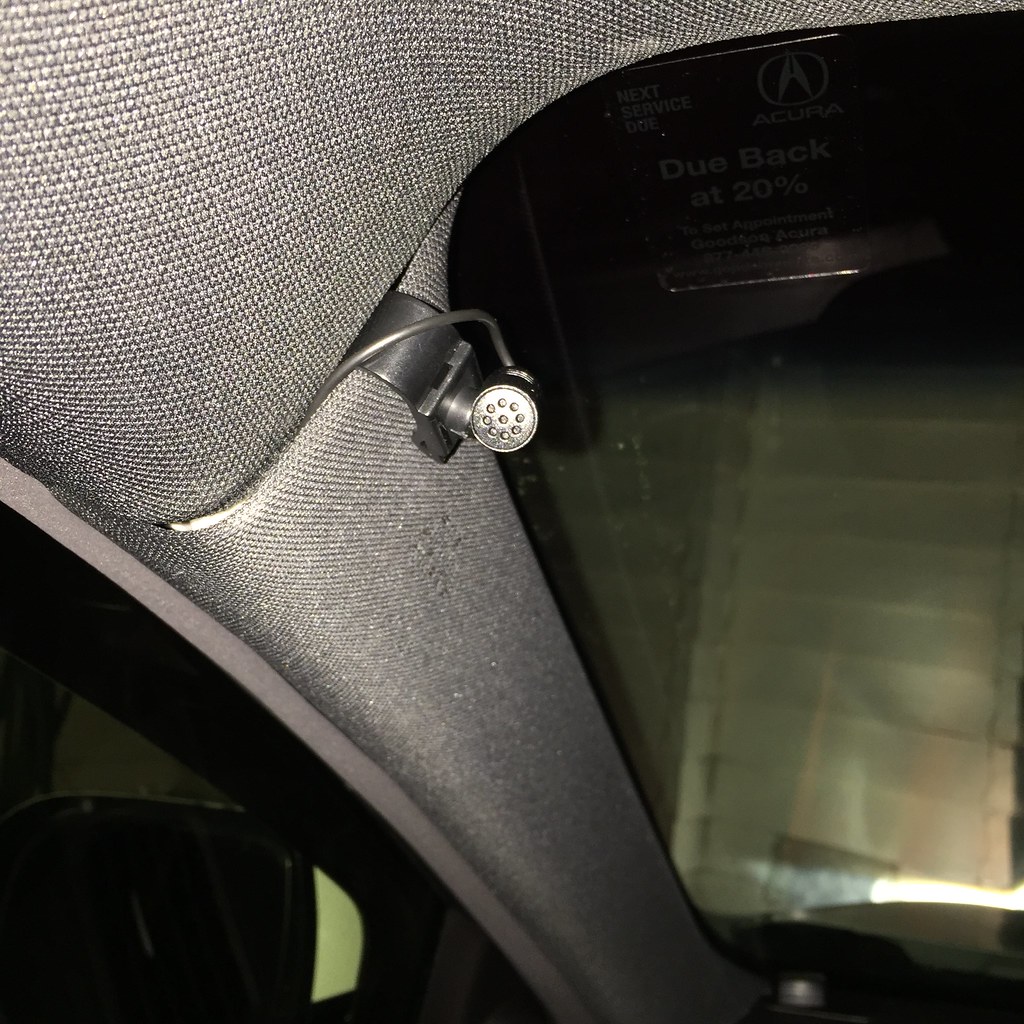
Again, the mic is mounted on the a-pillar where it meets the roof lining;
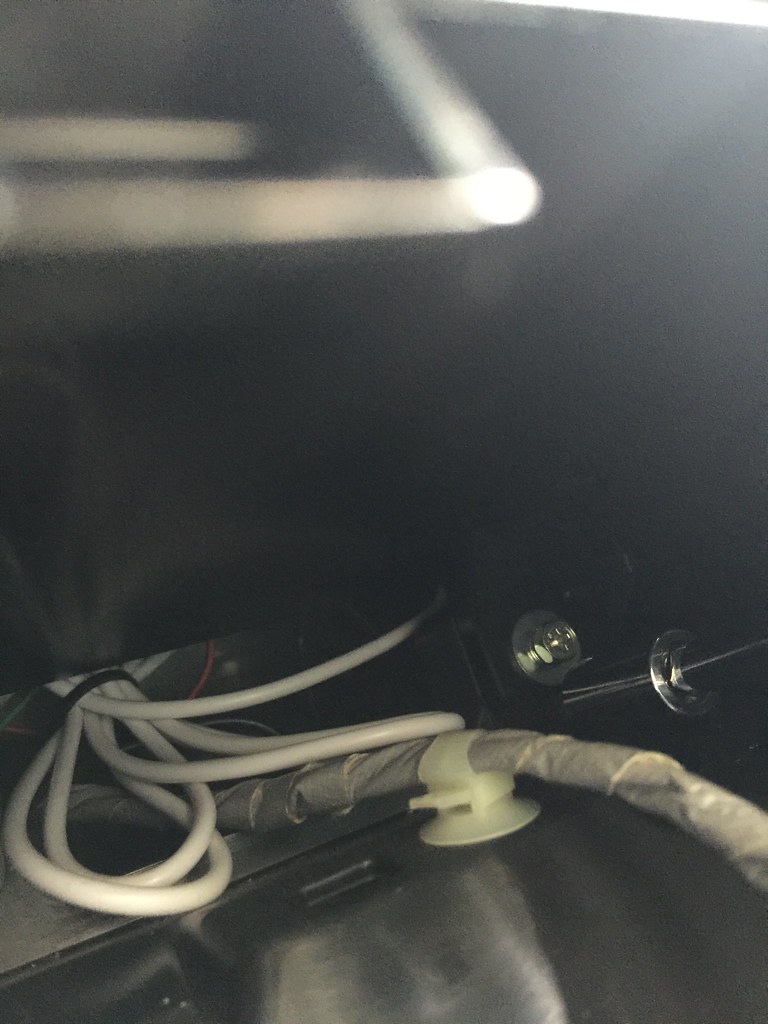
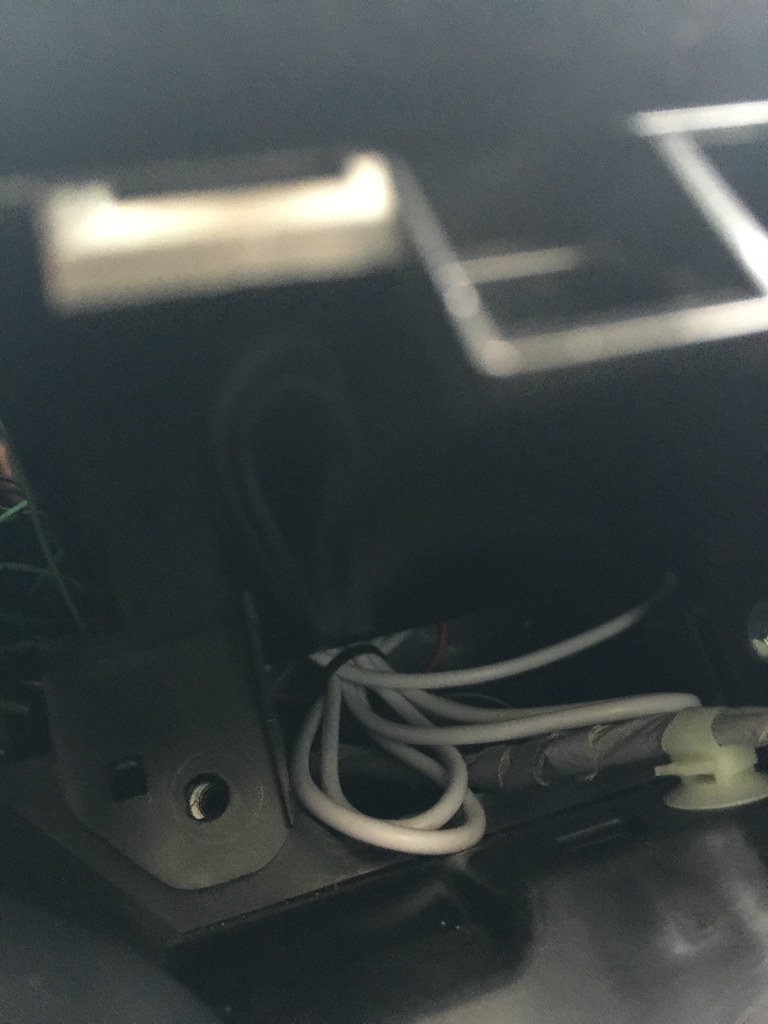
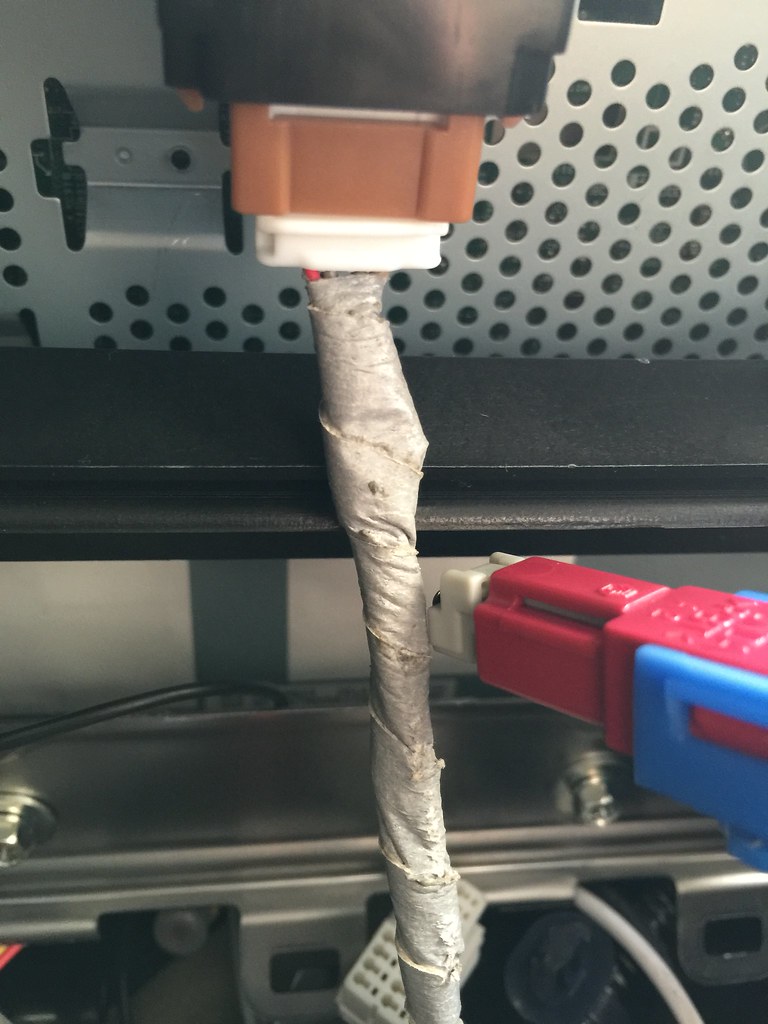
The wire for the GPS and the Mic run from the dash, above the knee kick panel, and up the a pillar. I removed the rubber trim to be able to insert the wire behind it; and put the rubber trim back.
I pulled the wire out in this photo to show where it is ran;
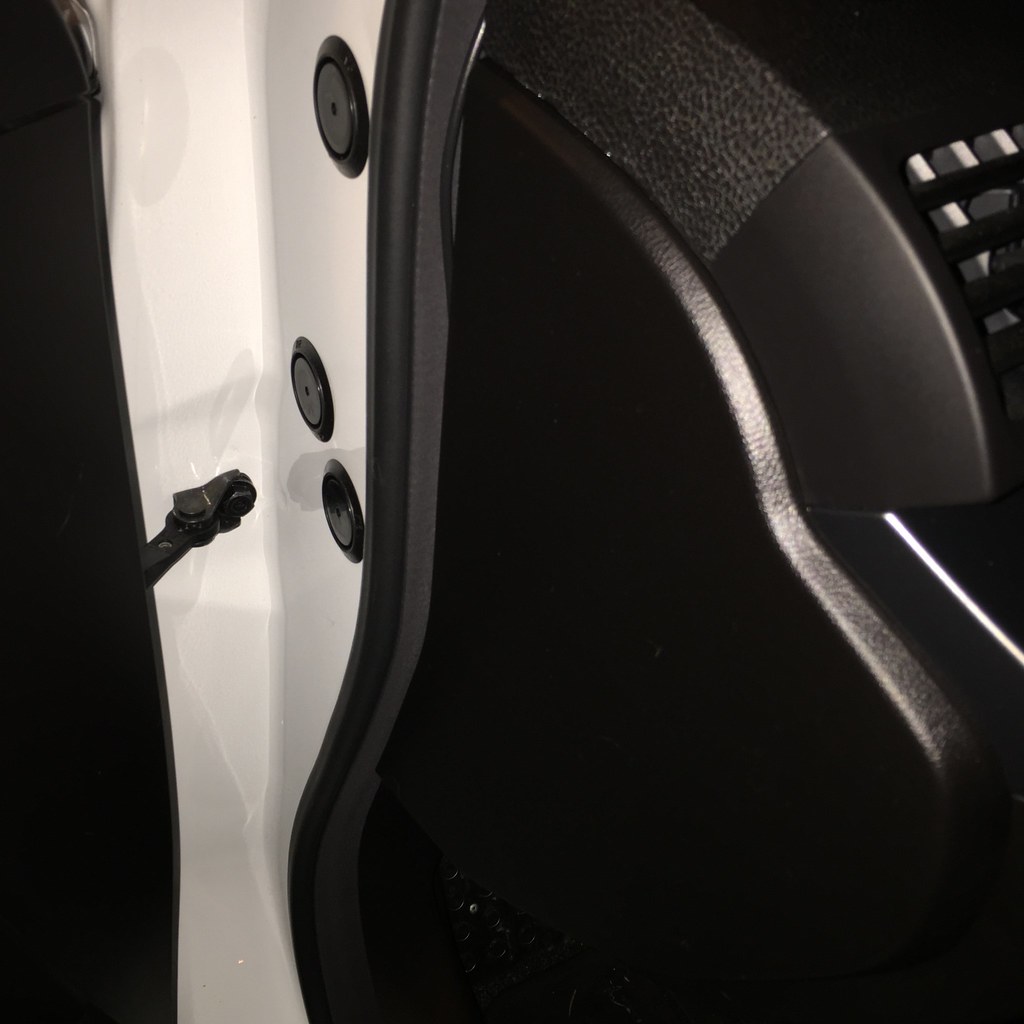
and then this is with it behind the rubber lining;
Alright thanks, that helps. Im actually running my Head Up Display and my Aftercooler Pump wire in that same location. Should be easy enough to run one more wire through there.
Alright thanks, that helps. Im actually running my Head Up Display and my Aftercooler Pump wire in that same location. Should be easy enough to run one more wire through there.
Should be, the GPS wire is a little thick; but the mic wire is really small!
What I've learned about doing the intstall myself..
1. The metra bracket's DO in fact have 2 mounting places on either side to align your double din unit to the new face. I test fit my JVC-KW-V40BT unit with the new metra din and saw there was about a 2-3mm gap on the upper and lower portions of the din (total of 5mm of gap) so this is why I used the plastic metra brackets instead of the metal OEM brackets. I wanted to ensure the gap was centered across the top and bottom. Then I added foam to decrease the appareance of gap, and also added foam to parts that could cause vibration and rattle..
5mm of gap (maximized at the bottom)
Added foam to top and bottom to decrease appearance of gap
Added foam to brackets where rattle might occur
Overall gap appearance greatly reduced
2. Steering wheel AUDIO controls can be recovered using PAC-SWC unit. But the HFT (Hands Free Telecommunication) which allows you to answer/end calls is located in harness connector 20P NOT the 24P which controls the Audio. In essence, the Answer/End no longer works and you have to use your new display to answer/end calls. I don't think it's that big of a deal, but it's worth sharing.
2a) I didn't want to to cut/splice my OEM harness so I made 2 new connections on the Metra harness that matched the same positions as the PAC wires I needed to connect to (Pink-control signal), (Brown-grnd wire). This was a lot easier when installing in the car, but took extra effort on the SETUP STAGE while wiring everything.
You can see the new wires I added here (I chose the same colors as the OEM harness so that it would be easy to tell you had the right thing connected)
All of the Metra harness wires soldered to the new JVC unit. I utilized a lot of heat shrink (exposed wires/metal can cause interference and noise)
3. My unit came with an external USB with a female end (to connect any type of phone, tablet/audio-video device). I assume it's a standard length for all the units. I tried running it to the center console and it DOES NOT HAVE ENOUGH LENGTH. I ended up running it to the passenger side "cubby area" next to the center console knee.
Anyways, I figured I would add to this already great DIY, and help contribute. Please feel free to ask any questions. I asked like 20 before my install haha
Great DIY, I read on the 9th gen civics a lot of people couldn't keep the Bluetooth buttons either. However, someone figured it out by using two PAC units they could. Would this work on our TSX?
What I've learned about doing the intstall myself..
1. The metra bracket's DO in fact have 2 mounting places on either side to align your double din unit to the new face. I test fit my JVC-KW-V40BT unit with the new metra din and saw there was about a 2-3mm gap on the upper and lower portions of the din (total of 5mm of gap) so this is why I used the plastic metra brackets instead of the metal OEM brackets. I wanted to ensure the gap was centered across the top and bottom. Then I added foam to decrease the appareance of gap, and also added foam to parts that could cause vibration and rattle..
5mm of gap (maximized at the bottom)
Added foam to top and bottom to decrease appearance of gap
Added foam to brackets where rattle might occur
Overall gap appearance greatly reduced
2. Steering wheel AUDIO controls can be recovered using PAC-SWC unit. But the HFT (Hands Free Telecommunication) which allows you to answer/end calls is located in harness connector 20P NOT the 24P which controls the Audio. In essence, the Answer/End no longer works and you have to use your new display to answer/end calls. I don't think it's that big of a deal, but it's worth sharing.
2a) I didn't want to to cut/splice my OEM harness so I made 2 new connections on the Metra harness that matched the same positions as the PAC wires I needed to connect to (Pink-control signal), (Brown-grnd wire). This was a lot easier when installing in the car, but took extra effort on the SETUP STAGE while wiring everything.
You can see the new wires I added here (I chose the same colors as the OEM harness so that it would be easy to tell you had the right thing connected)
All of the Metra harness wires soldered to the new JVC unit. I utilized a lot of heat shrink (exposed wires/metal can cause interference and noise)
3. My unit came with an external USB with a female end (to connect any type of phone, tablet/audio-video device). I assume it's a standard length for all the units. I tried running it to the center console and it DOES NOT HAVE ENOUGH LENGTH. I ended up running it to the passenger side "cubby area" next to the center console knee.
Anyways, I figured I would add to this already great DIY, and help contribute. Please feel free to ask any questions. I asked like 20 before my install haha
Great follow up and insights. The plastic brackets worry me, but if I can get more than one screw in each side, I'm open to try it. I agree with the odd gap, I did use black foam as well.
I bought a 10ft usb cable to not run into the "not long enough problem" you had mentioned. I thought once I put everything away I'd never be in there again... Little did I know lol
Great DIY, I read on the 9th gen civics a lot of people couldn't keep the Bluetooth buttons either. However, someone figured it out by using two PAC units they could. Would this work on our TSX?
ssjoeboe; do you know if the HFL 20-pin connector has the same color wire (pink) for the bluetooth input to the headunit?
I'm seriously considering wiring up another PAC, using the 3.5mm splitter and giving this a shot, but I can't find a wiring diagram for the other harnesses that connect to the radio.
EDIT: Why couldn't you just splice the current PAC SWI input wire and split it off to the 20pin connecter and reprogram the PAC to include the bluetooth answer/hangup functions?
I was going to mention how you could do this and keep the BT buttons but I knew that probably no one would want to do it haha. (At least this is how I felt when I realized it was in the other connector)
I believe you just need to take that extra white wire that comes with the PAC unit and splice into the BT wire the same way you did the pink wire. I have the Pin-out information if you need it. Or I can post the picture tonight lol
Lol, I believe you are correct. I do need to know which one is the BT wire. It gives me a good excuse clean up the wires back there too. If you don't mind letting me know which pin/wire color from the 20pin I'm looking for; it would be appreciated.
So yeah that's what I would try, Ground B9 and splice B19.. The other TEL is just for shielding. Im not an Electrical Engineer, just a lowly mechanical engineer haha ... but Im pretty sure the Bcan communication is used for HFL commands and voice rec stuff..
You don't have to worry about HFL mute because your head unit is already communicating with your BT phone to mute the music and tell you a phone call is coming in... now you're wiring an extra input to the PAC so that it can actually get signal when you press the "answer/end call". Hope that helps
It does. I may try it this weekend and see how it goes. Thanks for the insights and thoughts on it.
Afraid I don't have good news, rewired the PAC but HFL was not giving any response. I wasn't successful with getting it to work. I did change out the brackets which does give a much more solid (surprised) and uniform look than reusing the OEM brackets
My installer got all my buttons on my steering wheel to work with my Pioneer AVIC-8100NEX aftermarket headunit including the Bluetooth call pickup / end buttons! In addition I have 4 functions of my channel + / - buttons. If I press quickly it goes up/down my presets and if I give it a longer press, it seeks forward and backward. He was able to do all of this with 1 PAC unit, the SWI-CP5. I'm not sure how he did it, but all the buttons function properly.
Where did you get this table? Wiring diagrams? I am searching for a while but couldnt find it. Would you lke to post the other connectors too? I mean 24, 20, 12 and 12 pin CD Changer..
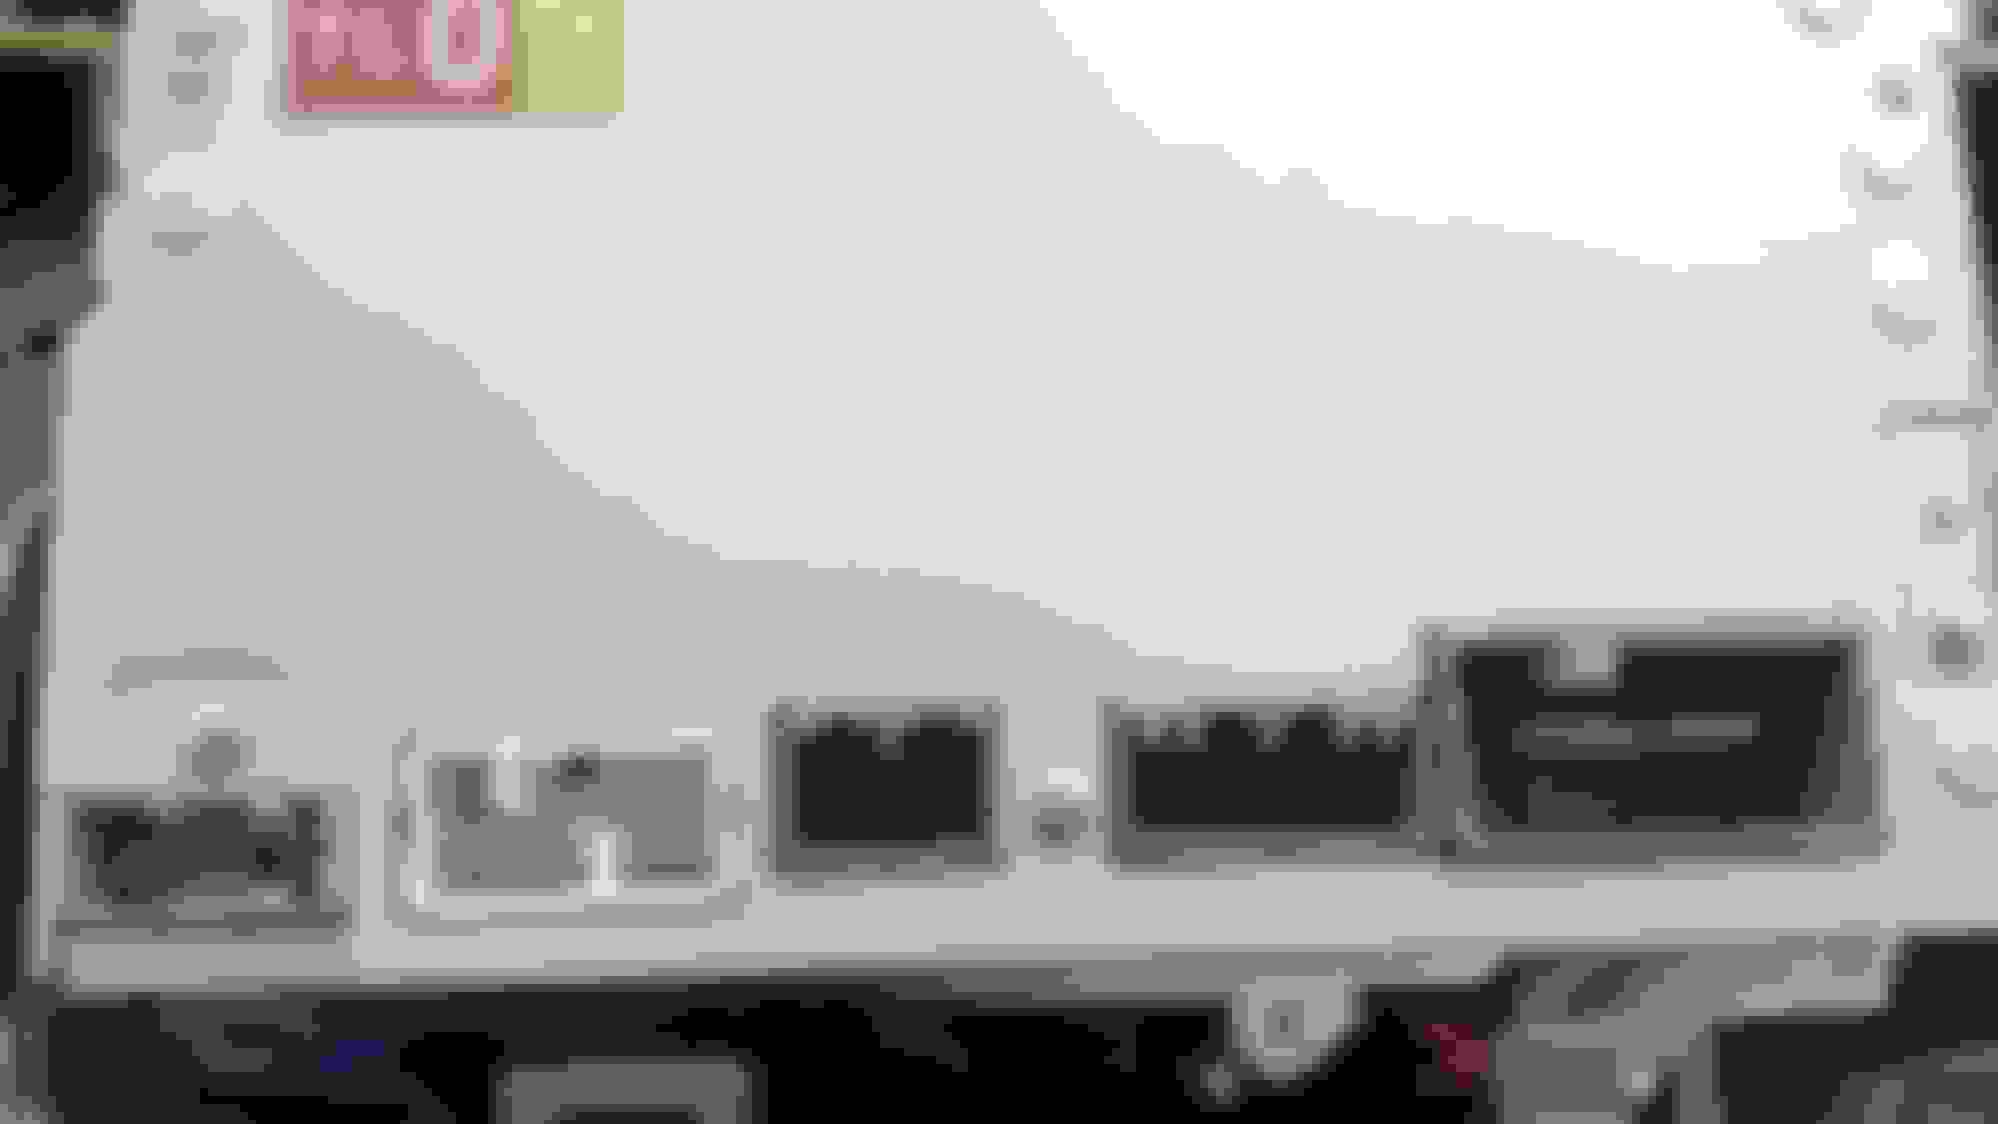
This is how my 39000-TL0-G200 Premium Audio 6CD/DVD system looking from back and wanna replace it with aftermarket android 2 DIN.. Need to know about these output pins..
My installer got all my buttons on my steering wheel to work with my Pioneer AVIC-8100NEX aftermarket headunit including the Bluetooth call pickup / end buttons! In addition I have 4 functions of my channel + / - buttons. If I press quickly it goes up/down my presets and if I give it a longer press, it seeks forward and backward. He was able to do all of this with 1 PAC unit, the SWI-CP5. I'm not sure how he did it, but all the buttons function properly.
 02-10-2015, 07:10 PM


 (I cleaned this all up after the photo)


 . Plus the climate control temps would be missing in a TECH TSX if the little screen is completely deleted.