When you click on links to various merchants on this site and make a purchase, this can result in this site earning a commission. Affiliate programs and affiliations include, but are not limited to, the eBay Partner Network.
I have a 2009 SH-AWD TL with Tech. My Bluetooth works off and on with my phone. Generally, I find it works when I don't need it and doesn't work when I do need it. My phone works fine in my other two Honda's (S2000 and Odyssey). Funny enough, it used to never work. Then I got a new phone recently (Samsung S7 for anyone searching key words - I am adding as many as possible!) and it worked for about a week. Then it had an electrical fart and now won't even recognize that the phone exists even though my phone can see that the Acura HFL exists.
When I search online, I find a gazillion links to replacing blue-tooth modules on 3G (pre-2009) TLs and even MDXs. What I can't find is any commentary on replacing a 4G unit. I saw one reference on this board that says the hands-free module (sometimes called HFL or HFT - in case people are googling) is located below the radio unit but no further clarification.
I have spent over two hours looking at videos, links, etc. and have tried on multiple occasions - because I hate to be "that guy" who starts a thread because he was too lazy to look three lines down or use the search function.
Perhaps I am blind - but I cannot find any commentary. Looking at an Acura parts website, the part appears to be the following:39770-TK4-A11 39770-TK4-A11 / HFT UNIT (BLUETOOTH)
It is under the electric section and under the "Control Unit (Cabin) (1) subsection. However, the diagram does not show where it is located.
1. This is a common problem. Does anyone know if there is any sort of recall on this? I have searched the tech bulletins and can't find one. The dealer acknowledged the HFL has issues but that tech is never there on Saturdays when I take my ride into the dealer.
2. Can someone confirm the location?
3. Does anyone have service manual diagrams or other information that may help?
4. Has anyone replaced this and have pointers? If it really is underneath the audio unit - that seems like a massive pain in the butt to replace so I am interested to get some perspectives.
5. Any videos available (I can't find anything on YouTube)?
Sorry if this is repetitive. On the other hand, if you are also a 4G owner tired of the broken Bluetooth, then I hope someone responds to the above and you also get some relief.
Thanks for the response. I have tried disabling the Wi-Fi as suggested in the other post - I meant to add that to my original post. It does not help for me.
I have even tried deleting my phone and repairing it to see if that works. But now, the HFL will not even see the phone. I had set a specific passcode to be my security key (instead of the default random code). So even though the HFL seemingly can't see my phone now, I frequently get a request on my phone input the HFL security code (even when the HFL is not in pairing mode). So I am pretty sure my HFL is just screwed up. I want to replace but can't find any details.
Anyone else? I can't understand why there are 100 hits on the 3G but almost no discussion on the 4G problems. Anyone have either the service manual or the electronics troubleshooting manual that speak to this?
Wow. That is incredibly kind. It looks like a pain in the but. But that is the first real answer I have ever gotten. Thank you so much. Gonna order a replacement HFL module today as I already know it is not the phone (since this phone once worked with this HFL and works with other Honda HFL just fine and my other phones have had trouble with this HFL). Thank you.
Success. Took about two hours. Here is my attempt to document the steps. The part number is in my OP. The service manual pages from Blaze9 linked above were also a help. Overall - it took me about 2 hours with about 20 minutes wasted because I dropped a screw down in the console and had to fish it out. I can confirm that the HFL model is behind the little compartment under the radio. Unfortunately, you have to take out most of the center console to get to it. Here are the steps:
Here are the tools I used
This was taken after the fact so that is the old module. Note that I made a mark on it so I would not accidently confuse it with the new module. Not many tools needed. I bought a big set with 11 trim tools - but I only used this one the entire time.
1. Remove the silver garnish pieces on either side of the center console. This is pretty straightforward. Just insert a trim tool at the back of the silver pieces where they join just below the lid of the rear console. The key to this repair is to be patient. Pull the pieces off gently and keep working until they pop out easily. You don't have to jerk anything or even pull that hard. It will all come out if you pull gently. Also, make sure you pull straight out from the underlying piece to which the trim is attached. The tabs are all perpendicular to the trim pieces so you pull straight out.
Insert the trim tool at the back of the silver garnish piece and gently pry it up. It will pop loose pretty easily.Repeat the process on the other side. Start at the back and work your way forward.When you get to the front of the left garnish, you will need to disconnect the starter wire from the back of the starter button. Be careful pulling on the areas where trim is thin - so you don't break it.
2. Now, work on removing the trim around the shift knob. Ultimately, you have to remove the shift knob, the trim piece around the knob and flat panel below the shifter that contains the heated seat buttons and gear indicators. If you look at the book linked from Blaze9 above, you can see where the actual tabs are - that is where you need to pull. Once you get it start, pull straight out gently - it will pop out very easily. Note that I think the book lists the steps here in the wrong order. I think it is easier to remove the shift knob before you remove the trim pieces below the shifter. There are small screws holding the shift knob on and they are really hard to get to - and even harder if the trim pieces are already loose. So I would remove the shift knob and then remove the trim pieces. Here is a good video for a similar car - to remove the shift knob on an A/T.
You really just put a thumb and finger on the silver ring and push down. It won't move at first - just keep at it and it will drop. Once the boot is pulled down, use a small straight screwdriver to pop out the plastic piece on the front of the knob. This took some patience as it is fragile and finicky. There are two flat screws on the front of the shifter knob holding it on. These are tough to get to - I used a small S screwdriver. You can only turn the screws about 1/8 of a turn because there isn't much room. I followed the order in the service manual so the knob is still on the shifter. As noted above, I would first remove the knob before starting this step. Insert the trim tool on the side of the trim piece. I used a small screwdriver at the back of the trim piece to get it started - then put the trim tool in the side. If I was doing it again, I would put the yellow tab on the silver piece above in front of the screwdriver instead of on the black piece behind the screwdriver - or maybe both places. Just to protect the finish. This is the first flat panel trim piece.Now you can remove the second flat trim piece. I inserted the tool up at the front crack - where it was less likely to be seen should I scuff up the plastic. Just gently pry it up.Once you get all the tabs loose, then disconnect the two seat warmers (blue and white) and the gear light indicator (green). Now you can pull the flat trim pieces over the shifter. Set aside.3. Now you can work on the main center console - which is a single unit all the way from the cup holders to the little doored compartment under the radio.
Remove the two screws at the front of the center console on the either side of the doored compartment.Now, start at the back of the center console under where the lid to the rear console closes. I inserted my trim tool and levered it up - it popped out pretty easily.Do the same thing on the back passenger side of the center console. Once you have the back pried up on both sides, just walk your hands up along the plastic until the entire unit pops out.
Before you can remove the center console, you have to disconnect the orange connector to the charge port.
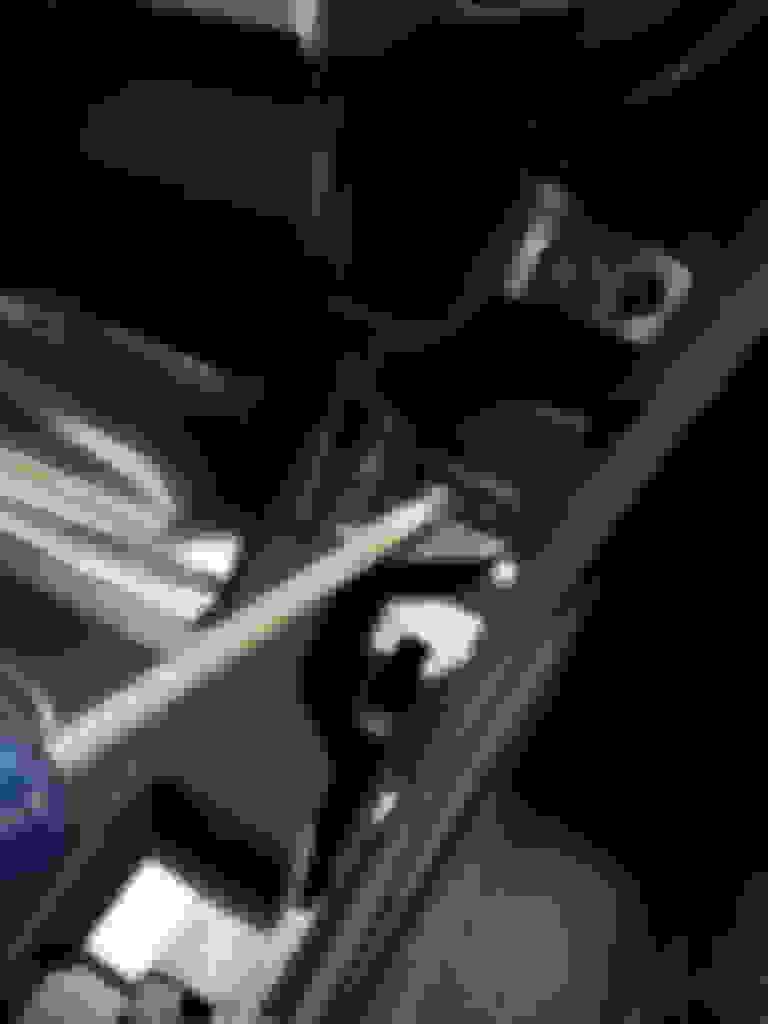
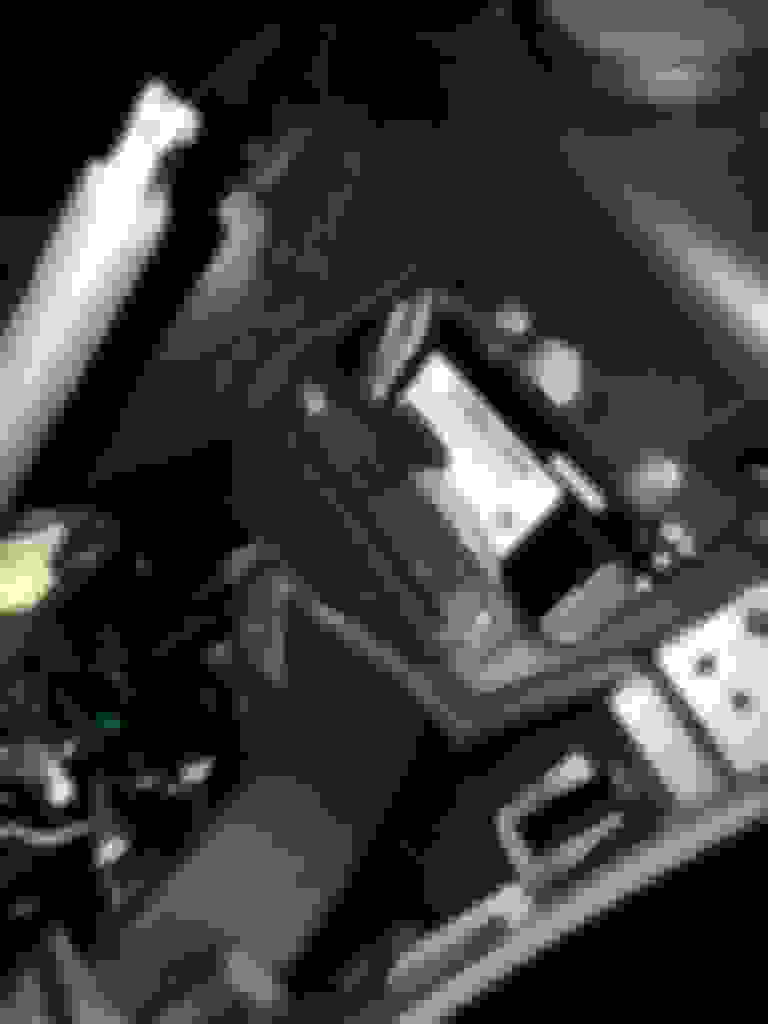
4. Almost home! With all the trim removed, you can now see the HFL unit. It is a bit tough to reach and I dropped a screen down in the tunnel. But besides that, it good to finally see it!
With the center console removed, you can see the HFL unit beneath the radio.
Remove the plastic strap on top of the HFL unit. You will need to disconnect the grey cable at the front. There is also a grey cable plugged into the right side of the HFL unit. Finally, the HFL is held in place by two phillips head screws (don't drop 'em!).
5. Once you replace the HFL unit, then put the pieces back in the reverse order. One note:
When you put the center console back in place, before you snap it in, be sure to pull the seat warmer cables out so you can get to them. You will need to reconnect the two seat warmer cables (blue and white), the gear indicator light (green) and the charge port (orange).
We have success! The little Bluetooth symbol shows that I successfully connected my phone.
Overall, it was much easier than I was expecting. If you are patient and pull the trim pieces off carefully, they pop right out without damage. I have been looking for guidance on this repair for a couple of years but could never find anything for the 4G Acura TL's. Hopefully, this will help some of you. Thanks to Blaze9 for posting the service manual.
Last edited by RedneckCPA; 09-02-2016 at 10:52 PM.
Thanks man! That is awesome. If you can, can you see if there's any "date" markings on your old HFL unit? I'm wondering if they did any hardware updates in the new unit compared to the old one from the factory. BT standards keep evolving.
Also you don't need to remove the whole shifter assembly. You just need to detach the shifter base and the rest of the center console can be removed w/ the shifter still in place.
I was having the same problem with my iPhone 7. It first I thought it was the module that controls the bluetooth because the phone was newer. If you go to the Acura grace notes site and update the firmware it will allow you to connect to bluetooth and play music music from your phone. Also every six months grace notes updates and it would be best to do that so that way if you buy new phone as I do every year you wouldn't have to worry about any of those connectivity problems. This works!!!
I too had to replace the HFL Bluetooth module on my 2012 TL. I ordered the part from Delray Acura for $175 and in the 5 days it took to get the part I snapped out the trim noted in the post on my way to work as I sat in NJ traffic. When I finally got the part I had the old one out and the new one installed and all back together in about an hour.
A credit card does really well to snap out the long trim pieces near the seats, including the shifter trim below.
Work the cc down to release the corner clips - then just pry it straight up.
Once apart, moving the shifter selector down to the "S" position gives plenty of room to unscrew the two Phillips head screws with a stubby once you snap off the trim.
Before you can remove the center console, you have to disconnect the orange connector to the charge port.
4. Almost home! With all the trim removed, you can now see the HFL unit. It is a bit tough to reach and I dropped a screen down in the tunnel. But besides that, it good to finally see it!
With the center console removed, you can see the HFL unit beneath the radio.
Remove the plastic strap on top of the HFL unit. You will need to disconnect the grey cable at the front. There is also a grey cable plugged into the right side of the HFL unit. Finally, the HFL is held in place by two phillips head screws (don't drop 'em!).
5. Once you replace the HFL unit, then put the pieces back in the reverse order. One note:
When you put the center console back in place, before you snap it in, be sure to pull the seat warmer cables out so you can get to them. You will need to reconnect the two seat warmer cables (blue and white), the gear indicator light (green) and the charge port (orange).
We have success! The little Bluetooth symbol shows that I successfully connected my phone.
Overall, it was much easier than I was expecting. If you are patient and pull the trim pieces off carefully, they pop right out without damage. I have been looking for guidance on this repair for a couple of years but could never find anything for the 4G Acura TL's. Hopefully, this will help some of you. Thanks to Blaze9 for posting the service manual.
Awesome write up�I�m 99% sure the BT module is responsible for draining my battery. This is my second battery purchase and new alternator. Hopefully your fix will help my issue.
 08-19-2016, 04:54 PM