When you click on links to various merchants on this site and make a purchase, this can result in this site earning a commission. Affiliate programs and affiliations include, but are not limited to, the eBay Partner Network.
my first audio install - front components, amp, and corner trunk sub
this thread is way overdue (project started about 2 years ago) but i wanted to document it nonetheless and hopefully it can help others as well. my main goal was to have a relatively cheap build and to do everything on my own. i researched a lot and talked to many members on here (thank you to those that helped me) before i got started and even though it was a huge pain in the butt, i feel very confident with audio stuff and have helped many other people as well. everyone that i show my system to is impressed for it being a first time audio project....so here it is!
Summary
- initially installed front components JBL GTO608C but switched them to Image Dynamics CTX65XS (soo much better!)
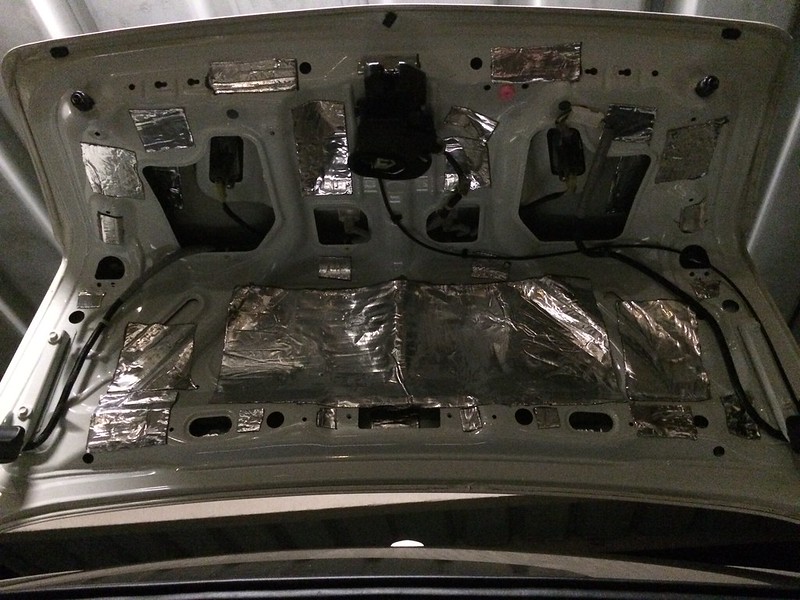
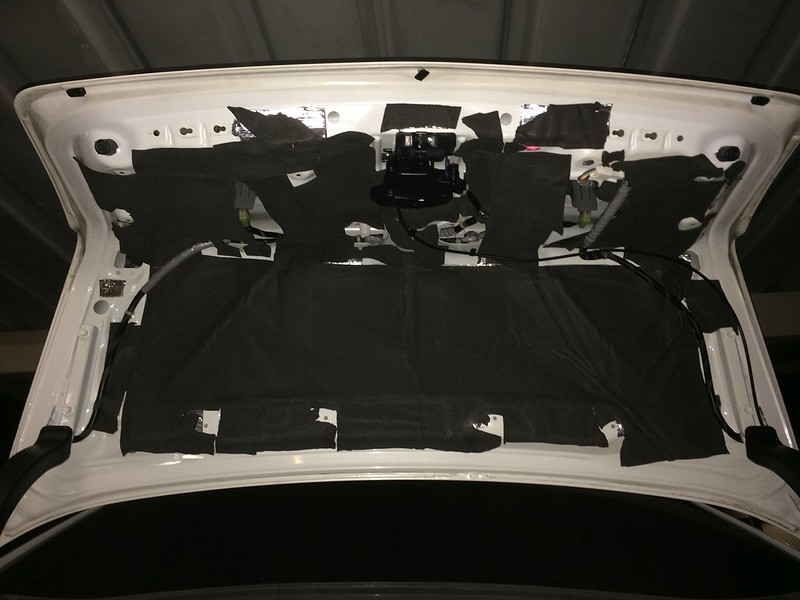
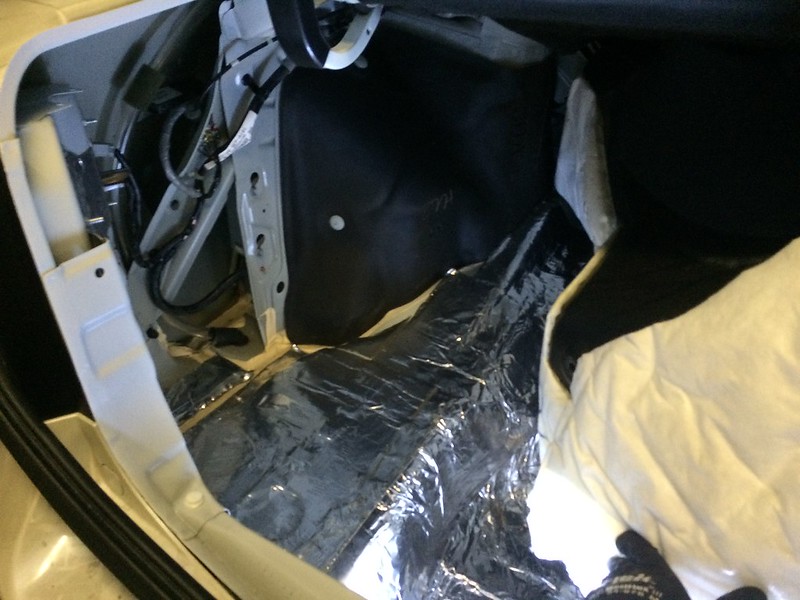
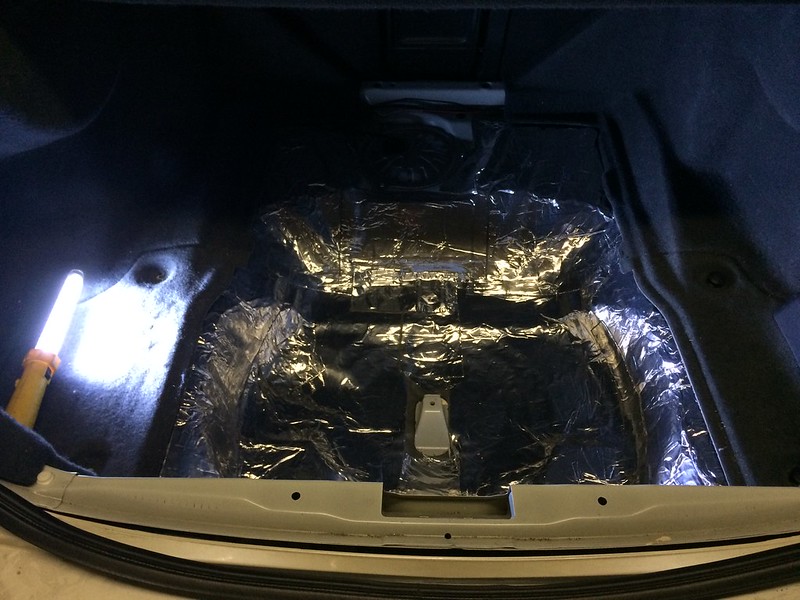
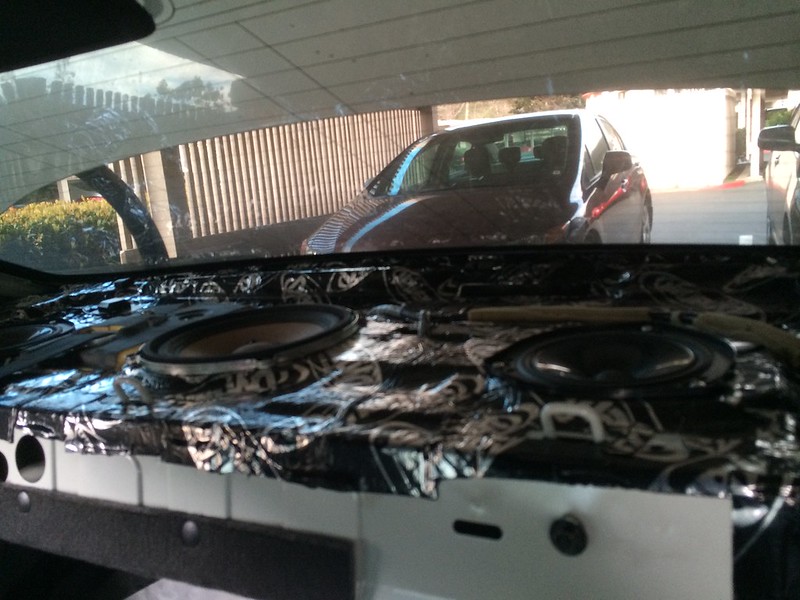
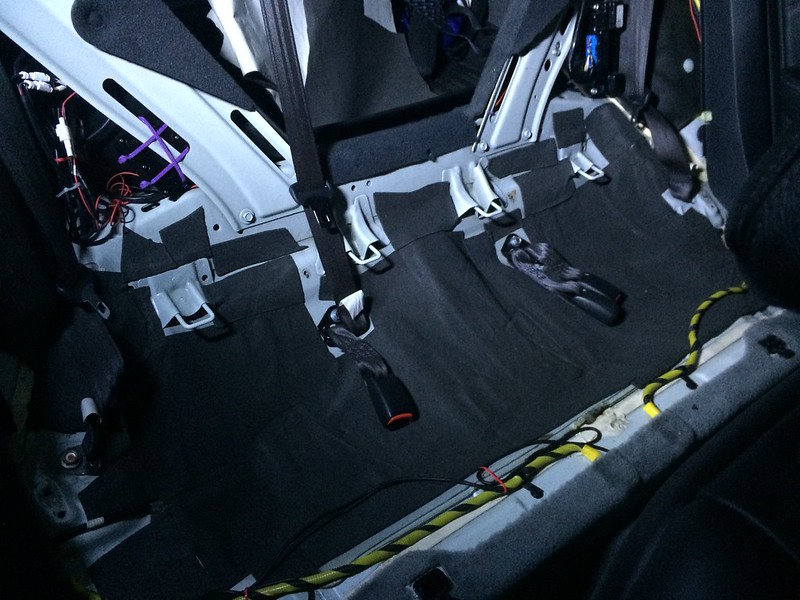
- sound deadener and ensolite foam on all doors, entire trunk, trunk lid, under rear seats, and rear deck
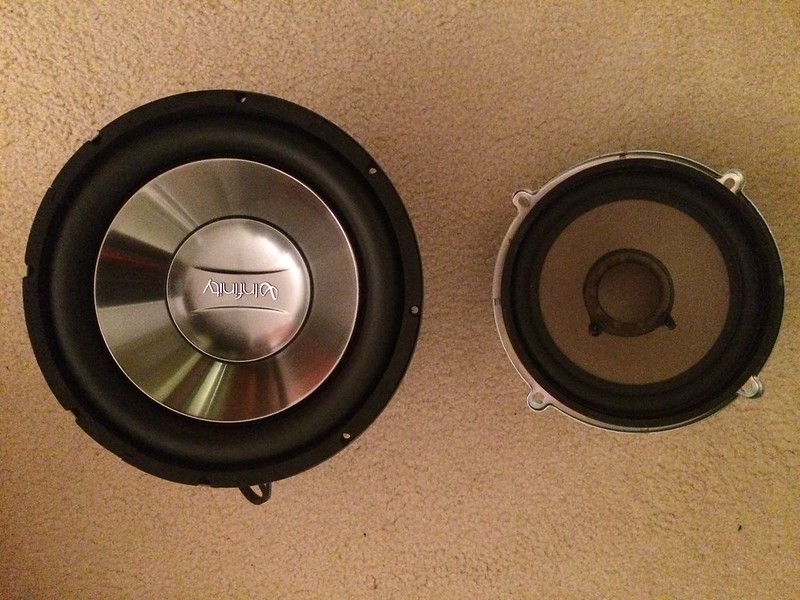
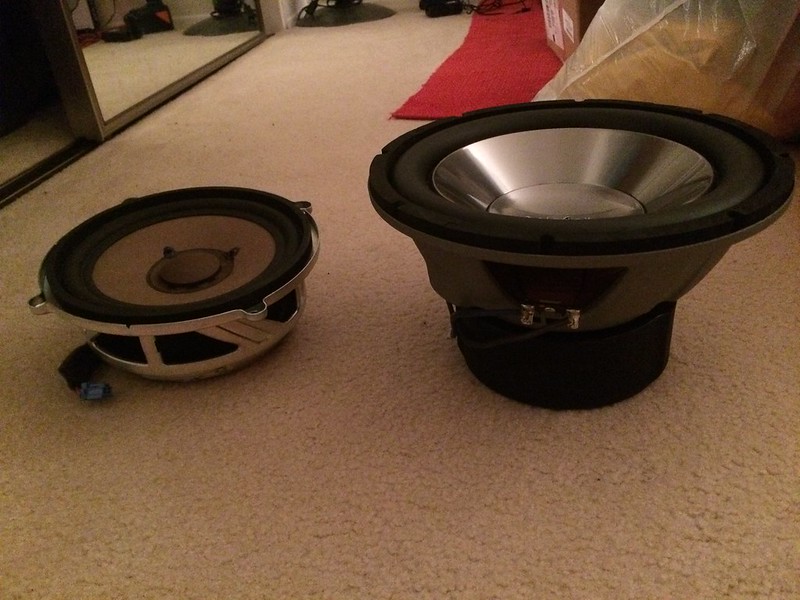
- 10" sub: infinity 1062w
- corner trunk sub enclosure by Markland Designs
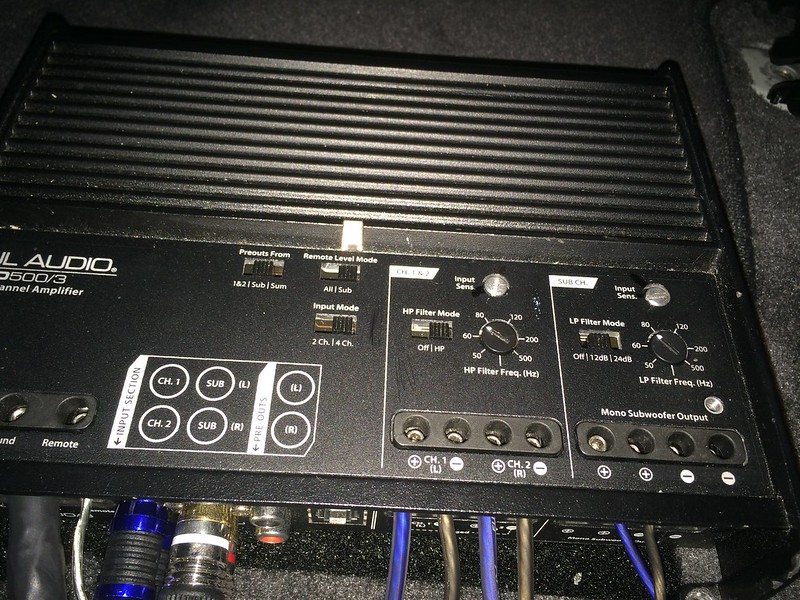
- JL xd500/3 amp
- hooked up sub with a PAC Audio SNI35 LOC to the oem sub signal after the oem amp
- hooked up front components (tweeters and mids) directly to head unit wires near oem amp
- reconnected new audio mids output to the wires coming out of the oem amp, so that i can utilize oem wiring all the way to the doors (then i used metra connectors to use stock door connectors)
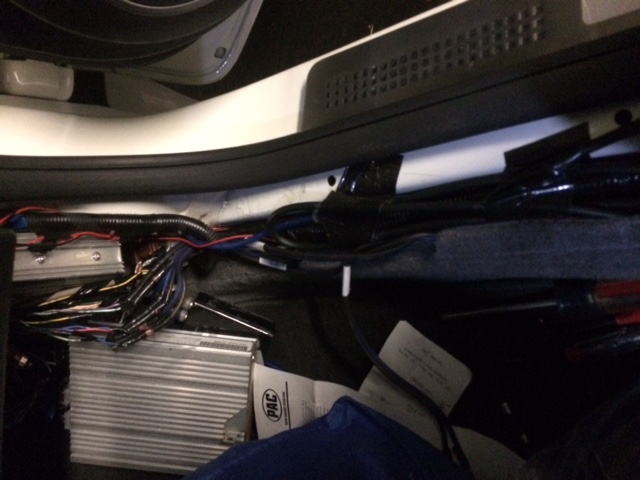
- crossovers are located under the passenger seat
- wiring for components: head unit --> aftermarket amp --> crossovers --> oem door wiring
- wiring for sub: head unit --> oem amp --> amp sub output --> pac audio LOC --> aftermarket sub
- rear fill is still stock speakers on stock amp
- ANC mics and control module were disconnected to prevent feedback from the sub
Sound Deadening and Ensolite
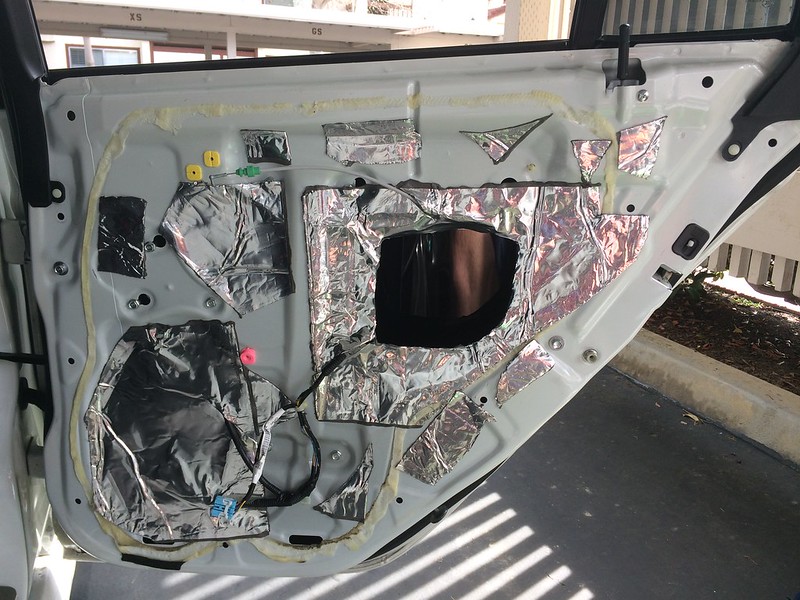
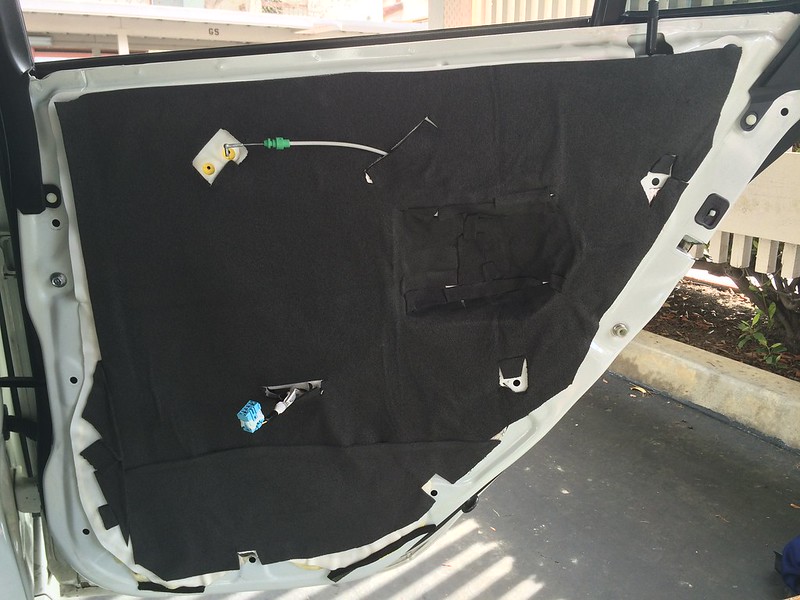
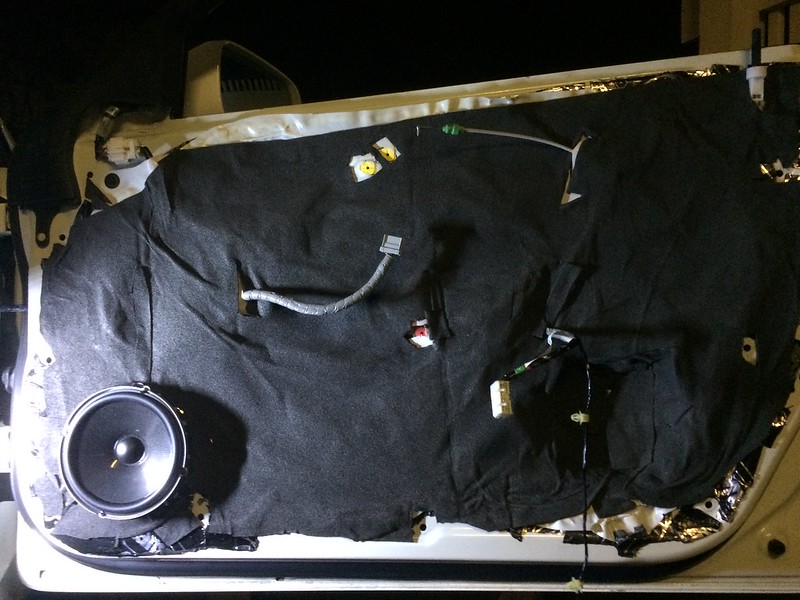
I wanted to do all i could to get the best sound out of my system so i covered all my doors in both sound deadener and also ensolite foam. this made a HUGE impact even on the stock system, enough that i did this to my wife's stock honda civic as well. outside noise gets cut down and the bass is more emphasized from the doors. i used material from raam audio, which was a good value for the price compared to the bigger names. i also added sound deadener and some foam to the rear deck, trunk, trunk lid, and some under the rear seats.
Sub
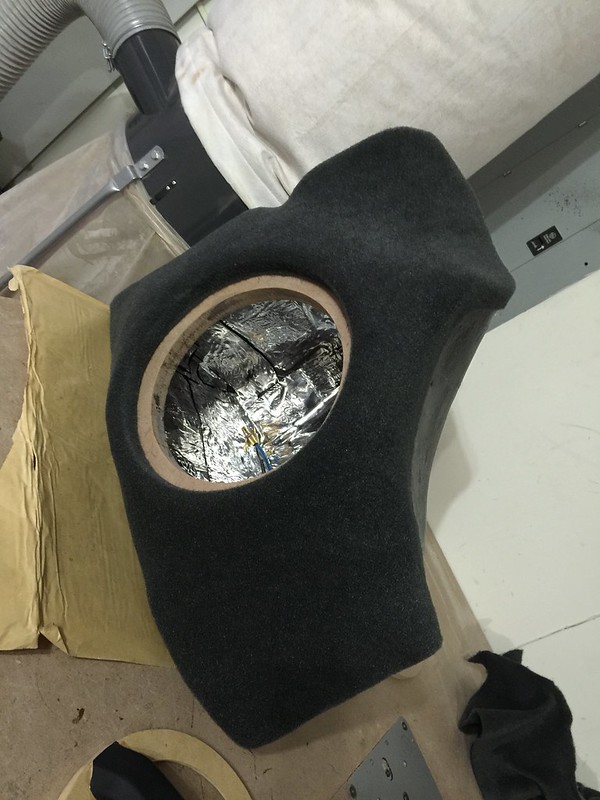
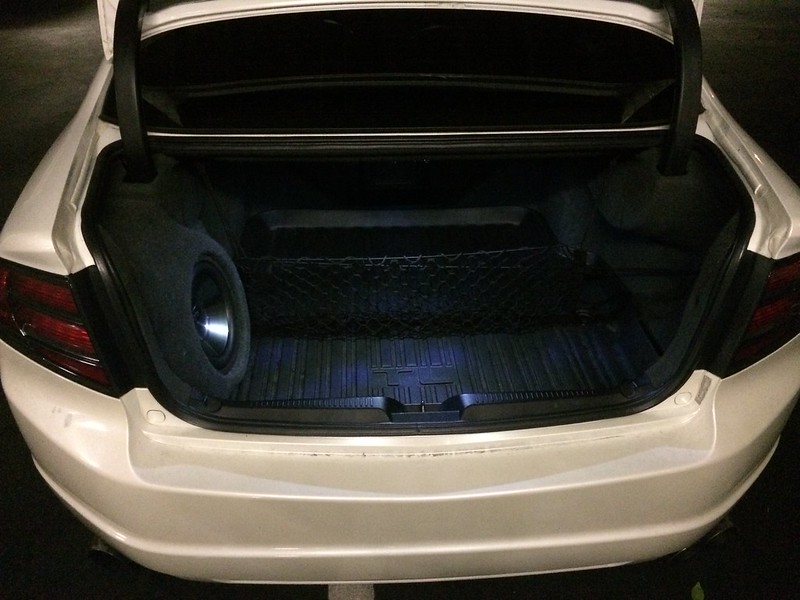
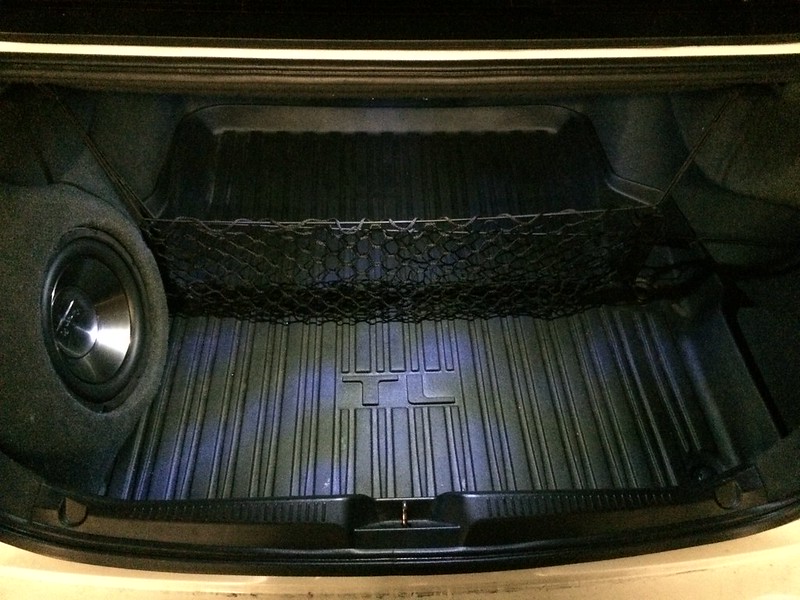
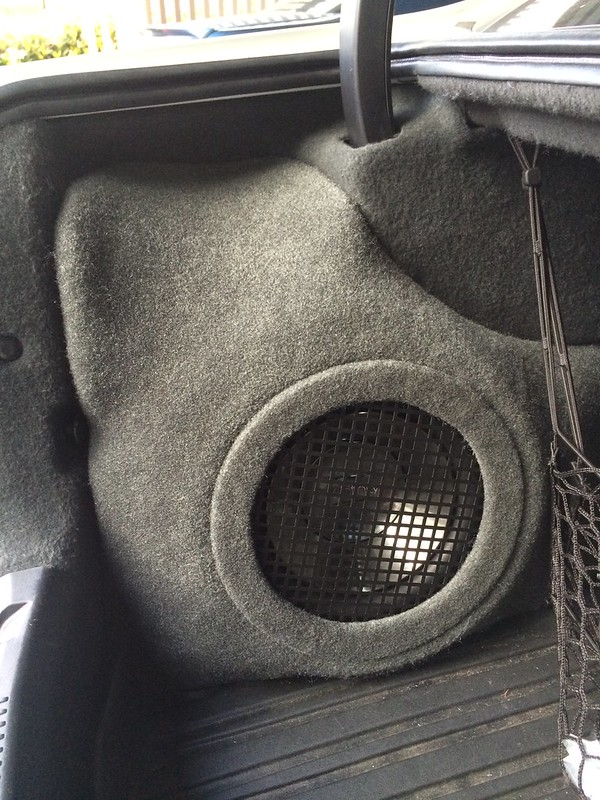
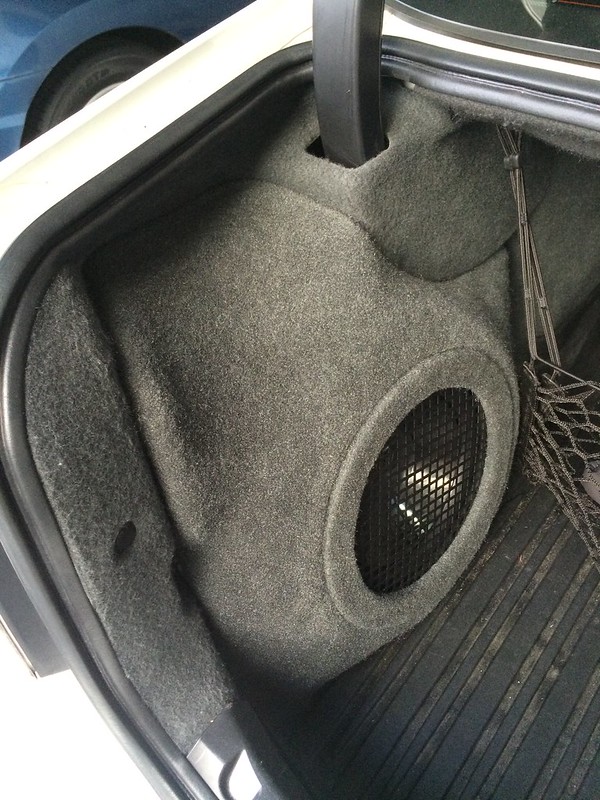
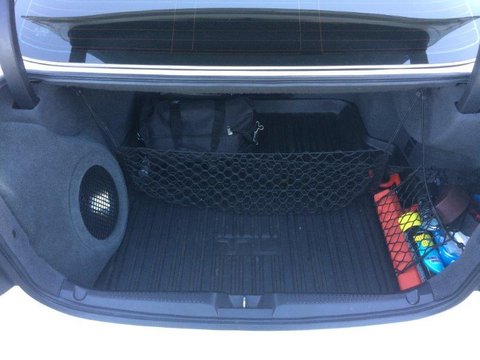
I had to keep my trunk fully functional (one of my wife's - i mean my - requirements) and i didn't want anything too bass heavy, so i opted for a 10" corner trunk enclosure. i kept my eye out for a wickedcas enclosure but they were too expensive and finally found a good middle ground by getting one from Markland Designs. It's a trunk enclosure he made and a few members on here have them, and even though it's built super super well and matches the carpet, the price was very good even with shipping from Georgia to California!
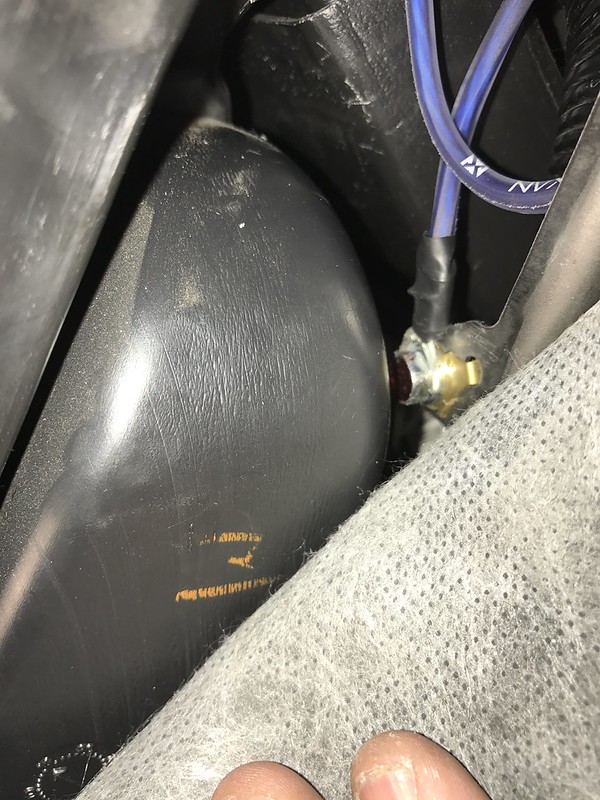
next i had to figure out how i wanted to mount the sub into the enclosure and then the enclosure into the trunk so it can't be easily stolen. i found a document online that told me how to install the enclosure so that it would take lots of effort to be stolen. basically you use an existing threaded hole (for the cargo net) and add in a bolt and rubber/metal washers. then you use a nut from the inside of the enclosure to lock it down to the trunk....very robust!
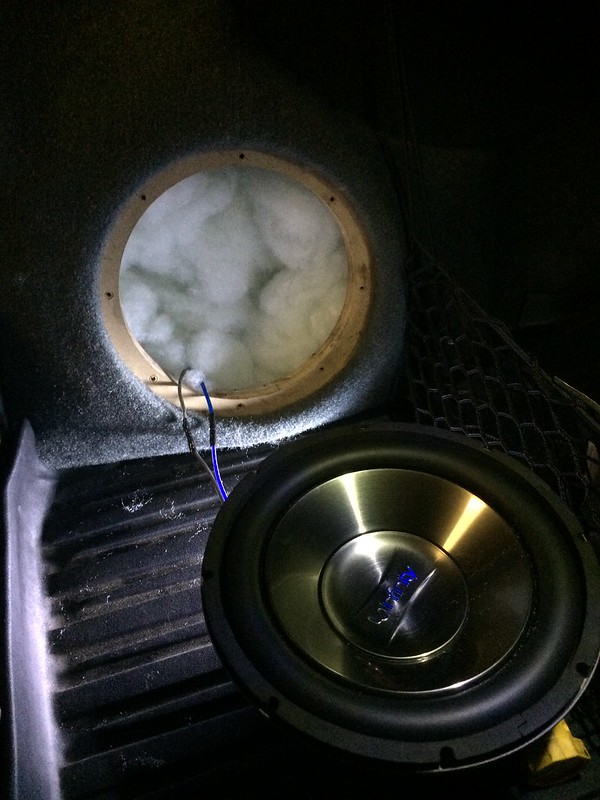
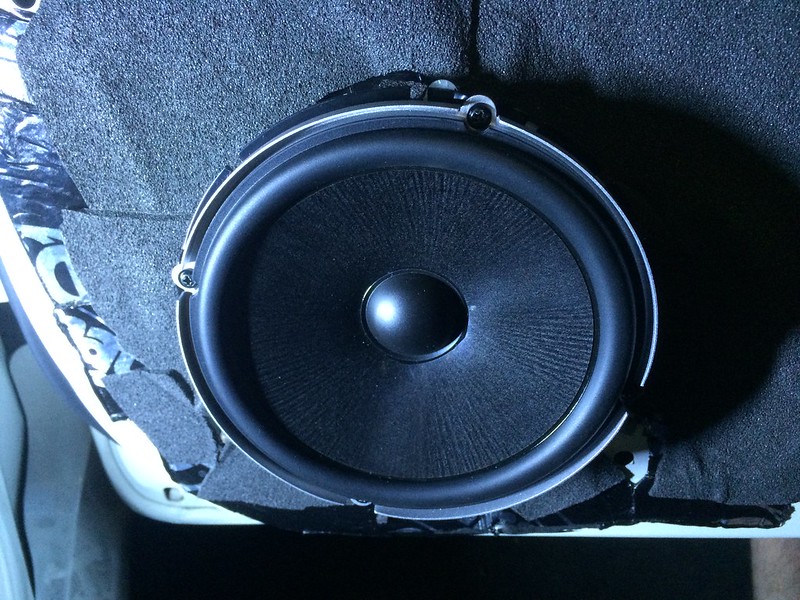
quick test fit to make sure the sub was fitting right
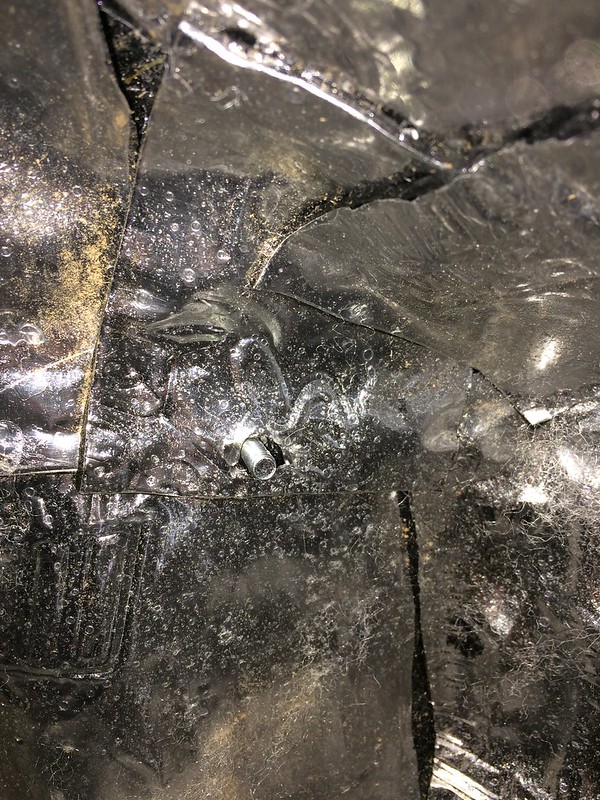
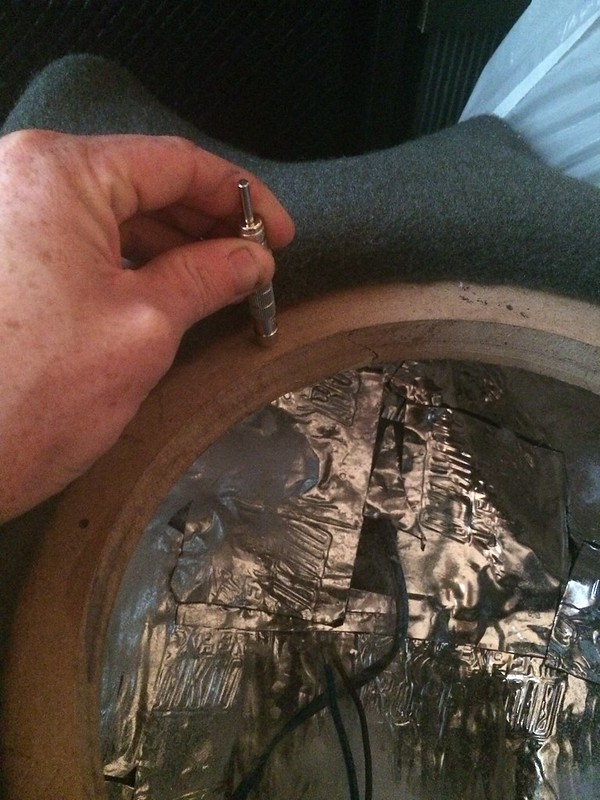
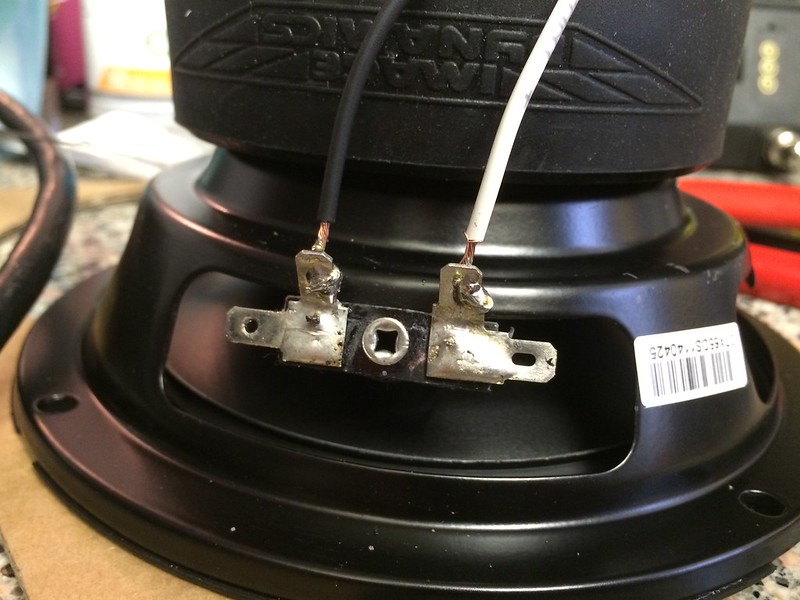
pulled the wiring through the carpet so that i can solder it to the sub
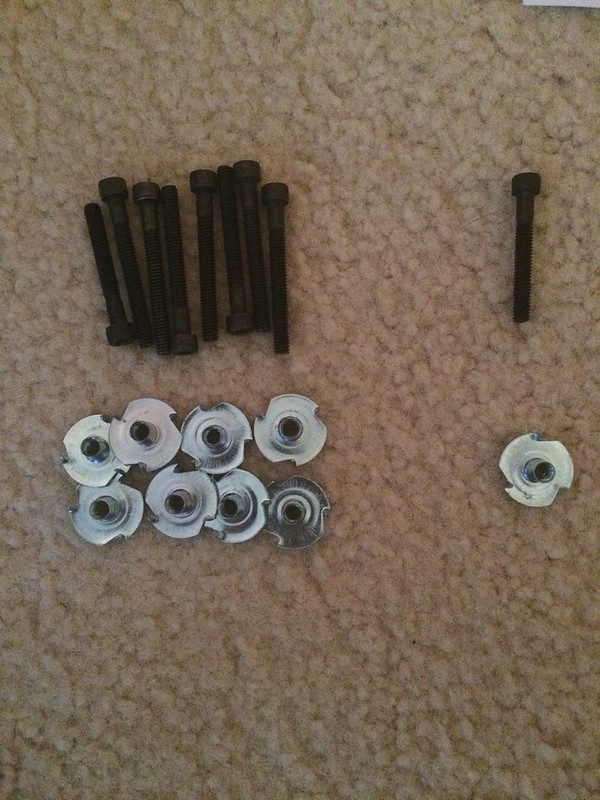
i used some t-nuts to mount the sub to the enclosure
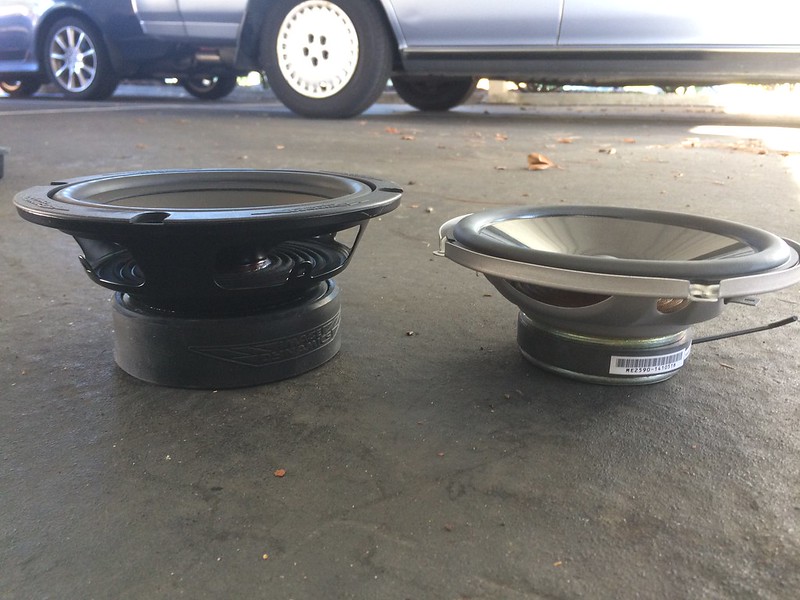
oem sub on left (removed after new sub install), infinity 1062w on the right...huge difference!
added polyfill to the enclosure
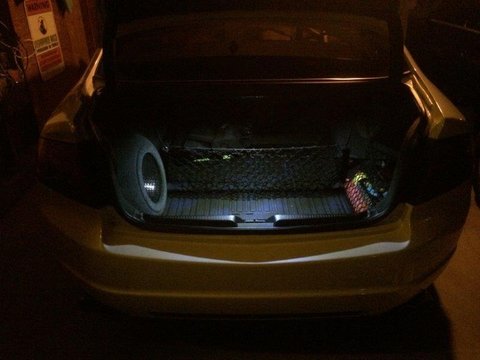
sub installed and trunk mat put back into place! (without grill protector in place)
added a basic grill to protect the sub since my trunk needs to be functional. i just used silicone sealant to keep everything together under the carpet lip
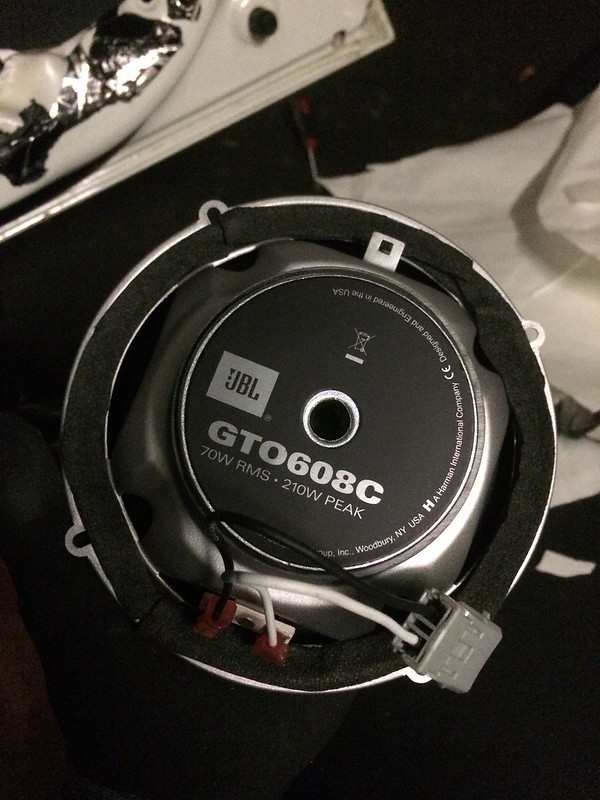
Front components - JBL GTO608C (before being replaced)
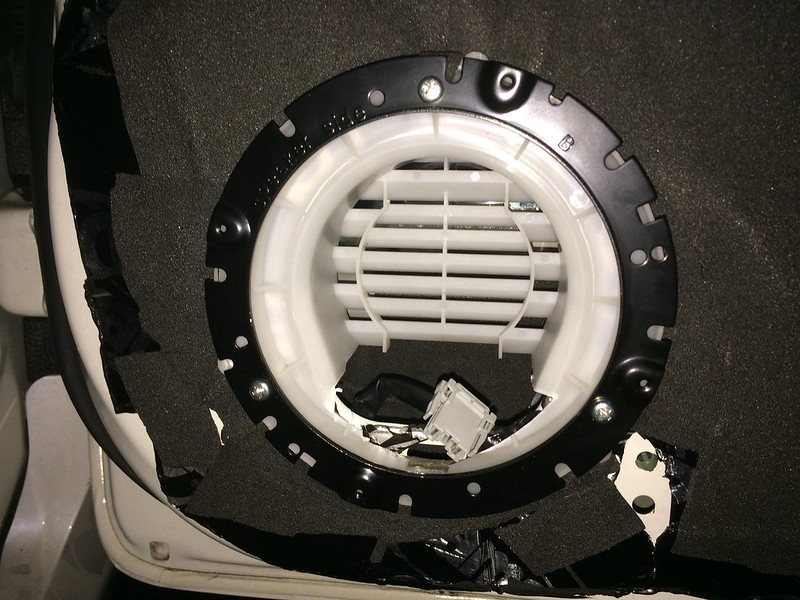
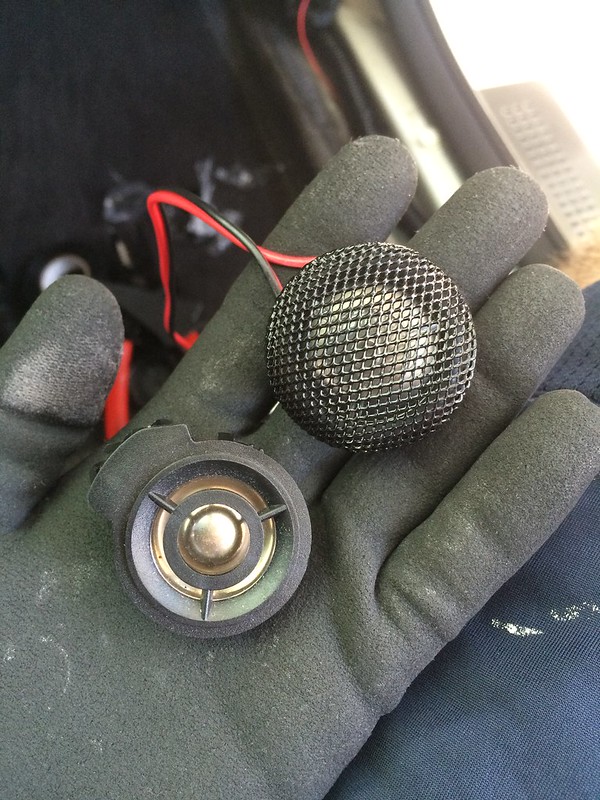
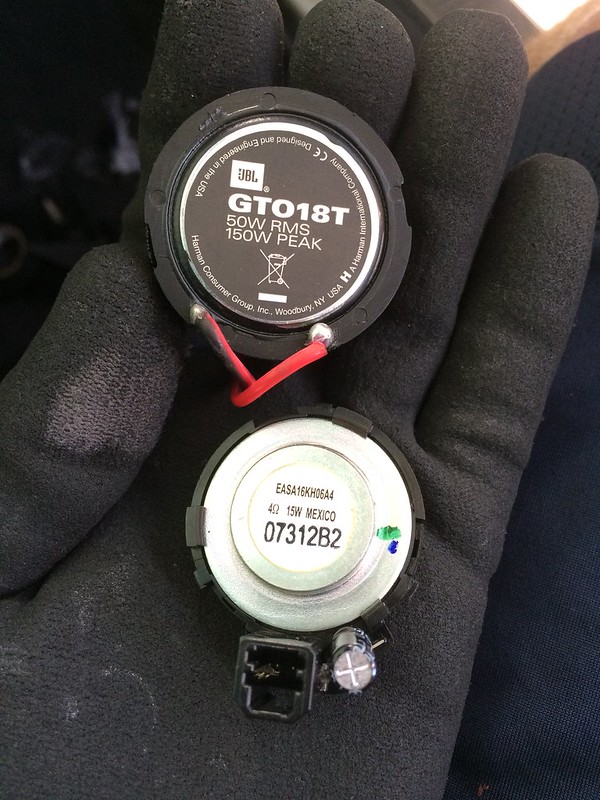
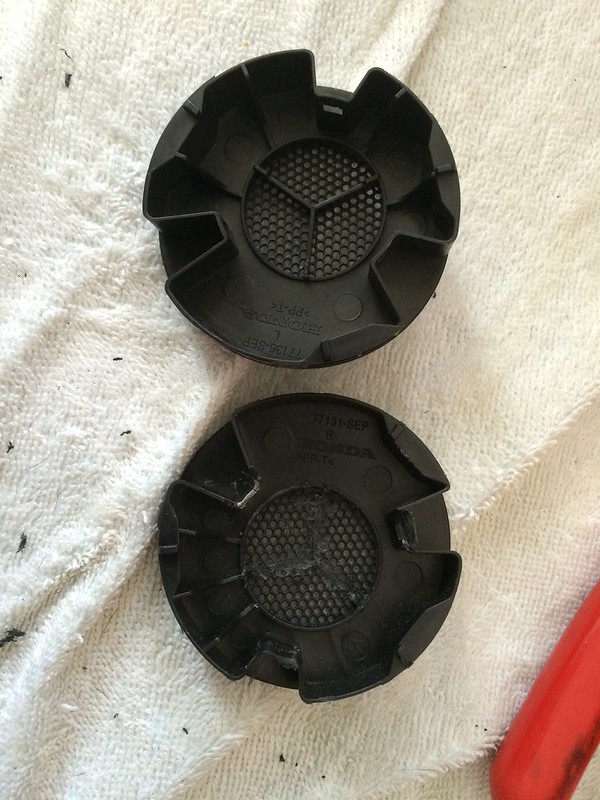
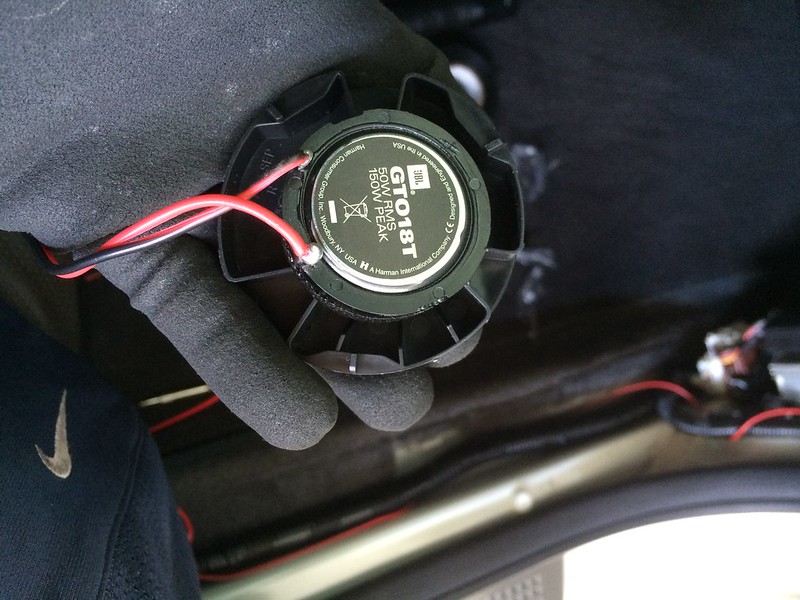
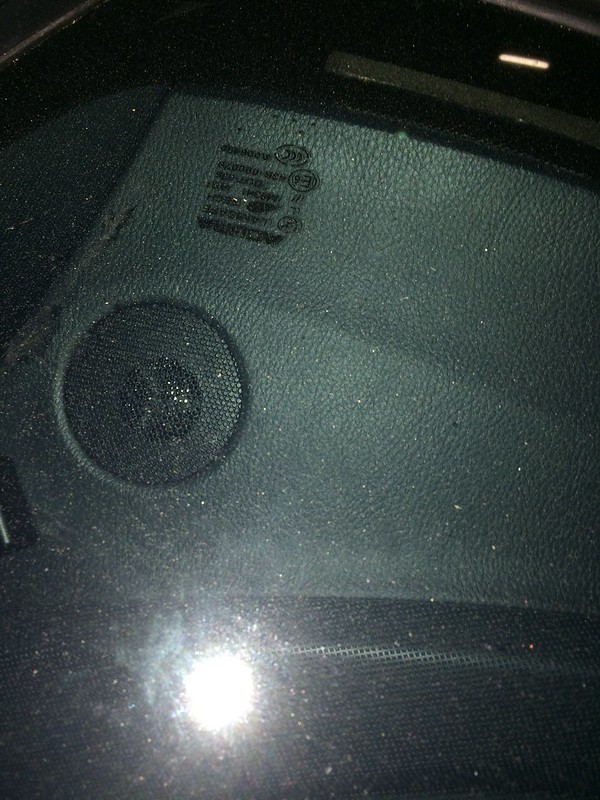
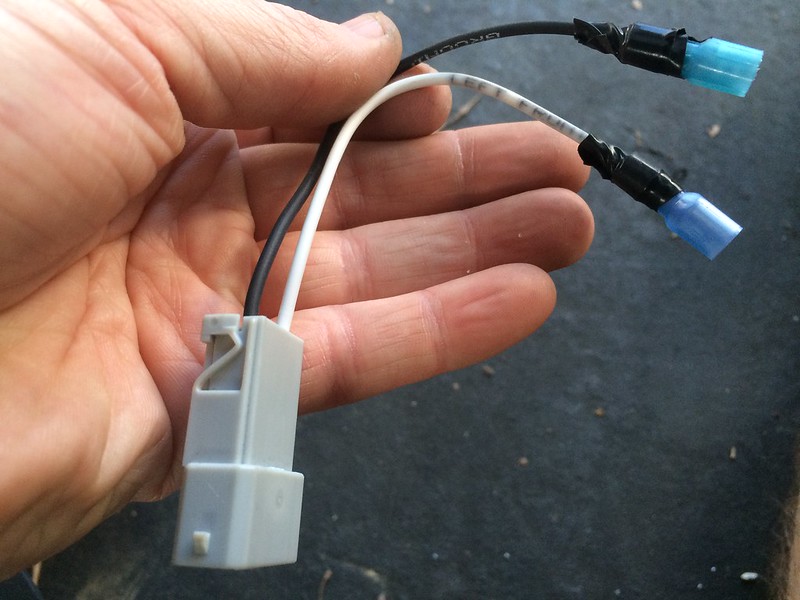
At first this was truly a budget build and i went with some cheap JBL GTO608C components, mainly because this was my first build and i wanted something that was nearly plug and play with the stock door location. the JBLs are nice in that you only need to slightly modify the stock white plastic bucket for the wire connectors (see second picture where the white basket is open on the bottom). Other than that, it's truly plug and play with all oem mounting hardware. for the oem tweeters i had to shave off the underside and use some adhesive to get the tweeter to stick to the oem grill
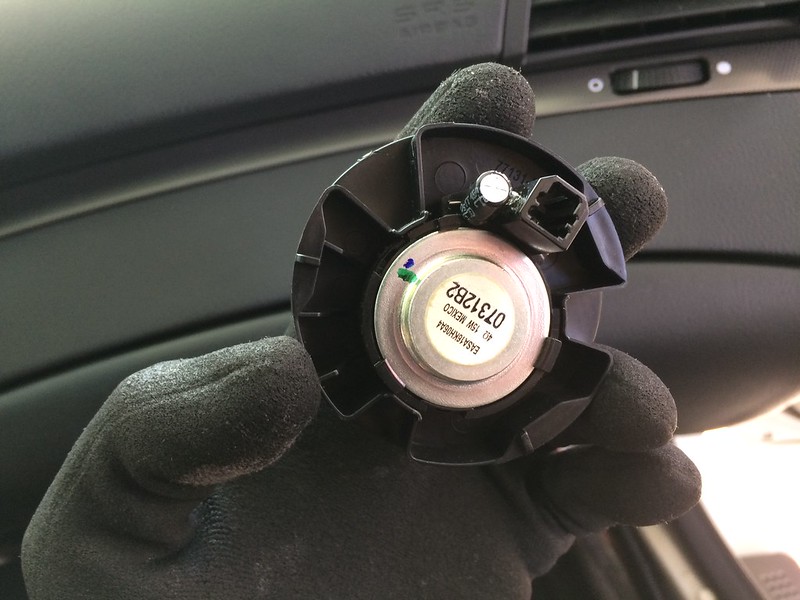
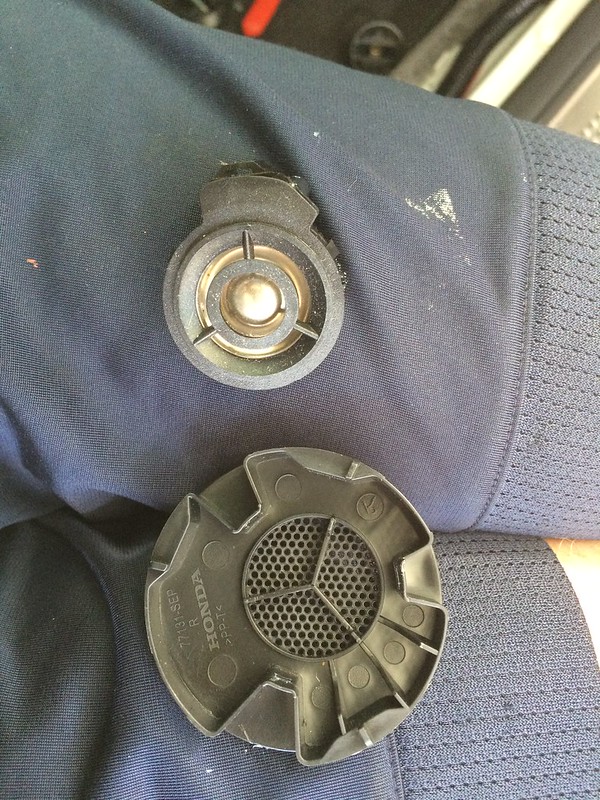
oem tweeter
oem wire to tweeter
oem tweeter removed from grill
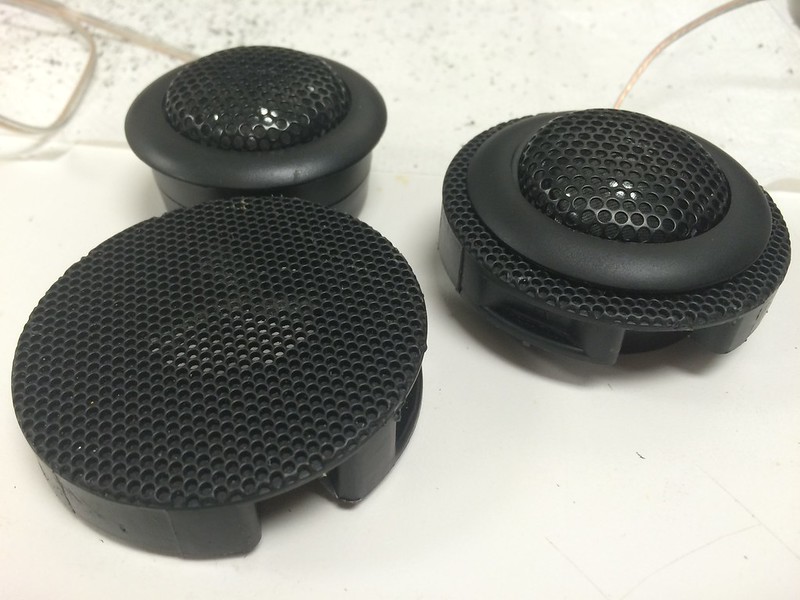
JBL tweeter on left, oem on right
shaved underside of oem grill to fit JBL tweeter flush
JBL tweeter glued to the oem grill
JBL tweeter with oem look (oem grill)
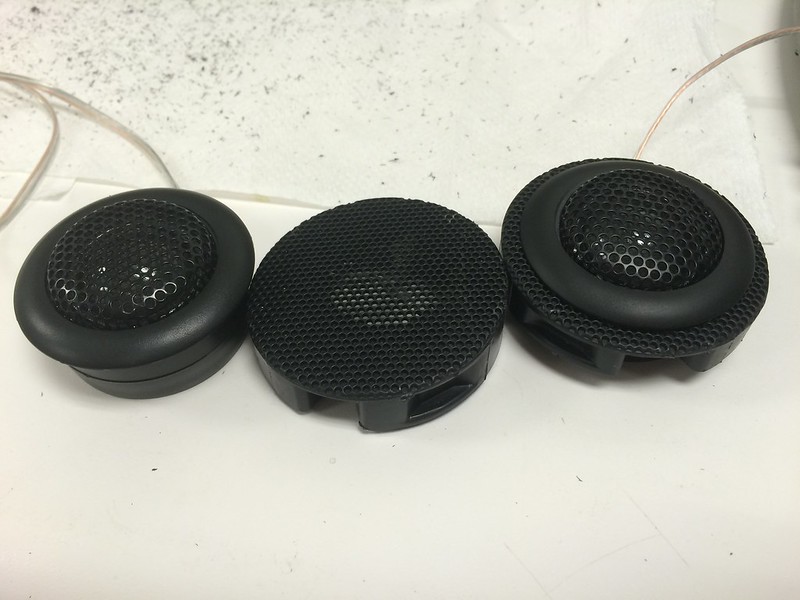
Front components - Image Dynamics CTX65CS (sound amazing)
However, i kept reading about the image dynamics and how great of a value they were, so around black friday i found a deal i couldn't pass up and decide to go for them. i figured now is a time to learn how to modify doors to fit speakers haha
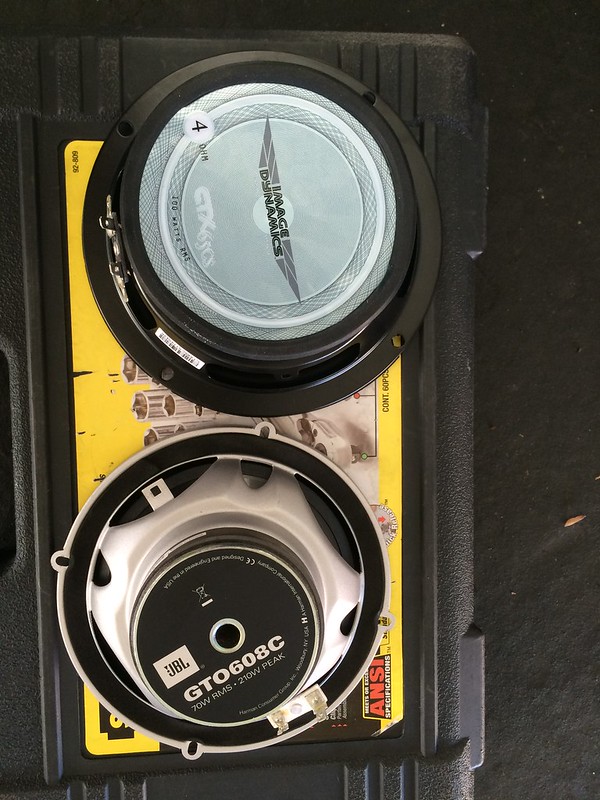
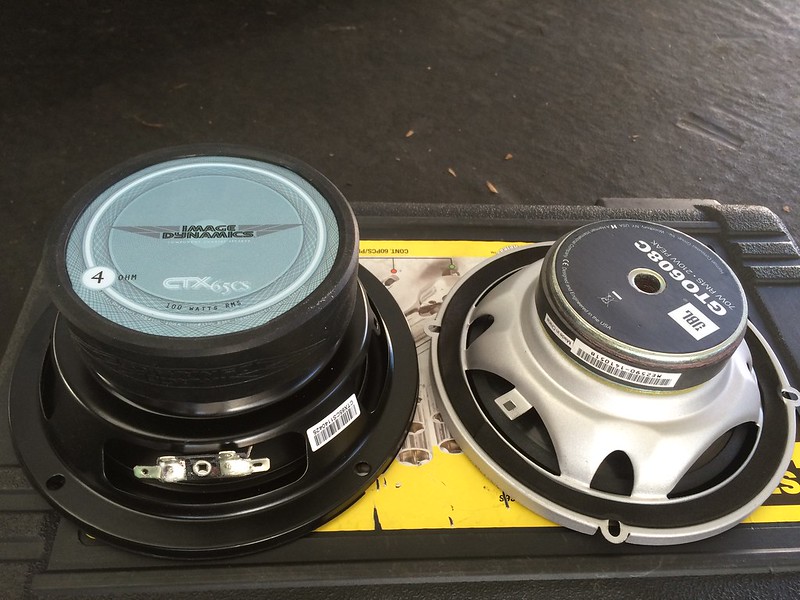
you can see how much bigger the magnet is for the image dynamics on the left compared to the JBL on the right (and the JBL was already bigger than the stock speaker!)
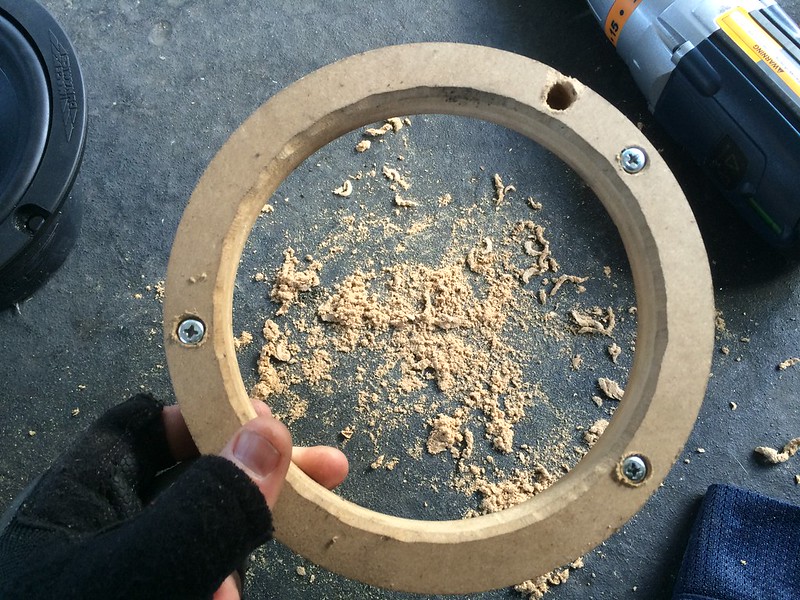
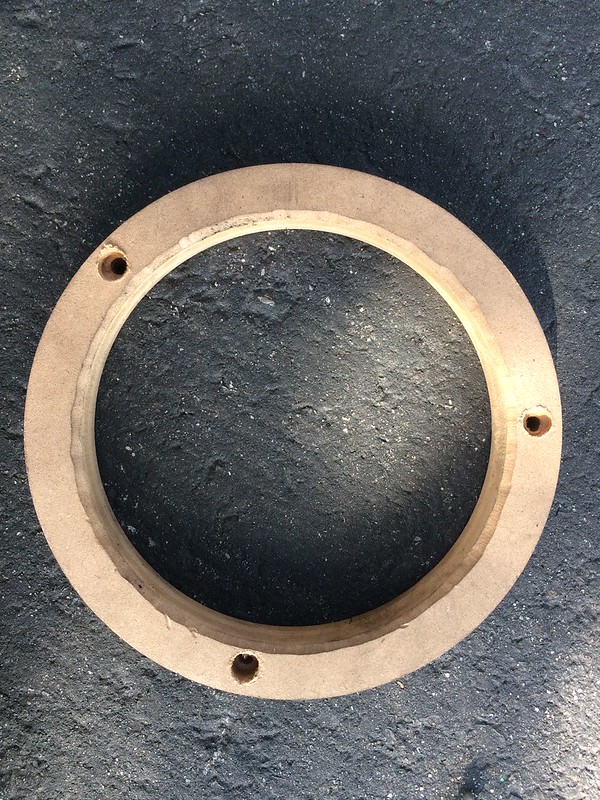
doing research, i found i would need 3/4" spacers for these speakers. i purchased some 3/4" ebay spacers and drilled my own mounting holes and shaved it to fit the new speakers
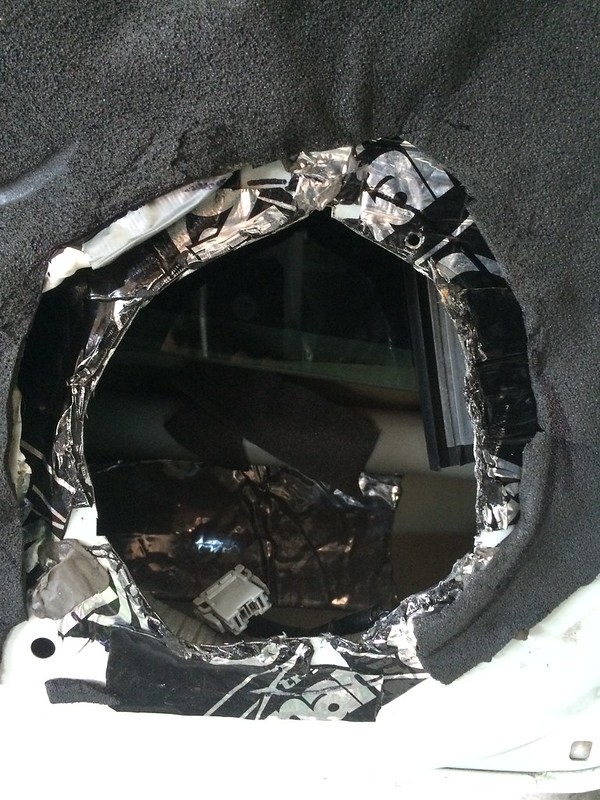
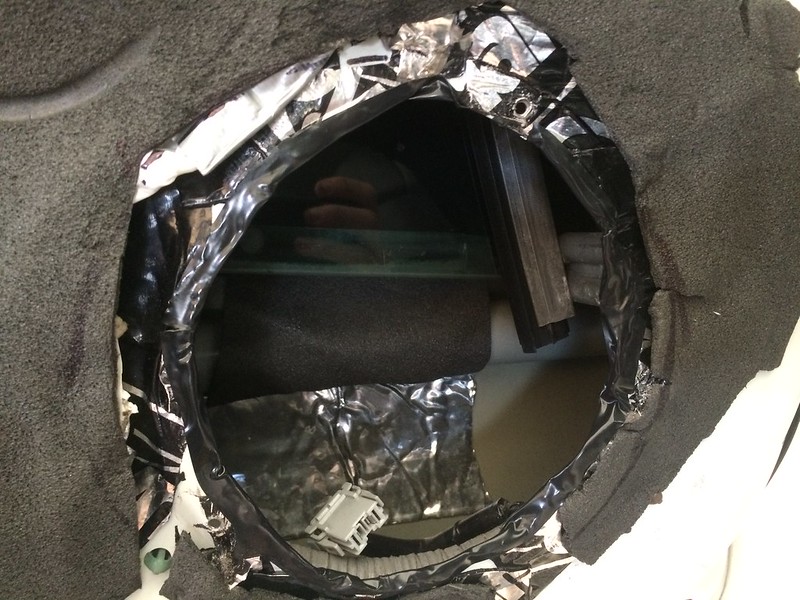
i then bought some cheap sheet metal shears at home depot and cut a larger opening in the door (now we're talking!) i also used a dremel to make the sharp edges a little duller from where i cut (wear gloves!!)
i then shaved down the door panel so that it wouldn't interfere with the speaker. a razor blade easily cut off most of the plastic
drilled the mounting locations
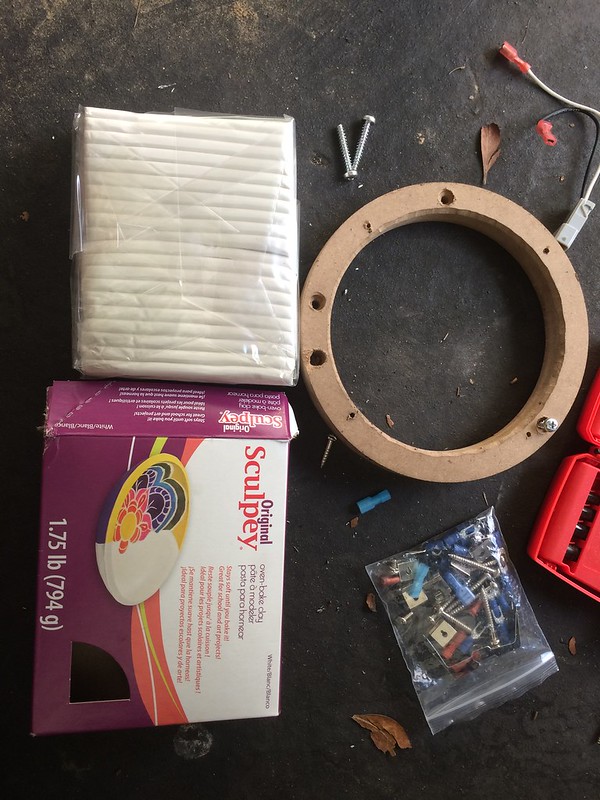
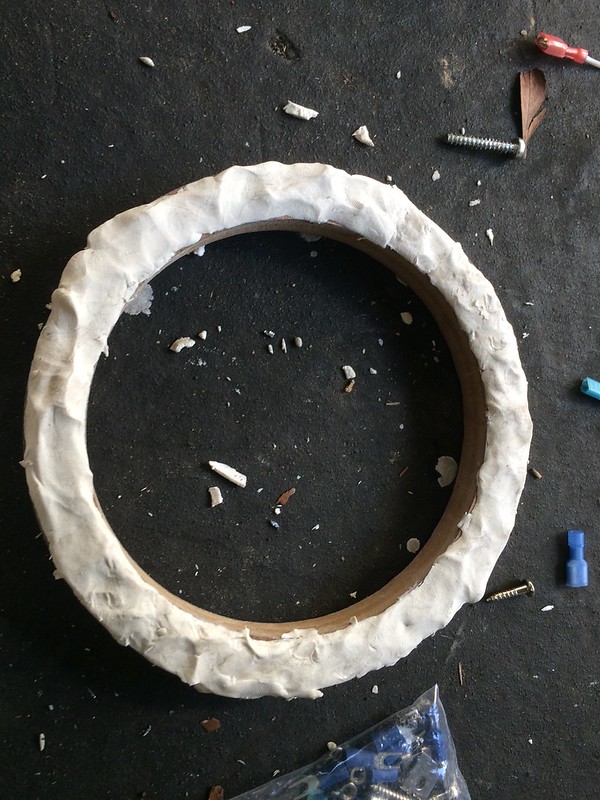
i did some more research and wanted to seal in the sound waves as much as possible, so i purchased some molding clay locally and sealed in the entire speaker perimeter.
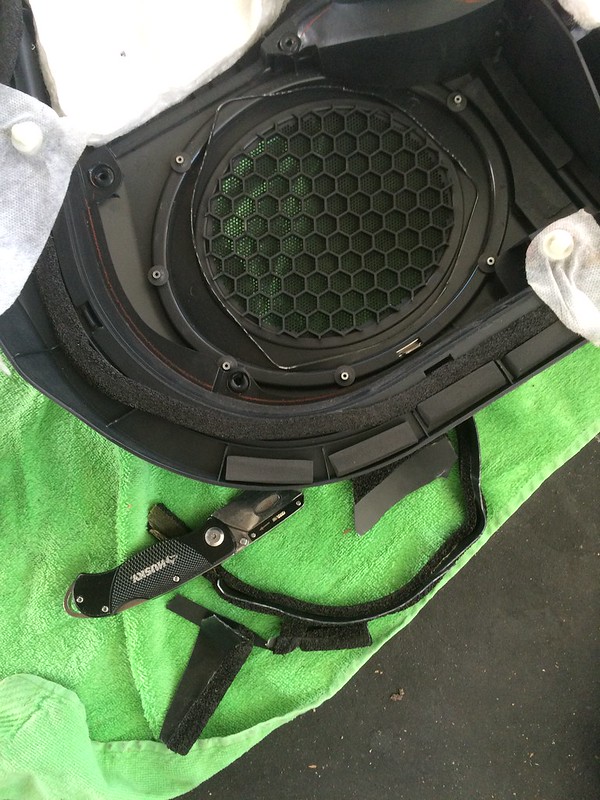
test fit
some more clay to seal in the waves
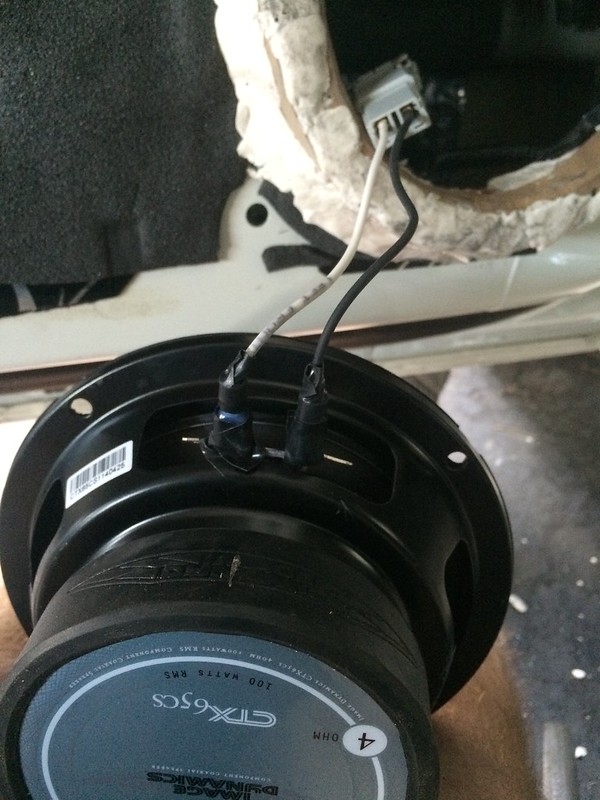
then i soldered some metra connectors to mate up with the oem door speaker connectors
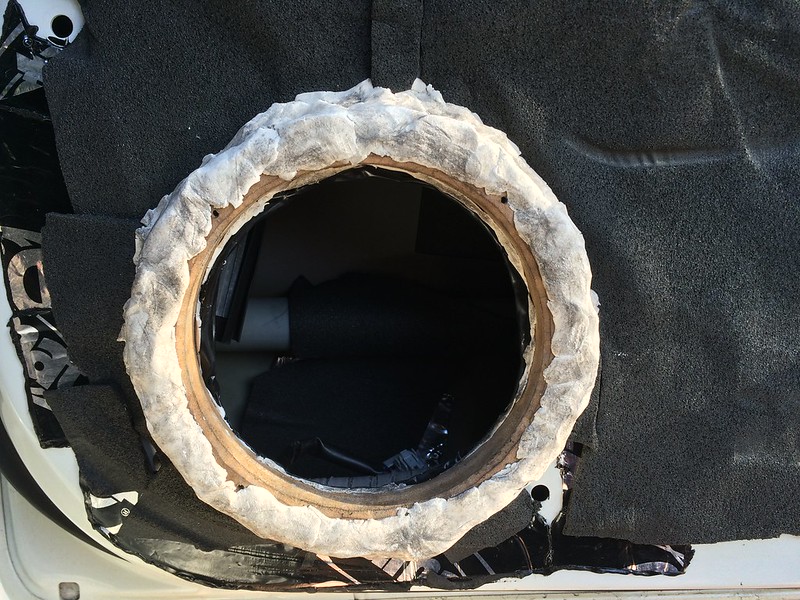
all installed with more molding clay!
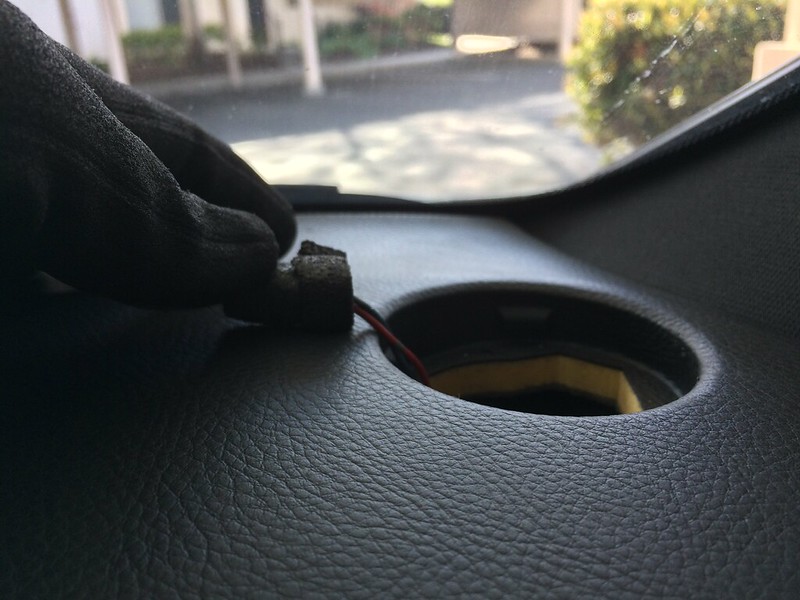
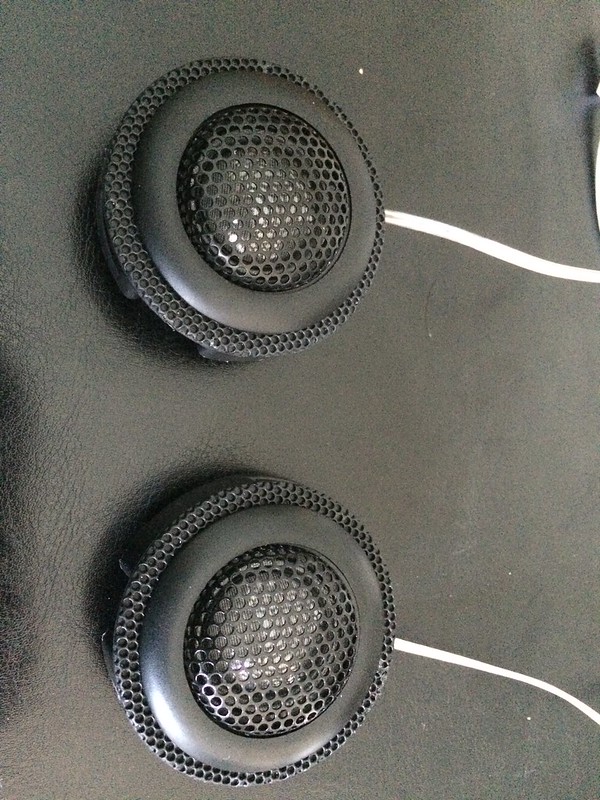
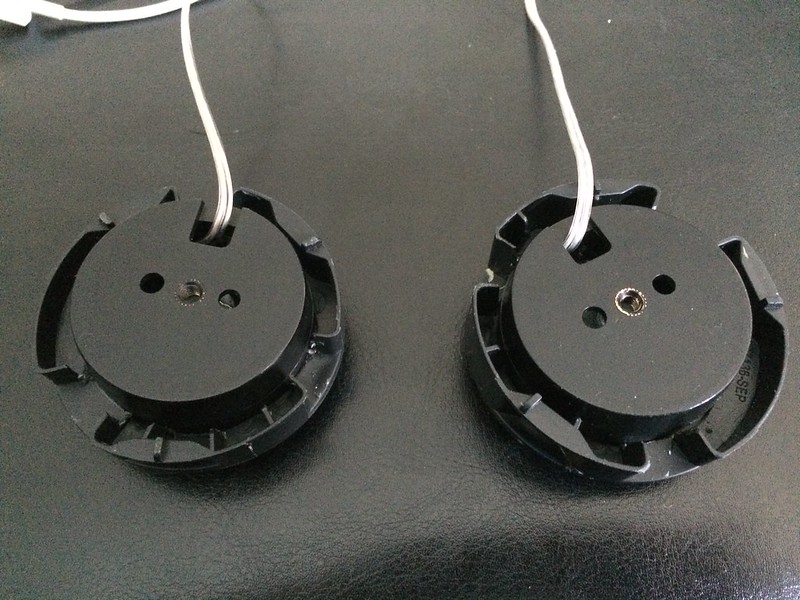
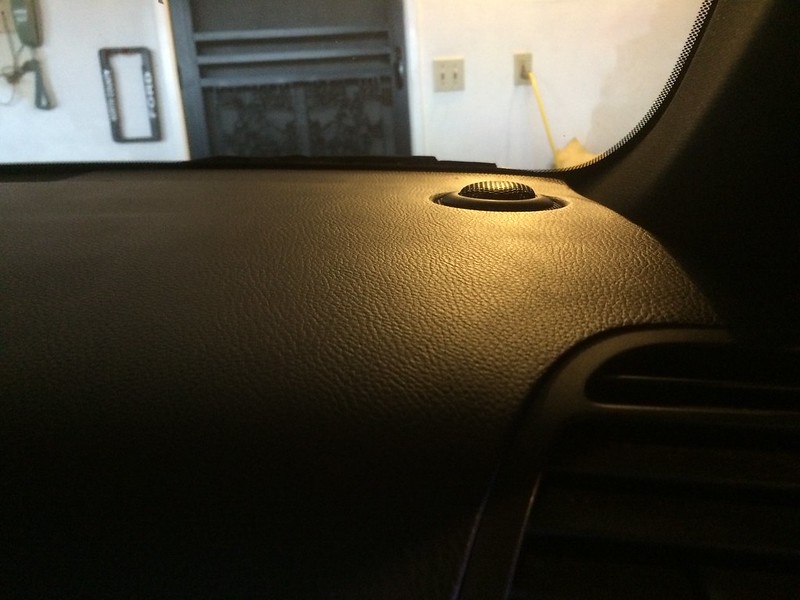
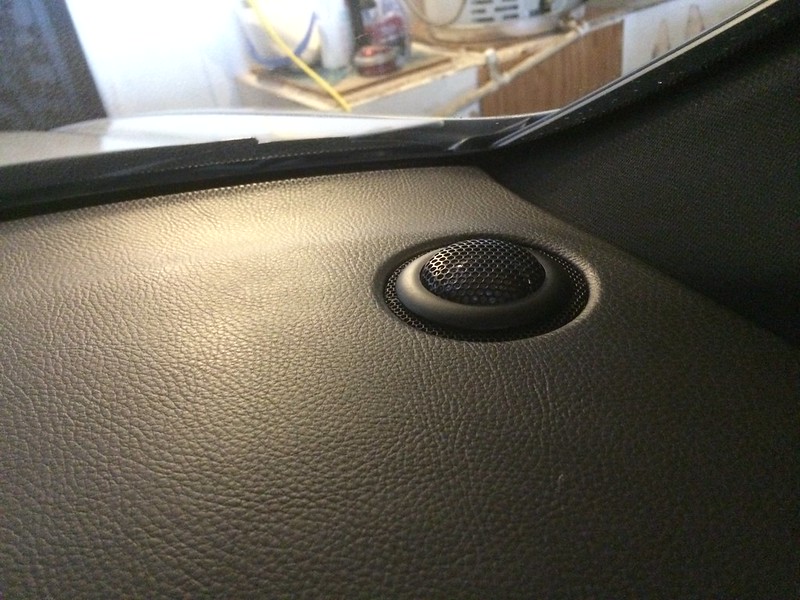
next came the ID tweeters. this time i didn't want to glue them to the underside, so instead i cut a hole in the middle of the oem grill and popped the tweeters in from above. looks close to oem but not all the way
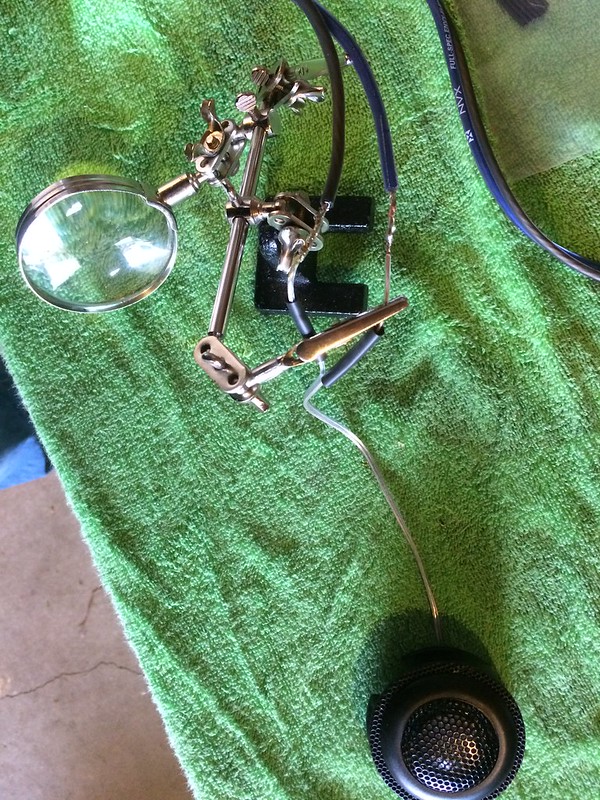
i soldered new wire leads to the tweeters and dropped them down from the hole in the dash to the wires below
Wiring
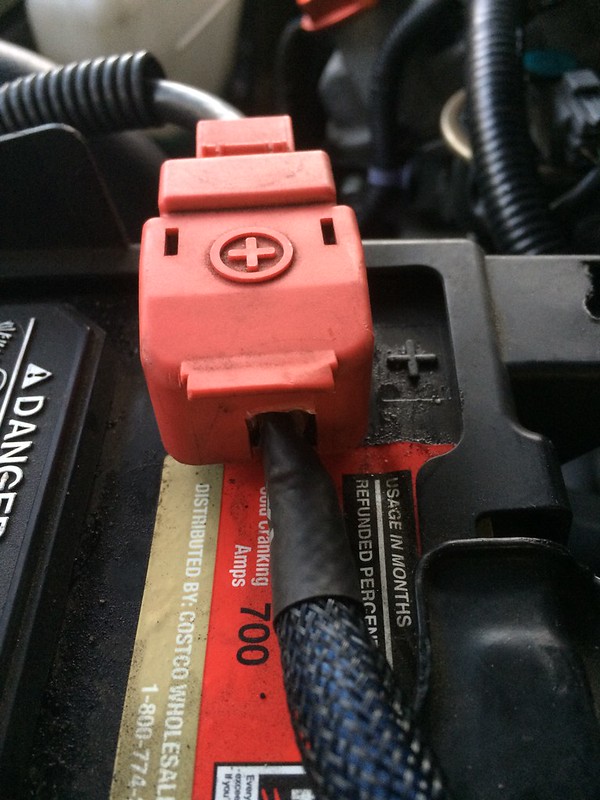
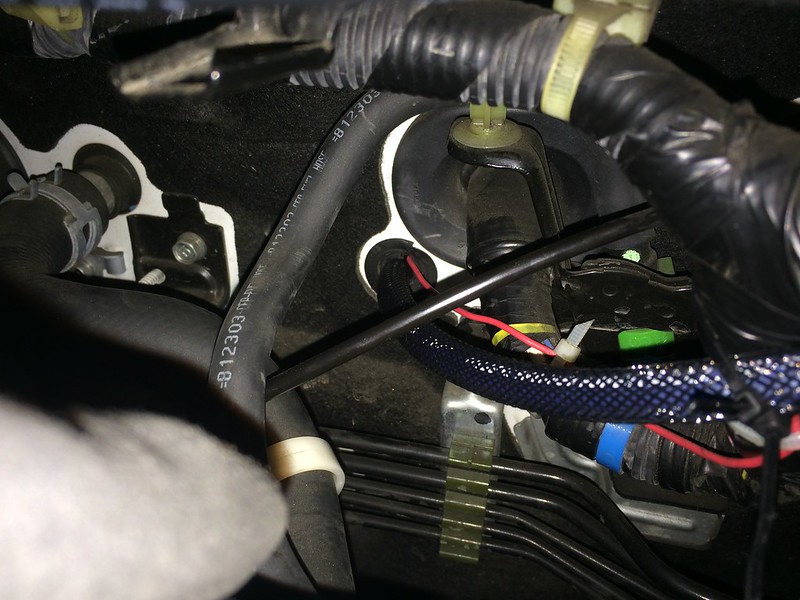
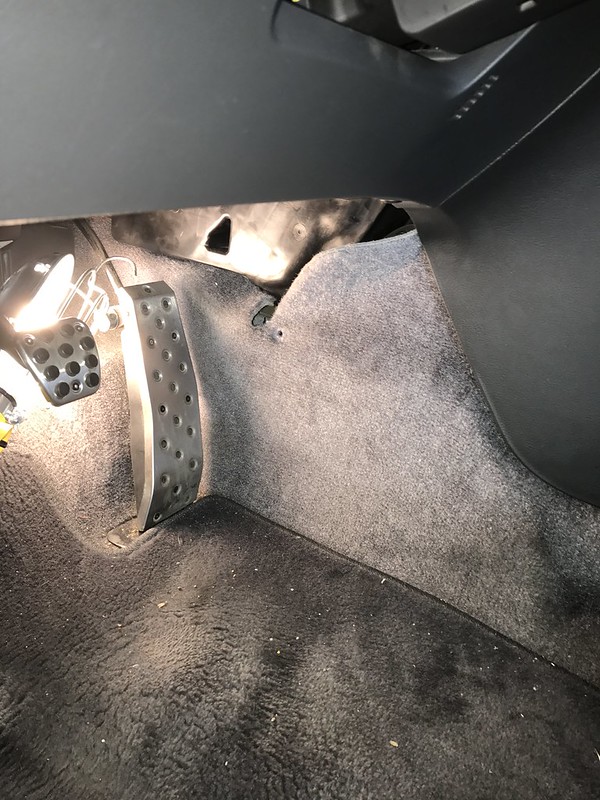
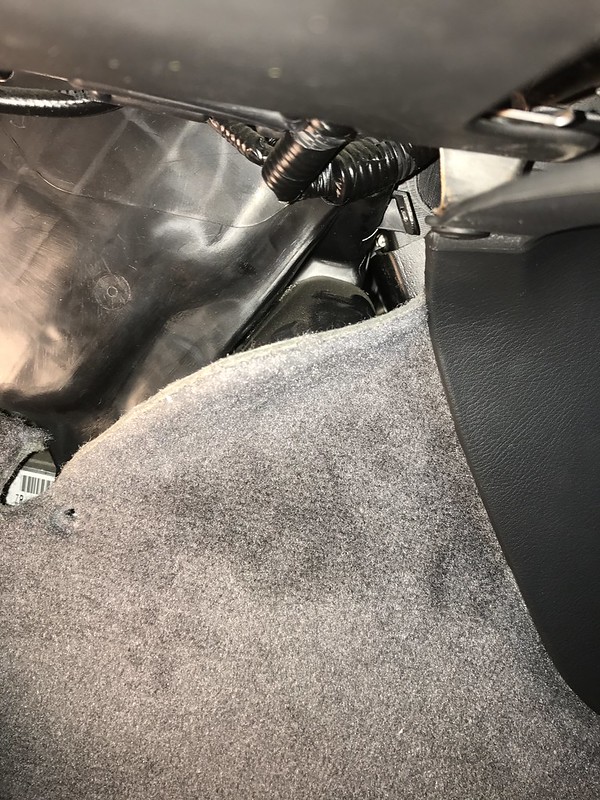
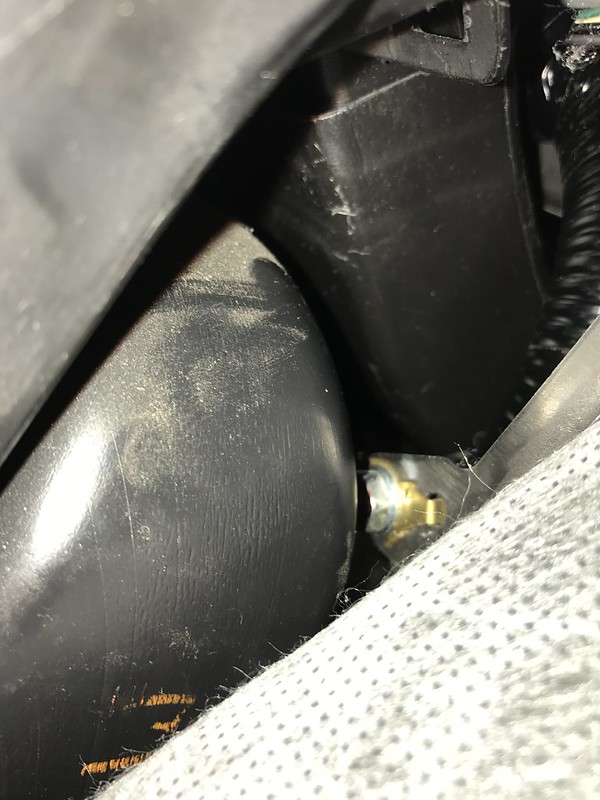
i routed my power wire from the battery through the engine bay and through the firewall in the middle of the car
cut a slot in the oem positive connector cover
pulled the power wire through with a coat hanger
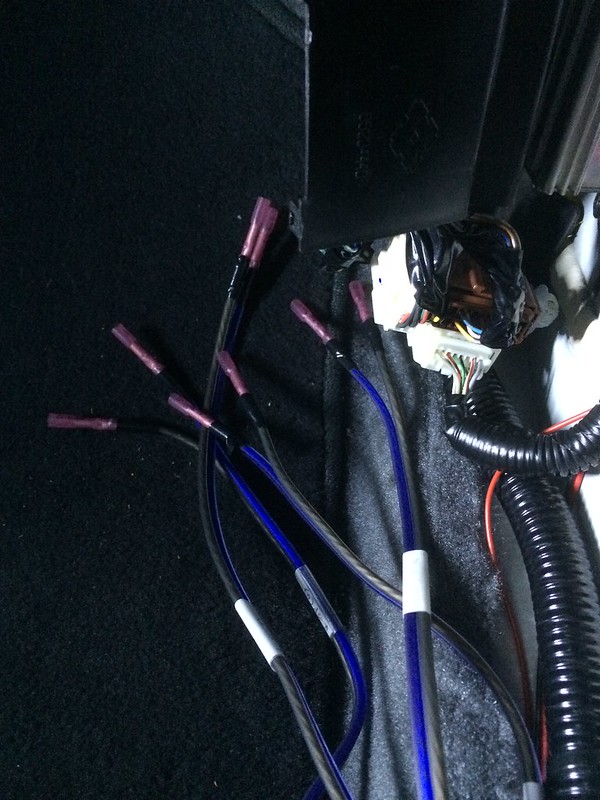
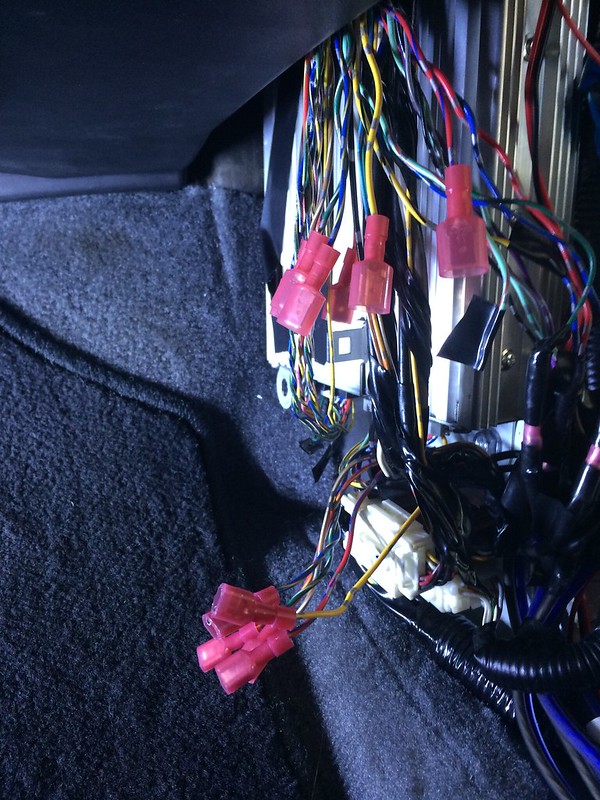
I cut all my wiring at the oem amp location.
prior to soldering it all together
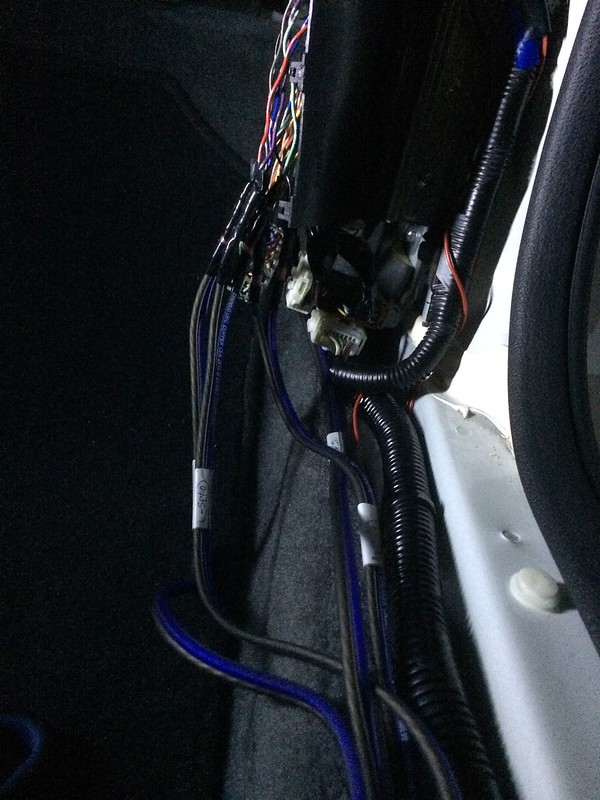
ran the wiring down the side of the car
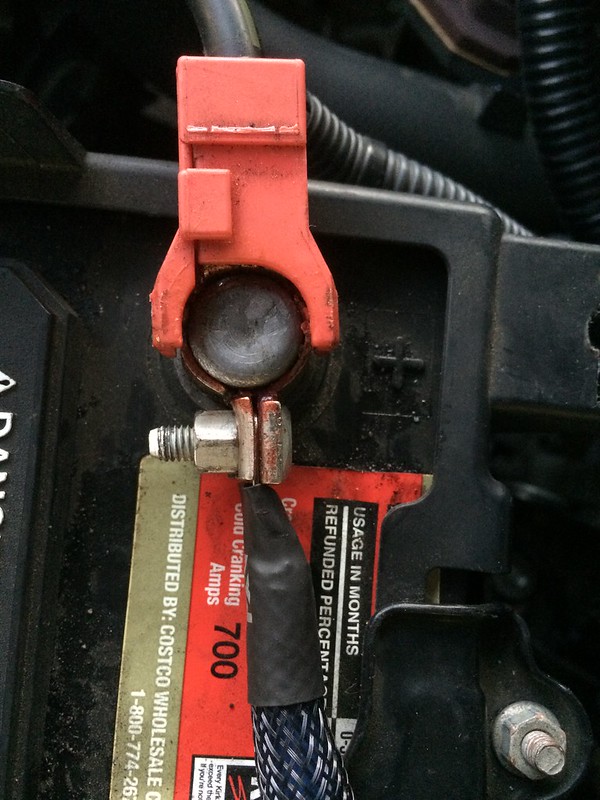
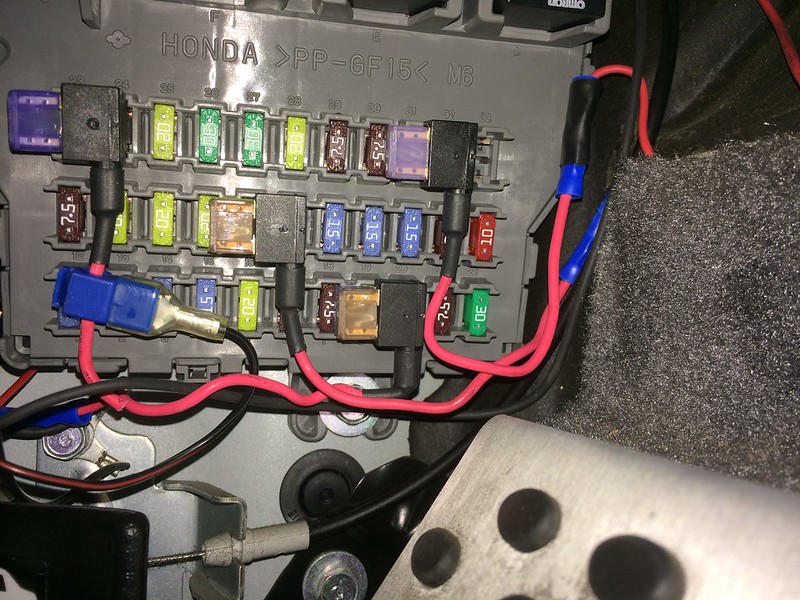
aftermarket amp remote turn-on installed with an add-a-fuse
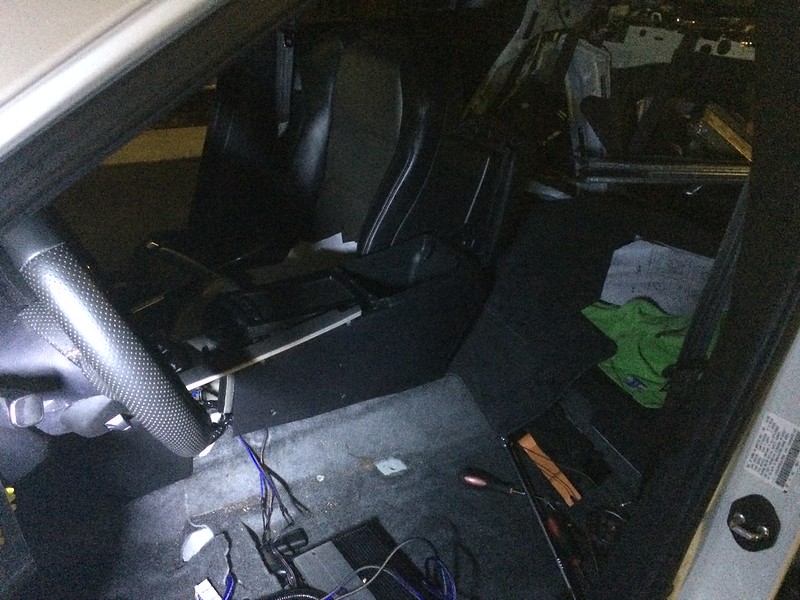
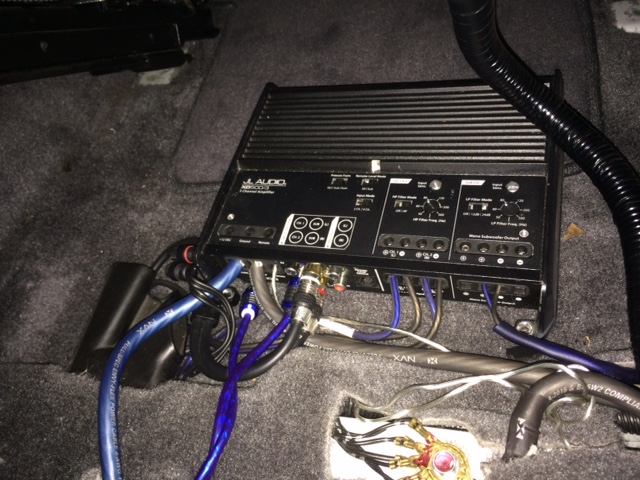
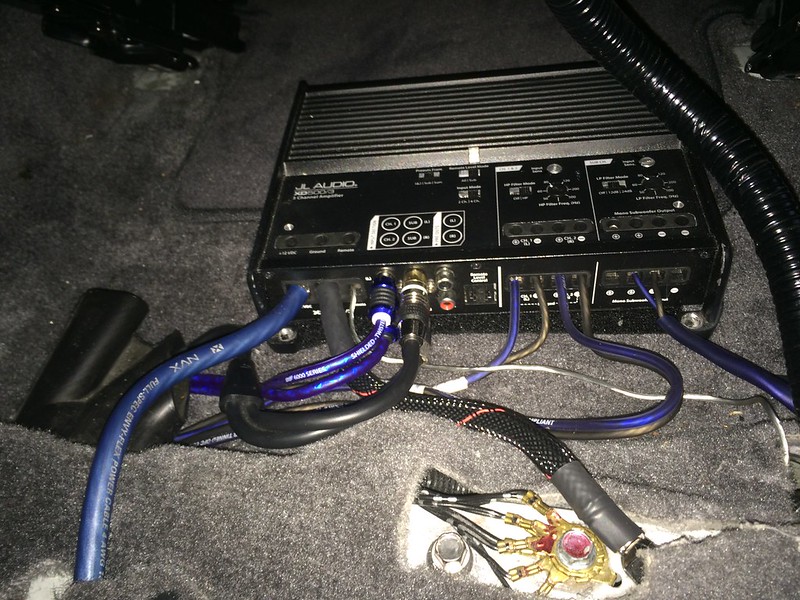
Amp: JL XD500/3
i wanted to keep my amp under my driver's seat and so i chose a class D amp (lower profile). i wanted a decently powerful amp so i found a used JL amp, fits perfectly under the seat.
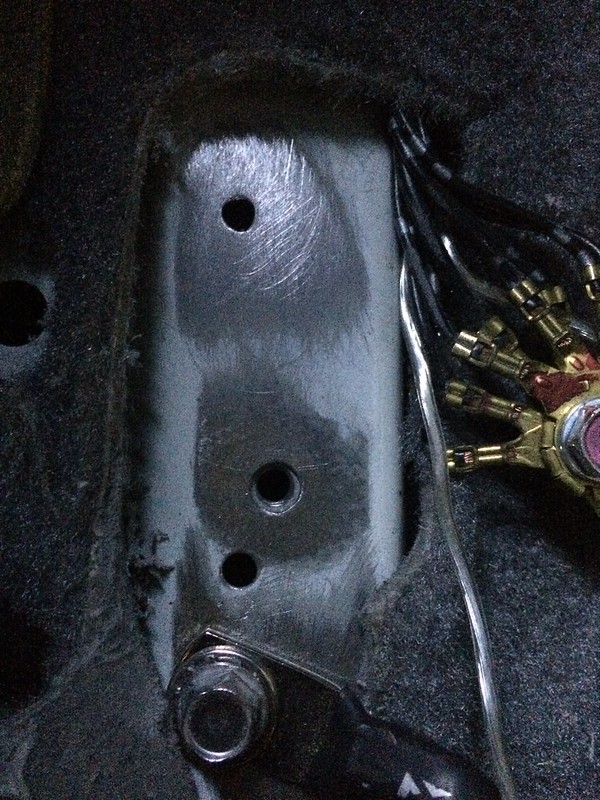
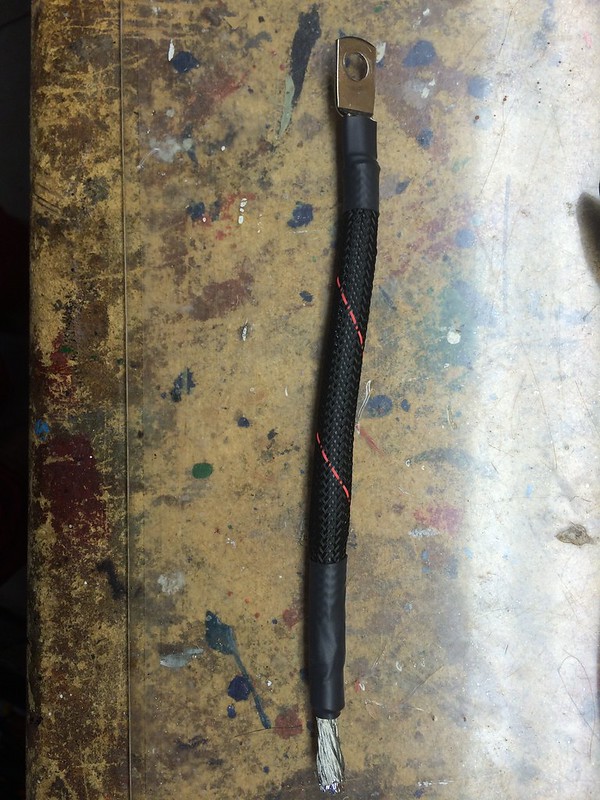
drilled my own ground location next to an oem ground and sanded off the paint
i then shorted my ground wire and put some sheathing on it
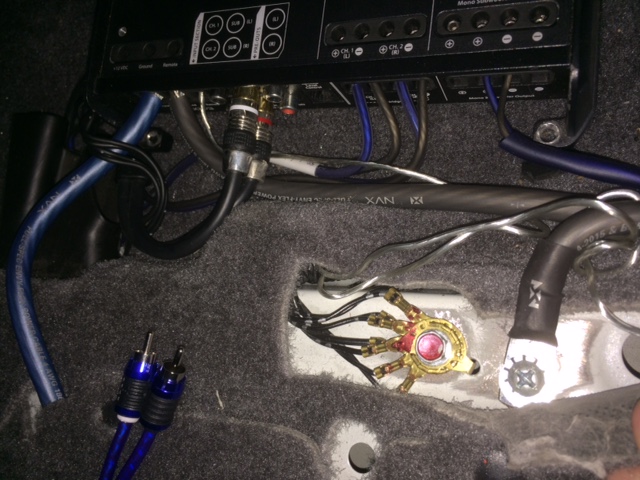
final amp install
Downsides
in my mind the audio system sounds way better than stock and i'm very very happy how it turned out. however i do have some noise that i could never solve, i tried filters, better rcas, rerouted rcas, etc but no effect, even took it to a few audio shops. recently i met a couple of local audio guys in the acura scene and they recommended i put a ground wire from the oem head unit to the aftermarket amp ground. i did that and even though the noise is still there, it did take away a slight engine whine and the sound is much clearer now. so in summary the noise is still there (white noise), but no one notices but me. overall very happy with it!
hard to reach oem head unit ground from the front
went to the side and around to get to it
there it is! ran a 16ga wire from there back to the aftermarket amp ground
Final setup with grill installed
i had a local shop set the gains for me and i have no distortion or rattles. the sound is super clean and even though there's much better equipment out there and it was a huge pain to research and install (the TL is very finicky), i'm very happy with this project and how it turned out!
Last edited by thoiboi; 07-18-2017 at 10:49 AM.
Reason: replaced with new Flickr links
Wow holuy shit man... I'm very impressed with all the. Work you put in to you loved TL.
Me and OP been talking non stop back and forth trying to resolve his issues.
Either way good job attention to details are more then beyond. And you did it right from covering this up to sound deadener. That's how install should be ... The rest of you learn from this and take notes. Don't cut corners when it comes to installs. Do it right the first time...
When you screwed the front door speakers in, did you use anything on the back of the screw or did you just screw it through the metal? I currently have my speaker rings just drilled through the thin layer of sheet metal. I'm not a huge fan of that, so I am looking for solutions. I also need to get some smaller screws.
Do you have any rattles still? I am having some bad ones in my drivers side front door panel. I am fairly sure I have narrowed it down to the aluminum trim piece. I need to remove the door again and deaden that portion. I also have some rattles coming from the passenger side front door panel that I haven't been able to figure out.
How do you like those ID's? I've read a lot of good things about them. I need to replace my 6.5" woofers because one of them is blown. They didn't like anything below 100Hz and would pop, so I needed some replacements anyways.
Great install! I hopefully will get some pictures of mine up one of these days when I am closer to having it finished. Maybe I'll just start a build log. It's hard when I basically only have the weekends to do anything.
Ummmmm, when are you coming over to my house so we can do all this on my car too?
haha i've already given you enough ideas for your new TL, you got a lot of work coming haha. i've ruined your bank account...
Originally Posted by mrkingstonvi
Awesome work OP!
Originally Posted by projectwidow
Awesome write up man!! Love the detailed description and photos!
Originally Posted by thoiboi
great job D!
thanks guys!
Originally Posted by QuickTL07
Wow holuy shit man... I'm very impressed with all the. Work you put in to you loved TL.
Me and OP been talking non stop back and forth trying to resolve his issues.
Either way good job attention to details are more then beyond. And you did it right from covering this up to sound deadener. That's how install should be ... The rest of you learn from this and take notes. Don't cut corners when it comes to installs. Do it right the first time...
hey thanks mario, that means a lot coming from you, the audio king!! i spent more than i wanted but i agree that it's better to do it the right way from the start and the rewards will come! can't wait to see how your current install turns out
Originally Posted by NoTLoud
Awesome! Looks great!
I have a few questions:
When you screwed the front door speakers in, did you use anything on the back of the screw or did you just screw it through the metal? I currently have my speaker rings just drilled through the thin layer of sheet metal. I'm not a huge fan of that, so I am looking for solutions. I also need to get some smaller screws.
Do you have any rattles still? I am having some bad ones in my drivers side front door panel. I am fairly sure I have narrowed it down to the aluminum trim piece. I need to remove the door again and deaden that portion. I also have some rattles coming from the passenger side front door panel that I haven't been able to figure out.
How do you like those ID's? I've read a lot of good things about them. I need to replace my 6.5" woofers because one of them is blown. They didn't like anything below 100Hz and would pop, so I needed some replacements anyways.
Great install! I hopefully will get some pictures of mine up one of these days when I am closer to having it finished. Maybe I'll just start a build log. It's hard when I basically only have the weekends to do anything.
thanks man! definitely start a build log that way if you have any questions you can get help as you do the project. looking forward to see what you put together
- screws: i believe i used sheet metal screws so they just thread into the sheet metal and are very secure. make sure you have 3 or 4 and your speakers will be more than secure since that's what sheet metal screws are meant to do.
- i do not have any rattles at all. all the sound deadener, foam, and clay all help reduce vibrations in the door/door panel. i even have some sound deadener on the inside of the plastic door panel itself to cut out any rattles. also make sure all your door panel clips are fully seated to really push the door panel against the door
- i love the IDs. at first i kicked myself for not being satisfied with the JBLs and looking at the IDs, but as soon as i made the switch it was a 100x improvement! the IDs are known for having great bass and by having my high pass crossover set to 76-80 i can hit some of the 80-100 Hz notes without any issue. they really sound great for their price and some people compare them to $300-$400 speakers. i would install them again in a heartbeat.
Bro, my wallet hates you. Dislikes me too, for sure.
What sound deadener and ensolite CCF did you use? Is MLV anywhere in that combination? Opinions on that? I can't wait to do my doors.
haha we are all in the same boat
i used raam audio for all my products. I used their ensolite foam along with their raamat (sound deadener). I briefly looked into mlv be to be honest I don't think it's needed unless you're a huge audiophile or competing. Doing the doors with sound deadener and ensolite on the stock speakers even makes a huge difference!
Looks good! I currently running tue stock sysyem with the doors and rear deck deadened. It soynds pretty good. I will be ordering some Dayton RS180-4s soon though for the doors. I have some NVX XSP TW tweeters from my last TL waiting to go in along with a Herts HX250D (10" sub) and a JL HD900/5 to power it all. Like you I will keep rear fill on stock amp.
A suggestion since you seem concerned bout bass quality. Hooking up rcas tp the preamp sub wires should allow you to connect the clean low level signal directly to your amp. JL amps have circuitry which allow use of the differential balanced signals put out by tue head unit (eliminating noise picked up along the signal path. Whwn I switched from a LOC setup to the preamp setup tue difference in bass quality was very noticable.
thanks! i'm actually not concerned about bass quality it's actually at a level that i love (not in your face but great boost from stock), didn't know i came off that way. i also will keep it with the LOC because i want oem sub control which a LOC still allows me to have. i have a remote bass knob but i already have too many things going on in my cabin and don't want to add another input to my car haha
you have some sweet stuff lined up for your car, id be interested to see how your final setup comes together! i hear good things about hertz and i'm sure it's a sweet sub. i'm not familiar with the nvx products, i used their wiring kit but that's as far as i know with them. i looked them up and they are pricey (to me...they cost almost as much as my IDs haha) so i'm sure they are good. what will you do for crossovers?
By bass quality I didnt necessarily mean louder, but tue low frequencies will be. It will sound better, clearer, integrate better, and you will still have control of sub level with oem control.
For crossovers dont need any for tue daytons and just a simple highpass filter for the nvx tweets (couple capacitors). This until I get a minidsp 6 to 8. Even then I will probably keep the caps on the tweets for backup protection.
i'm pretty sure i won't have sub control if i go pre oem amp (like 95% sure haha). did i research that wrong? if so, i'd consider going preamp but i'm pretty sure no sub control going that way.
ah yea that's right you can just add in some capacitors! gonna be an awesome setup for you. audio is a tease because you can always find better and better products and you know they will make a huge difference haha...it's endless
I am 100% sure you CAN. Thats how my last TL was wired up. Actually like I said earlier I first went pist amp then tried pre amp and noticed a big difference. I had control of the sub level using tye oem knob in both situations.
haha ok i stand correct i'll take your word for it! weird that a lot of past threads say otherwise, maybe they didn't even try haha. why didn't you tell me this 2 years ago haha jk.
shoot, maybe i'll get back in there this weekend and see what i can do. i have a baby coming any day so the rewiring might not happen right away, but i'll put it on my to-do list, thanks for the heads up!
EDIT: this could actually be a pretty easy change no rewiring. if i do i, i'll need to disconnect my 2 rca inputs for the sub channel and just switch my amp from 4 channel input to 2 channel input correct? and then it will pull the sub signal from the full range ch 1/2? i'll have to have a shop reset my gains (or have some local audio guys do it) but not a huge deal. will probably test this out tonight real quick
You will be attaching RCAs to the preamp sub wires going to the oem amp. You could connect tue front left and right channels but why? Use the sub preamp wires.
You will be attaching RCAs to the preamp sub wires going to the oem amp. You could connect tue front left and right channels but why? Use the sub preamp wires.
ahh now it makes sense why you got sub control and others didn't! most people use just the full range left and right and have the amp pull the sub signal from there. you connected directly to the sub specific signal prior to the oem amp. do you know what frequency the oem head unit cuts off the sub signal at? i think most wanted full range so they could manually control it at the amp filter
i'll have to see if i have the wiring to do sub wires the way you did it (wire to RCA connections)
Yes. There are two wires and its not hard to wire them up. Two positives from rca wire go to one and the two negatives to the other. The stock amp attentuates low frequencies which you will see. Preamp signal plays as low as 16Hz , or lower, if your sub can play it.
Not sure how high the signal will play actually... I always cut off below 80 so... At least up to 80 Hz but probabaly higher maybe with some attentuation starting around there? I am curious now.
Dude, why cant you live on the east coast =( im gonna be hitting you up for advice lol
haha hit me up all you want...haven't heard from you in a while hope things are coming along nicely!
Originally Posted by stevemk07
Yes. There are two wires and its not hard to wire them up. Two positives from rca wire go to one and the two negatives to the other. The stock amp attentuates low frequencies which you will see. Preamp signal plays as low as 16Hz , or lower, if your sub can play it.
Not sure how high the signal will play actually... I always cut off below 80 so... At least up to 80 Hz but probabaly higher maybe with some attentuation starting around there? I am curious now.
i'm going to try to work on this some tonight. i still think i might have a leftover kicker "2 channel rca to wire" device somewhere at home, that would make it super easy. i have my cutoff set to around 75-80 but i'm sure the oem is a little above that. thanks again for the heads up!
haha hit me up all you want...haven't heard from you in a while hope things are coming along nicely!
i'm going to try to work on this some tonight. i still think i might have a leftover kicker "2 channel rca to wire" device somewhere at home, that would make it super easy. i have my cutoff set to around 75-80 but i'm sure the oem is a little above that. thanks again for the heads up!
[QUOTE=sockr1;15975696]haha hit me up all you want...haven't heard from you in a while hope things are coming along nicely!
haha yes its been quite awhile, ive hit a bit of a wall with doing stuff to the car as insurance has been killing my pockets. Finally swapped to a new policy today which is saving me ridiculous money, so hopefully i can start doing stuff to the car.
I know i need a suspension overhaul, i think my compliance bushings are on their way out, my rear passenger side strut is leaking and is possibly blow, and passenger side axle shakes on acceleration....
So im gonna swap both, possibly do those bushings instead of the oem compliance, spc rear camber kit, skunk 2 front it and BC coilovers with the swift springs. THEN headlights. did the modified stock radio and modified amp, i like it but my DLS iridium speakers need more juice, so it looks like im gonna be doing a custom system after all..
i'm pretty sure i won't have sub control if i go pre oem amp (like 95% sure haha). did i research that wrong? if so, i'd consider going preamp but i'm pretty sure no sub control going that way.
ah yea that's right you can just add in some capacitors! gonna be an awesome setup for you. audio is a tease because you can always find better and better products and you know they will make a huge difference haha...it's endless
You do have sub control pre-amp. If anyone is interested, i have a custom harness that was created to get the pre amp signal with a direct plug into oem harness. Its in classifieds. It will allow you to control front, rear, sub and center.
I am 100% sure you CAN. Thats how my last TL was wired up. Actually like I said earlier I first went pist amp then tried pre amp and noticed a big difference. I had control of the sub level using tye oem knob in both situations.
Originally Posted by Gary Mac
You do have sub control pre-amp. If anyone is interested, i have a custom harness that was created to get the pre amp signal with a direct plug into oem harness. Its in classifieds. It will allow you to control front, rear, sub and center.
just wanted to say thank you guys and that you were right, if i take the preamp signal using the sub specific wires, i can still retain control of the aftermarket sub using oem controls.
today during my lunch break, i removed the LOC completely. i took the preamp sub wires and hooked them up to a kicker speaker-to-rca adapter (
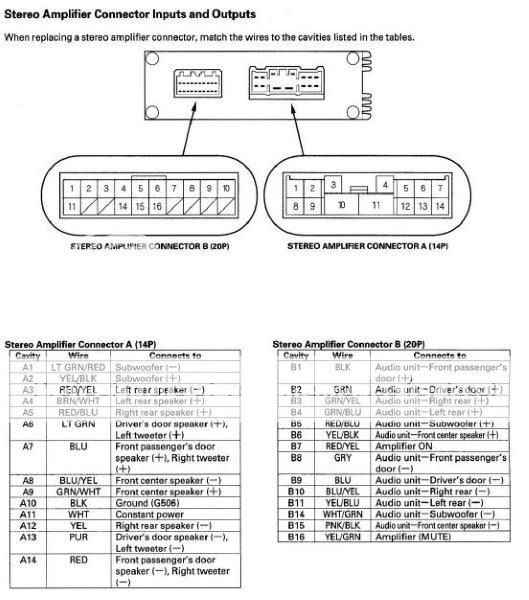
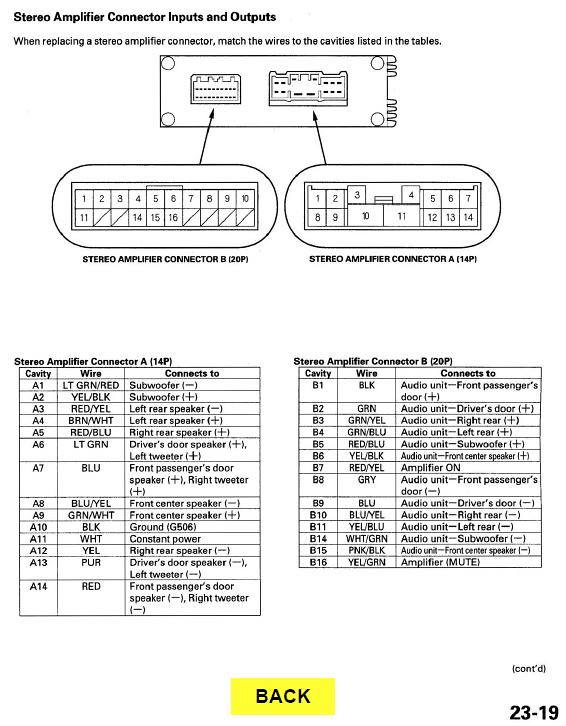
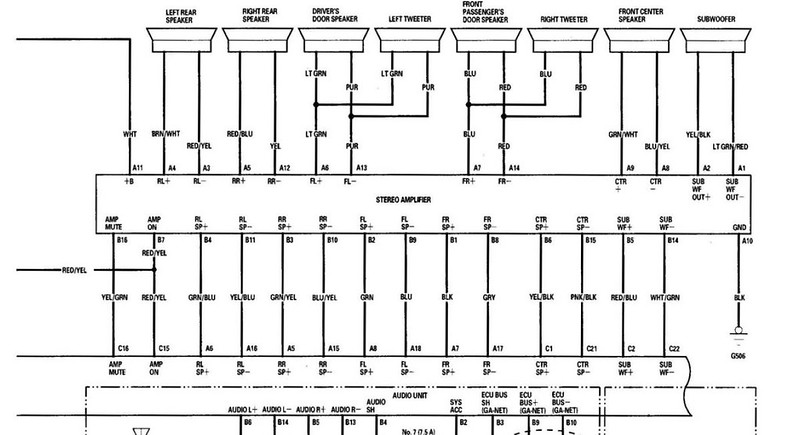
). soldered both blue wires to the positive (B5) and the grey ones to the negative (B14) and hooked it back up to my main sub rca. lower sub notes do tend to sound cleaner and more precise! thanks again guys
here's the 07-08 wiring diagram that i used (black is the input 20 pin connector, grey is the output one)
Originally Posted by Bchester6
Pre amp signal is how I did it as well so I could retain sub control with the OEM knob. Dave hit me or Chris up if you need help tuning.
thanks for the offer brian! however, i just set up the new gain to match the voltage output from the last set up by the steps below:
- before i switched to the preamp signal, i measured the AC voltage of the sub output using a 50 Hz test tone on a CD and the volume at 10 (this was the LOC post amp signal)
- voltage came out to 17.26 V
- tested the voltage again after i switched to the preamp sub signal and made sure the gain was set to hit that same 17.3 V output.
just wanted to say thank you guys and that you were right, if i take the preamp signal using the sub specific wires, i can still retain control of the aftermarket sub using oem controls.
today during my lunch break, i removed the LOC completely. i took the preamp sub wires and hooked them up to a kicker speaker-to-rca adapter (https://www.amazon.com/Kicker-KISL-2.../dp/B00I4EBOYK). soldered both blue wires to the positive (B5) and the grey ones to the negative (B14) and hooked it back up to my main sub rca. lower sub notes do tend to sound cleaner and more precise! thanks again guys
here's the 07-08 wiring diagram that i used (black is the input 20 pin connector, grey is the output one)
thanks for the offer brian! however, i just set up the new gain to match the voltage output from the last set up by the steps below:
- before i switched to the preamp signal, i measured the AC voltage of the sub output using a 50 Hz test tone on a CD and the volume at 10 (this was the LOC post amp signal)
- voltage came out to 17.26 V
- tested the voltage again after i switched to the preamp sub signal and made sure the gain was set to hit that same 17.3 V output.
good to go!
Very good. Can yoy detect any "noise" doing it this way?
just wanted to say thank you guys and that you were right, if i take the preamp signal using the sub specific wires, i can still retain control of the aftermarket sub using oem controls.
today during my lunch break, i removed the LOC completely. i took the preamp sub wires and hooked them up to a kicker speaker-to-rca adapter (https://www.amazon.com/Kicker-KISL-2.../dp/B00I4EBOYK). soldered both blue wires to the positive (B5) and the grey ones to the negative (B14) and hooked it back up to my main sub rca. lower sub notes do tend to sound cleaner and more precise! thanks again guys
here's the 07-08 wiring diagram that i used (black is the input 20 pin connector, grey is the output one)
thanks for the offer brian! however, i just set up the new gain to match the voltage output from the last set up by the steps below:
- before i switched to the preamp signal, i measured the AC voltage of the sub output using a 50 Hz test tone on a CD and the volume at 10 (this was the LOC post amp signal)
- voltage came out to 17.26 V
- tested the voltage again after i switched to the preamp sub signal and made sure the gain was set to hit that same 17.3 V output.
good to go!
hey dave, so LOC units are no good for these cars?
Yay Dave way to go!! What he's trying to say is that LOC units aren't necessary if you have an amp that has balanced inputs. You can use an LOC but you may be introducing unnecessary noise to your system as a result...
Yay Dave way to go!! What he's trying to say is that LOC units aren't necessary if you have an amp that has balanced inputs. You can use an LOC but you may be introducing unnecessary noise to your system as a result...
Ahhh okay okay, well i have an xtant amp for mt bass, not installed yet, would you know if the inputs are balanced?
Very good. Can yoy detect any "noise" doing it this way?
i can't but i also feel that any noise for the sub would be removed with the low pass filter so i wouldn't hear noise either way
the output is definitely punchier and tighter, thanks again
Originally Posted by Ceaze
That's a nice clean setup.
thanks! i try to make my stuff look and feel as oem as possible
Originally Posted by 03max6spd
hey dave, so LOC units are no good for these cars?
Originally Posted by Bchester6
Yay Dave way to go!! What he's trying to say is that LOC units aren't necessary if you have an amp that has balanced inputs. You can use an LOC but you may be introducing unnecessary noise to your system as a result...
agree with what brian said! that being said, i now have a LOC, a line driver, and a JL remote bass switch that are up for sale if anyone wants them
thanks brian! finally found some time to wrap that up, appreciate the heads up on the switch. hope things have been well!
Hey nice setup! One question, how did those JBL GTO608C's perform with your factory amp? I have some that just came in the mail and I want to use the factory amp because I don't want to get so involved with audio like I used to be. One of my front door speakers is sounding like garbage so I was looking for some good near stock replacements.
 03-07-2017, 03:24 PM