When you click on links to various merchants on this site and make a purchase, this can result in this site earning a commission. Affiliate programs and affiliations include, but are not limited to, the eBay Partner Network.
This is so cool. I love Wagons. MrsHeeltoe is really close to getting one actually and threads of pride like this make it hard to resist.
Anyway I hate/love to plug our wares...all the emblems and engine covers you've gotten are available (and lots of times in stock) at Heeltoeauto.com. We try to make it easy getting all the stuff for your car in one place.
Lastly, on the suspension front, I am not so sure coilovers will be overkill. It is really an over-glorification of a shock and spring set, where the lower mount is adjustable for height. The springs and shocks are DESIGNED to work together, and they are much better suited to getting the right look and feel. AGX and Eibachs....not a bad choice, but you are definitely going to miss out on some refinement compared to something like a Street Advance set from Tein. When the time comes, don't be shy to take advantage of our consultation services. It's free and generally pretty helpful. https://www.heeltoeauto.com/customer...l#consultation
Marcus
Thanks Marcus. I do spend a lot of time poking around your site and it's helpful to hear your thoughts. It'll be a while before I can really consider a new exhaust and/or suspension. I always feel bad about taking off perfectly good, new, OEM designed parts for aftermarket. I mean, it happens eventually, just not before the first oil change!
All good things to think about and that Fujitsubo does look really good on that wagon. And my boy (the main reason I have the wagon) does like cars with some exhaust note, so I might actually be closer than I think to pulling the trigger!
And my boy (the main reason I have the wagon) does like cars with some exhaust note, so I might actually be closer than I think to pulling the trigger!
Cheers,
--Joe
There you go! The exhaust upgrade is a must family necessity now!!
Thanks Marcus. I do spend a lot of time poking around your site and it's helpful to hear your thoughts. It'll be a while before I can really consider a new exhaust and/or suspension. I always feel bad about taking off perfectly good, new, OEM designed parts for aftermarket. I mean, it happens eventually, just not before the first oil change!
All good things to think about and that Fujitsubo does look really good on that wagon. And my boy (the main reason I have the wagon) does like cars with some exhaust note, so I might actually be closer than I think to pulling the trigger!
Cheers,
--Joe
Glad to heard you have visited our site Hoping our new design is working well for you.
I can definitely agree that taking off perfectly good parts is an odd thing us car folks do, but the car is ultimated tuned and designed for the masses and enthusiasts will appreciate a bit more customization than your normal pedestrian user will. The beauty of it is you can do whatever you want, and we are here if you need us.
Things have been a little quite on the auto-front lately. General life stuff seems to get in the way of unnecessary motor-related pursuits. I've spent a few dollars picking up some lighting parts here and there, including the vast majority of the lights robpp had on his car before he went back to stock: HIDs, Full Interior LEDs, License Plate LEDs, Reverse LEDs. That's all sitting in a box waiting for a day that A) I'm in town, and B) I have more than 20 minutes of free time.
A few weeks ago I was looking at the Retrofit Source website, for a LED light bar that I could buy to put on the shelf and not install on my truck for the same reason I can't get around to doing anything on the car, and I saw they had some B-Stock of their replacement LED fog light/housings. The prices were *very* attractive and I had s sneaking suspicion that even their B-Stock would still be pretty much perfect so I pulled the trigger on two sets: a Type S set that fits the TSX and a Type T set that'll go on my 4Runner (not anytime soon though).
I also stopped over to Lamin-X.com and purchases some door cup paint protectors and a 9"x16" sheet of 40 mil clear film for the fog lights. All that stuff arrived last week and I set about getting things done.
First up, the Morimoto XB LED fog lights. Pretty nice construction and they look nice right out of the box.
As I suspected, it took a little bit of effort to actually figure out what made these less than perfect inventory. One lens has a very small chip or inclusion, and the other has a few very minor surface cracks or crazing. What really amuses me is that installing these without any vinyl protective covers and the lenses would quickly get damage much worse than this. The defects are so minor that it took me about 30 minutes to be able to photograph them in such a way to get them to show up.
Next up was getting the Lamin-X cut to size. In a fit of obsessiveness (and any of you engineers out there know what I'm talking about), I made sure to take measurements of the three locations I want to install the film and then did a quick layout to make sure I get my cut lines correct to make sure everything fits. Then I proceeded to cut the first two pieces for these fog lights buuuut I managed to cut the sheet in the wrong direction like a big dummy.
And that's when I ran out of time, so to be continued where next time I'll actually install the Lamin-X and pull off the front bumper to install the lights...
I accidentally'd into a little bit of spare time yesterday night so I made some clear stop signs.
For anyone following along at home, the TRS XB LED Type S fog lights (and I suppose the stock TSX parts as well) are a little less than 4" in diameter. I cut 4" squares and then trimmed them to 4" octagons so there wasn't excessive material on the corners. It fit pretty much correctly.
Following the directions*, I wet the surface of the lens and the adhesive back of the vinyl. It took a couple tries to get it stuck roughly centered but it was pretty easy to pull and reapply so no worries there. I was pretty impressed how much compliance even the 40 mil vinyl has. It wrapped pretty well and didn't pucker too bad; much better than I was expecting. Here you can see it applied cold and starting to get wrapped over:
Applied some heat with a hair dryer to A) soften up the vinyl to bend over the edges better, B) evaporate some of the excess water between the lens and adhesive, and C) warm up the adhesive to stick better. No pics here because all my hands were busy and I haven't mastered taking pictures with my monkey feet.
Here you can see the vinyl applied to the left part. Not as optically clear like the uncovered one on the right. You can also see many little bubbles in the adhesive. I'm pretty sure most of that will clear up over time as there is still some moisture under the vinyl and it needs to slowly diffuse through the plastic.
Last step was to go around the edge and trim off the excess material. This shot shows the small adhesive bubbles a little better. It also shows the extreme wrap I was able to get rolling over the edge of the lens. I didn't think the Lamin-X would like doing that but it was surprising how compliant it got with heat.
Second lamp was the same as the first. And then I spent the rest of the night rubbing around the edges with my thumb to get it to stick. This warms up the vinyl and adhesive a little bit to stick better and it helps work out some of the water still under the vinyl.
When I got up this morning, both vinyl covers had started to lift a little bit, I'd guess 40-50% of the way around the "cylinder" portion. I hit one with a hair dryer again to soften the vinyl and re-worked it back into position. I'm curious to see if it'll stay stuck. I knew it was a bit optimistic to expect the vinyl to fully conform around the edges like that and I expect to have to go back and trim the "cylindrical" portion of the vinyl, leaving just the "flat" domed part on the lens surface. But it isn't hurting anything to try this out first out of curiosity.
*Directions were not actually followed, I made things up as I went, YMMV.
Yep. That's true. I'm just curious how extreme the Lamin-X will conform. I'm not expecting it to work and will likely cut it back, but wanted to get some data first.
Ditched a little bit of work today to finally make a little headway.
Took some "before" pictures at night a couple weeks ago. Got one fog installed this morning before the heat got too oppressive and I'm optimistic about taking some "half-n-half" pictures this evening to compare the OEM to Morimoto retrofits.
Maybe able to get the second one installed tonight/tomorrow. Pictures to follow soon!
I don't think you'll be disappointed with XB Fogs! I bought them for my 3G but they didn't fit so I just threw them on my Mom's Accord and they are SEX.
Awesome, so I set aside this Friday to get some work done on the car; pull the bumper and finish up the fog lights, take care of another swapmod, do some buttoning up, change some lights to LED, get a wash/wax/shine/detail... and it's supposed to rain all day.
Awesome, so I set aside this Friday to get some work done on the car; pull the bumper and finish up the fog lights, take care of another swapmod, do some buttoning up, change some lights to LED, get a wash/wax/shine/detail... and it's supposed to rain all day. WTF. <img alt="" src="images/smilies/rant.gif" title="Rant" /> So, back into the holding pattern.
OH crap.. apparently i did come across your thread all the way back in June about the LED Fogs..
what an idiot of me.. i got bored and finally decided to go through it... How'd you'd like the fogs? I still smile when I go home and see my mom's car with them..
Now I need to find some time and retrofit some actual HID's in them to match
Originally Posted by cu2wagon
Awesome, so I set aside this Friday to get some work done on the car; pull the bumper and finish up the fog lights, take care of another swapmod, do some buttoning up, change some lights to LED, get a wash/wax/shine/detail... and it's supposed to rain all day.
WTF.
So, back into the holding pattern.
This Friday. As long as the weather holds out; this Friday I'll get it wrapped up. I've been rolling with only one LED fog installed since late June... like this O_o.
are you taking off your bumper or trying to do it in the wheel well? I just dropped the bumper when doing it, super easy, only took 1.5 hours or so from start to finish including taking a bunch of pictures (J style )
are you taking off your bumper or trying to do it in the wheel well? I just dropped the bumper when doing it, super easy, only took 1.5 hours or so from start to finish including taking a bunch of pictures (J style )
Nope.
Was able to go in through the wheel well on the passenger side. Gave me a false sense of hope.
Driver side has a large plastic somethingorother blocking egress so the bumper will need to come off. Which is what I wanted to avoid, because, ugh.
I've done enough headlight retrofits on various cars that dropping bumpers is second nature
almost like Justin's curbing of cars
I *think* it is the resonator. Which, if it is, will be coming out once the bumper is off.
Taking it off is by no means tedious, I just don't like fighting with the little clips around the headlight. Always feel like "today's the day they'll die".
So, when I left off back in June, I had added a Lamin-X 40-mil clear film to both fog lights (Morimoto XB LED Type S, direct fit) and was able to get the passenger side light installed to do a side-by-side comparison. I had arbitrarily picked to install the passenger side first and I found that I was able to do so without removing the front bumper cover. There is a little access panel on the front bottom engine cover that I was able to reach through and pull the OEM light and install the Morimoto. Only tricky bit was it was pretty much working blind as it's a cramped space without much access.
Turns out, the driver side isn't as easy with the gigantic resonator chamber residing right above the access hatch. Even my petite, girly-man hands can't fit up in there to pull that light. So to do that side you either need to have already removed the resonator, or pull the bumper cover (which you need to do to remove the resonator also). 50/50 hindsight.
Well then, here's how that goes--
Here's a comparison of the OEM halogen fog light and the Morimoto LED fog light (Fronts)
(Backs)
You can see that the OEM light has the harness connector right at the back of the housing but that the Morimoto has a pigtail coming from the back; this will cause the wiring to dangle a bit more than it does with the OEM lights. Not a big deal I suppose; I initially wanted to find a way to affix the light side connector to the rear bracket, but that would make subsequent removal difficult. I think keeping the harness loose is the best bet. YMMV.
The "easy" way to install the passenger side is going through this little access hatch. Pop the four plastic clips (shown in their popped but not removed state):
And from here you can push up on the panel and get access to the fog light:
It's a tight fit, but with a stubby Philips screwdriver, you can reach in there and remove the two small screws holding the light in place. Pull it out and replace. You'll be working blind getting the upper left screw back in place but it's totally do-able.
Buttoned back up and ready to align the light and do some comparisons.
Stock fog lights (head-on):
Stock fog lights (front 3/4):
Stock vs Morimoto (head-on):
Stock vs Morimoto (front 3/4):
Stock vs Morimoto (head-on, close):
And flashing back to last June when this actually happened, I did a quick comparison of the light output from each side by blocking off both headlights and the alternate side fog light:
The approach was fairly unscientific; I ran a light meter app on my pocket computer/phone and propped up with a tape measure about 15-feet away, right in the centerline of the car. We call this the "ain't exactly rocket surgery" method. You can see the results, stock put out about 152 lux and the LEDs put out about 279 lux. Brighter and whiter (although I didn't bother characterizing the color output of the lamps because even I draw the line at nerding out somewhere).
That's where I left off for quite a while. With the oppressive heat and humidity of the summer and my general, um, laziness, I rocked the mix-match style for a few months. Since I found that it would be necessary to pull the front bumper, I waited a while for the weather to get a bit more favorable, and during that time I kept thinking that I should replace the fog light surrounds with the open grille V6 versions. So I did.
Picked up a set of the V6 grilles --
GRILLE ASSY., R. SIDE (LOWER), 71115-TL0-G60
GRILLE ASSY., L. SIDE (LOWER), 71116-TL0-G60 :
And then set aside a pleasant morning to do the deed. While it's not overly difficult to pull the front bumper, it's not my favorite task. I always feel like I'm going to tear one of those stubborn little clips under the headlights. When I was doing my front grille swap, I found this little bugger to be very helpful to manipulate the headlight clips:
When it came time to pop the headlight clips, I found that prying the fender side of the bumper away and shoving my arm up there like I'm trying to birth a calf enabled me to use the plastic tool to slip under the clip and release the tab on the bumper. Sorta looked like this:
Go pop, pop, pop along the one side and then repeat on the other side and give the bumper free! (Obligatory, bumper removed; achievement unlocked picture)
Here's how the OEM fog light and grille surround assembly looks mounted inside the bumper. You can see the two screws holding the fog light in place, one just to the right of the blue cylinder at about 4 o'clock, and the second one 180-degrees from it at about 10 o'clock.
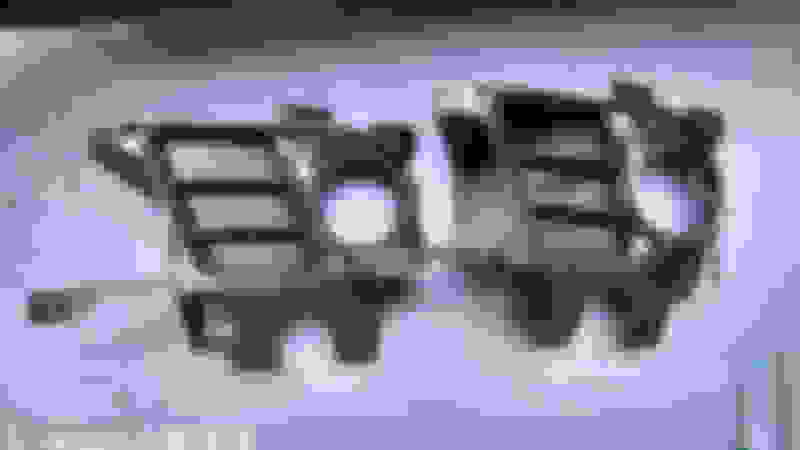
Comparing the I4 (left) and V6 (right) fog light surrounds:
For what it's worth, I found that the part number markings on the back of the V6 grilles have a slash number for the final field, corresponding to the part numbers for either the V6 or I4 applications. Drawing back on some previous automotive sub-tier supplier experience, I *think* that both the I4 and V6 applications start with the same molded part with the V6 unit undergoing an additional machining operation to remove the plastic from the front section to make the vented/open sections. Big Deal / Gee Whiz; Cool Story Bro!
And the breakdown of the foglight and grille assembly. In this picture, the silver garnish is still installed on the black plastic grille. It needs to be removed and carried over to the V6 grille:
When I was putting everything back together, I found that it was easier to put the black grille in place before attaching the silver garnish trim
Reassemble everything in the reverse order of removal and plug in the lights. The Morimotos ship with un-pinned connectors so make sure to check out the polarity before fitting the pins to the plastic connector; the lights will only work one way.
Here is what I found to be positive/negative relative to the stock harness connector. As shown, the upper/right side of the connector as seen, is the retaining clip. The red wire attaches to the left and the black to the right when looking into the connector with the clip on top.
And now a gratuitous "after" picture.
No shots of them on because, well, the color looks like the comparison picture but with the white on both sides.
Yeah, if you go look at the pictures above with the lamps on, I fiddled around with the shutter speed to try and capture the output as closely to real as I could. The third one is perhaps the best example. You can see that the LED lights are pretty spot on to the HID output. The OEM halogen is quite yellow in comparison.
You can also see a bit of the resulting color thrown on the ground from the lights, the LED being nice and white while the halogen is a bit warmer.
Actual output is hard to say. Empirically, the light meter says the LEDs are throwing more light. In actual application a properly adjusted fog light won't really look like it's doing much during normal, clear night, operation*. What I can say, and unfortunately I don't really have good pictures of it, is that I never really noticed the OEM halogen fogs when they were on. However, I forgot to turn them off after installing the LEDs and the first night that I was out driving with them on, the road seemed to be more "filled" with white light immediately in front of the car. I confirmed that by turning the fogs on and off and was noticing a very obvious difference over OEM.
*It took me a while to track down a good guideline for aiming fog lights. There is some conflicting information, but the general consensus I arrived at is as shown below in my nifty dork graphic:
This whole replacement I did was a huge exercise in scope creep. My initial intention was to merely add a protective film to the OEM lenses since they're so close to the road and pretty expensive to replace, and then add some whiter bulbs.
When I started looking around, I found the Morimoto B-stock for super cheap and I took the gamble. I fall into the camp of people who don't think fog lights *really* do much in application. They have a *very* limited function and an even smaller chance of needing to be used (at least in the places I've lived). I can probably count the number of times I've actually needed to use fog lights, and it's in the range of 5-ish.
So, while those gen 2 Morimoto look really sharp (style and output), I'm not sure they're technically worth it when looking at that picture of the Grand Am. The cutoff looks impressive, but the fill in front of the car seems pretty weak. IMO, the way those pictures look, the lights aren't doing what they're supposed to do as "fog lights". Pretty cool "accessory" lights, but they're throwing too much light too far forward and not enough downward. Perhaps it's just how Pontiac-bro has them aimed, but not my cup of tea.
Of course, like everything, that's just my opinion and your mileage may vary. If I could get a set of those gen 2s for $50 to play with, I'd do it. But for $200... I'm too cheap! I would be interested to see how they actually work on a TSX if they ever get released.
Thanks for bringing them up though, I wasn't aware of them and will keep tabs to see where that product line goes.
Met up with MC MiYoung3269 over the summer. He turned off the AOA long enough to humor my goober self and he shot a couple pictures of our cars meeting. His nicely stanced (but not stance-bro'd) car makes my wagon look like an offroading monster.
I like it a lot! It doesn't necessarily do anything spectacularly, but it does everything well.
On paper, the P/W of the CU2 with the K24Z3 is right on par with our old UC1 with the K24A4. So even though I traded a MT in the old Accord for the AT in the Wagon, I figured things would be about the same. I still miss rowing my own, but for a commuter, DD, kid-hauler... I can manage.
Honda did a great job refining that engine over the past 10 years; the K24Z3 is a peppy little sucker and even hauling the lardbucket of a wagon around is a fun endeavor. Probably why I've ever barely cracked 20mpg only a handful of times.
Love the space, and the styling, and once I fixed the grille, I really enjoyed seeing it parked in the driveway.
She still needs some wheels and suspension loving and if Greddy ever gets off their ass and releases that exhaust they've been teasing, I'll throw that at it as well. There are probably a few minor bit and pieces here and there that I'll add or tweak over the years but I really think it's a great car right out of the box.
Hopefully, by the time I'm ready for a new car in 12-15 years, Honda will have come full circle and released a new Accord Wagon.
 12-24-2014, 08:15 PM


 Hoping our new design is working well for you.


 so I just threw them on my Mom's Accord and they are SEX.


 what an idiot of me.. i got bored and finally decided to go through it... How'd you'd like the fogs? I still smile when I go home and see my mom's car with them..
 )
)
 Nope.
Nope.


 I would be interested to see how they actually work on a TSX if they ever get released.