Installation instructions for 2016 RDX LED fog lights
 06-03-2015, 01:13 PM
#1

Installation instructions for 2016 RDX LED fog lights
I am considering order OEM Acura 2016 LED fog lights. Does anyone have an pdf instructions/and/or tips for installation?
I thought you have to remove the bumper and get into the dash?
Seems like a lot of work?
I thought you have to remove the bumper and get into the dash?
Seems like a lot of work?


Popular Reply
06-28-2015, 05:07 PM
The Original Shawdy
Alright everyone, as promised I snapped some photos during the install for you guys of the LED foglights.
Make: Morimoto
Model: XB (type s) standalone
Temp: 5000k LED
Price: $170 + shipping or $190 + shipping with yellow Laminx film
Tools: Flat head screwdriver, a short and medium phillips screwdrivers
Installation time: 20-30 minutes
Looking from underneath the front bumper prey off the 4 "bitch clips" that hold the bottom plastic to the bumper:

Once you have removed the clips you then want to remove the one screw that holds the bumper to the fender:
After this you will have full access to the foglight housing with plenty of room to work:
To remove the OEM foglight, disconnect the connector from the bulb. Then there are two phillips screws diagonal from each other you want to remove from the back of the foglight. This is where you will need two different size phillips screwdrivers:
After that the foglight comes right out. Here is a comparison between the two:
The next step is to connect the power and ground wires to the supplied female plug in the kit. Make sure you check your factory plug to match the new one. Black goes with black and red goes with white:
Screw in the Morimoto Foglight, connect the plug and reinstall the splash guard and repeat the steps for the opposite side.
Before:
After:
I also installed the same kit on my 2014 TL but with the yellow Laminx they provide. They also turned out really nice:
Overall Impression: Honestly it was worth every penny. Just as nice as the factory option LEDs in my opinion. They shoot a sharp beam just like the Diamond LEDs or HID's with projectors. The install was super easy (plug and play). Best of all the 5000k match the Diamond LEDS perfectly. Same exact color. The 5000k with yellow laminx is a really nice crisp yellow. I highly recommend these for anyone looking to upgrade their factory fogs.
Make: Morimoto
Model: XB (type s) standalone
Temp: 5000k LED
Price: $170 + shipping or $190 + shipping with yellow Laminx film
Tools: Flat head screwdriver, a short and medium phillips screwdrivers
Installation time: 20-30 minutes
Looking from underneath the front bumper prey off the 4 "bitch clips" that hold the bottom plastic to the bumper:

Once you have removed the clips you then want to remove the one screw that holds the bumper to the fender:

After this you will have full access to the foglight housing with plenty of room to work:

To remove the OEM foglight, disconnect the connector from the bulb. Then there are two phillips screws diagonal from each other you want to remove from the back of the foglight. This is where you will need two different size phillips screwdrivers:

After that the foglight comes right out. Here is a comparison between the two:

The next step is to connect the power and ground wires to the supplied female plug in the kit. Make sure you check your factory plug to match the new one. Black goes with black and red goes with white:

Screw in the Morimoto Foglight, connect the plug and reinstall the splash guard and repeat the steps for the opposite side.
Before:

After:


I also installed the same kit on my 2014 TL but with the yellow Laminx they provide. They also turned out really nice:


Overall Impression: Honestly it was worth every penny. Just as nice as the factory option LEDs in my opinion. They shoot a sharp beam just like the Diamond LEDs or HID's with projectors. The install was super easy (plug and play). Best of all the 5000k match the Diamond LEDS perfectly. Same exact color. The 5000k with yellow laminx is a really nice crisp yellow. I highly recommend these for anyone looking to upgrade their factory fogs.
06-03-2015, 04:04 PM
#2

You can find the accessories installation instruction in the following link. https://estore.honda.com/acura/acces...&modelName=RDX
06-12-2015, 07:51 PM
#3
The Original Shawdy
Installation doesn't look too bad. I have the 2016 Advance and swapping the factory dogs for Morimoto XB 5k LED Foglights. Direct replacement with OEM fitment.
Morimoto's are around $200 instead of $675.
Morimoto's are around $200 instead of $675.
Last edited by carbonTSEX; 06-12-2015 at 07:57 PM.
06-15-2015, 09:29 AM
#4

Thanks in advance.
06-16-2015, 08:40 PM
#6
06-17-2015, 10:34 PM
#7
The Original Shawdy
Yes they are the same part. This is the best mod for replacing the oem fog lights with LEDs.
Trending Topics
06-21-2015, 09:21 AM
#8
The Original Shawdy
Ordered both sets yesterday. Coming in this week.
06-25-2015, 03:01 PM
#9
The Original Shawdy
Foglights arrive tomorrow. Not sure if I'll have time to install after work so most likely they'll be on Saturday. I'll post pictures of the RDX and TL with them to give everyone an idea of the yellow and white XB's look like since I ordered both pairs.
06-25-2015, 05:39 PM
#10
Sounds good, carbonTSEX. I'm looking forward to it.
06-25-2015, 07:47 PM
#11
Please take pictures also during the swapping operations.
Really interested on how much room is available once you turn the steering wheel and take the wheel well cover off.
Really interested on how much room is available once you turn the steering wheel and take the wheel well cover off.
06-25-2015, 11:36 PM
#12
The Original Shawdy
Ill see what I can do for you. Stay tune.
06-28-2015, 05:07 PM
#13
The Original Shawdy
Alright everyone, as promised I snapped some photos during the install for you guys of the LED foglights.
Make: Morimoto
Model: XB (type s) standalone
Temp: 5000k LED
Price: $170 + shipping or $190 + shipping with yellow Laminx film
Tools: Flat head screwdriver, a short and medium phillips screwdrivers
Installation time: 20-30 minutes
Looking from underneath the front bumper prey off the 4 "bitch clips" that hold the bottom plastic to the bumper:
Attachment 46622
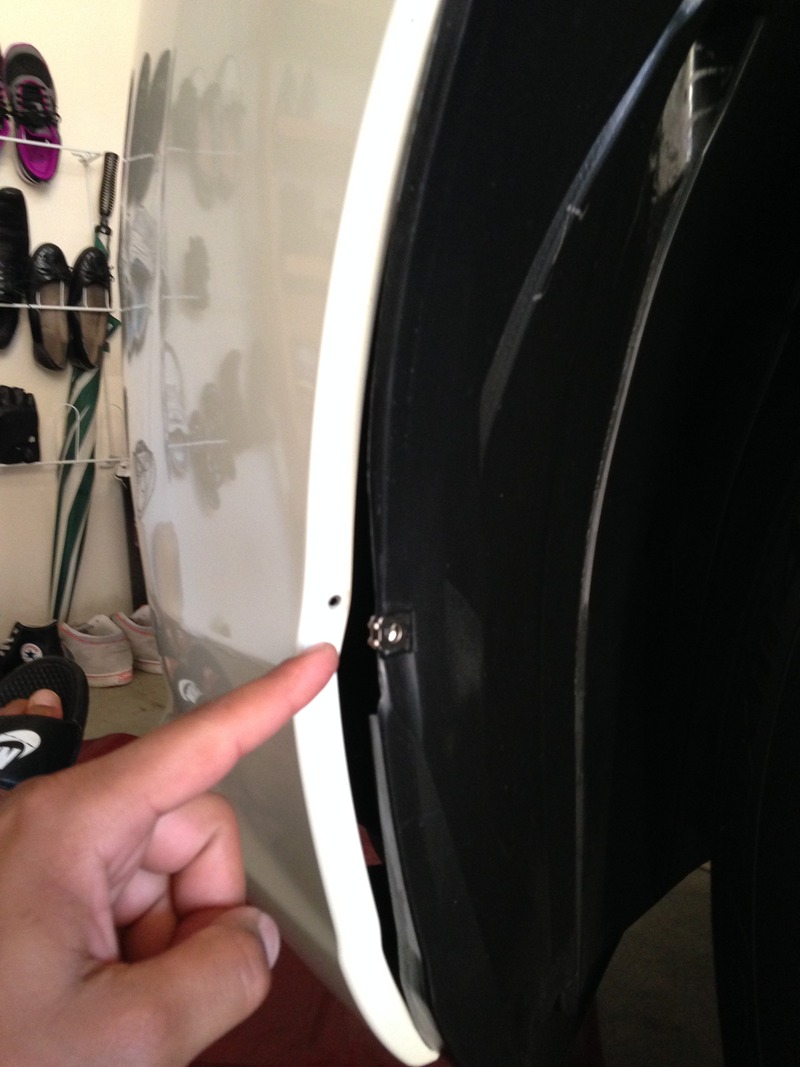
Once you have removed the clips you then want to remove the one screw that holds the bumper to the fender:
Attachment 46623
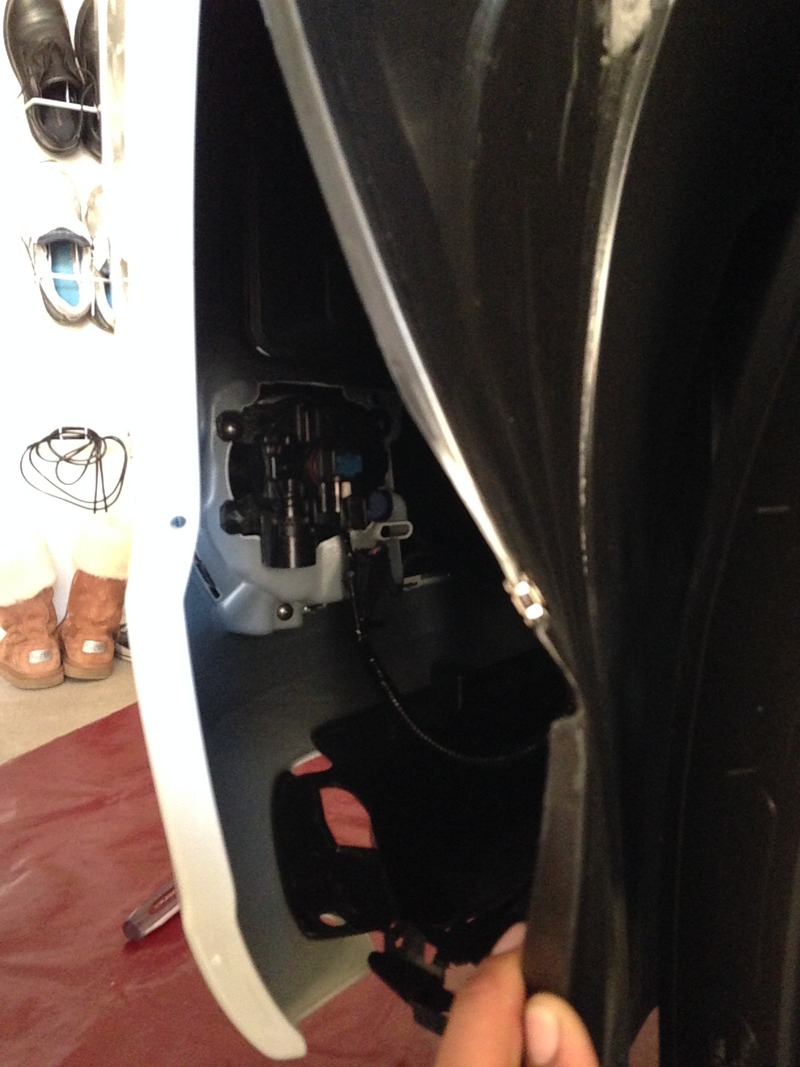
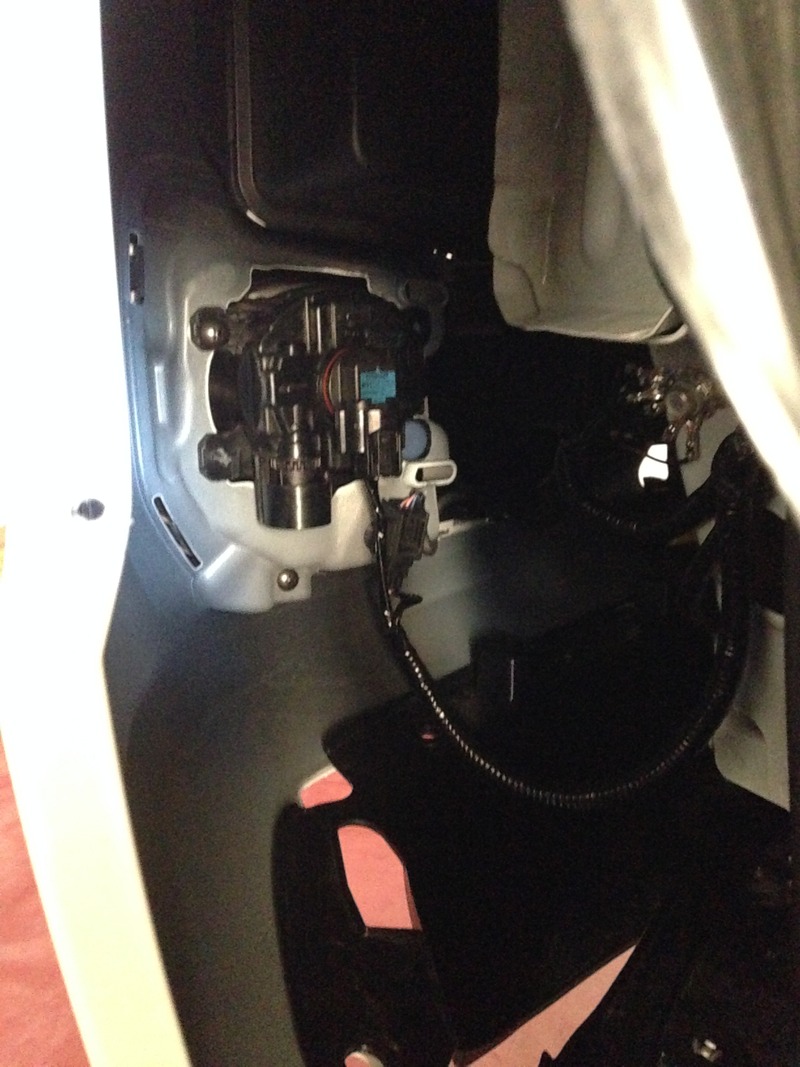
After this you will have full access to the foglight housing with plenty of room to work:
Attachment 46624
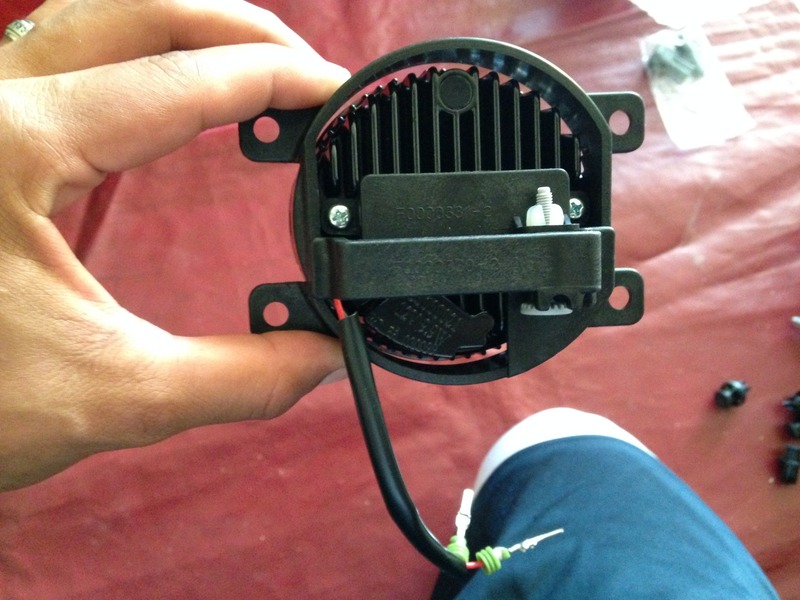
To remove the OEM foglight, disconnect the connector from the bulb. Then there are two phillips screws diagonal from each other you want to remove from the back of the foglight. This is where you will need two different size phillips screwdrivers:
Attachment 46625
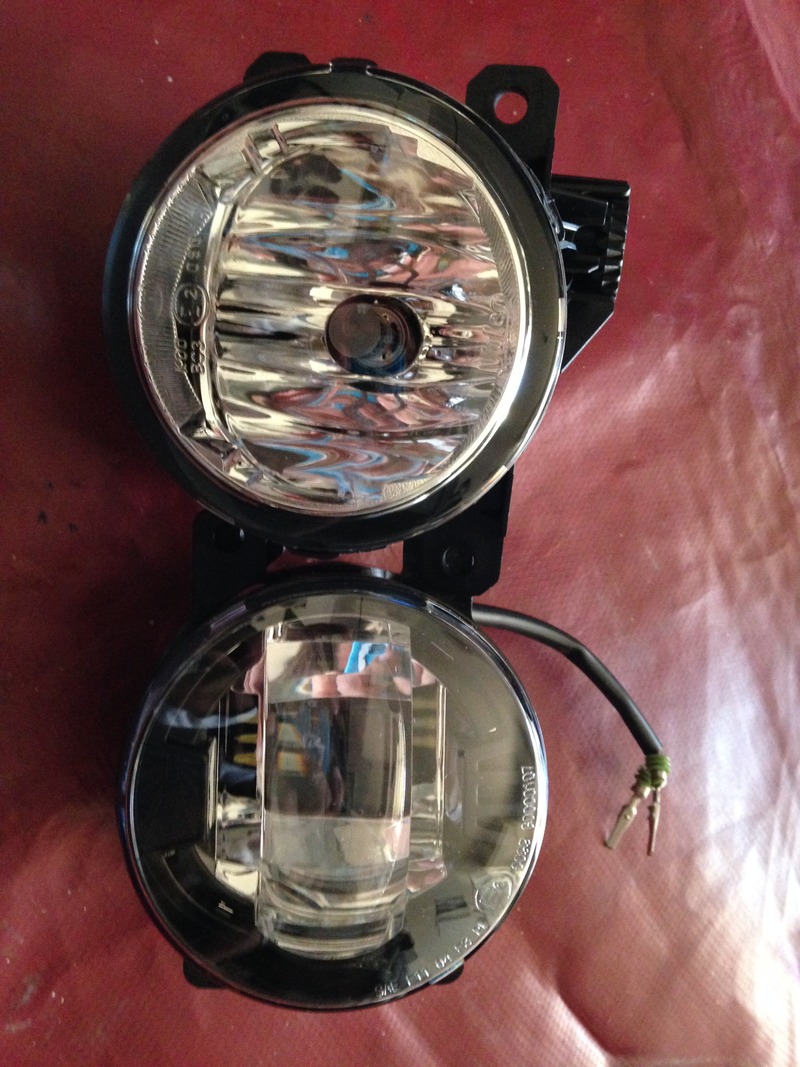
After that the foglight comes right out. Here is a comparison between the two:
Attachment 46626
The next step is to connect the power and ground wires to the supplied female plug in the kit. Make sure you check your factory plug to match the new one. Black goes with black and red goes with white:
Attachment 46627
Screw in the Morimoto Foglight, connect the plug and reinstall the splash guard and repeat the steps for the opposite side.
Before:
Attachment 46628
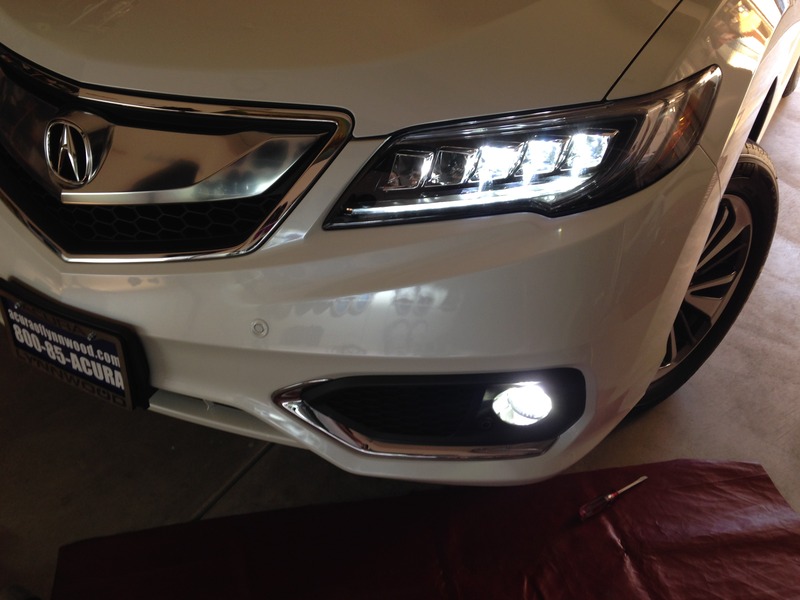
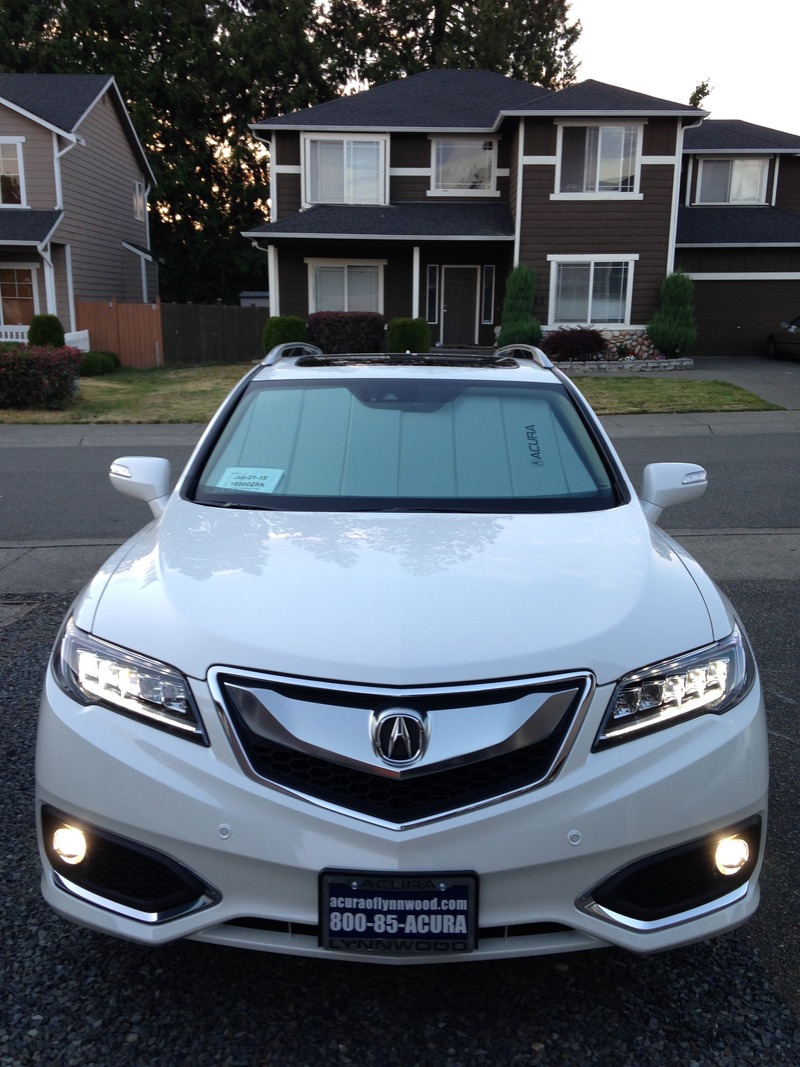
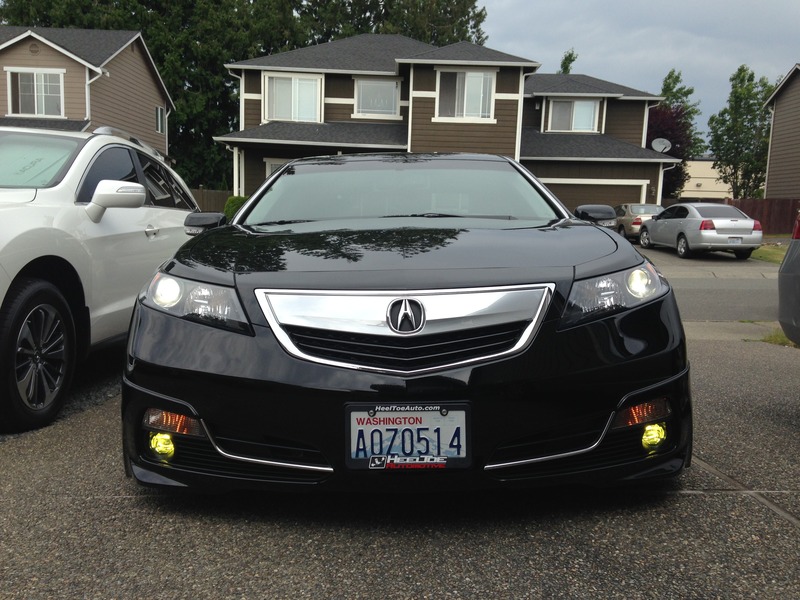
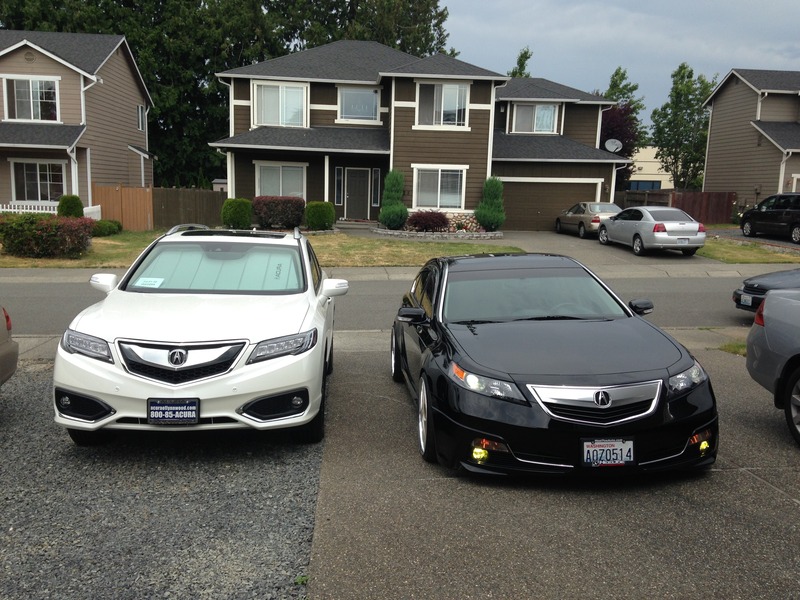
After:
Attachment 46629
Attachment 46630
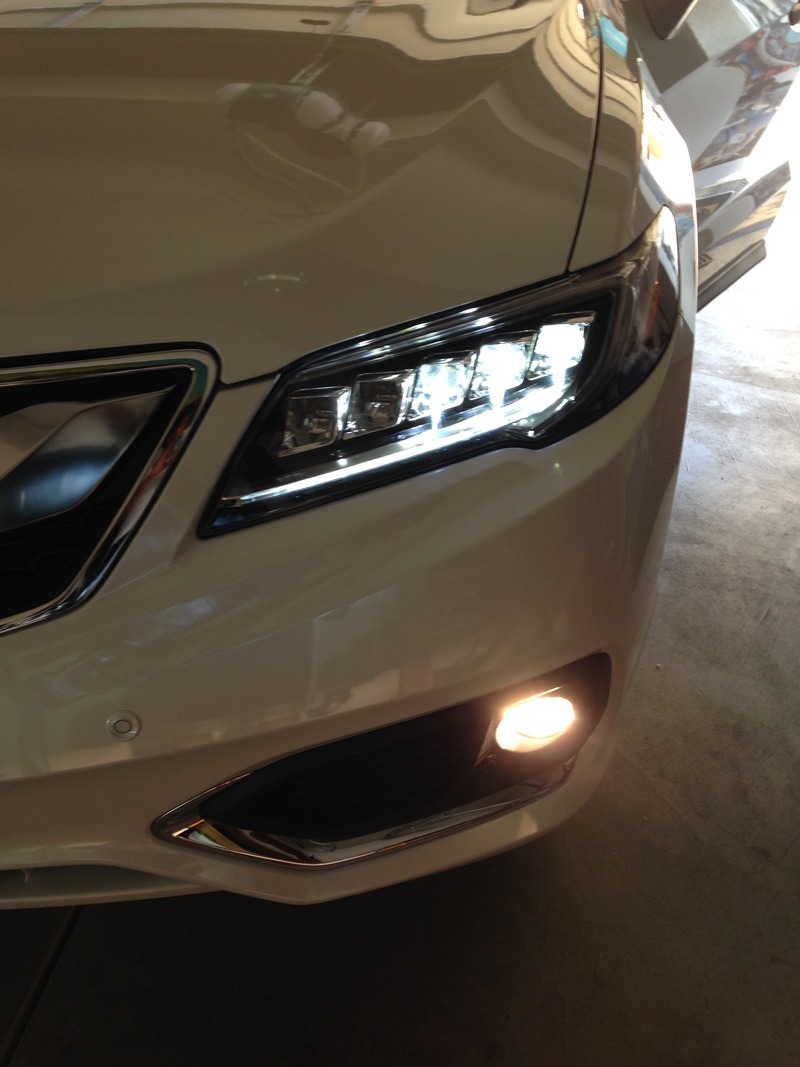
I also installed the same kit on my 2014 TL but with the yellow Laminx they provide. They also turned out really nice:
Attachment 46631
Attachment 46632
Overall Impression: Honestly it was worth every penny. Just as nice as the factory option LEDs in my opinion. They shoot a sharp beam just like the Diamond LEDs or HID's with projectors. The install was super easy (plug and play). Best of all the 5000k match the Diamond LEDS perfectly. Same exact color. The 5000k with yellow laminx is a really nice crisp yellow. I highly recommend these for anyone looking to upgrade their factory fogs.
Make: Morimoto
Model: XB (type s) standalone
Temp: 5000k LED
Price: $170 + shipping or $190 + shipping with yellow Laminx film
Tools: Flat head screwdriver, a short and medium phillips screwdrivers
Installation time: 20-30 minutes
Looking from underneath the front bumper prey off the 4 "bitch clips" that hold the bottom plastic to the bumper:
Attachment 46622
Once you have removed the clips you then want to remove the one screw that holds the bumper to the fender:
Attachment 46623
After this you will have full access to the foglight housing with plenty of room to work:
Attachment 46624
To remove the OEM foglight, disconnect the connector from the bulb. Then there are two phillips screws diagonal from each other you want to remove from the back of the foglight. This is where you will need two different size phillips screwdrivers:
Attachment 46625
After that the foglight comes right out. Here is a comparison between the two:
Attachment 46626
The next step is to connect the power and ground wires to the supplied female plug in the kit. Make sure you check your factory plug to match the new one. Black goes with black and red goes with white:
Attachment 46627
Screw in the Morimoto Foglight, connect the plug and reinstall the splash guard and repeat the steps for the opposite side.
Before:
Attachment 46628
After:
Attachment 46629
Attachment 46630
I also installed the same kit on my 2014 TL but with the yellow Laminx they provide. They also turned out really nice:
Attachment 46631
Attachment 46632
Overall Impression: Honestly it was worth every penny. Just as nice as the factory option LEDs in my opinion. They shoot a sharp beam just like the Diamond LEDs or HID's with projectors. The install was super easy (plug and play). Best of all the 5000k match the Diamond LEDS perfectly. Same exact color. The 5000k with yellow laminx is a really nice crisp yellow. I highly recommend these for anyone looking to upgrade their factory fogs.
The following 12 users liked this post by carbonTSEX:
Chaptorial (07-18-2015),
CJaneDrive (11-03-2015),
Comfy (08-04-2015),
dirleton (09-25-2015),
firstacuratl (10-27-2016),
and 7 others liked this post.
The following users liked this post:
carbonTSEX (06-28-2015)
07-17-2015, 11:45 AM
#15
Sticky under the 2G Garage?
You can find the accessories installation instruction in the following link. https://estore.honda.com/acura/acces...&modelName=RDX
07-17-2015, 05:31 PM
#16
Instructor
Thanks for the detailed install pictures.
I just picked up my new 2016 Graphite Luster Advanced Package this morning and ordered a set these lights from Amazon this afternoon. I really can't stand mismatched color temps. between the factory lights (not just an Acura problem). For $600+ I was just going to leave the fogs turned off but for $170 plus easy installation I'm all over this mod.
I just picked up my new 2016 Graphite Luster Advanced Package this morning and ordered a set these lights from Amazon this afternoon. I really can't stand mismatched color temps. between the factory lights (not just an Acura problem). For $600+ I was just going to leave the fogs turned off but for $170 plus easy installation I'm all over this mod.
The following users liked this post:
carbonTSEX (07-18-2015)
07-18-2015, 10:02 AM
#17
Race Director

Excellent thread and thanks for taking the time to document the install.
I'm still considering an RDX with the Advanced package and was going to purchase the LED fog lights as an accessory. If I do decide to the pull the trigger on an RDX I'll definitely be skipping that option and save some money by purchasing and installing these instead.
Car looks great!
I'm still considering an RDX with the Advanced package and was going to purchase the LED fog lights as an accessory. If I do decide to the pull the trigger on an RDX I'll definitely be skipping that option and save some money by purchasing and installing these instead.
Car looks great!
The following users liked this post:
carbonTSEX (07-18-2015)
07-18-2015, 02:51 PM
#18

Excellent thread thanks guys. Just picked up my graphite/greystone 16 Adv today. The salesperson was under the impression the fogs were LED. Today she learned something. I will be ordering my Mori's today
The following users liked this post:
carbonTSEX (07-18-2015)
07-18-2015, 10:08 PM
#20
The Original Shawdy
Glad I am able to help everyone out and find an alternative that cost less with just as good quality. You could run 3 sets of the morimoto's for the price the dealer charges. Installation is really quick and easy too. Great mod for all RDX owners. I've had no issues with them since install, they are super bright and color is just about identically to the DRLs and HIDs on the 16's. Feel free to add your pictures before and after install if you'd like.
My dealer is a Acurazine vendor and I get a great discount but not on the Morimoto's. If you think $170 is a little pricey, you can always wait for theretrofitsource to have a sale like 20% off but not gonna get much lower then that. When you compare these with other fog light options, these are by far the best (personal opinion).
Enjoy and happy modding.
Last edited by carbonTSEX; 07-18-2015 at 10:14 PM.


The following users liked this post:
carbonTSEX (07-21-2015)
08-04-2015, 01:06 PM
#22

The lights look really nice, but JDM ASTAR sells an LED H11 bulb replacement for about $30 (Amazon) that gives the same light output and color. I have them in my wife's 2016 RDX and my 2011 F350.
08-04-2015, 09:00 PM
#24
The Original Shawdy
Now for license plate lights and door curtiousy lights those are perfect.
The following users liked this post:
Comfy (08-04-2015)

The following 2 users liked this post by giovane:
carbonTSEX (08-08-2015),
pilozm (11-04-2017)
08-08-2015, 03:55 PM
#26
The Original Shawdy
Glad you are happy! I would never steer the community the wrong way. Enjoy em!
08-22-2015, 02:17 PM
#27
3rd Gear

Can anyone who has done this install successfully post up the adapter that came with their fog lights to help me set my mind at ease before I waste my time opening up the bumper to find out I'm screwed?

Thanks all!


 08-22-2015, 02:53 PM
#29
08-22-2015, 03:16 PM
#30
Hi Giovane, how did you determine that from oemacuraparts.com, regarding 1st gen vs 2nd gen and 2016s? I get different part numbers searching there. I may be missing something - I am looking at the fog lights for the 2016 as an accessory, whereas they were standard equipment in 2008. Thanks.
08-22-2015, 04:23 PM
#31
The Original Shawdy
Hey sorry I just read this. The connector does look correct. Was it already connected or did you have to plug the wire prongs thru the females plug? Mine was the same, had to put it to put it together. Just make sure the wires are in the correct way or you'll have a hard time getting them out clean Aniyah the reuse them. It literally takes no time to open the bumper like I showed. Let us know how it goes.
08-22-2015, 05:30 PM
#32
Hi Giovane, how did you determine that from oemacuraparts.com, regarding 1st gen vs 2nd gen and 2016s? I get different part numbers searching there. I may be missing something - I am looking at the fog lights for the 2016 as an accessory, whereas they were standard equipment in 2008. Thanks.


The following users liked this post:
Kaputnik (08-22-2015)
08-23-2015, 04:35 PM
#33
3rd Gear
Hey sorry I just read this. The connector does look correct. Was it already connected or did you have to plug the wire prongs thru the females plug? Mine was the same, had to put it to put it together. Just make sure the wires are in the correct way or you'll have a hard time getting them out clean Aniyah the reuse them. It literally takes no time to open the bumper like I showed. Let us know how it goes.
Thanks to all for the great DIY instructions and the feedback!
Question, with the extra length of cable added with the morimotos, how did you secure it to avoid contact with the other surfaces?
The following users liked this post:
carbonTSEX (08-24-2015)
08-23-2015, 04:51 PM
#34
08-24-2015, 11:16 AM
#35
The Original Shawdy
Glad you got them installed.
08-25-2015, 10:49 AM
#36
Just got mine installed yesterday into a Canadian model RDX.
Note: Passenger side fog light: The top right fog light mounting screw is hidden behind the windshield washer fluid storage tank. You will need a small angle screw driver to get to the self tapping screw.
You can order the fogs through a Canadian supplier.
Note: Passenger side fog light: The top right fog light mounting screw is hidden behind the windshield washer fluid storage tank. You will need a small angle screw driver to get to the self tapping screw.
You can order the fogs through a Canadian supplier.
The following users liked this post:
carbonTSEX (08-25-2015)
08-25-2015, 11:43 AM
#37
OEM fog lights are quite expansive because they come with bumper trims, harness, dashboard lever and of course bulbs.
I wonder how much they would cost without the whole bundle, just the bulbs.
Here's a thread on the ILX subforum where a user shows the OEM LEDs.
https://acurazine.com/forums/photogr...-light-930621/
I tried to check online for the Koito brand and serials but I had no luck.
I wonder how much they would cost without the whole bundle, just the bulbs.
Here's a thread on the ILX subforum where a user shows the OEM LEDs.
https://acurazine.com/forums/photogr...-light-930621/
I tried to check online for the Koito brand and serials but I had no luck.
08-25-2015, 01:17 PM
#38
OEM fog lights are quite expansive because they come with bumper trims, harness, dashboard lever and of course bulbs.
I wonder how much they would cost without the whole bundle, just the bulbs.
Here's a thread on the ILX subforum where a user shows the OEM LEDs.
https://acurazine.com/forums/photogr...-light-930621/
I tried to check online for the Koito brand and serials but I had no luck.
I wonder how much they would cost without the whole bundle, just the bulbs.
Here's a thread on the ILX subforum where a user shows the OEM LEDs.
https://acurazine.com/forums/photogr...-light-930621/
I tried to check online for the Koito brand and serials but I had no luck.
I seen the kit sold online and the price for the OEM LED fog lights is ~ 450 USD.
08-25-2015, 11:33 PM
#39
The Original Shawdy
RSX_Takishi that is good info for any Canadian's that are interested in doing the foglight install.
08-26-2015, 12:12 AM
#40
I ordered the Morimoto fogs via a Canadian supplier and installed yellow Lamin-X on them. They look super slick.