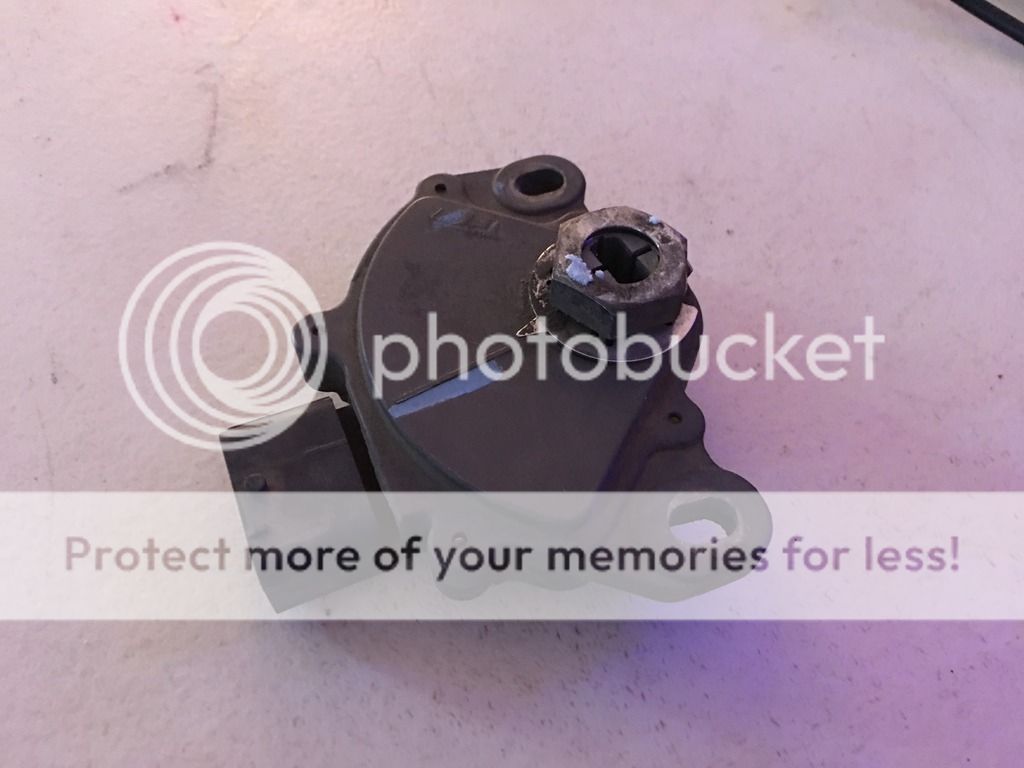
Transmission Range Switch (Safety Switch)
 01-07-2017, 09:37 PM
#1
Moderator
Thread Starter
Transmission Range Switch (Safety Switch)
Hi Folks!
This is not a DIY!
Just wanted to share with you guys my issues with the TRS.. Sometime ago I had an issue where I could not start the MDX at all, the MID will show "CHECK STARTING SYSTEM".. It did this like 2 times in separate occasions.
Finally about a month ago a Check Engine code will pop off every time I engage reverse quickly, Like doing a 3 point turn in a hurry.. Drive "D" would blink in the dashboard, MID will say CHECK TRANSMISSION and the NAV will show a P1717 Code telling me that the TRS was at fault... So finally this was the reason the car did not wanted to start in those 2 occasions. Today finally my TRS came in the mail, It took some time to get here because of the holidays and probably because I used FED EX (Considering all my items from USPS came in time).
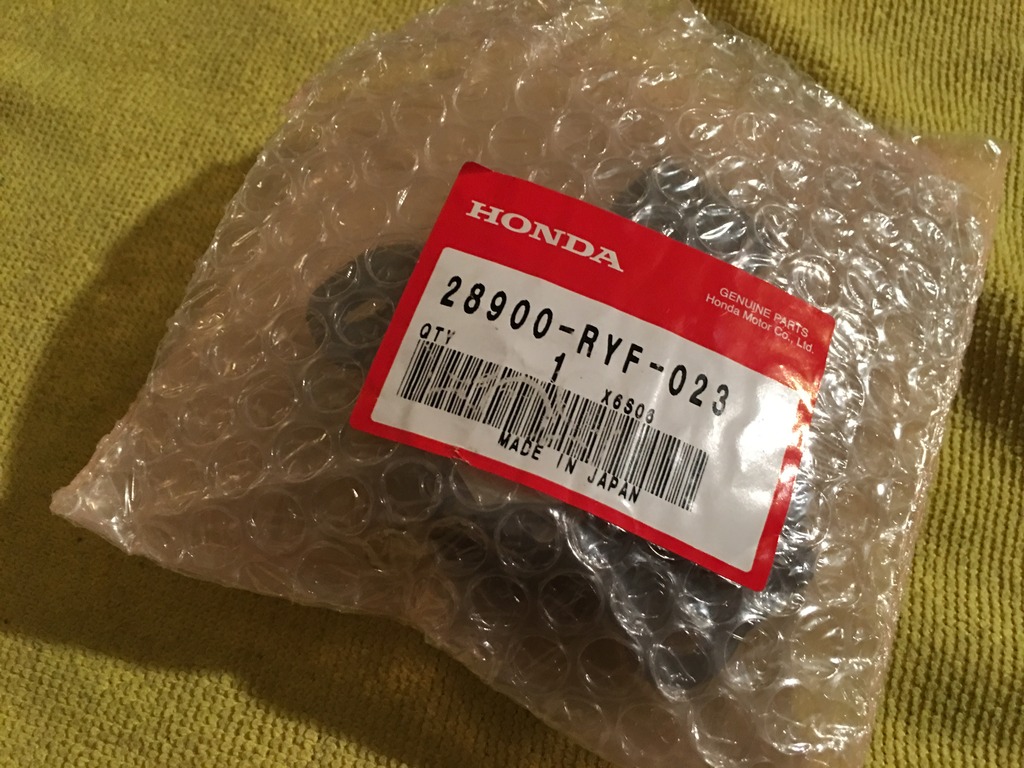
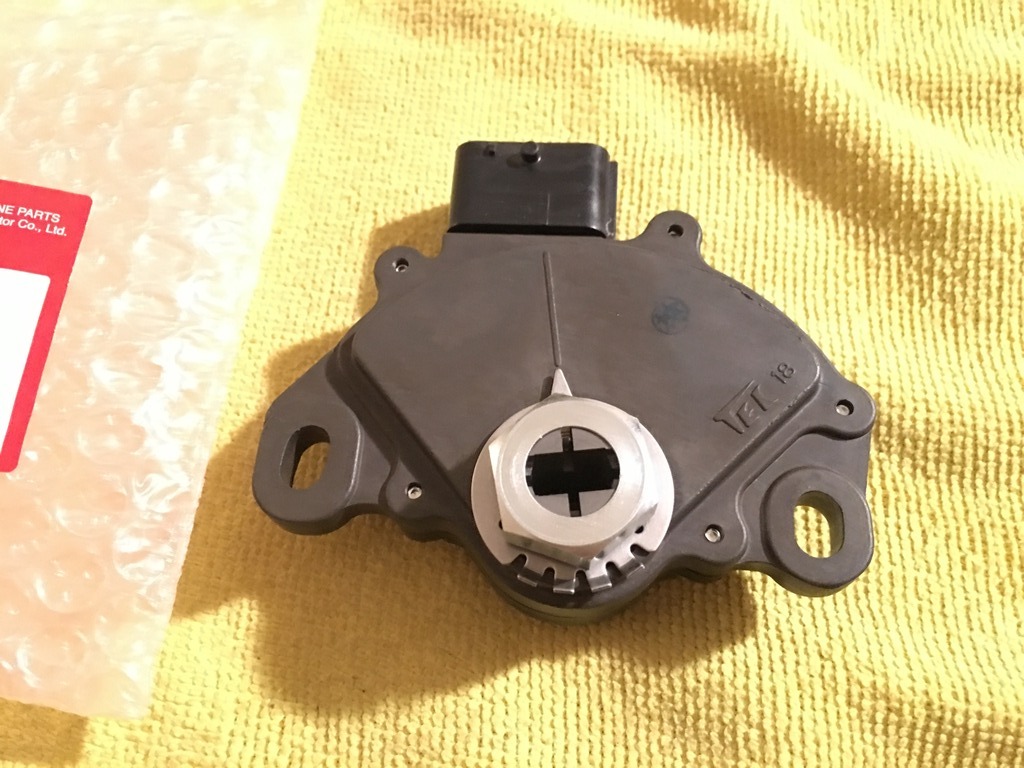
The part you will need for the MDX is 28900-RYF-023 this is unique to the 07-08-09 models only it will not fit 10-13.. Total Cost? 70 bucks shipped for a Brand new OEM "Japan Made" TRS.
Since the DIY for the TRS has been done to hell I do not think we need yet another DIY to change it... Just wanted to change my Experience so if anybody is having issues with a No Start situation and a P1717 Code? This is it!
You can in theory remove the TRS and try to clean it but since the TRS in the MDX is relatively cheap I did not think twice to just replace it all together... Now time for the stupid Purge Valve Solenoid that is still ticking like hell.
This is not a DIY!
Just wanted to share with you guys my issues with the TRS.. Sometime ago I had an issue where I could not start the MDX at all, the MID will show "CHECK STARTING SYSTEM".. It did this like 2 times in separate occasions.
Finally about a month ago a Check Engine code will pop off every time I engage reverse quickly, Like doing a 3 point turn in a hurry.. Drive "D" would blink in the dashboard, MID will say CHECK TRANSMISSION and the NAV will show a P1717 Code telling me that the TRS was at fault... So finally this was the reason the car did not wanted to start in those 2 occasions. Today finally my TRS came in the mail, It took some time to get here because of the holidays and probably because I used FED EX (Considering all my items from USPS came in time).
The part you will need for the MDX is 28900-RYF-023 this is unique to the 07-08-09 models only it will not fit 10-13.. Total Cost? 70 bucks shipped for a Brand new OEM "Japan Made" TRS.


Since the DIY for the TRS has been done to hell I do not think we need yet another DIY to change it... Just wanted to change my Experience so if anybody is having issues with a No Start situation and a P1717 Code? This is it!
You can in theory remove the TRS and try to clean it but since the TRS in the MDX is relatively cheap I did not think twice to just replace it all together... Now time for the stupid Purge Valve Solenoid that is still ticking like hell.

The following users liked this post:
MODDED11MDX (03-20-2019)
01-10-2017, 04:08 PM
#2
Moderator
Thread Starter
Well got the bastard out...
PRO DIY TIP #1:
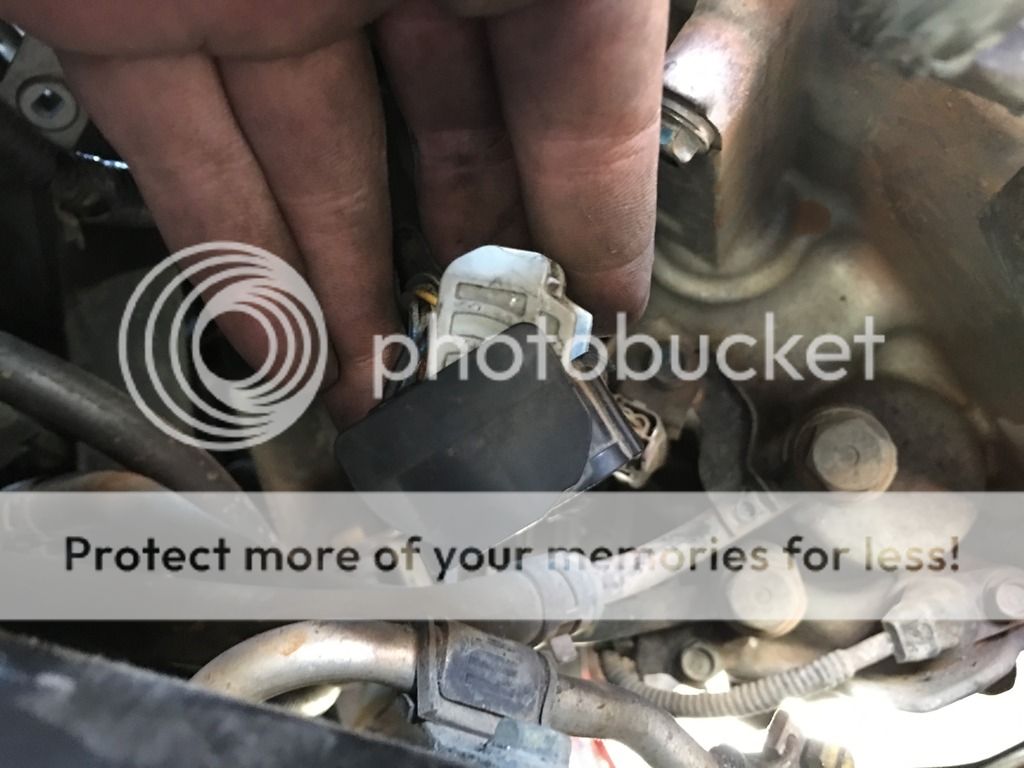
Not without a hiccup though, First day was a bust because I could not unplug the TRS connector for my life. The connector itself has a strange locking mechanism that is not common with other Honda & Acura systems I�ve personally seen, Not even in my TL-S... Even more curious is that Nobody in the entire internet has come up with a clear picture of the connector Lock in our MDX so this is a first! On the Internet!

The connector lock works by having a straight pull lock on top, But instead of Pulling Out like any other connector you have to pull the white part only (Do not grab the black part of the connector) the white portion will hinge down and will push the black connector out by itself. There is no need to touch the black portion of the connector. This is what made me stop the first try I tried to change it BECAUSE:
PRO DIY TIP #2
DO NOT CHANGE IT FROM THE TOP!!!!!!!!!!!!!! Even if the manual says to remove the battery and battery tray what it doesn�t say is that there a a gazillion connectors hanging from the battery tray base.. Its a nightmare to pull them out and even then there is a Connector attached to the lower portion near the headlight that its almost impossible to remove, So I move the battery tray away so I could reach the TRS and man the angle is horrible you will have to work pointing DOWN and extending your arms to reach the TRS because of the engine bay being lower than the chassis frame line.. This is what made impossible to see how the Locking Mechanism of the TRS Connector worked and Since the Internet didn�t have a Picture of it? It was impossible to decipher from the top end.
My Advice is to do this from the Wheel well fender side... This is INSANELY easier than the convoluted way they OEM Manual states, If you do it this way you will only have to remove the driver side wheel, A couple of plastic push pins and 2 bolts max to get access to the TRS.. This way also makes it easier to pull the Locking Connector of the TRS.
So those are my notes on the TRS Change Procedure..
DIY Difficulty Scale: (Using the OEM Way = 8/10) (Using the Wheel Well Mode = 3/10)

PRO DIY TIP #1:
Not without a hiccup though, First day was a bust because I could not unplug the TRS connector for my life. The connector itself has a strange locking mechanism that is not common with other Honda & Acura systems I�ve personally seen, Not even in my TL-S... Even more curious is that Nobody in the entire internet has come up with a clear picture of the connector Lock in our MDX so this is a first! On the Internet!

The connector lock works by having a straight pull lock on top, But instead of Pulling Out like any other connector you have to pull the white part only (Do not grab the black part of the connector) the white portion will hinge down and will push the black connector out by itself. There is no need to touch the black portion of the connector. This is what made me stop the first try I tried to change it BECAUSE:
PRO DIY TIP #2
DO NOT CHANGE IT FROM THE TOP!!!!!!!!!!!!!! Even if the manual says to remove the battery and battery tray what it doesn�t say is that there a a gazillion connectors hanging from the battery tray base.. Its a nightmare to pull them out and even then there is a Connector attached to the lower portion near the headlight that its almost impossible to remove, So I move the battery tray away so I could reach the TRS and man the angle is horrible you will have to work pointing DOWN and extending your arms to reach the TRS because of the engine bay being lower than the chassis frame line.. This is what made impossible to see how the Locking Mechanism of the TRS Connector worked and Since the Internet didn�t have a Picture of it? It was impossible to decipher from the top end.
My Advice is to do this from the Wheel well fender side... This is INSANELY easier than the convoluted way they OEM Manual states, If you do it this way you will only have to remove the driver side wheel, A couple of plastic push pins and 2 bolts max to get access to the TRS.. This way also makes it easier to pull the Locking Connector of the TRS.
So those are my notes on the TRS Change Procedure..
DIY Difficulty Scale: (Using the OEM Way = 8/10) (Using the Wheel Well Mode = 3/10)
The following users liked this post:
MODDED11MDX (03-20-2019)
 01-17-2017, 10:25 PM
#4
Moderator
Thread Starter
Your welcome Si_jeff!
Another member at MDXers.org asked for a specific question in the replacement so I ended up writing the DIY (I do not like Written DIYs but I didn�t take any other pictures of this so).
This is the written DIY:
My DIY Steps Are:
1.- Jack Up the Car and remove the Driver Wheel.
2.- Put on a Jack Stand in the Front Chassis jacking point to hold the car securely.
2*.- I left the car in PARK all of the procedure..
3.- Remove the Lower Wheel well cover by undoing the 10mm bolt and 2 plastic push pins in the bottom, There are 2 more securing the lower portion of the Cover to the Lower Engine Guard and Chassis in the Wheel Well (Just need to remove 4 push pins in total. Remove the Philips Screw that secures the bumper and you can now bend the lower plastic cover a little bit on top of the Brake Caliper and it will stay there.
4.- You can now clearly see the TRS on the side of the transmission, Remove the 10mm bolt holding the Transmission Ground cable to make more room (Optional).
5.- Remove the Shift Cable Metal Lever, You will have to punch the securing metal tab on the Nut with a Flat Screwdriver and a Hammer... Honda in all of its glory decided to punch the TOP securing tab on the Nut! Undoing this from the TOP?? That would be funny to see.
6.- There are 3 parts on top of the Shifter Metal Lever (Do not lose them) The correct order is:
(NUT > Metal Securing Tab > Pressure Washer > Shifter Metal Lever > TRS).
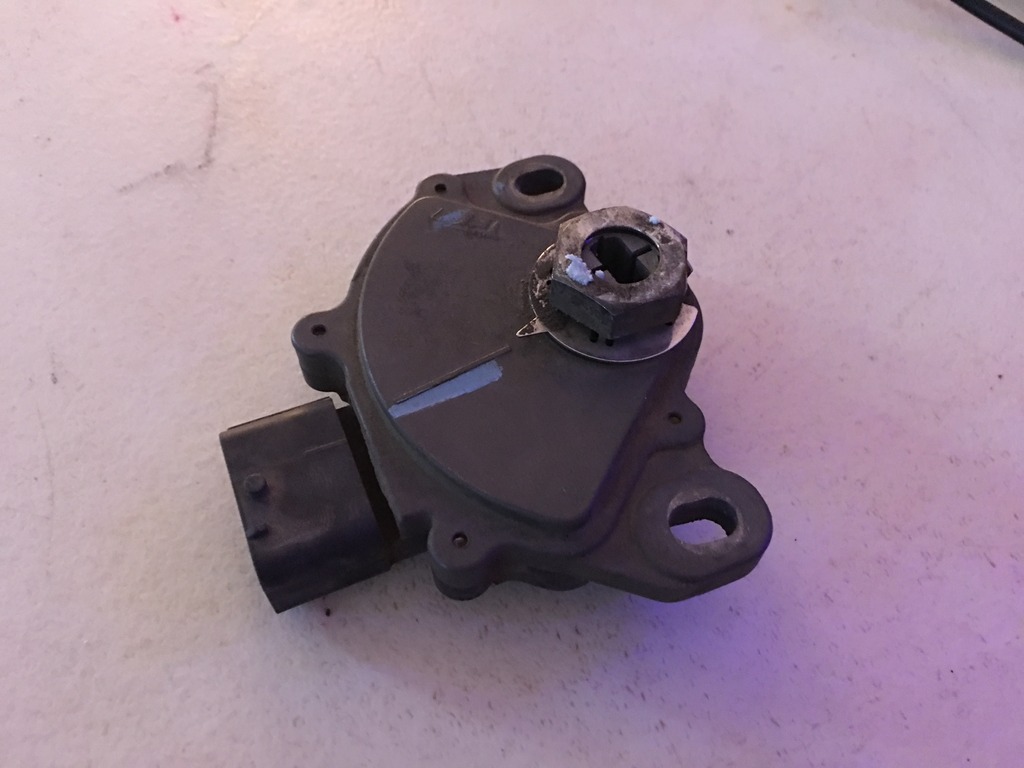
7.- The TRS is held in place by 2x 12mm bolts to the transmission but there is an Extra 22mm Bolt making pressure in the Transmission TRS Shaft, You will have to undo it by punching out the metal securing tabs holding the 22mm nut and holding the TRS shaft with a 6mm Crescent Tool so you can undo the 22mm bolt without stressing the trans shaft.
8.- Now with the TRS Removed you can undo the Cable by following the pictures I posted before.
9.- Reverse Procedure to Install it!
10.- Since you have your battery installed you can now Adjust the Neutral Position! Do this by securing the 12mm bolts on the TRS just a tad firm so you can move it but wont wobble out of position easily, Go inside your car Open Key in Position II (DONT START THE ENGINE) and put the shift lever in NEUTRAL adjust until the Neutral (N) Light in the dashboard remains ON at all times while the shifter is in Neutral, Wobble the shifter back and forth (Dont change gears) and all the slack in the shifter must stay in neutral position, If the lights suddenly goes off with the slack adjust the TRS until it doesn�t.. Once you find the sweet spot secure the TRS bolts to and your done with it..
This is what I don�t get with the TOP Method.. You don�t have the battery installed so how the heck are you supposed to Adjust the TRS in real time? Using Jumper Cables for the battery? This part didn�t make sense in the manual method.
Another member at MDXers.org asked for a specific question in the replacement so I ended up writing the DIY (I do not like Written DIYs but I didn�t take any other pictures of this so).
This is the written DIY:
My DIY Steps Are:
1.- Jack Up the Car and remove the Driver Wheel.
2.- Put on a Jack Stand in the Front Chassis jacking point to hold the car securely.
2*.- I left the car in PARK all of the procedure..
3.- Remove the Lower Wheel well cover by undoing the 10mm bolt and 2 plastic push pins in the bottom, There are 2 more securing the lower portion of the Cover to the Lower Engine Guard and Chassis in the Wheel Well (Just need to remove 4 push pins in total. Remove the Philips Screw that secures the bumper and you can now bend the lower plastic cover a little bit on top of the Brake Caliper and it will stay there.
4.- You can now clearly see the TRS on the side of the transmission, Remove the 10mm bolt holding the Transmission Ground cable to make more room (Optional).
5.- Remove the Shift Cable Metal Lever, You will have to punch the securing metal tab on the Nut with a Flat Screwdriver and a Hammer... Honda in all of its glory decided to punch the TOP securing tab on the Nut! Undoing this from the TOP?? That would be funny to see.
6.- There are 3 parts on top of the Shifter Metal Lever (Do not lose them) The correct order is:
(NUT > Metal Securing Tab > Pressure Washer > Shifter Metal Lever > TRS).
7.- The TRS is held in place by 2x 12mm bolts to the transmission but there is an Extra 22mm Bolt making pressure in the Transmission TRS Shaft, You will have to undo it by punching out the metal securing tabs holding the 22mm nut and holding the TRS shaft with a 6mm Crescent Tool so you can undo the 22mm bolt without stressing the trans shaft.
8.- Now with the TRS Removed you can undo the Cable by following the pictures I posted before.
9.- Reverse Procedure to Install it!
10.- Since you have your battery installed you can now Adjust the Neutral Position! Do this by securing the 12mm bolts on the TRS just a tad firm so you can move it but wont wobble out of position easily, Go inside your car Open Key in Position II (DONT START THE ENGINE) and put the shift lever in NEUTRAL adjust until the Neutral (N) Light in the dashboard remains ON at all times while the shifter is in Neutral, Wobble the shifter back and forth (Dont change gears) and all the slack in the shifter must stay in neutral position, If the lights suddenly goes off with the slack adjust the TRS until it doesn�t.. Once you find the sweet spot secure the TRS bolts to and your done with it..
This is what I don�t get with the TOP Method.. You don�t have the battery installed so how the heck are you supposed to Adjust the TRS in real time? Using Jumper Cables for the battery? This part didn�t make sense in the manual method.
The following 2 users liked this post by Skirmich:
MODDED11MDX (03-20-2019),
Si_jeff (01-18-2017)
05-25-2017, 05:27 PM
#5
2nd Gear

Join Date: May 2017
Age: 51
Posts: 2
Likes: 0
Received 0 Likes
on
0 Posts
Hi skirmish,
just a quick one for you,
how long approximately will take with both methods, I just need this info to justify the bill that i received from Napa auto pro since they went the hard way and took them around 3,5 hours labour.
Many thanks in advance
just a quick one for you,
how long approximately will take with both methods, I just need this info to justify the bill that i received from Napa auto pro since they went the hard way and took them around 3,5 hours labour.
Many thanks in advance
Well got the bastard out...
PRO DIY TIP #1:
Not without a hiccup though, First day was a bust because I could not unplug the TRS connector for my life. The connector itself has a strange locking mechanism that is not common with other Honda & Acura systems I�ve personally seen, Not even in my TL-S... Even more curious is that Nobody in the entire internet has come up with a clear picture of the connector Lock in our MDX so this is a first! On the Internet!
The connector lock works by having a straight pull lock on top, But instead of Pulling Out like any other connector you have to pull the white part only (Do not grab the black part of the connector) the white portion will hinge down and will push the black connector out by itself. There is no need to touch the black portion of the connector. This is what made me stop the first try I tried to change it BECAUSE:
PRO DIY TIP #2
DO NOT CHANGE IT FROM THE TOP!!!!!!!!!!!!!! Even if the manual says to remove the battery and battery tray what it doesn�t say is that there a a gazillion connectors hanging from the battery tray base.. Its a nightmare to pull them out and even then there is a Connector attached to the lower portion near the headlight that its almost impossible to remove, So I move the battery tray away so I could reach the TRS and man the angle is horrible you will have to work pointing DOWN and extending your arms to reach the TRS because of the engine bay being lower than the chassis frame line.. This is what made impossible to see how the Locking Mechanism of the TRS Connector worked and Since the Internet didn�t have a Picture of it? It was impossible to decipher from the top end.
My Advice is to do this from the Wheel well fender side... This is INSANELY easier than the convoluted way they OEM Manual states, If you do it this way you will only have to remove the driver side wheel, A couple of plastic push pins and 2 bolts max to get access to the TRS.. This way also makes it easier to pull the Locking Connector of the TRS.
So those are my notes on the TRS Change Procedure..
DIY Difficulty Scale: (Using the OEM Way = 8/10) (Using the Wheel Well Mode = 3/10)
05-25-2017, 06:44 PM
#6
Moderator
Thread Starter
For labor? well using the Wheel Well method should not take longer than 1 hour since the hardest part is to remove the wheel only and with Shop Tools that is a breeze done in less than 2 minutes... Replacing the actual TRS took me less than 15 minutes and I have never attempted this before on a MDX so it took longer because I was taking my time, taking care of the connector so I do not break it. I tackled it with common house tools and it was easy as hell.. 1 hour labor tops if the shop isn�t trying to screw you over, I firmly believe this is the Method used by many Transmission Shops since a couple of them quoted me 1 hour labor.
Top Method? MANNN This is hard.. I would say about 2 hour labor just because getting the battery out and the cable latches its a PITA! You have to be careful specially with the Fuse Box that has many connectors attached to the base of the battery... Removing the battery tray and connectors by itself is a 30 min job (Shop estimate 1 hour labor for sure), Then working on the actual TRS from the top???? Jesus Christ I cannot even imagine it. But granted another 1 hour labor tops just to get the damn thing out (Which is always the hardest part) and Adjust it so that is about 2 hour tops for the Top Method (OEM MANUAL METHOD).
3.5 hours? NOPE just No... With proper tools and a Seasoned shop mechanic that is in no way in Hell a 3.5hour job... I call ripoff for sure.
Last edited by Skirmich; 05-25-2017 at 06:46 PM.
05-25-2017, 08:11 PM
#7
2nd Gear
Join Date: May 2017
Age: 51
Posts: 2
Likes: 0
Received 0 Likes
on
0 Posts
Thank you
Thanks for the quick reply,
that will definitely help me tomorrow and will support my argument,
again, thanks a lot
that will definitely help me tomorrow and will support my argument,
again, thanks a lot
For labor? well using the Wheel Well method should not take longer than 1 hour since the hardest part is to remove the wheel only and with Shop Tools that is a breeze done in less than 2 minutes... Replacing the actual TRS took me less than 15 minutes and I have never attempted this before on a MDX so it took longer because I was taking my time, taking care of the connector so I do not break it. I tackled it with common house tools and it was easy as hell.. 1 hour labor tops if the shop isn�t trying to screw you over, I firmly believe this is the Method used by many Transmission Shops since a couple of them quoted me 1 hour labor.
Top Method? MANNN This is hard.. I would say about 2 hour labor just because getting the battery out and the cable latches its a PITA! You have to be careful specially with the Fuse Box that has many connectors attached to the base of the battery... Removing the battery tray and connectors by itself is a 30 min job (Shop estimate 1 hour labor for sure), Then working on the actual TRS from the top???? Jesus Christ I cannot even imagine it. But granted another 1 hour labor tops just to get the damn thing out (Which is always the hardest part) and Adjust it so that is about 2 hour tops for the Top Method (OEM MANUAL METHOD).
3.5 hours? NOPE just No... With proper tools and a Seasoned shop mechanic that is in no way in Hell a 3.5hour job... I call ripoff for sure.
Top Method? MANNN This is hard.. I would say about 2 hour labor just because getting the battery out and the cable latches its a PITA! You have to be careful specially with the Fuse Box that has many connectors attached to the base of the battery... Removing the battery tray and connectors by itself is a 30 min job (Shop estimate 1 hour labor for sure), Then working on the actual TRS from the top???? Jesus Christ I cannot even imagine it. But granted another 1 hour labor tops just to get the damn thing out (Which is always the hardest part) and Adjust it so that is about 2 hour tops for the Top Method (OEM MANUAL METHOD).
3.5 hours? NOPE just No... With proper tools and a Seasoned shop mechanic that is in no way in Hell a 3.5hour job... I call ripoff for sure.
Trending Topics
03-19-2019, 08:30 PM
#9

First off Thank You!
I know this is an old thread but I'm currently doing this on my RL 2nd gen. Which seems to have the same set up as yours, probably because SH-AWD. I couldn't find another write up specifically for the RL. The other DIY write up is TL and is much easier it seems.
Do I need to be worried about this Cable link with the punched nut? I'm scared to mess it up somehow.
03-19-2019, 09:23 PM
#10
Moderator
Thread Starter
Hi! and your welcome!
What you need to do before removing the big 22mm nut is undo the securing metal tab (Its a simple metal sheet that bends over the nut so it cannot undo itself). Once you punch the metal off the nut you will see the TRS shaft which has 2 flat faces.. You will need a crescent tool to HOLD that shaft while you are removing the 22mm nut because if you do not hold the TRS shaft you will be applying all the torque to it and its a pretty slim shaft…
Once you removed the big nut everything else is a walk in the park.. I have done my TL-S TRS before but its not quite the same physically, This was my first time tackling this type of TRS and it went well the first time. Just take your time specially while adjusting it and you cannot mess it up, Just use logic and common sense and its straight forward.
The following users liked this post:
2005RL_boi (03-20-2019)
03-30-2020, 09:33 PM
#12
Advanced
Hey, I am having a TRS/ neutral safety switch Issue with my 3G 06 Automatic TL. I installed a new TRS/ neutral safety switch and the car starts, and shift into gears while stationary/brakes applied I have not tried to drive the car yet. The PRND the lights up on the dash as you shift into gears in the square that has PRND and tiptronic mode does not light up. I am thinking the switch is not adjusted correctly. I am not sure how to adjust the switch so that the PRND box lights up. Please help!!