Comfort Switch DIY w/photos
 07-01-2015, 11:27 AM
#1

Comfort Switch DIY w/photos
1...below...Here are the tools that I used:
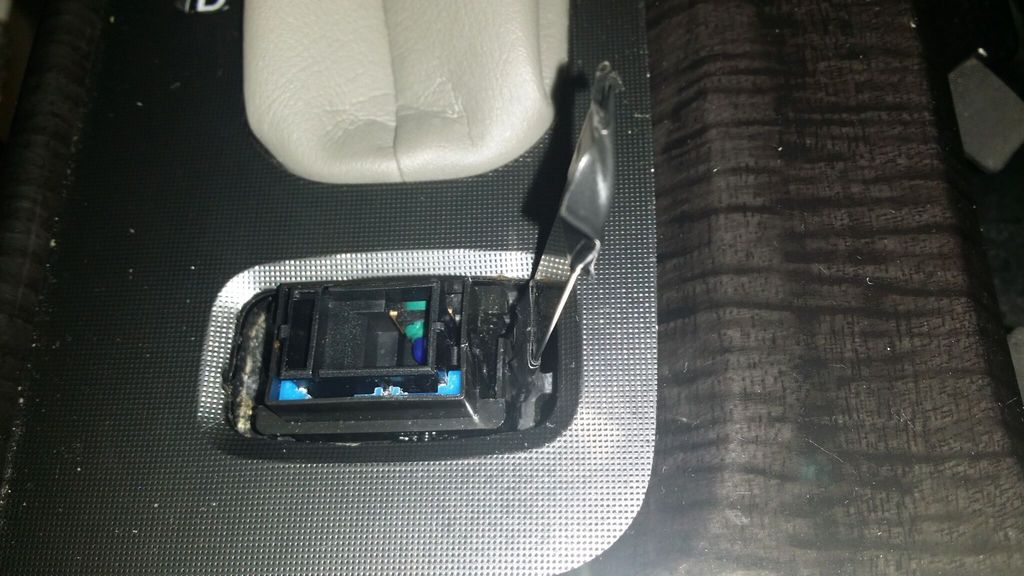
ruler, electrical tape, 90 degree needle nose pliers, gap gauge with removable gauges, metal file. Photo #1 shows the old switch, with its top popped off.
I found the part number at an Acura parts web site:
CHASSIS, then SELECT LEVER, then #1, for $11.16
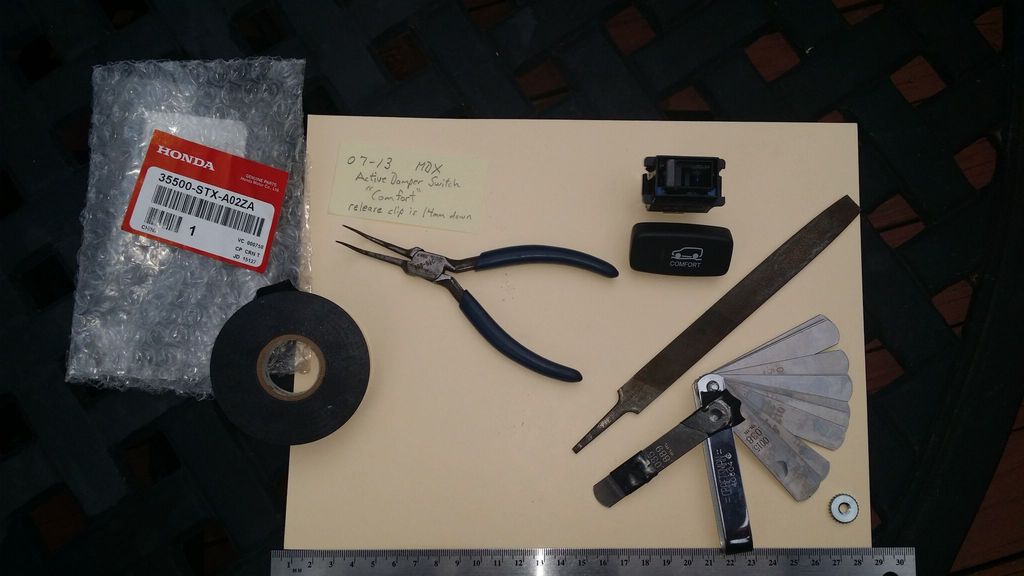
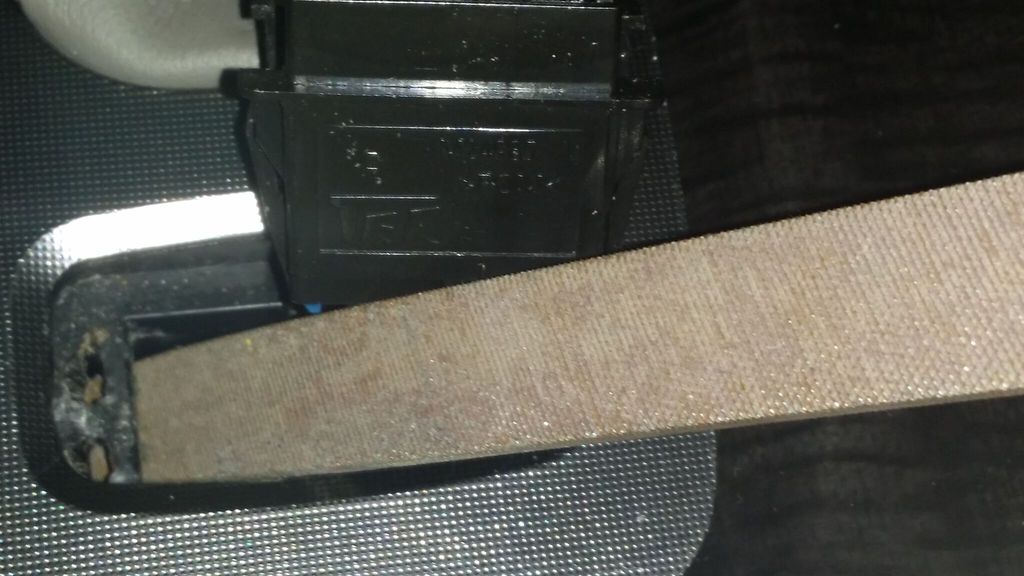
2...below...Part numbers and the top edge of the release clip is 14mm down, from the edge of the console, so I put some electrical tape 14mm, from the end of my gap gauge tool (and on the end, as not to cut myself). See the taped up 35/1000nds gap gauge that I used in photo #4:

3...below...Working on the driver's side, I slid the gap gauge in, until the edge of the tape met the console and gently pulled towards the driver's door.
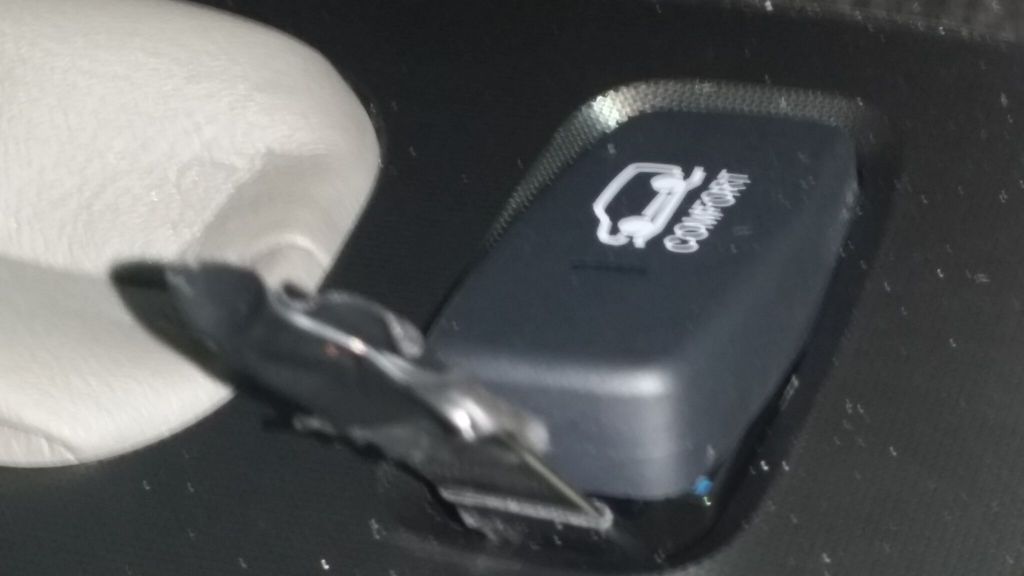
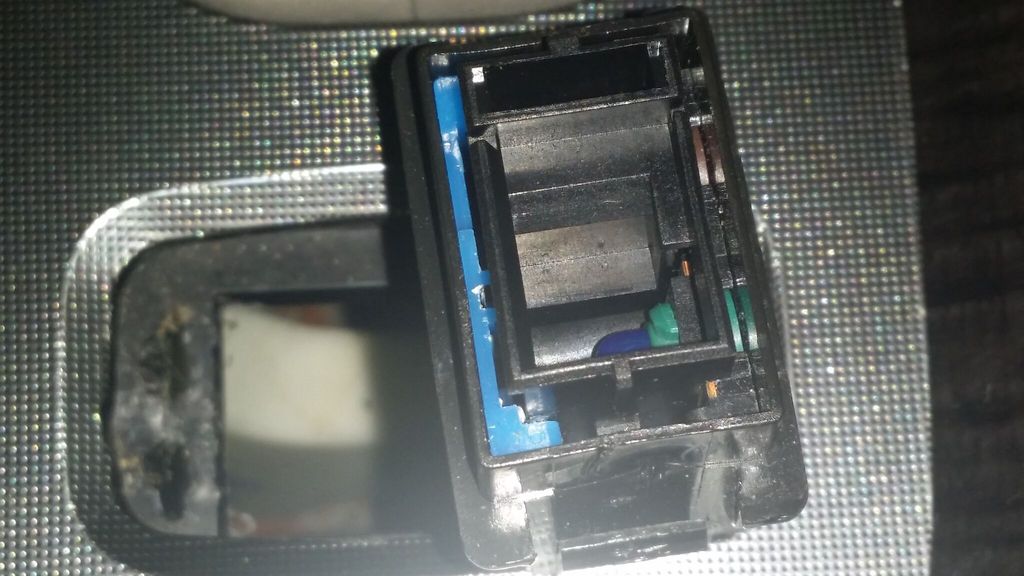
4...below...The switches' top popped off and I see that someone has done this before, because of the scratches to both sides of the console's retainer.
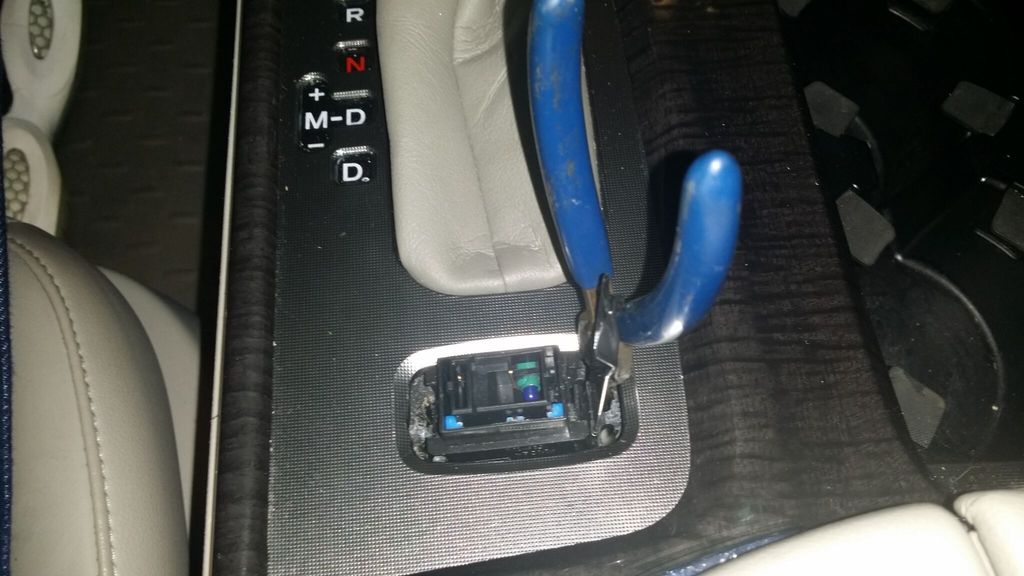
5...below...It's hard to see, but I have both the piers and the gap gauge slid next to the switches clip. I inserted the pier into the hole and turn them to put pressure on the clip, while at the same time, I slid the gap gauge between the clip and the console's retainer.
5a...below...Duplicate photo, please disregard.
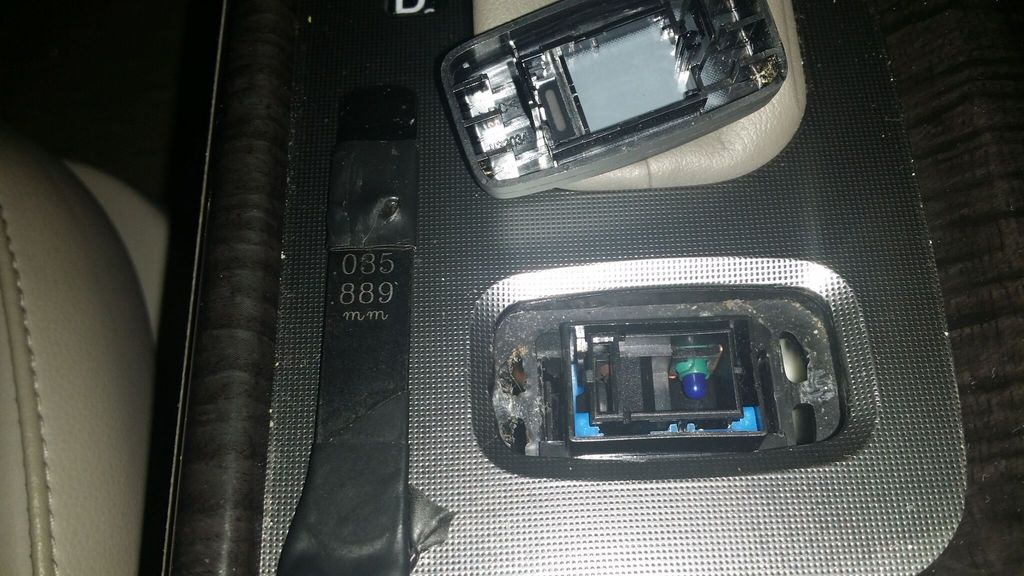
6...below...Just the gap gauge is slid down 14mm past the top edge of the switches clip (still working on the driver's side).
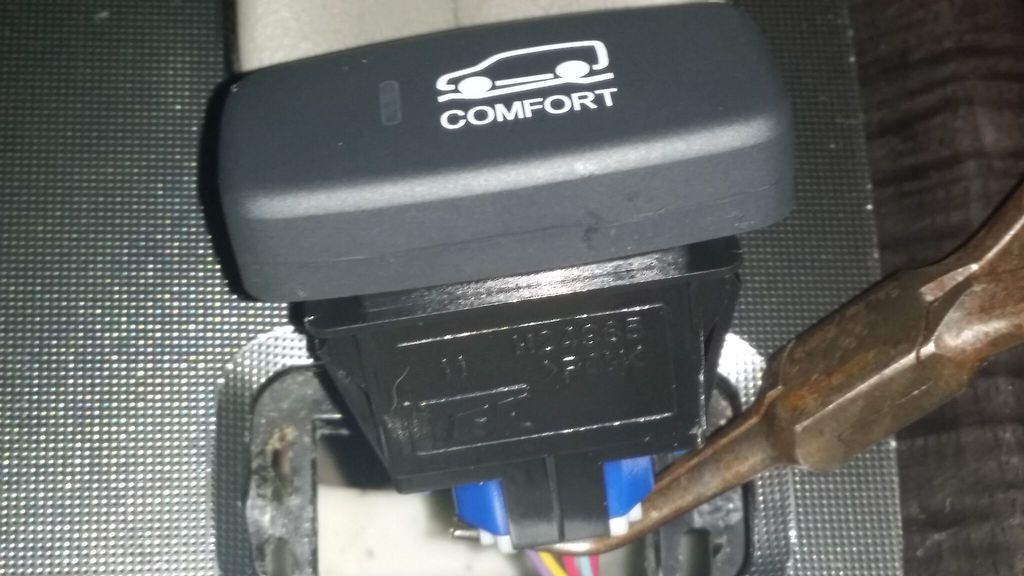
7...below...The old switch is out and rotated 90 degrees.
8...below...I rounded off the underside of the console's retaining edge, so that the next time that I need to do this...the switch will come out even easier.
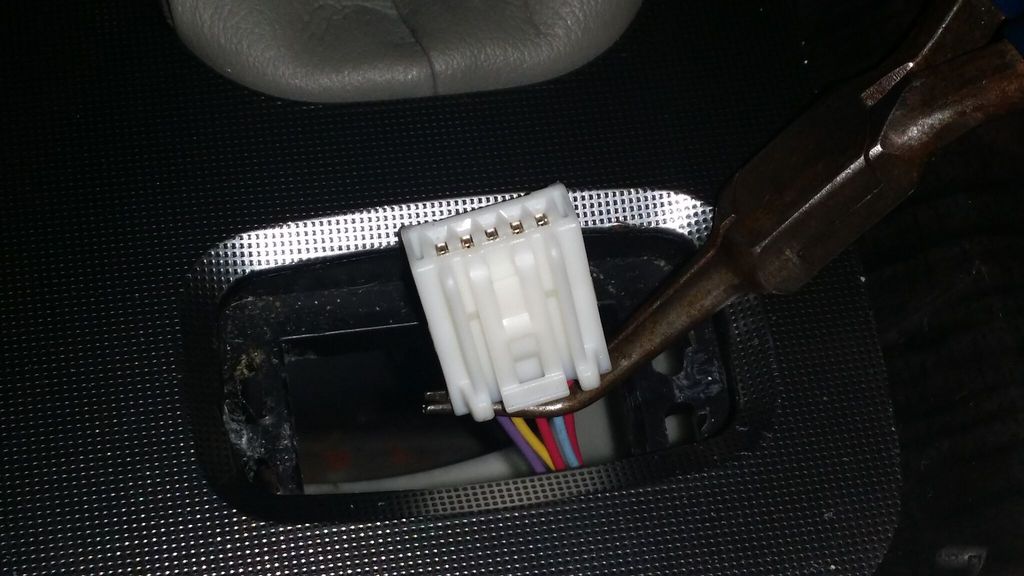
9...below...Gently holding the connecter, so I can press the white release tab, to separate the switch from the connecter.
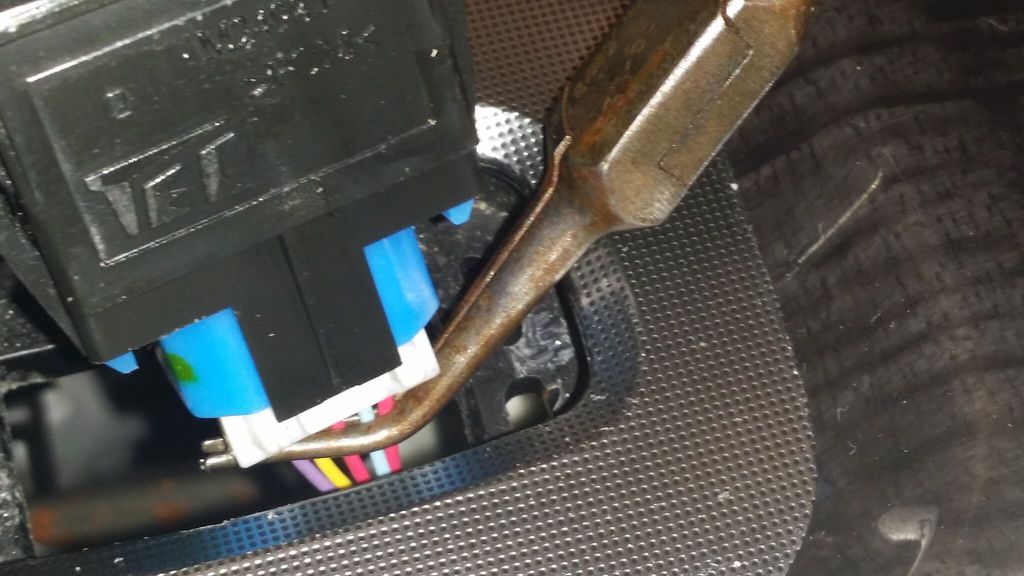
10...below...Not much slack in the wiring harness and I didn't drop it down into the console.
11...below...I snapped the new switch on.
ruler, electrical tape, 90 degree needle nose pliers, gap gauge with removable gauges, metal file. Photo #1 shows the old switch, with its top popped off.
I found the part number at an Acura parts web site:
CHASSIS, then SELECT LEVER, then #1, for $11.16
2...below...Part numbers and the top edge of the release clip is 14mm down, from the edge of the console, so I put some electrical tape 14mm, from the end of my gap gauge tool (and on the end, as not to cut myself). See the taped up 35/1000nds gap gauge that I used in photo #4:
3...below...Working on the driver's side, I slid the gap gauge in, until the edge of the tape met the console and gently pulled towards the driver's door.
4...below...The switches' top popped off and I see that someone has done this before, because of the scratches to both sides of the console's retainer.
5...below...It's hard to see, but I have both the piers and the gap gauge slid next to the switches clip. I inserted the pier into the hole and turn them to put pressure on the clip, while at the same time, I slid the gap gauge between the clip and the console's retainer.
5a...below...Duplicate photo, please disregard.
6...below...Just the gap gauge is slid down 14mm past the top edge of the switches clip (still working on the driver's side).
7...below...The old switch is out and rotated 90 degrees.
8...below...I rounded off the underside of the console's retaining edge, so that the next time that I need to do this...the switch will come out even easier.
9...below...Gently holding the connecter, so I can press the white release tab, to separate the switch from the connecter.
10...below...Not much slack in the wiring harness and I didn't drop it down into the console.
11...below...I snapped the new switch on.
Last edited by Carpayment4life; 07-01-2015 at 11:34 AM.
 07-01-2015, 11:45 AM
#3
Yes, I had a burnt bulb.
The (green base) bulb is part 35854-STX-A01.
I got the bulb too, because I was afraid that I would crush the switch, upon removal. So, I spent the extra $11 and got the entire switch, as well.
I couldn't find any details, before I tried this and finding the part number was not easy, because it is in the Chassis section.

Thread
Thread Starter
Forum
Replies
Last Post
MrHeeltoe
1G TSX Tires, Wheels, & Suspension
20
02-23-2023 01:54 PM
MrHeeltoe
2G TSX Tires, Wheels & Suspension
3
09-29-2015 10:43 PM
MrHeeltoe
3G TL Tires, Wheels & Suspension
0
09-28-2015 05:43 PM